Wooden Serving Board Hire: A Cape Town & Winelands Guide

Guests are due in under an hour. The florist is adjusting the final stems, the bar team is chilling bottles, and the food table still looks flat. Then the boards arrive, the cheeses come out of refrigeration, the charcuterie is layered properly, and the whole room changes. A well-chosen wooden serving board doesn't just hold food. It gives the table weight, warmth, and a sense that the event has been styled with intention.

That matters in Cape Town and the Winelands, where settings do a lot of visual work on their own. A vineyard lawn in late afternoon light doesn't need fussy styling. A city launch in an industrial venue doesn't want rustic clutter. The board you choose has to support the mood, the menu, and the movement of service.

It also has to survive the reality of local events. Outdoor heat, breeze, transport to remote venues, quick turnarounds, and food that sits beautifully for photos but still needs to be practical for guests. That's where many people get stuck. They know they want the premium grazing-table look. They're less sure about board size, timber tone, food safety, or whether buying a stack of boards is even sensible for one event.

Elevate Your Event with the Perfect Grazing Board

A grazing setup often becomes the place guests gather first. At a Winelands wedding, that usually happens before anyone has found their seat. Guests drift from the welcome drinks to the harvest table, and the boards become part of the atmosphere. They soften trestle tables, break up crisp linen, and make abundant food feel generous rather than over-styled.

The best setups don't look crowded with props. They look grounded. Wood does that naturally because it brings texture and contrast to glassware, ceramics, polished cutlery, and pale napery. If you're layering event décor, it helps to think about the board as part of the tabletop composition rather than an afterthought. A good reference point is how surface textures work together across the whole setting, especially when you're combining serving pieces with candles, florals, and place settings, much like the styling ideas in this guide to decor on table layouts.

Where the board changes the whole look

At vineyard weddings, long rectangular boards usually suit the setting because they echo banquet tables and create a relaxed, generous line. They work well with torn bread, fruit, hard cheeses, and shared-style service.

At a corporate launch, the brief is often cleaner. Guests are standing, circulating, and balancing a drink in one hand. In that setting, smaller boards placed in clusters across cocktail tables or presentation stations often work better than one oversized centrepiece.

Practical rule: If guests need to move while they eat, style several accessible boards instead of one hero board that causes a queue.

Ambition is easy. Practicality is the trick.

Most planners start with the visual goal. They want a table that feels premium, editorial, and generous in photographs. The substantive decisions come immediately after that.

  • Board scale: Too small and the food looks cramped. Too large and it can feel under-filled.
  • Board style: A chunky rustic slab suits a farm-style lunch, but it can look heavy at a modern product launch.
  • Venue conditions: Sun, wind, and moisture all change what works on the day.
  • Service flow: Staff need room to replenish, clear, and reset without destroying the styling.

Wooden boards have a long history in food preparation and serving. Wooden chopping boards are documented as early as 3000 BC in ancient Egypt, and by the Middle Ages wooden boards had become common in affluent European households, later evolving further in the early 1900s when hard maple block construction improved durability, as noted in this history of wooden board development. That heritage still matters because the appeal of wood hasn't changed. It feels useful, tactile, and welcoming.

For events, that same appeal needs to be managed with a stylist's eye and a production mindset. A beautiful board is only successful if it looks right in the room, holds up through service, and doesn't become one more fragile item to worry about.

Selecting the Ideal Wooden Serving Board for Your Event

Some boards are decorative. Others are event workhorses. You need to know the difference before you build a menu around them.

A board for a plated bread service isn't the same as a board for a full grazing spread. A board that looks lovely in a showroom can be awkward once caterers start placing soft cheese, cured meat, preserves, and warm canapés on it. Selection starts with appearance, but it should end with function.

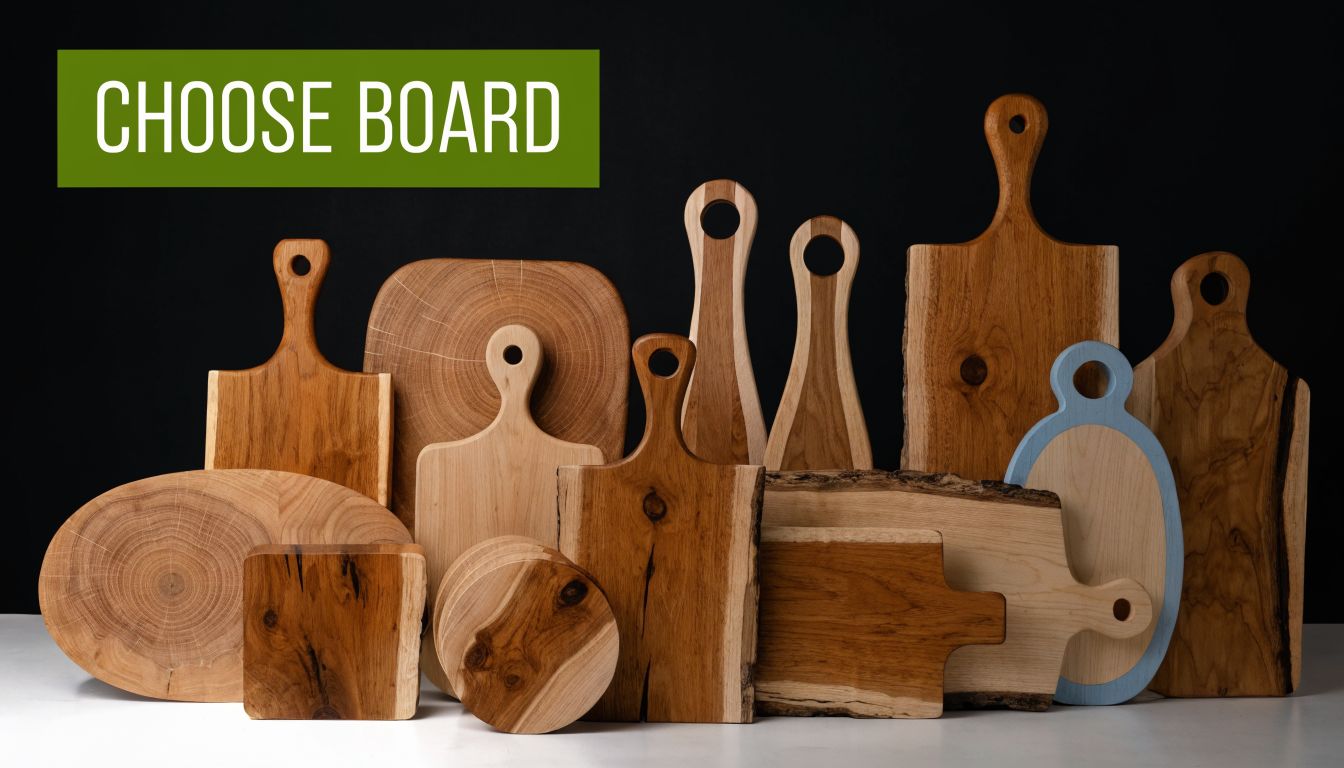
A collection of various rustic wooden serving boards of different shapes and sizes displayed together.

Start with material

The use of wooden boards for serving has deep roots. By the Middle Ages, wooden cutting boards were common in affluent European homes, with durable hardwoods like maple and oak valued for their ability to withstand use while protecting knife blades, as described in this overview of historic wooden board use.

For modern events, material choice still affects performance.

Wooden Board Material Comparison Best For Aesthetic Care Level
Oak Hearty grazing tables, bread service, rustic weddings Classic, sturdy, grounded Moderate
Acacia Rich food displays, premium canapé stations, darker styling schemes Warm, varied grain, elegant Moderate
Bamboo Lighter casual setups, daytime events, clean modern styling Light, neat, contemporary Moderate to higher attention for presentation consistency

Oak reads solid and established. It works particularly well when your venue already has natural texture, such as wine barrels, timber tables, stone walls, or lawn settings.

Acacia has stronger colour variation. That can be beautiful with pale cheeses, figs, crackers, and brass-toned serving ware, but it's less predictable if you want every board to match exactly in photographs.

Bamboo gives a cleaner visual line. It often suits daytime corporate events, wellness launches, or contemporary catering where the food palette is bright and minimal.

If you like handled pieces for easier placement and movement, this feature on a wooden tray with handles is useful for thinking through grip, portability, and presentation.

Shape controls the way guests move

Rectangular boards create direction. They're the best choice when you want a strong visual runner down a long table or you're dividing a spread into sections like breads, charcuterie, cheeses, and fruit.

Round boards feel more social and self-contained. They suit smaller clusters, side stations, lounge setups, and any event where guests gather in pockets rather than one long line.

Long narrow boards are excellent for:

  • Table runners of food: especially on harvest tables
  • Passed visual impact: when staff carry them to stations before final placement
  • Linear styling: where repeated shapes create rhythm down the table

Round boards are better for:

  • Intimate stations: four to eight guests circling naturally
  • Cocktail environments: where traffic comes from all sides
  • Soft visual breaks: between florals, candles, or signage

A board should make service feel easier. If it forces guests into a bottleneck, it's the wrong shape even if it photographs well.

Size should match the menu, not just the guest count

People often ask for a formula, but event styling rarely rewards rigid maths. A canapé-led event needs less board space per person than a grazing meal where the board is doing the work of a starter or shared main moment.

Use this decision guide instead:

  1. For light nibbles, choose smaller boards spread across multiple points so guests can reach them quickly.
  2. For a feature grazing table, use larger boards with space left between food groupings. Empty negative space is part of the premium look.
  3. For full grazing service, think in zones rather than one giant board. Bread on one, charcuterie on another, cheese on another, condiments in bowls between them.

The mistake I see most often is overcommitting to one oversized board. It sounds dramatic, but it's harder to transport, heavier to style on site, and awkward to replenish cleanly. Several coordinated boards nearly always look better and work better.

Artful Styling and Presentation with Cape Flair

A strong board starts with placement, not food. Put it in the wrong spot and even beautiful produce looks accidental. Put it in the right spot and the whole table feels intentional before a single olive lands.

At Cape events, local ingredients do a lot of the visual heavy lifting. You don't need imported excess to make a board feel luxurious. Biltong, droëwors, local cheeses, fresh figs, stone fruit, preserves, nuts, olives, crusty bread, and seasonal greenery already give you colour, texture, and a strong sense of place.

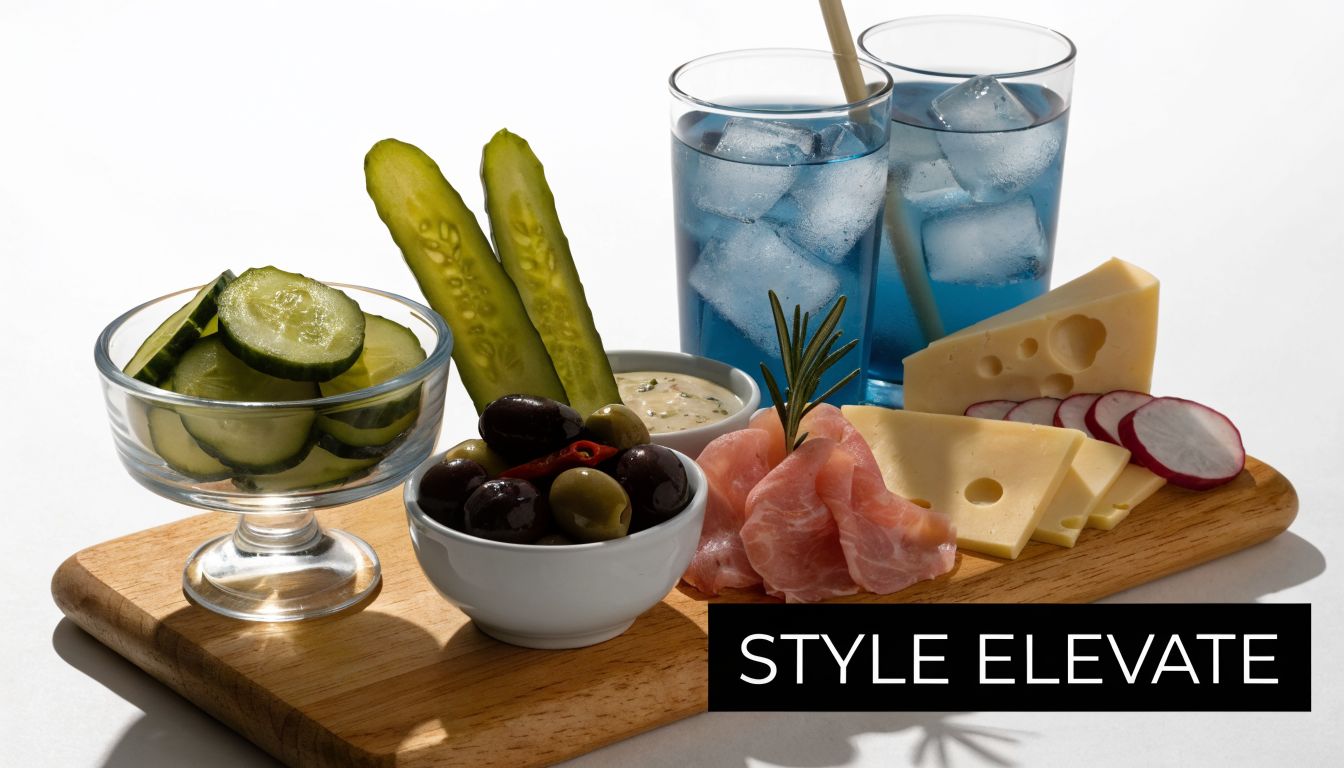
A wooden serving board featuring blue cocktails, cheese, cured meat, olives, pickles, and sliced radishes.

Build the board like a stylist

Start with anchor points. These are the visual stops that make the arrangement feel stable. Small bowls of olives, ramekins of preserves, and little dishes for honey or chutney work well because they hold wet ingredients and break up the flatter elements.

Then create a line through the board. On many event boards, that line is a folded charcuterie run through the centre. Some stylists call it a salami river. Whether you use salami, bresaola, or neatly layered cured meat, the principle is the same. It gives the eye somewhere to travel.

After that, place your larger pieces.

  • Cheese first: hard wedges and soft rounds shape the composition
  • Meat next: folded or rolled for height
  • Carbs around the edges: crackers and sliced bread frame the board
  • Fresh produce last: figs, grapes, radishes, and herbs fill gaps without looking forced

Make abundance look edited

The premium look isn't about packing every centimetre. It's about contrast. Dense clusters next to breathing room. Matte bread against glossy olives. Pale cheese against dark timber.

Three styling habits separate polished boards from messy ones:

  • Vary height: stack crackers loosely, fold cured meats, and let grapes spill slightly
  • Repeat colours: if you use fig, repeat that tone elsewhere with cured meat or preserves
  • Keep garnish relevant: rosemary, thyme, or subtle fynbos can work, but only if it suits the food and doesn't smell distracting

Leave some timber visible. Guests need to see the board itself for the display to feel premium rather than overfilled.

Cape ingredients that always earn their place

For Winelands weddings, I like boards that echo the local scenery and the season. That usually means local fruit, earthy tones, and ingredients that can hold their shape during service.

A few combinations work consistently well:

  • For a vineyard afternoon: brie, mature cheddar, fig preserve, green grapes, seeded crackers, walnuts, and torn sourdough
  • For a Cape heritage angle: biltong, droëwors, hard cheese, pickled onions, roosterkoek pieces, and chutney in small bowls
  • For a modern city launch: clean-cut cheeses, charcuterie ribbons, cornichons, radishes, olives, and crisp flatbreads with restrained greenery

Style for the event type, not your mood board

Rustic weddings can carry more texture. Boards can be broader, looser, and layered with fruit and bread in a more generous way.

Corporate boards need cleaner edges. Guests often grab quickly, so pieces should be easier to lift, less drippy, and arranged with more obvious access points. That means fewer sprawling garnishes and better spacing.

For private milestone celebrations, the sweet spot is usually somewhere in the middle. Guests want the warmth of abundance, but hosts still need food that's easy to refresh without pulling the whole display apart.

A board should look inviting from a distance and easy to eat from up close. If it only does one of those jobs, it needs refining.

Essential Food Safety and Board Care for Events

Wood still gets unfairly treated as the risky option by people who assume plastic is automatically more hygienic. In event work, that assumption can lead to bad habits, especially when plastic boards are heavily scored, poorly cleaned, or used far beyond their best condition.

A 2020 scientific study demonstrated that wood has inherent antimicrobial properties, with bacteria surviving for significantly less time on wooden surfaces than on stainless steel, polycarbonate, and aluminium, according to this summary of wood's antimicrobial performance. That matters because it shifts the conversation away from myth and back to proper handling.

A person wiping down a wooden serving board with a green cloth against a black background.

What smart event teams do on the day

The board itself isn't the whole food-safety story. Service conditions matter just as much. Outdoor heat, long setup windows, and repeated guest contact all affect how food should be managed.

These habits make the biggest difference:

  • Use barriers where needed: parchment paper under very oily, acidic, or strongly coloured items can protect the board finish and simplify cleanup
  • Clean spills fast: soft cheese, jam, chutney, and fruit juices shouldn't sit on the surface any longer than necessary
  • Dry properly after cleaning: boards should never be packed away damp
  • Separate prep from presentation: don't treat the styled board as an all-purpose kitchen chopping surface during service

What doesn't work

Leaving boards in the sun while the catering team handles something else is a common mistake. So is washing them quickly and stacking them flat while still damp. Both shorten the board's useful life and raise the risk of odour, staining, or warping.

Another bad habit is overloading one board with every wet ingredient on the menu. It might look lush for ten minutes, then the crackers soften, oils spread, and the board starts looking tired.

Professional-looking boards stay fresh because someone is managing them during service, not because they were styled beautifully once.

If your team is refining backstage cleaning routines, this article on preventing mold growth via WipesBlog.com is useful as a general reminder about moisture control, airflow, and why damp equipment should never be closed away before it has dried properly.

Why managed stock is often the safer option

For one-off hosts, board care tends to become an afterthought. The event ends, the leftovers are dealt with, and the boards are washed late, stored badly, or forgotten in a garage or scullery. That's where quality drops fast.

Professionally maintained stock usually performs better because the condition of the board is part of the service standard. Surfaces are checked, cleaned properly, dried correctly, and rotated before they become tired-looking. For events where presentation and hygiene both matter, that level of consistency is worth more than owning a pile of boards that only look good on day one.

The Smart Way to Source Boards in Cape Town and the Winelands

Buying boards sounds sensible until the logistics arrive. Then you're storing bulky items, transporting them to venues with narrow access, protecting them from damage, and hoping they still look polished after multiple uses.

That problem gets sharper in the Cape. Wooden boards used for events in South Africa face specific durability challenges, including high UV exposure at outdoor venues and coastal salt air in Cape Town, which means rental stock needs specialised maintenance and treatment protocols between uses, as noted in this overview of South African event board challenges.

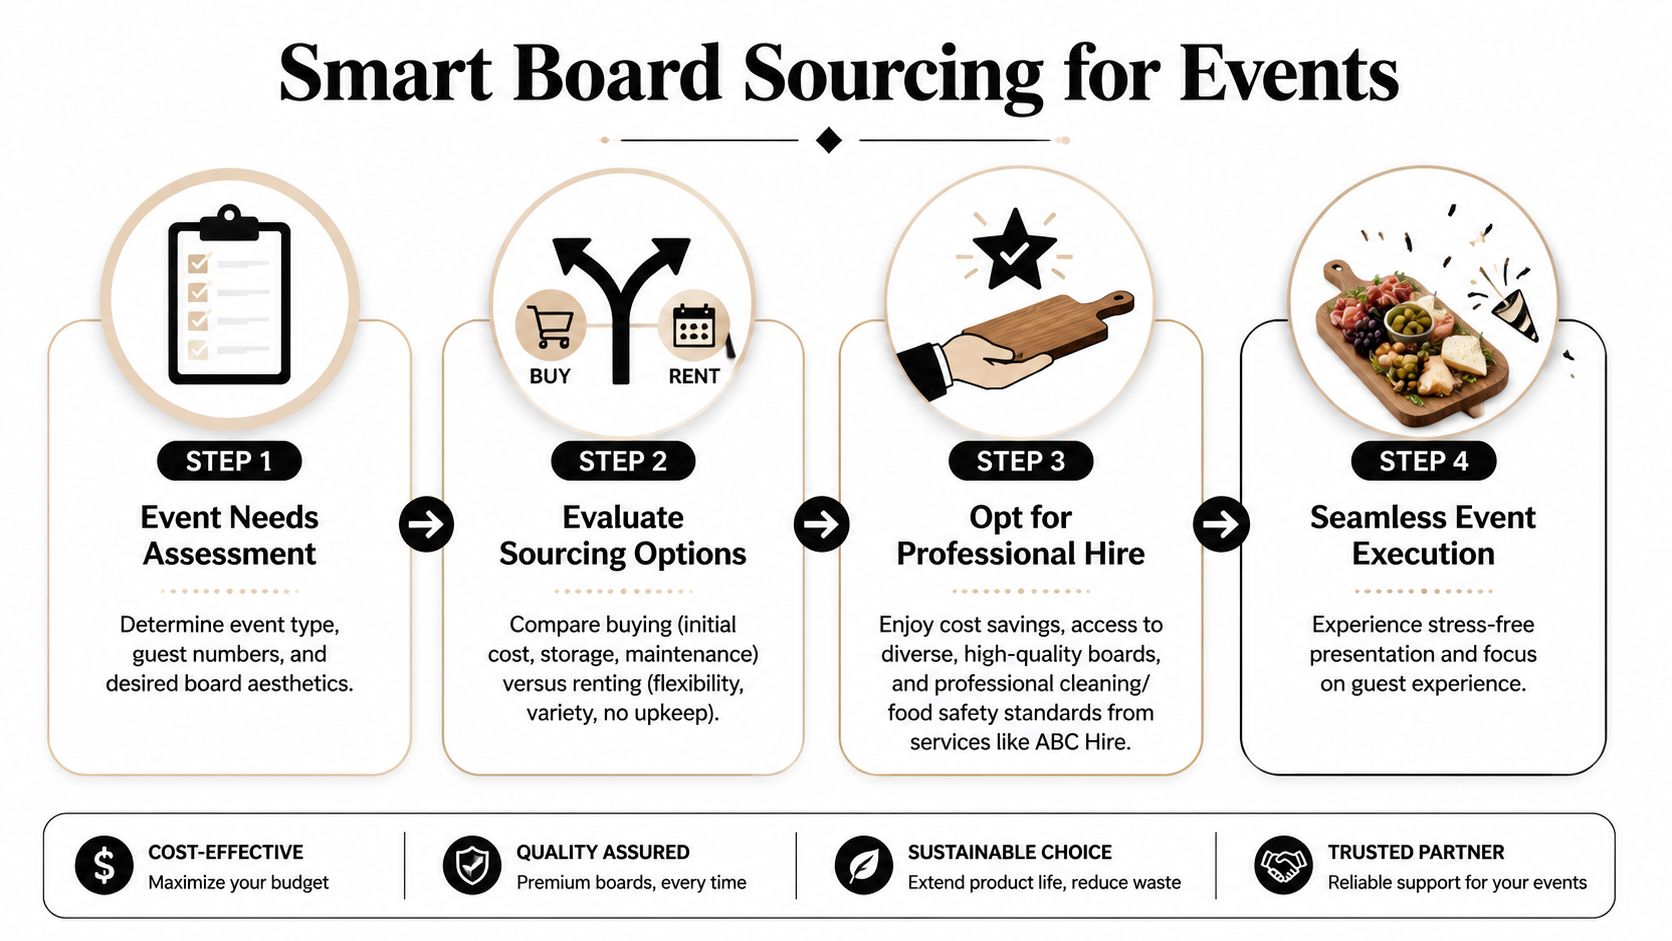
A four-step infographic illustrating the smart sourcing of wooden serving boards for professional event planning.

Why hiring usually wins

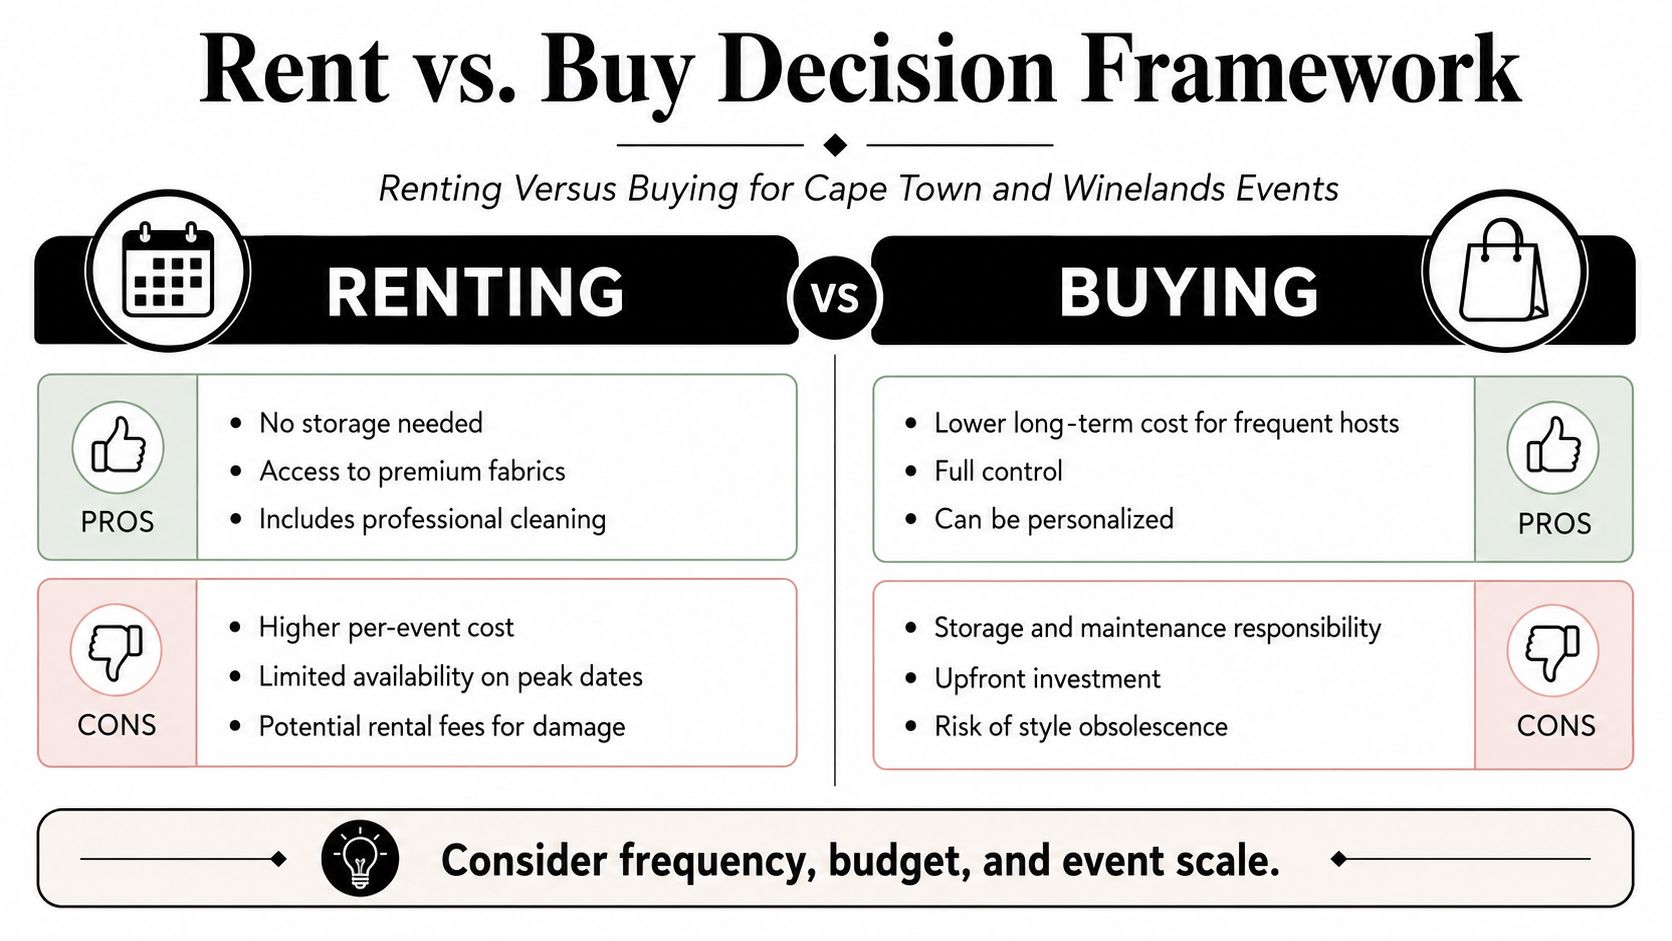
For most weddings, launches, and private functions, hiring makes more sense than purchasing. Not because buying is wrong, but because events place unusual pressure on serving ware.

You're dealing with:

  • Transport risk: large boards knock against each other in transit
  • Storage issues: timber needs suitable conditions between events
  • Style variation: one event may need pale minimal boards, the next darker rustic pieces
  • Maintenance labour: proper cleaning, drying, and conditioning takes time

Hiring lets you match the board selection to the brief instead of forcing every event to work around what you own.

A practical sourcing process

The easiest sourcing process is usually the simplest one.

  1. Confirm the event style
    Rustic wedding, polished corporate launch, private birthday, or a formal school event. The brief shapes the board choice.

  2. Map the food format
    Shared grazing, bread service, canapé stations, or mixed displays. This tells you whether you need statement boards, clusters, or both.

  3. Check venue realities
    A Stellenbosch farm, a Franschhoek estate, and a Seapoint rooftop all ask different things of the setup team.

  4. Choose convenience over clutter
    If the boards need to arrive clean, consistent, and ready for service, professional hire reduces the variables.

For anyone balancing boards with the broader event setup, this guide to furniture for hire in Cape Town is a useful reminder that serving pieces never stand alone. They need to work with tables, seating, bars, and the service footprint around them.

The smartest event purchases are often the ones you don't make. If an item needs ongoing care, storage, and transport planning, hiring it can protect both your budget and your sanity.

Where rental is especially useful

Hiring is particularly practical for destination weddings in the Winelands, corporate teams hosting roadshow-style activations, and private clients who want a refined food display without building a permanent inventory.

It also helps when your brief changes late. A caterer may expand the grazing station. A planner may decide to split one table into three. A venue may shift service indoors because of wind. Flexible stock solves those problems more cleanly than trying to improvise with whatever boards happen to be in a cupboard.

Bringing Your Unforgettable Display to Life

A memorable grazing display isn't built by accident. It comes from matching the wooden serving board to the occasion, styling it with restraint, and treating food safety and board care as part of the design process rather than backstage admin.

That's why the best event tables feel effortless. The materials suit the venue. The food is arranged for both beauty and access. The practical side has already been handled before the first guest arrives.

If you're planning the broader guest setup at the same time, it can help to look at related event layout ideas such as Premier Marquee Hire's table and chair services, especially when you're thinking about how serving stations, seating, and circulation work together.

The strongest displays in Cape Town and the Winelands always strike the same balance. They feel generous, relaxed, and polished, but they're grounded in good choices. The right boards make that possible. Professional hire often makes it easy.


If you're planning an event in Cape Town, Stellenbosch, Franschhoek, Paarl, or the surrounding areas, ABC Hire can help you build a polished event setup with quality rental pieces that work beautifully in real venues and real service conditions.

Gold Side Tables: Your Ultimate Event Styling Guide

You’ve finalised the florals, the candles are on brief, the linen works, and the room still feels a little unfinished. That usually happens in the last layer of styling. The large items are doing their job, but the guest experience between those hero elements still needs shape, shine, and somewhere practical to rest a drink, a clutch, or a small arrangement.

That’s where gold side tables earn their place. In a Cape Town wedding lounge, they can lift a soft neutral palette without making it feel heavy. In a Stellenbosch corporate launch, they give a seating cluster a polished edge and make the room feel considered rather than merely furnished. They’re small pieces, but they read like jewellery in a venue.

The Midas Touch That Elevates Every Event

A planner will often walk into a venue and know immediately that the layout is correct but the mood isn’t landing yet. The sofas are in place. The bar is built. The lighting is working. What’s missing is a reflective accent that catches candlelight, LED glow, or late afternoon sun and ties the styling together without adding clutter.

Gold side tables offer unobtrusive support. They don’t fight with a statement floral install or a dramatic dancefloor. They support it. Place one beside a velvet occasional chair, or between two lounge seats with a low arrangement and glassware, and the whole area feels more intentional. That’s why they work so well as event pieces rather than just furniture.

South Africa’s connection to gold gives that finish extra resonance. The Witwatersrand Gold Rush of 1886 helped shape a long cultural familiarity with gold as a marker of celebration, craft, and status, and the country historically produced over 50% of the world’s gold supply according to this background on gold history. In the Western Cape event world, that affinity still shows up in how clients respond to gold-accented décor.

Gold works best when it’s used as punctuation, not as noise.

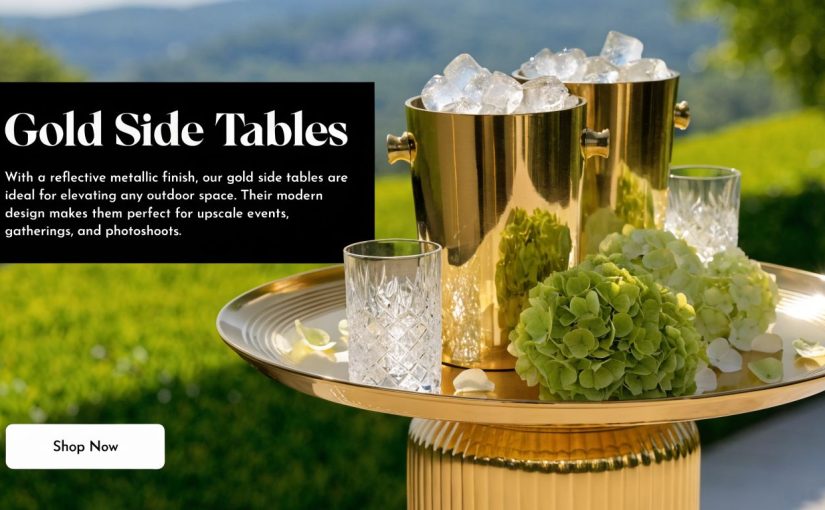
For planners building out a coordinated look, it helps to think of these tables as companions to other warm metallic seating details. If your event already includes gold Tiffany chairs, a side table in a matching or complementary finish can stop the room from feeling visually disconnected.

The effect is strongest when the table is doing two jobs at once. It needs to look elegant from across the room and still be useful at arm’s reach.

A Spectrum of Gold Exploring Styles and Finishes

Not every gold side table says the same thing. Some read clean and architectural. Others feel romantic, decorative, or overtly glamorous. Choosing well starts with understanding both style and finish, because clients often ask for “gold” when what they really mean is a specific mood.

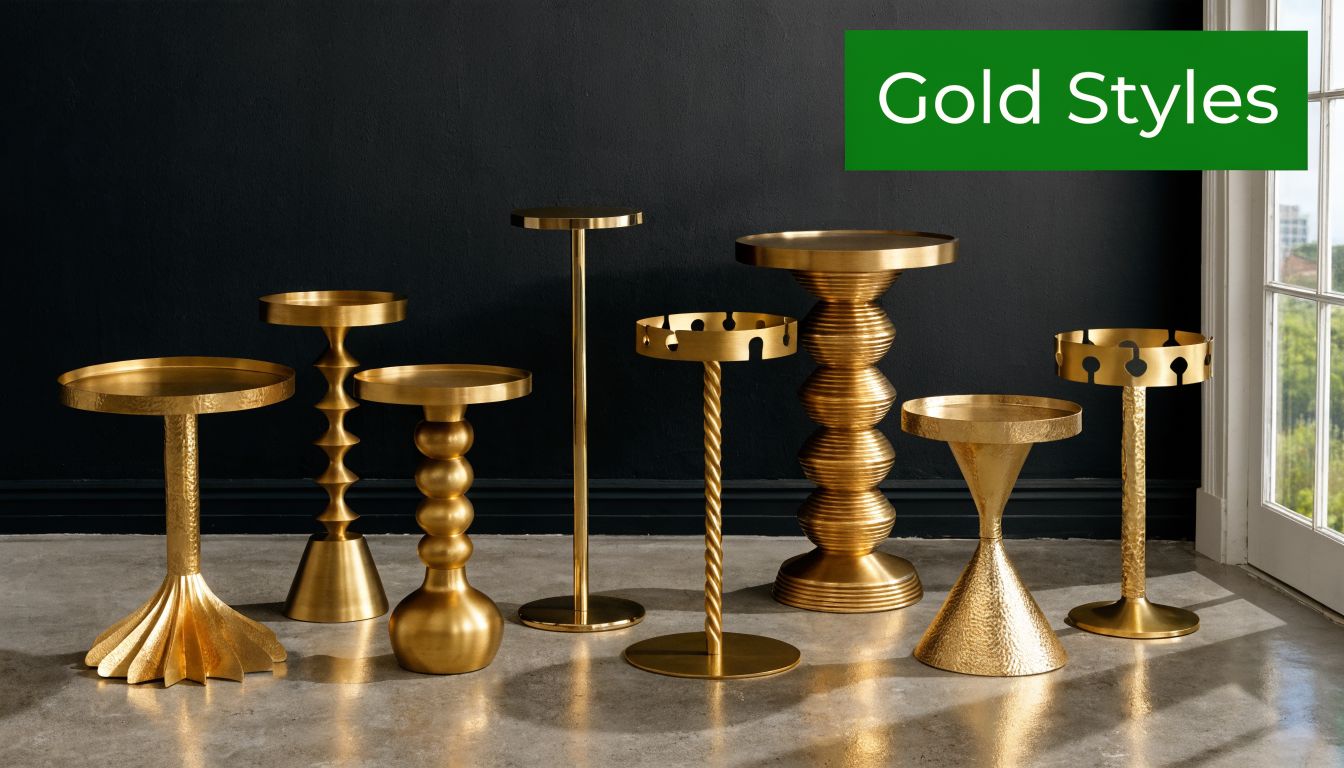
A collection of various gold side tables with unique designs arranged against a dark wall background.

Modern gold side tables

Modern gold side tables suit venues where the architecture is already doing some of the work. Think clean-lined wine estate interiors, glass-heavy reception spaces, or corporate lounges where branding needs to remain the focal point. These tables usually rely on slim frames, geometric bases, and restrained tops.

They’re useful when you want metal detail without visual heaviness. A round top with a simple gold frame can sit next to a boucle chair, hold a drink and a candle, and still leave the setup feeling airy.

A modern shape also plays well with black, stone, white, taupe, and smoked glass. If the event palette includes contemporary materials, browsing pieces similar in spirit to marble top end tables can help clarify whether you want the gold to feel warm and decorative or structured and architectural.

Vintage and decorative styles

Vintage-inspired gold side tables bring more personality. You’ll see curved legs, patterned metalwork, Art Deco references, mirrored shelves, or detailing that feels softer and more ornamental. These are often the right choice for weddings, milestone birthdays, or any event where romance matters more than restraint.

They work especially well with:

  • Textured seating: Velvet, tufted ottomans, and upholstered benches.
  • Layered tabletops: Bud vases, votives, champagne coupes, and folded napkins.
  • Warm lighting: Candles, festoon lighting, and amber-toned LEDs.

Use them carefully, though. If the venue already has highly decorative chandeliers, patterned carpeting, and ornate tableware, an overworked side table can push the room into visual clutter.

Practical rule: The more detailed the venue and floral styling are, the simpler the side table should be.

Mirrored and high-glam options

Mirrored gold side tables are the statement-makers. They bounce light, photograph beautifully, and can make a smaller lounge area feel brighter at night. They’re ideal near dancefloors, champagne stations, or entrance moments where reflection adds energy.

The trade-off is maintenance during service. Fingerprints, condensation rings, and cake crumbs show quickly on mirrored surfaces. For formal events with attentive staff, that’s manageable. For high-traffic parties, a less fussy surface is usually easier.

Understanding finishes properly

Clients often use “gold”, “brass”, and “metallic” interchangeably, but the finish changes the feel of the room. The easiest way to think about it is to compare tables to jewellery.

Finish How it reads in a venue Where it works best
Brushed brass Softer, muted, less reflective Romantic weddings, earthy palettes, textured lounges
Polished brass High-shine, formal, more noticeable Black-tie events, glamorous receptions, evening bars
Gold lacquer Smooth and even in colour Modern styling where consistency matters
Gold-plated metal look Richer and more jewellery-like Feature pieces, premium lounge moments

A matte gold finish behaves like brushed jewellery. It adds warmth without shouting. A polished finish behaves like a dress piece. It catches every light source in the room.

That matters when pairing side tables with larger rentals. If your lounge also includes metallic statement surfaces, it’s worth reviewing related styling examples such as gold coffee tables so the metallic elements feel related rather than mismatched.

What usually works and what doesn’t

A few patterns come up repeatedly on real event floors:

  • Works well: One clear metal story across the lounge cluster. Warm gold with warm glassware and cream florals feels coherent.
  • Often fails: Mixing yellow gold, rose gold, chrome, and copper in the same small area without a deliberate reason.
  • Works well: Letting one finish dominate and using other materials to soften it.
  • Often fails: Choosing the table from a product photo without considering what the venue lighting will do to the finish.

The best choice isn’t the most ornate table. It’s the one that keeps the room balanced.

Function Meets Form Selecting the Right Table for Your Occasion

A beautiful table that’s too low, too narrow, or too unstable becomes a nuisance within the first hour of service. Selection should start with use, not with colour. Ask what guests will place on the table, how long they’ll occupy the area, and whether staff need to move around it carrying trays, coffee service, or branded materials.

In Cape Town’s event market, gold-finished side tables account for 12% of premium furniture rentals for night-time events, and a 2024 industry report noted more than 2,500 units rented annually across over 1,200 weddings, which tells you two things at once: they’re popular, and planners need to choose them deliberately rather than treat them as filler pieces. That market context was noted in the earlier gold heritage discussion and is part of the same source base already referenced there.

Start with height and reach

A side table should be easy to use without guests leaning awkwardly forward or twisting in their seat. In lounge clusters, the top should sit comfortably near the arm height of the seating around it. If it’s noticeably lower, glasses end up on chair arms. If it’s too tall, the setup feels stiff and slightly commercial.

For practical selection, use this decision lens:

  • Beside a single chair: Choose a compact top for one drink, one phone, and one small accent item.
  • Between two seats: Allow enough surface area for shared use. Two glasses and a candle arrangement fill space faster than people expect.
  • At a welcome drink point: Prioritise top stability and easy access over decorative base detail.

Event type changes the brief

The right table for a wedding is not always the right table for a product launch or matric dance. The styling may overlap, but the pressure on the furniture doesn’t.

Weddings

Wedding lounges usually ask the table to do three jobs at once. It has to photograph well, support drinks, and leave room for a small floral or candle element. Round tops often work best because guests move around them easily and they soften the look of a seating cluster.

Corporate events

Corporate events need cleaner functionality. If attendees are networking with a drink in one hand and a phone or notebook in the other, the table needs a clear usable surface. Intricate decorative edges can look good in photos but reduce practical space.

Parties and formal dances

High-energy events are where stability matters most. If the floor is busy and guests are circulating constantly, a delicate-looking table with a narrow base can become a headache. In these settings, a sturdier build and simpler top are usually the smarter call.

If guests have to think about using the table, the table is wrong for the event.

Don’t ignore traffic and flooring

Venue flooring changes how a table performs. A polished indoor floor is forgiving. Lawn, gravel, paving joints, and slightly uneven heritage venue surfaces are not. For Winelands events, this becomes a genuine styling decision because the prettiest placement spot isn’t always the most stable one.

Check these before confirming your quantity:

  1. Surface condition: Flat indoor floor, decking, lawn, gravel, or mixed terrain.
  2. Guest density: Quiet lounge corner or high-traffic circulation zone.
  3. Service style: Passed canapés, plated dining, self-pour stations, or coffee service.

A side table succeeds when nobody comments on it. Guests use it, and the room feels finished.

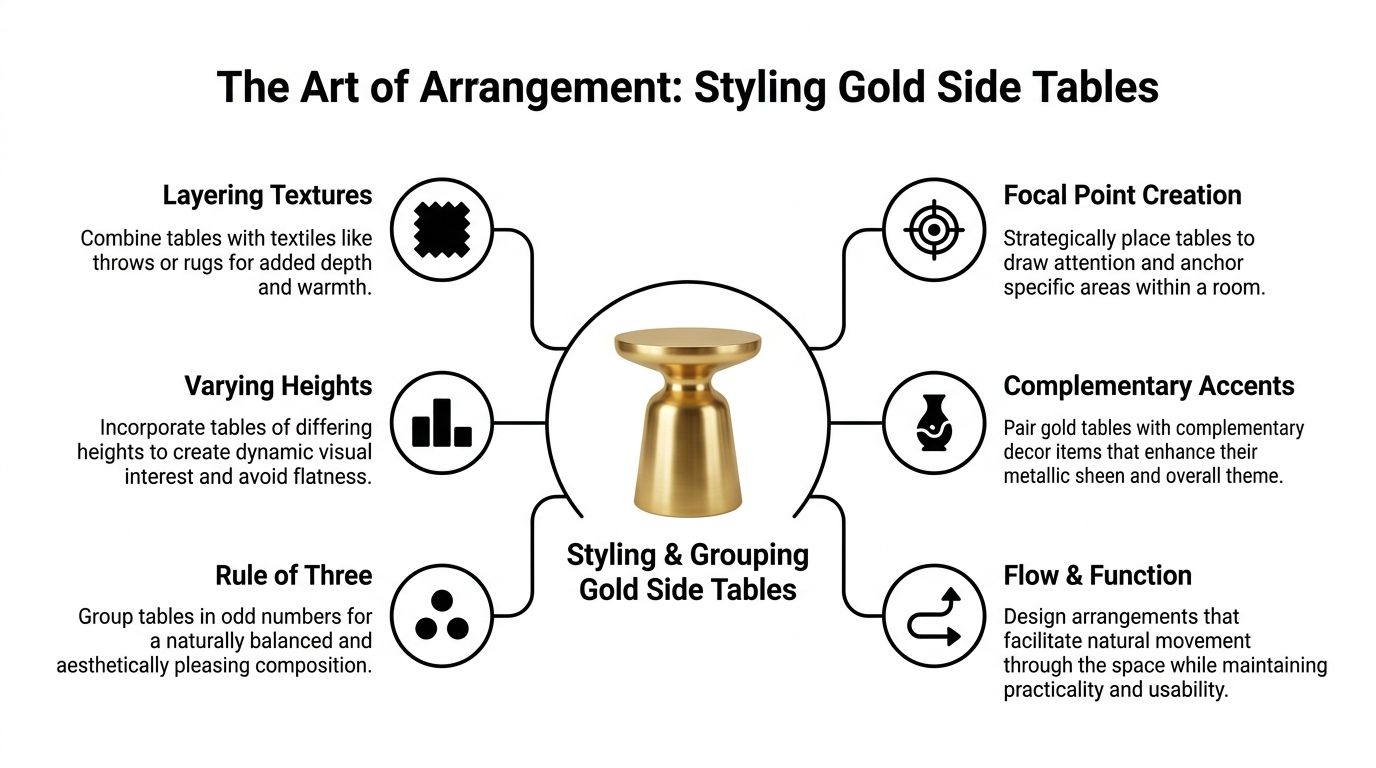
The Art of Arrangement Styling and Grouping Gold Side Tables

One gold side table can be elegant. A well-grouped set can define a whole area of the event. Placement is what turns these tables from isolated accents into layout tools that shape movement, conversation, and photo opportunities.

An infographic titled The Art of Arrangement showing six tips for styling gold side tables.

When planning visual zones, product stylists often talk about background control, reflection, and visual hierarchy. Those same principles apply to events, and the thinking behind crafting the right background for your product is surprisingly useful when deciding how metallic furniture will sit against draping, walls, branding panels, or floral installs.

The Conversation Pod

This is the most reliable arrangement for lounge areas. Use three small tables with slight variation in height or visual weight around a sofa-and-chair grouping. The cluster shouldn’t feel perfectly symmetrical. A little irregularity makes the setup feel lived-in and softer.

Use this when the seating area is meant to keep guests there for a while. One table can take florals, another drinks, and the third can remain open for practical use.

  • Best for: Cocktail lounges, bridal lounges, VIP seating.
  • Avoid if: The footprint is tight and service staff need a direct through-route.
  • Styling note: Keep at least one tabletop mostly clear.

The Elegant Welcome

A single gold side table near an entry point can do far more than fill space. It gives arriving guests a visual cue that they’ve entered a curated event environment. Add a candle, a welcome sign detail, a single arrangement, or pre-poured drinks if staffing and timing allow.

This setup works because it’s restrained. Don’t overcrowd the tabletop. A side table at an entrance should read instantly.

A good arrival moment tells guests what kind of evening they’re walking into.

The Cake Annex

Cake displays often look beautiful in isolation but become awkward in use. Guests need somewhere for flutes, forks, napkins, or small dessert accompaniments, and those practical items can ruin the central display if they’re placed on the main cake table itself.

Two flanking gold side tables solve that neatly. They frame the hero piece and absorb the useful items without diluting the photograph.

The Lounge Bridge

This arrangement is useful in larger venues where separate seating pockets can start to feel disconnected. Place gold side tables between adjacent lounge zones to visually “stitch” them together. The tables don’t need heavy styling. Their repeated finish creates continuity.

This approach works particularly well when the room has multiple conversational clusters and you want a coherent metallic thread running through the floor.

The Photographic Corner

Create a small feature area with one statement chair, one gold side table, and a controlled décor item such as a vase, lamp, or champagne bucket. This gives guests a natural spot for portraits and candids without needing a full photo booth structure.

A few simple rules make these arrangements stronger:

  • Vary heights: Flat lines look static in photos.
  • Use odd numbers: Groupings of three usually feel easier on the eye than pairs.
  • Mind clearance: Guests still need to move naturally around the space.
  • Edit accessories: If the table itself is striking, reduce tabletop clutter.

The strongest styling plans don’t use more pieces. They place the right pieces with intent.

The Smart Choice Renting vs Buying for Cape Town Events

For one-off events, buying gold side tables is usually the expensive answer to a short-term problem. Purchase can make sense for a permanent venue with consistent styling needs and available storage. For planners, private hosts, schools, and most corporate teams, it usually creates extra cost and extra admin.

The local market gap makes that even clearer. For one-off events, renting gold side tables can deliver over 40% cost savings compared with buying, and the same source context notes that no major ZA rental platforms list these items for local hire, while 62% of Cape Town schools report challenges with furniture reuse after events like matric dances according to the source set tied to gold side table purchase listings. That combination matters. If reuse is difficult and storage is inconsistent, ownership becomes wasteful very quickly.

What buying really adds to the job

Buying sounds simple when you’re looking at a product page. The hidden work starts afterwards. Someone has to receive the tables, inspect them, store them, transport them, protect them during loading, wipe them down, and deal with wear across multiple events.

That’s manageable if furniture management is part of your operation. It isn’t manageable if your team is already occupied with guest lists, technical suppliers, catering deadlines, and venue access windows.

Where renting makes more sense

Renting is usually the better route when the event brief changes from one job to the next. A romantic Winelands wedding might need brushed gold with soft edges. A city launch might need something cleaner and more structured. Hiring lets the furniture follow the brief instead of forcing the brief to fit what you already own.

For planners who need broader event inventory as well, a local option such as furniture for hire in Cape Town is one way to keep lounge pieces, seating, and support items aligned within the same logistics plan.

Rental vs purchase comparison for gold side tables

Consideration Renting (with ABC Hire) Buying
Upfront spend Lower commitment for the event period Higher initial outlay
Storage after the event Not your problem once collected You need secure, clean storage
Style flexibility Choose a look that suits each brief You’re tied to what you own
Transport Usually coordinated as part of rental logistics You arrange vehicles, loading, and returns
Maintenance Event-level care during use Ongoing cleaning, repairs, and wear management
Quantity changes Easier to scale up or down per event Difficult if demand changes suddenly
Use case Best for weddings, launches, formal dances, private functions Better suited to permanent venues with repeated use

Buying works for stock rooms. Renting works for events.

The less obvious trade-off

Ownership can also narrow your creative options. Once a venue or planner has spent money on one style, there’s pressure to use it repeatedly whether or not it’s the best fit. That’s how rooms start to look recycled instead of perfectly suited.

With rented gold side tables, the decision can stay where it belongs. On the event concept, the venue conditions, and what guests will do in the space.

Logistics and Care for Hired Tables in the Cape

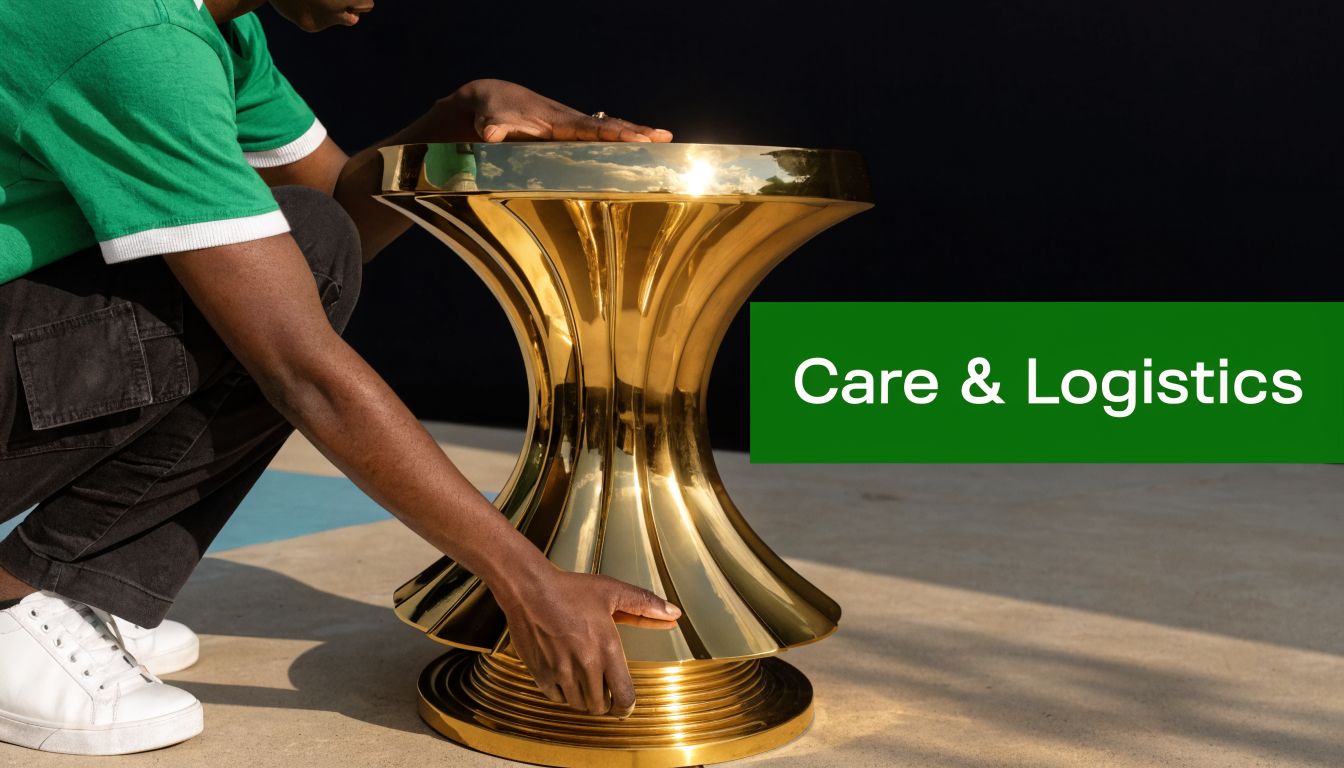
A gold side table can leave the warehouse spotless and still arrive at a venue facing three local realities: narrow access times, mixed terrain, and weather that changes faster than the running order. Good logistics matter as much as good styling, especially across Cape Town, Stellenbosch, Franschhoek, and Paarl.

A person crouching down while carefully positioning a polished gold side table on a paved outdoor surface.

The outdoor side of the market has become harder to ignore. Source data notes a 22% increase in outdoor corporate events in the Winelands and an 18% rise in rainfall, with 35% of event cancellations avoided by using appropriate rental furniture over owned pieces that are more vulnerable to coastal humidity or UV exposure, as summarised in the source context linked to gold side table category listings. That tells planners something practical. Outdoor furniture selection isn’t decorative fussiness. It’s risk control.

Getting placement right on site

The first step is always surface assessment. A polished table on a flat indoor floor behaves very differently from the same table on paving joints, timber decking, or compacted lawn. Before styling starts, test each placement point for wobble and adjust the plan if the ground isn’t fully true.

A few habits prevent most problems:

  • Check before dressing: Confirm stability before adding glassware, candles, or florals.
  • Keep weight centred: Don’t place heavy objects on one edge of a narrow top.
  • Allow breathing room: Avoid squeezing tables into pathways where guests or staff will clip them.

Caring for the finish during service

Gold finishes look refined when they stay clean and dry. During the event, the biggest threats are condensation, abrasive cloths, sticky spills, and improvised cleaning. If a table gets marked, gentle handling matters more than aggressive wiping.

Use soft cloths only. Avoid harsh cleaners, rough scrubbers, or anything that can dull the finish. If drinks service is heavy, ask staff to keep an eye on condensation rings and wipe them promptly with appropriate materials.

Outdoor use in Cape weather

Outdoor setups need a stricter eye. Even when a table is suitable for event use outside, that doesn’t mean it should sit fully exposed for hours if rain threatens or sea air is particularly sharp. Positioning under a stretch tent, marquee edge, verandah, or covered lounge zone is usually the safer call.

For Winelands events, keep these in mind:

  1. Morning setup is not the whole forecast: Conditions can shift by late afternoon.
  2. Metal reflects heat and light differently outdoors: What looked subtle in a showroom may read brighter in direct sun.
  3. Collection condition matters: Clearing standing water and obvious residue before pickup helps avoid unnecessary issues.

The planners who have the smoothest event days usually treat hired furniture as part of operations, not just décor. That’s what keeps the room looking sharp from guest arrival to final pack-down.

Your Questions Answered

Do gold side tables only suit formal events?

No. They suit styled events. That includes formal weddings and black-tie dinners, but it also includes contemporary brand launches, birthdays, engagement parties, and polished matric farewells. The key is choosing the right shape and finish. A sleek, restrained gold table can feel modern rather than traditional.

How many gold side tables do I need?

Start with function, not symmetry. A lounge area usually needs enough tables so guests don’t have to balance drinks on chair arms or window ledges. If there’s a cake zone, welcome point, or portrait corner, count those separately. It’s better to place fewer tables well than scatter too many without purpose.

Can gold side tables work with silver cutlery or black décor?

Yes, if one finish clearly leads and the others support it. Gold side tables pair well with black, white, stone, glass, and many neutral linen colours. Mixed metals can work too, but only when the contrast feels intentional. If every metallic tone is competing for attention, the room starts to look unresolved.

The safest way to mix finishes is to choose one hero metal and let the rest stay quieter.

Are they practical for drinks and canapés?

They are, provided the top size suits the setting. In cocktail lounges, guests need enough room for glassware and a small styling element. For packed standing events, they should be placed where people can approach them comfortably rather than in circulation bottlenecks.

What if my event is outdoors?

Outdoor use is possible, but placement matters. Covered positions are usually preferable, especially in the Cape where weather can shift during the course of an event. Stability, moisture exposure, and guest traffic all need to be considered before final placement.

Do I need matching gold pieces everywhere?

Not at all. Matching everything can flatten the room. A better result usually comes from repeating gold with restraint. You might use gold side tables in the lounge, a separate metallic detail at the bar, and keep dining tables more neutral.

What causes the most styling mistakes with gold side tables?

Usually one of three things:

  • Choosing by photo alone: The venue lighting changes how the gold reads.
  • Over-accessorising: Too many candles, flowers, menus, and props can hide the table itself.
  • Ignoring scale: A tiny table beside a large sofa looks decorative but not useful.

When the finish suits the room and the proportions suit the guest experience, gold side tables rarely feel like a risky choice.

Add a Touch of Gold to Your Next Event

Gold side tables do more than fill corners. They sharpen lounge layouts, support service, catch light beautifully, and help an event feel finished. In Cape Town and the Winelands, they’re especially effective because the venues often ask furniture to do double duty. It must look refined in photographs and still perform well through setup, guest flow, and pack-down.

The strongest results come from making a few grounded decisions. Choose the right finish for the room. Match the size to how guests will use it. Place each table with purpose. And for one-off events, avoid turning a styling need into a storage problem.

If you’re planning a wedding, activation, formal dance, or private function, hiring is usually the cleaner route. It gives you flexibility, removes the burden of long-term ownership, and lets the furniture fit the event rather than the other way around.


If you’re planning an event and want to use ABC Hire for gold side tables and related event furniture, the simplest next step is to review the available style direction, request a quote, and confirm delivery details for your venue in Cape Town or the Winelands. That gives you clarity on quantities, finishes, and logistics before the styling plan is locked.

Glass Candle Holders Your Guide to Styling Cape Town Events

Ever wondered how event spaces go from ordinary to utterly magical? It’s often the simple things, and nothing does it quite like the warm flicker of candlelight. But the real secret ingredient? Glass candle holders. They’re so much more than just accessories; they are the essential tools we use to craft an unforgettable atmosphere.

How Glass Candle Holders Transform Event Ambiance

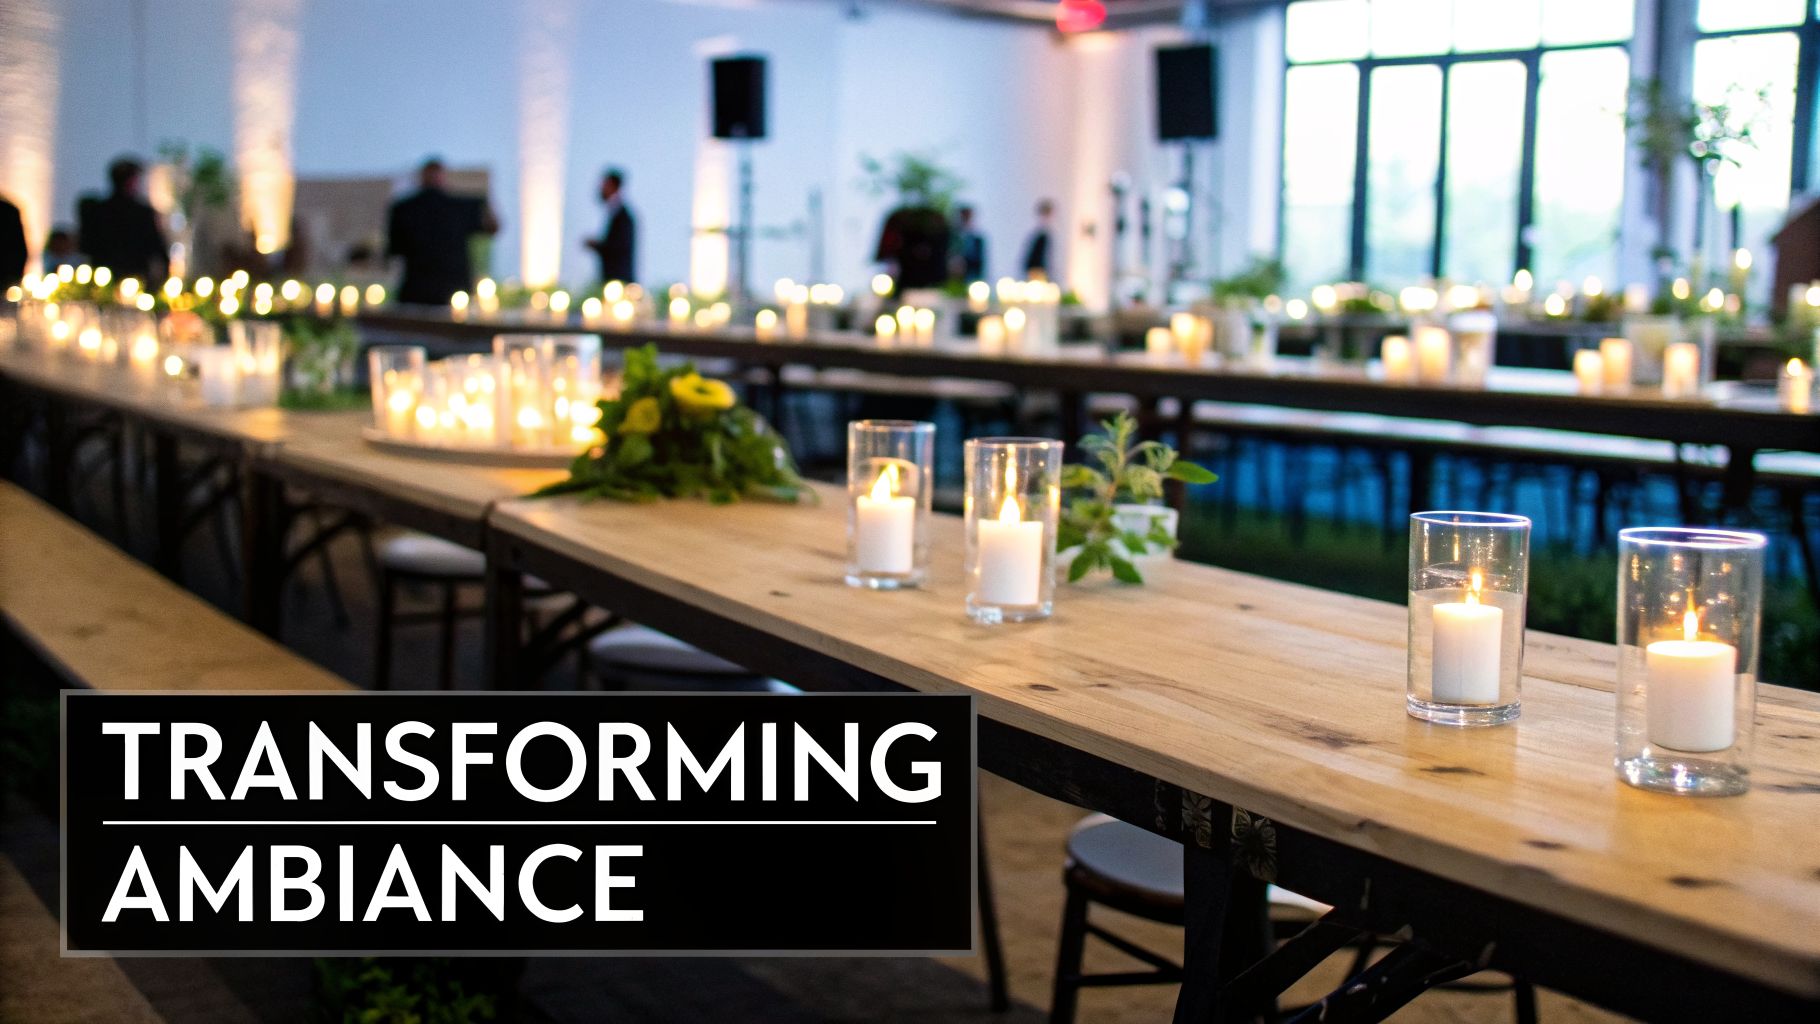
A long wooden table adorned with many glass candle holders, lit candles, and green decor, creating a warm ambiance.

Think of glass holders as the directors of your event’s lighting. They take the raw, dancing flame of a candle and shape its entire personality. The right glass can amplify a tiny tealight into a radiant glow, shield a tall taper from a gentle breeze, or diffuse the light to create a soft, romantic haze across the room.

The magic is all in how they play with light, which in turn sets the mood. A clean, unadorned glass cylinder feels modern and chic, perfect for a corporate gala. On the other hand, a cluster of small, delicate votive holders creates an immediate sense of intimacy and wonder, exactly what you want for a wedding reception. They aren't just containers; they are instruments of design.

Defining Your Event's Atmosphere

The beauty of glass candle holders is their power to transform a space, creating an immersive feeling that truly connects with your guests. This focus on sensory engagement is a cornerstone of great experiential marketing, turning a simple get-together into something people remember. You can steer your entire theme with these simple tools:

  • For Luxury and Glamour: Go for tall, slender glass holders with elegant taper candles. They add height and a real sense of drama to your tables.
  • For Rustic Charm: Simple votive or hurricane-style holders mixed with natural elements like wood and fynbos feel warm, earthy, and inviting.
  • For Modern Sophistication: Clean-lined cylinder holders in various heights give you a minimalist yet incredibly impactful look.

This incredible versatility makes them a non-negotiable for event planners across Cape Town and the Winelands. And the numbers back it up: South Africa’s candle market revenue is projected to hit USD 451.5 million by 2033. Votive candles—which almost always need a glass holder—are leading the charge, claiming a massive 27.27% share of the market.

By simply choosing a specific style of glass candle holder, you are making a powerful statement about your event's identity before a single guest arrives. It’s the first step in building a cohesive visual narrative.

This subtle control over the atmosphere is precisely why they're a staple in our inventory. While you're weighing your options, it's worth noting that other lighting choices, like our popular rechargeable table lamps, can offer a different but equally modern twist. Ultimately, the right holder doesn't just hold a candle; it holds the entire mood of your event in its delicate grasp.

Choosing the Perfect Glass Candle Holder Style

Think of choosing a glass candle holder like picking the right frame for a beautiful painting. The frame isn't just there to hold the art; it enhances it, drawing your eye and pulling the whole look together. It’s the same with candle holders—they define the character of the candlelight and shape the entire mood of your event.

Not all glass candle holders are the same. Each style brings its own personality to the table and is designed for a specific job. Getting to know these differences is the first step in creating a truly intentional design for your wedding or corporate function.

Let's break down the most popular styles you can hire. This is your practical guide to making a smart choice that lines up perfectly with your event's theme and the atmosphere you want to create.

A Quick Guide to Glass Candle Holder Styles

To make things even easier, we've put together a quick comparison of the most common styles we offer. This table will help you see at a glance which holder is the best fit for your candles, your venue, and your vision.

Holder Style Primary Use & Aesthetic Compatible Candles Ideal For…
Hurricane Holders Tall, protective, and elegant. Perfect for creating a grand statement and shielding flames from wind. Pillar Candles Outdoor weddings, walkway lighting, rustic or dramatic themes.
Cylinder Vases Sleek, modern, and incredibly versatile. Their clean lines suit any sophisticated setting. Pillar Candles, Floating Candles Corporate events, minimalist weddings, creating elegant centrepieces.
Votive & Tealight Holders Small, intimate, and magical. Used in clusters to create pockets of warm, twinkling light. Votive Candles, Tealights Adding layers of light, table accents, bar and lounge areas.

As you can see, each style serves a purpose. The key is to match the holder not just to your decor, but also to the type of candle you plan on using to ensure a safe and beautiful result.

The Three Main Styles Demystified

When you get down to it, most glass candle holders fall into three main groups. Each one works with different candles and creates a completely different feel.

  • Hurricane Holders: These are the heroes of any outdoor event. With their tall, wide glass shields, they protect flames from the Cape Doctor, making sure your candles stay lit. They’re a perfect match for pillar candles and create a substantial, elegant look on tables or along garden paths.

  • Cylinder Vases: The ultimate chameleon of event decor. Cylinders are incredibly versatile and come in a huge range of heights and diameters. You can use them with pillar candles, float candles on water inside them, or even fill them with flowers. Their clean, modern lines make them a go-to for sophisticated corporate events and minimalist weddings.

  • Votive and Tealight Holders: Don't underestimate these little guys. They are small but mighty, creating magical pockets of twinkling light wherever you put them. Votives are perfect for clustering in groups on tables, ledges, or bars to produce a concentrated, intimate glow. They add layers of warmth and sparkle that are hard to beat.

This variety is sparking some amazing creativity in the event world, transforming everything from corporate brand activations in the city to school formals across South Africa. It's a big deal globally, too—the candle holder market is projected to grow from USD 0.72 billion in 2025 to USD 0.94 billion by 2031, with glass styles leading the charge. You can read more about this trend and its impact on themed events.

When picking a style, you're really balancing looks with practicality. Just ask yourself two simple questions: "Do I need to protect the flame from wind?" and "What mood am I after—dramatic and tall, or low and intimate?"

Matching Holder to Event Theme

Now for the fun part: connecting these styles to your actual event theme. The candle holders you choose should feel like a natural part of your overall vision, not an afterthought.

A quick way to get it right is to think about your venue. For a rustic Winelands wedding on a gorgeous old farm, a mix of hurricane lamps and votive holders scattered across wooden tables feels romantic and authentic. On the other hand, for a sleek corporate awards dinner in a modern Cape Town venue, clustering cylinder vases of different heights will scream sophistication.

Ultimately, the perfect style is one that blends seamlessly into your event's story. It’s there to support the theme and cast the perfect glow on your special occasion, without stealing the show.

Arranging Holders for Maximum Visual Impact

There’s a secret to creating that breathtaking, candlelit glow you see in magazines, and it’s all about placement. You can have the most beautiful glass candle holders, but if they’re just scattered about, the effect can fall flat. The real magic happens when you arrange them with purpose to create rhythm, dimension, and that unforgettable ambiance.

Think of it this way: using candle holders all at one height is like listening to a song with only one note. It gets a bit boring! The moment you mix different heights, you create visual layers and a much more dynamic, professional look. This is where the real artistry comes in.

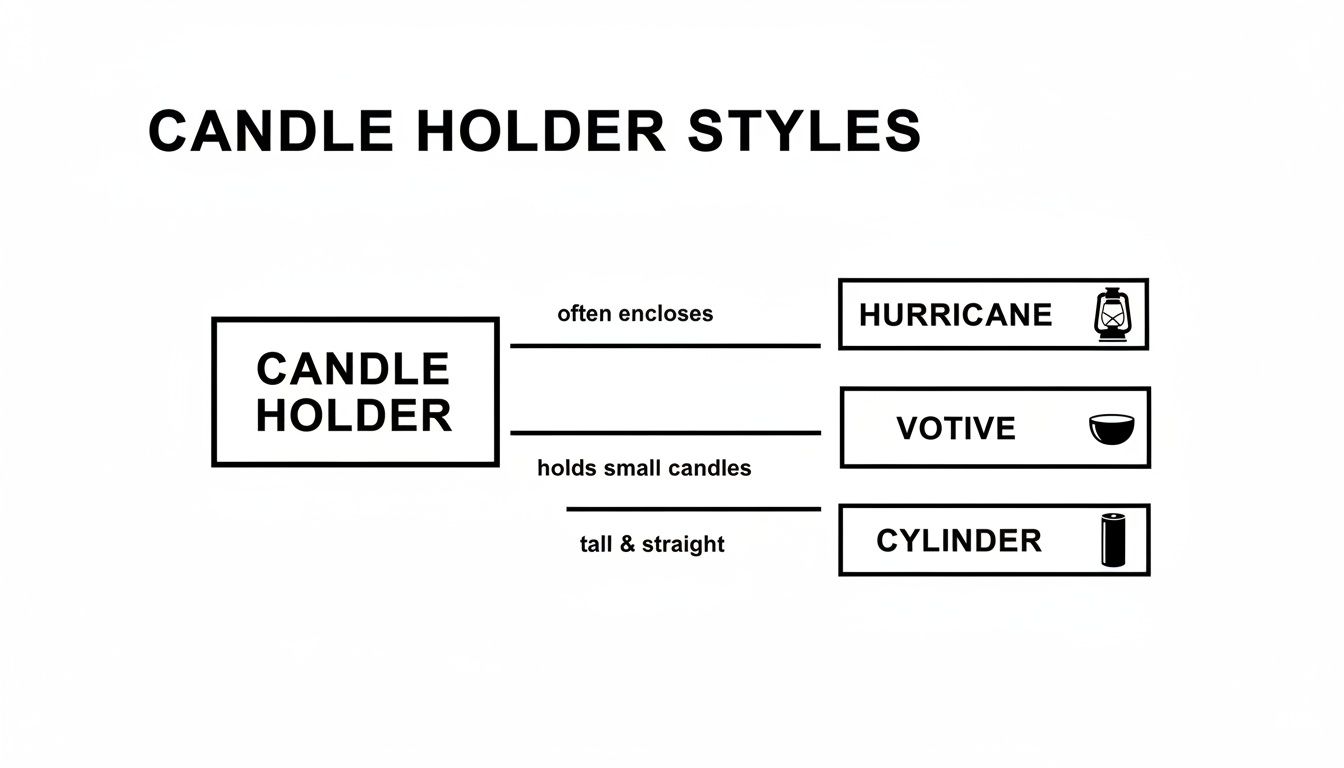
Diagram illustrating Hurricane, Votive, and Cylinder candle holder styles with their descriptions and icons.

As you can see, the three main styles—Hurricane, Votive, and Cylinder—each have a unique role to play. A classic and foolproof combination is pairing tall, elegant cylinders with the low, gentle glow of votives. This simple trick instantly adds depth and sophistication to any table.

Calculating the Right Number of Holders

One of the first questions we always get from clients is, "So, how many do I actually need?" It's a great question because it helps you avoid the two most common pitfalls: using too few, which can look a bit sparse, or using too many, which makes your tables feel cluttered.

Here are a few guidelines we use to strike that perfect balance.

For Long Banquet Tables (2.4m):

  • Minimalist & Elegant: If your flowers are the star of the show, aim for 5-7 holders of different heights. Space them artfully down the centre for a clean, stylish look.
  • Lush & Abundant: For a truly radiant glow, we suggest using 10-15 holders. Group them in clusters of three or five between your floral arrangements to create pools of light.

For Round Guest Tables (1.8m diameter):

  • Central Focus: A simple cluster of 3-5 holders in the middle of the table is all you need. It creates a beautiful, intimate focal point without getting in the way.
  • Integrated Accents: If you have a large floral centrepiece, tucking 3-4 small votive holders around its base adds a gorgeous twinkling effect that complements the flowers.

Just remember, these are starting points! The final number really depends on your other decor. A table with a thick, bushy floral runner will need fewer candle holders than one with just a few sprigs of minimalist greenery.

Mastering Placement and Grouping

Once you’ve got your numbers sorted, it’s time for the fun part—arranging them like a pro. The absolute key here is to avoid lining them up like soldiers in a straight, even row. That tends to look stiff and unnatural.

Instead, we lean on a classic design trick: the "rule of three." This principle says that items grouped in odd numbers are more visually appealing and balanced. Try grouping three or five cylinder holders of varying heights together. It instantly creates a mini-sculpture of light that’s far more engaging than a single holder on its own.

For a softer, more romantic look, nothing beats scattering generous clusters of small votives. Placing five, seven, or even nine votives close together creates a powerful pool of warm, inviting light. This technique is especially effective for highlighting key areas, such as:

  • The wedding cake table
  • The bar or drinks station
  • Guest book or gift tables

These little clusters act like visual magnets, drawing your guests' eyes and adding a touch of magic to every corner. If you're looking for more ideas, our guide on choosing the perfect centrepiece for your table has plenty of inspiration that pairs beautifully with candlelight. By combining the right quantities with artful placement, you can be sure your glass candle holders don't just light up the room—they bring it to life.

Styling Ideas for Cape Town and Winelands Venues

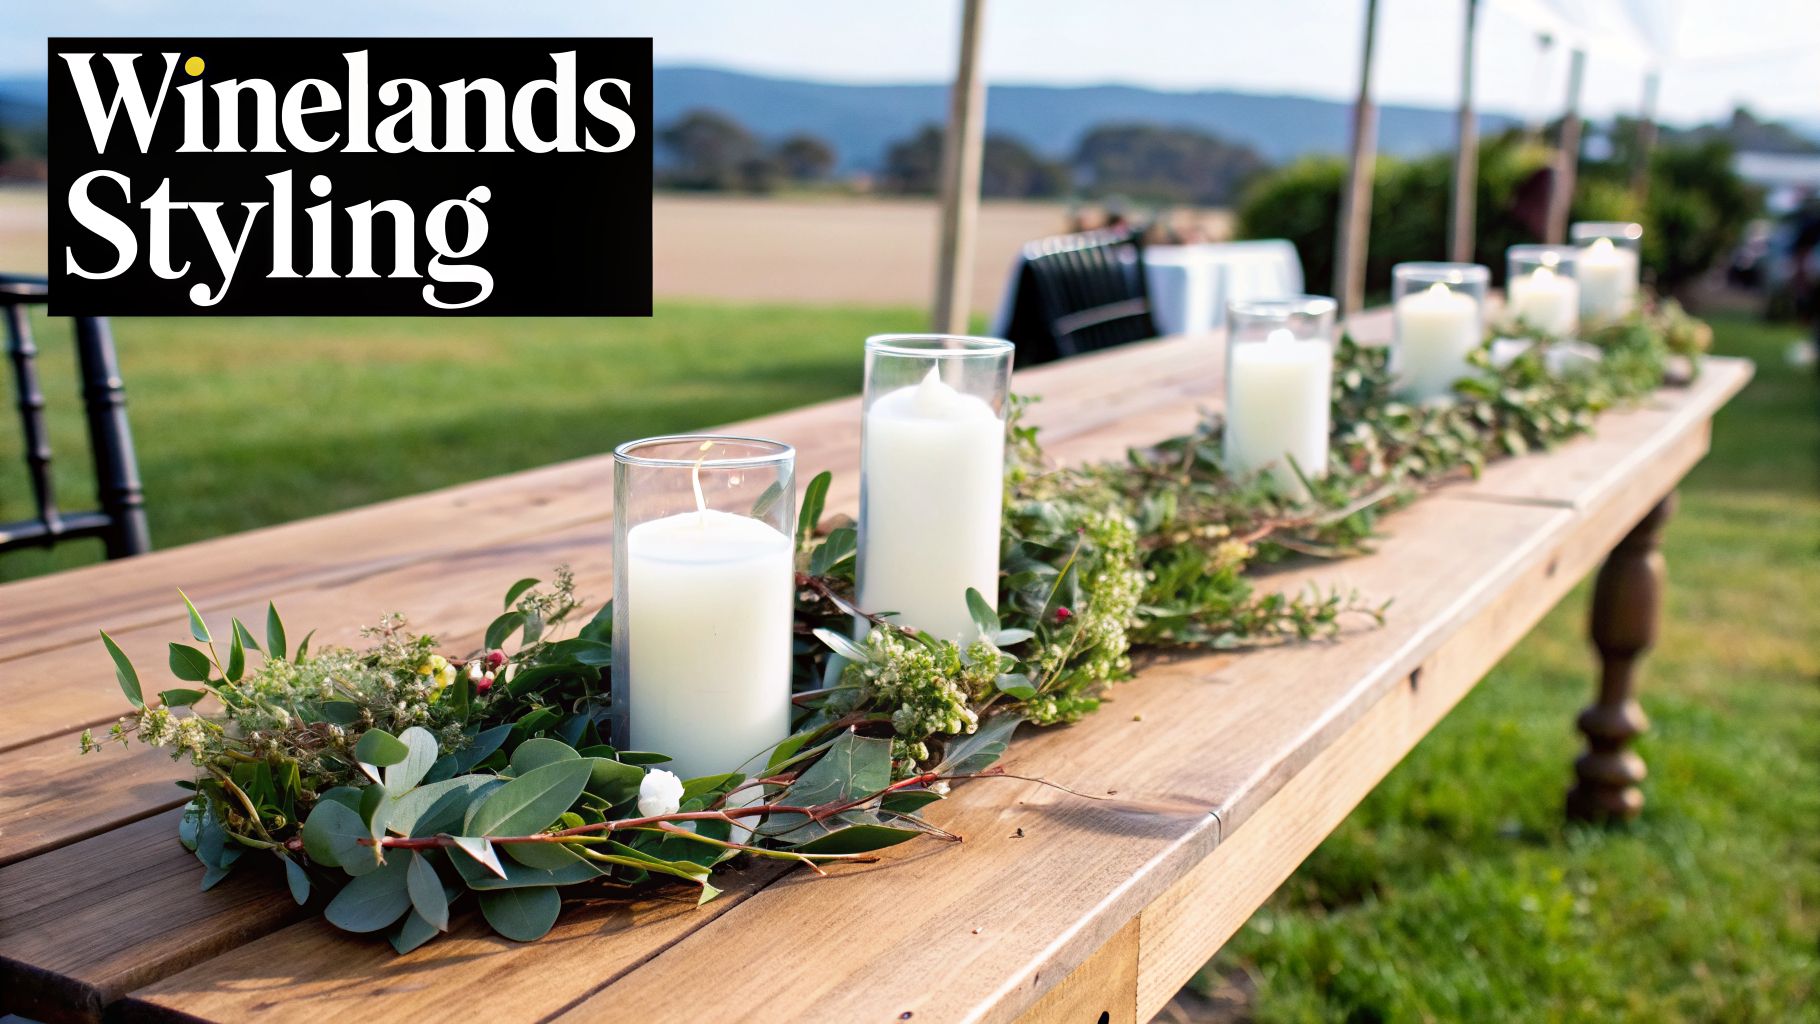
An outdoor wooden table decorated with a green garland and white candles in glass holders.

Alright, this is where the fun begins. Let’s get creative and look at some real-world styling ideas perfectly suited to the stunning backdrops of Cape Town and the Winelands. These are practical, easy-to-replicate looks we’ve seen work time and time again at weddings, corporate functions, and milestone birthdays.

Think of your venue as the main stage and our glass candle holders as the lighting that sets the mood. They’re incredibly versatile, able to enhance the rugged mountain views of Stellenbosch, the chic urban vibe of the V&A Waterfront, or the classic charm of a Constantia wine farm.

Here are a few of our favourite themes to get you started.

Rustic Winelands Wedding Charm

Picture this: long, wooden tables set beneath the sprawling oaks of a Franschhoek wine estate. The whole feel is natural and organic, so the décor needs to complement that, not compete with it. This is where glass candle holders really shine, adding a warm, romantic glow without feeling out of place.

  • Holder Choice: We love mixing cylinder glass candle holders of different heights with simple votive holders. The tall cylinders bring a touch of elegance, while the low-lying votives create that intimate, twinkling effect down the length of the table.
  • Styling Elements: A runner of fresh eucalyptus and local fynbos down the centre is a must. You can nestle the cylinder holders right into the greenery, which also helps protect the flame from any light breezes.
  • Finishing Touches: Dot clusters of three or five votive holders between place settings. Their soft light beautifully highlights the texture of linen napkins and the grain of the wooden tables, creating a scene that’s pure romance.

It’s all about creating a beautiful contrast—the clean, crisp lines of the glass against the wild, natural shapes of the foliage. It feels authentic and perfectly at home in the Winelands.

Chic Corporate Launch in the City

When you’re planning a corporate event at a modern city venue like the Zeitz MOCAA or a hotel at the V&A Waterfront, the look needs to be polished, sleek, and impressive. Glass candle holders are fantastic for creating a sense of occasion and luxury.

For corporate events, the key is controlled elegance. You want a look that feels high-end and curated, not fussy. Tall, clean-lined glass holders deliver this with minimalist perfection, casting a professional yet warm glow.

To pull this off, your best bet is to stick with clean lines and a simple colour scheme.

  • Holder Choice: Go exclusively for tall, slender cylinder glass holders. Grouping them tightly in clusters of varying heights creates a powerful, sculptural focal point.
  • Styling Elements: Keep floral arrangements minimal. Think a single, elegant orchid stem or a clean bunch of calla lilies. This uncluttered approach lets the dramatic height and candlelight do all the talking.
  • Finishing Touches: To really elevate the look, place these arrangements on reflective surfaces like mirrored trays or use our high-gloss tables to double the candlelight. They also look incredible when combined with hired LED cocktail tables, creating a dynamic mix of modern lighting.

Magical Matric Dance or Milestone Birthday

For events like matric dances and big birthdays, you want to create a real sense of magic and celebration. The decor should feel fun, glamorous, and maybe even a little whimsical. This is your chance to go all-out with sparkle and light.

  • Holder Choice: A huge number of votive and tealight holders will be your best friend here. Because they’re so small, you can use them in large quantities to create a breathtaking sea of twinkling lights.
  • Styling Elements: Get creative with placement! Use them to line walkways, frame the dance floor, or create glowing clusters on bars, dessert tables, and window sills. More is more with this look.
  • Finishing Touches: For that extra wow factor, mix standard glass votives with mercury glass or coloured glass holders that tie into your theme. The reflective, coloured light creates a dazzling effect that feels incredibly special and looks amazing in photos.

Why Renting Glass Candle Holders Is the Smart Choice

You've spent ages planning the perfect look for your event, and every detail is falling into place. But now comes the tricky part: how do you actually get all those beautiful décor items to your venue? When you’re dealing with something as delicate as glass candle holders, the idea of buying, transporting, cleaning, and storing them can feel like a mountain to climb.

This is where hiring comes in. Renting your glass candle holders isn't just about making life easier; it's a savvy move that saves you money, time, and a whole lot of hassle.

Picture this: you need 150 stunning cylinder vases to bring your wedding tables to life. Buying them outright would be a massive expense for something you'll probably never use in that quantity again. By renting, you get that high-end look you’re after for a fraction of the price. It's a no-brainer for one-off events like weddings, matric dances, or milestone birthdays where every rand in the budget counts. Hiring is a fantastic way to save money on your wedding day without sacrificing style.

The Benefits Beyond Cost Savings

The savings are a big plus, but the real magic of renting is how it removes all the logistical headaches. Think about everything that goes into managing event décor. When you hire from a professional service like ABC Hire, you can cross a bunch of tedious jobs off your list.

  • Pristine Quality, Every Time: We make sure every single candle holder arrives at your event in perfect condition. They're clean, polished, and have no chips or cracks. They're ready to go straight onto the tables.
  • No Storage Headaches: Where do you even keep hundreds of fragile glass items before and after your event? When you rent, they show up when you need them and disappear when you’re done. Simple.
  • Effortless Cleanup: This is probably the best part. Instead of facing hours of soaking and scrubbing wax out of 150 holders after a long night, you just leave them for us to collect. We handle all the cleaning.

Renting transforms your décor from a logistical nightmare into a simple, creative choice. Your only job is to pick the styles that match your vision; we handle the rest, from delivery right through to the post-event cleanup.

Unlocking a World of Variety

Another huge advantage of hiring is the incredible range of options you get. Your event might call for sleek, modern cylinder vases, but your personal style at home is more rustic. Renting gives you the freedom to choose the perfect glass candle holders for the day without being stuck with them forever.

This access to our wide inventory lets you get truly creative. You can mix and match different styles, play with various heights, or find that one specific holder that perfectly captures the aesthetic of your Winelands venue—all without the commitment of buying. If you're looking for more ideas, our guide to events decoration hire is packed with inspiration.

The ABC Hire Rental Process Explained

We’ve made our rental process as straightforward as possible so you can focus on enjoying your event.

  1. Browse & Select: Have a look through our online catalogue of glass candle holders and other décor.
  2. Request a Quote: Add the items and quantities you want to a quote request. Our team will get back to you quickly with clear, upfront pricing.
  3. Confirm & Schedule: Once you’re happy, we'll lock in your booking and arrange delivery and collection times that work for you.
  4. Seamless Logistics: Our team delivers everything directly to your venue in Cape Town, Stellenbosch, Franschhoek, or the surrounding Winelands, and we come and collect it all after the party’s over.

At the end of the day, renting is simply the smartest way to get a polished, beautiful look without the stress and expense. It’s a practical solution that ensures your event is remembered for its incredible atmosphere, not the cleanup that came afterwards.
Here is the rewritten section, crafted to match the specified human writing style and tone:

Essential Safety Tips for a Flawless Event

A stunning candlelit event is a beautiful thing, but its success hinges on safety. The warm glow of candlelight creates an unforgettable atmosphere, but open flames always need a watchful eye.

Following a few simple safety rules is non-negotiable. Think of it as the invisible foundation of your décor—it protects your guests, your venue, and the beautiful glass candle holders you’ve hired.

Match Your Candle to Your Holder

This is the most common mistake we see, and it’s easily avoided. Using a candle that’s too big for its glass holder can cause the glass to overheat, creating a risk of it cracking or even shattering.

Always follow these simple pairing rules:

  • Pillar Candles: Make sure there’s at least 2-3 cm of space between the candle and the glass walls. This gap is crucial for letting heat escape safely.
  • Votive Candles: These are designed to turn completely to liquid. They absolutely must be in a snug-fitting votive holder that can contain all that molten wax.
  • Tealights: Only use these in proper tealight holders. Their little metal or plastic cups aren't enough to protect your tables on their own.

Using the correct candle size isn't just for looks; it's a critical safety measure. Get this one step right, and you’ll prevent most potential heat-related accidents with glassware.

Smart Placement and Safe Distances

Once your candles and holders are correctly paired, where you put them is everything. That enchanting flicker can quickly become a hazard if it’s too close to flammable materials. A sudden gust of wind or an accidental bump can have serious consequences.

Here’s what to do:

  1. Find a Stable Surface: Always place glass candle holders on flat, sturdy tables where they won't wobble or be easily knocked over.
  2. Keep Clear of Flammables: Maintain a safe distance from anything that could catch fire—think floral arrangements, linen runners, paper place cards, and flowing curtains.
  3. Never Leave Flames Unattended: This is the golden rule. Always have a designated person, like the venue manager or a staff member, who is responsible for monitoring the candles and putting them out safely at the end of the night.

Following these straightforward tips ensures your beautiful event is also a completely safe one, giving you total peace of mind.

Common Questions About Hiring Our Glass Candle Holders

When you're sorting out the finer details of your event, a few questions are bound to come up. We get it. To make your planning easier, we’ve put together answers to the most common queries we receive about hiring our glass candle holders.

Absolutely! You can definitely use real candles in our hired glass holders. The key is simply to match the right candle to the right holder to avoid overheating the glass and ensure everything is safe. For example, a big pillar candle needs a cylinder with enough space around it, while votives should sit snugly in their designated containers.

Can I Put Flowers or Water in Glass Candle Holders?

Yes, many of our glass candle holders are fantastic for more than just candles. Our cylinder vases, in particular, are incredibly versatile. We’ve seen clients create breathtaking centrepieces by filling them with water for floating candles or submerged flowers.

You can get creative with anything from elegant flower stems to decorative stones. Just give us a heads-up on your plans when you book. That way, we can confirm you’ve chosen the best holders for the job and offer a few tips if needed.

What Happens If a Holder Breaks During My Event?

We know that accidents can happen, especially at a lively event. Our rental agreement is very clear about damages. If an item like a glass candle holder breaks, a replacement fee is charged to cover its cost.

To help prevent any mishaps, we always suggest:

  • Placing holders on stable, flat surfaces.
  • Keeping them away from high-traffic spots, like busy walkways or service areas, where they might get bumped.
  • Handling them with care if you need to move them during the event.

How Should I Prepare the Holders for Collection?

This is one of the best parts about hiring from ABC Hire: you do not need to clean the wax out of the candle holders. Your only job after the party is to make sure all the flames are safely extinguished.

Once the candles are out and the holders are completely cool, simply pop them back into the delivery crates they came in. Our team takes care of all the messy, time-consuming wax removal and cleaning back at our warehouse.
It's a simple, hands-off process designed to make your life easier. You get to focus on enjoying the beautiful atmosphere you’ve created, and we’ll handle the cleanup.


Ready to create an unforgettable atmosphere with the perfect lighting? ABC Hire offers a stunning selection of glass candle holders and other event essentials to bring your vision to life. Explore our collection and get a quote for your Cape Town or Winelands event at https://abchire.co.za.
Hiring a Rectangular Cocktail Table in Cape Town

Don't just think of a rectangular cocktail table as a place to pop a drink; it's a clever tool that can completely shape the vibe and social flow of your event. Its straight, clean lines naturally pull people together and get them talking, making it an absolute must-have for weddings, corporate functions, and parties where making connections is the whole point.

Why Rectangular Cocktail Tables Are an Event Powerhouse

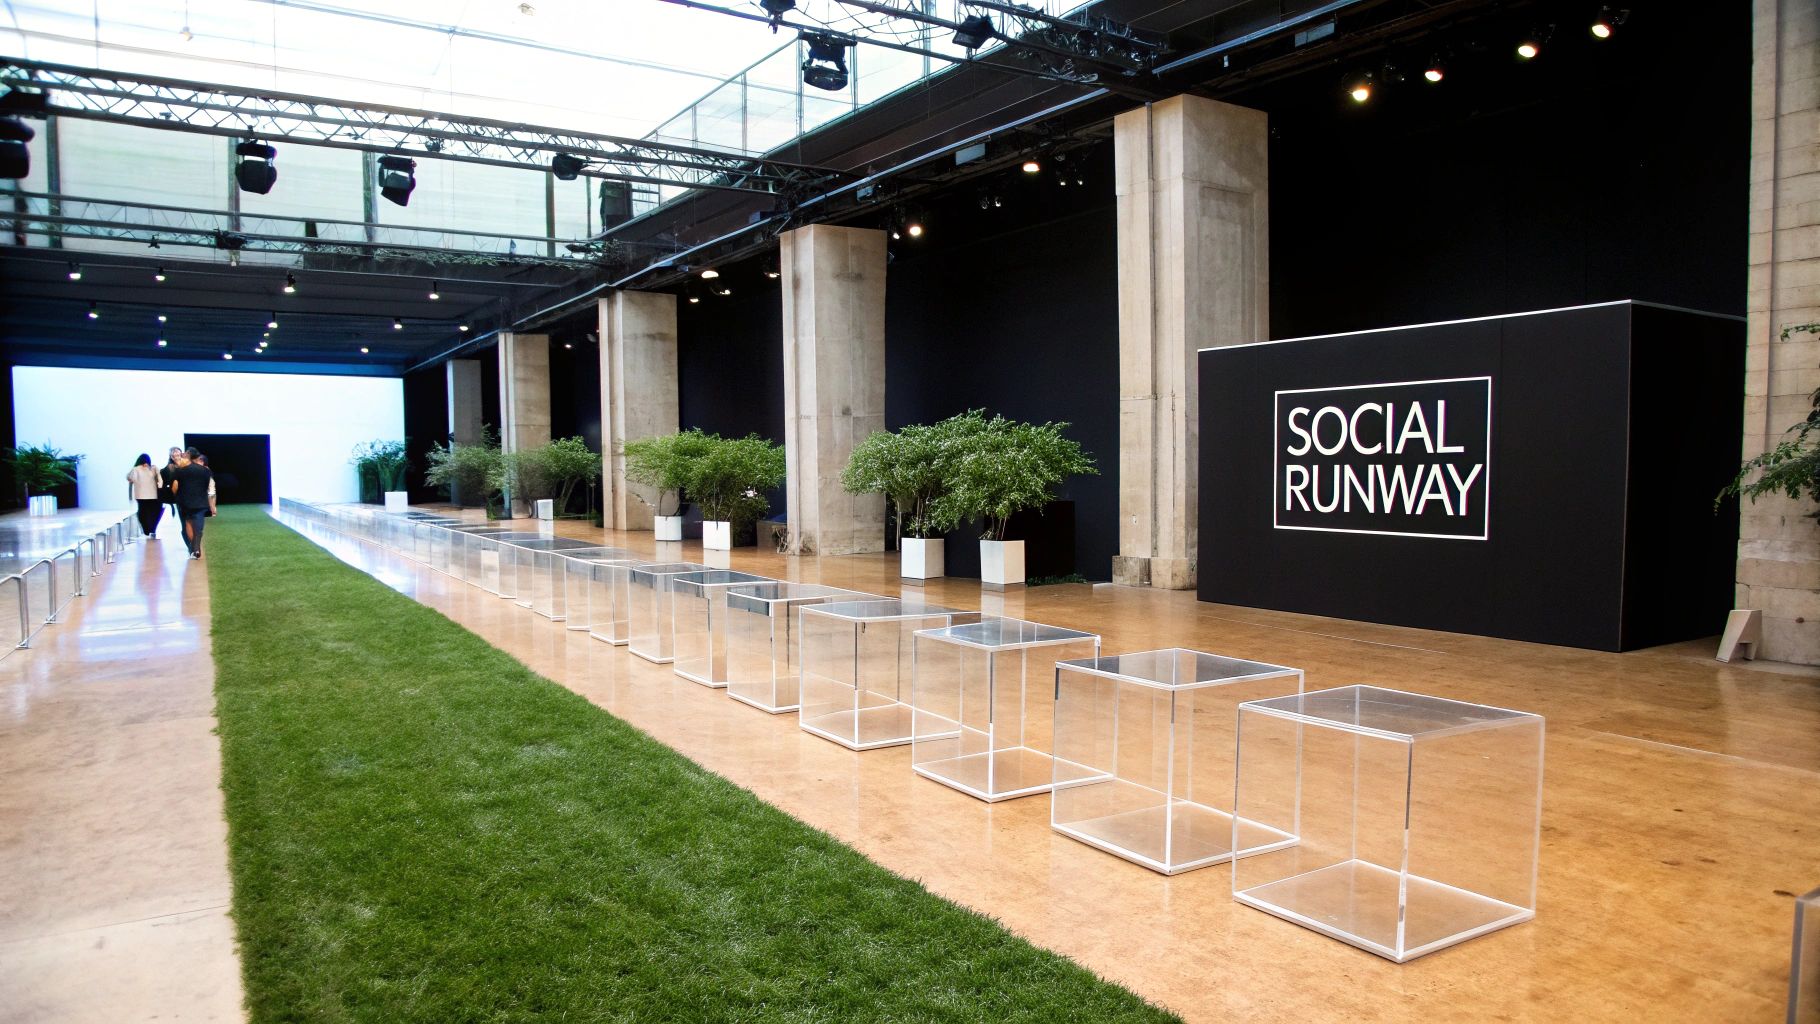
A long event hall featuring a green grass runway and many clear rectangular tables.

We like to think of a rectangular cocktail table less as furniture and more as a piece of social architecture. Its long form creates what you could call a 'social runway' – a natural path that guides how your guests move and helps define different zones within your venue. For event planners, this kind of subtle crowd control is priceless.

Unlike round tables that tend to create small, closed-off circles, the rectangular shape fosters a much more open and fluid atmosphere. Guests can easily drift in and out of conversations, moving along the table without feeling like they're interrupting. This makes it a serious powerhouse for networking events in Cape Town, where getting people to interact is the name of the game.

Creating Natural Social Hubs

The shape itself is a catalyst for conversation. A rectangular table acts as a natural gathering point, giving guests plenty of space to place their drinks and canapés while they chat with others. This simple function is key to keeping everyone comfortable and encouraging them to stick around and mingle.

  • Linear Flow: It allows several small groups to form along its length, sparking all sorts of different interactions.
  • Space Efficiency: Its shape is perfect for making the most of your floor space, especially in marquees or long, narrow venues – a common challenge out in the Winelands.
  • Aesthetic Foundation: It gives you a strong, modern canvas for any decor theme, whether it's sleek corporate branding or lush, romantic wedding florals.

The real magic of a rectangular cocktail table is how it blends practicality with a bit of social engineering. It’s a core piece that supports both the functional needs and the sophisticated atmosphere you're aiming for.

Adapting to Modern Event Needs

Today's events are all about versatility and style, and the furniture needs to keep up. The South African furniture market, recently valued at a massive USD 2.47 billion, is leaning heavily towards multi-purpose pieces that can adapt to any occasion. This trend really highlights the value of hiring smart, flexible solutions like the rectangular cocktail table.

This piece isn't just a fleeting trend; it’s a direct response to how modern events are being designed – with a sharp focus on experience and interaction. For a bigger picture, it helps to understand broader audience engagement strategies too. Ultimately, it’s a key ingredient in crafting those unforgettable moments for your guests.

Selecting the Right Size for Your Guest Count

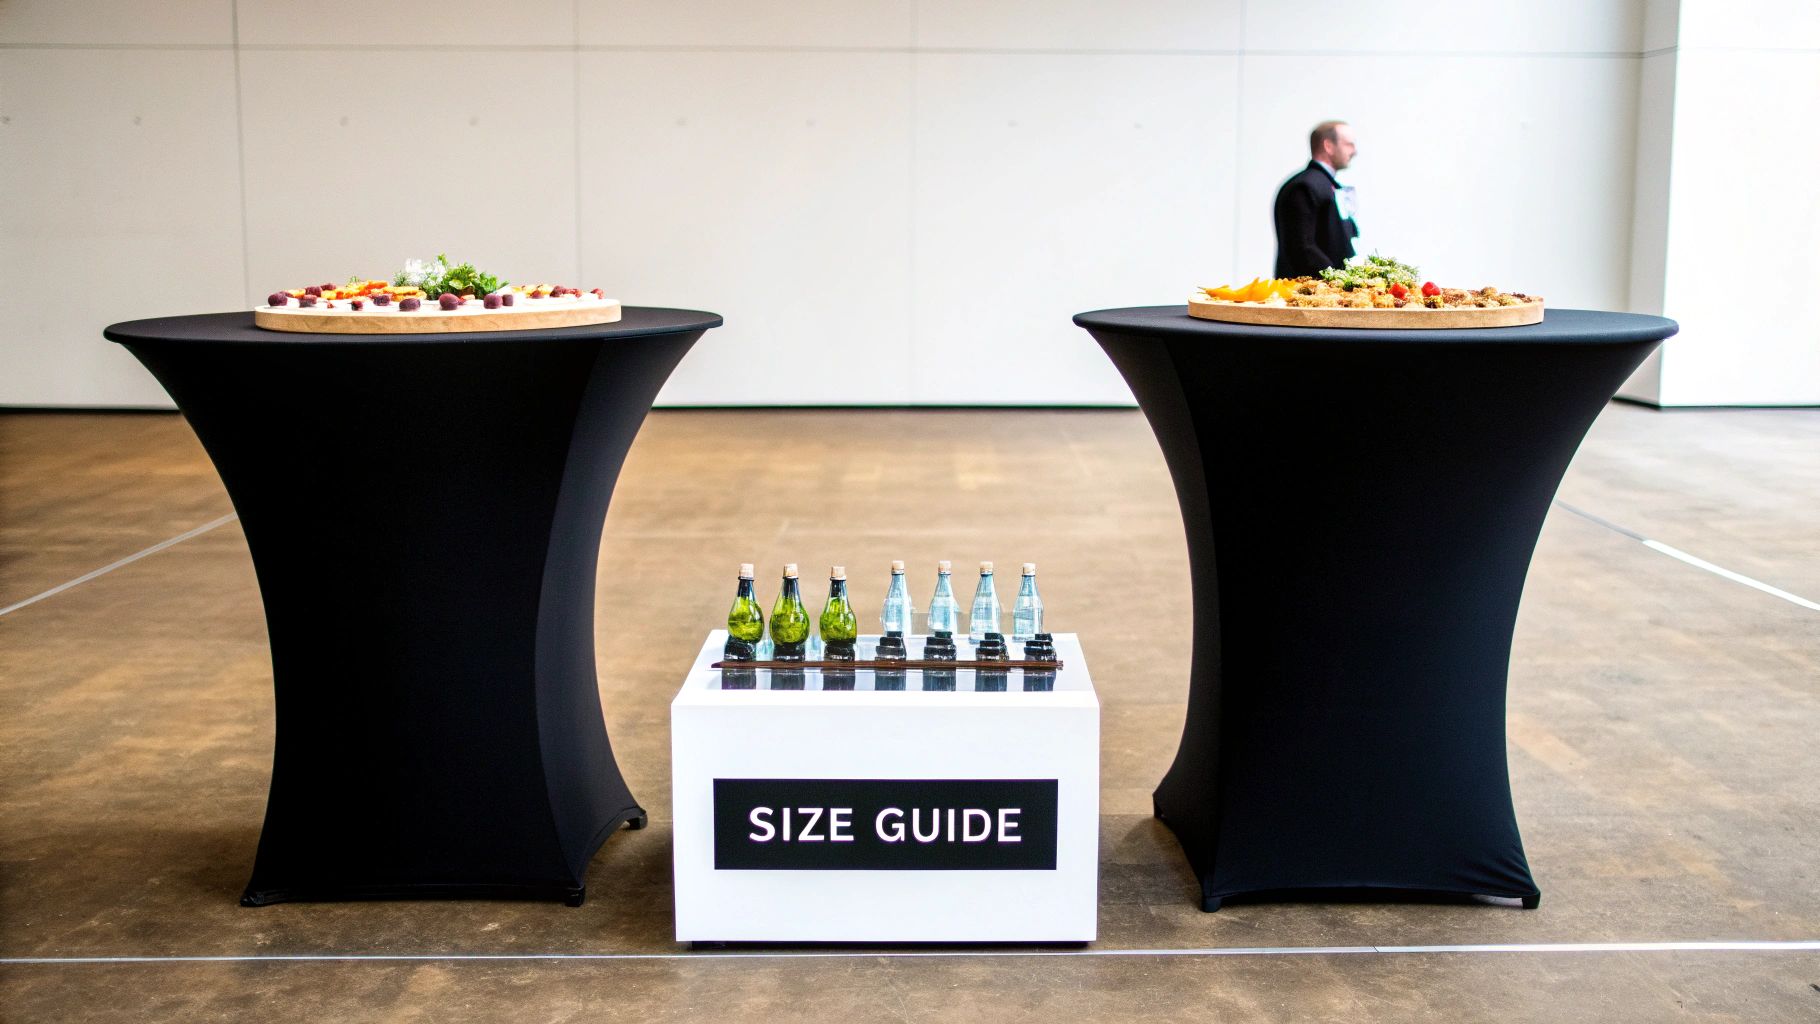
Two black cocktail tables with food platters flank a 'SIZE GUIDE' display with small bottles.

Choosing the right size rectangular cocktail table is a lot like picking a vehicle for a road trip. A zippy two-seater is fantastic for a quick getaway, but you'll need something much roomier for a family holiday. The same thinking applies to your event — the table’s dimensions need to match its purpose and your guest list to make sure everyone is comfortable.

Get it wrong, and you'll feel it. An oversized table can make a space feel cavernous and disconnected, while one that's too small quickly leads to a frustrating game of drink-and-platter Jenga. The sweet spot is that perfect balance where guests can chat and place their drinks down without a second thought.

For example, a narrower table is brilliant for a corporate networking event. It encourages easy conversation across its width and keeps the flow moving. On the other hand, a wider rectangular table gives you more real estate, making it perfect for a wedding pre-reception where you want to display canapés and floral arrangements alongside guests' glasses.

Matching Table Length to Guest Capacity

When it comes to numbers, the length of the table is your most important guide. Think of it as giving each guest their own personal bubble of space. Everyone needs enough elbow room to mingle without bumping into the person next to them.

As a general rule, our standard 1.8m table is a fantastic, versatile choice for smaller, more intimate gatherings. It provides more than enough space for groups of 6 to 8 people to gather around and chat. This size works wonders when you dot a few around a venue to create multiple little social hubs.

For larger events or if you want to create a central feature, a 2.4m table is the way to go. This size can comfortably host 8 to 10 guests, making it a more efficient option when you're accommodating more people in one area, like near a bar or entrance.

The key is to think not just about the number of guests, but how you want them to interact. A longer table encourages a linear flow of conversation, perfect for building a dynamic, buzzing energy in the room.

Rectangular Cocktail Table Size and Capacity Guide

Still weighing up the options? This quick reference guide should help you select the right table size based on your guest count and event style, whether they'll be standing or seated on high chairs.

Table Length Standing Capacity (Mingle) Seated Capacity (High Chairs)
1.8 Metres 6-8 Guests Up to 6 Guests
2.4 Metres 8-10 Guests Up to 8 Guests

Before you lock in your floor plan, it’s always a good idea to see what else is available. Have a look at our broader guide on tables and chair rentals for Cape Town events to explore all the different styles and combinations you can create.

By carefully matching the size of your rectangular cocktail tables to your event's specific needs, you’re setting the stage for a seamless and comfortable experience for every single guest.

Rectangular vs Round Tables: A Practical Comparison

Choosing between a rectangular or a round cocktail table might feel like a minor detail, but trust me, it’s a decision that completely shapes the energy and flow of your event. Think of it like laying out a garden path. One path is straight and direct, guiding people efficiently from A to B. The other meanders, encouraging guests to slow down and mingle. Each shape creates a totally different social dynamic.

The rectangular cocktail table is the absolute master of structure and space. Its long, linear shape is a perfect fit for venues with narrow layouts, like a marquee out in the Winelands or a chic city gallery. When you place them in rows, you instantly create clear pathways. This directs guest traffic and stops those frustrating bottlenecks from forming near the bar or entrance. It's a strategic move for managing big crowds and getting the most out of every square metre.

Round tables, on the other hand, are naturally more intimate. They pull guests into a small, inward-facing circle, which is brilliant for fostering tight-knit conversations between a few people. The downside? This can sometimes create little social "islands," making it tougher for guests to float between different groups and really mix.

Analysing Guest Interaction

The biggest difference is how people connect. A rectangular table encourages a much more fluid, open style of socialising. Guests can stand side-by-side, easily dipping in and out of conversations along its length without feeling like they're interrupting. It’s like a bustling high street where people can pop into shops and cafes whenever they feel like it.

This open-ended design is especially powerful for networking events where the whole point is to connect as many people as possible. It’s a well-known fact in event planning that layouts promoting easy movement lead to more interactions. A long rectangular table acts as a central hub that keeps that energy flowing.

Round tables tend to create a more "contained" social bubble. Once a group of four or five people gathers around one, it can feel like a closed circle that’s a bit intimidating for others to join. While they're fantastic for small, established groups, they can sometimes get in the way of broader mingling.

The core decision really comes down to your event's main goal. If you want to spark dynamic networking and movement, the rectangular shape is your best friend. If you're aiming for pockets of deep conversation, round tables definitely have their place.

Aesthetic and Decor Versatility

From a design point of view, each shape offers its own unique creative potential. A rectangular cocktail table gives you a strong, linear canvas that is incredibly versatile. It works beautifully for creating sleek, modern looks or for setting up a grand, banquet-style feel. You have a long, unbroken surface that’s just asking for a dramatic floral runner, branded materials, or an elaborate canapé display.

  • Rectangular Tables Excel At:

    • Creating structured, architectural layouts.
    • Maximising standing capacity in tight spaces.
    • Guiding guest flow and defining clear pathways.
    • Providing a long canvas for statement centrepieces and decor.
  • Round Tables Are Ideal For:

    • Fostering intimate conversations within small groups.
    • Breaking up large, open spaces with softer lines.
    • Creating a more traditional or classic event atmosphere.

Ultimately, the choice isn't about which shape is "better," but which is a better fit for your specific venue, guest count, and the social vibe you want to create. For those looking to explore different finishes, you can also learn more about the unique appeal of metal cocktail tables for hire in our detailed guide.

How to Style Your Rectangular Cocktail Table

A styled rectangular cocktail table with a burlap runner, floral arrangements, and a magazine.

Think of a rectangular cocktail table as a blank canvas, giving you the perfect chance to bring your event’s theme to life and create a real focal point. Styling isn't just about making things look pretty; it’s about crafting an atmosphere that feels deliberate and pulls your guests right into the experience. Whether it's a rustic Winelands wedding or a sharp corporate function in Cape Town, the right decor can turn a simple piece of furniture into a memorable part of the day.

The long, straight shape of these tables provides a natural "runway" for your creativity. So, think beyond just a tablecloth. How can layers, textures, and lighting all work together to tell your event's story? You'd be surprised how much impact even the smallest details can have on the overall vibe.

This is where you get to make your event stand out. The luxury furniture market in South Africa is booming, valued at USD 420.3 million, which tells us people are really starting to invest in high-end experiences. Clients in Cape Town and the Winelands are looking for unique rental solutions that go beyond the basics, making curated styling more important than ever.

Wedding Styling for Winelands Charm

For weddings, especially those set against the gorgeous backdrop of Stellenbosch or Franschhoek, the goal is usually romantic elegance. A rectangular cocktail table is the perfect foundation for achieving this look.

Start with beautiful linens. A crisp white or ivory tablecloth is a classic base, but why not add a textured runner in a complementary colour like blush, sage green, or dusty blue? This adds a bit of depth and draws the eye right down the length of the table.

Next, let's talk centrepieces. A low, lush floral arrangement packed with eucalyptus, roses, and maybe some local fynbos creates a stunning, organic feel that won't get in the way of conversation. Weave in some candles of different heights to bring in a warm, romantic glow as the sun goes down.

  • Linen Runners: Try using materials like raw silk, cheesecloth, or linen to add some beautiful texture.
  • Romantic Florals: Go for arrangements that are long and low, rather than tall and round.
  • Candlelight: Mix up pillar candles with delicate tea lights for more dynamic, layered lighting.

Corporate Styling for Cape Town Sophistication

Corporate events need a completely different approach—one that’s sleek, professional, and often tied to the brand. In this setting, a rectangular cocktail table becomes a powerful branding tool.

You can forget traditional linens here and think more about customisation. A vinyl wrap with your company’s logo or event branding can make a huge impact and look incredibly professional. Suddenly, every table becomes a subtle marketing touchpoint.

Keep the decor minimalist and modern. Instead of big floral arrangements, think about geometric objects, sculptural pieces, or even just a simple vase with a single, elegant orchid. The key is to keep the lines clean and avoid any clutter. If you're looking for more specific ideas, our guide on a gold cocktail table for hire has some fantastic tips for adding a touch of glamour.

For corporate functions, every design choice should reinforce the brand's identity. The styling of a rectangular cocktail table can communicate professionalism, innovation, or creativity before a single word is spoken.

Upgrading with LED Lighting

For any evening event, whether it's a private party or a corporate gathering, LED furniture is an exciting styling upgrade. An LED rectangular cocktail table doesn't just hold drinks; it becomes an illuminated feature that really captivates your guests.

These tables can be set to a single colour to match your event's theme, or you can program them to cycle through a whole spectrum of colours for a more dynamic and festive atmosphere. They don't need any tablecloths because the glowing surface is the main attraction, offering a modern and totally hassle-free solution. This simple addition can completely elevate the mood of an outdoor party or an evening networking session.

Crafting a Killer Event Floor Plan

A great floor plan is the unsung hero of any successful event. It’s the blueprint that guides how your guests move, chat, and experience the space you’ve created. When you nail it, everything just flows. But get it wrong, and you’re left with awkward bottlenecks and a vibe that feels totally off.

The real goal? To design a space that feels natural, comfortable, and buzzing with the right kind of energy.

The placement of your rectangular cocktail tables is the backbone of this whole operation. Don't just see them as furniture; they're your tools for directing foot traffic and carving out different zones. A thoughtful arrangement can create distinct areas within a single venue—a high-energy spot for mingling near the bar, a quieter lounge corner for real conversations, and clear pathways that get people where they need to go without a second thought.

Give Them Space to Mingle

The number one rule of a good floor plan is giving your guests room to breathe. Nobody enjoys that awkward shuffle past a group of people or feeling like they’re pinned in a corner. Proper spacing isn't a luxury; it’s essential for a comfortable experience.

A good rule of thumb is to leave at least 1.5 to 2 metres of space for your main walkways. This is wide enough for two people to pass each other easily and gives your bar and catering staff a clear run. For the gaps between individual tables where guests will be standing, aim for a minimum of 1 metre. This simple step prevents clusters from becoming too crowded and encourages people to move around and chat with different groups.

A floor plan isn't just about how much furniture you can fit in. It's about designing an experience for people. The space between the tables is just as important as the tables themselves—it's what dictates the flow of conversation and energy.

Designing Zones That Work

Once you've mapped out your main pathways, you can start using rectangular cocktail tables to create specific zones.

Imagine a wedding at a stunning Cape Town vineyard. You could arrange the tables in a long, elegant line overlooking the Franschhoek mountains to create a sophisticated 'social runway'. Or, for a corporate networking event, you might group them into small clusters to form mini-hubs where people from the same industry can connect.

This kind of strategic layout is more important than ever. As people and businesses invest more in creating memorable event experiences, the demand for premium event rentals is on the rise. Recent trends in South African retail sales point to growing consumer confidence, which often leads to bigger budgets for high-quality events. As a planner, knowing how to use furniture to shape an experience puts you ahead of the game. By mastering your layout, you’re not just placing tables; you’re laying the foundation for an unforgettable event. For more on this, check out the latest findings on South Africa's retail trade trends.

Common Questions About Hiring Cocktail Tables

Jumping into the world of event rentals can feel like you're learning a new language. You've got questions about timelines, setup, and all the little details that make a big difference. Don't worry, we get it. This section is all about answering the most common queries we hear about hiring our rectangular cocktail tables, giving you the clear, straightforward info you need.

Our mission is to make the entire rental process feel effortless. By tackling these common questions upfront, you can plan with confidence and keep your focus where it belongs: on creating an unforgettable experience for your guests.

Booking and Logistics

One of the first things everyone wants to know is, "How far in advance should I book?" It's a great question. For events during Cape Town’s peak season (which generally runs from September to April), we really recommend getting your cocktail tables booked 3 to 4 months ahead.

If you're planning a wedding or a large-scale corporate function, it's even wiser to lock in your booking 6 to 9 months out. This gives you peace of mind and ensures you get the exact style and quantity you need.

So, what about delivery and setup? We handle all of it. Once your order is confirmed, our logistics team gets in touch to arrange a delivery time that works perfectly with your venue's schedule. Our crew will deliver the tables, place them right where you want them according to your floor plan, and make sure every single one is clean, stable, and ready to go. When the party's over, we'll be back at the agreed time to collect everything. No heavy lifting for you!

Styling and Usage

"Do I need to put tablecloths on them?" This is another popular question, and the answer really comes down to the look you're going for. Our standard tables have a clean, modern finish that looks fantastic on its own for a minimalist or industrial vibe. But if you're aiming for a more formal or customised theme, a high-quality linen can introduce beautiful colour and texture.

For a real showstopper, our LED cocktail tables are a game-changer. They don't need any covering at all—their awesome lighting effect is the main attraction!

Can these tables be used outdoors? Absolutely. Many of our rectangular cocktail tables are built tough and are perfect for outdoor settings, making them a hit at Winelands weddings and garden parties. While we always suggest having a backup plan like a marquee for Cape Town's unpredictable weather, our tables are more than ready for a beautiful day outside.

This diagram shows you the simple steps for planning your floor layout.

A diagram illustrating the floor planning process with steps for spacing, pathways, and zones.

By thinking about spacing, pathways, and different zones in that order, you create a natural flow that keeps guests comfortable and your event running smoothly. As you weigh up your options, it helps to know where you can easily get a table quote to compare different choices for your event.

The Essential Guide to Tablecloths for Round Tables

Choosing the right tablecloth isn't just about covering a table. It’s about laying the groundwork for your entire event's look and feel. This guide is here to take the guesswork out of picking the perfect tablecloths for your round tables, making a tricky decision feel simple. We’ll walk through everything from measuring for that perfect drape to picking fabrics that create just the right mood.

Your Foundation for Flawless Event Design

Whether you're planning a lavish wedding, a sharp corporate gala, or a cosy get-together, the linens you choose really set the scene. The right tablecloth makes your centrepieces shine, pulls your colour scheme together, and creates that polished, intentional look guests always notice. Think of it as the canvas for your entire tablescape.

This guide will give you the confidence and know-how to select linens that don't just fit perfectly but truly elevate your event from start to finish.

We'll cover the essentials:

  • Getting the Measurements Right: Learn the simple maths for calculating the correct size, whether you’re after a dramatic floor-length look or a more casual half-drop.
  • Choosing Your Fabric: We’ll explore which materials work best for your theme, from ever-reliable polyester to glamorous satin.
  • Styling Tips and Tricks: Get inspired with ideas for layering and coordinating your linens for a stunning, cohesive design.

And for anyone curious about the actual craft behind great linens, you can dive into a designer's guide on how to make a tablecloth for a deeper look. Once you get these core details right, you can turn any round table from just okay to completely unforgettable.

Getting the Perfect Fit: How to Measure for Round Tables

Let's be honest, the one thing that can instantly make a beautifully planned event look a bit… off? It’s a badly fitting tablecloth. Too short and it looks like a mistake; too long and it becomes a trip hazard. Getting the size right is the single most important detail for a polished, professional look, and thankfully, it’s easier than you think.

First things first, you need two simple measurements: the diameter of your tabletop (that’s the distance straight across the middle) and its height (from the floor up). Most of our standard event tables here in South Africa stand 76 cm tall. Jot those two numbers down, as they're the starting point for everything else.

This simple flow chart breaks it down perfectly: measure first, then think about fabric and style.

A three-step process flowchart for tablecloth selection showing measure, fabric, and style.

As you can see, getting that measurement right from the start is absolutely crucial. It dictates all your other creative choices down the line.

Understanding the Tablecloth Drop

You'll hear the term "drop" a lot in the events world. It’s simply the industry term for how far the fabric hangs down from the edge of the table. This is where you get to decide on the mood and formality of your setup.

  • Half Drop: This is your go-to for a more casual, relaxed vibe. The cloth hangs about halfway to the floor (roughly 38 cm), making it perfect for daytime functions or informal get-togethers.
  • Full Drop: The gold standard for elegance. For weddings, awards dinners, or any formal occasion, you’ll want a full drop. The fabric just kisses the floor, creating a clean, seamless look that hides table legs completely.
  • Puddle Drop: Want maximum drama? The puddle drop is for you. Here, the fabric drapes extravagantly onto the floor, creating a luxurious "puddle" of material. It's a bold, high-fashion statement for the most opulent events.

The Simple Formula for a Perfect Fit

Once you know your table’s diameter and the kind of drop you want, the maths is dead simple.

Table Diameter + (2 x Desired Drop) = Required Tablecloth Diameter

Let’s run through a quick example. Say you’re using one of our popular 1.8-metre round tables and you want that classic, floor-length look. The drop would be 76 cm (the height of the table).

So, the calculation is: 180 cm + (2 x 76 cm) = 332 cm. You'd be looking for a 3.3m round tablecloth to get that perfect, elegant drape. It's a fundamental step that works for any table style, and you can see more inspiration in our guide on styling a round wooden table.

Getting this right matters. South Africans invest heavily in quality textiles for their homes and events—spending reached R12.5 billion by late 2022. This tells us that quality and appearance are priorities, and having the right size tablecloth is a huge part of that.


Round Tablecloth Sizing Cheat Sheet

To make things even easier, we've put together this quick cheat sheet. Just find your table size and see exactly what you need for a half or full drop.

Table Diameter (cm) Tablecloth for Half Drop (cm) Tablecloth for Full Drop (cm) Seats
90 180 240 2-4
120 210 270 4-6
150 240 300 6-8
180 270 330 8-10

Keep this handy, and you'll never have to guess again. It's our little secret to ensuring your event looks flawless every single time.

Choosing Your Fabric: A Guide to Materials and Textures

Once you’ve nailed down the perfect size, the next big decision is the fabric. This is where the personality of your event really starts to shine through. The material you choose does so much more than just cover the table; it sets the entire mood.

Think of it as dressing your tables. A sleek, high-sheen satin instantly says “glamorous evening affair,” making it a no-brainer for a wedding reception or gala dinner. On the other hand, a textured linen or cotton blend gives off a more organic, relaxed vibe, perfect for a daytime celebration or a rustic-themed wedding. The texture, weight, and finish of the fabric truly bring your theme to life.

Various colorful satin fabric swatches, including black, gold, and blue, draped over a white round tablecloth.

The Most Popular Fabric Choices

In the world of event rentals, some materials have become firm favourites for being both good-looking and practical. Let’s walk through the most common options we see for round tables so you can match the fabric to your function.

  • Polyester: This is the undisputed workhorse of the events industry. Why? It's incredibly durable, handles spills like a champ, and is a breeze to wash. Best of all, it's famous for being wrinkle-resistant, which is a massive win for any event planner. Polyester has a smooth, clean finish and comes in a huge range of colours, making it a versatile and budget-friendly choice for just about any occasion.

  • Satin: If you’re looking to dial up the luxury, satin is your go-to. Its glossy, high-sheen surface catches the light beautifully, creating a rich, elegant atmosphere that feels special. It's an obvious choice for weddings, anniversaries, and high-end corporate events. While it looks absolutely stunning, it can be a bit more prone to snagging or wrinkling than polyester, so it needs a gentle touch.

  • Spandex (Scuba): For a crisp, modern, and totally form-fitting look, spandex is an excellent choice. It stretches tightly over the table, creating a sleek silhouette with zero wrinkles or draping. This material is brilliant for cocktail tables, registration desks, or trade show booths where you want a clean, professional look.

When choosing a fabric for your event, it's always smart to think about both the look and the practical side of things. Below is a quick comparison to help you decide which material is the best fit for your specific needs.

Tablecloth Fabric Comparison for Events

Fabric Type Best For Feel & Appearance Care & Durability
Polyester All-purpose events, corporate functions, family gatherings Smooth, matte finish. Clean and professional. Very High: Stain-resistant, wrinkle-resistant, machine-washable.
Satin Weddings, galas, milestone birthdays, elegant dinners Silky, high-sheen, and luxurious. Reflects light beautifully. Medium: Prone to snags and wrinkles. Requires careful handling.
Spandex Modern events, cocktail parties, trade shows, exhibitions Stretchy, form-fitting, and sleek. Creates a smooth surface. High: Wrinkle-free by design. Easy to clean.

Ultimately, each fabric has its moment to shine. Polyester is your reliable all-rounder, satin brings the glamour, and spandex delivers that sharp, modern edge.

Balancing Aesthetics With Practicality

While it’s easy to fall in love with a fabric's appearance, you have to consider the practical side, especially for a big event. That gorgeous but delicate silk might not be the wisest choice for a lively party with plenty of food and red wine flowing.

The best fabric choice is one that not only complements your event's theme but can also withstand the realities of the occasion. It's a balance between style and sensibility.

Think about the specifics of your event. Is it happening outdoors where wind could be an issue? A lightweight fabric might spend more time flying away than on the table. Is it a formal dinner where spills are practically guaranteed? A stain-resistant material like polyester would be a very smart move.

For more inspiration on creating a specific mood, our guide on using black tablecloths for a sophisticated look has some great ideas. At the end of the day, picking the right material ensures your tables look fantastic from the moment the first guest arrives until the very last one leaves.

Styling Round Tables to Impress Your Guests

You’ve sorted the right size and picked the perfect fabric – now for the fun part. Styling your tablecloths for round tables is where your event theme really springs to life. A beautifully dressed table isn't just a place for plates; it becomes the heart of your guest's experience, tying all your decor elements together into one stunning, cohesive picture.

The goal here is to graduate from just covering a table to actually designing a tablescape. Think in layers, textures, and colours that all work in harmony to set a specific mood. This is your opportunity to turn a simple piece of furniture into a major player in your event's design story.

A round table with white tablecloth, brown runner, place settings, greenery, and a 'Table Styling' screen.

Styling for Weddings

For weddings, it’s all about romance, elegance, and those personal touches that make the day uniquely yours. Layering is your secret weapon here, adding a wonderful depth and sophistication to your round tables.

Start with a classic, floor-length tablecloth in a neutral shade like white, ivory, or soft champagne. This gives you a clean canvas. From there, you can add a pop of personality on top.

  • Sheer Overlays: A delicate organza or chiffon overlay can introduce a soft, dreamy quality without making the table look too busy.
  • Sequin Runners: If you’re after a touch of glam, a sparkling sequin runner down the centre is a showstopper. This is especially effective on the head table or cake table to really draw the eye.
  • Colour Coordination: To create that seamless, professionally-styled look, match your linen colours to your floral arrangements, invitations, or even the bridesmaid dresses. It creates a beautiful consistency that looks incredible in photos.

A well-styled table does more than just look pretty; it makes guests feel special and considered from the moment they take their seats. It’s a subtle but powerful way to show your attention to detail.

Styling for Corporate Events

When styling for a corporate function, the brief changes. The focus shifts to professionalism, sophistication, and reinforcing the brand. The look should be clean, intentional, and a direct reflection of the company's image. Clutter is the enemy here; elegant simplicity is your best friend.

Your tablecloths should look sharp and polished. A high-quality polyester in a classic black, navy, or crisp white usually works best, providing a refined backdrop for the rest of the setting.

From that solid foundation, you can weave in branding elements tastefully.

  1. Incorporate Company Colours: Use the brand’s primary or secondary colours subtly. A coloured napkin or a simple, elegant runner can introduce branding without being overwhelming.
  2. Use Custom-Branded Runners: For a more direct approach, a custom-printed runner featuring the company logo can look incredibly professional, particularly for conferences or product launches.
  3. Choose Professional Fabrics: Stick to materials that communicate quality. A smooth, wrinkle-free polyester tablecloth always projects competence and attention to detail, making sure your brand is presented in the best possible light.

Whether it’s a wedding or a corporate gala, styling your tablecloths is really about creating an atmosphere. By thinking about layers, colours, and the overall message you want to send, you can transform any round table into a stunning focal point that impresses every single guest.

On-Site Setup and Care for Your Rental Linens

A flawless look on the day of your event really comes down to how you handle the linens. Those final touches are what separate an average setup from a truly professional one, ensuring your round tablecloths look just as stunning in person as they did in your plans.

Your rental linens will almost always arrive clean, pressed, and on hangers to keep creasing to a minimum. The first thing you'll want to do is lay them out carefully. Unfolding them on a clean, dry surface is a simple step that prevents any last-minute dirt or snags and makes the whole setup process much smoother.

Nailing the Perfect Drape

Getting a tablecloth to hang evenly on a round table is key. If the drop is lopsided, the entire setting can look off-balance. Luckily, there's a simple professional trick to get it right every time.

  1. Find the Centre: Hold the tablecloth up by its very centre.
  2. Align with the Table: Position the centre of the cloth directly over the centre of the table.
  3. Let it Fall and Smooth: Gently release the tablecloth, letting it fall naturally. Smooth it out from the middle towards the edges, allowing the fabric to drape evenly all the way around.

It’s worth taking a moment to walk around the table just to double-check that the drop is consistent. It's a small detail, but it makes a huge difference to the overall polish of your event.

The Secret to a Crisp, Wrinkle-Free Finish

Even when your linens are delivered on hangers, a few minor creases from transport are pretty much unavoidable. The secret to getting that crisp, smooth finish—a step many people forget—is a handheld garment steamer.

Gently run the steamer over any wrinkles you see, holding it a few centimetres away from the fabric. The steam relaxes the fibres, and you'll see the creases literally fall out. This works like a charm on fabrics like polyester and satin, giving your tables a sharp, pristine look that's immaculate in photos and to the naked eye.

Pro Tip: Always steam your tablecloths after you’ve placed them on the table. This way, you avoid creating new wrinkles while moving them and you can see exactly where any touch-ups are needed for a flawless finish.

How to Handle Spills and Stains

Accidents happen. But a quick response can stop a small spill from becoming a permanent stain and save you from potential damage fees. We always recommend having a little "stain kit" handy with a few clean cloths, some soda water, and a gentle stain remover.

If something like red wine or a sauce gets spilled, immediately blot the area with a dry, clean cloth. Whatever you do, don't rub! Rubbing just pushes the stain deeper into the fabric. A gentle dab with a cloth dampened with soda water can often lift the stain right out.

After the event, all you need to do is shake the linens to get rid of any loose crumbs and pop them into the laundry bags we provide. Please resist the urge to wash them yourself; rental companies use highly specialised cleaning processes. Understanding the ins and outs of professional linen dry cleaning services shows just how specific the requirements can be. Following these steps ensures a smooth, hassle-free return and a perfect presentation every time.

Finding the Right Linen Supplier in Cape Town

The Cape Town event scene is buzzing with options, but choosing the right linen hire partner is what separates a good event from a great one. A reliable supplier does more than just drop off a stack of tablecloths; they’re a key part of your team, making sure everything looks perfect without adding to your stress.

Finding that perfect fit boils down to asking the right questions. Don’t be shy! Get into the nitty-gritty of their stock levels for big weddings, their exact delivery and collection process, and what happens if a little red wine gets spilt. A transparent, professional company will have all these answers ready for you.

Key Questions for Your Potential Supplier

Before you sign on the dotted line, you need total clarity. A supplier worth their salt will appreciate your detailed questions—it shows you’re a pro who cares about the details.

Here are a few non-negotiables to run through with them:

  • What are your delivery and collection procedures? You need to know their timelines and whether they offer a setup service.
  • Can I see fabric swatches in person? This is a big one. What you see on a screen can be worlds away from the real thing. You have to feel the texture and see the colour with your own eyes to know it’s right.
  • What is your policy on damaged or stained linens? It’s always best to know the potential costs upfront. No one needs that kind of surprise after a successful event.

The local market here is strong for a reason—people value quality. In fact, South African household spending on textiles hit a massive R12.5 billion by the end of 2022, a number that really shows how much we all appreciate good-quality fabrics for our homes and events. You can dive deeper into these trends in the latest report from Statistics South Africa.

A great supplier is more than just a vendor; they are a partner invested in your event's success. Their reliability, communication, and the quality of their stock are just as important as the price.

Choosing a local expert with a solid reputation is always a smart move. For a bit more on sourcing the best event items locally, our guide on finding quality decor hire in Cape Town has some extra tips. Do your homework, vet your suppliers properly, and you’ll find a partner who delivers amazing quality, every single time.

Frequently Asked Questions About Round Tablecloths

It's completely normal to have a few questions when you're getting into the finer details of event planning. When it comes to round tablecloths, getting the right answers can be the difference between a setup that’s just okay and one that looks absolutely spectacular. We've put together some of the most common questions we get, with practical, no-fuss answers.

This should help you make those final decisions with confidence, making sure every table looks flawless.

What Is the Most Popular Size for Round Tablecloths?

For most formal events in South Africa, like weddings or corporate galas, the goal is always that elegant, floor-length drop. The undisputed industry favourite is the 3.3m (132-inch) tablecloth. It’s the perfect match for a standard 1.8m (72-inch) round table, which is what you'd typically use for 10-12 guests.

This size gives you that beautiful, seamless look by hiding the table legs completely. If you're using a slightly smaller 1.5m (60-inch) table, a 3m (120-inch) cloth will give you that same stunning floor-length finish.

Can I Use an Overlay on a Round Tablecloth?

Of course! Using an overlay is one of our favourite styling tricks. It’s a brilliant way to add a pop of colour, a different texture, or just a bit more dimension to your tables. You can easily bring in your event's theme colours or add a touch of sparkle without having to use a fully patterned cloth for the base.

A really popular and effective look is to place a smaller square overlay diagonally over a full-length round tablecloth. This creates gorgeous, cascading points of fabric that add real visual interest to the whole setting.

Imagine a rich satin overlay in your wedding colour over a crisp white base – so chic. Or, for a big birthday bash or New Year's Eve party, a sequin overlay can instantly take the glam factor up a notch.

How Do I Get Wrinkles Out of Rented Tablecloths?

While we deliver all our linens on hangers to keep creasing to a minimum, a few wrinkles from transport are pretty much unavoidable. The quickest and safest way to get a perfectly smooth, crisp finish on-site is with a handheld garment steamer.

Steam is gentle enough for most fabrics, like polyester and satin, and it works wonders at relaxing the fibres so the creases just fall away. If you don’t have a steamer, you can sometimes tumble the linen in a dryer on a low heat setting with a damp cloth for about 15 minutes. Just be sure to check with us or your rental provider first to make sure you’re following the specific care instructions for the fabric.


Ready to create a stunning look for your next event? ABC Hire offers a premium selection of tablecloths for round tables and all the event essentials you need in Cape Town. Explore our collection and get a quote today at https://abchire.co.za.

Your Guide to Renting a Round Wooden Table

A round wooden table is so much more than just a piece of furniture; it’s the heart of your event's atmosphere. Whether you’re planning a rustic celebration in the Cape Winelands or a polished corporate function in the city, the right table is what brings people together and elevates your entire design. The circular shape is fantastic for encouraging conversation, making sure every single guest feels included in the moment.

Choosing the Right Round Wooden Table for Your Event

Overhead view of an event hall with a server walking past round tables set with place settings.

First things first, let's match the table style to your event's theme and venue. A table isn't just a place to put a plate; it's a huge part of your overall aesthetic. The wood's grain, its colour, and the finish can completely change the mood, so it’s worth paying close attention to these details.

Think about it this way: a rustic, reclaimed pine table with all its beautiful knots and a natural finish is absolutely perfect for a relaxed outdoor wedding at a Stellenbosch wine farm. It just works with those earthy tones, simple linen runners, and wild floral arrangements, creating a warm, organic feel that feels right at home in the Winelands.

On the other hand, if you’re hosting a formal corporate gala in a chic Cape Town venue, a sleek, dark oak or rich mahogany table with a polished finish projects pure elegance. It sets a sophisticated tone, ready for crisp white linens, fine china, and dramatic, tall centrepieces.

Matching Wood Style to Venue Type

Getting the synergy right between your tables and the venue is key. You want the furniture to feel like it belongs there, not like it was just dropped in as an afterthought.

Here are a few pairings that we see work beautifully in and around Cape Town:

  • Vineyard Estates: Go for lighter-coloured woods like pine or ash. Their softer tones blend seamlessly with the sun-drenched landscapes and rustic charm of the Winelands.
  • Modern City Lofts: A dark, ebonised wood or a table with super clean lines and a smooth finish can create a stunning contrast against industrial backdrops like exposed brick or concrete.
  • Historic Manor Houses: You can’t go wrong with classic woods like walnut or cherry. Their deep, rich hues and refined grain patterns complement traditional architecture and a more formal atmosphere.

The goal is to create a cohesive design story where every element works together, starting with your tables. The wood you choose shouldn't just match your theme; it should enhance the unique character of your venue.

Considering Finish and Texture

Beyond the type of wood, the finish itself plays a massive role. A matte or oiled finish gives you a more natural, tactile experience, letting the wood's texture become a feature in its own right. This is brilliant for events aiming for an authentic, grounded vibe.

A high-gloss or lacquered finish, however, adds a layer of formality. It reflects light beautifully, contributing to a more glamorous and polished look. Before making your final decision, it's always a good idea to explore different pairings of wooden tables and chairs to make sure your entire vision comes together perfectly.

Creating a Flawless Floor Plan and Guest Flow

There's a reason we love round wooden tables – they are brilliant for creating a warm, social atmosphere. But their footprint demands some smart floor planning. If you get the spacing wrong, even a beautiful venue can feel chaotic, making it a nightmare for guests and service staff to move around. The real goal is to design a layout that feels both intimate and comfortably spacious, ensuring everything flows smoothly from the moment guests arrive.

This is about more than just placing tables on a diagram; you're essentially choreographing the entire guest experience. Think about creating clear, intuitive pathways. You want to guide people naturally from the entrance to their seats, to the bar, and to key spots like the dance floor or stage. A well-designed floor plan prevents those awkward bottlenecks and lets everyone, including your caterers, navigate the room with absolute ease.

Mastering Table Spacing

The golden rule for placing your tables is to leave enough room for both seated guests and foot traffic. A classic rookie mistake is underestimating just how much space you need once chairs are pulled out and people are actually mingling.

Here are the industry-standard measurements we always stick to:

  • Between Tables: You need a minimum of 1.5 metres between the edges of adjacent tables. This gives guests enough room to push their chairs back without bumping into the person behind them and allows staff to serve without a fuss.
  • Main Walkways: For any main artery – think paths to the exits, restrooms, or the bar – widen that gap to at least 1.8 metres. This is crucial for handling a higher volume of traffic safely and comfortably.
  • Wall Clearance: Always keep your tables at least 1.2 metres away from any walls or other obstructions. No one wants to be the person trapped against the wall, unable to get up without asking the whole table to shift.

A diagram with three icons and labels: leaf for Style, building for Venue, ruler for Size, connected by arrows.

This simple process of thinking through style, venue, and size is the absolute foundation of a great event layout. As you can see, the table choice has a direct knock-on effect on your floor plan, with each element influencing the next.

Strategic Placement for the Best Experience

Once your spacing is sorted, it's time to think strategically about where each round wooden table goes. Take a look at your Western Cape venue. Are you at a stunning wine estate with panoramic mountain views? Then orient the layout so as many guests as possible can soak in that scenery.

A great floor plan does more than just fit everyone in; it enhances the venue's best features and directs attention where you want it. It's the unseen architecture of a memorable event.

For a corporate event, you'll want to ensure everyone has a clear line of sight to the stage or presentation screen. At a wedding, the head table needs a prime position, and the dance floor should feel like an inviting, central hub, not an afterthought. This is the kind of careful planning that elevates the guest experience from just "functional" to truly exceptional. Thinking about your overall setup early is key, and it's always worth exploring comprehensive guides on tables and chair rentals to make sure all your furniture pieces work together perfectly.

Designing Your Tablescape from Linens to Centrepieces

A microphone and lit candles sit on a round wooden table, with event speakers and dark curtains in the background.

A beautiful round wooden table isn't just a place for guests to sit; it's the creative canvas for your entire event's aesthetic. The first big design choice you'll face is whether to let that natural wood shine or to dress it up with linens. Each path creates a completely different atmosphere, and the right decision really just boils down to the mood you want to set.

Leaving the wood bare is a fantastic choice, especially for events with a rustic, bohemian, or minimalist vibe. Picture a wedding at a Franschhoek wine farm, where the rich grain of the oak tables beautifully complements the surrounding vineyards. This approach is all about celebrating texture and authenticity, making the round wooden table itself a core part of the design.

On the other hand, dressing your tables in linens can instantly dial up the formality and create a more cohesive look. A crisp white tablecloth can transform a simple table for a classic, elegant wedding. For a corporate gala, a deep velvet cloth can create a moody, luxurious atmosphere. Linens are your secret weapon for injecting bold colour and tying your whole design palette together.

The Great Debate: Linens or Bare Wood?

Honestly, there’s no right or wrong answer here—only what’s right for your event. It’s like choosing between showcasing a beautiful picture frame or the painting inside it. A bare table draws the eye to the quality of the furniture, while a draped table shifts the focus to what you place on top.

Here are a few scenarios to get you thinking:

  • Bare Wood Wins: Perfect for a relaxed, daytime corporate retreat in Stellenbosch. The natural wood feels grounded and approachable. Pair it with simple ceramic dinnerware and arrangements of indigenous fynbos.
  • Linens Shine: A sophisticated 50th birthday party in a Constantia venue is the ideal setting for linens. A full-length cloth in a deep jewel tone adds drama and provides a clean backdrop for polished silverware and sparkling crystal.
  • The Hybrid Approach: Never underestimate the power of a runner! A simple linen or textured fabric runner adds a pop of colour and softness while still letting that gorgeous wood frame the tablescape.

Crafting the Perfect Centrepiece

The shape of a round table is a gift when it comes to centrepiece design. Unlike long, rectangular tables that work well with linear arrangements, a round table demands a central focal point that looks great from every single angle. The number one rule is to keep sightlines clear. Guests need to be able to see and chat with everyone at their table without having to peer through a jungle of flowers.

A common mistake we see is a centrepiece that's too tall or too wide. It effectively builds a wall between guests. As a rule of thumb, aim for arrangements that are either below eye level (under 30 cm) or tall and skinny enough to see through, like a single orchid stem in a slim vase.

Low, lush arrangements of flowers, candles, and greenery are almost always a winner. Clustering items of different heights in the middle creates visual interest without blocking anyone. For example, a group of pillar candles on a wooden tray, surrounded by eucalyptus and succulents, gives off a warm, inviting glow that really encourages conversation.

Ultimately, the centrepiece for your round wooden table should enhance that communal, social feel, not get in the way of it.

Getting Your Tables On-Site: Nailing the Logistics in Cape Town

Choosing the perfect round wooden table is just the start. The real make-or-break part of the hire process? The logistics. Getting those tables delivered, set up, and collected without a hitch is absolutely critical, especially when you're juggling timelines with busy Cape Town venues. The secret weapon here is simple: asking the right questions before you sign anything.

Before you even think about confirming the booking, you need to get crystal clear on their delivery and collection windows. Are we talking a specific, one-hour slot, or a vague "sometime between 9 am and 1 pm"? That one detail can make a world of difference for your venue manager, who needs to plan for access and staff. Smooth handovers are all about communication.

Must-Ask Questions for Your Hire Company

Never assume anything is standard practice. Every company has its own way of doing things, so run through this checklist to make sure you've covered all the bases.

  • Setup and Breakdown: Does the delivery fee just cover a kerbside drop-off, or will their team actually place the tables according to your floor plan? Knowing this upfront helps you budget for extra hands if you need them.
  • Weather Contingencies: This is Cape Town, after all. If you're planning an outdoor event, what's their plan B if the weather turns? Can they quickly pivot to an indoor setup, and what are the cost implications?
  • Condition on Arrival: What happens if a table shows up with a wobble or a big scratch? A professional company will have a solid process for a quick replacement, no questions asked.

Here’s a pro tip: The moment your hired furniture arrives, do a thorough inspection. Check every leg, run your hand over the tabletops, and look for any damage. It’s so much easier to flag an issue on the spot than to scramble for a solution an hour before your guests walk in.

This bit of proactive planning ensures you get the quality you’re paying for and saves you from any nasty day-of surprises. Taking care of these details is a huge part of the puzzle, and getting a feel for the bigger picture of furniture for hire in Cape Town can really put you ahead of the game.

A Word on Supply and Quality

The beautiful finish on a quality wooden table comes down to one thing: the wood itself. But for local manufacturers, getting their hands on high-quality timber isn't always easy.

The production of roundwood in South Africa has had its ups and downs, which has a direct knock-on effect on what's available for making great furniture. In fact, by 2018, total roundwood production had dropped to around 18.7 million cubic metres. There are even projections of potential shortfalls down the line. You can read more about the supply of industrial roundwood in South Africa and how it shapes the industry.

This is exactly why it's so important to book those beautiful wooden pieces well in advance, especially if you have your heart set on a specific style.

Tech, Lighting, and Natural Wood: A Perfect Match

In today's events, that beautiful, rustic look needs to play nicely with modern tech. Nobody wants to sacrifice charging points or stunning lighting just for a wooden table. The trick is to blend them seamlessly, so your tech supports the vibe instead of clashing with it.

One of the biggest headaches, especially at corporate gigs, is the mess of cables from laptops, sound gear, or projectors. Keeping things looking clean is non-negotiable. A simple but effective trick is to run cables neatly down a central table leg, securing them with black gaffer tape so they just disappear into the shadows. For cords running across the table itself, a well-placed decorative runner can hide a flat extension cable perfectly.

Let There Be Light: Highlighting the Wood Grain

The right lighting can take a wooden table from just a piece of furniture to a genuine showstopper. Forget about blasting the room with harsh overhead lights; that just washes everything out. The real magic happens when you get specific and use light to bring out the wood's natural character.

Here are a couple of techniques we use all the time:

  • Pin-spotting: This is a fantastic way to make your centrepieces the hero. A tight beam of light is focused directly onto your floral arrangements or decor, making them pop with colour and detail. It creates a stunning focal point on every single table.
  • Uplighting: We love this one. Small lights placed on the floor at the base of the table cast a gentle, warm glow upwards. This beautifully highlights the texture and rich tones of the wood grain, adding a wonderful sense of depth and warmth to the space.

By focusing your light, you guide your guests' eyes exactly where you want them to go—to the beautiful details you've so carefully planned. It creates a far more intimate and high-end feel than general room lighting ever could.

Fusing Styles for a Unique Look

The beauty of a round wooden table is just how versatile it is. You can pair it with almost anything, which is where you can get really creative and design a look that’s completely your own. Don’t be shy about mixing different styles; that’s often where the most memorable designs come from.

For a really striking effect, try pairing a rustic wooden table with sleek, modern ghost chairs. The contrast between the earthy, organic wood and the clean, contemporary lines of the transparent chairs is incredible. Because the chairs are see-through, the table remains the star.

Another idea we love is hanging industrial-style pendant lights or minimalist geometric fixtures above the tables. This frames the setting beautifully and adds a chic, edgy element to an otherwise classic setup. It’s this kind of fusion that creates a sophisticated and unforgettable look for any Cape Town wedding or corporate function.

Your Top Questions About Renting Wooden Tables

When you’re planning an event in Cape Town, especially a wedding or a corporate function, a few key questions always come up about the furniture. Getting the details right on your wooden tables from the start is a game-changer for a smooth, stress-free process.

We’ve pulled together the most common queries we get from wedding planners, event coordinators, and private hosts. Here are the clear, practical answers you need to make confident choices that perfectly match your vision.

How Far in Advance Should I Book My Tables?

If your event falls within Cape Town’s peak season (that’s typically October to April), you need to be thinking about booking your round wooden tables six to nine months ahead. Seriously.

High-quality wooden furniture is a hot ticket item for Winelands weddings and year-end functions, so the best stock gets snapped up fast. If you leave it too late, you’ll likely face a limited selection and might have to compromise on the style you really wanted.

Planning for the quieter off-season? You can probably get away with a shorter lead time, maybe three to four months. But honestly, booking early always guarantees you get your first choice and gives you one less thing to worry about.

What’s the Most Popular Table Size?

Hands down, the 1.8-metre diameter round table is the industry workhorse. There's a good reason it's the most popular choice by a mile. It comfortably seats eight to ten guests, hitting that sweet spot between creating an intimate, chatty vibe and still having enough room for place settings, glassware, and a gorgeous centrepiece.

For smaller, more intimate gatherings or venues where space is tight, the 1.5-metre (seating six to eight) or the 1.2-metre (seating four to six) tables are also fantastic options. The real trick is to match the table size to your seating plan to avoid guests feeling either squashed or miles apart.

You want to encourage easy conversation. A table that’s too big can make guests feel disconnected, while one that’s too small just feels cluttered. The 1.8-metre size really is the magic number for most events.

Can I Use Wooden Tables for an Outdoor Winelands Event?

Absolutely! In fact, round wooden tables are a perfect fit for the rustic, natural beauty of the Cape Winelands. Their warm, organic feel looks incredible set against a backdrop of vineyards and mountains.

The golden rule for any outdoor event in the Western Cape, though, is having a solid plan B for the weather. Always have a marquee or an indoor space ready to go. It’s also crucial that the tables are placed on flat, stable ground—no one wants a wobbly table. A reputable rental company will supply durable, weather-treated tables designed specifically to handle the outdoors.


Planning the perfect event starts with the right foundation. At ABC Hire, we provide an extensive range of high-quality round wooden tables and other event essentials to bring your vision to life in Cape Town and beyond.

Explore our collection and get a quote today at https://abchire.co.za

Wing Back Chairs for Cape Town Events

A wing back chair isn't just a place to sit; it's a statement. It brings a certain kind of elegance, intimacy, and sense of occasion to an event that few other pieces can. With that distinctive high back and those iconic sheltering 'wings', a wing back chair provides both comfort and a powerful visual anchor, instantly lifting a space from ordinary to something quite special. It’s a classic for a reason.

The Enduring Allure of Wing Back Chairs in Modern Events

A pair of stylish grey wing back chairs arranged in a modern event space.

So, why do these chairs keep showing up at the most stylish events, from Winelands weddings to corporate galas in Cape Town? The secret is in their unique blend of beautiful form and practical function. They don't just fill a space; they create an experience for your guests. Think of them less as furniture and more as tools for crafting atmosphere.

The high backrest is fantastic for support, making them a smart choice for events where guests will be seated for a while, like conferences or long, celebratory dinners. But it’s the 'wings' that really work their magic. Originally designed to keep draughts away in old English manor houses, today they serve a brilliant modern purpose.

Creating Intimacy and Focus

In a busy, bustling event, those wings create a private little nook for guests. They subtly muffle the ambient noise and minimise distractions, making real conversation possible. If you want to create an instant conversational hub, just place two wing back chairs facing each other. It’s a perfect setup for a lounge pocket or a VIP zone.

For an event planner, a wing back chair is a strategic asset. It directs attention, frames important moments, and communicates a standard of luxury and care to every guest who sits in one.

A Growing Market for Statement Seating

We're seeing a huge demand for sophisticated pieces like these. The South African furniture market, currently valued at around USD 2.47 billion, is set for some serious growth. Within that market, wing back chairs make up a solid 12-15% of all accent chair sales, especially in design-savvy hubs like Cape Town where people value both heritage and comfort. You can explore more about this growing market and what's driving it.

This trend points to a bigger shift in event design. Planners and their clients are moving past purely functional seating. They want pieces that add to the overall look and feel of the day.

A well-chosen wing back chair offers so much:

  • A Stunning Visual Focal Point: They are perfect for sweetheart tables, photo booths, or on-stage settings.
  • An Instant Touch of Sophistication: They immediately make an event feel more polished and high-end.
  • Versatile Styling Potential: They can slip into any theme, from classic romance to sleek modern minimalism.

Ultimately, using these chairs sends a clear message. It shows you’re committed to the details, you care about guest comfort, and you’re dedicated to creating a memorable, luxurious atmosphere that people will be talking about long after they've gone home.

Exploring Wing Back Chair Styles for Every Theme

Picking the right wing back chair is really about matching its personality to your event's story. It’s definitely not a one-size-fits-all deal; the silhouette, fabric, and little details all play a huge role in the atmosphere you’re trying to create. Think of it like casting the perfect actor for a key role in your event.

A chair isn't just there to fill a space; it has the power to elevate your entire theme. Let's walk through some of the most popular styles you can hire, connecting each design to the specific mood it helps to build. This should help you pinpoint your vision and choose a chair that truly tells your event's unique story.

The Classic Queen Anne

The Queen Anne is what most people picture when they think "wing back chair." It’s instantly recognisable by its elegant, curved lines and graceful silhouette. You'll spot it by its softer, more fluid shapes, its signature cabriole legs (those are the curved ones with a little decorative foot), and often a shell or fan carving at the very top.

This style just screams classic romance and refined grace. Its regal but welcoming vibe makes it a fantastic choice for:

  • Traditional Weddings: Perfect as the star seating at a sweetheart table or for giving parents and grandparents a distinguished spot.
  • High Teas and Bridal Showers: It adds that perfect touch of classic femininity and charm.
  • Elegant Galas: Use them to craft sophisticated lounge pockets that invite guests to have a quiet chat.

The Queen Anne’s design has stood the test of time, bringing a sense of heritage and class without ever feeling stuffy. It’s a surprisingly versatile option for any event aiming for a polished, upscale feel.

The Stately Chesterfield

If the Queen Anne is all about graceful curves, the Chesterfield wing back is its bold, confident cousin. What gives it away? The deep button-tufting, the rolled arms that often sit as high as the back, and its solid, grounded feel. Usually upholstered in a rich leather, it feels substantial and incredibly luxurious.

This chair brings a sense of gravitas and old-school comfort, making it a powerhouse for certain themes. For a deeper dive into choosing statement pieces like this, our guide on decorative chairs for weddings has some great insights for nailing the perfect aesthetic.

A Chesterfield wing back doesn't just ask guests to sit; it offers them a place of distinction. Its classic, club-like feel is perfect for creating exclusive, comfortable spaces within a larger event.

Think about bringing in a Chesterfield for:

  • Sophisticated Corporate Lounges: A natural fit for VIP areas, speaker green rooms, or quiet networking zones at conferences.
  • Whisky or Gin Bars: It's the perfect companion for a masculine, speakeasy, or library-themed setup.
  • Winter Weddings: Just imagine a pair of these beside a crackling fireplace in a historic Winelands venue—it creates such a warm, inviting scene.

Modern and Contemporary Interpretations

Stepping away from the historical designs, modern wing backs offer a fresh, clean-lined alternative. These styles often take the classic silhouette and strip it back, simplifying it for a more contemporary feel. They might have straighter lines, more angular wings, and sleek, unadorned legs.

Where these chairs really get to have fun is the upholstery. You’ll find them in vibrant velvets, bold geometric prints, and chic, neutral fabrics. This adaptability makes them a fantastic tool for events with a modern edge.

These contemporary wing backs are brilliant for:

  • Product Launches and Brand Activations: You can easily find colours that match corporate branding for a seamless, professional look.
  • Chic Cocktail Parties: They act as stylish statement pieces, adding a pop of colour and personality to the room.
  • Art Gallery Openings or Fashion Events: Their sculptural quality fits right in with creative, forward-thinking environments.

Ultimately, the style you go for sets the whole tone. Whether you need the romantic elegance of a Queen Anne, the commanding comfort of a Chesterfield, or the sleek flair of a modern design, the right wing back chair is out there, ready to help you tell your event's story.

How to Choose the Right Upholstery and Fabric

The fabric on a wing back chair is its soul. It sets the tone, the feel, and the practicality of the chair within your event space. Picking the right upholstery is all about striking a balance between your aesthetic vision and the real-world demands of the occasion. After all, you need those chairs to look flawless from the moment the first guest arrives until the last one leaves.

Think of it like dressing your chairs for the specific role they have to play. You wouldn't wear a delicate silk gown to an outdoor garden party, right? In the same way, you shouldn't choose a plush velvet for a high-traffic area where spills are a real possibility. The material has to match the event's vibe and its logistical realities.

This infographic breaks down the distinct personalities of classic, lounge-style, and modern wing back chairs.

Infographic about wing back chairs

You can see how each style's silhouette—from the regal curves of a Queen Anne to the sleek lines of a contemporary piece—sets a completely different tone for an event.

Comparing Popular Fabric Choices

Choosing the right fabric really boils down to three things: durability, aesthetic, and texture.

For a glamorous indoor wedding reception, a velvet wing back is simply unmatched. Its rich texture catches the light beautifully, creating a sense of opulence and depth. Of course, it’s best suited for a controlled environment where the risk of spills is low.

If you're styling a sophisticated corporate lounge or a VIP area, leather is a serious power player. It has a premium look, is incredibly durable, and can be wiped clean in a second, which makes it a practical choice for longer events. A quality leather wing back communicates professionalism and comfort all at once.

Then you have versatile options like linen and high-performance fabrics. Linen brings a relaxed, organic feel, which is perfect for a Winelands wedding with a rustic-chic theme. On the other hand, modern performance fabrics give you the best of both worlds—they come in a massive range of colours and textures while offering superior resistance to stains and wear.

A quick tip from experience: always consider the lighting. A fabric's colour and texture can look entirely different under the soft glow of fairy lights compared to the bright lights of a conference hall. Asking your supplier for a fabric swatch can be a total game-changer.

To help you decide, here's a quick-reference guide comparing common wing back chair fabrics and their best uses for events.

Upholstery Comparison for Event Planners

Material Best For (Event Type) Aesthetic/Vibe Durability & Maintenance
Velvet Indoor weddings, galas, formal parties Luxurious, opulent, rich Lower durability; needs careful handling. Prone to staining.
Leather Corporate events, VIP lounges, upscale bars Sophisticated, professional, classic Very durable; easy to wipe clean.
Linen Outdoor weddings, rustic themes, garden parties Relaxed, natural, chic Prone to wrinkling and staining unless treated.
Performance Fabric High-traffic areas, family-friendly events, outdoor use Versatile (can mimic other fabrics) Excellent durability; highly resistant to stains and fading.

This table should make it easier to match the right material to your specific event needs, ensuring your chairs are both beautiful and practical.

Understanding the Local Supply

The quality of materials is often tied to where they come from. Globally, the market for wing back chairs includes about 65 importers and 76 manufacturers. Here in South Africa, a good portion of the high-end options are imported. Roughly 20-30% of the supply features premium materials from heritage design hubs like the UK and Italy, which aligns perfectly with the tastes of our upscale clients and the discerning local event industry. You can learn more about these global trade dynamics to see the full picture.

This access to international designs means that as an event planner in Cape Town, you have a fantastic variety of authentic, high-quality upholstery choices right at your fingertips.

Key Upholstery Considerations for Events

To nail your decision, just ask yourself a few practical questions:

  • What kind of event is it? An elegant gala needs a very different fabric from a casual outdoor cocktail party.
  • Who are the guests? If children are on the guest list, a stain-resistant fabric is an absolute must.
  • What’s the venue like? Outdoor settings call for fabrics that can handle humidity and changing temperatures.
  • What’s the mood? Do you want the chairs to feel luxurious, comfortable, professional, or relaxed?

By thinking through these points, you can choose an upholstery that not only fits your colour scheme but also stands up to the demands of your event. That way, your wing back chairs will look just as stunning at the end of the night as they did at the beginning.

Strategic Placement for Maximum Impact

Two elegant wing back chairs creating an intimate seating area at a stylish event.

It’s one thing to choose a gorgeous wing back chair. It’s another thing entirely to know where to place it. That’s where the real magic happens, unlocking its power to completely transform your event space.

Think of these chairs as more than just somewhere to sit. They’re design tools that can guide how your guests move, frame those all-important moments, and create an atmosphere that people remember. The right placement turns a functional item into a true focal point.

The goal is to use the chair’s natural presence to draw the eye and define a space. A poorly placed wing back can feel awkward or get in the way, but a thoughtfully positioned one elevates the whole room. It’s all about creating intentional little scenes—vignettes that feel both luxurious and welcoming, making sure every corner of your venue is working for you.

Creating Memorable Wedding Moments

For weddings, wing back chairs are a brilliant way to dial up the romance and sophistication. They create picture-perfect scenes that couples and their guests will absolutely adore. That elegant silhouette is a natural attention-grabber, making them perfect for highlighting the most important people and moments.

Here are a few high-impact ideas for any wedding:

  • The Sweetheart Table: Frame the happy couple with a pair of stunning wing back chairs. This not only makes them feel like royalty but also creates a beautiful focal point for all those photos during the speeches and toasts.
  • A Photo Booth Lounge: Forget the basic backdrop. Why not design a chic lounge for your photo booth? Two wing backs, a stylish rug, and a small side table create a sophisticated and interactive photo op that guests will queue up for.
  • Ceremony Seating for Honoured Guests: Reserve beautifully styled wing backs for parents or grandparents in the front row. It’s a simple, thoughtful gesture that honours their role on the day.

Designing Corporate and Private Event Layouts

At a corporate function or private party, wing back chairs are your secret weapon for creating zones of comfort and exclusivity. Their very structure lends a sense of privacy and importance, making them ideal for layouts that need to serve different purposes within the same event.

The high back is a huge plus here. It offers fantastic ergonomic support, which is a big deal for guests sitting through long presentations or panel discussions. Focusing on comfort like this sends a clear message of care and professionalism.

By placing wing back chairs strategically, you can subtly guide the social dynamics of an event. You can encourage quiet conversations in one corner while creating a clear focal point for a speaker in another—all with the same versatile piece of furniture.

Here are a few effective layouts for corporate and milestone events:

  1. The Speaker's Stage: A single, commanding wing back chair on stage works wonders for a moderator or keynote speaker. It adds a sense of authority and gives them a comfortable spot during Q&A sessions.
  2. Exclusive VIP Lounges: Arrange clusters of four wing back chairs around a coffee table to create semi-private networking pods. The 'wings' help to muffle background noise, making it easier to have focused conversations.
  3. The Seat of Honour: Celebrating a milestone birthday or anniversary? Designate a special wing back chair for the guest of honour. It instantly becomes a celebratory throne, making them the clear centre of attention for gifts and well-wishes.
  4. Intimate Conversation Nooks: During a cocktail hour, place pairs of wing back chairs in quieter corners of the venue. This invites guests to step away from the main crowd for deeper, one-on-one chats, which can make all the difference for networking.

Ultimately, where you put your wing back chairs should be a deliberate design choice. When you think strategically about how and where to use them, you move beyond just decorating a room and start actively shaping your guests' experience, creating a seamless flow and an impact that lasts.

How to Style Your Wing Back Chairs

A stylishly decorated wing back chair paired with a small side table and a lamp.

A wing back chair is a powerful design anchor on its own, but its true magic comes alive when you treat it as the star of a carefully curated scene. Styling isn’t just about tossing a cushion on the seat; it’s about creating a complete vignette that tells a story and amplifies your event’s atmosphere.

Think of the chair as your main character. The surrounding décor is its supporting cast, and your job is to direct them. By building a small, self-contained world around each chair or pair, you transform a simple seating area into an intentional design moment. From an elegant side table to the soft glow of a lamp, every element works together to make guests feel special.

Building Cohesive Vignettes

Creating a stylish setting is all about layering. You need a mix of textures, shapes, and lighting to make it work. Start by pairing your wing back chairs with other furniture that balances their scale and form. A heavy, substantial chair, for example, looks fantastic next to a delicate, slim-legged side table. The contrast is what makes it interesting.

Pay attention to the visual weight of each piece. If your chair has solid, upholstered sides that go right to the floor, pair it with a table that has slender legs. This allows light and space to flow underneath, preventing the whole setup from feeling too blocky or heavy.

A modern, low-pile rug is a brilliant way to define the space, anchoring the chairs and table to create an intimate "room within a room." This trick is especially useful in large, open-plan venues where you want to carve out distinct zones for conversation or a quiet escape.

Using Textiles for Colour and Texture

This is where you can have some fun. Accent cushions and throws are the easiest and most effective way to tie your chairs into the event’s colour scheme. They’re your chance to be playful while keeping things sophisticated.

For a classic wedding, picture a cream linen wing back with a soft, blush velvet cushion. Or for a bold corporate event, a charcoal grey chair could be energised with a throw in the company's signature brand colour. It’s amazing how these small touches can make such a huge impact.

Don’t be afraid to mix patterns and textures. A smooth leather chair can be softened with a chunky knit throw, or a plain velvet chair can be brought to life with a geometric-print cushion. The key is to maintain a consistent colour story.

Comfort is also becoming a huge deal in modern event design. Recent trends in South Africa show that about 30% of furniture buyers now prioritise ergonomic comfort right alongside style. This is spilling over into the event world, as planners look for seating that not only looks incredible but also keeps guests happy. This makes well-designed wing back chairs an obvious choice. You can discover more about these evolving furniture trends and what they mean for the industry.

The Crucial Role of Lighting

Lighting is what brings your whole vignette to life. It highlights the chair’s dramatic shape and creates that warm, inviting ambiance that guests remember. The right light can completely change the mood.

Consider these lighting options to really show off your chairs:

  • A Slim Floor Lamp: Placed just behind the chair, it casts a soft, downward glow that’s perfect for an intimate reading or conversation nook.
  • A Dramatic Uplighter: Positioned on the floor and aimed up at the chair, an uplighter accentuates its tall silhouette for a theatrical, high-impact look.
  • Table Lamps: A small, elegant lamp on an adjacent side table adds a layer of warm, localised light that makes the space feel extra cosy and welcoming.

Here are a few ideas to get you started on creating those perfect pairings for different event themes.

Styling Combinations for Wing Back Chairs

Event Theme Chair Style/Colour Suggested Pairings Styling Tip
Romantic Wedding Cream or blush velvet Gold-rimmed side table, antique mirror, floral arrangement Drape a delicate, sheer fabric over one wing for a touch of ethereal softness.
Modern Corporate Charcoal grey or navy fabric Sleek chrome side table, geometric-print cushion, branded coasters Use a throw in a bold, contrasting brand colour to make the chair pop.
Winelands Rustic Natural linen or distressed leather Reclaimed wood crate table, chunky knit throw, lantern Keep the lighting warm and low to enhance the cosy, rustic feel.
Glamorous Gala Black leather or jewel-toned velvet Mirrored side table, metallic floor lamp, faux fur throw Go for high-contrast pairings. A black chair with a white fur throw is pure drama.

By combining furniture, textiles, and lighting, your wing back chairs become so much more than just seats. They become key players in your design vision, creating memorable, beautiful, and functional spaces that your guests will love.

Navigating Rentals in the Western Cape

Finding the perfect wing back chairs for your event in Cape Town or the Winelands goes way beyond just picking a gorgeous style. You've got to think about the real-world logistics—from getting them delivered to your venue in Stellenbosch to understanding what happens if a glass of red wine takes a tumble.

Think of your rental company as a key partner in your event's success. A good supplier will be upfront about their process and help you spot potential problems before they happen. This is especially true for outdoor or marquee events, where your beautiful furniture might have to contend with unpredictable weather or uneven ground. The first thing you should do is have a proper chat about the nitty-gritty of your event.

Your Essential Rental Checklist

Before you sign on the dotted line, you need to be crystal clear on what you're getting. A quick conversation can sort out expectations and save you from any nasty last-minute surprises. Getting these details ironed out early is a cornerstone of smart event planning, a topic we dive into deeper in our guide to renting furniture for events.

Go into that conversation armed with these key questions:

  • Delivery and Collection: What are the fees for delivery to venues out in Paarl or Franschhoek? Do those costs go up for weekend or after-hours collections?
  • Setup and Placement: Is setting up the chairs included in the price? Will the delivery team place them according to my floor plan, or is that left to my team?
  • Damage Policy: What’s the plan if a chair gets damaged? Is there a damage waiver I can pay, and what exactly does it cover? This is a must-ask, especially for outdoor functions.
  • Weather Contingency: What happens if the heavens open? What are your policies for protecting delicate pieces, like velvet wing backs, from a sudden downpour?
  • Lead Times: How far ahead do I need to book? This is crucial for popular styles, especially during the mad wedding season in the Winelands.

Having these answers upfront means you can build a realistic budget and plan your day with confidence. No guesswork, no panic.

Demystifying Rental Pricing

The hire price for wing back chairs can vary quite a bit, so it helps to know what’s driving the cost. It’s not just a simple daily rate; it's a mix of the chair's value, the delivery logistics, and how long you need it for.

Here are the main factors that will shape your final quote:

  1. Material Rarity and Quality: It makes sense that a genuine leather Chesterfield or a plush silk-velvet chair will cost more to hire than one in a standard fabric. They are more valuable and need more specialised care.
  2. Design and Exclusivity: An iconic, classic design or a rare vintage find will have a higher price tag than a more common style. You're paying for the "wow" factor it brings to your event.
  3. Delivery Distance: Logistics are a big part of the cost. A delivery to a remote wine farm will naturally cost more in time and fuel than a drop-off at a central Cape Town hotel.
  4. Hire Duration: Most suppliers work on a standard 1-3 day hire rate. If you need the chairs for a full week, ask about a long-term rate—it can often be more budget-friendly.

Here's a pro tip: sometimes spending a bit more on a standout chair that needs less styling can actually save you money on other décor. It's all about creating a balanced and effective budget.

By approaching the rental process with a solid checklist and a clear picture of the pricing, you can confidently book the perfect wing back chairs for your event. This ensures your chosen pieces not only look incredible but also fit neatly into your budget and logistics, setting the stage for a flawless day.

Common Questions About Using Wing Back Chairs

Even the most organised event planner has questions pop up. We get it. To make sure you feel completely confident using wing back chairs at your next function, we’ve put together answers to the queries we hear most often.

Think of this as your practical cheat sheet. From booking timelines to guest comfort, these insights will help you sidestep potential headaches and ensure your event is a roaring success.

How Far in Advance Should I Book?

If you’re planning for the peak wedding season in the Cape Winelands (which is usually September to April), you’ll want to book your specialty furniture, including wing back chairs, at least six to nine months ahead. The really beautiful, unique styles get snapped up fast, especially for weekend dates at popular venues in Stellenbosch and Franschhoek.

Booking early doesn’t just secure your chairs; it gives you a better selection and often a better price. For corporate functions or off-season events, three to four months is typically enough lead time. Still, it never hurts to lock in your favourites as soon as you’ve settled on a theme. Finding the right supplier is the first step, and you can learn more in our guide to hiring chairs near me.

Are Wing Back Chairs Comfortable for Long Events?

Absolutely. In fact, their very design is what makes them so comfortable. That high back provides brilliant support for the upper back, neck, and shoulders. This is a huge plus for guests sitting through long corporate presentations, awards dinners, or a multi-course wedding feast.

The ergonomic shape of a wing back actually encourages better posture than many other accent chairs. This means your guests are far less likely to get fidgety or tired, keeping them comfortable and engaged for the entire event.

Can They Be Used in Accessible Seating Plans?

Yes, and they can be a fantastic, dignified choice for an accessible seating plan when you place them thoughtfully. The sturdy arms on most wing back models give guests excellent support if they need a little help sitting down or standing back up.

The key is to leave plenty of space around the chair for easy movement. Avoid tucking them into tight corners or crowded spots. By placing them in a spacious, clearly marked accessible zone, you’re offering an option that’s both stylish and genuinely practical.

How Can I Protect Delicate Chairs Outdoors?

Using a lush velvet or linen wing back for an outdoor cocktail hour looks incredible, but you need a plan. Your best bet is to place them on a solid, level surface – think a patio, a deck, or a proper temporary floor inside a marquee.

And always have a plan B for the weather. If there’s even a hint of rain, make sure the chairs are under cover. For delicate fabrics, ask your rental company if they offer protective treatments. Another great idea is to have elegant throws ready to drape over the chairs to protect them from direct sun or minor spills.


Ready to find the perfect statement seating for your next event? ABC Hire has a handpicked collection of beautiful wing back chairs for any theme. Take a look at our inventory and let’s create something unforgettable together. https://abchire.co.za

Your arch for Wedding: Guide to the perfect backdrop

Of all the decorative pieces you’ll choose for your wedding, the arch is arguably the most important. Think about it – it’s more than just a pretty frame. It’s the heart of your ceremony, the exact spot where you’ll exchange vows, and the backdrop for some of the most emotional and cherished photos of your life. A great arch can completely transform a space, turning it into a sacred, personalised setting that anchors your entire wedding theme.

Why Your Wedding Arch Is the Heart of Your Ceremony

Let’s be real, the wedding arch is the main character of your ceremony decor. It’s where you’ll say your “I dos,” share that first kiss as a married couple, and create memories that will literally last a lifetime. An arch does so much more than just look good; it sets the entire mood and tells a story about your unique style as a couple. This one piece has the power to completely define your ceremony space.

Whether you’re picturing rustic charm in the Winelands or chic, modern elegance in a city venue, the right arch solidifies your vision. It’s a non-negotiable for any couple wanting a truly memorable and visually stunning ceremony.

More Than Just a Pretty Frame

A wedding arch plays several crucial roles, making it an essential part of your big day:

  • It creates a focal point. An arch naturally draws everyone’s eyes to the most important spot—the two of you.
  • It anchors your theme. From boho pampas grass to classic roses, the arch instantly communicates your wedding’s aesthetic.
  • It symbolises a new beginning. Traditionally, walking through an arch represents crossing the threshold into a new life together, adding a beautiful layer of symbolism to your vows.

This is especially true here in South Africa, where outdoor ceremonies are incredibly popular. With around 26% of South African couples choosing garden-style venues, the wedding arch has become a central feature. Couples often set aside between ZAR 16,000 to ZAR 30,000 for florals, which usually includes a breathtaking arch installation filled with gorgeous, locally sourced flowers. You can find more details like this in these wedding industry statistics on saradoesseo.com.

Your arch is the silent witness to your vows and the frame for your future. It’s the visual anchor that ties every other element of your ceremony together, ensuring your photos are as magical as the moment itself.

Choosing the right arch comes down to a few key decisions around style, budget, and logistics. It’s just one piece of the puzzle, of course, and our guide on how to plan a wedding can help you see how everything fits together. Let’s walk through everything you need to know.

Choosing Your Ideal Arch Shape and Material

Before you even think about adding a single flower, the actual structure of your wedding arch sets the entire mood for your ceremony. It’s the skeleton of your backdrop. Feeling a bit lost in all the options? Let’s break down how to find the perfect frame for your vision by looking at how shape and material come together to create a specific feeling.

The shape of your ceremony arch is a huge visual statement. It’s not just about what looks pretty; different forms create completely different emotions. A classic rounded arch, for instance, is timeless and romantic. Its gentle curve frames a couple perfectly, suggesting continuity and forever – no wonder it’s a go-to for traditional celebrations.

On the other hand, a square or rectangular arch gives you clean, modern lines. This shape feels more grounded and structured, creating a bold and contemporary frame. It’s a fantastic choice for industrial-chic venues or against a dramatic natural backdrop where its sharp angles create a beautiful contrast.

Matching Shape to Your Wedding Style

To get it right, think about your venue and the overall theme you’re going for. A rustic wooden arch, for example, feels completely at home at a winelands wedding, blending in with the vineyards and countryside charm. A sleek gold moongate (a full circle arch), however, could be the perfect glamorous touch for a sophisticated city wedding.

Here are a few popular shapes to consider:

  • Triangle or A-Frame: This edgy shape brings a bohemian or rustic feel. It symbolises strength and stability, making it a brilliant choice for an outdoor or forest ceremony.
  • Hexagon: A modern favourite, the hexagon adds a unique geometric element that feels contemporary and stylish without being too harsh.
  • Asymmetrical: Perfect for creative and unconventional couples. An asymmetrical arch breaks from tradition, creating dynamic visual interest and a sense of organic, flowing movement.

This quick diagram shows just how much the arch’s structure influences the mood, memories, and style of your ceremony.

Infographic about arch for wedding

As you can see, the arch is a central piece that ties together your decor choices, photographic style, and your personal aesthetic.

Selecting the Right Material

The material of the arch is just as important as its shape. A heavy, dark wood arch feels earthy and grounded, while a minimalist copper or gold metal frame feels light, airy, and modern. Metal arches are also incredibly versatile—they can be styled up for a glamorous affair or left bare for a more industrial look.

Consider these options:

  • Wood: Perfect for rustic, bohemian, or beach weddings. Its natural texture adds so much warmth.
  • Metal: Ideal for modern, classic, or industrial themes. Gold, copper, and black are popular finishes that really pop.
  • Acrylic: For a truly contemporary and almost invisible look, a clear acrylic arch makes your flowers and decor look like they’re floating in mid-air.

Need a hand matching your dream arch to your venue? This quick guide should help.

Wedding Arch Style and Venue Pairing Guide

Arch Style Best Suited Venue Material Aesthetic Feel
Classic Round Garden, Ballroom, Chapel Metal or Wood Timeless, Romantic, Soft
Modern Square Industrial Loft, City Rooftop Metal (Black/Gold) Bold, Structured, Contemporary
Rustic Triangle Forest, Winelands, Farm Natural Wood Earthy, Bohemian, Grounded
Glam Moongate Modern Hotel, Beach Resort Metal (Gold/Copper) Chic, Luxurious, Statement
Boho Hexagon Botanical Garden, Barn Light Wood or Metal Unique, Stylish, Geometric

Ultimately, your choice should feel like a natural fit for the space you’ve chosen.

Your choice of arch is more than just a decor decision; it’s an extension of your personality. It should feel authentic to you as a couple and enhance the natural character of your chosen venue.

Think about the story you want your wedding to tell. Do you see a fairytale romance framed by a floral-draped circle, or is your modern love story better defined by a bold, geometric shape? By aligning the shape and material with your personal style and venue, you create a ceremony backdrop that isn’t just beautiful, but deeply meaningful too.

Renting, Buying, or DIY-ing Your Wedding Arch?

This is the big question every couple bumps into: do we rent, buy, or just build the thing ourselves? Honestly, there’s no magic answer. The best choice really comes down to your budget, your timeline, and just how much you want to get your hands dirty.

Let’s unpack each option so you can figure out what feels right for you.

The Sheer Convenience of Renting

For most couples, renting an arch is easily the most convenient and stress-free route. Think about it: a professional hire company handles absolutely everything. They deliver it, set it up perfectly, and then whisk it away after the last guest has gone home.

This leaves you free to actually enjoy your wedding day, knowing the main feature of your ceremony is sturdy, beautiful, and in expert hands. You also get access to a huge range of professionally built structures that would be far too complicated or expensive to buy outright.

If you’re planning a wedding in a popular spot, your options are endless. A quick look at services for decor hire in Cape Town, for instance, shows you everything from rustic wooden frames to sleek, modern metal hoops.

Here’s why it’s such a popular choice:

  • Zero logistical headaches: Delivery, setup, and removal are all part of the service.
  • Professional quality: You know the arch will be stable, safe, and look incredible in your photos.
  • So much choice: You can browse a whole catalogue of styles without having to commit to owning one.

Buying an Arch as a Forever Keepsake

Buying your wedding arch turns it from a one-day prop into a beautiful, lasting memento. Just picture that gorgeous wooden frame from your “I do’s” standing in your garden a few years from now, covered in climbing roses. It’s a wonderfully romantic reminder of where it all began.

Of course, this path comes with a few practicalities. You’ll need to figure out how to transport it and where to store it before the wedding (and after!). You’ll also be the one in charge of setting it up on the day. While you can always sell it later, that takes time and effort you might not have post-honeymoon.

Here’s a thought: If you love the idea of having a piece of your wedding day as a permanent fixture in your home, buying could be the perfect sentimental choice. But if you see it becoming just another thing to deal with later, hiring is probably a smarter move.

The Personal Touch of a DIY Project

Going the DIY route gives you complete creative control and can be a great way to save a bit of cash. For a fairly simple wooden arch, the materials might only set you back around ZAR 1,000 to ZAR 1,500. It’s a fantastic opportunity to build something that is one-hundred-percent you.

But—and this is a big but—you have to be realistic. A DIY wedding arch demands time, the right tools (think mitre saws and drills), and a decent level of skill to make sure it’s safe. Before you dive in, have an honest chat with your partner. Do you really have a spare weekend in the crazy run-up to the wedding to build, sand, and paint an arch? A wobbly arch is a safety hazard you definitely don’t need on your big day.

Bringing Your Arch to Life with Flowers and Decor

Lush floral arch for wedding ceremony

Okay, so you’ve picked the perfect arch structure. Now for the fun part—making it yours. This is where a simple frame transforms into a breathtaking centrepiece for your ceremony, packed with your unique style and personality.

Styling an arch for those once-in-a-lifetime photos is about so much more than just adding a few flowers. It’s a chance to play with texture, create depth, and set the emotional tone for your vows. This is the final touch that brings your whole vision together.

The Art of Floral Design

Flowers are nearly always the star of the show, but how you use them is what truly makes a difference. You absolutely don’t need to cover every square inch of the frame to make a powerful statement. In my experience, strategic placement often has a far bigger impact and is a lot kinder to your budget.

Here are a few popular approaches I’ve seen work beautifully:

  • Asymmetrical Clusters: This is a very modern and dynamic look. A large, lush floral arrangement is fixed to one corner or side of the arch, with a smaller, delicate cluster on the opposite side to create balance. It feels wonderfully organic and really draws the eye.
  • The Full Lush Look: For that timeless, romantic feel, you can’t go wrong with covering the entire arch in greenery and blooms. It creates an enchanting garden gateway that’s incredibly impactful, especially for an outdoor ceremony.
  • The Grounded Arch: This is such a stunning and unique approach. Instead of attaching flowers to the arch itself, they are arranged at the base, creating an effect that looks like they are growing up around you. It perfectly frames the couple as if you’re standing in a wildflower meadow.

Your floral design doesn’t have to be symmetrical to be balanced. An asymmetrical arrangement can create incredible visual interest and movement, guiding your guests’ eyes exactly where you want them to be—on you.

For a distinctly South African touch, why not incorporate our beautiful local flora? A King Protea makes a bold, magnificent statement, while delicate fynbos adds incredible texture and a real sense of the Cape landscape.

Beyond the Blooms: Adding Texture and Light

While flowers are often the main event, other decorative elements can elevate your arch from beautiful to truly unforgettable. Mixing in different textures and materials is what adds that extra layer of personality.

Think about how different materials can weave your wedding theme into the arch itself. Flowing fabrics like chiffon or organza are perfect for softening the hard lines of a wooden or metal frame, adding a touch of romance as they catch the breeze. This works especially well for beach or garden weddings.

If you’re leaning towards a bohemian or rustic aesthetic, pampas grass is a fantastic choice. Its feathery plumes add amazing texture and a free-spirited vibe. Dried elements like preserved eucalyptus, bunny tails, and palm spears also introduce different shapes and tones that are just gorgeous.

Creating an Evening Ambiance

Is your ceremony taking place later in the day? If so, lighting becomes a non-negotiable part of your decor. The right lighting can transform your arch into a magical, glowing backdrop as the sun goes down.

  • Fairy Lights: Twinkling fairy lights woven through flowers or draped with fabric create instant romance and wonder. They cast a soft, ambient glow that looks incredible in photos.
  • Edison Bulbs: For a more industrial or modern-rustic vibe, hanging Edison bulbs at different heights creates a stylish, warm, and inviting atmosphere.
  • Candles: There’s nothing more romantic than candlelight. Placing pillar candles inside lanterns at the base of the arch adds a classic, intimate glow.

The key is to combine these elements thoughtfully. You could pair a lush floral cluster with draped chiffon for a classic look, or mix pampas grass with the warm glow of fairy lights for a boho-chic vibe. Getting creative with lighting can be a real game-changer; our guide on using a fairy light curtain for events has some brilliant ideas you can adapt for your arch.

By layering florals, fabrics, and light, you create a multi-dimensional backdrop that truly brings your ceremony space to life.

Working with Your Vendors for a Flawless Setup

Wedding vendors coordinating the setup of an arch for wedding

Getting that stunning wedding arch from a mood board into reality is all about teamwork. You can have the most beautiful design in mind, but if your vendors aren’t communicating, things can get messy. This is where a little bit of coordination becomes your best friend for a stress-free day.

Think of it like a relay race. The rental company brings the arch frame, passing the baton to the florist, who then has to work within the venue’s rules. If one person stumbles, the whole setup can be delayed.

Good coordination just means everyone knows exactly what they need to do—from placing the last flower to packing it all away at the end of the night. It’s how you avoid those last-minute surprises and can actually focus on, you know, getting married.

Questions for Your Venue Manager

The first person to speak to is your venue manager. They are the gatekeeper of the space and know all the dos and don’ts. Before your florist or rental company even show up, you need to get the lowdown from them. A quick chat can save you from major headaches later.

Make sure to ask these crucial questions:

  • Placement Rules: Are there any off-limits areas? Some venues are very particular about their lawns or floors.
  • Attachment Rules: How can we hang things? Are nails, staples, or heavy-duty tape a no-go? Your florist absolutely needs to know this.
  • Timings: What time can vendors get in to start setting up, and when does everything need to be gone? Nail down those delivery and collection windows.

Getting these details sorted first gives your other vendors a clear brief to work with, ensuring your arch for wedding is both beautiful and rule-abiding.

Aligning with Your Florist and Rental Company

Once you know the venue’s rules, it’s time to get your creative team in sync. Your florist and rental company need to be on the same page about delivery, assembly, and breakdown. It’s a mistake to assume they’ll just figure it out between themselves.

The smoothest wedding days I’ve seen are always the ones with meticulous behind-the-scenes planning. Clearly defining who does what for the arch setup and breakdown isn’t just a nice-to-have—it’s essential.

Here’s a quick checklist to run through with them:

  1. Who builds it? Will the rental company assemble the arch structure and leave it ready for flowers, or does the florist’s team handle the entire thing from start to finish?
  2. Who breaks it down? Clarify who takes the flowers off and who collects the actual arch. This is especially important if it needs to be collected late at night.
  3. What’s the rain plan? If you have to move the ceremony inside, are your vendors ready to pivot and set up the arch in the backup spot?

By leading these conversations, you become the glue that holds it all together. This little bit of proactive planning is your ticket to a seamless setup, letting you relax and enjoy the moment.

Your Common Wedding Arch Questions Answered

When you’re deep in the wedding planning trenches, it’s only natural for a few questions to pop up, especially about something as central as your ceremony arch. From budgeting concerns to the dreaded “what if it rains?” panic, let’s tackle some of the most common queries we hear from couples. Getting these answers sorted will help you move forward with confidence.

You want every single detail to be just right, and that means understanding the costs upfront. It’s usually one of the first things couples ask when they start exploring their options.

How Much Does It Cost to Rent a Wedding Arch in South Africa?

The cost to hire a wedding arch in South Africa can really vary, depending on the style, what it’s made of, and how you want it decorated. To give you a general idea:

  • Basic Frame Hire: For a simple, unadorned wooden or metal arch frame, you can expect to pay anywhere from ZAR 800 to ZAR 1,500.
  • Fully Decorated Arch: If you’re dreaming of an arch styled with lush, fresh flowers and beautiful fabrics by a professional, the price typically ranges from ZAR 4,000 to ZAR 15,000, and sometimes more if you have your heart set on rare flowers or a very complex design.

Our best advice? Always ask for a detailed quote that breaks down delivery, setup, and collection fees so there are no surprises later on.

What Is Our Plan B if It Rains on Our Wedding Day?

This is a must-have conversation with both your venue and your decor hire company, and you should have it early on. Many arches, especially wooden ones or those draped in delicate fabrics, don’t hold up well in the rain. Your Plan B should be a dedicated indoor ceremony spot where the arch can be easily moved to.

Make sure you confirm with your florist or rental company if they’re able to handle a last-minute location change on the day. Some of the more modern metal or acrylic arches are more weather-resistant, which might be a smarter choice if you’re getting married in a season known for unpredictable weather.

Can We Repurpose the Ceremony Arch for the Reception?

Absolutely! And you totally should. Repurposing your arch is a brilliant way to make your decor budget stretch further and get more enjoyment out of such a beautiful statement piece. It means your investment gets to shine throughout the entire celebration, not just for the half-hour ceremony.

A popular move is to place the arch behind the main bridal table, which creates a stunning backdrop for all the speeches and photos. You could also use it to frame your wedding cake display or position it as a grand entrance feature for your reception area. Just be sure to chat through the logistics of moving it with your wedding coordinator or florist to make sure it happens smoothly and safely between the ceremony and reception.


Ready to find the perfect arch for your wedding? At ABC Hire, we offer a stunning selection of high-quality arches and event furniture to bring your vision to life. Explore our collection and let us help you create an unforgettable ceremony backdrop at https://abchire.co.za.

Your Guide to a Perfect Fairy Light Curtain Backdrop

A fairy light curtain is so much more than just a string of lights; it’s one of the most effective tools I’ve seen for completely transforming an event space in minutes. With just one simple piece of decor, you can instantly create a magical, warm, and unforgettable atmosphere, turning any plain wall into a show-stopping backdrop.

Creating an Unforgettable Atmosphere with Fairy Lights

Image

Let’s be honest, very few decorations can alter a space as quickly and dramatically as a wall of light. A cascade of warm, twinkling lights is an instant atmosphere creator, making it a bit of a secret weapon for event designers and party hosts across Cape Town.

Forget generic decor; this is about crafting an experience.

The Visual Impact on Event Spaces

The real magic of a fairy light curtain is its versatility. It can be the star of the show or a subtle supporting element that elevates everything else around it.

I’ve seen them used in so many creative ways:

  • Wedding Receptions: Imagine a curtain of lights behind the main table, casting a romantic glow on the happy couple. It creates a dreamy, soft-focus background that looks absolutely incredible in photos.
  • Corporate Events: For a more professional setting, a sleek, cool-white light curtain can frame a stage or create a sophisticated focal point behind a registration desk. It adds a touch of class without being distracting.
  • Birthday Parties: A vibrant fairy light curtain can turn a plain wall into a fantastic photo booth backdrop, encouraging guests to snap and share memories all night. This works especially well when you pair it with other fun rentals. You can get some more ideas in our guide on hiring a cotton candy machine.

A single wall of lights can make a room feel warmer, more intimate, and infinitely more special. It’s often the difference between a simple gathering and a truly memorable occasion.

A Growing Trend in South Africa

This love for atmospheric lighting is a trend that’s really taking off. While specific data on fairy light curtains is hard to come by for the South African market, the demand for decorative, energy-efficient lighting solutions is clearly on the rise.

We’re seeing a huge shift towards more aesthetically pleasing event and home decor. The LED market, which includes these beautiful light curtains, is benefiting massively from this. It’s all about creating a vibe, and these lights deliver every time.

Choosing the Right Fairy Light Curtain for Your Vision

This is where the magic really starts to happen. Picking the perfect fairy light curtain is the first step in bringing your creative vision to life. Get this right, and you set the entire mood for the event. Get it wrong, and it can feel a little… off. It’s about more than just brightness; it’s about matching the light’s personality to your theme and venue.

Light Colour: The Mood-Setter

Think of it like choosing a paint colour for a room.

Warm white lights give off that soft, yellowish glow that just feels cosy and romantic. They’re my go-to for rustic barn weddings, intimate anniversary dinners, or any event where you want people to feel instantly welcome and relaxed.

On the other hand, cool white lights are crisp, modern, and vibrant. These are brilliant for corporate functions, slick birthday parties, or when you’re going for that stunning winter wonderland effect.

Don’t underestimate the power of colour temperature. The choice between warm and cool white will fundamentally alter the mood of your space and how it appears in photographs.

Deciding on a Power Source

The practical side of things can’t be ignored, and your venue’s layout will pretty much decide this for you. Each power option has its pros and cons, so have a good think about where you’ll be setting up.

Here’s a quick rundown of what I’ve learned from experience:

  • Plug-In: This is your most reliable bet for consistent, long-lasting brightness. Perfect for indoor events where you have plenty of wall sockets. You can set them up and forget about them, knowing they won’t dim halfway through the speeches.
  • Battery-Operated: Absolute lifesavers for venues with tricky power situations. Think remote gardens, historic buildings with protected walls, or anywhere you want to avoid a mess of extension cords. They give you total freedom to place lights anywhere.
  • Solar-Powered: A fantastic, eco-friendly choice for outdoor events that start in the day and drift into the evening, like a garden party or a beach celebration. They look incredible alongside other outdoor rentals, like the ones in our guide to Cape Town umbrella hire.

To help you decide at a glance, here’s a simple comparison of the features.

Fairy Light Curtain Feature Comparison

Use this table to quickly compare key features and decide which type of fairy light curtain is best for your event.

Feature Plug-In Battery-Operated Solar-Powered
Best For Indoor events, long durations Tricky venues, outdoor spaces Outdoor day-to-night events
Brightness Strongest & most consistent Can dim as batteries weaken Varies with sun exposure
Portability Limited by cord length Highly portable, no cords Portable, needs sun access
Eco-Friendly Standard energy use Depends on battery type High
Setup Needs nearby power outlets Easiest & most flexible Needs placement in sunlight

Ultimately, the best choice really hinges on your specific venue and how you plan to use the lights throughout your event.

Style and Design Considerations

Beyond the technical stuff, the actual design of the curtain plays a huge part in the final look.

A uniform drop style, where every strand is the same length, gives you a very clean, polished backdrop. It’s fantastic for creating a solid wall of light behind a main table or for framing a stage with a sleek, modern feel.

If you’re after something a bit more whimsical and organic, an icicle-style curtain is perfect. The staggered, varying lengths add a touch of relaxed, bohemian charm. I love using these to create a dreamy, starry-night effect.

It’s no surprise that these lights have become so popular. The global LED curtain lights market was valued at a massive USD 2.17 billion in 2024 and is only expected to keep growing. It just goes to show how much people value beautiful, energy-efficient lighting for their events and homes. You can read more about the growth of the LED curtain lights market on Expert Market Research if you’re interested in the trends.

How to Hang Your Fairy Light Curtain Like a Pro

Right, this is where the magic really starts to happen. Getting the installation right is the key to that polished, professional look, and it saves you from the nightmare of tangled wires and wonky strands. Let’s go through the tools and tricks that seasoned event planners swear by.

First off, get your toolkit ready. You don’t need a huge box of gear, just a few essentials that make all the difference. For most indoor walls, especially at venues where you can’t leave a mark, damage-free adhesive hooks are your absolute best friend. If you’re working with a more rustic vibe—think exposed beams or wooden frames—a handful of clear zip ties or small nails will do the trick. And a measuring tape? Non-negotiable for getting your spacing perfect.

Preparing Your Space for Installation

Before you even think about unwrapping those lights, take a second to prep your surface. Give the wall or window frame a quick wipe down to get rid of any dust. This is a crucial step if you’re using adhesive hooks, as it helps them get a proper grip that’ll last the whole event.

Next, measure the width of the space you want to cover. Then, unroll your fairy light curtain on the floor, making sure to keep the main horizontal wire separate from the vertical strands. Trust me on this one—this simple move prevents a tangled mess and makes the whole process about ten times easier. It’s a small detail that saves you a massive headache.

This basic workflow is your secret to a quick, clean setup. This little infographic breaks down the core steps for a handy visual guide.

Image

Thinking about it as measure, mount, and hang really simplifies things and helps make sure you don’t miss a step.

Mounting Techniques for Different Surfaces

The surface you’re working with will completely change your game plan. You wouldn’t tackle a painted wall the same way you would a delicate window frame.

  • Painted Drywall: This is what you’ll run into most of the time. Use clear, removable adhesive hooks and space them evenly across the top. Make sure you follow the instructions on the packet, especially the bit about waiting before you hang anything, to get a really strong bond.
  • Window Frames: Small, clear hooks work a charm here too. You could also use clear adhesive tape for a super discreet look, just securing the main wire along the top of the frame.
  • Exposed Beams or Archways: This is where zip ties are a game-changer. They’re strong, practically invisible from a distance, and won’t damage the structure.
  • Behind Sheer Fabric: For that soft, dreamy glow, hang your fairy light curtain first, then drape a layer of tulle or organza over it. Use a separate set of hooks or pins to secure the fabric.

Here’s a pro tip: always start hanging from the end closest to your power source. This way, you know for sure that your cord will reach the socket without having to stretch the lights awkwardly or scramble for an extension lead at the last minute.

By picking the right tools and matching your technique to the surface, you’ll guarantee an installation that’s both stunning and secure. A well-hung fairy light curtain looks intentional and elegant, lifting the whole atmosphere of your event from simply decorated to truly magical. Getting this part right sets the stage for everything else.

Creative Styling Techniques for a Breathtaking Display

Image

Right, so your fairy light curtain is up and secure. That’s the groundwork done. But just hanging the lights is like setting the stage; the real magic happens when you start styling. This is where we go beyond the basics and add those creative touches that turn a simple wall of light into an unforgettable centrepiece.

The secret is all about playing with depth and texture. A single layer of lights is pretty, sure, but when you start combining it with other elements, you get that rich, professional look everyone wants. It’s the difference between a nice decoration and a truly immersive experience for your guests.

Layering with Fabrics for a Dreamy Effect

One of the most effective tricks in the book has to be layering your fairy lights with sheer fabrics. Think tulle, organza, or chiffon. These materials catch the light in the most beautiful way, diffusing it to create a soft, ethereal glow that’s incredibly romantic and looks amazing in photos.

Here’s how to nail this look:

  • Hang the lights first: Get your curtain installed right up against the wall or backdrop.
  • Drape the fabric over the top: Use a separate rod or another set of hooks to hang a panel of sheer fabric just a few centimetres in front of the lights.
  • Let it hang loose: Don’t pull the fabric taut. You want it to drape naturally, creating soft folds. A slightly gathered look always works best.

We see this done all the time for weddings and engagement parties. It instantly adds a layer of sophistication and romance to any venue.

Weaving in Greenery and Florals

If you’re aiming for a more organic, bohemian, or rustic theme, you have to bring in some natural elements. Weaving greenery (real or faux) and floral garlands through the strands of your light curtain adds incredible texture and a touch of natural beauty.

Picture a wedding reception with a warm white fairy light curtain as the backdrop for the main table. By artfully weaving some eucalyptus garlands and a few clusters of white roses along the top and down the sides, you create a stunning focal point that pulls the whole room’s decor together. Simple, but so effective.

Pro Tip: Less is often more. The goal here is to complement the lights, not completely cover them. A few well-placed garlands will have a much bigger impact than a dense wall of foliage. You want those lights to twinkle through the gaps for that truly magical effect.

The demand for creative lighting is exploding globally. While specific numbers for the South African market are hard to come by, the smart curtain fairy light market hit a global size of USD 1.21 billion in 2024. That just shows how much people value these kinds of creative lighting options for their events. You can dig deeper into the growth of the smart lighting market on Growth Market Reports.

Creating Thematic Focal Points

Don’t just think of your fairy light curtain as a background—make it the main attraction! By being strategic with where you place and how you style it, you can highlight specific areas and create a genuine ‘wow’ moment for your guests.

For instance, you could:

  • Frame a Dessert Table: Make your cake or sweet treats the undisputed star by placing a shimmering light curtain behind them. It naturally draws everyone’s eyes and creates a picture-perfect spot.
  • Design a “Starry Night” Ceiling: For indoor events with high ceilings, hanging multiple curtains overhead can create the illusion of a sparkling night sky. This works especially well in marquees, which you can read more about in our guide on hiring a gazebo.
  • Build a Grand Entrance: Drape lights around an entryway or arch to welcome guests with an immediate sense of occasion and magic from the moment they arrive.

Right, so you’ve done the hard work, stepped back to admire your masterpiece, and… something’s not quite right. A whole section is dark, or it looks a bit wonky. Don’t stress! This happens to everyone, even us pros.

Think of this as your setup first-aid kit. Most of the little hiccups you’ll run into when hanging a fairy light curtain are surprisingly easy to fix. Let’s tackle some of the most common issues so you can get that perfect glow.

What to Do When a Section of Lights Is Out

It’s the moment that makes your heart sink. You’ve got the curtain hung perfectly, you plug it in, and one long, lonely strand refuses to light up. Before you start thinking the whole set is a dud, take a deep breath and check a couple of things.

First, follow that dark strand all the way up to where it meets the main horizontal wire. Sometimes, during the excitement of unboxing and hanging, one of these little connections gets pulled loose. Give it a gentle but firm push back into place – often, that’s all it needs. If that doesn’t do the trick, have a quick look along the wire itself for any obvious pinches or damage.

  • Check the Connection: Make sure the base of the non-working strand is pushed securely into the main wire.
  • Inspect the Wire: Scan for any little breaks or damage in the thin copper wire.
  • Swap Power Sources: It’s worth a shot! Try a different plug point or fresh batteries just to rule out a power issue.

Fixing Unevenly Spaced Strands

You’ve got them up, but the spacing is all over the place. One gap is wide, the next is narrow, and the whole thing just looks messy. You absolutely do not have to take it all down and start from scratch.

This is an easy one. Most fairy light curtains are designed so you can gently slide the vertical strands along the main horizontal wire. Just unhook the main wire from its mounting points, and manually shuffle the strands left or right until they look perfectly spaced. If you’re a perfectionist, grab a tape measure to get the gap between each strand spot on.

A tiny adjustment here makes all the difference between something that looks DIY and a truly professional installation. Taking a few extra minutes to get the spacing just right is a small effort that pays off big time.

Safely Hiding Cords and Wires

Nothing ruins the magic of a floating wall of light faster than a tangled mess of extension cords snaking across the floor. The goal is to make the lights look effortless, and a huge part of that illusion is hiding how they get their power.

Clear or white adhesive clips are your best friend here. Use them to run the power cord neatly along a skirting board, down a corner, or behind a door frame where no one will see it. If you’re setting up near furniture, even better – just tuck the cord behind a couch or under a rug. For events, we always use gaffer tape that matches the floor colour. It keeps the wires flat, prevents a tripping hazard, and keeps the whole look clean and polished. Get the cords out of sight, and all the attention will stay right where you want it: on your beautiful fairy light curtain.

Your Fairy Light Curtain Questions, Answered

Image

Let’s quickly run through some of the questions we get all the time about using fairy light curtains for events. Getting these details sorted will help you finalise your plans with confidence, knowing your setup will be every bit as magical as you’ve pictured.

How Long Does It Take to Set Up a Fairy Light Curtain?

This can change depending on your setup, but a good rule of thumb for a standard 3×3 metre curtain is to budget around 30-45 minutes. That gives you plenty of time to carefully get the lights untangled, measure and place your hooks properly, and hang the curtain without rushing.

If you’re getting a bit more creative by layering them with fabric or weaving in some florals, you’ll probably want to set aside closer to an hour. The real key here is patience—rushing is when things get tangled and you end up with uneven spacing.

Can I Use Them Outdoors?

Absolutely, but you have to be smart about it and pick the right lights. Not all fairy light curtains are made to brave the great outdoors. If you’re planning an event outside, it’s essential to look for lights with an IP rating (like IP44 or higher), which tells you they’re protected against water splashes.

For an outdoor setup, think about these options:

  • Battery-operated curtains are fantastic for flexibility, saving you the headache of finding an outdoor plug point.
  • Solar-powered lights are a brilliant, eco-friendly choice, especially for events that kick off in the afternoon and run into the evening.
  • If you go with a plug-in model, double-check that the plug and any extension cords are also rated for outdoor use and kept safe from moisture.

Choosing a fairy light curtain specifically designed for outdoor use isn’t just about making sure they work; it’s a critical safety step. Always read the product specs before you hang any electrical decor outside.

What Is the Best Way to Store a Fairy Light Curtain After Use?

Storing them properly is the secret to avoiding a tangled mess next time. The biggest mistake you can make is to just bunch them up and chuck them in a box—you’ll be greeted by a frustrating knot when you pull them out again.

Instead, grab a piece of sturdy cardboard or even a plastic coat hanger. Start by neatly wrapping the main horizontal wire around your cardboard or hanger. After that, carefully wrap each vertical strand on its own or in small, easy-to-manage bundles. This keeps everything organised and ready to go for your next event.

Can a Fairy Light Curtain Damage Walls?

This is a huge concern, especially when you’re in a hired venue. The great news is, with the right tools, you can hang your lights without leaving so much as a scratch. For most painted walls, your best friends are damage-free, removable adhesive hooks.

These hooks are made to hold a surprising amount of weight and then peel off cleanly without ripping the paint. Just make sure you follow the instructions on the packet for putting them up and taking them down—especially the part about letting the adhesive set before you hang anything. A little bit of prep work will keep the venue’s walls looking perfect.


Ready to create a truly magical atmosphere at your next event? ABC Hire offers a stunning range of lighting and decor rentals to bring your vision to life.

Explore our collection and book your rentals today at https://abchire.co.za.

📍 Cape Town + Winelands