Trestle Tables Hire Cape Town Event Guide

When you’re pulling together an event in Cape Town, hiring trestle tables is one of the smartest, most stylish, and budget-friendly moves you can make. It doesn’t matter if it’s a wedding, a corporate function, or a big family get-together; trestle tables are the ultimate blank canvas. They provide a practical, versatile foundation for creating an experience your guests won’t forget. Let’s get into why these tables are an event planner’s best-kept secret.

Why Trestle Tables Are Your Event’s Secret Weapon

Rustic wooden trestle table with X-frame legs on concrete floor in event venue space

Think of a trestle table as the starting point for your event’s whole design—a sturdy, adaptable surface that holds up your entire creative vision. Unlike your standard round tables, their long, rectangular shape naturally gets people talking and dining together. This makes them absolutely perfect for creating that warm, inclusive vibe everyone loves.

Their simple, clean lines mean they fit in just about anywhere. Picture them draped in elegant, flowing linens for a sophisticated wedding in Stellenbosch. Or imagine them left completely bare, showing off their rustic wooden charm at a wine farm in Franschhoek. You could even line them up for a sleek, modern corporate gala right in the heart of Cape Town. This adaptability is their real superpower.

The Smart Choice for Any Occasion

Choosing to hire trestle tables isn’t just about looks; it’s a strategic move that helps your budget and simplifies your logistics. Their shape is incredibly efficient for seating a lot of guests, letting you get the most out of your venue’s space without it feeling cramped. They’re also a breeze to transport, set up, and arrange into different layouts—from long, flowing banquet-style rows to more intimate U-shaped setups.

Trestle tables offer that perfect marriage of form and function. They give you the practical framework you need for a successful event while also acting as a beautiful canvas for your unique styling and decor.

Here in South Africa, trestle tables have become a staple in the event rental world because they just work so well and look so good. They typically range from 1.8m to 2.4m long and can comfortably seat between 8 to 12 guests, making them a great choice for gatherings of any size. Rental companies across the country offer these at really competitive daily rates, often somewhere between R100 to R150 per table, which proves just how affordable they are.

If you’re looking for great local options, check out Cherri Hire to get a feel for what’s available. This guide will walk you through everything else you need to know, from picking the right style to absolutely nailing your seating plan.

Choosing the Perfect Trestle Table for Your Theme

Think of your trestle table as the canvas for your event’s masterpiece. The right choice sets the entire mood and brings your theme to life. It’s one of those foundational decisions that can make or break the atmosphere you’re trying to create. A raw, unfinished wooden trestle table, for instance, just feels right at a rustic vineyard wedding, while a dark, polished wood finish adds that touch of class needed for a corporate gala.

The table you choose sends a signal to your guests. Are we going for relaxed and informal, or is this a more structured, elegant affair? The real magic of trestle tables is how well they adapt to either vibe, all depending on the style you pick.

Matching Material to Your Mood

The material is probably the most defining feature of a trestle table. It’s the first thing people notice, and it does the heavy lifting in establishing your event’s personality. A table isn’t just a place to put plates and glasses; it’s a major piece of your decor that anchors the whole room.

To help you decide, let’s look at the most popular options available for hire.

Comparing Trestle Table Styles for Your Event

This table breaks down the common trestle table types you’ll find, helping you match the right style to your event’s theme and practical needs.

Table Type Best For (Event Theme) Material Pros Cons
Rustic Pine/Oak Farm-style, bohemian, rustic, outdoor weddings Natural Wood (Pine, Oak) Warm, authentic feel. Shows beautiful wood grain. Very sturdy. Can be heavy. May show marks more easily if not protected.
Sleek Dark Wood Corporate functions, gala dinners, formal celebrations Stained/Polished Wood Elegant and sophisticated. Hides minor spills well. Versatile for many themes. Can feel too formal for casual events. Scratches can be noticeable.
Industrial Metal & Wood Urban, modern, contemporary parties, brand activations Wood Top, Metal Legs Stylish and on-trend. Lightweight and often easy to move. Metal legs might not suit very traditional or soft themes.
Basic Plastic/Resin Budget-friendly events, kids’ parties, community fairs High-Density Polyethylene Lightweight, durable, and easy to clean. Most affordable option. Lacks aesthetic appeal; almost always requires a tablecloth.

Choosing the right material is all about aligning the table’s character with your event’s story. Whether you need the down-to-earth charm of rustic pine or the sleek confidence of dark wood, getting this detail right makes all the difference. For more ideas on how to pair these tables perfectly, have a look at our guide on wooden tables and chairs.

The trestle table’s simple design—a top resting on two supports—has its roots in medieval Europe, but it has found a special place in South Africa’s vibrant event scene. Its construction makes it incredibly easy to transport and store, which is a massive win for event planners juggling tight schedules and different venues.

This classic design isn’t just practical; it’s also incredibly efficient. The lack of fixed corner legs means you can seat more people along the sides, boosting your guest capacity by up to 15% compared to standard tables. When you’re trying to maximise your venue space, that’s a huge advantage.

Ultimately, you want a table that doesn’t just fill a space but actively tells your event’s story. By thinking carefully about the material and finish, you turn your trestle table hire into a deliberate design choice that elevates the entire experience for your guests.

Getting Your Event Layout and Seating Plan Just Right

This is where a talented event planner truly makes their mark—transforming an empty venue map into a space that feels both functional and absolutely stunning. When you hire trestle tables, their long, clean lines give you incredible creative freedom, but the real secret to success is mastering the layout. This isn’t just about cramming tables into a room; it’s about crafting an experience for your guests from the moment they walk in.

The first, most practical step is figuring out your seating capacity. A standard 1.8m trestle table is perfect for six to eight guests – that’s usually three on each side, with the option of one at each end if your floor plan allows. For a bit more room, a longer 2.4m table comfortably fits eight to ten guests. Getting this basic math right is the bedrock of your entire event design.

From Numbers to Atmosphere

Once you know how many people each table holds, you can start to play with the flow of the room. A great layout feels deliberate, guiding guests and staff smoothly through the space. Imagine long, dramatic banquet-style rows of trestle tables; they create an incredible sense of community and grandeur, making them ideal for weddings or big celebratory dinners.

On the other hand, a U-shaped arrangement is a brilliant choice for presentations or speeches, as it naturally draws everyone’s focus to a central point. For corporate events, this setup is a winner because it boosts engagement and gives the head table or speaker maximum impact.

The style of the table itself also plays a huge part in telling your event’s story, whether you’re going for rustic charm, modern minimalism, or classic elegance.

Three trestle table style options showing rustic wood plank, modern light wood, and classic dark wood designs

Dodging Common Layout Pitfalls

One of the biggest blunders we see is overcrowding. It’s so important to leave enough space for people to move around. As a rule of thumb, aim for at least 1.2 to 1.5 metres for your main walkways. This gives guests and catering staff plenty of room to navigate without bumping into chairs or each other.

Remember, a successful layout isn’t just about where people sit; it’s about how they experience the space. Good flow prevents bottlenecks, makes service smoother, and contributes to a relaxed, comfortable atmosphere for everyone.

Think about the natural paths guests will take—from the entrance to the bar, to the restrooms, and eventually to the dance floor. Your table plan should support this movement, not block it. A well-designed layout just feels right.

If you need a little more inspiration on how different furniture can work together, have a look at our complete guide to chair and table rental. By focusing on both your seating numbers and how the space feels, your trestle tables will become the foundation of a perfectly executed event.

Styling Trestle Tables to Create an Atmosphere

Elegant outdoor table styling with white plates, wine glasses, blue napkins and fresh greenery garland

This is where the real fun begins. A bare trestle table is a blank canvas, and its true potential shines through when you start to layer on your own unique style. With a few smart choices, you can turn a simple wooden surface into the heart and soul of your event, creating a vibe that your guests will feel the moment they take their seats.

Think of it this way: your first decision is whether the table itself is part of the décor. A beautiful, rustic wooden table left completely bare can be stunning, perfect for a relaxed Winelands wedding. On the other hand, a crisp white tablecloth creates an instant sense of classic formality.

This is your foundational choice. Are you going for naked and natural, or dressed and elegant? Everything else flows from here.

Building Your Tablescape Layer by Layer

Once you’ve set your base, it’s time to build up the texture and colour that will tie everything together with your event’s theme. Every single element you add from this point on should feel deliberate and contribute to the overall look.

A table runner is a fantastic tool. It can add a slash of colour or a specific texture down the centre of the table without hiding it completely. Imagine a flowing silk runner for a touch of luxury, or a simple hessian one to lean into a rustic, farm-style feel. It’s a simple trick that draws the eye down the entire length of the table, creating that wonderful banquet effect.

Next up, the place settings. This is where you can really inject personality.

  • Placemats: These can introduce new materials, like woven seagrass for a beachy, bohemian look or even sleek slate for something more modern and edgy.
  • Charger Plates: Nothing says “special occasion” quite like a charger plate. A touch of metallic gold or silver instantly makes a place setting feel more luxurious.
  • Napkins: Don’t overlook the humble napkin! The choice of fabric and even the way it’s folded can make a huge impact. A simple fold with a sprig of rosemary tucked in is just as beautiful as an elaborate knot.

And if you’re aiming for a truly dramatic, high-fashion look, don’t be afraid to go dark. Exploring options like black table cloths can create a seriously chic and modern atmosphere where glassware and metallic cutlery really pop.

The Finishing Touch: Centrepieces and Lighting

The centrepiece is the star of the show, but it has to play nicely with your guests. It needs to be beautiful without blocking conversation. This is where long trestle tables give you a massive creative advantage, allowing for a design that flows down the table.

A classic mistake is using centrepieces that are too tall. They look great in photos, but they create a wall right down the middle of the table, killing conversation. Low, sprawling arrangements like greenery garlands or a collection of small bud vases are perfect for trestles because they encourage that communal, chatty atmosphere.

Think beyond just flowers, too. A line of candles in varying heights creates a romantic, flickering glow that is hard to beat. For a more modern party vibe, weaving subtle LED fairy lights through a garland can add a touch of magic as the sun goes down.

Ultimately, your goal is to create a focal point that brings people together, not one that keeps them apart. The way you choose to style your trestle tables hire can completely transform the feeling in the room.

Right, so you’ve picked out your tables. Now comes the part that can feel a bit daunting: the money and the logistics. But don’t worry, getting this sorted is actually pretty straightforward and key to a stress-free event. Knowing what to expect with costs and the whole rental process—from booking to collection—will give you the confidence to plan everything perfectly.

The final price on your quote isn’t just a random number; a few key things will influence it. The size and type of table are the big ones. A big, beautiful wooden table will naturally cost a bit more to hire than a smaller, standard plastic one. The number of tables you need and how long you need them for will also shape the final cost. A weekend wedding hire is a different beast to a single-day corporate function, and the price will reflect that.

How the Rental Process Usually Unfolds

Once you know what you need, the booking part is easy, but it pays to be on the ball. Any decent hire company in Cape Town will have a clear, simple process to get your furniture locked in.

Here’s what that typically looks like:

  1. Enquiry & Quote: You’ll send over your event date, where it’s happening, and a rough idea of the table styles and numbers you’re after. They’ll come back with a detailed quote.
  2. Confirmation & Deposit: To lock in your booking, you’ll usually need to pay a deposit, which is often around 50% of the total hire cost.
  3. Final Payment: The rest of the balance is typically due a week or two before the big day.
  4. Sorting Out Logistics: The hire company will then chat with you or your venue manager to sort out delivery times and any specific setup needs.
  5. Delivery & Setup: On the day, their crew will deliver and, if you’ve arranged it, set up the tables exactly where you want them.
  6. Collection: After the party’s over, the team will come back at a pre-arranged time to pack up and collect everything.

A Few Key Things to Keep in Mind

Beyond those basic steps, a couple of details can really make or break the experience. Delivery fees, for instance, are almost always worked out based on how far your venue is from their warehouse. An event in Paarl or Franschhoek will have a different delivery charge compared to one in the Cape Town CBD.

It’s also super important to get your head around the company’s damage policy. Accidents happen! Make sure you’re clear on what happens—and what it might cost—if a table gets a bad stain or a scratch. Always give the rental agreement a good read before you sign anything.

We see a massive surge in demand for trestle tables—often by 40-50%—between September and December. This is peak season, thanks to all the weddings and year-end functions, and it definitely affects availability.

This seasonal rush means booking well ahead is a must, especially if you have your heart set on those popular rustic wooden tables. The good news? Trestle tables are built tough. They have a very low damage rate, usually under 5% for each rental, which helps keep the hire prices down for everyone. If you want to dive deeper into these industry trends, you can check out more insights on local rental statistics. A little bit of forward planning goes a long way in making sure you get the perfect tables without any last-minute drama.

Tips for Cape Town and Winelands Venue Planning

Planning an event in the Western Cape is a dream. You’ve got everything from the buzz of the Cape Town CBD to the quiet, rolling hills of Stellenbosch and Franschhoek. But these stunningly different locations come with their own unique logistical puzzles, especially when it comes to your trestle table hire. A city delivery might be a straight shot, but a remote wine farm needs a bit more forward-thinking.

The secret to a smooth setup is understanding the specific challenges of your chosen venue. For example, many of the historic Winelands estates have beautiful but narrow, winding farm roads. It’s absolutely essential to check with your rental company that their delivery trucks can actually get to the property. The last thing you want is a massive truck stuck on a tight corner, throwing your entire schedule into chaos.

Navigating Venue-Specific Rules

Before you lock in your trestle table order, have a proper chat with your venue manager. They know the space inside and out and can give you invaluable local advice.

Here are a few key things to ask your venue:

  • Access Times: When can suppliers deliver and collect? Some venues have very strict windows to avoid disrupting their own operations or other guests.
  • Furniture Restrictions: Are there any rules about the type of furniture allowed? This is especially important for historic wooden floors or delicate lawn areas.
  • Supplier Coordination: How do they like to work with outside suppliers? Clear communication between your venue and your rental company is the key to a stress-free day.

Think of it as a partnership. Your venue wants your event to be a success just as much as you do. By asking about potential hurdles upfront, you can make sure there are no nasty surprises on the day.

Matching Your Tables to the Scenery

One of the best parts of a Cape Town or Winelands event is the incredible backdrop. You want your trestle tables to complement the scenery, not clash with it. A rustic, raw wood table looks absolutely breathtaking against vineyard hills, while a sleeker, darker wood finish might be the perfect fit for a chic city venue with skyline views.

Don’t forget the practical side of an outdoor setup, either. If you’re setting up on a lawn, you need to be sure the table legs will be stable on the uneven ground. Chatting about these details with your supplier ensures your trestle tables hire not only looks beautiful but is perfectly suited to its unique Cape setting. That’s how you guarantee a seamless and memorable experience for you and your guests.

Here are the answers to a few questions we often get about hiring trestle tables. Getting these sorted out will give you complete peace of mind as you put the final touches on your plans.

How Far in Advance Should I Book?

If your event is in Cape Town or the Winelands during the busy season (that’s usually September to December), we strongly suggest booking your trestle tables at least three to six months ahead. The really popular styles, like our rustic wooden tables, get snapped up quickly. Booking early means you get exactly what you want without any last-minute stress.

Planning something in the off-season or a smaller get-together? You can often get away with booking one to two months in advance. Still, it never hurts to lock things in as soon as you’ve confirmed your date and venue.

Can Trestle Tables Be Used Outdoors?

Absolutely! Many of our trestle tables, especially the solid wood and durable plastic options, are perfect for outdoor events. Just give us a heads-up that you’re planning an outdoor setup when you book.

We can then recommend the best materials to handle potentially uneven ground and let you know if there are any specific care instructions, especially if the weather turns. This helps make sure your outdoor event is both stunning and stable.

Always take a moment to check your hire agreement for the company’s policy on weather-related damage. It’s a simple step that can save you from unexpected costs if the famous Cape weather decides to throw a surprise your way.

What Happens If a Table Is Damaged?

From a spilled glass of red wine to an accidental scratch, we know that things can happen. Most rental companies have a clear damage policy in their agreement, which usually involves a damage waiver or a security deposit.

A little bit of wear and tear is generally expected, but significant damage might lead to a fee for repair or replacement. It’s a good practice to inspect the tables when they arrive and let us know about any pre-existing issues right away. This kind of open communication is the key to a smooth trestle tables hire experience.


Ready to bring your event to life with the perfect tables? At ABC Hire, we offer a stunning range of high-quality trestle tables and event furniture to make your vision a reality. Check out our collection and get a quote today at https://abchire.co.za.

Backdrop to Hire: Cape Town Event Backdrops Guide

Think of a backdrop as the visual anchor for your entire event. It’s the single element that can transform an ordinary space into something truly memorable. Whether you're planning a wedding, a corporate function, or a big party, the right backdrop sets the tone, elevates your theme, and gives your guests the perfect spot for those all-important photos.

Finding the Perfect Event Backdrop

An elegant wedding backdrop with white draping and floral arrangements.

Choosing a backdrop is so much more than just filling an empty wall. It’s a major design decision that pulls the whole atmosphere of your event together. The material, style, and sheer scale all play a part, so it’s worth getting to know your options before you commit. The good news is, from soft and romantic to bold and corporate, the choices are endless.

Classic Fabric Backdrops

You can never go wrong with fabric. Timeless choices like velvet, chiffon, and sequin drapes are staples for weddings and elegant galas for a reason. Velvet brings a rich, luxurious texture that absorbs light beautifully, instantly creating a dramatic and sophisticated mood.

Chiffon is its lighter, airier cousin—perfect for softer, more romantic settings, especially when you weave in some fairy lights. And for a pop of pure glamour? A sequin or shimmer wall is a must for birthday parties, awards nights, and festive celebrations.

Modern Printed and Custom Backdrops

When it comes to corporate events, product launches, or themed parties, a custom-printed vinyl backdrop is a game-changer. These allow for high-resolution graphics, company logos, or any pattern you can dream of to align perfectly with your branding. A well-designed printed backdrop does double duty: it’s a professional background for stage presentations and a "step-and-repeat" wall for guest photos, which is fantastic for brand visibility.

Key Takeaway: Don't underestimate the power of a backdrop. It's not just a background; it’s an interactive element that defines a space, guides guests, and becomes a central feature of your event's story.

Trending Statement Backdrops

Lately, we’ve seen a big move towards more immersive and three-dimensional designs. If you’re looking to create an unforgettable focal point that gets people talking, these are the way to go.

  • Floral and Greenery Walls: These bring the outside in, creating a fresh, vibrant atmosphere that’s full of life. They are incredibly popular for weddings, bridal showers, and spring events, adding a beautiful, organic texture to any space.
  • Wooden Arches and Structures: A rustic wooden arch is just a beautiful centrepiece for a winelands wedding ceremony in Stellenbosch or Franschhoek. These structures are a blank canvas—you can adorn them with flowers, drapery, or lighting to match your theme. If this is your style, it’s worth exploring different options for wedding arch hire to get some inspiration.
  • LED Video Walls: For the ultimate modern impact, nothing beats an LED video wall. It opens up a world of dynamic content possibilities. You can display moving graphics, videos, or changing colours, making it a powerful tool for concerts, tech conferences, and high-energy corporate events.

Ultimately, the best backdrop is one that feels like it truly belongs in your venue and fits your theme. Try to visualise the event from your guests' perspective. An elegant drape behind the main table at a Cape Town wedding creates a real sense of occasion, while a branded wall at a corporate event in the city centre reinforces professionalism and brand pride.

Getting Backdrop Sizing and Placement Right

A beautifully sized and placed floral backdrop at an outdoor event.

You can pick the most incredible backdrop, but if it's too small for the room or shoved in a weird corner, it’s just not going to work. Getting the scale and positioning spot-on is what separates an amateur look from a professional, high-impact one. This is about more than just looking good—it affects your guests' experience, the quality of your photos, and even safety.

Before you even think about looking at a backdrop to hire, get out a measuring tape. You need the exact dimensions of the space you have in mind. Make a note of the ceiling height, the available floor area, and anything that might get in the way, like pillars, fire exits, or any permanent fixtures.

If you’re planning an outdoor event somewhere in the Cape Winelands, you also need to think about things like uneven ground and wind. Your supplier will need to know this to make sure the backdrop can be secured properly and safely.

Matching Size to Purpose

The right dimensions really come down to what you’re using the backdrop for. The most common mistake I see is people choosing a backdrop that’s too small, and then every photo has distracting bits of wall or random background clutter creeping in around the edges. Any good supplier will help you figure this out, but it’s always smart to have a general idea of the standards.

  • Photo Booths: For a photo booth, you’ll want a backdrop that’s at least 2.4 metres wide. This gives a small group of three or four people enough room to pose without feeling squashed. If you expect bigger group shots, go for 3 metres or even wider.
  • Ceremony Arches: A standard wedding arch is typically around 2.2 metres tall and 1.8 metres wide. This creates a beautiful frame for the couple without completely dwarfing them.
  • Stage Backgrounds: When it comes to a stage or the main table, you need to think big. The backdrop should be wide enough to cover the area behind all the key speakers or the entire length of the top table. You're often looking at something around 3 metres wide by 2.4 metres high, if not larger.

Pro Tip: Grab some painter's tape and mark out the backdrop's dimensions on the floor and wall of your venue. It’s a super simple trick that helps you actually see the scale in the room and make sure it won’t block a key walkway or feel out of place.

Strategic Placement for Maximum Impact

Once you’ve got the size sorted, the next big decision is where to put it. You want your backdrop to be a focal point, not a clumsy obstacle. Think about the natural flow of traffic at your event and where your guests are likely to gather.

Placing a backdrop in a busy, high-traffic spot—like right by the main entrance or next to the bar—is just asking for a bottleneck. It’s a classic mistake.

Instead, find a dedicated space with plenty of room in front of it. This gives photographers enough distance to get the perfect shot and lets guests interact with it comfortably without causing a traffic jam. A well-placed backdrop should feel like a natural invitation, not something people have to squeeze past.

Styling Your Backdrop to Fit Your Theme

A stylishly decorated event backdrop featuring balloons, drapery, and a neon sign.

So, you’ve picked out a backdrop. Great start! But that’s just the beginning—think of it as the canvas for your event's masterpiece. The real magic happens when you start styling it.

The details you add—the textures, lighting, and accessories—are what bring your theme to life. It’s how you transform a simple background into a show-stopping focal point that gets everyone talking and snapping photos.

When we move beyond a basic colour or material, the right add-ons are what truly tie the backdrop into your event's look and feel. A simple black drape might feel a bit plain on its own, but add some dramatic uplighting, and suddenly it's a sophisticated, high-end feature perfect for a corporate gala. It’s all about the layers.

Creating Mood with Lighting and Drapery

Lighting is, without a doubt, one of the most powerful tools in any event stylist’s kit. It can completely change the vibe of a backdrop without you having to touch the backdrop itself. It’s our best-kept secret for creating an incredible atmosphere, even on a tight budget.

A few lighting techniques we love:

  • Uplighting: Placing lights at the base of the backdrop and pointing them upwards creates gorgeous shadows and highlights, adding depth and a real sense of grandeur.
  • Fairy Lights: You just can’t beat the gentle sparkle of fairy lights for a soft, romantic atmosphere. Draping them over fabric or weaving them into a floral wall adds an instant touch of whimsy. For a deeper dive, check out some fantastic ideas for using a fairy light curtain for your event.
  • Gobo Projections: A gobo is essentially a stencil that goes over a light source. You can project custom patterns, logos, or monograms directly onto the backdrop for a truly unique and personalised touch.

Drapery is another game-changer. Adding flowing swathes of chiffon or organza to a solid backdrop or a wooden arch instantly softens the look, creating movement and a much more luxurious finish.

Personalising with Signs and Accessories

This is where you get to make the backdrop completely your own. Custom elements are what make it feel special, whether it's for a wedding, a birthday bash, or a brand launch.

Custom neon signs are huge right now, and for good reason—they create an instant "wow" factor with a couple's name, a fun quote, or a company logo.

For a rustic theme, you can't go wrong pairing a lush greenery wall with a custom-cut wooden sign. Planning a birthday? Add balloon garlands in your chosen colour scheme to a shimmer wall for a fun, celebratory vibe. Don’t be afraid to mix and match to create something that’s all you.

To help spark some ideas, here's a quick guide matching popular themes with add-ons that work beautifully together.

Backdrop Styling and Add-On Ideas

Event Theme Recommended Backdrop Add-Ons Desired Atmosphere
Modern & Minimalist Clean lines, single-colour fabric, subtle uplighting, acrylic signage Chic, sophisticated, elegant
Rustic & Romantic Greenery or floral wall, wooden signage, draped fairy lights, soft chiffon Whimsical, warm, natural
Glamorous & Bold Sequin or shimmer wall, neon sign, balloon garland, dramatic drapery Fun, celebratory, high-energy
Boho Chic Macrame hanging, dried florals (pampas grass), Persian rugs, peacock chair Relaxed, earthy, artistic
Corporate & Branded Printed backdrop with logo, gobo projection, sleek uplighting in brand colours Professional, polished, impactful

These are just starting points, of course. The best designs often come from mixing and matching elements to create something totally unique to your event.

Expert Tip: When choosing your accessories, try to think in threes. A combination of three elements—like a neon sign, a balloon garland, and some drapery—often creates a more balanced and visually interesting design than just one or two.

When you're looking for a backdrop to hire, it’s a huge help if you come with a mood board or a clear idea of your theme. That way, we can recommend the perfect base and the best accessories to bring your vision to life. A well-styled backdrop doesn’t just look good—it tells the story of your celebration.

How Backdrop Hire Pricing Works in the Western Cape

Figuring out the cost of a backdrop to hire is key to keeping your event budget on track and avoiding any last-minute surprises. The final number on your invoice is never just one thing; it’s a mix of the backdrop itself, the labour to set it up, and the logistics of getting it to your venue. Let's unpack what you can expect when hiring a backdrop in Cape Town, Stellenbosch, Franschhoek, or Paarl.

The first price you’ll usually see is the base hire fee. This is for the backdrop panel or fabric and its essential support frame for a standard period, which is typically 24 hours. Think of it as the starting point.

But that base fee is just part of the story. A few other services are crucial for a smooth setup, and these are usually itemised separately on your quote. Knowing about these from the get-go helps you properly compare suppliers.

What’s Usually Included and What Costs Extra

When a quote lands in your inbox, it's really important to read it carefully. While every company has its own way of doing things, any professional service will usually separate the product from the logistics.

Here’s a common breakdown of what to look for:

  • Included in the Base Fee:

    • The backdrop itself (like shimmer wall panels, a fabric drape, or a printed vinyl sheet).
    • The standard frame or stand needed to put it all together safely.
  • Common Additional Costs:

    • Delivery and Collection: This fee is all about distance. A wedding on a Franschhoek wine farm will naturally have a higher delivery cost than a party in Cape Town's CBD.
    • Setup and Takedown: This covers the team's time and skill to professionally install the backdrop and then come back after the party to dismantle it. For safety and a flawless look, this is non-negotiable.
    • After-Hours Service: If your event wraps up late and the backdrop needs to be collected outside of normal business hours (say, after 11 PM), you can expect an after-hours collection surcharge.
    • Customisation: Need your company logo or a personalised message on a printed backdrop? That will be an extra design and production cost.
    • Add-Ons: Fun extras like balloon garlands, neon signs, or special lighting are always priced separately.

A good, transparent quote will always list these costs clearly. If you just see a single total, don't be shy—ask for a detailed breakdown so you know exactly what you’re paying for.

Navigating Local Logistics in the Cape

Getting a large backdrop delivered and installed in the Western Cape has its own unique challenges. Whether it's navigating the narrow streets of the Bo-Kaap or getting to a remote wine farm in the Paarl valley, logistics play a huge part in the final cost.

Suppliers have to factor in fuel, vehicle costs, and their team's time on the road. Hitting city traffic for a CBD event or dealing with strict access times at certain venues can add a layer of complexity—and cost. Always give your supplier the exact venue address and any specific instructions, like if there's a service elevator or loading bay restrictions. This helps them give you an accurate quote and plan a seamless installation.

Your Quote Checklist: Questions to Avoid Hidden Fees

To make sure you’re totally clear on the costs and avoid any nasty surprises later on, it's a great idea to ask your potential supplier these specific questions before signing anything. Getting the answers in writing is the best way to protect yourself and your budget.

  1. Is the price you've quoted inclusive of VAT?
  2. What’s the standard hire duration, and what are your fees if I need it for longer?
  3. Are delivery, setup, and collection all itemised separately on the quote?
  4. Do you have an after-hours or Sunday collection surcharge? If so, how much is it?
  5. What’s the cost for a site inspection if my venue needs one?
  6. What does the damage waiver or security deposit cover, and when will it be refunded?
  7. Are there any extra travel costs for venues outside your normal service area?

Asking these direct questions means you can make a smart, informed decision when choosing a backdrop to hire, making sure the whole process is as stress-free as your beautifully styled event.

Your Essential Backdrop Booking Checklist

Nailing your backdrop hire is all about good, solid planning. When you have a clear timeline and a checklist to work from, what could be a headache becomes a simple, straightforward process. This ensures every little detail is locked down long before your first guests even think about arriving. Think of this as your game plan, from the moment you first enquire to the post-event pack-down.

It helps to treat your backdrop booking just like any other key event supplier. Here in the Western Cape, wedding season (September to April) gets incredibly busy. Popular items, like our floral walls, can get booked out 6-9 months in advance. If you're planning a corporate function or an event in the quieter months, you can probably get away with a 2-3 month lead time.

The golden rule? As soon as you have your date and venue locked in, get in touch. It's the best way to make sure you get your first choice.

The Booking Process, Step by Step

Once you've found a backdrop supplier you love, the process is usually quite straightforward. Knowing the steps helps you stay organised and on top of your to-do list. To make life even easier, you can slot these points into a bigger plan, like the one in this handy event planning checklist template.

  • First Contact: Drop them a line with your event date, the venue, and which backdrop you've got your eye on. This is your chance to check availability and get a feel for the price.
  • Sign on the Dotted Line: Any professional hire company will send you a proper rental agreement. Take a moment to read it through properly. It should clearly spell out the total cost, the hire period, and exactly what’s included.
  • Pay the Deposit: To officially reserve the backdrop for your date, most suppliers will ask for a 50% non-refundable deposit. Remember, your booking isn't secure until that payment has been made.
  • Finalise the Logistics: About a month out from your event, it's time to confirm the delivery window, setup time, and collection details. You'll need to coordinate this with both your venue and the hire company, so communication is key.
  • Settle the Balance: The remaining payment is usually due 7-14 days before the event kicks off.

Crucial Reminder: Always, always read the fine print. Pay special attention to the cancellation policy and the terms around the damage deposit. You need to be crystal clear on what happens if your plans change or if something gets accidentally damaged on the night.

Key Questions to Ask Before You Sign

Before you commit, it's smart to get clear, written answers to a few important questions. This protects you and makes sure there are no last-minute surprises or misunderstandings.

  • What are your specific insurance requirements? Does my venue need a copy of this?
  • What is your cancellation policy, and what are the important deadlines I need to know?
  • How much is the refundable damage deposit, and what exactly does it cover?
  • When can I expect the damage deposit to be returned to me after the event?

Getting this information locked down upfront gives you total peace of mind. It frees you up to focus on the fun stuff, confident that every detail of your backdrop to hire is completely sorted.

Common Questions About Backdrop Hire

Pulling together all the final details for your event can feel like you're piecing together a massive puzzle. Getting straight answers to your questions is what makes everything click into place. We’ve rounded up some of the most common queries we get about hiring a backdrop to help you plan with complete confidence.

How Far in Advance Should I Book?

My advice? Book early, especially if you have your heart set on something specific.

For popular items like our flower walls or if you're planning a wedding during the peak season here in the Cape (that’s roughly September to April), you’ll want to book 6-9 months in advance. This pretty much guarantees you get your first choice and avoids that last-minute panic.

For standard backdrops or events in the quieter months, 2-3 months is usually fine. But honestly, it never hurts to get in touch early. A quick email can secure your date and give you peace of mind.

Can I Customise a Hired Backdrop?

Absolutely! This is where you can get really creative. Most hire companies, including us, offer a bunch of customisation options.

This could be as simple as adding custom decals, a company logo, or a cool neon sign to one of our standard backdrops. Or, we can go all out and create a fully custom-printed design from scratch, which is a big hit for corporate events and brand activations.

Just be sure to chat through your ideas with your supplier. Keep in mind that custom work usually comes with extra costs for the design and production, and it'll need a bit more lead time to get it just right.

The infographic below gives you a quick visual of the booking journey.

Infographic about backdrop to hire

It’s a handy guide that takes you from your first enquiry right through to sorting out the final logistics with your venue.

What If the Backdrop Gets Damaged?

It happens! That's why most rental companies will ask for a refundable damage deposit. It’s standard practice and covers any little mishaps. The terms for what counts as damage will be laid out clearly in your rental agreement.

For minor, fixable things, you might see a small deduction from your deposit. More serious damage, however, could mean forfeiting the full amount to cover a costly repair or a full replacement.

Top Tip: Always, always read your hire agreement carefully. It outlines your responsibilities and protects both you and the supplier. It just makes sure everyone is on the same page about the damage policy, so there are no awkward conversations later.

Does the Price Include Setup and Takedown?

In most cases, yes. Any professional backdrop hire service will almost always include delivery, setup by their team, and takedown in the final quote. We do this to make sure the backdrop is installed safely, looks absolutely perfect for your event, and is removed without any fuss afterwards.

Always double-check that this is clearly stated in your quote, just to avoid any surprise fees on the day.


Ready to find the perfect backdrop for your Cape Town event? At ABC Hire, we offer a stunning selection of backdrops and accessories to bring your vision to life. Explore our collection and get a quote today!

Gas Outdoor Heater Event Planning Guide

If you're planning an outdoor event in Cape Town, you already know you have to be ready for its famously unpredictable weather. A gas outdoor heater is your secret weapon for making sure guests are comfortable, turning what could be a chilly evening into a warm, memorable atmosphere. This guide is built specifically for event planners, walking you through everything from picking the right heater to mastering placement and safety.

Keeping Your Cape Town Event Warm And Inviting

Part of Cape Town’s charm is its incredible outdoor venues, but we all know the weather can turn on a dime. As an event planner, guest comfort is everything. A sudden drop in temperature can kill the mood faster than anything else.

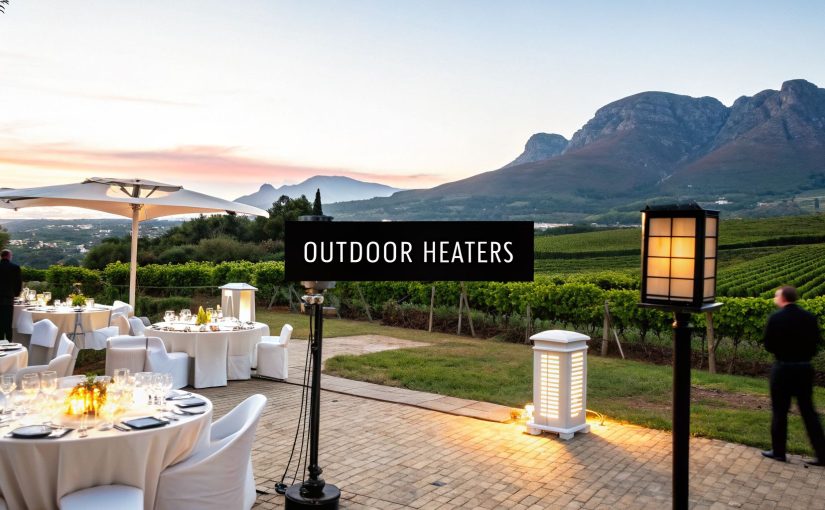
That's where a strategically placed gas outdoor heater comes in. It’s more than just an appliance; it's a tool for creating a consistently welcoming vibe. It allows you to stretch the usable hours of a venue, making sure your event continues seamlessly long after the sun goes down.

A gas outdoor heater warming up an elegant outdoor event space at night

The real goal here is to turn a potential problem—a cold evening—into a feature of comfort and luxury. By creating pockets of warmth, you encourage guests to mingle, relax, and actually enjoy the experience you’ve worked so hard to create. Think of these heaters as functional decor that radiates pure hospitality.

Why Gas Heaters Are an Event Staple

Their popularity isn't just a local trend. It reflects a global preference for reliable outdoor comfort. In fact, the worldwide market for outdoor heating, where gas heaters are a massive component, was valued at around $6.0 billion and is expected to hit $8.86 billion by 2032. That kind of growth shows a real, sustained confidence in this technology's ability to deliver.

This guide is your complete playbook, focusing on the practical knowledge you actually need as an event planner. We'll cover:

  • How They Work: Get a simple breakdown of how a gas outdoor heater creates instant, targeted warmth.
  • Choosing the Right Model: Figure out which heater styles will best suit your event's look and layout.
  • Calculating Coverage: Master the art of knowing exactly how many units you need for perfect comfort.
  • Safety and Placement: Learn the essential protocols to ensure a secure and smooth experience for everyone.

By mastering the use of a gas outdoor heater, you're not just fighting the cold; you're actively designing a more inviting and enjoyable guest experience from start to finish.

Whether you're planning a wedding under a clear marquee or a corporate function on an open-air terrace, this is crucial info. Often, these setups are paired with other hired structures, and knowing how to integrate heating is key. For more tips on creating covered spaces, have a look at our guide on gazebo hire in Cape Town to see how all the pieces can work together.

From selecting the perfect heater to ensuring it runs flawlessly on the day, we’re here to help you succeed.

How a Gas Outdoor Heater Actually Works

Ever wondered what's going on inside one of those patio heaters? Think of it as a cleverly designed, controlled campfire, channelling warmth exactly where your guests need it most. Instead of wood, it runs on Liquefied Petroleum Gas (LPG)—the same gas you’d use for a braai—to create powerful, comforting radiant heat. The whole setup is a simple but brilliant bit of engineering that delivers instant cosiness.

When you fire it up, a valve releases a steady flow of LPG from the cylinder. The gas travels up a hose to the heart of the unit: the burner assembly. A simple push-button igniter creates a spark, igniting the gas, and that's when the magic really starts.

Close-up of a gas outdoor heater's glowing emitter screen

But the flame doesn't just burn openly. It heats up a crucial component called the emitter screen, which is a tough metal grid sitting right above the burner. As the screen gets hot, it glows a familiar, bright orange, just like the embers in a fire.

From Glowing Emitter to Radiant Warmth

That glowing screen is the real source of the warmth you feel. It sends out infrared radiation, a type of energy that travels through the air until it hits a person or an object. It’s the very same kind of heat you feel from the sun on a clear day.

This is what sets an outdoor heater apart from your typical indoor one. Most indoor heaters use convection, which means they warm up the air, and that warm air circulates around the room. An outdoor gas heater uses radiation to heat people and objects directly, not the air itself.

Why This Matters for Your Event: Radiant heat is a game-changer for outdoor events because it cuts straight through cool air and isn't easily carried off by a breeze. It delivers that instant feeling of warmth directly to your guests, keeping everyone comfortable even on a chilly Cape Town evening.

This direct approach is way more efficient for open spaces. You’re not wasting energy trying to heat an entire garden or patio; you’re focusing all that lovely warmth right where your guests are mingling.

The Key Components Directing the Heat

Three main parts work together to make this happen safely and effectively. Knowing what they do will give you the confidence to operate any rental heater like a pro.

  1. The Gas Regulator: This is the small but vital bit that connects the gas cylinder to the heater's hose. It’s the gatekeeper, making sure gas is delivered to the burner at a constant, safe pressure. Without it, the flame would be all over the place.
  2. The Burner and Emitter: As we mentioned, this is the engine room. The burner creates the flame, and the emitter turns that flame's energy into widespread infrared heat. A well-maintained burner gives you a clean, steady flame for maximum warmth.
  3. The Reflector Shield: You can't miss this part—it’s the large, umbrella-like metal disc at the very top of the heater. Its job is simple: to catch all the heat rising from the emitter and bounce it downwards in a wide cone. Without this shield, most of that valuable warmth would just float off into the sky.

Together, these parts create a reliable system that turns a simple cylinder of LPG into a comforting circle of warmth. It’s the science behind that cosy feeling that keeps a great outdoor party going long after the sun has set.

Choosing The Right Heater For Your Event's Style

Picking a gas outdoor heater isn't just about keeping guests warm – it's a design choice that adds to the whole vibe of your event. The right heater should blend in with your decor and layout, enhancing the look you've worked so hard to create. It’s all about striking that perfect balance between function and style.

The two most popular heaters you can hire each bring something different to the table. Your decision really comes down to whether you need quiet, widespread warmth or a dramatic, eye-catching centrepiece. Let's look at what makes each one unique.

The Workhorse Mushroom Heater

The classic freestanding mushroom heater is a crowd favourite for a good reason. Its famous umbrella-shaped reflector is built to push heat out efficiently, making it a reliable workhorse for pretty much any outdoor space. Think of it as the most dependable player on your event heating team.

This design is brilliant at radiating heat downwards and outwards in a big, even circle. It’s perfect for creating warm zones in open areas like gardens, patios, or around cocktail tables where people are standing and chatting. Because it has an understated look, it provides comfort without stealing the show from your main decor.

Thanks to its wide heat coverage, the mushroom heater is often the most budget-friendly choice for warming up larger areas, as you'll likely need fewer of them to keep everyone comfortable.

The Showstopping Pyramid Heater

When your event calls for a bit of drama and a high-end feel, the pyramid heater is a knockout. Its standout feature is a tall, quartz glass tube with a live flame dancing up the middle. It provides both heat and an incredible visual.

This type of heater is like a piece of functional art. It’s perfect for framing an entrance, marking out a VIP lounge, or just adding a touch of class to a chic cocktail party. While its heat is a bit more focused than a mushroom heater's, the beautiful glow and striking design create an atmosphere that people won't forget.

A pyramid heater takes something essential—warmth—and turns it into a design feature. Guests are naturally drawn to the light and movement, making it an elegant and natural spot for people to gather.

A Side-by-Side Comparison

To help you see the difference clearly, here’s a quick comparison of these two popular styles. This table lays out their strengths and where they shine, helping you match the right heater to your event’s specific needs.

Gas Outdoor Heater Comparison for Event Planners

Heater Type Best For Heat Coverage (Approx.) Aesthetic Appeal Key Consideration
Mushroom Heater Widespread, practical heating for open spaces, gardens, and marquees. 15-20 sq meters Functional and classic, designed to blend in rather than stand out. Maximum heat efficiency and coverage for your budget.
Pyramid Heater Creating a visual focal point, accentuating entrances, or high-end events. 10-15 sq meters Modern and dramatic, with a visible flame for high visual impact. Atmosphere and style are as important as the heat itself.

At the end of the day, your choice comes down to your main goal. Need to heat a large, open area for a seated dinner efficiently? The mushroom heater is your best bet. Trying to create a stylish, exclusive lounge for a product launch? The pyramid heater will deliver that "wow" factor.

Often, the best solution involves a mix of both. You can find out more about creating comfortable, stylish outdoor zones in our guide to Cape Town umbrella hire, which covers another key part of guest comfort.

How Many Heaters Do You Actually Need?

Getting the right number of heaters for your event is a bit of a balancing act. Too few, and your guests will be shivering and huddling together for warmth. Too many, and you'll end up with uncomfortable hot spots while burning through your rental budget. The real goal is to create a consistent, gentle warmth that feels completely natural and inviting.

A good starting point is the general rule of thumb. A standard mushroom-style gas outdoor heater will typically warm up a radius of about 20 square metres. But, and this is a big but, that’s just an estimate. Real-world conditions like a sudden gust of wind, the night's actual temperature, and whether your space has any partial shelter will massively affect how they perform.

This is especially true for events in Cape Town, where a sea breeze can roll in without any warning. A steady wind can easily shrink a heater's effective coverage by 25-30%, which means you might need to place them a bit closer together than you first thought.

Start by Mapping Your Event Zones

Before you can land on a final number, you need to get a clear picture of your venue's layout and, more importantly, how your guests will actually use the space. Don't just think in total square metres; break the area down into its different zones.

Put yourself in your guests' shoes. Where will people naturally gather? Pinpointing these social hubs is the secret to placing your heaters strategically.

  • Seated Dining Areas: These are your top priority. Guests aren't moving around, so they'll feel the cold much more. You need consistent, overlapping warmth here.
  • Cocktail and Standing Zones: Think high-top tables or areas near the bar—these are natural mingling spots. Heaters here can be spaced a little further apart.
  • Lounge Pockets: Those cosy seating areas with couches or beanbags need their own dedicated heat source to feel truly comfortable and inviting.
  • Entrances and Exits: Placing a heater near the main entrance creates an instant feeling of warmth and welcome the moment guests arrive.

This approach means you're not just wasting heat on empty space. You're focusing the warmth exactly where it will make the biggest difference to your guests' experience.

The infographic below gives you a quick visual guide to help you see the difference between heater types and where they work best as you map out your event.

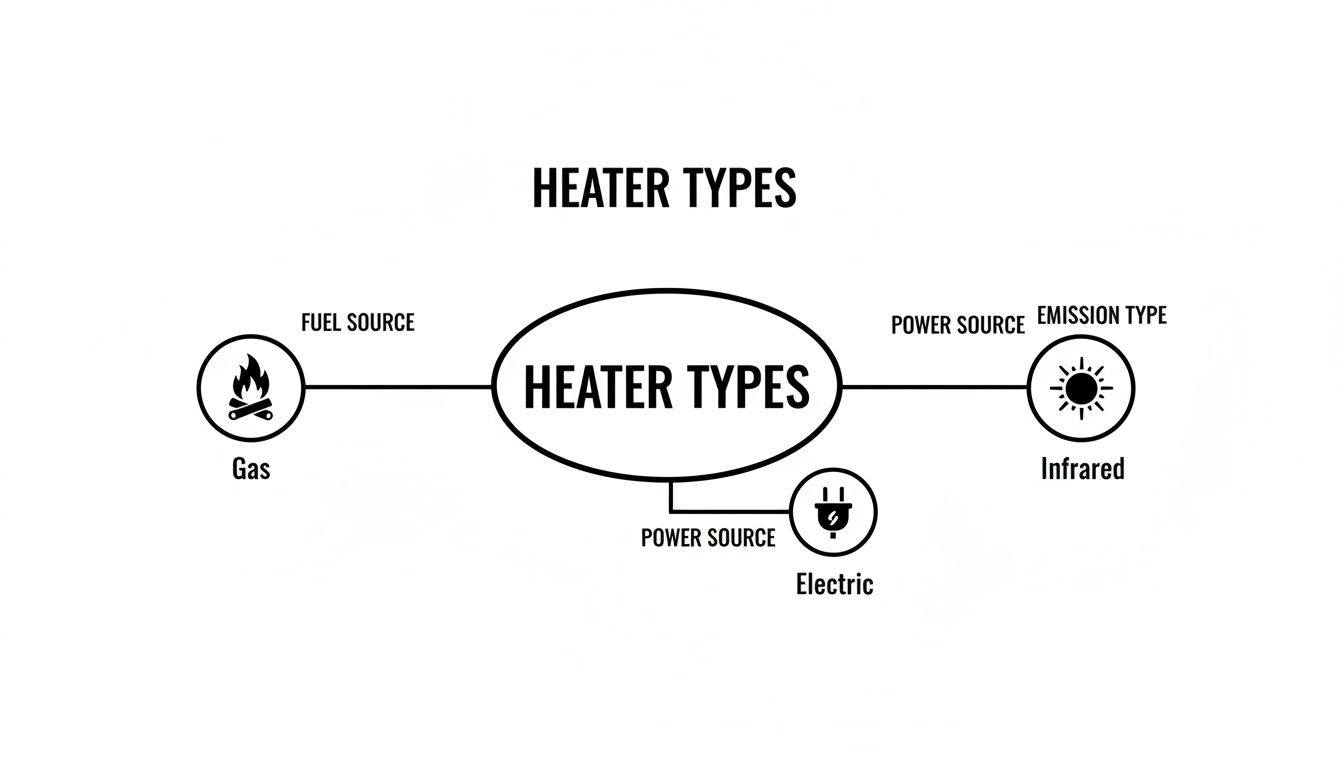
Infographic about gas outdoor heater

As you can see, mushroom heaters are brilliant for wide coverage, while the pyramid-style ones add a real atmospheric touch to specific zones.

Putting it Into Practice: Scenarios and Calculations

Let’s run through a couple of common event setups. This should help you visualise how to calculate what you'll need.

Pro Tip: Always sketch out a simple floor plan of your venue. Use circles to represent the rough 20-square-metre coverage of each heater, then move them around on paper to cover your key zones without leaving any big cold spots.

Scenario 1: The Standing Cocktail Party
For an open-air cocktail do with 80 guests, the aim is to create pockets of warmth rather than heating the entire garden. People will be moving and mingling.

  • Calculation: Guests will naturally cluster in groups, so you can strategically place 4 to 5 heaters around high-traffic areas like the bar, food stations, and a few cocktail tables. This encourages flow while making sure no one is ever too far from a bit of warmth.

Scenario 2: The Seated Wedding Reception
Here we have a seated reception with 10 round tables, each seating 10 guests. The priority is consistent warmth for every single table, as people will be sitting down for a long time.

  • Calculation: A great setup is to place one heater in the gap between every two tables. This arrangement would call for 5 heaters to cover all ten tables perfectly. You might want to add a sixth one near the entrance or by the dance floor for good measure.

By mapping your zones and thinking about the flow of your specific event, you move from guesswork to a solid, actionable heating plan. It’s the best way to ensure every guest stays comfortable and your budget is used as efficiently as possible.

Mastering Heater Safety And Local Regulations

When you hire a gas outdoor heater, you're not just renting equipment; you're taking on the responsibility for your guests' safety. And while our heaters are designed to be incredibly safe and reliable, their sheer power demands a healthy dose of respect and careful handling. It's like being the captain of a ship—you need to know the rules of the sea to ensure a smooth, worry-free journey for everyone on board.

Getting safety right is the absolute cornerstone of a successful event. It’s non-negotiable, and it all boils down to understanding the core principles of placement, ventilation, and the heater's own safety mechanisms. These aren't just polite suggestions; they are essential steps to protect your guests, your venue, and your hard-earned reputation.

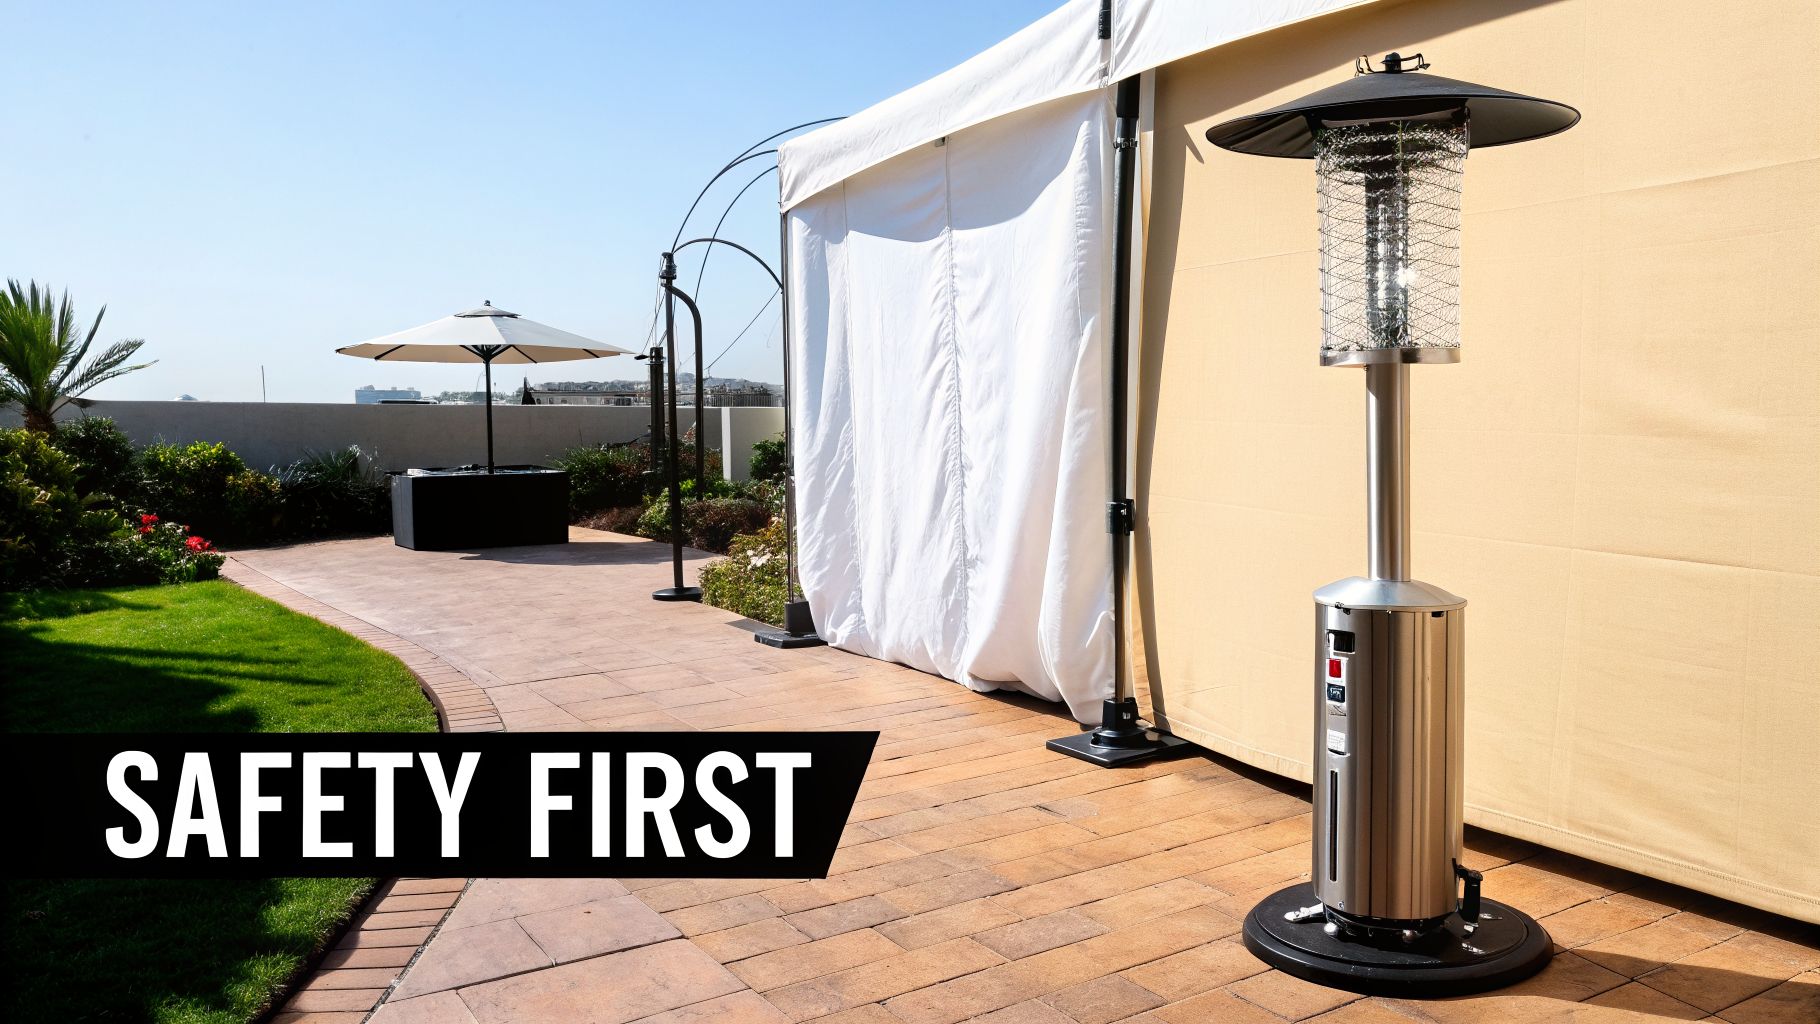
A gas heater placed safely on a stable patio surface away from flammable materials

Core Safety Protocols For Every Event

Your first job is to pick the right spot. A gas heater must always be placed on a completely flat, stable, and non-combustible surface. Grass can be uneven and poses a potential fire risk, making a paved patio, solid deck, or firm flooring the ideal foundation.

Next up is clearance. That radiant heat feels wonderful, but it’s intense. Keeping a safe distance from anything flammable is critical. This includes tent walls, hanging decorations, flowy tablecloths, and even dense bushes or trees.

As a golden rule, always maintain a minimum clearance of 1 metre on all sides of the heater and even more space overhead, especially if it’s under a marquee or a large umbrella. And a quick pro-tip: never, ever let guests use a heater as a coat rack or a place to hang their bags.

Understanding Built-In Safety Features

Professional hire companies like ABC Hire only stock units equipped with modern safety technology. One of the most important features to know about is the anti-tilt switch.

This clever little device is a real lifesaver. If a heater gets accidentally knocked or tilted beyond a safe angle, the switch automatically cuts the gas supply, instantly putting out the flame. It's an essential safeguard against fire hazards, particularly at lively events where guests are mingling and moving around.

Ventilation: The Silent Protector

Proper ventilation is arguably the most crucial safety aspect of all, especially if you’re using heaters in a semi-enclosed space like a marquee with one or two sides open. Gas outdoor heaters consume oxygen and release carbon monoxide (CO) as a byproduct. Out in the open air, this is no problem at all as the gas just dissipates harmlessly.

But in a poorly ventilated area, CO can build up to dangerous levels. That’s precisely why these heaters must never be used in fully enclosed tents, garages, or any indoor space. For any semi-enclosed setup, you have to ensure there is plenty of cross-flow ventilation to keep the air fresh and, most importantly, safe. The safety rules for heaters are closely linked to your venue choice, a topic we dive into in our guide on tent hire for parties.

Navigating Local Regulations And Environmental Impact

For most private events in Cape Town held on private property, you won’t need a specific permit just for using gas heaters. However, your event's overall safety plan must still comply with the City of Cape Town’s event by-laws, not to mention any specific rules set by your venue. The simplest way to tick this box is by using certified, professional equipment from a reputable hire company.

It’s also worth touching on the environmental conversation. While traditional gas patio heaters are effective, there is a growing awareness of their carbon footprint. A gas-powered patio heater can emit around 3 kilograms of CO2 within just a couple of hours. As environmental concerns rightly become more prominent, the industry is shifting towards solutions with better emission controls. By choosing well-maintained, efficient models for your event, you can do your part to minimise its impact.

Your Gas Heater Questions Answered

When you're in the thick of event planning, a few questions are bound to pop up, especially when dealing with equipment. For gas outdoor heaters, getting those answers sorted is key to a safe, warm, and brilliant event. We've pulled together the most common questions we get from event planners right here in Cape Town, with simple, no-nonsense answers.

Think of this as your personal cheat sheet for heater hire. From how long the gas lasts to safety and local rules, we'll cover what you need to know to handle things like a seasoned pro.

How Long Does a 9kg Gas Bottle Last In a Patio Heater?

This is the big one, and for good reason—it hits your budget and your logistics. That 9kg LPG cylinder is the fuel tank for your heater, and how long it lasts comes down to one thing: the heat setting.

Crank it up to the highest setting, and you can expect a single 9kg bottle to give you about 8 to 10 hours of solid warmth. If you're just looking for a bit of ambient heat on a lower setting, you can easily stretch that to around 12 hours.

Event Planning Takeaway: For most standard evening events running 5-6 hours, one 9kg gas cylinder for each heater is usually plenty. But if you're planning a longer celebration or expecting a proper Cape Town cold snap that needs high heat from the get-go, it’s a smart move to have a spare cylinder on standby for each unit.

Can I Use a Gas Outdoor Heater Inside a Marquee?

This is a critical safety question. The short answer is no, you absolutely cannot use a gas outdoor heater inside a fully enclosed marquee. It's incredibly dangerous. With no way for fumes to escape, you run a serious risk of fire and a hazardous build-up of carbon monoxide.

But, you can use them safely in a semi-enclosed setup. If your marquee has at least one side completely open, you’ll have the airflow needed to let heat and fumes dissipate safely.

Even then, placement is everything:

  • Give It Space: Keep the heater a minimum of 1 metre away from the marquee walls, ceiling, and any draping or décor.
  • Keep It Stable: The heater must be on a completely flat, solid surface to make sure there’s no chance of it tipping over.

If your event is in a fully sealed marquee, your only safe options are electric heaters or a ducted heating system where the unit stays outside.

What Happens If a Heater Is Knocked Over?

A great question, especially for lively events with guests moving around. Luckily, any professional rental heater worth its salt comes with a non-negotiable safety feature: an anti-tilt switch.

It’s a clever little mechanism. If the heater gets bumped and tilts too far, or gets knocked over completely, the switch instantly cuts the gas supply to the burner. The flame goes out immediately, stopping a potential fire before it can even start.

While the anti-tilt switch is a great backup, your best strategy is always smart placement. Position heaters away from busy walkways, the dance floor, or kids' play areas to minimise the risk from the start.

Do I Need a Special Permit For Gas Heaters At a Cape Town Event?

Navigating council regulations can feel like a headache, but for gas heaters, it’s usually quite straightforward. For most private events on private property in and around Cape Town, you won’t need a specific "heater permit."

That doesn't mean it's a free-for-all, though. Your event's overall safety plan still needs to line up with the City of Cape Town’s by-laws and any rules your venue might have.

The easiest way to tick all the boxes is to hire from a professional company.

  • Certified Gear: A reputable supplier makes sure their heaters are certified and maintained to meet national safety standards (like those from the LPGSA).
  • Compliance Made Easy: When you hire compliant equipment, you're showing you've done your due diligence, which makes getting your event plan signed off by a venue a whole lot smoother.

Working with a trusted partner like ABC Hire means you get equipment that’s not just effective, but also fully compliant—taking one more thing off your very full plate.


Ready to create a warm and inviting atmosphere for your next outdoor event? At ABC Hire, we provide top-quality, safe, and stylish gas outdoor heaters that are perfect for any occasion. Explore our heating solutions and get a quote today at https://abchire.co.za.

Mobile Fridge Hire Ultimate Event Cooler Guide

Renting a mobile fridge means having reliable cold storage delivered straight to your venue. It’s the easiest way to keep consistent temperatures for everything from fine cheeses to summer beverages. No more juggling ice blocks or worrying about warm spots in coolers.

Understanding The Key Benefits Of Mobile Fridge Hire

Switching from cooler boxes to a mobile unit can slash waste and free up precious setup hours. In Pretoria, a wedding I coordinated saw fresh canapés stay crisp from prep straight through to service. Meanwhile, a Johannesburg outdoor festival kept thousands of chilled drinks flowing without a hiccup.

Key Advantages At A Glance:

  • Precise Temperature Control for dairy, chocolate and delicate produce
  • Scheduling Flexibility – hire for a few hours or several days
  • Rapid Setup in under an hour once power’s in place
  • Reduced Waste cutting spoilage by up to 30%
  • Optimised Placement close to service points for faster guest support

Real World Scenarios With Mobile Fridges

At a boutique wedding in Stellenbosch, a 2 m³ unit slipped neatly into a courtyard, keeping petits fours perfect until the last bite.

Over a three-day music festival near Cape Town, organisers leaned on large cold rooms to store crates of beer and mixers. They never ran dry, even when temperatures soared.

This industry has grown steadily across South Africa since about 2008. Once a niche solution, it now underpins government functions, catering businesses and community fundraisers.

Discover more insights in Semela’s report.

Operational Flexibility And Waste Reduction

Modern fridge trailers plug into any standard 220 V outlet or run seamlessly off generators. You can reposition units mid-event or swap sizes if your guest list shifts at the last minute.

“Switching to mobile fridge hire cut my event waste by nearly a third,” says planner Sarah Nkosi.

Feature Cooler Box Mobile Fridge Hire
Temperature Range Variable -20 °C to 5 °C
Capacity Up to 100 L 2 – 10 m³
Setup Time 30+ minutes Under 1 hour
Waste Reduction Low Up to 30%

Check out our guide on essential catering equipment for hire in our catering equipment for hire article.

Benefits For Multiple Event Types

From intimate gatherings to large-scale launches, mobile fridges adapt on the fly. A corporate unveiling in Paarl cut spoilage by 25%, boosting profits simply by swapping out cooler boxes.

Integrating these units into your catering workflow means fewer manual checks and no service interruptions. In remote areas with patchy grid power, generator-ready fridges are a lifesaver.

Use Cases:

  • Boutique weddings: discreet 2 m³ units for desserts and charcuterie
  • Multi-day festivals: expansive cold rooms for hundreds of beverage crates
  • Remote pop-ups: generator-compatible models for off-grid reliability

Whether it’s a fundraiser, product launch or government function, mobile fridge hire elevates any event by keeping supplies safe and service smooth until the last guest departs.

Choosing the Right Mobile Fridge for Your Event

When you firm up guest numbers and nail down your menu, you’re halfway to choosing the perfect fridge. A 2 m³ trailer unit will often cover a 200-guest corporate brunch, but as headcounts climb—or if your event spans several days—you’ll want to look at 5 m³ or larger cold rooms.

Drinks, cheeses and fresh produce each need their own bit of space. Toss in a midday heatwave under a marquee, and insulation plus airflow suddenly become just as crucial as raw volume.

This quick framework pairs fridge size with guest count, menu requirements and venue limitations, so you stay cool under pressure.

Matching Fridge Type To Your Event

Capacity grabs the headlines, yet storage style shapes performance. Trailer fridges roll in fast and are up and running in under an hour—ideal when space is tight. Static cold rooms deliver serious volume for multi-day festivals, though you’ll need extra floor space and reliable power.

  • Trailer Fridges: Perfect for short-term setups and compact sites
  • Static Cold Rooms: Built for high volumes and extended events
  • Generator Backup: Non-negotiable if mains outlets sit metres away

Mobile Fridge Capacity Guide For Events

Use this table to eyeball the right fridge volume for your guest list and event type.

Event Size (Guests) Recommended Fridge Size (Cubic Metres) Typical Use Case
Up to 50 2 m³ Cocktail mixers
51 to 100 3 m³ Dessert tables
101 to 200 5 m³ Corporate brunch
201 to 500 8 m³ Sports tournaments

Keep a 20% buffer in mind for last-minute menu tweaks or surprise extras.

Real-World Examples In Cape Town

At a Stellenbosch corporate brunch, a 5 m³ trailer handled 120 wine crates and charcuterie platters with ease. Even when temperatures topped 30 °C, cheeses stayed under 4 °C thanks to thick insulation. Meanwhile, an 8 m³ cold room on a three-day sports event near Muizenberg sailed through constant restocks—with zero spoilage.

Pro Tip Always plan for 20% extra capacity. Menu changes sneak up on you faster than you think.

Infographic On Decision Factors

Infographic about mobile fridge hire

This decision tree highlights how temperature control, schedule flexibility and waste reduction guide your fridge selection.

Venue Constraints And Placement

A quick site check keeps delivery hassle-free. Measure gate clearances and assess floor-loading limits before the day arrives. Position units close to power but shielded from direct sunlight, and always set them on level ground for consistent cooling.

  • Verify gate widths and floor strength
  • Maintain at least 10 cm clearance around vents
  • Keep units off reflective surfaces

Temperature And Food Safety Considerations

Aim for 0 °C to 4 °C for perishables and –1 °C to 5 °C for beverages. Be mindful of loading patterns—crowding shelves leads to hotspots.

  • Log temperatures with calibrated probes every four hours
  • Separate high-risk items from walls and vents
  • Rotate stock so older items move to the front

Booking And Reservation Insights

Seventy-three per cent of planners say reserving three months ahead slashes stress levels. In Cape Town’s peak season (November–March), book trailers 4–6 months out to avoid disappointment.

  • Confirm delivery slots and on-site contact details
  • Compare daily, weekend and weekly rates
  • Ask about generator hire and emergency support

Final Checklist And Tips

  • Match guest count with your menu’s storage needs
  • Map mains outlets and generator locations
  • Factor in a 20% safety buffer
  • Inspect door seals and alarm functions before loading

Summary Of Selection Framework

First, pin down guest numbers, menu items and ambient conditions. Next, choose between trailer or static based on event duration and site constraints. Finally, build in buffers and carry out a thorough site survey.

  • 20% capacity buffer for unexpected demands
  • Site check covering power, access and ground level
  • Safety inspections on seals, alarms and temperature logs

This approach cuts waste by up to 30% and keeps everything at safe temperatures—so you can focus on running a flawless event.

Streamlining Delivery Setup And Placement

Mobile fridge setup

Getting a mobile fridge exactly where it needs to be makes the whole day smoother. Before anything else, map out access routes and check gate clearances.

Don’t let road restrictions become a showstopper.

  • Assess road width and surface quality to confirm truck clearance
  • Measure gate height and width for trailer access
  • Verify floor-loading capacity against fridge weight
  • Note nearby power outlets or generator drop points
  • Share site contact details and arrival time windows

Sharing Your Site Plan

A crystal-clear site plan is your best defence against last-minute hiccups. Highlight the fridge position with exact distances to electrical points. Don’t forget to mark hazards like low-hanging branches or overhead cables.

A precise map equals a smooth delivery.

  • Guides drivers straight to the spot, cutting delays
  • Keeps units away from risks like uneven ground
  • Confirms ventilation gaps are respected
  • Makes on-the-fly tweaks simple

Preparing The Ground And Ventilation

You need a level surface—anything else risks uneven cooling. Leave at least 10 centimetres around vents so air can circulate freely.

  • Shield the unit from direct sunlight to ease its workload
  • Keep space around the condenser for natural airflow
  • Avoid wind tunnels that blow hot air back in
  • Set up a temporary canopy if your fridge has no built-in shade

Managing Power And Cables

Neatly routed cables aren’t just tidier—they’re safer. A dedicated 220 V outlet is ideal, and a generator backup pays dividends at off-grid venues.

A handy example comes from our Gauteng team, who provide full delivery, setup and collection, so hosts can breathe easy. These cold rooms plug into standard 220 V outlets or run off electric-start generators when grid power isn’t an option.
Learn more about mobile cold room services in Gauteng

Plan generator capacity in advance. A 10 kVA unit will run two 5 m³ fridges at once. Always budget an extra 20 percent for lights or sound systems.

  • Keep a small UPS for critical alarms
  • Assign someone to monitor fuel levels
  • Test the automatic switch-over before guests arrive

Final Pre-Event Checklist

A quick run-through now saves hours on D-Day.

  • Confirm arrival window with your hire company
  • Verify gate clearance and truck turning radius
  • Inspect fridge door seals and alarm systems
  • Review the site plan against power and cable routes
  • Label all cable runs and safety zones

With these steps in place, mobile fridge hire almost sets itself up.

A clear site survey and precise placement cut setup time by up to 40 percent.

Pro Tips And Real Examples

At a farm wedding in Paarl, a narrow driveway meant we had to rethink placement. Coloured tape marked each cable run along the edge of hanging baskets.

  • Labelled cables by staff member for quick troubleshooting
  • Routed cords under rubber ramps to eliminate trip hazards
  • Stored generator fuel in an insulated box away from public areas

That simple strategy eliminated cable faults over two days.

Generator Capacity Fridge Units Supported Typical Run Time
5 kVA 1 × 2 m³ fridge 6 hours
10 kVA 2 × 5 m³ fridges 8 hours
15 kVA 3 × 5 m³ fridges 10 hours

Wrap Up Delivery Planning

Gather your team for a final walk-through of the site plan. Double-check measurements, contact numbers and any backup arrangements. Clear communication and detailed notes will turn mobile fridge hire into just another box ticked on your event checklist.

Preparation prevents chaos when every minute counts.

With delivery logistics locked down, you can move on to food-safety protocols and focus on what really matters—delivering an unforgettable event.

Ensuring Food Safety With Mobile Fridge Hire

Mobile fridge loaded with produce

When you’re juggling trays of canapés and chilled cocktails, there’s no room for second-guessing your cold storage. One temperature hiccup can ruin hundreds of plates—and your reputation.

Hiring a mobile fridge takes the burden off your team by delivering consistent temperatures and real‐time monitoring. But even the best equipment needs a solid plan: from loading techniques to sanitation routines, every detail counts.

Ideal Temperature Set Points

Different foods demand their own safe zone. After talking to event pros, most slashed food-safety issues by 95% simply by sticking to these benchmarks:

  • Raw Meat: 0 °C to 2 °C to keep salmonella at bay
  • Dairy Products: 1 °C to 4 °C for peak creaminess
  • Leafy Produce: 2 °C to 5 °C to hold that satisfying crunch
  • Ready-to-Serve Items: 3 °C to 4 °C for flavour and safety balance

Loading Plan To Prevent Hotspots

Air needs space to flow—crowding shelves or blocking vents invites warm pockets and uneven cooling. Keep things moving with this simple approach:

  • Place heavy items on bottom shelves
  • Maintain a 10 cm gap from back walls and vents
  • Alternate high- and low-risk products for even chill
  • Label each shelf so restocks happen in a flash

For instance, a Stellenbosch caterer stacked raw meats at the bottom and rotated stock daily. The result? Fewer temperature spikes during rush service.

Pre-Event Checklist For Food Safety Logging

A quick yet thorough checklist avoids last-minute scrambles. Tick these off before those doors swing open:

  • Verify that door seals close snugly
  • Test alarms and note their trigger points
  • Calibrate probes to ±0.5 °C accuracy
  • Log baseline temps every eight hours
  • Set limits on how long doors stay open

“Switching to a four-hour logging routine and enforcing door-open limits saved us hours of double‐checks and cut waste dramatically,” says head chef Thandi Mbele.

Sanitation Best Practices

A spotless fridge is as critical as the correct temperature. Overlooked corners or clogged drains can undo all your hard work. Follow these steps:

  • Use food-grade sanitisers that comply with SANS standards
  • Flush and inspect internal drains daily
  • Wipe up spills immediately to avoid drips
  • Swap out drip trays and gaskets after busy events

Organising Items By Risk Level

Risk Level Example Items Storage Notes
High Risk Poultry, Raw Meat Bottom shelves, separate bins
Medium Risk Dairy, Cooked Meats Mid-level shelves, sealed covers
Low Risk Fruits, Bottled Drinks Top shelves, keep vents clear

Risk Level Labelling And Zoning

Colour-coding shelves and crates makes training faster and cuts sorting time by 40%. Try this:

  • Red Tags: Raw proteins, tucked away from serving stations
  • Yellow Tags: Cooked dishes ready to plate
  • Green Tags: Prewashed produce and beverages

Print your labels before the fridge arrives so zones are clear from the start.

Pair chilled storage with heated stations by checking out our guide on catering food warmers. With these steps in place, your mobile fridge hire becomes a reliable partner, keeping every dish safe and your guests impressed.

Navigating Pricing Contracts And Hidden Costs

Booking a mobile fridge might feel straightforward, but those extra fees can stack up fast. A clear understanding of daily, weekend and multi-day rates will keep you on budget and out of surprises.

  • Daily Rates charge a flat fee per calendar day, based on fridge size and hire length.
  • Weekend Packages typically cover Friday afternoon through Monday morning at a discounted price.
  • Multi-Day Discounts kick in once you book longer than three days or opt for a weekly hire.
  • Minimum Hire Periods often apply during our peak season (November to March).

Even after you lock in the base rate, add-ons can sneak into your final invoice.

  • Delivery Distance Fees rise with each kilometre beyond your supplier’s standard zone.
  • Setup And Collection Charges cover the labour to position and remove the unit.
  • Cleaning Deposits hold onto cash until the fridge returns in good order.
  • Insurance Premiums start at R75 per day, protecting you against accidental damage.
  • Power And Generator Hire kicks in if mains power isn’t available on site.

Contract Clauses To Examine

Don’t let the small print shift unexpected costs onto you. Before you sign, zero in on these clauses:

  • Liability Limits: Who pays if the fridge needs repairs or replacement after an accident?
  • Force Majeure: How do loadshedding or extreme-weather events affect your hire?
  • Cancellation Terms: Sliding-scale penalties can balloon if you cancel too late.
  • Emergency Support: Confirm guaranteed response times and backup-unit options.

Always know your hire company’s response time before you commit.

Sample Cost Breakdown

Seeing a real-world example makes hidden fees obvious. Here’s a rough guide for a one-day 2 m³ fridge hire in Cape Town:

Item Cost (ZAR)
1-Day Hire (2 m³ Fridge) R1,200
Delivery Within Cape Town R350
Cleaning Deposit (Refundable) R500
Insurance Premium (Per Day) R75
Generator Hire (Per Day) R600

Negotiation Tips For Mobile Fridge Hire

You’ve got more bargaining power than you think. Here’s how to trim the final bill:

  • Bundle Rates by pairing fridge hire with a mobile bar setup to share delivery fees. For ideas, Check out mobile bar service tips.
  • Off-Peak Discounts if you hire on weekdays or outside public-holiday windows.
  • Flexible Return Windows can reduce late-return penalties.
  • Custom Insurance Options let you choose just the right coverage, often lowering daily premiums.

Savvy renters even make up to R6,000 a month sub-hiring their fridges. Dive deeper in Semela’s Industry Report.

Checklist For Hidden Fees

Before you sign off, run through this quick checklist to catch every extra cost:

  • Confirm whether fuel surcharges apply beyond a set radius.
  • Review penalties for short-duration or early-return bookings.
  • Understand cleaning and damage deposit refund timelines.
  • Verify insurance cover limits and excess amounts.

A transparent contract can save you thousands in unexpected surcharges.

When To Ask For Clarifications

Fee structures aren’t standardised across providers. Always get specifics in writing:

  • Ask about zones beyond 15 km to avoid surprise transport fees.
  • Challenge vague “handling” or “service” costs until you have exact figures.
  • Confirm overtime charges for pickups outside normal hours.

Clarify every fee before you commit—your budget will thank you.

Common Questions On Mobile Fridge Hire

Event planners constantly juggle countless details. One of the biggest stress points is ensuring reliable cold storage on demand—and that’s where mobile fridge hire steps in.

Below are the questions we hear most. They cover everything from booking timelines and power specs to emergency support and relocation rules. These answers reflect real client experiences around Cape Town and supplier policies tailored to ABC Hire’s service area.

  • Booking windows that secure fridge availability without rushed decisions
  • Protocols for fridge failure and guaranteed help
  • Power supply must-haves and safe cable management

Booking Timeframe

One trick is to secure your fridge months before the big day. During Cape Town’s peak season, aim for at least 4–6 months ahead. That way, you get better rates and a wider choice of units.

For smaller gatherings, a lead time of 4–6 weeks usually works. Waiting until the last minute? You might still get a fridge, but choices and flexibility could disappear fast.

  • Reserve 6 months in advance for large weddings or festivals
  • Book 4 weeks ahead for intimate celebrations
  • Confirm delivery slots early to avoid schedule clashes
  • Ask about seasonal peak surcharges and availability
  • Review cancellation policies for stress-free changes

At a Stellenbosch festival, one organiser booked a 5 m³ cold room trailer six months out. No rush fees, no equipment shortages—just smooth sailing.

“Booking early is the difference between choice and compromise,” says event manager Themba Sithole.

Emergency Support

When chilled goods are on the line, you need help at a moment’s notice. The best hire companies back you with 24/7 emergency assistance and clear response times.

Always get emergency contact numbers and repair protocols in writing. That way, you’re never left guessing if the fridge sputters or shuts down.

  • Keep your supplier’s emergency hotline close at hand
  • Verify response times and backup-unit options
  • Test the support line during site visits

“Emergency support guarantees ensure you never lose control of your cold chain.”

During a Durban product launch, a client sidestepped spoilage when a technician arrived within two hours to repair their unit—and they’re still raving about it.

Relocation Restrictions

Moving a heavy cooling unit sounds simple, but DIY transport is a recipe for disaster. Most hire contracts forbid customers from relocating the fridge themselves after delivery.

This protects both your event and the supplier’s insurance. If you need refrigeration in multiple spots, ask for extra units or a professional relocation service.

Allowed Actions Not Allowed Actions
Finalise placement before setup Moving unit after handover
Communicate preferred location DIY transport during hire
Confirm site plan with driver Relocating without support

At a Cape Town wedding, a narrow courtyard meant the fridge had to be professionally moved—adding an unexpected R500 to the bill. A quick site plan would have saved the extra charge.

Power Requirements

Most mobile fridges draw from a 220 V single-phase supply, running off a dedicated 15 A plug point. Confirm these specs well before the event day.

For remote venues, factor in a 10 kVA generator to handle two 5 m³ units plus extra equipment. Label and route cables carefully to avoid trip hazards.

  • Check for a 220 V 15 A outlet on site
  • Label and secure cables to prevent accidents
  • Verify generator capacity against total load
  • Test switch-over procedures and UPS systems before guests arrive

Keep spare extension leads and surge protectors on hand. They can mean the difference between smooth service and a fridge meltdown.

Final Thoughts

Getting these details nailed down early turns cold storage into a non-issue. With clear booking windows, power checks and relocation plans, you’ll sidestep last-minute headaches.

Share this checklist with your crew and ensure every item is confirmed in writing:

Task Checkpoint
Booking Time 4–6 months ahead
Power Setup 220 V outlet labelled and tested
Emergency Contacts Hotline and response times recorded
Relocation Plan Site plan confirmed with driver
Temperature Checks Log every four hours

Ready to lock in your mobile fridge hire with ABC Hire? Visit ABC Hire to reserve your unit and secure reliable cold storage for any event.

A Guide to Black Table Cloths for ZA Events

Black tablecloths aren't just there to cover a table; they're a strategic design choice that can anchor the entire look and feel of your event. Think of them as the perfect canvas. They create a bold, dramatic foundation that makes every other detail—from your vibrant floral arrangements to the gleaming cutlery—pop with an intensity you just don't get with other colours. It’s a single decision that can instantly elevate the atmosphere from ordinary to completely unforgettable.

Why Black Table Cloths Are an Event Designer's Secret Weapon

An elegant event setup featuring black table cloths with gold and white accents.

In the world of event design, colour is never just colour. It's an emotion, a statement, and a powerful tool. While crisp white linens are the traditional, safe option, black tablecloths are a deliberate, powerful move. They bring a level of sophistication and drama to a room that few other colours can touch, transforming a simple table into a deliberate focal point of design.

The Psychology of Sophistication

There's a reason black is universally associated with elegance, formality, and prestige. When you use it as the base for your event's decor, it immediately signals a high-end, carefully curated experience. This psychological impact is instant, setting a tone of importance for weddings, corporate galas, or milestone celebrations right across South Africa.

A black tablecloth doesn’t just absorb light; it absorbs attention. It forces the eye to focus on the carefully chosen details you've placed on top of it. It’s the ultimate supporting actor that makes your star elements—centerpieces, chargers, and glassware—truly shine.

Creating Visual Contrast and Depth

The real genius of using black linen is its incredible ability to create stunning visual contrast. Just picture a centrepiece of bright pink peonies or deep red roses against that dark background; the colours instantly appear richer, more vibrant, and more saturated.

This effect carries through to everything else on your table:

  • Metallics: Gold, silver, and rose gold cutlery and charger plates will gleam with an unparalleled brilliance.
  • Glassware: Your crystal and glass items sparkle more intensely, catching the light and adding a serious layer of glamour.
  • Crockery: Crisp white or patterned plates stand out beautifully, making the food presentation itself a work of art.

This contrast is what stops a tablescape from looking flat or one-dimensional. It adds a depth and layered richness that is both visually striking and incredibly memorable for your guests.

By mastering this one element, you can craft a stunning and cohesive look. For a broader view on creating a chic event atmosphere, explore our guide to elegant party rentals that can complement your theme. Black linens really do provide the perfect foundation for an unforgettable event.

Choosing the Right Fabric for Your Black Table Cloths

A close-up of different black table cloth fabrics, showcasing their unique textures and sheens.

The entire mood of your event can hinge on one simple thing: the fabric of your table cloths. Choosing the right material for a black table cloth is a bit like picking the right outfit for an occasion—it sets the tone and determines how everything looks, feels, and even performs.

Every fabric has its own personality. You've got different textures, sheens, levels of durability, and the way the material drapes over the table. Getting to know these differences is the secret to matching your linens to your event's theme, vibe, and practical needs. Whether you're after high-glamour sophistication or something sleek and modern, the fabric is where it all begins.

Polyester: The Reliable Workhorse

Think of polyester as the trusted bakkie of the event world. It’s the most common choice for black table cloths, and for good reason: it’s incredibly tough, fights off wrinkles, and won’t break the bank. This makes it a brilliant, practical option for everything from big corporate functions to busy family celebrations.

Polyester usually has a matte or low-sheen finish, which gives you a deep, true black colour that acts as the perfect canvas for any decor you throw at it. Its resilience means it can handle spills and repeated use, making it a firm favourite for rental companies and anyone who hosts events often.

The bottom line: If you need a dependable, cost-effective, and low-maintenance option that always looks polished, polyester is your go-to. It gives you a clean, professional look without any of the fuss.

Interestingly, the South African clothing and textiles industry, which supplies many of these materials, has been through some big shifts. The sector's contribution to total manufacturing was about 2% in late 2022. Our local industry has also seen a rise in imported goods, with 61% of clothing and 41% of textiles now coming from overseas. You can dig deeper into the local textile industry and its evolution to learn more.

Satin: The Touch of Glamour

When your event needs a bit of drama and luxury, satin is the answer. With its high-sheen, glossy surface, a black satin table cloth reflects light beautifully, creating a feeling of pure opulence. This lustrous quality makes it perfect for swanky evening events like weddings, galas, and milestone birthdays where you want to create a rich, glamorous atmosphere.

While it's undeniably gorgeous, satin is more delicate than polyester and can snag or wrinkle more easily. But when making a massive visual impact is the top priority, nothing beats the luxurious feel and radiant look of satin.

Damask and Jacquard: The Textured Elegance

For those who want to add a subtle layer of depth and pattern, damask and jacquard weaves are fantastic choices. These fabrics have intricate patterns woven right into the material, creating a stunning tone-on-tone effect.

  • Damask: Often features floral or ornate patterns that are reversible. The design is created by contrasting a satin weave with a duller background, giving it a subtle, textured shimmer.
  • Jacquard: This is a broader category that includes damask. Jacquard fabrics can have more complex patterns, from geometric shapes to detailed motifs.

These materials add a touch of classic sophistication without needing another colour. The texture catches the light in really interesting ways, giving your tables a visual appeal that's both refined and elegant.

Spandex: The Modern and Sleek Fit

For a completely different look, spandex (or Lycra) offers a contemporary, form-fitting solution. Often sold as fitted covers, spandex table cloths stretch tightly over a table, getting rid of every single wrinkle and creating a clean, almost sculptural silhouette.

This sleek look is ideal for:

  1. Modern Cocktail Parties: Perfect for highboy or poseur tables.
  2. Trade Shows and Exhibitions: Gives a professional and easily brandable look.
  3. Contemporary Events: Looks amazing with minimalist decor and LED furniture.

Spandex is incredibly durable and a breeze to care for, making it a practical and stylish choice for events that need a sharp, modern edge. It smooths over any scuffs or imperfections on the table itself, guaranteeing a flawless finish every time.

How to Master Table Cloth Sizing for a Polished Look

Nothing throws off a beautiful event setup faster than a badly fitting tablecloth. If it’s too short, it looks cheap and accidental. Too long, and it suddenly becomes a tripping hazard for your guests. Getting the sizing just right is the secret to making your black table cloths look polished, intentional, and utterly professional.

The key to all this is understanding one simple concept: the “drop”. This is just the length of fabric that hangs down from the tabletop. How long that drop is completely changes the feel of the event, defining the table's silhouette and shifting the whole atmosphere of the room.

Understanding the Different Tablecloth Drops

Choosing the right drop is a bit like picking the right hemline for an outfit—it sets the tone. There are three main lengths you'll work with, and each one creates a completely different effect.

  • Half-Drop (Casual and Practical): This drop hangs about halfway to the floor, usually 15 to 20 cm. It’s a clean, informal look that works brilliantly for casual get-togethers, garden parties, or corporate events where people are standing and mingling. It's practical, stays clear of chairs, and just looks neat.

  • Full-Drop (Elegant and Formal): This is the go-to for any formal event, like a wedding or a gala dinner. The tablecloth drops right to the floor, hiding the table legs completely. This creates a stunning, seamless column of colour that makes the whole room feel more luxurious.

  • Puddled Drop (Dramatic and Lavish): If you want to make a serious statement, this is it. The fabric extends past the floor and "puddles" in a lush pool around the base of the table. It’s a very stylised look, usually saved for high-impact spots like the cake table, gift table, or the main table at an opulent celebration.

A Quick Guide to Sizing Your Black Table Cloths

Want to get it right every time without the guesswork? You just need two measurements: your table's dimensions (length and width for a trestle, or diameter for a round table) and its height. The standard table height in South Africa is 76 cm.

Once you know what kind of drop you want, the maths is surprisingly simple.

For a round table: Table Diameter + (Drop Length x 2) = Your Tablecloth Diameter.

For a rectangular table:

  • Table Width + (Drop Length x 2) = Your Tablecloth Width.
  • Table Length + (Drop Length x 2) = Your Tablecloth Length.

That’s it! Following this little formula ensures you’ll choose the perfect size. A well-fitted cloth is the foundation of your table design, and getting this right is a game-changer. To make things even easier, our complete guide on tables and chair rentals can help you coordinate all your furniture needs perfectly.

Sizing Guide for Black Table Cloths on Standard ZA Tables

To make life even simpler, we've put together a quick cheat sheet for the most common table sizes you'll find here in South Africa. Use this chart to quickly find the right black tablecloth for the most popular drop lengths.

Table Shape & Size (cm) Guests Seated Half-Drop Cloth Size (cm) Full-Drop Cloth Size (cm)
Round 150 cm 6-8 Round 180 cm Round 305 cm
Round 180 cm 8-10 Round 210 cm Round 335 cm
Trestle 180 x 75 cm 6-8 Rectangular 210 x 105 cm Rectangular 335 x 230 cm
Trestle 240 x 75 cm 8-10 Rectangular 270 x 105 cm Rectangular 395 x 230 cm

With this guide, you can be confident your black table cloths will drape perfectly, giving you that flawless, high-end finish that takes your event from good to absolutely unforgettable.

Styling Ideas for Black Table Cloths

Right, you’ve picked the perfect fabric and you’ve got the sizing sorted. Now for the fun part – the creative magic! A black tablecloth isn’t just a piece of material to cover a table; it's a blank canvas. Think of it as the 'little black dress' of event design. It’s timeless on its own, but with the right accessories, it becomes absolutely spectacular.

The real strength of black is just how versatile it is. It can anchor almost any look you can dream up, from over-the-top glamour to sleek, understated modernism. By layering different colours, textures, and especially lighting, you can turn that simple black base into a breathtaking tablescape that tells the story of your event.

Let’s get into some practical ideas to bring your vision to life.

Creating Classic Elegance

For a look that simply never goes out of style, you can't go wrong pairing black tablecloths with crisp white and gleaming metallics. This high-contrast combination is the very definition of sophistication, making it perfect for formal weddings, awards dinners, and upscale galas.

  • White and Gold: Picture this: your black linen topped with brilliant white dinner plates, framed by gold charger plates and matching gold cutlery. It's a look that’s immediately luxurious and incredibly striking.
  • Monochromatic Grace: For something a touch softer, try pairing the black cloth with ivory or cream napkins. Add centrepieces filled with classic white flowers like roses, hydrangeas, or orchids to complete the elegant picture.

This timeless aesthetic is all about clean lines and a polished finish. It creates an atmosphere of pure, refined grace, and honestly, it’s a classic for a reason – it always looks impeccable.

Embracing Modern Minimalism

If your event is leaning more towards a chic and contemporary feel, black provides the perfect backdrop for a minimalist design. Here, the focus shifts to sleek silhouettes and uncluttered surfaces. It's a "less is more" philosophy where the deep, solid black of the cloth makes every simple, high-quality item pop.

Think about using slate or stone charger plates, matte black cutlery, and simple, elegant glassware. For a centrepiece, a single sculptural piece works beautifully – maybe a geometric candle holder or a minimalist floral arrangement in a clean, clear vase. The idea is to let the quality of each item speak for itself against that dark, uninterrupted background.

The power of a minimalist black tablescape lies in its confidence. It doesn't shout for attention; it commands it through deliberate simplicity and clean, impactful design choices.

Designing for Nighttime Events

Black tablecloths really come into their own at evening events. They have this amazing ability to merge with the ambient darkness, creating an immersive and dramatic atmosphere. The secret to getting this right, though, is strategic lighting. Without it, the space can feel a bit sombre instead of sophisticated.

This is where your lighting design becomes a crucial part of your tablescape. Weaving delicate strings of fairy lights down the centre of the table can create a magical, starry-night effect. You can get more inspiration for this by reading our guide on how to style a fairy light curtain, which has fantastic ideas you can adapt for your tables.

Using LED furniture and uplighting around the room is another game-changer. It casts a beautiful glow that the black linens will absorb and reflect in really interesting ways. That’s why pairing black with reflective elements is so important for night events.

  • Metallic Runners: A sequined gold or silver runner will catch the light beautifully.
  • Crystal and Glass: Don't be shy with glassware and crystal candle holders – they will sparkle and dance in the low light.
  • Bold Centrepieces: This is the time for vibrant, colourful florals that will pop dramatically against the dark canvas.

The infographic below shows the different drop lengths you can choose, which really sets the foundation for your tablescape's style.

Infographic showing half-drop, full-drop, and puddled tablecloth styles.

This visual guide helps make it clear how the length of the cloth—from a casual half-drop to a formal full-drop or a dramatic puddle—sets the initial tone for your whole design.

When you skillfully combine black tablecloths with thoughtful lighting and reflective decor, you can create a truly electrifying and unforgettable nighttime atmosphere.

Renting vs Buying Your Black Table Cloths

When you're planning an event, one of the first practical hurdles you'll hit is deciding whether to rent or buy your black table cloths. It sounds simple, but this choice goes way beyond just the price tag. You're really weighing up convenience, long-term value, storage, and the dreaded post-event clean-up.

Getting this right can save you a mountain of stress (and money!), so let’s get into the nitty-gritty of how this plays out in the South African event scene.

The whole decision really boils down to one question: how often will you actually use them? Think of renting as paying for a perfect, hassle-free experience for a single day. Buying, on the other hand, is an investment. You're buying an asset you'll use again and again.

The Case for Renting Black Table Cloths

For most people planning a once-off event – think a wedding, a 21st birthday, or a special corporate gala – renting is almost always the way to go. The biggest win here is pure convenience. Event hire companies are pros at this; they deliver professionally laundered, crisp linens and, best of all, they whisk them away for cleaning afterwards.

That means no worrying about red wine stains or figuring out where to store a dozen bulky cloths. It’s just not your problem.

On top of that, renting gives you:

  • A Lower Upfront Cost: You’re only paying a small fraction of the retail price, which frees up your budget for other things, like the food or entertainment.
  • Access to Top-Notch Quality: Rental companies stock professional-grade fabrics like heavy-duty polyester or elegant satin that would cost a fortune to buy outright.
  • Total Flexibility: You can pick the perfect size and fabric for this specific event without being stuck with one style forever.

When Buying Your Linens Makes Sense

Now, if you're a venue, a busy event planner, or a business that holds regular functions, buying your black table cloths starts looking much more attractive. Yes, the upfront cost is higher, but it pays for itself over time. Every time you use your own linens, you're chipping away at the cost-per-use, making it a smart long-term investment.

The main advantage here is long-term value. If you're hosting events every month, you could easily recoup the purchase cost within a year or two compared to what you'd spend on continuous rental fees.

Owning them also puts you in complete control. You can have the linens customised, hemmed to a specific length for your tables, or even monogrammed with your brand. Of course, this means you need a clean, dry place to store them and the ability to launder and press them properly to keep them looking sharp.

The market for buying household textiles is definitely there. In fact, recent data showed that in the second quarter of 2024, the household furniture, appliances, and equipment sector in South Africa recorded sales of R13,609 million. It's a sign that people are consistently investing in these kinds of goods. You can dive deeper into the South Africa's retail trade sales figures on Statssa.gov.za.

A Side-by-Side Comparison

To make it even clearer, here’s a straightforward breakdown to help you choose what’s right for you.

Key Takeaway: Let frequency be your guide. For a single event, the convenience of renting is unbeatable. For regular use, buying offers far better financial value in the long run, as long as you've got the space and resources to care for them.

Factor Renting Black Table Cloths Buying Black Table Cloths
Best For One-off events (weddings, parties) Venues, frequent hosts, caterers
Upfront Cost Low High
Long-Term Value Low (single use) High (multiple uses)
Maintenance None (handled by the company) Your responsibility (washing, storage)
Storage Not required Requires significant, clean space
Convenience Extremely high Low

When you've invested in beautiful, high-quality black tablecloths, you want them to stay that way. Rich, dark, and ready for every event. But dark fabrics can be tricky – they show up lint, stains can be surprisingly visible, and fading is always a risk.

A little bit of know-how goes a long way in keeping your linens looking as dramatic and sophisticated as the day you got them.

It's not just about looking good; it's smart business. In South Africa, spending on textiles for events and other uses hit a massive R12.5 billion by the end of 2022. This shows just how much we value quality materials, and proper care ensures you get the most out of your investment. You can dive deeper into these figures in the latest South African textile industry study.

Washing to Preserve That Deep, Rich Colour

The secret to stopping your black tablecloths from looking washed out is a gentle washing routine. Always, always use cold water. Hot water is the enemy of dark dyes, causing them to bleed out and lose their intensity over time.

Stick to a mild liquid detergent made for dark colours. These are much gentler and help lock the dye into the fabric. Steer clear of powdered detergents, as they can sometimes leave a chalky film on dark fabrics, and it goes without saying: never use bleach or any detergent that has chlorine in it.

Tackling Common Event Stains

Let's be honest, an event is a minefield of potential stains. But acting fast can save your linens from disaster. The golden rule is to pre-treat stains before they even see the inside of a washing machine. Once heat from a dryer hits a stain, it can set it for good.

Pro Tip: Whatever you do, don't rub a fresh spill! Grab a clean, damp cloth and blot the stain gently. Always work from the outside in to stop it from spreading. It's a simple trick that makes a world of difference.

Here’s your action plan for the usual suspects:

  • Red Wine: The classic party foul. Blot it immediately, then sprinkle salt over the area to draw out the liquid. A good wine stain remover used before washing is also a lifesaver.
  • Oily Food or Grease: Dab a small amount of dish soap right onto the spot and gently work it in with your fingers. Let it sit for a few minutes before you wash it.
  • Candle Wax: First, let the wax harden completely. Scrape off as much as you can with a dull knife. Then, place the stain between two paper towels and press it with a warm (not hot!) iron. The paper will soak up the melted wax like a charm.

Drying and Storing for a Flawless Finish

How you dry your black tablecloths is just as important as how you wash them. To keep them from fading and to cut down on wrinkles, tumble dry on a low heat setting.

The trick is to pull them out of the dryer while they're still just a little bit damp. This makes ironing so much easier.

When you do iron, turn them inside out and use a medium heat setting. The final step is storing them properly. You can fold them neatly, but hanging them in a cool, dry cupboard is even better. This prevents those stubborn, deep creases and makes sure your black tablecloths are ready to steal the show at a moment's notice.

Answering Your Top Questions About Black Table Cloths

Even when you have a clear vision, a few last-minute questions always seem to pop up, especially with a bold choice like black. It can feel like a big commitment, but trust me, with the right information, it's a decision you can make with total confidence. Let's run through the most common queries we get from event planners right here in South Africa.

Think of this as your final checklist. It’s here to iron out any lingering doubts and make sure your event design isn't just beautiful, but perfectly executed. We'll cover everything from wedding etiquette to making sure the room feels magical, not gloomy.

Are Black Table Cloths Okay for a Wedding?

Absolutely! In fact, they’re becoming a go-to choice for modern, chic, and sophisticated weddings. Black acts as a stunningly dramatic canvas that makes everything else pop. Your vibrant floral arrangements, gleaming metallic cutlery, and colourful glassware will stand out with an incredible intensity you just don't get with other colours.

This look works particularly well for:

  • Evening receptions where you're aiming for a touch of glamour.
  • Black-tie events that demand the ultimate in sophistication.
  • Art Deco, contemporary, or even moody romantic wedding themes.

How Do I Stop Black Linens From Looking Faded?

Keeping that rich, deep black colour is all about how you care for them. The secret is in the wash cycle. Always wash your black table cloths in cold water, and use a detergent made specifically for dark fabrics. It's crucial to stay away from bleach or any harsh chemicals that will strip the dye right out.

When it's time to dry, use a low heat setting on your tumble dryer. Even better, line dry them out of harsh, direct sunlight. Following this simple routine is the best way to prevent fading and keep your linens looking brand new.

What Colour Napkins Should I Use?

This is where the fun really begins, as you can completely define the style of your event. For a timeless, high-contrast look that just oozes elegance, you can't go wrong with crisp white or classic ivory napkins. If you want to dial up the glamour, metallic napkins in gold, silver, or rose gold will add a beautiful, luxurious shimmer.

Want to inject some personality? Go for deep jewel tones. Rich colours like emerald green, sapphire blue, or a deep ruby red look absolutely stunning against black and are a fantastic way to tie your whole colour scheme together.

Will the Venue Feel Too Dark?

This is a very common concern, but it's one that's easily managed with a bit of smart styling. The key is balance. First, make sure the venue has good lighting. Then, you need to deliberately bring in reflective elements to your tablescape to catch and bounce that light around the room.

Think about using glassware with interesting cuts, metallic charger plates, or even a sequined table runner. Bright, colourful floral centrepieces and napkins will also bring so much life and dimension to the setup, creating an atmosphere that feels dramatic and inviting, not dark and heavy.


Ready to create a stunning, sophisticated look for your next event? ABC Hire offers a premium selection of high-quality black table cloths and all the event essentials you need to bring your vision to life.

Explore Our Event Hire Collection and Get a Quote Today

Choosing Bar Table With Chairs For Your Event

Choosing the right bar table with chairs isn't just about giving people a place to sit; it's about choreographing the entire social vibe of your event. The furniture you pick is the silent director of your party, guiding everything from lively mingling to quiet, intimate chats.

The Strategic Role of Bar Tables in Event Design

Bar tables with chairs arranged for a stylish event

Imagine your venue is a blank canvas. A bar table and chair set isn't just a piece of furniture; it's your brushstroke for creating different zones, each with its own energy. We call this event zoning, and it’s the secret to smart space planning. It lets you subtly influence how your guests interact without having to say a single word.

The real magic lies in knowing when to use standing social hubs versus seated conversation nooks. Each one serves a completely different purpose, and getting the mix right is what creates a truly brilliant atmosphere.

Creating Social Hubs and Intimate Nooks

High cocktail tables, or "poseur tables" as they're often called, are natural centres of gravity for any event. Their height encourages guests to stand, move about, and chat with different people. This makes them absolute winners for:

  • Networking Events: They keep the energy flowing and stop people from getting stuck in one spot all night.
  • Welcome Receptions: Pop them near the entrance or bar to create an instant buzz as guests walk in.
  • High-Traffic Areas: They act as handy "perches" for someone to put down their drink while they have a quick chat.

On the other hand, a lower bar table with chairs or stools creates a much more relaxed, grounded feel. These setups are an open invitation for guests to settle in for longer, more meaningful conversations. They create cosy, intimate zones perfect for small groups who want to connect away from the main hustle. Think of that quiet corner at a wedding where family can properly catch up, or a dedicated lounge spot at a corporate do for deeper discussions.

By cleverly mixing both standing and seated options, you create a balanced space that works for every type of personality, making sure all your guests feel right at home.

The Influence of Materials and Lighting

The material of your bar tables and chairs is a huge part of telling your event's story. A rustic wooden table brings a wonderful warmth and charm to an outdoor wedding in the Cape Winelands. By contrast, a sleek metal or acrylic table gives a sharp, contemporary feel that's perfect for a product launch in the city.

Lighting then comes in to amplify that mood. Warm, ambient light will make the grain of a wooden table glow, creating a cosy, inviting atmosphere. But throw some dynamic coloured lighting on modern furniture, and you can transform a simple room into a vibrant, high-energy space. Understanding how these two elements work together is the key to a cohesive and unforgettable look.

To get more ideas on how furniture can define your event, check out our complete guide to selecting a bar table and chairs. When you think about these details, your furniture stops being just a prop and becomes a key player in crafting an amazing experience.

Exploring Bar Furniture Styles And Materials

When you start looking at bar furniture, you quickly realise it’s about more than just giving people a place to put their drinks. Every bar table with chairs tells a story and sets a tone. This isn't just a rental decision; it's a creative choice that will directly shape how your guests feel and interact.

The first big decision comes down to one simple question: do you want your guests standing and mingling, or sitting and settling in? It’s like choosing between creating a vibrant, bustling town square or a quiet, cosy café. Both are fantastic, but they encourage completely different social dynamics.

Standing Cocktail Tables For Dynamic Mingling

Often called poseur tables, these taller, slimmer tables are the secret ingredient for a high-energy, social event. They’re designed for guests to gather around while standing, creating fluid and informal social hubs. Their height naturally keeps people on their feet, making it easy to drift in and out of conversations without the commitment of finding a seat.

This makes them a brilliant choice for:

  • Networking Functions: They keep the energy up and stop guests from getting stuck in one spot, encouraging them to circulate and make new connections.
  • Pre-Event Receptions: Dotted around the space, they’re the perfect landing spots for drinks and canapés while guests arrive and get chatting.
  • Crowded Venues: Their small footprint is a lifesaver in tight spaces, letting you host more people without the room feeling cramped.

Think of them as the social butterflies of event furniture—they create little pockets of activity and keep the atmosphere buzzing.

Seated Bar Tables For Comfortable Connections

On the other hand, a classic bar table with chairs or stools sends a very different message: "Settle in, get comfortable." By adding seating, you’re creating dedicated zones for rest and deeper conversation. These setups are perfect for guests who want to have a proper chat, enjoy a more substantial bite to eat, or simply take a break.

Seated arrangements are fantastic for carving out relaxed lounge areas away from the main action. They offer a welcome retreat for anyone needing a rest from standing and are ideal for creating more intimate nooks within a larger event.

The real magic often happens when you use a mix of both. Use standing tables to build energy in high-traffic spots, and place seated tables in other areas to offer pockets of comfort and quiet conversation.

The Impact Of Different Materials

Once you've nailed the function, it's time to think about the feel. The material of your bar table and chairs is your best tool for setting the theme. Each one brings its own personality to the table, and can completely change the mood of your event.

Warm and Rustic Wood
You can't go wrong with wood. It's a timeless choice that brings a sense of warmth, authenticity, and natural charm. A beautiful wooden bar table can look right at home at a rustic farm wedding or add an earthy, organic touch to a slick corporate dinner. It’s this versatility that makes it so popular.

In fact, wood is a cornerstone of the South African furniture industry, accounting for around 70% of all materials used. There's a growing love for sustainable, locally sourced options like premium pine and indigenous hardwoods, which has cemented wood’s place as a go-to for creating inviting event spaces. You can read more about the South African furniture market on Fortune Business Insights.

Sleek and Modern Metal
For a sharper, more contemporary vibe, metal is the way to go. Tables made from materials like aluminium or steel have an industrial-chic feel that's perfect for product launches, modern art shows, or cool urban parties. Pair them with the right lighting, and you can create a seriously dramatic and sophisticated look. If you're curious about this style, have a look at our guide on the benefits of hiring metal cocktail tables.

Innovative Illuminated LED Furniture
If you really want to make an impression, especially after dark, illuminated LED tables are showstoppers. These aren't just tables; they're dynamic pieces of decor. They can glow in a single colour to match your theme or cycle through a whole spectrum of hues, instantly transforming the atmosphere. LED furniture is perfect for creating a futuristic lounge, lining a vibrant dance floor, or just adding that unforgettable "wow" factor as the sun goes down.

Mastering Dimensions For Flawless Space Planning

You’ve picked the perfect style for your bar furniture. Awesome. But now comes the part that truly separates a good event from a great one: getting the dimensions right. Planning the size and layout of your bar table with chairs isn’t just about making sure everything fits; it’s about creating a vibe, a flow, and an experience your guests will remember.

This is where the magic really happens. A thoughtful layout prevents those awkward human traffic jams, lets your service staff glide through the crowd, and makes every single guest feel like they have their own comfortable spot in the room.

Getting The Height Right

First things first, let's talk height. Bar tables generally come in two standard heights, and matching them with the right stool is non-negotiable for comfort. We’ve all been there—perched on a stool that’s too low or awkwardly high for the table. Let’s make sure that doesn’t happen at your event.

  • Counter-Height Tables: These are typically 90-95 cm high. You’ll want to pair these with counter stools that have a seat height around 60-70 cm.
  • Bar-Height Tables: Often called poseur tables, these stand taller at 105-110 cm. For these, you'll need proper bar stools with a seat height of 75-80 cm.

Getting this pairing spot-on means your guests can lean in, chat comfortably, and have enough legroom, whether they’re sipping a cocktail or having a more involved conversation.

Calculating Your Guest Capacity

Next up: how many people can you fit around each table? This really comes down to whether your guests will be perching or sitting. A standing-height cocktail table is fantastic for quick, flowing chats and can host more people. A seated table, on the other hand, creates a more intimate but fixed-capacity zone.

A standard round cocktail table with a 60-80 cm diameter is perfect for 3-4 guests to stand around. But if you add chairs to that same table, you’re realistically looking at seating for 2, maybe 3 guests at a push. For rectangular tables, a solid rule of thumb is to allow about 60 cm of table edge per person.

Here’s a pro tip we’ve learned over the years: don't order a chair for every guest at a cocktail-style event. You generally only need seating for about 30-40% of your attendees at any given time. This actually encourages people to move around and mingle, keeping the energy alive.

Designing Your Layout With Circulation Pathways

Okay, let's place these tables in your venue. I like to think of a layout as a collection of islands (your furniture clusters) and rivers (the pathways for people to move). Your job is to create wide, clear “rivers” so that everyone can flow through the space without a hitch. These are your circulation pathways.

These pathways are absolutely crucial, especially around hotspots like the bar, the entrance, or the restrooms. A poorly planned layout creates bottlenecks that kill the mood and make a venue feel cramped, no matter its actual size.

To get a feel for how different furniture styles can create different zones, check out this simple visual guide.

Infographic about bar table with chairs

It maps out the flow from high-energy standing tables to more relaxed seating areas and finally to high-impact LED furniture, helping you design distinct zones for your event.

To help you nail the spacing, here’s a quick reference chart we use all the time.

Quick Guide To Bar Table Dimensions And Spacing

Use this reference chart to select the right table sizes and ensure you allocate enough room for comfortable guest circulation.

Table Type Typical Height Typical Diameter/Width Guests (Standing) Guests (Seated) Recommended Space Per Table
Round Cocktail 105-110 cm 60-80 cm 3-4 2-3 2.5m x 2.5m
Square Cocktail 105-110 cm 60×60 cm 3-4 2 2.5m x 2.5m
Rectangular Bar 105-110 cm 180×60 cm 6-8 4-6 3.5m x 2.5m
LED Cube 40-50 cm 40×40 cm / 50×50 cm N/A 1 1.5m x 1.5m
LED Cocktail 110 cm 60 cm 3-4 2 2.5m x 2.5m

A few key measurements will save you a lot of headaches on the day:

  • Main Walkways: For those main arteries with heavy foot traffic, aim for a width of at least 1 to 1.5 metres.
  • Between Seated Tables: Leave a minimum of 1.2 metres between chairs that are back-to-back. This gives people enough space to pull their chairs out without bumping into anyone.
  • Around Individual Tables: Make sure there's at least 75 cm of clear space around each table so people can get in and out easily.

By taking a bit of extra time to plan your dimensions and pathways, you’re doing more than just filling a room—you’re designing an environment. It’s this attention to detail that ensures every bar table with chairs you hire helps create a flawless, fun, and memorable experience for all.

Matching Your Furniture To The Event And Venue

Choosing the right bar table with chairs is a lot like casting the perfect actor for a role. The furniture has to do more than just look the part; it needs to feel right for the scene and the setting. This is where we go beyond just picking individual pieces and start thinking about the complete picture, making sure every table and chair works in harmony with your event's theme, venue, and lighting.

That synergy is what transforms a space into an experience. A sleek, minimalist table that looks incredible at a tech product launch would feel completely jarring at a rustic garden wedding. The goal is to make your furniture choices feel intentional and seamless, as if they were designed specifically for that moment and that space.

Aligning Furniture With Your Event Theme

Think of your event theme as the script. Your furniture choices are the props that bring that script to life, reinforcing the story you want to tell your guests. Every style of bar furniture carries its own vibe and sets a certain expectation.

Let’s run through a few scenarios:

  • For a Corporate Product Launch: The theme is usually innovation, professionalism, and modern design. This calls for clean lines and sophisticated materials. Think minimalist metal tables, sleek acrylic poseur tables, or even our illuminated LED furniture that can be set to your brand's colours. The furniture needs to send a sharp, forward-thinking message.

  • For a Romantic Wedding: Here, you're aiming for warmth, intimacy, and celebration. Rustic wooden bar tables with chairs are a perfect fit, especially for a venue in the Cape Winelands. They add a natural, charming character that feels both elegant and relaxed. Paired with soft linens and floral centrepieces, they help create that enchanting atmosphere.

  • For a Milestone Birthday Party: The vibe is all about fun, celebration, and social energy. This is your chance to be more playful! Brightly coloured metal stools, quirky table designs, or a mix of high and low tables can create a dynamic space that gets guests mingling and having a great time.

Your furniture is a powerful visual cue. It's one of the first things guests notice, and it instantly sets their expectations for the experience ahead. Make sure it’s telling the right story.

Complementing The Venue's Unique Character

Your venue isn't just a backdrop; it has its own distinct personality. The best furniture choices don't fight against this character—they enhance it. Whether you're in a historic building or a modern blank-canvas space, your bar tables and chairs should feel like a natural extension of the environment.

A raw, industrial warehouse with exposed brick and ductwork, for example, is the perfect stage for sturdy metal or reclaimed wood furniture. These materials echo the venue's edgy aesthetic. On the flip side, in an elegant ballroom with chandeliers and ornate details, you’d want to choose more refined pieces—perhaps tables draped in luxurious fabrics or classic designs that complement the sophisticated surroundings. And for an outdoor marquee, weather-resistant materials are key, but you can still match the style to the event, from a relaxed beachy look to a formal garden party.

The Powerful Relationship Between Furniture And Lighting

Lighting is the final, crucial layer that pulls everything together. It has the power to completely transform the mood and highlight the best features of your chosen furniture. The interplay between light and material can create some truly magical effects.

Warm, ambient lighting, for instance, can make the grain of a wooden bar table with chairs practically glow, enriching its texture and creating a cosy, inviting feel. It’s perfect for crafting an intimate dinner setting or a relaxed lounge atmosphere.

On the other hand, dynamic, coloured lighting can turn simple acrylic or metal furniture into a stunning focal point. Imagine how vibrant uplighting can make a set of white poseur tables pop, or how a slow colour-fade effect on our LED furniture can bring a high-energy party zone to life. Always think about your lighting plan when selecting your furniture to ensure they work together to build the exact atmosphere you envision for your guests.

Styling Your Bar Tables For Maximum Impact

A beautifully styled bar table with chairs set up for an elegant outdoor event.

Once you’ve nailed down the practical side of your layout, the fun really starts. Styling your bar table with chairs is where you transform them from just places to sit into genuine design features that bring your event's theme to life. This is your chance to inject personality, sophistication, and visual flair that your guests will definitely notice.

Think of each table as a mini stage. It’s an opportunity to echo your colour scheme, subtly showcase your brand, or just create a beautiful, welcoming spot. Even the smallest, most thoughtful details can completely change the atmosphere, turning a functional area into a properly styled and memorable experience.

Choosing Centrepieces And Linens

The most obvious way to dress up a bar table is with a centrepiece. But with taller poseur tables, there’s one golden rule: keep it low. The whole point is to add a touch of style without getting in the way of a good chat. You don’t want your guests playing peek-a-boo around a massive floral display just to see who they’re talking to.

Here are a few practical but chic ideas:

  • Low Floral Arrangements: A few elegant stems in small bud vases or some low, compact posies add a pop of colour and life without blocking anyone’s view.
  • Candle Clusters: For evening events, a group of small candles or LED votives creates an instantly warm and intimate glow.
  • Minimalist Objects: Sometimes less is more. A simple, sculptural piece or a tastefully designed table number can add a clean, modern touch.

Linens are another game-changer. While many modern bar tables look fantastic on their own, a high-quality linen or a stylish runner can instantly connect the furniture to your event's colour palette. A crisp white linen gives off a classic, formal vibe, whereas a textured or coloured fabric can add real depth and character.

Creating Branded And Themed Vignettes

For corporate functions, styling is a fantastic chance for some clever, low-key branding. Forget about huge, in-your-face banners. Instead, you can weave your brand into the décor in a much more natural and sophisticated way. Think custom-printed coasters with your logo, small floral arrangements in your brand colours, or even branded napkins.

Beyond just decorating individual tables, try grouping them to create ‘vignettes’. This is all about arranging a small cluster of furniture and décor to create a distinct, picture-perfect zone within your event.

A vignette isn't just a random group of tables; it's a curated scene. Picture a cosy corner with two upholstered bar stools, a small wooden table, a soft rug, and a floor lamp. It creates an inviting 'moment' that stands apart from the main event space.

These curated zones work wonders. They break up a large room, give guests some fantastic photo opportunities, and make the whole venue feel more thoughtfully put together. You could set up a sleek, modern vignette with metal tables and minimalist décor in one area, and a more relaxed, rustic one with wooden furniture in another. It guides your guests through different moods as they move through the space, and that attention to detail is what makes an event truly stand out.

Making The Rental Process A Breeze

Hiring the perfect bar table with chairs for your event is about more than just picking a great-looking style. Getting a handle on the logistics is what turns a good plan into a seamless, stress-free reality. This is your inside guide to the whole journey, from that first quote right through to the final handshake when we come to collect everything.

Think of renting furniture as bringing a specialist partner onto your event team. When communication is clear and you know what to expect from the get-go, everyone is on the same page, working towards a flawless event. Let’s walk through the essential steps so you can feel completely confident and prepared.

From Quote To Confirmation

It all starts when you ask for a quote. To get the most accurate pricing, be ready with the key details: your event date, the venue’s address, exactly which items you have your eye on, and how many you’ll need. Don't hesitate to ask what the quote covers and what might be an extra cost.

Once you’re happy with the numbers and ready to move forward, we get to the confirmation stage. This is where you’ll check and sign the rental agreement. Honestly, this document is your best friend—it’s the roadmap for the entire hire.

Your rental agreement is there to protect both you and the hire company. It lays out all the responsibilities, clarifies costs, and sets clear expectations so there are no surprises later on.

Getting To Grips With The Rental Agreement

Taking a moment to read the fine print is always a smart move. A professional rental agreement will clearly detail a few key policies you need to know before you sign on the dotted line. Keep an eye out for:

  • Payment Schedule: This simply explains when your deposit is due and when the final balance needs to be settled.
  • Cancellation Policy: Life happens! It's important to know the deadlines for making changes or cancelling your order without facing a fee.
  • Damage Waiver: This is a big one. It's usually a small, optional fee that covers accidental damage to the furniture during your event. It protects you from potentially hefty replacement costs and offers serious peace of mind.

Understanding what's expected of you as the client is just as crucial. For a deeper look into the ins and outs of hiring event furniture, check out our complete guide on renting furniture for events.

The Logistics: Delivery, Setup, And Collection

This is where a professional hire company really proves its worth. Your agreement will lock in all the delivery and collection details. We’ll typically give you a delivery window and sort out access to the venue with you or your planner.

It’s always a good idea to ask if setup and placement are included. Some companies will just drop the items at a designated spot, but a full-service team like ABC Hire will help place the furniture exactly where you want it according to your floor plan. Trust us, this is a massive time-saver on a hectic event day.

Once the party’s over, the collection process works much like the delivery. Just make sure the bar table with chairs are clean, clear of any leftover decor, and gathered in the agreed-upon spot for a quick and easy pickup.

What Really Influences The Price?

A few different things play into the final cost of your furniture rental. Knowing what they are can help you manage your budget like a pro.

  1. Rental Duration: The standard hire is usually for a single event or a 24-hour period. If you need the items for longer, that’s totally possible, but the price will be adjusted.
  2. Quantity and Style: This one’s pretty straightforward—the number of items you hire and their design will affect the cost. A more elaborate, high-end bar table will naturally cost more than a simple, standard one.
  3. Delivery Location: The distance from our warehouse to your venue helps determine the delivery fee. Venues a bit further out, say in Stellenbosch or Franschhoek, might have different rates.
  4. Seasonal Demand: Just like with venues, there are peak seasons for furniture rental. Busy times of the year can affect both pricing and how far in advance you need to book.

Your Bar Table Rental Questions, Answered

Planning an event involves a lot of moving parts, and when it comes to furniture, a few questions always pop up. Let's walk through the common queries we get about hiring a bar table with chairs. Getting these details sorted will make your planning process a whole lot smoother.

How Many Bar Tables Do I Need For My Event?

This is the big one! For a cocktail-style event where you want guests to mix and mingle, a great rule of thumb is to have enough perching spots for 30-40% of your guests at any one time. You don't need a seat for everyone; the goal is to encourage flow and conversation.

So, for a party with 100 guests, you'd be looking at around 10-12 cocktail tables. If you're aiming for a more seated vibe, simply count one bar stool for each guest you want to accommodate and then choose tables that fit 2-4 chairs each. Just remember to check this against your venue's floor plan to make sure there's still plenty of room for people to move around comfortably.

What Is A Damage Waiver And Do I Really Need It?

A damage waiver is basically a bit of event insurance for your hired furniture. It's an optional fee, usually a small percentage of your total rental, that covers you for accidental damage—think a spilled glass of red wine or a chipped table leg. Without it, you could be on the hook for the full replacement cost if something gets broken.

Think of it as peace of mind. It protects your budget from those unexpected "oops" moments that can happen at even the best events.

We always recommend considering it. Just ask your rental company what their waiver covers specifically, so you know exactly what you're signing up for.

Can I Use Indoor Bar Tables For An Outdoor Event?

That really depends on the table itself and what the weather's up to. Many of our stunning wooden or upholstered tables are strictly for indoor use because direct sun or a sudden downpour can cause serious damage.

The most important thing is to let your rental company know your event is outdoors. That way, they can point you towards the right gear—weather-resistant options made from materials like treated wood, aluminium, or tough plastics. This ensures the bar table with chairs you hire will look fantastic from the first guest's arrival to the very last dance.


Ready to create a stunning and functional space for your next gathering? ABC Hire offers a wide range of stylish and high-quality bar tables and chairs perfect for any occasion in Cape Town. Explore our collection and get a quote today at https://abchire.co.za.

Wing Back Chairs for Cape Town Events

A wing back chair isn't just a place to sit; it's a statement. It brings a certain kind of elegance, intimacy, and sense of occasion to an event that few other pieces can. With that distinctive high back and those iconic sheltering 'wings', a wing back chair provides both comfort and a powerful visual anchor, instantly lifting a space from ordinary to something quite special. It’s a classic for a reason.

The Enduring Allure of Wing Back Chairs in Modern Events

A pair of stylish grey wing back chairs arranged in a modern event space.

So, why do these chairs keep showing up at the most stylish events, from Winelands weddings to corporate galas in Cape Town? The secret is in their unique blend of beautiful form and practical function. They don't just fill a space; they create an experience for your guests. Think of them less as furniture and more as tools for crafting atmosphere.

The high backrest is fantastic for support, making them a smart choice for events where guests will be seated for a while, like conferences or long, celebratory dinners. But it’s the 'wings' that really work their magic. Originally designed to keep draughts away in old English manor houses, today they serve a brilliant modern purpose.

Creating Intimacy and Focus

In a busy, bustling event, those wings create a private little nook for guests. They subtly muffle the ambient noise and minimise distractions, making real conversation possible. If you want to create an instant conversational hub, just place two wing back chairs facing each other. It’s a perfect setup for a lounge pocket or a VIP zone.

For an event planner, a wing back chair is a strategic asset. It directs attention, frames important moments, and communicates a standard of luxury and care to every guest who sits in one.

A Growing Market for Statement Seating

We're seeing a huge demand for sophisticated pieces like these. The South African furniture market, currently valued at around USD 2.47 billion, is set for some serious growth. Within that market, wing back chairs make up a solid 12-15% of all accent chair sales, especially in design-savvy hubs like Cape Town where people value both heritage and comfort. You can explore more about this growing market and what's driving it.

This trend points to a bigger shift in event design. Planners and their clients are moving past purely functional seating. They want pieces that add to the overall look and feel of the day.

A well-chosen wing back chair offers so much:

  • A Stunning Visual Focal Point: They are perfect for sweetheart tables, photo booths, or on-stage settings.
  • An Instant Touch of Sophistication: They immediately make an event feel more polished and high-end.
  • Versatile Styling Potential: They can slip into any theme, from classic romance to sleek modern minimalism.

Ultimately, using these chairs sends a clear message. It shows you’re committed to the details, you care about guest comfort, and you’re dedicated to creating a memorable, luxurious atmosphere that people will be talking about long after they've gone home.

Exploring Wing Back Chair Styles for Every Theme

Picking the right wing back chair is really about matching its personality to your event's story. It’s definitely not a one-size-fits-all deal; the silhouette, fabric, and little details all play a huge role in the atmosphere you’re trying to create. Think of it like casting the perfect actor for a key role in your event.

A chair isn't just there to fill a space; it has the power to elevate your entire theme. Let's walk through some of the most popular styles you can hire, connecting each design to the specific mood it helps to build. This should help you pinpoint your vision and choose a chair that truly tells your event's unique story.

The Classic Queen Anne

The Queen Anne is what most people picture when they think "wing back chair." It’s instantly recognisable by its elegant, curved lines and graceful silhouette. You'll spot it by its softer, more fluid shapes, its signature cabriole legs (those are the curved ones with a little decorative foot), and often a shell or fan carving at the very top.

This style just screams classic romance and refined grace. Its regal but welcoming vibe makes it a fantastic choice for:

  • Traditional Weddings: Perfect as the star seating at a sweetheart table or for giving parents and grandparents a distinguished spot.
  • High Teas and Bridal Showers: It adds that perfect touch of classic femininity and charm.
  • Elegant Galas: Use them to craft sophisticated lounge pockets that invite guests to have a quiet chat.

The Queen Anne’s design has stood the test of time, bringing a sense of heritage and class without ever feeling stuffy. It’s a surprisingly versatile option for any event aiming for a polished, upscale feel.

The Stately Chesterfield

If the Queen Anne is all about graceful curves, the Chesterfield wing back is its bold, confident cousin. What gives it away? The deep button-tufting, the rolled arms that often sit as high as the back, and its solid, grounded feel. Usually upholstered in a rich leather, it feels substantial and incredibly luxurious.

This chair brings a sense of gravitas and old-school comfort, making it a powerhouse for certain themes. For a deeper dive into choosing statement pieces like this, our guide on decorative chairs for weddings has some great insights for nailing the perfect aesthetic.

A Chesterfield wing back doesn't just ask guests to sit; it offers them a place of distinction. Its classic, club-like feel is perfect for creating exclusive, comfortable spaces within a larger event.

Think about bringing in a Chesterfield for:

  • Sophisticated Corporate Lounges: A natural fit for VIP areas, speaker green rooms, or quiet networking zones at conferences.
  • Whisky or Gin Bars: It's the perfect companion for a masculine, speakeasy, or library-themed setup.
  • Winter Weddings: Just imagine a pair of these beside a crackling fireplace in a historic Winelands venue—it creates such a warm, inviting scene.

Modern and Contemporary Interpretations

Stepping away from the historical designs, modern wing backs offer a fresh, clean-lined alternative. These styles often take the classic silhouette and strip it back, simplifying it for a more contemporary feel. They might have straighter lines, more angular wings, and sleek, unadorned legs.

Where these chairs really get to have fun is the upholstery. You’ll find them in vibrant velvets, bold geometric prints, and chic, neutral fabrics. This adaptability makes them a fantastic tool for events with a modern edge.

These contemporary wing backs are brilliant for:

  • Product Launches and Brand Activations: You can easily find colours that match corporate branding for a seamless, professional look.
  • Chic Cocktail Parties: They act as stylish statement pieces, adding a pop of colour and personality to the room.
  • Art Gallery Openings or Fashion Events: Their sculptural quality fits right in with creative, forward-thinking environments.

Ultimately, the style you go for sets the whole tone. Whether you need the romantic elegance of a Queen Anne, the commanding comfort of a Chesterfield, or the sleek flair of a modern design, the right wing back chair is out there, ready to help you tell your event's story.

How to Choose the Right Upholstery and Fabric

The fabric on a wing back chair is its soul. It sets the tone, the feel, and the practicality of the chair within your event space. Picking the right upholstery is all about striking a balance between your aesthetic vision and the real-world demands of the occasion. After all, you need those chairs to look flawless from the moment the first guest arrives until the last one leaves.

Think of it like dressing your chairs for the specific role they have to play. You wouldn't wear a delicate silk gown to an outdoor garden party, right? In the same way, you shouldn't choose a plush velvet for a high-traffic area where spills are a real possibility. The material has to match the event's vibe and its logistical realities.

This infographic breaks down the distinct personalities of classic, lounge-style, and modern wing back chairs.

Infographic about wing back chairs

You can see how each style's silhouette—from the regal curves of a Queen Anne to the sleek lines of a contemporary piece—sets a completely different tone for an event.

Comparing Popular Fabric Choices

Choosing the right fabric really boils down to three things: durability, aesthetic, and texture.

For a glamorous indoor wedding reception, a velvet wing back is simply unmatched. Its rich texture catches the light beautifully, creating a sense of opulence and depth. Of course, it’s best suited for a controlled environment where the risk of spills is low.

If you're styling a sophisticated corporate lounge or a VIP area, leather is a serious power player. It has a premium look, is incredibly durable, and can be wiped clean in a second, which makes it a practical choice for longer events. A quality leather wing back communicates professionalism and comfort all at once.

Then you have versatile options like linen and high-performance fabrics. Linen brings a relaxed, organic feel, which is perfect for a Winelands wedding with a rustic-chic theme. On the other hand, modern performance fabrics give you the best of both worlds—they come in a massive range of colours and textures while offering superior resistance to stains and wear.

A quick tip from experience: always consider the lighting. A fabric's colour and texture can look entirely different under the soft glow of fairy lights compared to the bright lights of a conference hall. Asking your supplier for a fabric swatch can be a total game-changer.

To help you decide, here's a quick-reference guide comparing common wing back chair fabrics and their best uses for events.

Upholstery Comparison for Event Planners

Material Best For (Event Type) Aesthetic/Vibe Durability & Maintenance
Velvet Indoor weddings, galas, formal parties Luxurious, opulent, rich Lower durability; needs careful handling. Prone to staining.
Leather Corporate events, VIP lounges, upscale bars Sophisticated, professional, classic Very durable; easy to wipe clean.
Linen Outdoor weddings, rustic themes, garden parties Relaxed, natural, chic Prone to wrinkling and staining unless treated.
Performance Fabric High-traffic areas, family-friendly events, outdoor use Versatile (can mimic other fabrics) Excellent durability; highly resistant to stains and fading.

This table should make it easier to match the right material to your specific event needs, ensuring your chairs are both beautiful and practical.

Understanding the Local Supply

The quality of materials is often tied to where they come from. Globally, the market for wing back chairs includes about 65 importers and 76 manufacturers. Here in South Africa, a good portion of the high-end options are imported. Roughly 20-30% of the supply features premium materials from heritage design hubs like the UK and Italy, which aligns perfectly with the tastes of our upscale clients and the discerning local event industry. You can learn more about these global trade dynamics to see the full picture.

This access to international designs means that as an event planner in Cape Town, you have a fantastic variety of authentic, high-quality upholstery choices right at your fingertips.

Key Upholstery Considerations for Events

To nail your decision, just ask yourself a few practical questions:

  • What kind of event is it? An elegant gala needs a very different fabric from a casual outdoor cocktail party.
  • Who are the guests? If children are on the guest list, a stain-resistant fabric is an absolute must.
  • What’s the venue like? Outdoor settings call for fabrics that can handle humidity and changing temperatures.
  • What’s the mood? Do you want the chairs to feel luxurious, comfortable, professional, or relaxed?

By thinking through these points, you can choose an upholstery that not only fits your colour scheme but also stands up to the demands of your event. That way, your wing back chairs will look just as stunning at the end of the night as they did at the beginning.

Strategic Placement for Maximum Impact

Two elegant wing back chairs creating an intimate seating area at a stylish event.

It’s one thing to choose a gorgeous wing back chair. It’s another thing entirely to know where to place it. That’s where the real magic happens, unlocking its power to completely transform your event space.

Think of these chairs as more than just somewhere to sit. They’re design tools that can guide how your guests move, frame those all-important moments, and create an atmosphere that people remember. The right placement turns a functional item into a true focal point.

The goal is to use the chair’s natural presence to draw the eye and define a space. A poorly placed wing back can feel awkward or get in the way, but a thoughtfully positioned one elevates the whole room. It’s all about creating intentional little scenes—vignettes that feel both luxurious and welcoming, making sure every corner of your venue is working for you.

Creating Memorable Wedding Moments

For weddings, wing back chairs are a brilliant way to dial up the romance and sophistication. They create picture-perfect scenes that couples and their guests will absolutely adore. That elegant silhouette is a natural attention-grabber, making them perfect for highlighting the most important people and moments.

Here are a few high-impact ideas for any wedding:

  • The Sweetheart Table: Frame the happy couple with a pair of stunning wing back chairs. This not only makes them feel like royalty but also creates a beautiful focal point for all those photos during the speeches and toasts.
  • A Photo Booth Lounge: Forget the basic backdrop. Why not design a chic lounge for your photo booth? Two wing backs, a stylish rug, and a small side table create a sophisticated and interactive photo op that guests will queue up for.
  • Ceremony Seating for Honoured Guests: Reserve beautifully styled wing backs for parents or grandparents in the front row. It’s a simple, thoughtful gesture that honours their role on the day.

Designing Corporate and Private Event Layouts

At a corporate function or private party, wing back chairs are your secret weapon for creating zones of comfort and exclusivity. Their very structure lends a sense of privacy and importance, making them ideal for layouts that need to serve different purposes within the same event.

The high back is a huge plus here. It offers fantastic ergonomic support, which is a big deal for guests sitting through long presentations or panel discussions. Focusing on comfort like this sends a clear message of care and professionalism.

By placing wing back chairs strategically, you can subtly guide the social dynamics of an event. You can encourage quiet conversations in one corner while creating a clear focal point for a speaker in another—all with the same versatile piece of furniture.

Here are a few effective layouts for corporate and milestone events:

  1. The Speaker's Stage: A single, commanding wing back chair on stage works wonders for a moderator or keynote speaker. It adds a sense of authority and gives them a comfortable spot during Q&A sessions.
  2. Exclusive VIP Lounges: Arrange clusters of four wing back chairs around a coffee table to create semi-private networking pods. The 'wings' help to muffle background noise, making it easier to have focused conversations.
  3. The Seat of Honour: Celebrating a milestone birthday or anniversary? Designate a special wing back chair for the guest of honour. It instantly becomes a celebratory throne, making them the clear centre of attention for gifts and well-wishes.
  4. Intimate Conversation Nooks: During a cocktail hour, place pairs of wing back chairs in quieter corners of the venue. This invites guests to step away from the main crowd for deeper, one-on-one chats, which can make all the difference for networking.

Ultimately, where you put your wing back chairs should be a deliberate design choice. When you think strategically about how and where to use them, you move beyond just decorating a room and start actively shaping your guests' experience, creating a seamless flow and an impact that lasts.

How to Style Your Wing Back Chairs

A stylishly decorated wing back chair paired with a small side table and a lamp.

A wing back chair is a powerful design anchor on its own, but its true magic comes alive when you treat it as the star of a carefully curated scene. Styling isn’t just about tossing a cushion on the seat; it’s about creating a complete vignette that tells a story and amplifies your event’s atmosphere.

Think of the chair as your main character. The surrounding décor is its supporting cast, and your job is to direct them. By building a small, self-contained world around each chair or pair, you transform a simple seating area into an intentional design moment. From an elegant side table to the soft glow of a lamp, every element works together to make guests feel special.

Building Cohesive Vignettes

Creating a stylish setting is all about layering. You need a mix of textures, shapes, and lighting to make it work. Start by pairing your wing back chairs with other furniture that balances their scale and form. A heavy, substantial chair, for example, looks fantastic next to a delicate, slim-legged side table. The contrast is what makes it interesting.

Pay attention to the visual weight of each piece. If your chair has solid, upholstered sides that go right to the floor, pair it with a table that has slender legs. This allows light and space to flow underneath, preventing the whole setup from feeling too blocky or heavy.

A modern, low-pile rug is a brilliant way to define the space, anchoring the chairs and table to create an intimate "room within a room." This trick is especially useful in large, open-plan venues where you want to carve out distinct zones for conversation or a quiet escape.

Using Textiles for Colour and Texture

This is where you can have some fun. Accent cushions and throws are the easiest and most effective way to tie your chairs into the event’s colour scheme. They’re your chance to be playful while keeping things sophisticated.

For a classic wedding, picture a cream linen wing back with a soft, blush velvet cushion. Or for a bold corporate event, a charcoal grey chair could be energised with a throw in the company's signature brand colour. It’s amazing how these small touches can make such a huge impact.

Don’t be afraid to mix patterns and textures. A smooth leather chair can be softened with a chunky knit throw, or a plain velvet chair can be brought to life with a geometric-print cushion. The key is to maintain a consistent colour story.

Comfort is also becoming a huge deal in modern event design. Recent trends in South Africa show that about 30% of furniture buyers now prioritise ergonomic comfort right alongside style. This is spilling over into the event world, as planners look for seating that not only looks incredible but also keeps guests happy. This makes well-designed wing back chairs an obvious choice. You can discover more about these evolving furniture trends and what they mean for the industry.

The Crucial Role of Lighting

Lighting is what brings your whole vignette to life. It highlights the chair’s dramatic shape and creates that warm, inviting ambiance that guests remember. The right light can completely change the mood.

Consider these lighting options to really show off your chairs:

  • A Slim Floor Lamp: Placed just behind the chair, it casts a soft, downward glow that’s perfect for an intimate reading or conversation nook.
  • A Dramatic Uplighter: Positioned on the floor and aimed up at the chair, an uplighter accentuates its tall silhouette for a theatrical, high-impact look.
  • Table Lamps: A small, elegant lamp on an adjacent side table adds a layer of warm, localised light that makes the space feel extra cosy and welcoming.

Here are a few ideas to get you started on creating those perfect pairings for different event themes.

Styling Combinations for Wing Back Chairs

Event Theme Chair Style/Colour Suggested Pairings Styling Tip
Romantic Wedding Cream or blush velvet Gold-rimmed side table, antique mirror, floral arrangement Drape a delicate, sheer fabric over one wing for a touch of ethereal softness.
Modern Corporate Charcoal grey or navy fabric Sleek chrome side table, geometric-print cushion, branded coasters Use a throw in a bold, contrasting brand colour to make the chair pop.
Winelands Rustic Natural linen or distressed leather Reclaimed wood crate table, chunky knit throw, lantern Keep the lighting warm and low to enhance the cosy, rustic feel.
Glamorous Gala Black leather or jewel-toned velvet Mirrored side table, metallic floor lamp, faux fur throw Go for high-contrast pairings. A black chair with a white fur throw is pure drama.

By combining furniture, textiles, and lighting, your wing back chairs become so much more than just seats. They become key players in your design vision, creating memorable, beautiful, and functional spaces that your guests will love.

Navigating Rentals in the Western Cape

Finding the perfect wing back chairs for your event in Cape Town or the Winelands goes way beyond just picking a gorgeous style. You've got to think about the real-world logistics—from getting them delivered to your venue in Stellenbosch to understanding what happens if a glass of red wine takes a tumble.

Think of your rental company as a key partner in your event's success. A good supplier will be upfront about their process and help you spot potential problems before they happen. This is especially true for outdoor or marquee events, where your beautiful furniture might have to contend with unpredictable weather or uneven ground. The first thing you should do is have a proper chat about the nitty-gritty of your event.

Your Essential Rental Checklist

Before you sign on the dotted line, you need to be crystal clear on what you're getting. A quick conversation can sort out expectations and save you from any nasty last-minute surprises. Getting these details ironed out early is a cornerstone of smart event planning, a topic we dive into deeper in our guide to renting furniture for events.

Go into that conversation armed with these key questions:

  • Delivery and Collection: What are the fees for delivery to venues out in Paarl or Franschhoek? Do those costs go up for weekend or after-hours collections?
  • Setup and Placement: Is setting up the chairs included in the price? Will the delivery team place them according to my floor plan, or is that left to my team?
  • Damage Policy: What’s the plan if a chair gets damaged? Is there a damage waiver I can pay, and what exactly does it cover? This is a must-ask, especially for outdoor functions.
  • Weather Contingency: What happens if the heavens open? What are your policies for protecting delicate pieces, like velvet wing backs, from a sudden downpour?
  • Lead Times: How far ahead do I need to book? This is crucial for popular styles, especially during the mad wedding season in the Winelands.

Having these answers upfront means you can build a realistic budget and plan your day with confidence. No guesswork, no panic.

Demystifying Rental Pricing

The hire price for wing back chairs can vary quite a bit, so it helps to know what’s driving the cost. It’s not just a simple daily rate; it's a mix of the chair's value, the delivery logistics, and how long you need it for.

Here are the main factors that will shape your final quote:

  1. Material Rarity and Quality: It makes sense that a genuine leather Chesterfield or a plush silk-velvet chair will cost more to hire than one in a standard fabric. They are more valuable and need more specialised care.
  2. Design and Exclusivity: An iconic, classic design or a rare vintage find will have a higher price tag than a more common style. You're paying for the "wow" factor it brings to your event.
  3. Delivery Distance: Logistics are a big part of the cost. A delivery to a remote wine farm will naturally cost more in time and fuel than a drop-off at a central Cape Town hotel.
  4. Hire Duration: Most suppliers work on a standard 1-3 day hire rate. If you need the chairs for a full week, ask about a long-term rate—it can often be more budget-friendly.

Here's a pro tip: sometimes spending a bit more on a standout chair that needs less styling can actually save you money on other décor. It's all about creating a balanced and effective budget.

By approaching the rental process with a solid checklist and a clear picture of the pricing, you can confidently book the perfect wing back chairs for your event. This ensures your chosen pieces not only look incredible but also fit neatly into your budget and logistics, setting the stage for a flawless day.

Common Questions About Using Wing Back Chairs

Even the most organised event planner has questions pop up. We get it. To make sure you feel completely confident using wing back chairs at your next function, we’ve put together answers to the queries we hear most often.

Think of this as your practical cheat sheet. From booking timelines to guest comfort, these insights will help you sidestep potential headaches and ensure your event is a roaring success.

How Far in Advance Should I Book?

If you’re planning for the peak wedding season in the Cape Winelands (which is usually September to April), you’ll want to book your specialty furniture, including wing back chairs, at least six to nine months ahead. The really beautiful, unique styles get snapped up fast, especially for weekend dates at popular venues in Stellenbosch and Franschhoek.

Booking early doesn’t just secure your chairs; it gives you a better selection and often a better price. For corporate functions or off-season events, three to four months is typically enough lead time. Still, it never hurts to lock in your favourites as soon as you’ve settled on a theme. Finding the right supplier is the first step, and you can learn more in our guide to hiring chairs near me.

Are Wing Back Chairs Comfortable for Long Events?

Absolutely. In fact, their very design is what makes them so comfortable. That high back provides brilliant support for the upper back, neck, and shoulders. This is a huge plus for guests sitting through long corporate presentations, awards dinners, or a multi-course wedding feast.

The ergonomic shape of a wing back actually encourages better posture than many other accent chairs. This means your guests are far less likely to get fidgety or tired, keeping them comfortable and engaged for the entire event.

Can They Be Used in Accessible Seating Plans?

Yes, and they can be a fantastic, dignified choice for an accessible seating plan when you place them thoughtfully. The sturdy arms on most wing back models give guests excellent support if they need a little help sitting down or standing back up.

The key is to leave plenty of space around the chair for easy movement. Avoid tucking them into tight corners or crowded spots. By placing them in a spacious, clearly marked accessible zone, you’re offering an option that’s both stylish and genuinely practical.

How Can I Protect Delicate Chairs Outdoors?

Using a lush velvet or linen wing back for an outdoor cocktail hour looks incredible, but you need a plan. Your best bet is to place them on a solid, level surface – think a patio, a deck, or a proper temporary floor inside a marquee.

And always have a plan B for the weather. If there’s even a hint of rain, make sure the chairs are under cover. For delicate fabrics, ask your rental company if they offer protective treatments. Another great idea is to have elegant throws ready to drape over the chairs to protect them from direct sun or minor spills.


Ready to find the perfect statement seating for your next event? ABC Hire has a handpicked collection of beautiful wing back chairs for any theme. Take a look at our inventory and let’s create something unforgettable together. https://abchire.co.za

Your Complete Guide to Cross Back Chairs for Events

You’ve probably seen them everywhere, from rustic barn weddings to elegant garden parties. Cross back chairs, sometimes called X-back chairs, are a true classic in the event world, and for good reason. They have this incredible knack for blending in while still making a statement.

So, Why Does Everyone Love Cross Back Chairs for Events?

When you're putting an event together, every little detail matters. Seating isn't just about giving people a place to park themselves; it’s a huge part of your overall look and feel. Cross back chairs have become a go-to for weddings, corporate events, and private parties because they nail that perfect mix of style, comfort, and practicality.

Think of them like the perfect pair of jeans – you can dress them up for a black-tie affair or keep it casual for a relaxed country vibe. Their design has its roots in the charming cafes of early 20th-century France, which gives them a warm, historic feel. It's this blend of rustic soul and elegant design that keeps them so popular.

More Than Just a Pretty Chair

The most noticeable feature is, of course, the 'X' on the back. But it’s not just for looks! That design actually provides great back support, keeping your guests comfortable whether they’re sitting through a long ceremony or a multi-course dinner. Unlike a lot of event chairs that sacrifice comfort for style, the cross back gets it right on both fronts.

And people have definitely noticed. Here in South Africa, they're a massive hit. A 2022 market report showed that cross back chairs accounted for a huge 18% of all dining chair sales in the country. What’s more, 62% of buyers said they chose them for their durability and classic look. It just goes to show they’re a trusted choice for homes and professional venues alike. You can read more about the history of the crossback chair and its market presence if you're curious.

The real magic of the cross back chair is how it adapts. It doesn’t scream for attention but quietly elevates the whole room, adding a layer of charm without taking over your theme.

A Chair for Any Occasion

Honestly, the best thing about cross back chairs is how versatile they are. They’re like chameleons, fitting into almost any event style you can dream up.

Here’s what we mean:

  • Rustic & Barn Weddings: Picture them lined up next to long wooden tables. They instantly create a warm, inviting, and totally authentic atmosphere.
  • Elegant & Formal Events: Get them in a black, white, or even a gold finish, and suddenly they're adding a touch of modern class to a very polished setting.
  • Outdoor & Garden Parties: They’re built tough. This makes them perfect for setting up on grass or slightly uneven ground where other, flimsier chairs might wobble.

At the end of the day, choosing cross back chairs is an investment in a look that’s both timeless and on-trend. They give you a beautiful, reliable foundation to build your event’s style on, making sure your venue looks incredible and your guests are comfortable.

Choosing Your Perfect Chair Material and Finish

The material and finish of a cross back chair are so much more than just minor details. They're the heart and soul of the chair, defining its entire personality and how it will feel in your event space. Think of it like choosing the fabric for a bespoke suit; the material dictates everything from the texture and strength to the overall vibe it gives off.

It all starts with the wood. For a classic cross back, wood is the only way to go, celebrated for its natural warmth and rugged durability. The type of wood you choose sets the foundation for the chair's final look and feel.

The Heart of the Chair: Wood Options

When it comes to high-quality cross back chairs, the two most popular choices you'll come across are oak and beech.

You can think of oak as the strong, dependable character in the story. It's known for its prominent, textured grain that brings a real depth and rustic feel to the table. This makes it an absolute winner for barn weddings or traditional, country-style themes. Its natural strength also means it can easily handle the energy of a bustling event.

Beechwood, on the other hand, is a bit more refined. It has a much finer, smoother grain, giving it a more uniform and polished appearance. This makes it a fantastic canvas for all sorts of finishes, from light, airy washes to bold, solid paint colours. While it’s still incredibly durable, it lends a slightly sleeker, more contemporary feel compared to the earthy charm of oak.

This infographic really gets to the core of what makes the cross back chair such a timeless favourite.

Infographic about cross back chairs

The image shows how the chair’s French countryside roots, rustic elegance, and amazing versatility make it a go-to for just about any event. Getting the chair right is one thing, but pairing it with the right table is just as important. You can dive deeper into that in our guide on choosing wooden tables and chairs.

Finding the Perfect Finish

Once you've picked your wood, the finish is what brings your vision to life. This is your chance to perfectly match the chairs to your event's colour scheme and theme. The finish doesn't just protect the wood; it sets the mood for the whole room.

Let's look at the most popular finishes and what they're best for:

  • Natural or Oak Finish: This is all about letting the wood's natural beauty shine through. It creates a warm, organic, and incredibly inviting atmosphere, making it a go-to for barn weddings, vineyard receptions, and bohemian-inspired gatherings.
  • Limewash Finish: A limewash or whitewash finish gives you a light, airy, and subtly rustic feel. It’s a huge favourite for garden parties, coastal events, and French provincial themes where you want a touch of weathered elegance.
  • White or Black Finish: For something more formal or modern, a solid painted finish is a fantastic choice. White cross back chairs are clean, crisp, and romantic—perfect for a classic wedding. Black, by contrast, brings a bit of drama and sophistication, ideal for modern galas or industrial-chic venues.
  • Distressed Finish: Here, the paint is intentionally weathered to let hints of the wood show through. This technique adds a layer of vintage character and authenticity, making the chairs feel like they have a story to tell.

To make the choice a bit clearer, here’s a quick breakdown of how these materials and finishes stack up for different event styles.

Comparing Cross Back Chair Materials and Finishes

Material/Finish Best For (Event Style) Key Characteristics Durability Rating
Oak (Natural) Rustic, Barn, Vineyard, Bohemian Prominent grain, warm tones, heavy and sturdy feel. Excellent
Beech (Natural) Scandinavian, Modern, Minimalist Fine, subtle grain, lighter wood tone, smooth surface. Very Good
Limewash/Whitewash French Provincial, Coastal, Garden Party Light, airy, weathered look with a soft texture. Good
Solid White Classic Wedding, Formal, Elegant Clean, crisp, and bright. Highly versatile. Good
Solid Black Modern, Industrial-Chic, Gala Sophisticated, dramatic, and contemporary. Good
Distressed Vintage, Shabby-Chic, Eclectic Aged, antique appearance with unique character. Good

Ultimately, choosing the right material and finish is about striking a balance between the look you want, the practical needs of your event, and the overall atmosphere you're trying to create. When you understand how these elements work together, you can select cross back chairs that aren't just places to sit, but key pieces of your event's design.

Weighing Up the Pros and Cons

To make the right choice for your event, it helps to see the full picture. Cross back chairs are undeniably beautiful, but like any piece of hire furniture, they come with their own set of upsides and downsides. Getting to grips with these points will help you pick seating that not only looks incredible but also works perfectly for your venue, budget, and logistical plan.

Let’s start with the good stuff. The look of these chairs is, without a doubt, their biggest selling point. They bring an instant feeling of warmth, class, and rustic charm that can single-handedly set the tone for an entire event. Plus, they look absolutely fantastic in photos, guaranteeing your event pictures will be stunning.

But they're not just a pretty face. These chairs are well known for being comfortable. That curved 'X' on the back isn't just for show; it gives excellent ergonomic support. This is a huge deal for any event where guests will be sitting for a long time, like a wedding reception or a corporate conference.

The Clear Advantages of Cross Back Chairs

Most of the benefits of choosing cross back chairs come down to guest experience and visual impact. Their solid construction means they feel sturdy and secure, even on slightly uneven ground like a lawn or a vineyard. That kind of reliability gives both you and your guests peace of mind.

Their versatility is another massive plus. It doesn't matter if your theme is a relaxed bohemian gathering or a formal black-tie affair; there’s a material and finish combination that will fit right in. This adaptability makes them a safe and stylish bet for almost any occasion you can think of.

To sum up the key benefits:

  • Aesthetic Versatility: They seamlessly fit into countless themes, from rustic to modern.
  • Superior Comfort: The ergonomic design keeps guests comfortable during long events.
  • Photogenic Quality: Their timeless look enhances the visual appeal of your event photos.
  • Sturdy and Stable: Their solid wood construction makes them reliable, especially for outdoor use.

Practical Considerations and Potential Downsides

Now, for the practical side of things. While that solid wood build is a pro for stability, it can be a con when it comes to logistics. Cross back chairs are heavier and bulkier than other options like plastic folding chairs or even Chiavari chairs. This just means they can be a bit more challenging and time-consuming to transport and set up.

Their physical footprint is also larger. They don't stack as neatly or tightly as other types of chairs, which can be a real issue if your storage space is tight or if you need to move them around efficiently during the event. This larger size might also affect your seating layout, possibly cutting down the number of guests you can fit comfortably into a smaller venue.

A key takeaway here is that while cross back chairs are winners in style and comfort, they do require more planning on the logistics front. It’s a trade-off between the beautiful result and the practical effort.

Finally, there’s the cost. Because of their high-quality materials and craftsmanship, cross back chairs usually have a higher hire price compared to more basic options. While they certainly deliver incredible value in looks and comfort, you’ll need to make sure the cost fits within your overall event budget. Weighing these practical factors against their undeniable charm is the best way to make a confident and informed decision for your special day.

Matching Cross Back Chairs to Your Event Theme

This is where the magic really happens. Choosing the right cross back chair isn't just about finding a place for guests to sit; it’s about selecting a centrepiece that pulls your entire event vision together. The perfect chair works in harmony with your venue, your tables, and the overall vibe you’re creating, turning a practical item into a powerful statement.

Think of it as casting the perfect actor for a leading role. A sun-drenched limewash chair at a vineyard wedding feels effortlessly romantic. A classic dark oak chair, on the other hand, brings an authentic, cosy warmth to a rustic barn reception. Each choice tells a slightly different story and sets a distinct mood for your guests from the moment they walk in.

Cross back chairs set up for an outdoor wedding reception

For the Rustic and Romantic Wedding

The rustic theme is where cross back chairs first made their name, and it’s easy to see why. This style is all about celebrating warmth, texture, and a genuine connection to nature—and these chairs fit right in.

For a setting like this, you can’t go wrong with natural wood finishes. A classic oak or walnut finish is absolutely perfect for a barn wedding, beautifully complementing exposed beams and long, wooden trestle tables. If you’re leaning towards a lighter, more provincial feel—think garden parties or coastal ceremonies—a limewash finish is an unbeatable choice. Its soft, weathered look adds a touch of elegance without ever feeling too formal. The trick is to let the wood's natural beauty enhance the organic feel of your venue.

For the Modern and Sophisticated Gala

Don't be mistaken, though—cross back chairs are far from a one-trick pony. With the right finish, they bring a surprising level of sophistication to modern and formal events, from corporate galas to black-tie fundraisers.

In this scenario, bold and clean finishes are your best friends. Black cross back chairs create a dramatic, contemporary look that pairs stunningly with crisp white linens and metallic accents. They offer a sleek silhouette that feels both modern and timeless. Alternatively, white cross back chairs provide a clean, elegant canvas, perfect for a chic and polished wedding reception. These solid colours completely transform the chair's rustic origins into something sharp and refined, proving just how versatile this design truly is.

Their widespread appeal is no industry secret. A 2023 report from the South African Wedding Planners Association (SAWPA) found that cross back chairs were used in a staggering 65% of all weddings and events nationwide. The report also highlighted that 72% of event planners in South Africa prefer them for their durability and transport-friendly design. You can explore more about these trends in event seating on Global Event Supply.

Aligning Chairs with Venue and Decor

Once you’ve settled on a general theme, it’s time to zoom in on the specific details of your venue and decor. The aim is to create a cohesive look where every single element feels deliberate and connected.

Think of your chairs as the visual thread that ties your entire event design together. They should complement, not compete with, the other elements in the room.

To really nail this, pay close attention to:

  • Venue Architecture: Does your venue feature dark wood panelling or stone walls? A darker oak or walnut chair will feel right at home. For a bright, airy space with huge windows, a limewash or white chair will enhance all that beautiful natural light.
  • Table Settings: Make sure the chair's formality matches your tablescapes. A rustic oak chair is a perfect partner for linen runners and wildflower centrepieces. A sleek black chair, however, calls for elegant china, polished cutlery, and more minimalist floral arrangements.
  • Colour Palette: Your chairs should feel like a natural part of your event's colour scheme. Use them to either complement your main colours or provide a grounding neutral base that allows brighter decor elements to really pop.

By thinking through these details, you elevate the process from just choosing a chair to thoughtfully curating an experience. It’s this careful selection that ensures your cross back chairs become an integral part of your event's beautiful and memorable story.

How to Style Your Chairs with Cushions and Decor

Cross back chairs are stunning all on their own, but let's be honest—this is where the real fun starts. Styling is your chance to take a beautiful chair and weave it right into the story of your event. With a few smart touches, your seating goes from just being functional to being a genuine showpiece.

Think of the chair as your starting point. The first, and maybe most important, detail is the cushion. This single choice can completely change the chair's personality, taking it from casual and rustic to polished and formal. Plus, it adds that all-important layer of comfort for your guests.

Woman decorating a cross back chair with a flower arrangement

Finding the Perfect Cushion Style

For cross back chairs, you’ll generally find two main cushion styles, and each one creates a totally different look and feel. What you choose really depends on the atmosphere you’re trying to build.

A tie-on cushion, usually made from a natural fabric like linen, gives off a relaxed, effortlessly chic vibe. Those visible ties add a lovely bit of rustic charm, which is perfect for outdoor weddings, garden parties, or bohemian-style events. They just feel organic and welcoming.

On the other hand, a fitted cushion offers a much cleaner, more streamlined look. These are tailored to fit the seat perfectly, creating a seamless and polished finish. This is the go-to for more formal occasions like a corporate gala or an elegant wedding reception where you want everything to look crisp and uniform.

Pro Tip: Always double-check with your hire company that the cushions you want actually fit the chairs you've booked. Not all cushions work with all chair models, so make sure they're the right size and style.

Beyond the Cushion: Creative Decor Ideas

Cushions are a great start, but that iconic 'X' on the back is practically begging for a little creative flair. These small details are what tie your whole theme together and make each guest's spot feel special.

Here are a few ideas to get you thinking:

  • Weave in Greenery: For a natural, earthy feel, try weaving thin strands of eucalyptus or ivy through the cross back. It’s a simple touch that brings a bit of the outdoors in and adds a beautiful, organic texture.
  • Drape Soft Fabrics: Let a piece of soft chiffon or organza flow down the back of the chair. You can tie it in a simple knot or let it hang freely for a really romantic, dreamy effect.
  • Add Floral Accents: A small posy of fresh or dried flowers, attached to the corner of the 'X' with a ribbon in your colour scheme, is a classic. It’s a perfect way to add a pop of colour and elegance.
  • Personalised Name Cards: Instead of putting name cards on the table, why not tie them to the back of the chair with a beautiful ribbon? It’s a lovely, personal touch that welcomes guests as they find their seats.

You can use these ideas on their own or mix them for a more layered look. Imagine pairing delicate greenery with soft, draped fabric—it creates a stunning visual, especially when the lighting is just right. In fact, good lighting can make all the difference, as we explore in our guide on using a fairy light curtain for enchanting event decor. At the end of the day, it's these little decorative choices that make your event feel uniquely yours.

Getting the Logistics Right for a Flawless Event

You’ve picked the perfect cross back chairs, but the job isn't done yet. The real secret to a stress-free event day lies in the practical side of things: delivery, setup, and collection. Nailing these logistics is what separates a good event from a truly seamless one. It all comes down to thinking ahead.

First things first, let's talk numbers. Once you have your final guest list, it’s always a smart move to add a small buffer. We recommend about 5-10% extra chairs. This little bit of wiggle room is a lifesaver, covering any last-minute plus-ones or unexpected needs without causing a scramble for seats.

Planning Your Delivery and Setup

Clear and early communication with your hire company is your best friend here. You'll need to lock in precise delivery and collection times that work with your venue's rules and your event’s flow. A delivery that shows up too early can create chaos in your setup space, but one that's late can throw your entire schedule off track.

To make life easier for everyone on the day, draw up a simple floor plan. Knowing exactly where every chair needs to go saves an incredible amount of time and muscle. Remember, beautiful wooden cross back chairs have more heft than their plastic counterparts, so having a clear placement plan for your setup team is essential.

Before you sign on the dotted line, have a few questions ready for your supplier. If you want a more complete checklist, our guide on hiring chairs near you has some fantastic pointers.

But for now, here are the absolute must-asks:

  • What happens in case of weather damage? This is crucial for any outdoor event where a surprise shower could be a real problem.
  • How are the chairs delivered? Will they arrive stacked? Does the delivery team help with placing them?
  • What are the exact delivery and collection windows? Make sure these line up perfectly with your venue's access times.
  • Are there extra fees for tricky access? If your venue has flights of stairs or a long walk from the truck, it’s best to know about potential costs upfront.

On-Site Coordination and Breakdown

The logistical planning doesn't stop once the chairs have arrived. Think about the flow of your event. Will you need to move chairs from the ceremony area to the reception? If so, you’ll need a dedicated team and a slick plan to get it done without a hitch.

The same goes for the end of the night. Designating a specific spot for stacking the chairs makes the collection process far quicker and smoother for the hire company. Cross back chairs can typically be stacked 6 to 8 high, which is useful to know when you're figuring out how much space you'll need for collection.

When you give your rental logistics the same attention to detail as your decor, you’re paving the way for a perfectly executed event where everything just falls into place.

At the end of the day, it all comes down to proactive planning. Confirming all the small details with your hire company, creating a solid floor plan, and thinking through the chair's entire journey—from drop-off to pickup—ensures your event’s execution is as elegant as its seating.

Your Cross Back Chair Questions, Answered

You've got the vision, you've seen the styles, but a few practical questions might still be lingering. That's completely normal. To make sure you feel 100% confident about your choice, we’ve tackled the most common questions we get from clients planning their big day.

How Much Does It Cost to Rent Cross Back Chairs?

Generally, you can expect to pay between R35 and R60 per chair, per day for cross back chair hire. The exact price tag will shift based on a few things: the material and finish you've fallen for, the number of chairs you need, and how long you'll need them for.

Just keep in mind that delivery and collection fees are usually quoted separately. It's always a good idea to ask for a fully detailed quote so there are no surprises and you can see exactly how it fits into your event budget.

Are Cross Back Chairs Actually Comfortable for a Long Event?

Yes, they really are. In fact, many in the events industry consider them one of the most comfortable options out there. That classic 'X' design isn't just for looks; it’s shaped to give your back proper support. This is a game-changer for events where guests are seated for a while, like a wedding reception or a full-day conference.

For that extra touch of luxury, especially if your event runs for a few hours, we always suggest adding a padded cushion. It's a small detail that makes a massive difference, keeping your guests happy and comfortable instead of fidgeting in their seats.

The secret to the cross back chair's success is that perfect blend of an ergonomic back with a cushioned seat. It's where style meets a genuinely comfortable seating experience.

How Do Cross Back Chairs Compare to Chiavari Chairs?

Ah, the classic debate! Both are stunning choices for events, but they bring a completely different vibe. Think of the Chiavari chair as your go-to for traditional, formal elegance. Its slender, upright spindles create a very classic and refined look.

The cross back chair, on the other hand, gives you a vibe that's more relaxed but still incredibly sophisticated. Its solid, rustic-inspired design adds a real sense of warmth and personality to any venue. When it comes down to pure comfort, the cross back usually wins, thanks to its more supportive back and slightly wider seat.

Can I Use Cross Back Chairs for an Outdoor Event?

Absolutely. Their solid wood construction makes them a fantastic and sturdy choice for outdoor settings. They handle uneven ground like grass or gravel much better than chairs with skinny legs, so you won't have to worry about wobbling.

One important thing to check, though, is your hire company's policy on weather. You should always have a backup plan—like a marquee or a tent—ready to go in case the weather turns. It protects both your guests and the beautiful chairs you’ve hired.


Ready to bring that timeless elegance and comfort to your next event? The team at ABC Hire is here to help you pick out the perfect cross back chairs from our collection right here in Cape Town.

Explore Our Chair Hire Options and Get a Quote Today

Your Ultimate Guide to Tent Hire for Parties

Hiring a tent for your party is one of the most flexible and creative ways to host an outdoor event. It literally transforms any space you choose into the perfect venue, giving you total control over the location, size, and atmosphere of your celebration. Rain or shine, you can create a truly unique and memorable experience.

Why Tent Hire Elevates Your Party Planning

A beautifully decorated tent set up for an elegant evening party

When you start planning a party, the first big question is always: where? Finding the right venue can feel impossible. The location is perfect but the room is too small, or the space is right but the décor just doesn’t fit your theme. This is where tent hire for parties completely changes the game.

Think of a hired tent as more than just a temporary shelter—it’s your very own blank canvas. You get a solid, architectural-grade structure that you can set up almost anywhere, giving you ultimate control. Suddenly, your beautiful back garden, a scenic piece of land, or even a chic urban courtyard can become the backdrop for the event you’ve been dreaming of.

Complete Creative Freedom

A traditional venue has its own fixed walls, carpets, and lighting that you have to work around. A tent, on the other hand, is a completely neutral and adaptable space. This freedom means you can build your party’s atmosphere from the ground up, making sure every single detail reflects your personal style or corporate brand.

The key benefits of this flexibility are huge:

  • Location Independence: You can host your event somewhere meaningful or stunning that would otherwise be off-limits.
  • Customisable Layouts: Want a big dance floor, a cosy lounge area, and a separate space for the buffet? No problem. You design the floor plan that works for you.
  • Thematic Control: Go wild with decorations! Match the lighting, flooring, and draping to your exact vision without any restrictions.

The demand for these kinds of personalised experiences is skyrocketing. The Middle East and Africa region has actually become the most dominant zone in the global tent rental service market, and South Africa is a massive part of that growth. Our thriving events industry—from weddings to huge corporate functions—has created a serious need for these impressive temporary structures. You see it everywhere, especially with the rise of outdoor weddings where couples use tent rentals to turn picturesque settings into truly elegant venues. If you’re interested, you can read the full research on the tent rental market to see just how much it’s booming.

A hired tent is more than just cover; it’s a strategic choice that hands you the creative reins. It allows you to design an experience, not just book a room, making your celebration truly one-of-a-kind.

Ultimately, choosing a tent for your next party is about embracing possibility. It’s a practical and stylish solution that adapts to your needs, protects your event from our unpredictable weather, and gives your guests a stunning setting to enjoy themselves in.

Finding the Perfect Tent for Your Event Style

Choosing the right tent is about so much more than just shelter—it’s about setting the entire tone for your party. Think of the tent as the canvas for your event. The style you pick can transform a simple get-together into an elegant gala or a relaxed festival.

Not all tents are created equal, and knowing the key differences will help you make a choice you’re happy with. Let’s break down the big three in the world of tent hire for parties: Frame Tents, Peg and Pole Tents, and Stretch Tents. Each one has its own personality and purpose.

The Self-Supporting Hall: Frame Tents

A Frame Tent, often called a marquee, is the ultimate problem-solver. Its biggest advantage is its clever design—a rigid aluminium frame holds up the roof, which means there are absolutely no interior poles to get in your way.

This wide-open interior gives you total freedom. You can set up your tables, create a dance floor, or position a stage anywhere you want without having to plan around annoying poles. Because they support themselves, frame tents are incredibly versatile and can be set up on almost any surface, including:

  • Grass and soft ground
  • Pavement and tar
  • Patios and decks
  • Even tennis courts!

On hard surfaces, they’re secured with heavy weights, making them a super reliable choice whether you’re in a city centre or a backyard where you can’t use pegs.

The Classic Peak: Peg and Pole Tents

If you’re picturing a classic, romantic wedding or a fancy garden party, the Peg and Pole Tent is probably what you have in mind. These tents are all about those gorgeous, high peaks, created by centre poles pushing up the sweeping canopy. The silhouette is just beautiful and looks amazing in photos.

But that classic elegance comes with two things to remember. First, those centre poles are part of the structure, so you’ll need to work them into your floor plan. Second, to get that lovely tensioned look, the tent has to be staked securely into soft ground like grass or soil. That means they won’t work on hard surfaces like concrete, but for a traditional outdoor celebration, their timeless look is hard to beat.

The Modern and Flexible: Stretch Tents

The Stretch Tent (sometimes called a Bedouin tent) is the cool, creative option. It’s made from a special waterproof fabric that’s incredibly flexible, allowing it to be rigged in all sorts of interesting shapes. You can set it up as a traditional canopy, attach it to a building, or even shape it around trees and garden features.

Stretch tents have a unique way of blending in with their surroundings. Their fluid shape feels more organic and integrated, making the tent seem like a natural part of the space rather than just a structure you’ve put up.

This makes them perfect for modern parties, cocktail events, or any celebration where you want a stylish, less formal vibe. While they look incredible, they offer a bit less protection from heavy wind and rain compared to a fully walled frame tent. If you’re planning something smaller and more casual, it’s also worth checking out other options; our guide on finding a gazebo for hire has some great tips for more intimate events.

Party Tent Styles at a Glance

Still weighing your options? This quick comparison should help you pinpoint the best fit for your party’s needs, location, and overall style.

Tent Type Best For Surface Requirement Key Advantage
Frame Tent (Marquee) Corporate events, weddings, parties needing an open floor plan. Any surface (grass, pavement, decks). Maximum layout flexibility with no interior poles.
Peg and Pole Tent Traditional weddings, classic garden parties, elegant galas. Soft ground only (grass, soil). Stunning aesthetic with high, swooping peaks.
Stretch Tent Modern cocktail parties, stylish brand activations, unique spaces. Versatile, can anchor to ground or buildings. Unmatched adaptability and contemporary style.

Ultimately, the best tent is the one that not only fits your guest list but also complements the atmosphere you want to create for your special day.

Calculating How Much Space You Really Need

Nailing the right tent size is easily one of the most important parts of hiring a tent for a party. If you go too small, your guests will be squashed and uncomfortable. But go too big, and the space can feel cold and empty, not to mention you’ll be paying for area you don’t even use. The secret is to think beyond a simple headcount and start visualising the entire event layout, mapping out every single thing that needs to fit inside.

The journey to finding your perfect tent starts with the style, the surface you’re setting it up on, and, of course, the total space you’ll need. This visual guide is a great starting point to walk you through those initial decisions.

Infographic about tent hire for parties

As you can see, once you’ve picked a tent style that fits your party’s vibe, you have to make sure it works on your surface (like grass or paving) before you can get down to the final space calculations.

Start With Your Guest Count

First things first, let’s get a rough estimate based on how your guests will be socialising. This gives you a baseline number to build on before you start adding all the other fun stuff into the mix.

A good rule of thumb is to use these simple guidelines:

  • Standing Cocktail Party: Set aside about 0.5 to 0.75 square metres per guest. This gives everyone enough room to mingle and move around without constantly bumping into each other.
  • Seated Dinner (Round Tables): You’ll need to plan for roughly 1.2 to 1.4 square metres per guest. This bigger space allows for the chairs and the room people need to pull them out without a fuss.

Let’s put that into perspective. For a standing cocktail party with 80 guests, you’re starting with a baseline of 40-60 square metres. But if you’re planning a seated dinner for those same 80 guests, you’re already looking at 96-112 square metres. That quick calculation shows you just how much the format of your event changes your space requirements.

Build Out Your Complete Floor Plan

Now for the really important bit: making room for everything else. Your guests aren’t just going to be standing or sitting. They’ll want a dance floor, a bar, and probably a spot for the DJ. Forgetting to account for these is the number one mistake people make.

The biggest oversight in party tent planning is calculating space for people but not for activities. A successful event layout accounts for the flow of movement, entertainment, and service areas—not just seating.

To make sure you don’t miss anything, use a checklist. Every single one of these elements needs its own dedicated footprint inside the tent. This is where you really see the scale of the party supply rental market. Globally, this market was valued at USD 15,225.4 million in 2023, with tables and chairs alone making up nearly 30% of that revenue. It just goes to show how much space furniture and other functional areas take up. You can learn more about the party rental market growth to get the full picture.

To help you out, here’s a quick cheat sheet with estimates for how much space you’ll need for various party elements.

Party Element Required Space (Approx. Square Metres)
Guest Seating (Round Tables) 1.2 to 1.4 sq. m per person
Guest Standing (Cocktail Style) 0.5 to 0.75 sq. m per person
Dance Floor 0.3 sq. m per guest (assuming half are dancing)
DJ Booth or Small Stage 5-10 sq. m
Bar Area 10-15 sq. m (for the bar and queuing space)
Buffet Tables (2.5m long) 3 sq. m per table (plus room for the queue)

Remember to add these figures to your baseline guest calculation to get a true picture of the total square metres you’ll need.

Let’s walk through a real-world example to see how it all comes together.

Example: An 80-Guest Party with Dinner and Dancing

  1. Guest Seating: 80 guests at 1.2 sq. metres each = 96 sq. metres
  2. Dance Floor: 80 guests x 0.3 sq. metres = 24 sq. metres
  3. DJ Booth: A decent-sized setup = 10 sq. metres
  4. Bar Area: A standard bar with space for guests = 10 sq. metres
  5. Buffet Tables: Two tables with plenty of access room = 10 sq. metres

Total Estimated Space: 96 + 24 + 10 + 10 + 10 = 150 square metres.

Following this simple process takes you from a wild guess to a realistic and functional floor plan. It’s the best way to make sure your event feels perfectly spacious and well-organised.

Accessorising Your Tent for a Flawless Event

A party tent decorated with elegant flooring, lighting, and comfortable seating

A great tent gives you the structure for your party, but it’s the accessories that really bring it to life and make it your space. Think of the tent as a blank canvas; the flooring, lighting, and climate control are the brushstrokes that turn it into a masterpiece. These aren’t just decorative extras—they’re essential for your guests’ comfort and for transforming a simple shelter into a properly luxurious venue.

The right add-ons are at the heart of modern tent hire for parties. We’re seeing a clear shift in the South African market towards more polished, personalised events. In fact, around 45% of high-end event planners are now asking for luxury tents with custom options, and 40% are demanding unique lighting and décor. It just goes to show that accessories are now seen as a must-have for creating an event that stands out. You can even discover more insights about these market trends to see how the pros are doing it.

Setting the Stage with Flooring

Don’t underestimate the power of good flooring. It does so much more than just cover up the grass; it creates a stable, clean, and safe surface for everyone. More than that, it completely elevates the feel of the interior, making it feel less like a tent and more like a real event hall.

You’ve got a few popular options to choose from:

  • Wooden Flooring: This is your top-tier choice for a solid, level base, especially if the ground underneath is a bit uneven. It gives off a seriously elegant and sophisticated vibe.
  • Dance Floors: If you expect people to be dancing, a dedicated dance floor is non-negotiable. They’re made of interlocking panels that create the perfect, smooth surface for a good party.
  • Matting or Coir: For a more rustic or casual feel, natural fibre matting is a great, cost-effective way to cover the ground and stop shoes from getting muddy.

Choosing the right floor turns your tent from an outdoor structure into a defined and comfortable indoor space—a critical step for any well-designed event.

Creating the Perfect Atmosphere with Lighting

Lighting is probably your most powerful tool for setting the mood. The right setup can make a space feel warm and intimate, vibrant and energetic, or totally dramatic. Just sticking a single light overhead will leave your tent feeling stark and unwelcoming.

Great lighting design doesn’t just illuminate a space; it directs attention, creates warmth, and crafts an emotional experience for your guests from the moment they walk in.

For a truly professional effect, think about layering different types of light:

  1. Ambient Lighting: This is your foundation. Think fairy lights or string lights draped across the ceiling to create that magical, warm glow that makes the whole space feel inviting. Our guide on using a fairy light curtain has some brilliant ideas for a stunning look.
  2. Task Lighting: This is the practical stuff. You need decent lighting over the bar, buffet tables, and at the entrance to make sure people can see what they’re doing and move around safely.
  3. Accent Lighting: Use uplighters to highlight key features like floral arrangements, decor, or the architectural peaks of the tent. It adds real depth and a touch of drama.

Ensuring Guest Comfort with Climate Control

Finally, never, ever forget the South African climate. A beautiful sunny day can quickly turn into a chilly evening, and a summer afternoon can get uncomfortably hot inside a marquee.

Climate control isn’t a luxury; it’s essential for keeping your guests happy.

  • Heaters: For evening parties or winter events, a few strategically placed patio heaters or proper tent heaters are an absolute must.
  • Fans or Air Conditioners: In the warmer months, fans keep the air circulating and provide a welcome breeze, making sure the tent stays comfortable for everyone.
  • Sidewalls: These are your best friend when it comes to weather protection. You can choose solid walls for privacy and blocking wind, or go for clear panoramic walls to keep those beautiful views while shielding guests from the elements.

Your Essential Tent Hire Process Checklist

Hiring a party tent can feel a bit daunting, but honestly, it’s not so bad when you break it down into simple, manageable steps. Think of it as a roadmap for your event setup. Following a clear process helps you sidestep common pitfalls, like getting hit with unexpected fees or not having your site ready on installation day.

This checklist will walk you through everything, from your very first phone call to the final pack-down, making sure you feel confident and in control the whole way through.

Before You Sign Anything

First things first: you need to ask the right questions before you put your name on any dotted line. A good hire company expects this and will be happy to give you clear answers. This is your chance to get a complete picture of the agreement, so don’t hold back.

Here’s what you absolutely need to cover:

  • A Detailed Quote: Insist on an itemised quote. You want to see the cost for the tent, delivery, setup, takedown, and any extras listed separately. No one likes vague numbers.
  • Insurance Coverage: Get clarity on what their insurance covers. What happens if the tent gets damaged while it’s on your property? Are you covered for wild weather?
  • Cancellation Policy: Life is unpredictable. Make sure you understand their policy on postponing or cancelling. Ask about any fees and the deadlines for making changes.
  • Payment Schedule: Confirm how much the deposit is to lock in your booking and find out when the final payment is due.

Getting all this in writing is non-negotiable. It protects you and the hire company and means no nasty surprises down the line. To get a handle on all your other event tasks, our event planning checklist template is a lifesaver.

Preparing Your Event Site

Once the booking is sorted, it’s time to get your location ready. Proper site prep is the secret to a fast, safe, and stress-free installation. The delivery crew will thank you for giving them a clear and accessible space to work their magic.

A well-prepared site is the foundation of a successful tent installation. Taking the time to measure, clear, and check the area beforehand saves significant time and prevents costly delays on event day.

Follow these simple steps to get your site ready:

  1. Measure and Mark: Use a few stakes or flags to mark out exactly where the tent will go. Crucially, remember to add at least 1.5 metres of extra space on all sides for the pegs and for the crew to move around.
  2. Check for Utilities: This is a big one. Before a single peg goes into the ground, you must know what’s underneath. Check for underground water pipes, electrical lines, or irrigation systems. If you’re not sure, it’s best to contact your local authority.
  3. Ensure Clear Access: The delivery truck needs a clear path to the setup spot. That means trimming back any low-hanging tree branches and moving any obstacles that could get in their way.
  4. Communicate with the Crew: Give the installation team a heads-up about any quirks of your site, like a sloping lawn or a tricky access point. The more they know in advance, the better.

What to Expect on Installation and Takedown Day

Knowing the schedule for setup and removal helps you plan the rest of your day. For a medium-sized tent, say a 6m x 12m marquee, a team of 3-4 people will typically need about 2-3 hours for the full installation.

The crew will show up, double-check the placement with you, and then get straight to it. Your main job is just to make sure the area is ready and they can get in and out easily. After the party’s over, the takedown is usually a quicker affair. The team will dismantle everything efficiently, leaving your garden just as they found it.

Breaking Down the Costs of Hiring a Party Tent

Figuring out the budget for your party tent can feel a bit like putting a puzzle together. You see one price, but the final quote often has a few other crucial pieces. Getting your head around this from the start will save you headaches later and help you see the real value you’re getting from a professional hire service.

It’s a bit like ordering a fantastic meal at a restaurant. The main course has its price, but you’ll also have side dishes, drinks, and a service fee. In the same way, the total cost for your tent is a mix of the tent itself, plus all the services and extras needed to make your event a roaring success.

What’s in Your Rental Quote?

Your final bill will usually be split into three main parts. Knowing what these are helps you see exactly where your money is going, and it gives you the power to tweak things to fit your budget.

  • The Base Rental Fee: This is the straightforward cost for the tent’s canopy and frame. The price tag here depends on the size and style you pick—a big, elegant frame tent is naturally going to cost more than a smaller, simpler one.
  • Labour and Delivery Charges: This covers the skilled crew who bring the tent to you, put it up, and take it down again. Things like how far they have to travel to your venue and how tricky the site is can nudge this cost up or down.
  • Essential Add-Ons: This is everything else you need to turn the tent into a proper venue. Think flooring, lighting, sidewalls for weather protection, and even climate control like heaters or fans.

This way of pricing is pretty standard across the events industry. The tent rental market has boomed in South Africa because it’s such a smart, cost-effective alternative to a permanent venue. Hiring almost always works out cheaper than building something from scratch, making it perfect for one-off events and seasonal parties. You can read more about these market trends to see the full economic picture.

What Else Can Affect the Final Price?

Beyond the big three, a few other things can shift your quote. Being aware of them means you can manage your budget better and avoid any last-minute surprises.

The most common budget surprise I see is underestimating the complexity of the site. A perfectly flat, easy-to-reach lawn will always be cheaper to work with than a sloped garden with a narrow entrance.

Here are a few things that can add to the labour costs:

  • Difficult Site Access: If the team has to lug heavy equipment a long way from their truck to where the tent needs to go, it’s going to take more time and people power.
  • Site Complexity: Putting a tent up on an uneven surface, a raised deck, or anywhere that needs special anchoring will bump up the installation fee.
  • After-Hours Service: If you need the tent set up or taken down outside of normal business hours, like late at night, you can expect to pay a bit extra for that convenience.

The best thing you can do is chat about all these details with your rental company right from the start. That way, you’ll get a clear, accurate quote that lines up perfectly with your event plans.

Common Questions About Party Tent Hire

Even after all the planning, a few nagging questions can pop up when you’re hiring a tent. We get it. To put your mind at ease, we’ve put together some quick, straightforward answers to the queries we hear most often from our clients.

How Far in Advance Should I Book a Party Tent?

Timing is absolutely crucial, especially if you want the best pick of the bunch. To be safe and avoid any last-minute panic, we always recommend booking your tent 3 to 6 months in advance. This is doubly important during South Africa’s peak seasons, like the sunny summer months and over the December holidays when demand just goes through the roof.

Got a bigger, more detailed event on the cards, like a wedding? Give yourself even more breathing room and aim for 9 to 12 months ahead. Booking early is the best way to guarantee you get the exact style and size you’ve got your heart set on.

Can a Tent Be Set Up on Pavement or Concrete?

Yes, it can! But this is where your choice of tent really matters. A Frame Tent (or marquee) is your go-to for hard surfaces. Because these structures are freestanding, they don’t need to be staked into the ground. Instead, we anchor them securely on pavement, patios, or decking using heavy-duty weights or water barrels.

Your traditional Peg and Pole Tent, however, needs soft ground like a lawn to work. It gets its stability from the tension of stakes driven deep into the earth. So, always let your hire company know what surface you’re working with – it’s one of the first things they’ll need to know.

The surface of your event site is one of the first and most critical details to share with your rental provider. It directly influences the type of tent you can safely and effectively use, making it a foundational piece of your event plan.

What’s the Plan for Bad Weather?

This is one of the best things about hiring a professional tent – you get instant peace of mind, no matter what the weather report says. These aren’t your average camping tents; they are tough, commercial-grade structures built to handle rain and moderate wind, keeping your party and your guests perfectly dry.

If the forecast looks a bit wild, adding sidewalls is a brilliant move. They offer extra protection against driving rain or a gusty breeze. You can go for solid walls for a complete shield or choose clear panoramic walls so you don’t lose that beautiful view. Just make sure to chat with your provider about the tent’s specific wind rating and their contingency plan for severe weather before you book.

Will I Need a Permit for a Tent in My Garden?

For most private parties on your own property here in South Africa, you generally won’t need a permit for a temporary tent. The rules are pretty relaxed for personal events held at home.

That said, local municipal rules can differ, especially for a really large structure or a massive guest list. If you’re unsure, it’s always smart to have a quick chat with your local council just to be 100% certain. A good, experienced hire company will usually know the local requirements and can give you solid advice.


Ready to create the perfect setting for your next celebration? The team at ABC Hire is here to help you choose the ideal tent and accessories for a flawless event. Explore our range and get a quote today at abchire.co.za

Pallet Outdoor Furniture: DIY Guides & Ideas

Looking to create a stylish, custom seating area for your patio or braai area without breaking the bank? Pallet outdoor furniture is your answer. It’s a brilliant way to repurpose wooden shipping pallets into functional, beautiful pieces like sofas, tables, and even planters. You get a unique blend of rustic charm and modern design that’s just perfect for the South African lifestyle.

Why Pallet Furniture Is Perfect for South African Patios

A stylish outdoor patio set made from wooden pallets, complete with comfortable cushions and decorative plants, showcasing a cosy and inviting atmosphere.

There’s a good reason you see pallet projects popping up in gardens and on patios across South Africa. It’s gone way beyond a passing trend to become a real staple. This isn’t just about saving a few rands; it’s about embracing a lifestyle that values creativity, sustainability, and making the most of our incredible climate.

When you build your own furniture, you get to design pieces that fit your space perfectly, whether you’ve got a small balcony in Cape Town or a sprawling lapa up in Gauteng.

Embracing Affordability and Style

The biggest draw? The cost, of course. With a bit of elbow grease, you can put together a complete lounge set for a tiny fraction of what you’d pay for something from a store. This opens up the dream of an inviting outdoor oasis for just about everyone.

This trend fits right in with our growing desire for personalised, comfy outdoor living spaces. The local demand is really taking off—the South African outdoor furniture market is projected to hit US$70.74 million in 2025. That number, highlighted in Statista’s market analysis, shows just how much we’re all investing in our homes’ outdoor areas.

Plus, it’s an eco-conscious choice. By upcycling pallets, you’re saving wood from the landfill and giving it a new, much more attractive life. That sustainable mindset really clicks with anyone who appreciates our country’s natural beauty.

The real beauty of pallet outdoor furniture lies in its versatility. It’s a blank canvas for your creativity, allowing you to build something that is not only functional but also a true reflection of your personal style.

A Rewarding DIY Journey

Building with pallets is a fantastic way to get into the world of DIY. The projects can be as simple or as complex as you like, making it a satisfying experience whether you’re a total beginner or a seasoned woodworker. Honestly, there’s nothing quite like the feeling of kicking back on a sofa you built with your own two hands.

For those who love creating comfortable spaces, you can find even more ideas in our guide to designing beautiful outdoor lounge sets. This journey doesn’t just transform your patio—it builds your confidence, one plank at a time.

Finding the Right Pallets: Safety and Sourcing

Several stacked wooden pallets in a workshop, ready to be repurposed.

Before you can even think about designs, you need the right raw materials. Getting your hands on pallets is usually pretty easy; finding the right pallets, however—the ones that are safe and strong enough for your pallet outdoor furniture—takes a little more care.

Trust me, not all pallets are created equal. Some are perfectly fine, while others can be genuinely hazardous.

It all comes down to a small, often overlooked stamp on the side of the wood. This little code tells you everything you need to know about how the pallet was treated to handle pests during its shipping life. For any DIY project that involves your family and home, learning to read these markings is non-negotiable.

How to Decode Pallet Stamps

The absolute best-case scenario is finding a pallet stamped with “HT”. This simply means it was Heat Treated. The wood was baked at a high temperature to kill off any bugs or larvae, making it completely safe to bring into your home and garden. This is the gold standard for any pallet furniture project.

On the flip side, if you see “MB” stamped anywhere, walk away. This stands for Methyl Bromide, a very toxic fumigant that you definitely don’t want anywhere near you, your kids, or your pets. These are a hard pass for furniture, planters, or any other project.

My Two Cents: If a pallet has no stamp at all? It’s best to play it safe and leave it. You have no way of knowing its history or what chemicals it might have soaked up along the way. Better to be safe than sorry.

To make things easier, here’s a quick guide to the most common pallet stamps you’ll encounter.

Pallet Safety Stamp Quick Reference Guide

Pallet Stamp Meaning Safe for Furniture? Comments
HT Heat Treated Yes This is your best and safest option. No chemicals used.
DB Debarked Yes The bark was removed. Often seen with the “HT” stamp.
KD Kiln-Dried Yes Dried in a kiln to reduce moisture. This is also a safe choice.
MB Methyl Bromide No Treated with a highly toxic pesticide. Avoid at all costs.
EUR/EPAL European Pallet Usually Yes These are typically heat-treated, but always look for the “HT” stamp to be sure.

Always double-check for the “HT” mark, as it’s the clearest indicator of a safe, chemical-free pallet.

Where to Find Pallets in South Africa

Sourcing pallets for free or very cheap is surprisingly simple once you know where to look. Many local businesses are more than happy for you to take them off their hands.

  • Hardware and Building Supply Shops: These places get massive deliveries and almost always have a stack of unwanted pallets out back. Just pop in and ask a manager if they’re up for grabs.
  • Garden Centres and Small Businesses: Think nurseries, pet shops, and independent retailers. They’re great spots, and their pallets are less likely to have been around harsh industrial chemicals.
  • Online Marketplaces: A quick search on Gumtree or Facebook Marketplace usually brings up plenty of listings for free pallets. It saves you the trouble of driving around hunting for them.

A Quick Checklist Before You Load Up

Once you’ve spotted a potential winner, give it a quick once-over. A bit of dirt is fine, but look out for these red flags.

  1. Strange Stains or Spills: Any weird discolouration or oily patches are a bad sign. You don’t know what was spilt on it.
  2. Strong Smells: The pallet shouldn’t have a noticeable chemical smell or any other strong, strange odour.
  3. Rot or Major Damage: Check for crumbly wood, heavy splintering, or any signs of mould.
  4. Brightly Coloured Pallets: Pallets painted in bright colours (usually blue or red) are often part of a rental pool, like those from CHEP. These technically aren’t yours to take.

Choosing quality, safe wood is the foundation of any great project, and it reflects a much bigger trend in outdoor living. Wood’s timeless appeal and durability made it the star, accounting for 66.45% of revenue. This just shows how much we love quality timber in our outdoor spaces. You can see the full breakdown of these market trends on Grand View Research.

For an even deeper dive into this world, check out our comprehensive article on everything you need to know about pallet wood furniture.

Right, so you’ve managed to get your hands on some safe, “HT” stamped pallets. The next part is where the real magic happens. This is the bit where we turn that rough, industrial timber into the beautiful, smooth foundation for your pallet outdoor furniture.

So many people rush this prep work, and honestly, that’s what separates an amateur-looking job from a truly stunning, professional one. Taking the time to properly dismantle, clean, and sand your pallets is the secret sauce. It makes the final piece look a thousand times better and ensures it’s safe, splinter-free, and ready for whatever the weather throws at it.

Getting the Planks Off Without a Fight

Trying to break down a pallet can be seriously frustrating if you don’t have a game plan. Just going at it with a hammer often ends with cracked planks and a pile of wasted wood. A bit of technique makes all the difference here.

One of the slickest ways to do it is with a reciprocating saw fitted with a metal-cutting blade. You can just slice straight through the nails holding the planks to the support blocks. It’s quick, clean, and keeps your boards perfectly intact, saving you a world of pain.

Don’t have a reciprocating saw? No problem. A trusty pry bar and a hammer will get the job done.

  • The Pry Bar Method: Gently wedge the pry bar under the edge of a plank and work it back and forth to loosen up the nails.
  • Work Both Ends: Whatever you do, don’t just pry from one side. Alternate between the ends of the plank to lift it nice and evenly. This is key to stopping the wood from splitting under pressure.
  • Yank Out Old Nails: Once a board is free, use the claw of your hammer to pull out any bits of nail left behind.

Here’s a little tip from my own experience: if a nail is putting up a real fight, don’t force it. Sometimes it’s easier to hammer the nail through the plank from the back and then pull it out. This trick can save the best side of your timber from getting damaged.

Getting That Smooth, Splinter-Free Finish

With your planks finally free, it’s time to clean and sand. Pallets pick up all sorts of dirt on their travels, so a good scrub is a must. A stiff brush with a bit of a bleach-and-water mix works wonders to sanitise the wood and get rid of any grime. Just be sure to let it dry completely in the sun before you start sanding.

Sanding is what really takes your project from just “rustic” to properly “refined”. It gets rid of that rough texture, nixes the risk of splinters, and gets the wood ready to soak up paint or sealant like a dream.

Your Sanding Toolkit

Tool Best For Pro Tip
Power Sander Quickly smoothing out the big, flat surfaces of your planks. Kick off with a coarse sandpaper (like 80-grit) to knock back the initial roughness, then move to a finer grit (120 or higher) for a silky-smooth finish.
Sanding Block Perfect for getting into edges, corners, and other detailed spots by hand. Always sand with the grain of the wood. Going against it will just scratch up the surface.
Sandpaper Sheet Handy for tight spots or for wrapping around curved edges. Fold the sheet to make a firm edge. It gives you more precision for those tricky corners.

Start by hitting all the main surfaces with your power sander. You don’t need to press down hard—let the tool do the heavy lifting. Once the large areas are looking good, grab a sanding block to carefully work on the edges and ends. It’s this attention to detail that gives your finished pallet outdoor furniture that top-quality, handcrafted feel.

The aim here is a surface that’s smooth to the touch all over. Run your hand over every plank to feel for any rough patches you might have missed. This final check is what makes sure your new sofa or table will be comfortable and safe for everyone to enjoy.

Right, you’ve done the hard graft of prepping your timber. Now for the fun part—turning those humble planks into killer pieces for your patio or next event. This is where your vision starts to take shape.

We’ll run through three classic projects. They’re perfect for getting started but still deliver that high-end, rustic look everyone’s after. Think of them as foundational builds. Once you’ve got these down, you’ll have the confidence and the skills to tackle just about any design you can dream up.

The Classic Pallet Sofa

A comfy outdoor sofa is pretty much the heart of any patio setup. This design is simple, solid, and you can easily tweak the size to fit your space.

For a standard two-seater, you’ll probably need:

  • Three pallets of the same size for your base and backrest.
  • Some heavy-duty wood screws (go for at least 75mm) to make sure everything is held together tightly.
  • A few metal L-brackets to give that backrest connection extra strength.
  • Your drill, a measuring tape, and a saw if you need to make any cuts.

Get started by stacking two pallets right on top of each other. This creates the base and gives you a decent seating height. Drive screws through the blocks of the top pallet into the one below to lock them together.

Next, stand the third pallet up behind the base—that’s your backrest. Fix it securely to the base using a combination of screws and L-brackets.

Quick tip from experience: Pop a few extra L-brackets on the bottom corners where the backrest meets the base. That spot takes a lot of strain, and that little bit of reinforcement makes a huge difference. No one wants a wobbly sofa!

The Rustic Coffee Table on Castors

A coffee table on wheels is a game-changer for any outdoor area. You can roll it around to make space for guests, clear a spot for a dance floor, or just rearrange your setup whenever you feel like it.

This project couldn’t be simpler. All you need is one good pallet, four castor wheels (make sure two have brakes!), and the screws to attach them.

Just get your pallet cleaned, sanded, and finished how you like it. Flip it over and screw a castor wheel onto each of the four corner blocks. Make sure you put the two locking castors on the same side. This lets you easily brake the table to keep it from rolling away.

The Space-Saving Vertical Planter

If you’re tight on floor space, a vertical planter is an amazing way to bring some green onto a small balcony or patio wall. It’s a super quick build that adds a massive pop of visual interest.

You’ll start with a single pallet stood on its end. The idea is to create little pockets for your soil and plants. Grab some spare planks (from another dismantled pallet or just scrap wood) and use them to close off the bottom of the open sections on the front of your planter.

Now you just need to make the pouches for planting:

  1. Measure the inside of each pocket you’ve just created.
  2. Cut up some landscape fabric so it’s big enough to form a pouch inside each section.
  3. Grab a staple gun and securely fasten the fabric along the inside edges. Boom—you’ve got your soil pockets.

This project is brilliant because it not only repurposes wood but also injects a bit of life and colour into your setting. The whole idea of versatile, sustainable furniture is a big deal in South Africa right now. The market is buzzing with innovation, and forecasts show it’s set for some serious growth, with rates expected to hit a peak of 5.58% in 2027. It just shows how much people are loving creative, eco-friendly outdoor solutions.

You can get the full scoop on these market trends in the complete 6Wresearch report.

Right, you’ve done the hard graft and built your furniture. Now for the fun part – bringing your pallet outdoor furniture to life and making sure it lasts. This final stage is where the magic happens, defining the look of your pieces and, crucially, protecting them from our harsh South African sun and rain.

Your choice of finish really comes down to balancing style with practicality. Are you after a rustic, natural vibe that lets the wood’s character shine through? Or do you want a pop of bold colour to liven up your event space? What you decide here will guide the products you buy and the overall feel you create.

This flow chart gives a great overview of the basic steps for some of the most popular pallet projects you might be tackling.

Infographic showing the process flow for building pallet outdoor furniture, with steps for a sofa, table, and planter.

It’s a simple visual guide that takes you from a raw pallet to a finished piece, showing just how achievable these builds are.

Choosing Your Protective Coat

When it comes to outdoor furniture, protection is everything. The relentless sun will bleach the wood, and winter rains can quickly lead to rot. A top-quality sealant is your first line of defence.

  • Varnish and Sealants: I always recommend looking for a marine-grade or an outdoor-specific polyurethane varnish. These are packed with UV inhibitors that work like sunscreen for the wood, stopping it from fading and cracking. They form a tough, waterproof shield.
  • Stains: An outdoor wood stain is a brilliant two-in-one option, colouring and sealing at the same time. Stains soak into the wood rather than sitting on the surface like paint, so they’re far less likely to chip or peel. Perfect for getting that classic, rustic look.
  • Paints: If you’re set on a solid, vibrant colour, a good quality outdoor acrylic or enamel paint is the way to go. Just be sure to start with an outdoor wood primer – this helps the paint stick properly and gives you a much more durable finish.

A little tip from my own experience: always apply at least two to three thin coats of your chosen finish. Let each one dry, give it a light sand, and then apply the next. This builds a much stronger protective layer than one thick, gloopy coat and gives you a far more professional result.

Styling Your Pallet Creations

With your furniture built and protected, it’s time to dial up the comfort and add your own personal touch. This is where you pull everything together to create that inviting outdoor oasis everyone will want to relax in.

Finding the right accessories is key. You’ll need weather-resistant cushions that can handle both the sun and an unexpected downpour. Look for fabrics specifically designed for outdoor use that resist mildew and fading. Plenty of local fabric shops and upholsterers in South Africa can even make custom-sized cushions to fit your pallet sofa perfectly.

Don’t forget the details! A few scatter cushions in complementary colours, a durable outdoor rug, and some pot plants can completely transform the space. For those long, sunny Cape afternoons, proper shade is a must. We’ve got some great advice on finding the perfect cover in our guide to choosing large outdoor umbrellas for your space.

Combine solid protection with thoughtful styling, and your new pallet furniture is guaranteed to be the star of any event.

Answering Your Top Pallet Furniture Questions

Even with the best guide in hand, a few questions always seem to crop up when you’re getting your hands dirty with a new project. Building with pallets is generally a breeze, but our unique South African climate can throw a few curveballs. Let’s get into the nitty-gritty of the most common queries we see.

How Do I Keep Termites Away?

This is a big one, especially for anyone near the coast. Pallets are typically made from untreated pine, which can look like an all-you-can-eat buffet to termites. Your first line of defence is a solid wood treatment that has an insecticide mixed in. Don’t just grab any old sealant; look specifically for products labelled as a wood borer or termite protector. Make sure you give the wood a thorough coating before you even think about painting or varnishing.

What’s the Best Way to Weatherproof My Furniture?

This question usually follows right after the termite one. How do you stop your beautiful new pallet couch from rotting away in the rainy season? The trick is to create a barrier that water just can’t penetrate.

Once you’ve treated the wood for pests, your best move is to use a high-quality, marine-grade varnish or a sealant made specifically for outdoor use. These aren’t just any old coatings; they’re formulated to actively repel water.

For truly bulletproof protection, here’s what I’ve learned:

  • Always apply at least three coats of your chosen sealant. One coat is never enough.
  • Get right into the end grains of the wood. These spots are like a sponge for moisture, so give them extra attention.
  • It’s also a smart idea to raise your furniture just slightly off the ground. A few small blocks or feet can stop it from sitting in puddles after a downpour.

Honestly, the most common mistake people make is skimping on the sealant. To make your furniture survive a Cape Town winter or a humid Durban summer, multiple layers are non-negotiable. It’s the only way to create that tough, waterproof shield.

Where Can I Find Cushions That Actually Fit?

Finding cushions for non-standard pallet furniture without breaking the bank can feel like a real challenge. But you have options. Before you give up, get a quote from a few local upholsterers or even fabric shops. Many of them offer custom cushion services that are surprisingly affordable.

If you’re on a tight budget, the DIY route is fantastic. Buying some high-density foam and a roll of durable outdoor fabric lets you create your own simple, no-sew cushion covers. It’s a great weekend project and saves you a ton of cash.


Planning an event and need more than just pallet furniture? ABC Hire offers a premier selection of stylish and durable event furniture rentals in Cape Town and surrounding areas. From elegant seating to eye-catching LED bars, we have everything you need to make your gathering unforgettable. Explore our collection at https://abchire.co.za today.

📍 Cape Town + Winelands