The Ultimate Guide to Room Screen Dividers for Event Design

Room screen dividers are basically clever, temporary walls you can use to slice and dice a large room into smaller, more intimate zones. For any event, they’re more than just functional; they’re like functional art. They let you sculpt the space, direct the flow of your guests, and create a specific vibe without needing to call in the builders. Think of them as your secret weapon for flexible event design.

How Room Screen Dividers Can Completely Change an Event Space

Picture this: you’ve booked a venue, and it’s a huge, open, cavernous hall. It’s a blank canvas, which is great, but also a bit daunting. This is a situation many event planners in Cape Town face, whether it’s a sprawling wine estate in Stellenbosch or a sleek corporate venue in the CBD. The real challenge is turning that big, empty area into a series of cosy, practical, and inviting spaces. This is exactly where room screen dividers come in to save the day.

They’re so much more than just simple partitions. They’re genuinely transformative pieces that solve common event headaches with a bit of style and a lot of practicality. At their core, their job is to bring structure and purpose to an otherwise wide-open floor plan.

Creating Function and Flow

First and foremost, room screen dividers are all about managing your space. They give you the power to build an event experience from scratch, mapping out dedicated zones for different activities. Getting this strategic separation right is a huge part of a successful event.

  • Defining an Entrance: You can easily create a welcoming entryway or a corridor that guides guests from the front door into the main event, setting the mood right from the get-go.
  • Separating Activities: Got a big ballroom? No problem. Section it off into a cocktail reception area, a formal dining space, and a dance floor. Each part of the evening gets its own special, contained feel.
  • Concealing Operations: Let’s be honest, nobody wants to see the catering prep stations or stacks of extra chairs. You can cleverly use dividers to hide all the back-of-house action, keeping everything looking polished and professional.

Enhancing Aesthetics and Privacy

Beyond just being practical, these dividers play a massive role in the overall look and feel of your event. The idea of using screens to create privacy and control an environment isn’t new; it’s a concept that’s been around for ages. In fact, archival research on South African interior artefacts shows that local communities were using traditional dividers made from woven grasses and reeds as far back as the mid-19th century. You can discover more insights about the historical use of room dividers from this research.

We’ve just refined that classic idea for modern events, where dividers now add layers of visual interest and create exclusive little pockets within a larger space.

Once you add a physical boundary, you instantly change the feel of a space. A simple screen can turn an open corner into a private VIP lounge or a quiet nook for conversation, making guests feel far more comfortable and looked after.

Ultimately, room screen dividers give you total control over the story your event space tells, turning it from something ordinary into something truly extraordinary.

Choosing the Right Divider for Your Event Theme

Picking the perfect room screen divider is a bit like choosing a statement piece of furniture for a room. It has to work, of course, but it also has to reflect the event’s personality. Get it right, and it elevates your theme. Get it wrong, and it just feels… off. It’s not simply about putting up a barrier; it’s about weaving in another layer of texture, colour, and style that ties into your whole vision.

Let’s put it this way: you wouldn’t use a sleek, minimalist metal divider for a rustic farm-style wedding in the Cape Winelands. It would clash horribly with the natural, earthy vibe. A warm wooden or woven screen, on the other hand, would feel like it belongs there. The goal is to make your dividers feel like a seamless part of the story you’re telling.

This diagram nails the core idea—room dividers are all about transforming a space. They create privacy, guide the flow of people, and hide things you don’t want guests to see.

A diagram illustrating space transformation benefits, including creating privacy, improving flow, allowing for visibility, and providing concealment.

The real takeaway here is that dividers do more than just divide. They actively shape how your guests experience the event by controlling what they see and where they go.

Matching Divider Types to Event Styles

The world of room dividers isn’t one-size-fits-all. There are a few key types, and knowing the difference is the first step to making a smart choice for your event.

  • Folding Screens: These are the classic, go-to option for a reason. Usually made of three or more hinged panels, they are incredibly easy to set up, shift around, and pack away. Their flexibility makes them perfect for creating a quick photo backdrop, sectioning off a cosy lounge area, or hiding the DJ booth from view.
  • Hanging Dividers: If you’re after a modern, airy feel, hanging dividers are a brilliant choice. They suspend from the ceiling, creating a sense of separation without completely boxing a space in. These are great for contemporary corporate events or chic private parties where you want to keep that open-plan atmosphere.
  • Modular Systems: For big events where you need proper, configurable walls, modular systems are your answer. These are interlocking panels that can be built into all sorts of shapes and sizes. They offer a much more solid, permanent-feeling division, which is ideal for trade show booths or breaking up a large conference hall.

Your choice of divider type directly shapes the flow and feel of your venue. Folding screens give you adaptability for dynamic events, while modular systems bring solid structure to more formal, large-scale functions.

Selecting Materials to Create Atmosphere

Once you’ve settled on a type, the material is what really brings your theme to life. It dictates the look, the texture, and the overall vibe the divider adds to the room.

Comparing Divider Materials for Event Planners

To make things easier, here’s a quick breakdown of the most common materials. Think of this as your cheat sheet for matching the material to the mood you’re trying to create.

Material Primary Aesthetic Best For Considerations
Wood Warm, classic, sophisticated Weddings, upscale corporate retreats, intimate dinners Can be heavy. Style ranges from rustic to modern carved.
Wicker/Rattan Natural, rustic, bohemian Garden parties, beach weddings, relaxed brand activations Lightweight and allows light through, but less private.
Metal Sleek, industrial, modern Art gallery openings, minimalist events, product launches Durable and strong but can feel cold without soft styling.
Fabric Soft, versatile, elegant Galas (velvet), conferences (sound absorption), brand events (colour matching) Huge variety of colours/textures. Can help dampen sound.
Acrylic/Polycarbonate Contemporary, clean, open Trade shows, modern parties, high-traffic areas Allows light through, maintaining an open feel. Lightweight.

Ultimately, the material you choose should be a natural extension of your event’s decor, not an afterthought.

A Closer Look at the Materials

Natural and Rustic Vibes

For events that need a warm, organic, or bohemian feel, you really can’t beat natural materials.

  • Wood: Wooden dividers just have a timeless warmth and elegance. Whether it’s solid, slatted, or intricately carved, wood provides a sturdy and sophisticated barrier that’s perfect for weddings, intimate dinners, and high-end corporate retreats.
  • Wicker or Rattan: These lightweight, woven materials add a wonderfully relaxed and rustic texture. They’re ideal for creating a laid-back atmosphere at garden parties, beach weddings, or boho-themed celebrations, as they let a bit of light filter through.

Sleek and Modern Aesthetics

If your event is all about a clean, sharp, and contemporary look, these materials will deliver that polished finish.

  • Metal: For a sleek, industrial edge, metal dividers are strong and durable. They fit right in with minimalist themes, art gallery openings, and modern corporate functions where clean lines are a must.
  • Fabric: Soft, versatile, and available in endless colours and patterns, fabric dividers are amazing for adding a pop of colour or a touch of elegance. They are also great for absorbing sound, which helps in creating quieter zones at a bustling reception. Think luxurious velvet for a gala or simple linen for a daytime event—the creative options are limitless.
  • Acrylic or Polycarbonate: These are a fantastic lightweight and shatter-resistant alternative to glass. They create separation while still letting light pass through, which is perfect for maintaining a sense of openness. They’re also easy to clean, making them a practical choice for high-traffic areas at trade shows or product launches.

Strategic Placement to Create Flow and Function

Great event design is about more than just what things look like; it’s about psychology. It’s about guiding your guests through an experience you’ve carefully planned out. When you place room screen dividers, you’re not just breaking up a space—you’re sculpting it to create natural pathways, distinct zones, and even a bit of discovery. The right placement turns a simple screen into a powerful tool for directing foot traffic and shaping the entire mood of the event.

Think of a big, open venue like an open field. Without any paths, people just wander. Room dividers are those gentle, guiding pathways. They create “soft boundaries” that subtly suggest where to go next, preventing that lost feeling and making the journey through your event seamless. It feels intuitive and welcoming, not restrictive.

A spacious event room with wooden and carpeted floors, featuring white room dividers and a black 'CREATE FLOW' banner.

This is the secret that separates a good layout from a great one. It’s the subtle art of making a large, potentially intimidating space feel manageable, intimate, and a breeze to navigate.

Creating Zones for a Seamless Event Journey

One of the best ways to use room screen dividers is for zoning—carving a large venue into smaller, purpose-driven areas. When you do this, you can guide guests through the different parts of your event without any confusion.

Let’s take a typical wedding reception in a big ballroom. You could use some elegant fabric screens to:

  • Form an Entry Corridor: Create a grand entrance that leads guests away from the main door and steers them towards the welcome drinks. This simple funnel builds anticipation right from the start.
  • Define a Cocktail Zone: Section off a dedicated space just for pre-dinner drinks and canapés. This contains the initial buzz and stops guests from wandering into the dining area before it’s time.
  • Reveal the Dining Area: Arrange dividers to hide the main dining setup at first. Then, they can be moved aside for a dramatic reveal when dinner is announced.

The same idea works perfectly for corporate events. You can easily create separate zones for registration, networking, a keynote presentation, and breakout sessions, all within the same hall.

Guiding Movement with Strategic Angles

How you angle your dividers makes a huge difference to how people move. Straight, rigid lines can feel like hard walls, but angled screens can subtly nudge people in a specific direction.

Imagine creating a gentle, curved path with several folding screens. This naturally encourages guests to meander along it, slowing their pace and giving them a chance to take in the decor or chat with others along the way.

On the other hand, a sharp 45-degree angle can effectively steer traffic away from a service entrance or a back-of-house area you’d rather keep private. It’s all about using visual cues to guide behaviour without a single “No Entry” sign in sight. Of course, for any of this to work, pairing your dividers with the right furniture is key. Our guide to choosing the perfect tables and chair rentals can help you finish off the look and function of each zone you create.

Practical Placement Scenarios

Okay, let’s get practical. Here are a couple of common event challenges and how to solve them with smart divider placement:

Scenario 1: The Overlooked Catering Station

  • The Problem: The catering prep area or buffet station is right in the line of sight, creating visual clutter and noise that distracts from the main event.
  • The Solution: Use a series of tall, solid room screen dividers to create a complete visual barrier. Place them a few metres in front of the station—this also gives staff plenty of room to work comfortably behind the scenes. Instantly, the whole room looks cleaner and more professional.

Scenario 2: The Empty Corner

  • The Problem: A large venue has an awkward, empty corner that feels forgotten and just sucks the energy out of the room.
  • The Solution: Use some decorative wooden or rattan screens to section off that corner and turn it into a feature. Add a couple of comfy chairs, a small table, and some soft lighting, and you’ve created an inviting photo booth backdrop or a quiet lounge nook for conversation.

By taking a moment to really look at your venue’s layout, you can spot these opportunities to make big improvements. Running through a mental checklist—identifying high-traffic routes, unsightly spots, and underused spaces—will help you place every single screen with purpose, ensuring it adds both beauty and logic to your event design.

Of course. Here is the rewritten section, crafted to sound completely human-written and natural, following the style and tone of the provided examples.


Essential Technical and Safety Considerations

Getting the look right is one thing, but making sure your event design is practical and safe is a whole different ball game. The last thing you want is a wobbly screen or a speaker that no one can hear. Overlooking these technical details can turn a great-looking divider into a genuine liability.

Think of it as the backstage work that lets the main event shine. Getting the acoustics, privacy, and stability right protects your clients, your guests, and ultimately, your reputation. These are the non-negotiables every planner in Cape Town needs to get right.

Managing Acoustics and Ensuring Privacy

One of the most underrated perks of using room screen dividers is how well they can control sound. Picture a big reception hall with high ceilings and tiled floors – sound just bounces everywhere, making it impossible to hold a conversation. This is where upholstered or fabric-covered dividers become your best friend, acting like sponges that soak up echoes and dial down the background noise.

It just makes the whole space feel more comfortable. In fact, this is a huge trend in office design right now. A 2023 report on the South African market found that 35% of new commercial office fit-outs used modular dividers with sound-insulation to create quieter, more private work areas. The same logic applies perfectly to events. You can read more about these commercial room divider market findings to see how the pros are using them.

For creating genuine visual privacy, keep these points in mind:

  • Height: You’ll want a divider that’s at least 1.8 metres (around 6 feet) tall. Anything shorter, and standing guests will be able to see right over the top.
  • Opacity: Go for solid materials. Wood, thick fabric, or opaque acrylic will get the job done. Things like rattan or slatted screens look great, but they only create a sense of separation, not total privacy.
  • Placement: Make sure you close any gaps. A small opening between panels or against a wall can completely ruin that feeling of a private, secluded space.

A great room screen divider doesn’t just block sight—it manages sound. Using acoustically absorbent panels is the key to creating quiet VIP lounges or ensuring a keynote speaker can be heard clearly over the clinking of glasses.

Prioritising Stability and Safety Protocols

This is the big one: safety. A divider tipping over is a serious hazard, so stability has to be your number one priority, especially when you’ve got guests walking around or kids at the event.

For indoor venues with smooth floors like polished concrete or wood, look for dividers with wide, heavy bases or T-shaped legs. If you’re setting up on thick carpet, check that the feet can sit flat without wobbling. For any outdoor event on grass, don’t even think about skipping the weighted sandbags at the base of each panel. A sudden gust of wind from the Cape Doctor could easily send them flying.

Finally, you have to play by the rules of the venue and public safety. Always remember to:

  1. Never Obstruct Exits: Your layout must keep all fire exits, extinguishers, and emergency routes completely clear. No exceptions.
  2. Check Fire Retardancy: Many venues require all decorative elements to be made from flame-retardant materials. Double-check this with your rental supplier to avoid any last-minute drama with the venue manager on the day.
  3. Secure Tall Dividers: If you’re using a divider taller than 2 metres, it’s always a good idea to secure it to a wall or pillar if you can. It adds that extra layer of stability and peace of mind.

Styling Dividers to Elevate Your Event Decor

Once you’ve figured out the practical side of things, it’s time for the fun part: making these functional items look absolutely stunning. Styling your room screen dividers is how you turn a simple partition into a feature piece, weaving it into your event’s creative vision. This is where a divider stops being just a divider and becomes a memorable part of the décor that guests will be snapping photos of all night.

Think of a plain wooden screen as a blank canvas. For a romantic wedding, you could weave delicate floral arrangements and cascading ivy through its panels to create a lush, organic photo backdrop. At a corporate launch, that same screen can be completely transformed with a custom-branded vinyl wrap, giving it a polished, professional look that reinforces the company’s identity.

Elegant event stage decor featuring rattan screen dividers, white floral arrangements, and green plants.

The possibilities are endless. The trick is to see the divider not as a wall, but as an active, exciting part of your overall design.

The Transformative Power of Lighting

Lighting is your secret weapon when it comes to styling room dividers. Honestly, it’s probably the most powerful tool you have. The right lighting can completely change the mood and appearance of a simple screen, turning it from a background piece into a dynamic art installation. It’s a surprisingly cost-effective way to get a high-impact look.

Here are a few techniques we love to use:

  • Uplighting: This is a classic for a reason. Placing lights on the floor and aiming them up along the divider creates dramatic shadows and highlights its texture. It works beautifully with carved wooden screens or textured fabric, adding a real sense of depth and drama to the room.
  • Backlighting: This one is all about elegance. By placing a light source behind a semi-translucent screen (like one made of shoji paper or thin fabric), you create a sophisticated silhouette effect. The soft, diffused glow is perfect for a chic lounge area or an ethereal wedding backdrop.
  • Gobo Projections: A gobo is just a fancy name for a stencil you put over a light to project a pattern or image. You can project anything onto a plain divider—from abstract textures and company logos to delicate floral motifs. It instantly turns a boring screen into a captivating visual display.

By strategically lighting your dividers, you can paint with light and shadow to craft an atmosphere. A simple backlight can make a screen glow with ambient warmth, while a sharp uplight can turn it into a bold architectural feature.

Creative Styling Ideas for Every Event

Beyond lighting, there are countless ways to physically dress up your dividers to match your theme. The aim is to make them feel like a custom, intentional part of the event design. Whatever you choose, it should enhance the divider, not overwhelm it.

For Weddings and Romantic Occasions

For that soft, romantic feel, you can’t go wrong with natural and delicate touches.

  • Floral and Greenery: Weave garlands of eucalyptus, roses, or even some local fynbos through the panels of a wooden or rattan screen.
  • Draping Fabric: Cascade soft fabrics like chiffon or organza over the top and sides to soften the lines and add a touch of elegance.
  • Hanging Elements: Suspend delicate glass baubles with tea lights, strings of fairy lights, or even macrame hangings from the top for a whimsical, bohemian vibe.

For Corporate and Branded Events

Corporate events demand a look that’s polished, professional, and on-brand.

  • Custom Vinyl Decals: Apply non-damaging, removable vinyl logos, taglines, or event graphics directly onto any smooth-surfaced dividers.
  • Integrated Shelving: Some of the more modern, modular dividers have options for shelving. These are perfect for displaying products, awards, or branded materials.
  • Colour Coordination: Use fabric dividers in your company’s brand colours. It’s a simple way to create a cohesive and immersive brand experience for your guests.

No matter how you style it, the goal is always to enhance the overall theme. Even a simple, well-placed divider can serve as a powerful visual anchor for your space. For more inspiration on creating stunning focal points, check out our guide on finding the perfect backdrop to hire for your event. Many of these same techniques can be used on backdrops to create a truly unforgettable design.

Renting vs Buying Dividers in Cape Town

As any event planner in Cape Town knows, every decision is a balancing act between your budget, the logistics, and the final impact. When it comes to room screen dividers, you’ll face the classic question: is it better to rent or buy?

While owning a set of dividers might seem like a good investment at first, the practical side of things—storage, transport, and maintenance—can quickly become a headache for most event professionals.

Imagine you’ve just wrapped up a gorgeous wedding at a Stellenbosch wine farm. The last thing on your mind should be figuring out how to haul ten bulky wooden screens back to a storage unit. This is exactly why for the vast majority of events, renting is the clear winner. It takes all those logistical nightmares off your plate and gives you far more flexibility.

Why Renting Is the Smarter Choice

Renting gives you access to a massive variety of styles without the long-term commitment or cost. One month you might need sleek, modern acrylic panels for a corporate launch in the CBD. The next, you might want rustic rattan screens for a bohemian beach wedding in Llandudno. A good rental company can provide all of this on demand.

Beyond the sheer variety, the practical benefits are huge:

  • No Storage Costs: You use the dividers for your event, and then they’re gone. No need to sacrifice precious office or warehouse space to store them.
  • Effortless Transportation: Reputable rental companies handle all the delivery and collection. This saves you from the stress of organising a big enough vehicle and the staff to move heavy, awkward items.
  • Zero Maintenance: Scratches, scuffs, and general wear-and-tear? That’s the rental company’s problem, not yours. The dividers simply arrive looking great every single time.

In a city like Cape Town, where making the most of your space is key, these benefits really add up. In fact, reports on the South African market show that demand for space-saving solutions like these has grown a lot. Roughly 23% of urban households now use some form of room divider, which just goes to show how practical they are. You can read more about how room dividers are used in the South African market.

Vetting Cape Town Rental Companies

Once you’ve decided renting is the way to go, the next step is finding the right local partner. And trust us, not all rental companies are created equal. To make sure everything goes off without a hitch, you need to ask the right questions before you sign anything.

Think of it as a job interview. You’re trusting a key part of your event’s design and logistics to this company, so it pays to be thorough.

Make sure you cover these essential points:

  • Inventory and Condition: Ask to see their catalogue or, even better, visit their showroom. Do they have a good selection of room screen dividers? Are the items well-looked-after, clean, and free from obvious damage?
  • Delivery and Setup Services: Get clear on whether their service includes delivery, setup, and breakdown. A full-service option can be a massive time and stress saver on event day.
  • Insurance and Damage Policy: What happens if a divider gets accidentally damaged by a guest? You need to understand their insurance coverage and what you might be liable for. A transparent, clear policy is the sign of a professional company.

The right rental partner is more than just a supplier; they are an extension of your event team. Their reliability, professionalism, and quality of inventory directly reflect on your final product.

Ultimately, choosing to rent frees you up to focus on what you do best: designing incredible experiences. By partnering with a reliable supplier, you get access to a world of decorative possibilities without the burden of ownership. For more ideas on sourcing the best items, our guide on finding top-quality decor hire in Cape Town offers some great additional tips.

Of course. Here is the rewritten section, crafted to sound completely human-written and match the requested style.


Common Questions About Using Room Screen Dividers

Even the most organised event can throw up a few surprises on the day. When you’re on-site and juggling a dozen things at once, you need quick, no-nonsense answers. We’ve put together a few of the most common questions we get from planners about using our room screen dividers, along with practical solutions to help you handle any challenge that comes your way.

Think of this as your back-pocket guide for those last-minute hiccups.

How Do I Make Sure the Dividers Are Stable on Uneven Ground?

This is a big one, and rightly so. We see it all the time with marquee weddings on beautiful lawns or events in older venues with charming, but not-so-level, floors. Safety comes first, so stability is key.

If you’re setting up outdoors on grass or an uneven surface, you’ll want dividers with a nice, wide base. To keep them securely in place, weighted sandbags are the go-to solution. Tucked neatly at the bottom of each panel, they’re fantastic for standing up to a sudden gust of the Cape Doctor. If the ground permits, stakes are another option, but always get the green light from your venue first.

For indoor events on old wooden floors or tiles, dividers with adjustable feet are a game-changer. You can level out each panel individually, so there’s absolutely no wobble.

Pro Tip: When you book your dividers, let your rental company know what kind of surface you’re working with. A good supplier can point you to the right type of room screen divider and provide all the necessary gear to keep it secure, taking one more thing off your plate.

Can I Brand or Customise Rented Room Screen Dividers?

Yes, you absolutely can! It’s a great way to make a rented piece feel like it was made just for your event and tie it into your corporate branding. Most rental companies in Cape Town are more than happy to help with this.

The easiest and most popular option is to use temporary vinyl decals. They can be applied to any smooth-surfaced divider to show off company logos, event hashtags, or branded messages. The best part? They peel off without leaving any sticky residue or damaging the panel.

Some suppliers, like us, also offer custom-printed fabric panels that fit onto the screen frames for a really polished, professional look. Just be sure to always check with your rental company about their approved customisation methods before you start, so you can avoid any unexpected damage fees.

How Far Ahead Should I Book Divider Rentals?

A little bit of planning goes a long way, especially during Cape Town’s peak event season from November to March. For a standard order, booking 4-6 weeks in advance is usually a safe bet. That gives you plenty of time to get what you need without any stress.

But, if you have more specific needs, you’ll want to book a bit earlier:

  • Large Orders: If you’re partitioning a huge space, it’s best to book at least 2-3 months ahead of time.
  • Speciality Styles: Our more unique or popular designs get snapped up fast, so reserve those as early as you can.
  • Custom Jobs: For custom-printed panels, we recommend getting in touch at least 3 months in advance. This gives us enough time for the design, printing, and production process.

Ready to find the perfect room screen dividers for your next event? ABC Hire offers a wide range of high-quality, stylish options to suit any theme or function. Explore our collection and let us handle the logistics, so you can focus on creating an unforgettable experience. Visit us online at abchire.co.za to get a quote today.

Outdoor Shade Solutions: outdoor umbrella with stand for every patio

When you're planning an outdoor event, you're really in the business of managing the elements. Your best friend in this fight? A solid outdoor umbrella with stand. We're going to move past the pretty pictures and get into what actually matters for a professional setup: safety, stability, and making sure it all looks seamless.

Choosing the Right Outdoor Umbrella for Your Event

A beige outdoor umbrella shades a small round table and two chairs on a sunny patio overlooking the ocean.

An outdoor umbrella isn't just a bit of shade. It's a crucial piece of your event's infrastructure. It carves out spaces, keeps your guests comfortable, and holds the whole atmosphere together.

As an event planner, picking the right one is a strategic move. You have to weigh up your venue, how many people are coming, and what the weather is likely to do—especially here in Cape Town, where things can change in a heartbeat.

The real goal is to find a unit that not only looks the part but is also built to last and do its job properly. Make the wrong choice, and you're looking at flapping canopies, wobbly bases, or worse, a real safety hazard when the wind picks up. But get it right, and that perfect outdoor umbrella with stand becomes a silent hero, giving guests pockets of cool shade or shelter from a passing shower.

A Framework for Your Decision

Before we get bogged down in the nitty-gritty of canopy fabrics and base weights, it helps to have a simple framework. Every choice you make should tick these four boxes:

  • Guest Comfort: First and foremost, are people protected from the sun and a bit of rain?
  • Event Flow: Are the umbrellas going to get in the way of people moving around or block important sightlines?
  • Operational Practicality: How easy is this for my team to set up, take down, and lug around?
  • Uncompromising Safety: This is the big one. The umbrella and its base have to be stable and wind-resistant. No exceptions.

Think of this guide as your roadmap to making these calls with confidence. We’ll start by breaking down the core decisions, from the type of umbrella and its size to the science of what makes a base stable enough for our Cape Town winds.

To get us started, here’s a quick overview of the key things you’ll need to consider.

Core Umbrella Decision Framework

This table breaks down the essentials you need to think about when choosing an umbrella for a professional event.

Factor Key Considerations
Umbrella Type Decide between centre-pole for individual tables and cantilever for open, unobstructed spaces.
Size & Coverage Calculate the required shade area based on your furniture layout and guest count.
Materials Evaluate canopy fabric for UV protection and frame material for durability and wind resistance.
Stand & Stability Match the base weight to the canopy size and consider anchoring methods for your specific venue surface.

Keep these four points in mind, and you're already on the right track to making a smart, safe choice for your event.

Understanding Umbrella Types and Sizes

Two outdoor patio umbrellas, a center pole and a cantilever, over dining sets with an ocean view.

When you're looking for an outdoor umbrella with stand, your first big decision comes down to two very different designs. This isn't just a style choice; it will directly shape your event's flow, how you use your space, and the overall atmosphere you're trying to create.

Let's get into the two main styles you'll be choosing between.

The Classic Centre-Pole Umbrella

This is the design everyone pictures when they think of an umbrella. The mast runs straight down from the middle of the canopy into the base. It’s a classic for a reason and works brilliantly in certain situations.

Think of it as the perfect tool for creating neat, defined zones. It’s the go-to for shading individual café tables or small bistro setups, especially when the pole can slide through a purpose-built hole in the table. This adds a ton of stability and gives you that clean, orderly look for a seated dining or cocktail area.

The trade-off, of course, is that the central mast is an obstruction. While it's great for tables, it’s not so practical for open areas like lounge seating or a kids' play zone where you need an uninterrupted floor plan for people to move around freely.

The Versatile Cantilever Umbrella

The cantilever, or offset, umbrella is an event planner's best friend when it comes to maximising usable space. The pole is positioned off to the side, with a sturdy arm extending out to hold the canopy exactly where you need it.

This design is the secret to creating those beautiful, wide-open shaded areas. Picture a stylish lounge with sofas and coffee tables, or a long banquet table, all sitting comfortably under a single canopy without a single pole getting in the way. That’s what a cantilever umbrella brings to the party.

Cantilever umbrellas offer incredible flexibility. Many models can tilt and rotate a full 360 degrees, which lets you adjust the shade as the sun moves across the sky—an absolute lifesaver for all-day events.

This adaptability makes them unbelievably useful. You can shade a seating area in the afternoon, then simply swing the canopy over to cover the bar as evening sets in, all without having to drag a heavy base around.

Centre-Pole vs Cantilever Umbrella Comparison for Events

To make the choice a bit easier, here’s a straightforward comparison of how each type stacks up in a real-world event setting.

Feature Centre-Pole Umbrella Cantilever (Offset) Umbrella
Best For Shading individual dining tables, creating uniform rows of coverage, bistro-style seating. Large lounge areas, long banquet tables, poolside seating, covering irregular spaces.
Space Usage Creates a central obstruction; you have to plan furniture around the pole. Provides a completely clear, open space under the canopy for maximum flexibility.
Adjustability Limited; some models offer a tilt function but can't rotate to follow the sun. Highly adjustable; most can tilt and rotate to provide targeted shade all day long.
Footprint Requires a smaller, less obtrusive base. Needs a larger, heavier base to counterbalance the offset weight, taking up more floor space.

Ultimately, the right choice depends entirely on your floor plan and what you want your guests to experience.

Choosing the Right Umbrella Size

Once you’ve settled on a style, the next question is size. The goal is to provide plenty of shade without the canopy feeling like it’s swallowing your event space. A simple rule of thumb is that your umbrella’s diameter should be at least 1.5 metres wider than the table or area it’s covering.

For example, a standard 1.2-metre round table that seats four to six guests needs an umbrella that's at least 2.7 metres across. This ensures that as the sun moves, your guests aren't left scrambling for the shady spot.

Here in South Africa, we've seen a clear trend towards larger sizes, and for good reason. Umbrellas over 3.2 metres have become popular for their generous coverage, making them ideal for commercial venues and bigger events. You can actually explore more about these market trends and how they affect event planning.

Sizing is about more than just measurements; it's about the guest experience. For more detailed advice, our guide to using large outdoor umbrellas for events can help you calculate the perfect shade footprint for any layout. Getting the size right shows thoughtful planning and a real commitment to keeping everyone comfortable.

Right, let's talk about what holds your umbrella together and keeps your guests comfortable. Beyond just the size and style, the materials you choose for the canopy and frame are what separate a one-season wonder from a long-term investment. This isn't just about looks; it's a practical decision that directly affects durability, safety, and ultimately, your bottom line.

Think of the canopy as the umbrella's skin. Its job is to fend off the harsh African sun, shrug off an unexpected downpour, and keep its colour without fading. The frame, meanwhile, is the skeleton. It’s the backbone providing all the strength needed to stand up to a gusty Cape Town afternoon.

What to Look for in Canopy Fabrics

When you start looking at canopy options, you'll come across a few key players. Each offers a different mix of performance and price, so it helps to know what you're paying for.

  • Polyester: This is a very common, budget-friendly choice. While it does a decent job of repelling water, basic polyester can fade over time with constant sun exposure. It’s a solid option for events where the umbrellas won't be out in the blazing sun day after day.

  • Olefin: A definite step up from polyester, olefin is a synthetic fabric that’s fantastic at resisting stains, mildew, and fading. It’s a great middle-ground option, giving you much better durability and colour-fastness without the top-tier price tag.

  • Solution-Dyed Acrylics: Honestly, this is the gold standard for outdoor fabrics. Brands like Sunbrella® are famous for a reason. With these fabrics, the colour pigment is mixed into the fibre before it’s even spun into yarn. This means the colour goes all the way through, making it incredibly resistant to fading. They also offer top-notch UV protection and water resistance.

What Are UPF Ratings?
The Ultraviolet Protection Factor (UPF) tells you how much UV radiation a fabric lets through. A canopy with a UPF of 50+ is excellent, blocking at least 98% of the sun's rays. It's a crucial feature for keeping your guests safe and comfortable.

Choosing the Best Frame Material

The frame is the unsung hero of a good outdoor umbrella. It needs to be tough enough to handle a breeze but manageable for your crew to set up and take down. The material makes all the difference.

Aluminium
Lightweight, completely rustproof, and easy on the wallet, aluminium is the go-to for most commercial-grade event umbrellas. Its natural resistance to corrosion makes it perfect for our coastal climate here in Cape Town. Look for a powder-coated finish for an extra layer of protection against scrapes and scuffs.

Steel
Steel frames are the heavyweights. They're stronger than aluminium and offer better stability when the wind picks up. The catch is that steel can rust if the protective coating gets chipped. Stainless steel is an option that won't rust, but it does come with a higher price tag.

Wood
There's no denying the classic, upmarket look of a wooden frame, often made from teak or eucalyptus. They are heavy and sturdy, which is great for stability. The downside is the upkeep; wood needs to be sealed or oiled regularly to stop it from weathering, rotting, or getting damaged by insects.

Here in South Africa, there’s a growing demand for umbrellas that can handle our diverse weather, offering serious UV protection and wind resistance. It’s no longer just a nice-to-have; a quality outdoor umbrella is becoming essential for ensuring comfort and safety at any outdoor venue. You can read more about this growing market demand on MarketGrowthReports.com.

Mastering Stability with the Right Umbrella Stand

Let's be blunt: an unsecured umbrella at an event isn't just a nuisance, it's a massive liability. When it comes to an outdoor umbrella with stand, the science of keeping it grounded starts and ends with the base. A stunning canopy is completely useless if it decides to take flight with the first gust of that famous Cape Town wind.

Think of your umbrella stand as an anchor. It’s not just a lump of dead weight; it’s a calculated counterbalance against some pretty powerful forces. The wind doesn't just push an umbrella sideways—it gets under the canopy, creating lift and trying to turn it into a giant, expensive kite. Your stand's one and only job is to be heavier than that upward force.

Calculating Your Base Weight

There's a simple rule of thumb that we event pros live by to keep everyone safe. The wider the umbrella canopy, the heavier its base needs to be. This isn’t a friendly suggestion; it’s a non-negotiable principle of physics that keeps your guests safe and your equipment where it belongs.

For every 30cm of canopy diameter, you need about 4.5kg of base weight. So, for a standard 3-metre umbrella, you’re looking at a minimum base weight of 45kg. If you’re in a notoriously windy spot, always play it safe and go heavier.

This quick calculation is your starting point. It takes the guesswork out of the equation and helps you make a solid, informed decision based on your specific umbrella size, ensuring your outdoor umbrella with stand setup is secure from the get-go.

This diagram helps simplify the material choices you'll face for the frame and canopy.

A simple diagram categorizing materials: frame and steel on the left, polyester and acrylic on the right.

As you can see, it breaks down the core components, showing how a frame material like aluminium gives you portability, while a canopy fabric like acrylic offers top-tier durability against the elements.

Choosing the Right Type of Umbrella Stand

Not all stands are created equal, and the right one really depends on your event's location, how long it's running, and what your team can realistically handle logistically.

Fillable Bases (Water or Sand)
These are often the go-to for temporary events. They’re light and a breeze to transport when they’re empty, and you simply fill them up with water or sand once you’re on-site.

  • Pros: Super portable, budget-friendly, and easy to pack away.
  • Cons: Can sometimes leak (water-filled) or be a real mission to empty (sand-filled). They might not pack enough punch for the really big cantilever umbrellas.

Solid Bases (Concrete, Granite, or Cast Iron)
For rock-solid security, especially in places you know get a bit of wind, you can't beat a solid base. These stands bring some serious, unmoving weight to the party, offering the best stability you can get.

  • Pros: Incredibly stable and built to last, plus they have a more premium, professional look.
  • Cons: They are seriously heavy and a pain to move around, requiring some muscle to transport and set up.

Think of it this way: a polished granite base is perfect for that high-end winelands wedding, while a simple, heavy concrete base provides the brute strength you need for a big outdoor festival. It’s all about matching the stand to the gig.

Anchoring Strategies for Tricky Surfaces

Your stability plan doesn’t stop once you've picked a heavy base. The ground you’re setting up on throws its own challenges into the mix. A smart anchoring strategy is your final line of defence.

  • On Grass or Soft Ground: Never, ever rely on just the base weight. You need to use heavy-duty ground stakes hammered through the base and deep into the soil. This gives you fantastic resistance against both sliding and tipping.
  • On Paving or Decks: Since you can't stake into these surfaces, extra weight is your best mate. Grab some dedicated, heavy-duty weight bags (at least 20kg each) and drape them over the stand. They wrap snugly around the pole and add a ton of low-profile stability without creating a new tripping hazard.
  • Coastal and Windy Conditions: For any event around Cape Town, you need to double down. Use the heaviest base you can, and add the weight bags on top. It is always, always better to be over-prepared.

At the end of the day, mastering stability comes down to a simple philosophy: respect the wind, understand the forces you're up against, and never, ever cut corners on weight. The right outdoor umbrella with stand, properly anchored, is a sign of a true professional who's committed to safety.

Renting Versus Purchasing Your Event Umbrellas

For any event planner, the big question eventually comes up: do you rent or buy your outdoor umbrellas with a stand? This isn't just about the initial hit to your wallet; it's a strategic decision that affects your storage, maintenance, and how nimble you can be. Getting this right means your equipment strategy actually supports your business goals and keeps your clients happy.

At first glance, renting seems like the easy way out. There's no big upfront investment, and you don't have to figure out where to stash a dozen bulky umbrellas between gigs. Plus, you can pick and choose different styles for different events. If you only do a few outdoor functions a year or are just getting your feet wet in the industry, renting is usually the smartest move.

But here's the catch: those rental fees start to add up, fast. This is where a little bit of maths can save you a lot of money.

Finding Your Financial Break-Even Point

Think of buying an umbrella as a long-term investment. To see if it's worth it, you just need to compare the full purchase price (don't forget the base!) to what you'd pay for a single rental.

Let's say a good commercial-grade outdoor umbrella with a stand costs you R5,000. To rent a similar one for an event costs R500. A quick calculation shows your break-even point is 10 events. Once you hit that tenth event, the umbrella has paid for itself. Every event after that is pure savings.

By owning your own gear, you're turning a constant expense into a real business asset. It not only saves you money down the line but gives you far more control over your inventory and last-minute event needs.

This simple exercise takes the guesswork out of the equation and lets you make a decision based on how many events you realistically have lined up.

The Hidden Factors in the Rent or Buy Debate

Of course, the decision isn't just about the numbers. There are a few other things to chew on that can swing you one way or the other.

Why Renting Might Be Right for You:

  • Variety without the Commitment: Need ten elegant cantilever umbrellas for a wedding this weekend, and twenty little bistro umbrellas for a market next month? Renting gives you that amazing flexibility.
  • No Maintenance Headaches: You can forget about scrubbing canopies, checking for rust, or fixing a wobbly stand. The rental company takes care of all that.
  • Zero Storage Costs: Storing big, heavy umbrellas and their bases takes up a surprising amount of secure space. Renting means that's not your problem.

Why Buying Could Be the Better Bet:

  • Always Available: When you own them, they're yours. This is a lifesaver for those last-minute bookings or when a client suddenly adds to their guest list.
  • Long-Term Value: A quality umbrella is an asset that pays for itself over and over, especially as rental prices creep up over the years.
  • Brand Consistency: Owning your inventory means you can even customise it. More importantly, it ensures a consistent look and quality across all your events, which clients will notice.

The event industry is definitely seeing more planners invest in their own durable, stylish gear to guarantee guest comfort. Online suppliers have made it easier than ever to buy a quality outdoor umbrella with a stand, often with features like better durability and UV protection. You can see how this plays out in the wider market with these umbrella market trends and consumer preferences on VerifiedMarketResearch.com.

So, what's the verdict? It really comes down to your business model. If you've got the storage space and a steady calendar of events, buying is a smart investment. But if your needs change all the time or you're short on space, renting is a practical, flexible solution. For anyone planning events in our beautiful but often gusty city, our guide on Cape Town umbrella hire has some specific advice to help you weigh your options.

Enhancing Ambiance with Accessories and Lighting

A quality outdoor umbrella with stand is a brilliant starting point, but the real magic happens when you start treating it like a piece of décor. It’s more than just shade; it’s a canvas. With the right extras, you can transform a simple umbrella from a practical necessity into a centrepiece that shapes the entire mood of your event, especially as the sun goes down.

Think about it: as evening arrives, your umbrellas shouldn't just fade into the darkness. They should become beacons of warm, inviting light. A little thoughtful illumination doesn't just help guests see their drinks; it adds a layer of sophistication and wonder to the whole affair.

Illuminating Your Event Space

Lighting is hands-down one of the best ways to lift the atmosphere under your umbrellas. And thankfully, we're long past the days of clunky, awkward lighting rigs. Today’s options are slick, simple to set up, and made specifically to work with umbrellas.

  • Rechargeable LED Lights: These are a planner's best friend. They’re just so convenient. Many are designed to clip straight onto the umbrella pole or its ribs, casting a lovely downlight over your tables without any trailing cables to worry about.
  • Solar-Powered Lights: A smart and green choice. These lights soak up the sun all day and then pop on by themselves as dusk settles in. They're perfect for events that run from afternoon into the evening, giving you seamless light without the cost.
  • String and Fairy Lights: For that truly dreamy, enchanting vibe, you just can't beat the charm of string lights. Weaving tiny fairy lights through the umbrella’s canopy creates a stunning, starry effect that makes any space feel more intimate and special. For some great ideas on pulling this off, have a look at our guide on using a fairy light curtain for events.

By simply adding light, you're massively extending the useable hours of your outdoor area. A beautifully lit umbrella space encourages people to stick around, chat, and enjoy themselves long after the sun has set.

Practical Accessories for Enhanced Comfort

Lighting is fantastic, but other accessories can seriously upgrade your guests' comfort and add a whole new level of function to your setup. These are the little details that show you've thought of everything and can be a real lifesaver when the weather decides to be unpredictable.

Side Walls for Added Protection
Attachable side walls or panels are an incredibly clever addition. They’re perfect for blocking that low, late-afternoon sun that always seems to get in everyone's eyes, or for shielding guests from a nagging, chilly breeze. This one simple accessory can keep a whole area comfortable when it would otherwise be a write-off.

Umbrella-Mounted Heaters
For those cooler evenings, especially in places like the Cape Winelands, you can get discreet electric heaters that mount right onto the umbrella pole. These are a game-changer. They send a gentle warmth downwards, keeping everyone at the table perfectly comfortable without the need for those bulky, freestanding heaters that eat up precious floor space. It’s a touch that shows you genuinely care about your guests' comfort, and they'll definitely remember it.

Here are the answers to the questions we get asked most often by event planners on the ground. When you're in the middle of a setup, you need quick, practical answers to get the job done right.

How Many Umbrellas Do I Need for My Event?

Figuring out the right number of umbrellas is a bit of an art. As a rule of thumb, plan for one large umbrella for every 6-8 person table if you're doing a dining setup. For more casual lounge areas, try spacing them about 1.5 metres apart. This creates a nice, continuous shaded zone where guests can mingle comfortably.

Honestly, the best way to do it is to sketch out your furniture layout on a floor plan. Work out the total square metres you need to cover, then divide that by the shade area of the umbrella model you've chosen. Pro tip: using a few medium-sized umbrellas often gives you more flexibility to chase the sun as it moves through the day, compared to relying on one or two giant ones.

What's the Safest Way to Secure an Umbrella in the Wind?

When it comes to safety, there are no shortcuts. Always, and I mean always, use a base that meets or exceeds the manufacturer’s minimum weight for your umbrella size. If you're not sure, go heavier. This is especially true here in Cape Town, where the wind can pick up out of nowhere.

Your securing strategy needs to change based on the surface:

  • On grass or other soft ground, you absolutely have to use heavy-duty ground stakes to supplement the base.
  • On paving or other hard surfaces, use hefty sandbags (at least 20kg each) and place them right over the stand.

It's crucial to have a clear wind policy in place before the event starts. Assign someone on your crew to keep an eye on the weather. Decide on a firm wind speed, say 30 km/h, where all umbrellas get closed and secured immediately. No exceptions.

How Should I Clean Commercial Umbrellas Between Events?

Looking after your gear is what keeps it looking professional and protects your investment. Once an event is over, a quick wipe-down of the frame with a damp cloth will get rid of any dust or spills.

For the canopy, start by brushing off loose dirt with a soft brush. You can tackle any stubborn spots with a simple solution of mild soap and lukewarm water. Make sure to rinse the fabric thoroughly with clean water afterwards and let it air dry completely while it's still open. This is key to preventing mildew. Never, ever store a damp umbrella – it's a surefire way to ruin it.

Can I Use a Table to Help Secure an Umbrella?

Look, a heavy patio table with a built-in umbrella hole does add a bit of stability, but it should never be your main line of defence. The table adds some weight and lowers the umbrella's centre of gravity, which is helpful, but it's no replacement for a proper, heavy base.

Even when you're putting an umbrella through a table, you still need to use a standalone base that meets the minimum weight requirements. Just relying on the table, especially with a big canopy, is a major safety risk in even a light breeze. Think of the table as an extra layer of support, not the foundation of your setup.


Ready to create perfectly shaded, stylish, and safe outdoor spaces for your next gathering? ABC Hire offers a premium selection of event furniture, including a wide range of outdoor umbrellas with stands, perfect for any occasion in Cape Town and the Winelands. Explore our inventory and get a quote today at https://abchire.co.za.

Your Guide to Renting a Round Wooden Table

A round wooden table is so much more than just a piece of furniture; it’s the heart of your event's atmosphere. Whether you’re planning a rustic celebration in the Cape Winelands or a polished corporate function in the city, the right table is what brings people together and elevates your entire design. The circular shape is fantastic for encouraging conversation, making sure every single guest feels included in the moment.

Choosing the Right Round Wooden Table for Your Event

Overhead view of an event hall with a server walking past round tables set with place settings.

First things first, let's match the table style to your event's theme and venue. A table isn't just a place to put a plate; it's a huge part of your overall aesthetic. The wood's grain, its colour, and the finish can completely change the mood, so it’s worth paying close attention to these details.

Think about it this way: a rustic, reclaimed pine table with all its beautiful knots and a natural finish is absolutely perfect for a relaxed outdoor wedding at a Stellenbosch wine farm. It just works with those earthy tones, simple linen runners, and wild floral arrangements, creating a warm, organic feel that feels right at home in the Winelands.

On the other hand, if you’re hosting a formal corporate gala in a chic Cape Town venue, a sleek, dark oak or rich mahogany table with a polished finish projects pure elegance. It sets a sophisticated tone, ready for crisp white linens, fine china, and dramatic, tall centrepieces.

Matching Wood Style to Venue Type

Getting the synergy right between your tables and the venue is key. You want the furniture to feel like it belongs there, not like it was just dropped in as an afterthought.

Here are a few pairings that we see work beautifully in and around Cape Town:

  • Vineyard Estates: Go for lighter-coloured woods like pine or ash. Their softer tones blend seamlessly with the sun-drenched landscapes and rustic charm of the Winelands.
  • Modern City Lofts: A dark, ebonised wood or a table with super clean lines and a smooth finish can create a stunning contrast against industrial backdrops like exposed brick or concrete.
  • Historic Manor Houses: You can’t go wrong with classic woods like walnut or cherry. Their deep, rich hues and refined grain patterns complement traditional architecture and a more formal atmosphere.

The goal is to create a cohesive design story where every element works together, starting with your tables. The wood you choose shouldn't just match your theme; it should enhance the unique character of your venue.

Considering Finish and Texture

Beyond the type of wood, the finish itself plays a massive role. A matte or oiled finish gives you a more natural, tactile experience, letting the wood's texture become a feature in its own right. This is brilliant for events aiming for an authentic, grounded vibe.

A high-gloss or lacquered finish, however, adds a layer of formality. It reflects light beautifully, contributing to a more glamorous and polished look. Before making your final decision, it's always a good idea to explore different pairings of wooden tables and chairs to make sure your entire vision comes together perfectly.

Creating a Flawless Floor Plan and Guest Flow

There's a reason we love round wooden tables – they are brilliant for creating a warm, social atmosphere. But their footprint demands some smart floor planning. If you get the spacing wrong, even a beautiful venue can feel chaotic, making it a nightmare for guests and service staff to move around. The real goal is to design a layout that feels both intimate and comfortably spacious, ensuring everything flows smoothly from the moment guests arrive.

This is about more than just placing tables on a diagram; you're essentially choreographing the entire guest experience. Think about creating clear, intuitive pathways. You want to guide people naturally from the entrance to their seats, to the bar, and to key spots like the dance floor or stage. A well-designed floor plan prevents those awkward bottlenecks and lets everyone, including your caterers, navigate the room with absolute ease.

Mastering Table Spacing

The golden rule for placing your tables is to leave enough room for both seated guests and foot traffic. A classic rookie mistake is underestimating just how much space you need once chairs are pulled out and people are actually mingling.

Here are the industry-standard measurements we always stick to:

  • Between Tables: You need a minimum of 1.5 metres between the edges of adjacent tables. This gives guests enough room to push their chairs back without bumping into the person behind them and allows staff to serve without a fuss.
  • Main Walkways: For any main artery – think paths to the exits, restrooms, or the bar – widen that gap to at least 1.8 metres. This is crucial for handling a higher volume of traffic safely and comfortably.
  • Wall Clearance: Always keep your tables at least 1.2 metres away from any walls or other obstructions. No one wants to be the person trapped against the wall, unable to get up without asking the whole table to shift.

A diagram with three icons and labels: leaf for Style, building for Venue, ruler for Size, connected by arrows.

This simple process of thinking through style, venue, and size is the absolute foundation of a great event layout. As you can see, the table choice has a direct knock-on effect on your floor plan, with each element influencing the next.

Strategic Placement for the Best Experience

Once your spacing is sorted, it's time to think strategically about where each round wooden table goes. Take a look at your Western Cape venue. Are you at a stunning wine estate with panoramic mountain views? Then orient the layout so as many guests as possible can soak in that scenery.

A great floor plan does more than just fit everyone in; it enhances the venue's best features and directs attention where you want it. It's the unseen architecture of a memorable event.

For a corporate event, you'll want to ensure everyone has a clear line of sight to the stage or presentation screen. At a wedding, the head table needs a prime position, and the dance floor should feel like an inviting, central hub, not an afterthought. This is the kind of careful planning that elevates the guest experience from just "functional" to truly exceptional. Thinking about your overall setup early is key, and it's always worth exploring comprehensive guides on tables and chair rentals to make sure all your furniture pieces work together perfectly.

Designing Your Tablescape from Linens to Centrepieces

A microphone and lit candles sit on a round wooden table, with event speakers and dark curtains in the background.

A beautiful round wooden table isn't just a place for guests to sit; it's the creative canvas for your entire event's aesthetic. The first big design choice you'll face is whether to let that natural wood shine or to dress it up with linens. Each path creates a completely different atmosphere, and the right decision really just boils down to the mood you want to set.

Leaving the wood bare is a fantastic choice, especially for events with a rustic, bohemian, or minimalist vibe. Picture a wedding at a Franschhoek wine farm, where the rich grain of the oak tables beautifully complements the surrounding vineyards. This approach is all about celebrating texture and authenticity, making the round wooden table itself a core part of the design.

On the other hand, dressing your tables in linens can instantly dial up the formality and create a more cohesive look. A crisp white tablecloth can transform a simple table for a classic, elegant wedding. For a corporate gala, a deep velvet cloth can create a moody, luxurious atmosphere. Linens are your secret weapon for injecting bold colour and tying your whole design palette together.

The Great Debate: Linens or Bare Wood?

Honestly, there’s no right or wrong answer here—only what’s right for your event. It’s like choosing between showcasing a beautiful picture frame or the painting inside it. A bare table draws the eye to the quality of the furniture, while a draped table shifts the focus to what you place on top.

Here are a few scenarios to get you thinking:

  • Bare Wood Wins: Perfect for a relaxed, daytime corporate retreat in Stellenbosch. The natural wood feels grounded and approachable. Pair it with simple ceramic dinnerware and arrangements of indigenous fynbos.
  • Linens Shine: A sophisticated 50th birthday party in a Constantia venue is the ideal setting for linens. A full-length cloth in a deep jewel tone adds drama and provides a clean backdrop for polished silverware and sparkling crystal.
  • The Hybrid Approach: Never underestimate the power of a runner! A simple linen or textured fabric runner adds a pop of colour and softness while still letting that gorgeous wood frame the tablescape.

Crafting the Perfect Centrepiece

The shape of a round table is a gift when it comes to centrepiece design. Unlike long, rectangular tables that work well with linear arrangements, a round table demands a central focal point that looks great from every single angle. The number one rule is to keep sightlines clear. Guests need to be able to see and chat with everyone at their table without having to peer through a jungle of flowers.

A common mistake we see is a centrepiece that's too tall or too wide. It effectively builds a wall between guests. As a rule of thumb, aim for arrangements that are either below eye level (under 30 cm) or tall and skinny enough to see through, like a single orchid stem in a slim vase.

Low, lush arrangements of flowers, candles, and greenery are almost always a winner. Clustering items of different heights in the middle creates visual interest without blocking anyone. For example, a group of pillar candles on a wooden tray, surrounded by eucalyptus and succulents, gives off a warm, inviting glow that really encourages conversation.

Ultimately, the centrepiece for your round wooden table should enhance that communal, social feel, not get in the way of it.

Getting Your Tables On-Site: Nailing the Logistics in Cape Town

Choosing the perfect round wooden table is just the start. The real make-or-break part of the hire process? The logistics. Getting those tables delivered, set up, and collected without a hitch is absolutely critical, especially when you're juggling timelines with busy Cape Town venues. The secret weapon here is simple: asking the right questions before you sign anything.

Before you even think about confirming the booking, you need to get crystal clear on their delivery and collection windows. Are we talking a specific, one-hour slot, or a vague "sometime between 9 am and 1 pm"? That one detail can make a world of difference for your venue manager, who needs to plan for access and staff. Smooth handovers are all about communication.

Must-Ask Questions for Your Hire Company

Never assume anything is standard practice. Every company has its own way of doing things, so run through this checklist to make sure you've covered all the bases.

  • Setup and Breakdown: Does the delivery fee just cover a kerbside drop-off, or will their team actually place the tables according to your floor plan? Knowing this upfront helps you budget for extra hands if you need them.
  • Weather Contingencies: This is Cape Town, after all. If you're planning an outdoor event, what's their plan B if the weather turns? Can they quickly pivot to an indoor setup, and what are the cost implications?
  • Condition on Arrival: What happens if a table shows up with a wobble or a big scratch? A professional company will have a solid process for a quick replacement, no questions asked.

Here’s a pro tip: The moment your hired furniture arrives, do a thorough inspection. Check every leg, run your hand over the tabletops, and look for any damage. It’s so much easier to flag an issue on the spot than to scramble for a solution an hour before your guests walk in.

This bit of proactive planning ensures you get the quality you’re paying for and saves you from any nasty day-of surprises. Taking care of these details is a huge part of the puzzle, and getting a feel for the bigger picture of furniture for hire in Cape Town can really put you ahead of the game.

A Word on Supply and Quality

The beautiful finish on a quality wooden table comes down to one thing: the wood itself. But for local manufacturers, getting their hands on high-quality timber isn't always easy.

The production of roundwood in South Africa has had its ups and downs, which has a direct knock-on effect on what's available for making great furniture. In fact, by 2018, total roundwood production had dropped to around 18.7 million cubic metres. There are even projections of potential shortfalls down the line. You can read more about the supply of industrial roundwood in South Africa and how it shapes the industry.

This is exactly why it's so important to book those beautiful wooden pieces well in advance, especially if you have your heart set on a specific style.

Tech, Lighting, and Natural Wood: A Perfect Match

In today's events, that beautiful, rustic look needs to play nicely with modern tech. Nobody wants to sacrifice charging points or stunning lighting just for a wooden table. The trick is to blend them seamlessly, so your tech supports the vibe instead of clashing with it.

One of the biggest headaches, especially at corporate gigs, is the mess of cables from laptops, sound gear, or projectors. Keeping things looking clean is non-negotiable. A simple but effective trick is to run cables neatly down a central table leg, securing them with black gaffer tape so they just disappear into the shadows. For cords running across the table itself, a well-placed decorative runner can hide a flat extension cable perfectly.

Let There Be Light: Highlighting the Wood Grain

The right lighting can take a wooden table from just a piece of furniture to a genuine showstopper. Forget about blasting the room with harsh overhead lights; that just washes everything out. The real magic happens when you get specific and use light to bring out the wood's natural character.

Here are a couple of techniques we use all the time:

  • Pin-spotting: This is a fantastic way to make your centrepieces the hero. A tight beam of light is focused directly onto your floral arrangements or decor, making them pop with colour and detail. It creates a stunning focal point on every single table.
  • Uplighting: We love this one. Small lights placed on the floor at the base of the table cast a gentle, warm glow upwards. This beautifully highlights the texture and rich tones of the wood grain, adding a wonderful sense of depth and warmth to the space.

By focusing your light, you guide your guests' eyes exactly where you want them to go—to the beautiful details you've so carefully planned. It creates a far more intimate and high-end feel than general room lighting ever could.

Fusing Styles for a Unique Look

The beauty of a round wooden table is just how versatile it is. You can pair it with almost anything, which is where you can get really creative and design a look that’s completely your own. Don’t be shy about mixing different styles; that’s often where the most memorable designs come from.

For a really striking effect, try pairing a rustic wooden table with sleek, modern ghost chairs. The contrast between the earthy, organic wood and the clean, contemporary lines of the transparent chairs is incredible. Because the chairs are see-through, the table remains the star.

Another idea we love is hanging industrial-style pendant lights or minimalist geometric fixtures above the tables. This frames the setting beautifully and adds a chic, edgy element to an otherwise classic setup. It’s this kind of fusion that creates a sophisticated and unforgettable look for any Cape Town wedding or corporate function.

Your Top Questions About Renting Wooden Tables

When you’re planning an event in Cape Town, especially a wedding or a corporate function, a few key questions always come up about the furniture. Getting the details right on your wooden tables from the start is a game-changer for a smooth, stress-free process.

We’ve pulled together the most common queries we get from wedding planners, event coordinators, and private hosts. Here are the clear, practical answers you need to make confident choices that perfectly match your vision.

How Far in Advance Should I Book My Tables?

If your event falls within Cape Town’s peak season (that’s typically October to April), you need to be thinking about booking your round wooden tables six to nine months ahead. Seriously.

High-quality wooden furniture is a hot ticket item for Winelands weddings and year-end functions, so the best stock gets snapped up fast. If you leave it too late, you’ll likely face a limited selection and might have to compromise on the style you really wanted.

Planning for the quieter off-season? You can probably get away with a shorter lead time, maybe three to four months. But honestly, booking early always guarantees you get your first choice and gives you one less thing to worry about.

What’s the Most Popular Table Size?

Hands down, the 1.8-metre diameter round table is the industry workhorse. There's a good reason it's the most popular choice by a mile. It comfortably seats eight to ten guests, hitting that sweet spot between creating an intimate, chatty vibe and still having enough room for place settings, glassware, and a gorgeous centrepiece.

For smaller, more intimate gatherings or venues where space is tight, the 1.5-metre (seating six to eight) or the 1.2-metre (seating four to six) tables are also fantastic options. The real trick is to match the table size to your seating plan to avoid guests feeling either squashed or miles apart.

You want to encourage easy conversation. A table that’s too big can make guests feel disconnected, while one that’s too small just feels cluttered. The 1.8-metre size really is the magic number for most events.

Can I Use Wooden Tables for an Outdoor Winelands Event?

Absolutely! In fact, round wooden tables are a perfect fit for the rustic, natural beauty of the Cape Winelands. Their warm, organic feel looks incredible set against a backdrop of vineyards and mountains.

The golden rule for any outdoor event in the Western Cape, though, is having a solid plan B for the weather. Always have a marquee or an indoor space ready to go. It’s also crucial that the tables are placed on flat, stable ground—no one wants a wobbly table. A reputable rental company will supply durable, weather-treated tables designed specifically to handle the outdoors.


Planning the perfect event starts with the right foundation. At ABC Hire, we provide an extensive range of high-quality round wooden tables and other event essentials to bring your vision to life in Cape Town and beyond.

Explore our collection and get a quote today at https://abchire.co.za

A Guide to Par Can Lighting for Events

Think of a painter’s brush. Now, instead of paint, imagine it uses light. That’s the simplest way to look at par can lighting—it’s a powerful tool used to wash walls with vibrant colour, put a speaker in the spotlight, or add dramatic highlights that completely change the feel of a space. This single light fixture is the backbone of modern event atmosphere.

Your Guide to Creating Atmosphere with Light

An indoor event space featuring white drapes, uplighting, a spotlight, and sound equipment.

An empty venue is just a blank canvas. Par can lighting gives you the entire colour palette to turn that canvas into a masterpiece. These lights are the real workhorses of the event industry, loved for their versatility, simplicity, and the massive impact they deliver. Whether you’re planning a chic Cape Town wedding or a slick corporate function, knowing how to use them is a game-changer.

This guide will get you up to speed on everything you need to know regarding par can lighting rentals and uses. We’ll start with the basics of what a par can is and why it’s a must-have for creating a specific mood. You’ll learn how to use light to tell a story, draw your guests’ attention, and transform a plain room into an experience they won’t forget.

What Makes Par Cans Essential

The real magic of a par can is its focused, directional beam of light. The name “PAR” actually stands for Parabolic Aluminized Reflector, which is just the fancy term for the tech inside that shapes the light. This design creates a strong, defined beam that you can aim with precision, making it perfect for all sorts of jobs.

Here’s why they are so vital for event design:

  • Atmosphere Creation: They can flip the mood of a room from cool and corporate to warm and romantic just by changing the colour.
  • Focus and Direction: Use them to highlight the important stuff—a wedding cake, a company banner, or a speaker at a podium. It tells your guests exactly where to look.
  • Architectural Enhancement: They are brilliant for uplighting columns, trees, or textured walls, bringing out the venue’s best features and adding a real sense of depth and drama.

A well-placed par can does more than just light something up; it sculpts the entire visual environment. It can make a small room feel grand or a massive hall feel cosy and intimate, all through the smart use of light and shadow.

From Simple Beams to Creative Effects

Back in the day, par can lighting was simple, single-colour units. But today, modern LED technology has completely changed the game. A single LED par can is now capable of producing millions of colours on demand. This opens up a world of creative options without ever having to fiddle with physical colour gels.

Think of this as your foundation for mastering event lighting. Once you get the hang of how par cans work, you’ll be able to make much better decisions when hiring equipment for your next event in the Cape Winelands or anywhere else. This knowledge helps ensure your vision comes to life exactly as you imagined it.

The Technology Driving the Light

A professional black LED PAR studio light with barn doors open, mounted on a stand.

To really get the most out of event lighting, it helps to know a little about what’s going on inside the fixture. The name itself, PAR Can, gives the game away. ‘PAR’ is short for Parabolic Aluminized Reflector, which is a fancy way of describing the polished, bowl-shaped mirror inside the light.

Think of it like the reflector in a high-powered torch. That curved, reflective surface is designed to catch every bit of light from the bulb and blast it forward in a concentrated, controlled beam. Without it, you’d just have a weak, messy glow. The PAR design is the secret sauce for creating those crisp, punchy beams of light that make uplighting and spotlights so effective.

While the basic par can lighting design hasn’t changed much, the light source itself has gone through a massive evolution, moving from old-school halogen bulbs to far more versatile LED technology.

Traditional vs LED: It’s No Contest

For years, the only real choice for PAR cans was a hot, power-hungry halogen bulb. They were the workhorse of the industry, but they came with a lot of baggage. Today, Light Emitting Diodes (LEDs) have taken over, offering event planners a whole new level of flexibility and efficiency.

Knowing the difference between the two is crucial when you’re deciding what to hire.

To put it plainly, the old halogen technology just can’t compete with modern LEDs. Here’s a quick breakdown of why the switch has been so complete:

Comparing Traditional Halogen and Modern LED Par Cans

Feature Traditional Halogen Par Can Modern LED Par Can
Heat Output Runs extremely hot. Can be a burn risk and uncomfortable for guests. Cool to the touch, making it safe to place anywhere.
Power Use Very high. Can easily trip a venue’s circuit breakers. Highly efficient. Uses up to 80% less power, so you can run more lights.
Colour Mixing Single colour per light. Requires physical plastic sheets (‘gels’) to change. Can create millions of colours from one fixture by mixing red, green, and blue diodes.
Lifespan Short. Around 2,000 hours on average. Extremely long. Typically 25,000 to 50,000 hours.
Flexibility Limited to one colour and brightness level. Clunky and slow to change. Colours and effects can be changed instantly and controlled electronically.

The move to LEDs isn’t just a trend; it’s a smart, practical choice. They run cooler, use a fraction of the power, and give you an entire rainbow of colours from a single light.

This shift mirrors what’s happening across South Africa, which is leading the continent in adopting LED lighting. For event professionals, this means access to reliable, energy-efficient fixtures that won’t let you down. You can learn more about the growth of the LED market in South Africa to see just how big this change has been.

Speaking the Language of Lighting

When you’re chatting with a lighting technician, knowing a few key terms will help you get your vision across perfectly.

The most important one is beam angle. This is just the measurement, in degrees, of how wide or narrow the cone of light is. A narrow beam angle, like 15 degrees, creates a tight, intense spotlight—perfect for hitting a wedding cake or floral centrepiece. A wider angle, like 45 degrees, produces a broad wash of colour that’s ideal for covering an entire wall.

Think of it like a garden hose nozzle. Twist it one way for a powerful, focused jet stream; twist it the other for a wide, gentle spray. The beam angle on a PAR can works exactly the same way.

You might also hear someone mention a PAR64 or a PAR56. These numbers originally referred to the diameter of the bulb in eighths of an inch (so a PAR64 was 8 inches across). While the terms are a bit old-fashioned now that LED lights are integrated units, they’re still used as shorthand for the fixture’s general size and brightness. A PAR64 is almost always bigger and punchier than a PAR38.

With just those few terms in your back pocket, you can walk into any planning meeting and discuss your lighting needs like a pro.

Creative Lighting Techniques for Stunning Events

A silhouetted performer sings on an outdoor stage with 'CREATE THE MOOD' banner and illuminated columns.

Alright, now that we’ve covered the technical side of things, let’s get into the fun stuff: the art of using par can lighting. Think of these lights as your paintbrush. With a few core techniques, you can completely transform a venue from just a room into an experience. It’s not about just making things brighter; it’s about shaping the space to create a very specific mood.

These are the exact building blocks that professional lighting designers use to craft those unforgettable moments. Once you get your head around them, you can take your event design to the next level and explain your vision with total confidence.

The Art of Uplighting

Uplighting is easily one of the most popular and high-impact techniques you’ll see at events. The idea is simple: you place par cans on the floor and aim them straight up a wall, a pillar, or even some draping. The effect, however, is dramatic.

This simple trick instantly adds height, elegance, and a touch of theatre to any space. It naturally draws your guests’ eyes upward, which makes ceilings feel higher and rooms feel so much grander. It’s also a brilliant way to wash a room in colour, turning a boring plain wall into a dynamic feature.

Picture a wedding at a Cape Winelands estate. Using amber or warm white uplighting against the old stone walls creates an incredibly romantic, intimate feel. On the other hand, for a corporate launch, a crisp, bold blue wash can reinforce the brand’s colour and give off a vibe of cool professionalism.

Uplighting is the single most effective way to change the perceived architecture of a room. It adds depth, hides imperfections, and creates a luxurious atmosphere with minimal effort and equipment.

Creating Drama with Backlighting

While uplighting is about enhancing surfaces, backlighting is all about creating silhouettes and making your subject pop. This technique means placing a light source behind whatever you want to highlight—a performer, a speaker, or a beautiful floral arrangement—and pointing it back towards the audience.

The result is a striking halo of light that outlines the subject, separating them from the background. It adds a powerful, almost theatrical quality that’s perfect for stages, main tables, or any key focal point. Backlighting is what gives you that iconic, dramatic outline you see at concerts. It guarantees the star of your event doesn’t just blend into the scenery but truly commands attention.

Ensuring a Flawless Stage Wash

A stage wash is a must-have for providing smooth, even light across a whole area, like a stage, dance floor, or presentation spot. Unlike a spotlight that follows one person, a wash covers the entire space in consistent, flattering light. This is so important for making sure everyone on stage is clearly visible, without any weird shadows or dark patches.

To get it right, we mount several par cans (usually with wider beam angles) overhead and overlap their beams just slightly. The goal is a seamless field of light. A good stage wash makes sure your speakers look great and that all the photos and videos from the event look polished and professional.

Painting with Colour and Mood

Colour is your most powerful tool. Different colours trigger different emotions, and you can absolutely use this to guide how your guests feel throughout an event.

  • Warm Tones (Amber, Gold, Soft Pink): These create a feeling of warmth, romance, and intimacy. They’re perfect for wedding receptions, special dinners, and any relaxed social event. They pair beautifully with other elements, too; you can learn more about creating a magical atmosphere by exploring ideas for a fairy light curtain.
  • Cool Tones (Blue, Magenta, Cyan): These shades give off energy, professionalism, and a modern, high-tech vibe. They are ideal for corporate functions, product launches, and parties where you want to create a bit of a buzz.
  • Vibrant Tones (Red, Green, Purple): Bold colours can either dial up the energy or create a sense of sophisticated elegance. Red is passionate and demands attention, while a deep purple can add a touch of regal luxury to a gala dinner.

When you start combining these techniques—using uplighting to set the room’s colour, a stage wash to light the action, and backlighting to make key people stand out—you create a layered, professional, and visually stunning design for any event.

A Practical Guide to Setup and Placement

Great lighting design is one thing on paper, but making it happen on the day is where the real magic lies. Now that we’ve covered the creative side, let’s get into the nuts and bolts of setting up your par can lighting safely and effectively. A little bit of planning here goes a long way, preventing those technical hiccups that can derail an otherwise perfect event.

It all starts with power. The absolute last thing you want is for the lights to cut out mid-speech at a wedding or during a keynote presentation. This means you need a basic handle on how much electricity your lights will draw so you don’t overload the venue’s circuits. One simple miscalculation can trip a breaker, plunging your beautifully lit space into complete darkness.

Mastering Power Management

The trick is to calculate your total power load. Every light fixture has a wattage rating that tells you exactly how much power it needs to run. The good news? Modern LED par cans are incredibly efficient, which is a massive relief compared to the old, power-guzzling halogen units.

To keep things running smoothly, just follow these simple steps:

  1. Check the Wattage: Look for the power rating on each par can you plan to use (a typical LED par might only be 72W).
  2. Add It All Up: Tally up the total wattage of all the lights you want to plug into a single power circuit.
  3. Know the Circuit Limit: In South Africa, a standard wall outlet is usually on a circuit rated for 16 amps, which can handle about 3,680 watts (16A x 230V). As a rule of thumb, always leave a buffer of around 20%, meaning you shouldn’t load a single circuit with more than roughly 2,900 watts.

Think of a power circuit like a single lane on a highway. If you try to jam too many cars (watts) onto it at once, you’ll cause a traffic jam—or in this case, a tripped breaker. By spreading your lights across different circuits, you keep the power flowing without any drama.

This focus on energy efficiency is a big deal in our local market. The South African LED lighting market, which includes event fixtures like par cans, pulled in revenue of about USD 1.03 billion and is expected to grow to USD 1.7 billion by 2030. You can get more insights on this expanding market and its regulations on Mordor Intelligence.

Rigging and Placement Options

Where you put your lights is just as important as the colours you choose. The right placement strategy is what truly brings your creative vision to life.

  • Floor Placement for Uplighting: This is the easiest and often most dramatic method. Simply placing par cans on the floor and aiming them up walls, pillars, or trees creates that classic, elegant uplighting effect. It’s quick, simple, and always looks incredible.
  • Tripod Stands: For a bit more flexibility, lighting stands (or tripods) get your lights off the ground. This is perfect for creating a wash of light over a stage, highlighting a specific feature like a cake table, or cross-lighting a dance floor.
  • Truss Mounting: For bigger events, lights are often clamped onto a metal truss structure hanging from the ceiling. This is the professional standard for lighting stages and entire rooms from above, giving you maximum control and coverage.

Prioritising Safety at Every Step

Safety should always be your top priority. A clean, secure setup doesn’t just look more professional; it prevents accidents that could completely ruin an event.

Cable management is absolutely critical. Run all your power and data cables neatly along walls or behind fixtures. Use gaffer tape to secure them flat to the floor, especially in areas where guests will be walking. This one simple step gets rid of the most common trip hazard at any event.

Finally, make sure every fixture is secure. If you’re mounting lights on a stand or a truss, double-check that every clamp and safety cable is fastened properly. This is even more important when you’re combining lights with other gear for extra atmospheric effects. If you’re looking to add another layer of visual appeal, have a look at our guide on how fog machine hire can complement your lighting setup. A stable, well-managed setup is the true hallmark of a pro.

How Many Par Cans Does Your Event Need?

Trying to figure out exactly how many lights you need can feel a bit like guessing, but it doesn’t have to be a shot in the dark. While there isn’t a single magic number that fits every event, you can get incredibly close by looking at three simple things: the size of your venue, the type of event, and the specific vibe you’re going for.

Think about it. A cosy, intimate wedding reception at a Stellenbosch wine estate has completely different needs from a massive corporate gala at the Cape Town International Convention Centre. One might just need a few lights to create a warm, inviting glow, while the other needs a serious setup to light a stage, highlight branding, and wash the whole venue in colour.

The first step is always to decide what you want the lights to do. Are you looking for subtle uplighting along the walls, a full-on stage wash for a band, or dramatic spotlights on architectural features? Each goal requires a different approach.

Rules of Thumb for Common Scenarios

To get you started, here are a few practical guidelines. For basic wall uplighting—the most popular use for par can lighting—a great rule of thumb is to place one light every 2 to 3 metres along the walls. This spacing is usually perfect for creating a beautiful, continuous wash of colour without leaving awkward dark patches or creating harsh, overly bright “hot spots.”

Let’s see how this plays out in a few real-world scenarios:

  • Intimate Wedding (50-80 guests): For a smaller venue, your focus is likely on creating warmth and romance. 10-12 LED par cans would be ideal for uplighting key walls, the main table, and maybe the entrance to tie everything together.
  • Medium Corporate Event (100-150 guests): Here, you need a bit more punch. You’ll probably be looking at 18-24 par cans to uplight the room’s perimeter, provide a simple wash for a speaker on stage, and highlight company banners or displays.
  • Large Gala or Awards Night (200+ guests): For a big, glamorous event, the numbers jump. You could easily need 30 or more fixtures to handle extensive uplighting, a full stage wash, backlighting for performers, and spotlighting key moments or centrepieces.

Think of it like painting a room. You wouldn’t try to paint an entire house with one tiny sample pot. The bigger your “canvas” (the venue) and the richer you want the “colour” (the atmosphere), the more “paint” (lights) you’re going to need.

The diagram below breaks down the key decisions you’ll make when setting up par cans, from placement and power right through to safety checks.

Diagram illustrating the Par Can Setup process, covering placement, power, and safety considerations.

This simple flow helps you remember to think through where the lights will go, how they’ll get power, and what you need to do to make sure the installation is safe and professional.

Estimating Your Par Can Needs

To make planning even simpler, here’s a quick reference table. Use it as a starting point to gauge how many par cans your event might require.

Event Type & Size Example Scenario Recommended Par Cans Primary Use
Small Gathering (Under 80 guests) A birthday party or intimate wedding reception in a restaurant. 8 – 12 Basic wall uplighting, highlighting a feature wall or main table.
Medium Event (80-150 guests) A corporate function or wedding in a medium-sized hall. 16 – 24 Perimeter uplighting, a small stage wash, and highlighting decor.
Large Event (150-300+ guests) A gala dinner, awards night, or large wedding in a ballroom. 24 – 40+ Full room wash, stage lighting, dance floor lighting, architectural highlights.
Outdoor/Marquee (Any size) A marquee wedding or outdoor festival-style event. Varies greatly Creating boundaries, lighting pathways, uplighting trees or tent structure.

Remember, this is a guide! Factors like ceiling height and wall colour will influence your final number.

Adjusting for Desired Effect and Venue

The numbers above are just a starting point. Your creative vision is what really matters. If you’re dreaming of a deep, super-saturated colour wash, you’ll want to place the lights closer together, maybe every 1.5 metres. This tight spacing makes the light beams overlap more, creating that rich, intense colour you’re after.

The venue itself is a huge factor, too. A room with dark wood-panelled walls is going to soak up light like a sponge, whereas a white marquee will reflect it beautifully. For that dark-walled venue, you might need to increase your light count by 20-30% to get the same brightness you’d achieve in a lighter space.

High ceilings also demand more powerful lights or a tighter beam angle to make sure the effect isn’t lost way up high. It’s always a good idea to chat with your rental provider. With their experience lighting up different venues all over Cape Town, they can give you expert advice tailored to your specific space.

Bringing Your Vision to Life with Light

We’ve covered a lot of ground, from the nuts and bolts of par can lighting to the creative magic that turns a simple room into a truly special place. You’ve seen how one light fixture can wash a space in emotion, pull focus with a sharp beam, and build a professional, layered atmosphere from scratch. Lighting is so much more than just a utility; it’s your most powerful tool for shaping how your guests feel the moment they walk in.

The main takeaway here is that you’re now set up to think like a lighting designer. You get the difference between a wash and a spotlight, you understand the massive impact of colour, and you know why safe, clever placement is non-negotiable. This isn’t just theory—it’s practical knowledge that gives you the power to plan with confidence and explain your vision clearly.

From Knowledge to Flawless Execution

With this new understanding, you can start turning those ideas into reality. You know what’s possible, whether you’re dreaming of a warm, romantic glow for your wedding or a slick, branded environment for a corporate launch. The next step is translating that vision into a seamless production. Remember, combining great lighting with other key elements, like a perfectly placed dance floor, is what creates that cohesive, engaging atmosphere. For more on that, check out our guide on how to hire a dance floor—it’s a perfect partner to your lighting plan.

Your event’s atmosphere is the sum of its parts. Great lighting doesn’t just illuminate the space; it enhances every other element within it, from the decor to the dance floor, creating a single, memorable experience for everyone.

This confidence is your new starting point. You can now walk into a conversation with a lighting pro, not with a vague idea, but with a clear, informed direction.

Partnering with Professionals

To make sure your event looks every bit as stunning as you’ve imagined, teaming up with an experienced crew is the way to go. They bring the technical know-how, the high-quality gear, and the on-the-ground problem-solving skills to pull off your plan without a hitch. Let them worry about the power, rigging, and programming while you focus on the big picture.

When you combine what you’ve learned here with their professional execution, you’re guaranteeing an atmosphere that isn’t just seen, but is truly felt by every single one of your guests.

Par Can Lighting: Your Questions Answered

When you’re getting into the nitty-gritty of event planning, a few practical questions about lighting are bound to pop up. We get it. Moving from the big idea to the actual setup brings up all sorts of details. Here are answers to the most common queries we get from clients planning events right here in the Cape.

Getting these specifics sorted is the key to a smooth, safe, and visually stunning event.

Can I Use Par Cans Outside?

Yes, you can—but you have to use the right gear. This is non-negotiable. For any outdoor event, from a sunset wedding on a wine farm to a garden party, you must use lights with an official IP65 rating.

An IP65 rating is your guarantee that the fixture is properly sealed against dust and can handle jets of water, which means a bit of classic Cape Town rain won’t cause a disaster. Trying to use indoor-only par cans outside is a serious electrical risk if they get wet. We also strongly recommend LED par cans for outdoor setups, as they sip power, making them much kinder to the generators you’ll likely be relying on.

What’s the Difference Between Uplighting and Downlighting?

It’s all about direction. The names really do say it all.

  • Uplighting is when we place par cans on the floor and aim them up. Think of washing a wall in a vibrant colour, making majestic old trees glow, or highlighting columns and draping. It’s the secret sauce for adding drama and texture, and it’s a massive favourite for weddings and gala dinners.
  • Downlighting is simply the opposite. We mount the lights overhead on a truss or from the ceiling and point them down. This is how we create a beautiful, even “wash” of light over a stage, dance floor, or dining area, making sure the important spots are perfectly lit.

A simple way to think about it: uplighting paints the ‘canvas’ of your venue—the walls, the trees, the architecture. Downlighting illuminates the action and the people within that canvas.

Most truly professional lighting designs use both. It creates a layered, dynamic look that’s both atmospheric and completely functional.

Do I Need to Hire a Lighting Technician?

This really boils down to how complex your lighting plan is.

If you’re just after some simple, static uplighting—say, setting the lights to a gorgeous amber and leaving them on all night—you probably don’t need a dedicated technician. A good rental company can deliver and set this up for you without any fuss.

However, the second you want the lights to do something, a professional technician becomes absolutely essential.

You’ll need a technician on-site if you want to:

  • Change colours during the event (e.g., a soft, warm glow for dinner that transforms into a vibrant party mode for dancing).
  • Sync your lights to music, a DJ set, or a video presentation.
  • Use spotlights to follow a speaker on stage or highlight the wedding couple during their first dance.
  • Run any kind of complex sequence of lighting cues for an awards ceremony or stage show.

A technician uses a special mixing desk (a DMX controller) to program and operate all the lights live. Their skill is what turns a static setup into a dynamic, breathtaking experience and ensures it all runs without a single hitch.


Ready to transform your Cape Town event with stunning, professional lighting? ABC Hire provides high-quality par can lighting and a full range of event furniture to create an unforgettable atmosphere. Explore our rental options and let us help you shine at https://abchire.co.za.

Bar Chairs White: The Ultimate Guide to White Bar Chairs

Of course. Here is the rewritten section, crafted to sound human-written by an experienced event professional, following all your specific instructions.


You might think a chair is just a chair, but when it comes to event design, some choices carry a lot more weight than others. White bar chairs, for instance, are far more than just a place for guests to sit; they're a strategic tool that brings a clean, modern, and sophisticated feel to any gathering. Their secret lies in their beautiful neutrality. They act as a blank canvas, making your colours pop, your flowers look lusher, and your lighting feel more dramatic.

From a chic wedding in Franschhoek to a corporate launch in the heart of Cape Town, this versatility is what makes them an event planner’s best friend.

Why White Bar Chairs Are an Event Designer’s Secret Weapon

A long, modern bar counter illuminated with white lights, featuring numerous white bar stools and elegant floral arrangements.

Think of your event space as the story you’re trying to tell. Every single element—the tablecloths, the centrepieces, the lighting—is a word in that story. In this context, white bar chairs are like the crisp, clean pages of the book. They don't shout for attention or distract from the main plot. Instead, they give every other design choice the space it needs to shine.

This quality makes them incredibly adaptable. A simple ribbon tied to the back or a colourful cushion can instantly link them to a corporate brand or a wedding colour scheme. Plus, their bright, airy profile has a wonderful way of making any space feel bigger and more open—a huge bonus whether you're working with an intimate venue or a grand marquee in Stellenbosch.

The Power of a Neutral Foundation

Imagine an artist standing before a canvas. A clean, white background is essential because it allows every brushstroke of colour to look its most vibrant and true. White bar chairs work in exactly the same way for event styling. Their neutrality isn't a weakness; it's their greatest strength. It provides a sophisticated foundation that supports your creative vision without ever overpowering it.

What does this mean for you? It means you get incredible flexibility.

  • For Weddings: They help create that dreamy, romantic backdrop that works so beautifully with soft pastels, lush greenery, and even bold metallic accents.
  • For Corporate Events: They project a sharp, professional image, which can be easily branded with company colours for product launches or networking events in Paarl.
  • For Private Parties: They can give a space a chic, gallery-like feel, allowing you to go wild with bold decorations and dramatic lighting that become the real stars of the show.

The true value of a white bar chair is that it can become whatever you need it to be. It's a design chameleon, effortlessly fitting in with everything from rustic charm and minimalist modernism to over-the-top glamour, making sure your event looks exactly how you pictured it.

Ultimately, choosing white seating is a deliberate move. It shows a real commitment to detail and style, setting a tone of effortless elegance from the moment your guests walk in.

Matching Chair Styles to Your Event Theme

Picking out the right white bar chair is a bit like casting an actor for a movie – the character has to fit the story. The chair you choose plays a huge part in telling your event's story, setting the mood and pulling the whole theme together. A sleek, minimalist chair would look completely lost at a rustic farm wedding, just like a classic wooden stool would clash with an ultra-modern corporate gala.

The goal here is to create a seamless look where every single element feels like it belongs. This means you need to think beyond just "a place to sit" and really consider the chair's shape, the material it's made from, and its overall design vibe. When you get this right, your seating doesn't just fill a space; it actively makes it better, giving your whole event a polished and thoughtfully designed feel.

Modern Minimalism for Corporate Sophistication

For corporate events, brand launches, or modern private parties in Cape Town, the look is usually all about clean lines and an uncluttered, sophisticated feel. This is where minimalist and Scandinavian-inspired white bar chairs really shine. Their whole design philosophy is "less is more," focusing on simple shapes, slim legs, and zero fussy details.

These chairs are absolutely perfect for creating an environment that feels professional and forward-thinking. Picture styles with sleek metal frames, maybe in chrome or matte black, paired with a simple white moulded seat. The result is sharp and clean, letting your branding or event décor be the star of the show without any competition.

The real magic of a minimalist white bar chair is its power to communicate professionalism and modernity without saying a word. It's a confident, understated choice that keeps the focus right where it should be: on networking, presentations, or the product you're launching.

This style works particularly well in venues with strong architectural features because the chairs complement the space instead of fighting with it.

To help you visualise the options, here's a quick comparison of some popular white bar chair styles we see at events across the Cape.

White Bar Chair Styles at a Glance

Style Best For (Event Type) Material Aesthetic Vibe
Scandinavian / Minimalist Corporate events, modern parties, brand launches Metal, Plastic, Wood Clean, sophisticated, professional
Cross-Back / Farmhouse Winelands weddings, rustic celebrations, garden parties Wood Warm, romantic, charming, relaxed
Acrylic / "Ghost" Cocktail parties, milestone birthdays, glamorous events Acrylic / Perspex Modern, fun, glamorous, futuristic
Industrial Urban-themed events, loft parties, trendy gatherings Metal, Wood Edgy, raw, chic, contemporary

Each style brings its own unique personality to the table (or bar, in this case!). Choosing the one that aligns with your event's overall atmosphere is key to creating a truly cohesive and memorable experience.

Rustic Charm for Winelands Weddings

When you're planning a wedding or a special celebration in the breathtaking surroundings of Stellenbosch, Franschhoek, or Paarl, the theme almost always leans towards rustic elegance. And for that, the classic cross-back or farmhouse-style white bar chair is an unbeatable choice. Typically made from wood and often finished with a soft or slightly distressed white paint, these chairs bring a sense of warmth, tradition, and pure romance.

Their timeless design, with that iconic 'X' on the backrest, adds a touch of country charm that feels both beautifully relaxed and incredibly refined.

  • Natural Materials: Wood brings in an organic, earthy element that effortlessly connects your indoor or marquee space with the natural beauty of the Winelands.
  • Comfort and Style: That supportive back means they are comfortable for guests to settle into for longer, perfect for lingering over a drink and a good chat.
  • Versatile Decoration: They are a stunning canvas. You can easily add floral arrangements, swags of greenery, or simple fabric sashes to tie in with your wedding colours.

Pairing these chairs with wooden bar tables creates a gorgeous, cohesive look that's effortlessly romantic and perfectly at home among the vineyards. For more inspiration on how different tables and chairs can complement each other, take a look at our complete guide to pairing bar tables and chairs.

Glamour and Fun with Unique Materials

For those milestone birthdays, chic cocktail parties, or any event designed to really dazzle, don't shy away from choosing bar chairs white that make a bold statement. Sleek acrylic or perspex chairs—sometimes called "ghost" chairs—are a fantastic way to do this. Their transparent or see-through quality adds a futuristic and glamorous touch, creating a feeling of light and space.

They are incredibly versatile, slotting in perfectly with a vibrant, colourful theme or a sophisticated, black-and-white one. These unique materials catch the light beautifully, especially under event lighting, adding a subtle sparkle that lifts the entire atmosphere. They send a clear signal that your event is modern, fun, and a little bit different—exactly what you want for creating an unforgettable experience.

Sizing Up Your Seating for Guest Comfort

Looks are one thing, but comfort is everything. This is where the practical details of your white bar chairs come into play, and it’s a step that can make or break your guests’ experience. A chair that’s too high, too low, or missing a footrest can quickly turn a gorgeous setup into an awkward one.

Honestly, getting the sizing right is one of the most important—and most often forgotten—parts of event planning. You want people to sit down and feel instantly at ease. Their knees shouldn't be bumping the underside of the table, and they shouldn't feel like they're towering over their drinks. The aim is a perfect, seamless fit that lets conversation flow as freely as the bubbly.

This little diagram shows how all the pieces fit together. You start with the big idea (your theme), which guides you to the right style of chair, ultimately creating the perfect vibe for your event.

A conceptual diagram showing the progression from Theme (lightbulb) to Style (chair) to Event (drink).

It’s all about making sure one decision logically follows the next, so the final result feels cohesive and intentional.

Bar Height vs. Counter Height: What's the Difference?

This is probably the most common mix-up we see. The easiest way to think about it is to picture a kitchen island versus a pub bar. Your home kitchen counter is almost always lower than a commercial bar, and the seating is made to match.

  • Counter Height: These tables are generally about 90cm high. For these, you’ll need a stool with a seat height of around 60-65cm. It’s the perfect setup for a more relaxed, intimate feel.
  • Bar Height: This is what you’ll find with standard poseur tables, which stand taller at 105-110cm. You'll need a proper bar-height chair to go with it, with a seat height of roughly 75cm.

The golden rule? Aim for 25-30cm of space between the top of the seat and the bottom of the tabletop. This is the sweet spot for legroom, making sure your guests can sit comfortably without feeling squashed. Always, always double-check the measurements of both your tables and chairs before you hire.

Don't Forget the Ergonomics

Real comfort is about more than just height. A few other details can make a massive difference, especially if your guests are going to be seated for a while.

Why a Footrest is a Must-Have
For any bar-height chair, a footrest isn't a luxury—it's essential. It gives guests a place to rest their feet, providing stability and stopping their legs from just dangling. It’s a small detail that dramatically improves comfort, takes the pressure off the lower back, and lets people truly settle in and relax.

To Back, or Not to Back?
Choosing between a backless stool and a chair with a backrest really comes down to the kind of vibe you're creating.

  • Backless Stools: These are brilliant for buzzy, social events where you want to encourage people to mix and mingle. They make it easy for guests to swivel around and chat, plus they tuck away neatly under the bar to open up the space.
  • Chairs with Backrests: If guests will be seated for a longer stretch—think a cocktail-style dinner or a presentation—a backrest is non-negotiable. It provides that much-needed back support so people can lean back and get comfortable.

This kind of flexible seating is becoming more and more popular. We're seeing a real trend in the South African events industry towards modular furniture that lets you create dynamic layouts. If you want to dive deeper, you can read more about the trends in the South African event furniture market.

Creative Layouts and Styling Ideas

Outdoor event setup with white bar chairs, a cocktail table, and a stage with a screen.

Just lining up your bar chairs white in a row is a massive missed opportunity. If you really want to elevate your event, you need to think like a designer. Use your seating to create intentional, functional, and beautiful spaces that feel completely natural.

It’s about moving beyond just giving people a place to sit. You’re crafting distinct zones that guide how your guests move, spark conversations, and build the exact atmosphere you’re aiming for. Think of your venue as a landscape and your bar chairs as the tools to sculpt it—whether you're building a sophisticated lounge for cocktails, a buzzing hub for networking, or a chic perimeter around the dance floor.

Designing Intentional Zones

By creating different "zones" within your venue, you encourage guests to move around and experience the space in unique ways. It’s an approach that adds depth and sophistication, making the whole event feel more curated and thoughtful.

1. The Cocktail Lounge Cluster
Don't just stick all the chairs at the bar. Pull a few away and group them in small, conversational clusters of three or four around a cocktail table. This instantly creates intimate pockets for guests to gather, chat, and relax. You’ve just turned a simple seating area into a stylish lounge, perfect for pre-dinner drinks or a quiet retreat from the main action.

2. The Networking Hub
For corporate functions in Cape Town, the layout needs to foster connection. Try arranging bar chairs white in outward-facing semi-circles or squares around tall tables. This setup naturally encourages guests to turn and engage with those next to them, making it a brilliant icebreaker for networking. It feels open and inviting, not rigid and closed off like traditional rows.

3. The Dance Floor Perimeter
Frame the dance floor with a scattered arrangement of bar tables and chairs. This gives guests a comfortable spot to rest between songs without making them feel cut off from the energy. It creates a soft boundary for the dance area and makes sure everyone feels part of the celebration, whether they’re dancing or just soaking it all in.

Styling Your White Bar Chairs

The beauty of white chairs is their versatility. They're a blank canvas just waiting for your personal touch. A few simple additions can completely transform their look to perfectly match your event’s theme and colour scheme, adding that final layer of polish.

Subtle styling can have a huge impact. It shows real attention to detail and ties your theme together.

  • Cushions and Throws: Adding cushions in your theme’s accent colour is the easiest way to inject personality. For a winter wedding in the Winelands, imagine a faux-fur throw draped over the back of a few chairs for a touch of cosy luxury.
  • Minimalist Floral Accents: A single, elegant stem or a small spray of greenery tied to the back of a chair with a ribbon can look incredibly chic. This works especially well for aisle chairs or those at a VIP table.
  • Ribbons and Sashes: For a more classic or romantic look, a simple satin or organza sash tied in a bow adds a soft, celebratory feel. It's a wonderfully effective technique that can be colour-matched to bridesmaid dresses or corporate branding.

The most effective styling enhances the chair’s clean lines without overwhelming them. Think of it as accessorising a classic white outfit—the right details make it pop, creating a look that is uniquely yours.

This same principle of subtle elegance works across all your seating. If you're creating a cohesive look throughout your venue, you might get some great ideas from our guide on styling the equally versatile White Tiffany Chairs for your event. Their classic design pairs beautifully with the modern appeal of white bar chairs.

Should You Hire or Buy Your Event Seating?

When you're planning an event, every item on your checklist comes with the same big question: do I hire it or buy it? When it comes to something like event seating, the answer is usually a no-brainer. Choosing to hire your white bar chairs isn't just the easy option; it’s the smartest, most practical move for almost any event planner, host, or coordinator out there.

Think of it this way: you wouldn't buy a brand-new limousine just for a wedding day. You rent it for the flair and convenience, then someone else worries about the petrol, insurance, and where to park it afterwards. Hiring event furniture works on the exact same principle. You get all the style and function you need, for a fraction of what it would cost to own, and none of the headaches.

The Clear-Cut Perks of Hiring

Opting to hire opens up a whole world of benefits that buying simply can't match for a one-off event. And trust me, the advantages go way beyond just the price tag.

  • Serious Cost Savings: The biggest win is financial. Buying a full set of quality white bar chairs is a massive expense. Hiring lets you get that same premium look for a tiny percentage of the cost, freeing up your budget for other things that make an event truly special.

  • Zero Storage and Upkeep Hassles: Let’s be realistic. What happens to thirty bar chairs after the party is over? They have to be stored somewhere clean and dry, which costs you money and space. You’re also on the hook for cleaning them, fixing any scuffs, and keeping them in mint condition—a hidden and ongoing cost people often forget.

  • Access to a Pro-Level Inventory: Event trends are always shifting, with a focus on pieces that are both gorgeous and durable. You can learn more about how the furniture market balances design and functionality on The Insight Partners. Hiring gives you a backstage pass to a professionally curated collection, where every single chair is guaranteed to be event-ready. No extra work for you.

Logistics, Sorted.

Maybe the best part about hiring is the sheer relief it brings. The whole process is designed to be completely seamless, taking a huge chunk of stress right off your plate. A professional hire company does all the heavy lifting—quite literally.

Hiring turns the messy logistics of sourcing furniture into a simple, hands-off service. It's the ultimate 'set it and forget it' solution, so you can focus on your guests and the experience, not on moving chairs around.

This all-in service includes scheduled delivery straight to your venue, whether it’s in Cape Town, Stellenbosch, or Franschhoek. The chairs show up spotless and ready to go. Once your event wraps up, the team comes back for collection, handling the entire breakdown. It’s a massive time-saver that lets you keep your focus where it belongs: on running a flawless event.

At the end of the day, deciding to hire is a strategic move. It's efficient, cost-effective, and gets rid of the stress, letting you create a beautiful, comfortable space for your guests. To dig a little deeper, check out our guide on the process of hiring chairs for your local event.

Tying It All Together

Ultimately, creating a standout event is all about the details. Choosing the right white bar chairs isn't just about giving people a place to sit; it’s a crucial part of the story you're telling. Every decision, from the style that echoes your theme to the height that ensures pure comfort, contributes to the final picture.

Think of it like putting the finishing touches on a masterpiece. You're now equipped to match sleek, minimalist chairs to a corporate launch in Cape Town or choose charming cross-backs for a rustic wedding in the Stellenbosch vineyards. You get the vital difference between bar and counter height and why a simple footrest can make all the difference to a guest's experience. This is the kind of insight that lets you design spaces that don't just look good, but feel right—encouraging guests to relax, connect, and enjoy every moment.

Your event seating is more than just furniture; it's the foundation of your guest experience. When you get it right, a simple get-together becomes a polished, memorable occasion that feels completely effortless.

Ready to Create Your Flawless Event?

Feeling inspired? The perfect seating for your wedding, party, or corporate function is just around the corner. Don't let the logistics get in the way of bringing your vision to life.

Here at ABC Hire, we make the entire process easy. We supply beautiful white bar chairs and a whole range of event furniture, with smooth delivery and collection across Cape Town, Stellenbosch, Franschhoek, and Paarl.

Ready to book the perfect pieces for your special day? Explore our collection and get a quote from ABC Hire today—let’s start planning together.

Your Event Seating Questions, Answered

Planning an event is all about the details, and getting the furniture and layout just right can feel like a puzzle. To make things a little easier, we've gathered the most common questions we get about hiring white bar chairs in Cape Town and the Winelands.

This is all about giving you clear, straightforward answers. We want to help you sidestep any last-minute stress and feel confident that every part of your seating plan is sorted. From "how many?" to "what if?", you'll find the practical advice you need right here.

How Many Bar Chairs Do I Actually Need?

This is probably the number one question we hear. For a cocktail-style event where you want guests to stand and mingle, a great rule of thumb is to have bar seating for about 30-40% of your guests. It’s the sweet spot.

So, if you're expecting 100 people, aim for 30 to 40 white bar chairs. This gives anyone who wants a break a comfortable spot to land, but it doesn't clutter the space or stop people from moving around and chatting. The whole point is to create a great, social vibe, and this ratio really helps.

Of course, that’s just a starting point. You might want to adjust the number based on a few things:

  • How long is the event? If it’s a longer affair, bumping the seating up towards 50% is a smart move to keep everyone comfortable.
  • Who are your guests? If you'll have older family members or guests who'd appreciate a guaranteed seat, it's always a thoughtful touch to provide more.
  • What's the venue like? A big, open space can handle more seating clusters, but in a smaller venue, you’ll want to be more strategic to avoid it feeling cramped.

What’s the Deal with Delivery and Collection?

Honestly, professional hire companies are here to make your life easier, and logistics are a massive part of that. The whole process is designed to be completely hands-off for you.

You'll schedule a delivery time that works perfectly with your venue's setup schedule. The chairs show up clean, checked over, and ready to go. The delivery team can either leave them in a designated spot for your planners to arrange, or for a small extra fee, they can often set them up for you according to your floor plan.

After the party's over, it's just as simple. The collection crew comes at the pre-arranged time to do all the heavy lifting and clearing out, making the pack-down process quick and painless. This service is a non-negotiable for a stress-free event.

What Happens If a Chair Gets Damaged?

Look, accidents happen. Any good hire company gets that. The rental agreements are set up to handle small mishaps in a way that's fair and totally transparent, so there are no nasty surprises.

Most agreements include a standard damage waiver or a small, refundable security deposit. This is there to cover the minor stuff that can happen at any event – think small scuffs, marks, or just general wear and tear. It gives both you and the hire company peace of mind.

If something major happens and a chair is badly damaged, the cost to fix or replace it would be charged as laid out in your rental contract. It’s always a good idea to read through these terms before you book. That way, you know exactly what to expect and can avoid any unexpected costs after the celebration is over.


Ready to lock in the perfect seating for your event? At ABC Hire, we have a stunning collection of white bar chairs and all your other event essentials. We offer seamless delivery and collection across Cape Town, Stellenbosch, Franschhoek, and Paarl. Explore our range and get your personalised quote today!

A Guide to Wicker Furniture Outdoor Settings

Before you even start thinking about colour schemes and cushion fabrics, the most important decision you'll make is choosing the right material for your wicker furniture outdoor setup. Get this wrong, and you could be looking at faded, cracked, or mouldy furniture in just one season.

The secret is knowing that "wicker" isn't a material itself—it's the weave. The actual fibres used in that weave are what make all the difference, and they generally fall into two camps: natural and synthetic.

Your local climate, especially here in South Africa, plays a massive role. A sun-drenched patio in Cape Town has totally different needs than a misty, sheltered veranda in Durban.

Natural Wicker: Beautiful, But Needs Protection

There’s a certain charm to natural wicker that you just can’t replicate. Made from organic materials like rattan, cane, or bamboo, it brings an unmatched warmth and classic texture to a space. It’s elegant and lightweight, perfect for creating that inviting, laid-back feel.

But here’s the catch: it's a plant-based fibre.

That means it’s vulnerable to moisture and harsh sunlight. In a humid coastal area, it can easily absorb moisture, which leads to mould, mildew, and eventually, rot. Leave it out in the intense Highveld sun, and the fibres will dry out, become brittle, and start to crack and unravel.

Because of this, I only ever recommend natural wicker for fully covered and protected outdoor areas—think deep, shady verandas or enclosed sunrooms where it's safe from direct rain and sun.

Synthetic Wicker: The All-Weather Workhorse

For any truly open-air wicker furniture outdoor setting, modern synthetic wicker is the undisputed champion. It’s almost always made from high-density polyethylene (HDPE), a tough resin engineered to handle whatever the South African climate can throw at it.

Here’s why it’s become the go-to choice for event planners and homeowners alike:

  • Built-in UV Resistance: Quality synthetic wicker has colour pigment running right through the strand, not just painted on top. This means it won't fade or become chalky, even after years of soaking up the African sun.
  • Completely Moisture-Proof: As a type of plastic, it simply doesn't absorb water. Rain just beads up and runs off, so you never have to worry about rot, mould, or warping.
  • Seriously Low Maintenance: Forget special treatments. A quick hose-down or a wipe with a bit of soapy water is all it takes to keep it looking new.

This diagram breaks down the choice perfectly. If your furniture will be exposed to the elements, synthetic is really your only practical option.

A diagram of a tree showing natural elements (leaves, gears) and synthetic elements (sun, leaves) linked to a covered porch.

This quick table can help you decide at a glance which wicker type is best suited for your event space.

Natural vs Synthetic Wicker: A Quick Comparison

Feature Natural Wicker (e.g., Rattan) Synthetic Wicker (e.g., HDPE Resin)
Best For Covered patios, sunrooms, verandas Open-air patios, pool decks, gardens
Weather Resistance Poor. Damaged by sun and moisture. Excellent. UV and moisture-resistant.
Durability Lower. Can become brittle and crack. High. Resists cracking, peeling, and fraying.
Maintenance High. Requires sealing and regular cleaning. Low. Easy to clean with soap and water.
Aesthetics Classic, warm, organic texture. Can mimic natural look; wide colour range.
Cost Varies, but can be expensive for high quality. Often more affordable and a better long-term value.

Ultimately, for any outdoor event hire, synthetic wicker gives you peace of mind and a far better return on your investment.

What’s Hiding Underneath Matters Most

The quality of outdoor wicker furniture goes deeper than the weave. The frame is the backbone of the entire piece, and a cheap frame will fail long before the wicker itself ever does.

Always, always look for a powder-coated aluminium frame. It’s the gold standard for a reason: it's light, incredibly strong, and completely rust-proof—a total non-negotiable for outdoor use in our climate.

A sturdy, rust-proof aluminium frame is the hidden hero of high-quality outdoor wicker furniture. While the weave gets all the attention for its looks, the frame is what ensures your investment will last for more than a few seasons.

It’s no surprise that the demand for durable outdoor furniture is booming. The regional market, including South Africa, was valued at USD 3,144.9 million in 2022 and is set to grow even more. This shows a clear shift towards investing in quality materials that can stand up to our diverse climates.

When planning your setup, remember that even the toughest furniture benefits from good protection. To learn more about pairing your seating with the right kind of shade, see our guide on how to choose large outdoor umbrellas.

Designing Your Outdoor Layout for Comfort and Flow

Great wicker furniture outdoor collections look fantastic on their own, but their real magic is revealed in how you arrange them. A smart layout can turn a simple patio into a welcoming, easy-to-use space that just begs guests to kick back and connect. It’s all about creating an experience, not just plonking down chairs.

The trick is to design a space that feels both spacious and intimate, guiding people naturally while offering comfy spots to settle in. It’s a delicate balance between looking good and being practical.

Outdoor wicker furniture set with a sofa, two chairs, and coffee table on a rug.

Establish Clear Zones and Pathways

Before you move a single piece, think about how people will actually move around. You need clear, obvious pathways from the house to the garden, over to the bar, or down to the pool. One of the biggest mistakes we see is furniture blocking these natural routes, forcing guests into an awkward shuffle.

Try to keep your main pathways at least 90cm to 120cm wide. This gives enough room for two people to pass each other without interrupting a seated conversation. This is non-negotiable for events where staff are carrying trays or guests are mingling with drinks. A wicker sectional sofa is brilliant for this; its L-shape can create a soft barrier that defines a lounge area while keeping a clear walkway open behind it.

Create Conversation Pods

Don't just line your chairs up against a wall. The goal is to group them in a way that encourages people to talk. We call these 'conversation pods'—small, dedicated seating arrangements that feel like their own little zones. They’re an open invitation to sit and chat.

For something like a cocktail party, you could set up a few different pods:

  • Two wicker armchairs with a small side table snuggled between them for a quiet, one-on-one chat.
  • A wicker loveseat facing two armchairs around a coffee table, perfect for a group of four.
  • A large circular wicker sofa arranged around a fire pit for bigger, more relaxed gatherings.

This strategy breaks a large, open space into more inviting sections, making the whole area feel cosier and much more organised.

The secret to a great outdoor layout isn't filling the space; it's defining it. Use your wicker furniture arrangements to create 'rooms without walls,' giving each area a clear purpose, whether it's for dining, lounging, or quiet conversation.

Use Rugs to Anchor Your Seating

An outdoor rug is your best friend when it comes to layout design. It works exactly like an indoor rug, visually grounding your furniture and carving out a specific zone. The moment you place a large wicker sectional and a couple of armchairs on a rug, you’ve instantly created a designated lounge area.

Just make sure the rug is big enough. A good rule of thumb is to have at least the front legs of all your main seating pieces on the rug. If the rug is too small, the whole setup feels cramped and disjointed. It's a simple touch, but it ties everything together and makes your wicker furniture outdoor setup look deliberate and polished.

Calculate Seating Without Overcrowding

It’s so tempting to try and squeeze in as much seating as possible, but this almost always backfires, making the space feel chaotic and uncomfortable. You’re much better off being realistic about how many people can fit comfortably.

As a guide, leave about 60cm of "elbow room" per person for comfortable seating. For getting around, make sure there’s at least 45cm of space between a coffee table and a sofa so people can get in and out without any hassle. When you prioritise comfort and flow over cramming people in, you create a far more enjoyable vibe for your guests. The right arrangement doesn’t just look good—it makes the entire outdoor experience one to remember.

Styling Outdoor Wicker Furniture Like a Professional

The real beauty of wicker furniture outdoor settings isn't just about the pieces themselves—it’s about how you bring them to life. Think of your wicker furniture as a beautiful, neutral canvas. The magic really starts when you layer on colours, textures, and lighting to create a specific mood.

This is your opportunity to turn a simple patio setup into a memorable experience for your guests. Whether you're aiming for a vibrant party atmosphere or a relaxed garden retreat, the right styling choices are what make all the difference.

A beautifully styled outdoor living space featuring wicker furniture, colorful pillows, and lush green plants.

Choose Your Colour Palette and Fabrics

The quickest way to inject personality into your wicker setup is with cushions and fabrics. Since most wicker comes in neutral tones like grey, brown, or white, it’s the perfect backdrop for almost any colour scheme you can dream up.

For a bold, energetic vibe that’s perfect for a daytime celebration, go for vibrant, UV-resistant textiles in shades like turquoise, coral, or sunny yellow. These colours pop beautifully against the wicker’s natural texture and create an instantly festive feel.

On the other hand, for a more sophisticated evening event, you might lean towards an elegant, muted palette. Think deep charcoals, soft creams, or even sage greens. These tones create a calm, luxurious mood that feels both timeless and incredibly inviting.

Whatever you choose, always put outdoor-friendly materials first. Performance fabrics are designed to resist sun-fading and dry quickly, which is an absolute must-have for our unpredictable Cape Town weather.

Layer with Textures and Accessories

Great styling is all about creating depth and visual interest. You can easily achieve this by layering different textures. Don't just stop at the seat cushions! Adding a few thoughtful accessories can make your outdoor space feel as comfortable and put-together as an indoor lounge.

Consider bringing in these layering elements:

  • Scatter Cushions: Mix and match cushions in different sizes, shapes, and patterns to add personality. Pairing a solid colour cushion with a patterned one in a complementary shade creates a stylish look without much effort.
  • Outdoor Throws: A lightweight throw casually draped over the arm of a wicker sofa adds a touch of colour and softness. It’s also practical for guests when the evening air gets a little chilly.
  • Outdoor Rugs: As we touched on earlier, a good rug anchors the whole seating area. Choose one with a pattern or texture that complements your cushions to tie the entire design together.

The most memorable outdoor spaces feel complete and intentional. Layering textiles like throws and varied cushions on your wicker furniture is the secret to moving beyond a basic setup and creating a truly inviting, 'lived-in' atmosphere for your guests.

Set the Mood with Creative Lighting

Lighting is one of the most powerful tools you have for transforming the atmosphere of an outdoor space. The right lighting can make your wicker furniture glow, creating an enchanting and intimate setting after the sun goes down.

Forget about relying on a single, harsh overhead light. The trick is to think in layers.

String lights or festoon lights draped overhead can instantly create a magical, café-like ambiance. Solar-powered lanterns placed around the seating area or on side tables add warm, individual pools of light without you having to worry about cords. For a touch of drama, you can even use uplighters to highlight nearby trees or garden features, adding depth to the whole scene.

This mix of ambient and accent lighting makes the space feel dynamic and ensures every corner is beautifully illuminated. For more inspiration, our guide to designing with outdoor lounge sets has plenty more ideas.

Bring Your Styling Theme to Life

Tying all these elements together with a clear theme is what really elevates your styling. Your wicker furniture outdoor set is versatile enough to fit into just about any aesthetic you can imagine.

Here are a couple of popular themes to get you started:

  1. Chic Coastal Vibe: Pair white or light grey wicker furniture with cushions in shades of navy blue and crisp white. Accessorise with driftwood-inspired decor, striped throws, and lanterns to get that relaxed, elegant seaside feeling.
  2. Bohemian Garden Retreat: Start with natural-toned wicker. Layer it with earthy-coloured cushions in terracotta, mustard, and deep green. Add macrame details, plenty of potted ferns and succulents, and patterned rugs for a free-spirited, eclectic look.

No matter your theme, bringing in natural elements like potted plants is always a winning move. Placing large ferns, palms, or flowering plants around your wicker furniture helps to seamlessly blend your styled area into the garden, creating a truly harmonious outdoor oasis.

Keeping Your Wicker Looking its Best: Cleaning & Maintenance

Your gorgeous wicker furniture outdoor setup is more than just seating; it's an investment in your event's atmosphere. A little regular care goes a long way, ensuring it looks incredible for years to come. Don't worry, it's not complicated, but it's the key to protecting your furniture from the elements and keeping it guest-ready.

The game plan changes slightly depending on whether you're working with natural or synthetic wicker. For both, though, the first step is always the easiest.

The Basics of Wicker Care

First things first: get those cushions off. Grab your vacuum with a soft brush attachment and give the furniture a good once-over. This is the quickest way to get rid of the loose dirt, dust, pollen, and cobwebs that love to hide in that beautiful weave. If you do this regularly, you'll stop that gritty buildup before it even starts.

For a deeper clean on synthetic wicker, all you need is a bucket of warm, soapy water – a mild, pH-neutral soap is perfect. Wipe everything down with a soft cloth. Got some stubborn dirt stuck in the weave? An old, soft-bristled toothbrush is your secret weapon here.

Once it's clean, give it a gentle rinse with a garden hose on a low-pressure setting. You want to wash the dirt off, not drive it deeper in. Then, just let it air dry completely in the sun before you even think about putting the cushions back on.

Tackling Specific Problems

Even the toughest outdoor furniture will face a few challenges, especially in our climate. From a surprise mildew outbreak after a wet week to the relentless sun, sometimes you need a more targeted approach.

Dealing with Mildew on Natural Wicker

Natural wicker can be a bit sensitive to dampness. If it gets wet and doesn't dry out fast enough, you might see some fuzzy grey or black spots. If you do, act quickly.

  1. Mix a solution of 50/50 white vinegar and water in a spray bottle.
  2. Lightly mist the mildew spots – don't soak the fibres.
  3. Gently scrub the mildew away with a soft brush. The vinegar will kill the spores.
  4. Wipe the area with a clean, damp cloth, then immediately dry it with a soft towel. Pop it in a sunny, breezy spot to dry out completely.

Protecting Against Sun Damage

High-quality synthetic wicker is built to be UV-resistant, but let's be honest, nothing is completely immune to the harsh African sun year after year.

  • Rotate Your Furniture: Every so often, just rearrange your layout. This ensures one side isn't always taking the full force of the sun, which helps keep the colour even.
  • Use Furniture Covers: When you're not using the furniture for a while, good-quality, breathable covers are your best friend. They shield against sun, rain, and dirt, and will seriously extend the life of your wicker.
  • Find Some Shade: If you can, position your setup under a large umbrella, a pergola, or on a covered patio. This not only protects the furniture but also makes the space much more comfortable for everyone.

A simple monthly routine is the secret here. Just 30 minutes of cleaning can stop grime from building up and fix tiny issues before they become big headaches. It’s all it takes to keep your outdoor wicker looking fantastic, season after season.

Your Seasonal Care Checklist

A little bit of prep work at the start and end of the season makes all the difference for your wicker furniture outdoor investment.

  • Start of Summer: Give every piece a thorough clean to get rid of any dust from storage. It's also the perfect time to check the frames and weave for any signs of wear and tear and see if the cushions need a deep clean before the season kicks off.
  • End of Summer: Clean everything again before you pack it away. Storing dirty furniture is an open invitation for pests and can let stains set permanently. Make absolutely sure every single piece is 100% dry before you cover it or move it into storage – this is crucial for preventing mould and mildew.

By following these simple tips, you’re making sure your wicker furniture stays beautiful, comfortable, and ready to be the centrepiece of your outdoor events for a long, long time.

Your Practical Checklist for Renting Outdoor Wicker

Renting outdoor wicker furniture is one of the smartest moves you can make for a wedding, corporate function, or any special event. It delivers that sophisticated, pulled-together look without the massive expense and hassle of buying. But to make sure it all goes off without a hitch, you need to know exactly what to look for and which questions to ask before you commit.

Think of this as your inside guide to getting it right. A few key checks can save you from hidden costs, last-minute panic, and the disappointment of furniture that doesn't live up to what you saw online.

Before You Sign Anything

That first chat with a rental company is where you lay the groundwork. Don't be shy about digging into the details—any decent company will welcome your questions and give you straight answers. This is your chance to get clarity on everything from the final bill to the logistics of drop-off and collection.

Here are the non-negotiable questions to ask:

  • What's the all-in cost? Get a fully itemised quote. It should clearly show the rental fee, delivery, setup, and collection charges. Crucially, ask if VAT is included so there are no nasty surprises later.
  • What’s your damage policy? You need to know what happens if accidents occur. Is there a damage waiver you can opt into, or are you on the hook for the full replacement cost if someone spills red wine?
  • What are the exact delivery and collection times? Lock in a specific delivery window and find out when they plan to collect. You have to make sure this lines up perfectly with your venue's access times to avoid being stung with extra fees.
  • Are cushions included and what's their condition? Double-check that the cushions in the photos are what you'll actually get. Ask if they're professionally cleaned after every event – it’s a huge indicator of a company’s quality standards.

Getting this right from the start is so important. To really get into the weeds, our complete guide on renting furniture for events has even more pro tips.

The Day of Delivery Inspection

When the delivery truck pulls up, don't just sign the paperwork and wave the team on. Take a few minutes to give every piece of wicker furniture outdoor a proper once-over. It’s far easier to flag an issue on the spot than to argue about it after the event.

Walk around each item and look specifically for:

  1. Structural Integrity: Check the frames and legs on every chair and sofa. Nothing should wobble. Give the arms and backs a gentle push to make sure they feel solid and secure.
  2. Weave Condition: Scan the wicker for any obvious unravelling, cracking, or fraying. A little bit of wear and tear is normal for rental stock, but you shouldn’t accept anything with significant damage.
  3. Cushion Quality: Inspect every cushion for stains, rips, or any musty smells. If you can, unzip them a little to check that the inner foam is in good shape.

Pull out your phone and take photos of every single piece as it comes off the truck. This gives you a time-stamped visual record of its condition on arrival and is your best protection against any disputes over pre-existing damage.

This quick, hands-on check ensures you’re getting the quality you’re paying for. South Africa has a thriving local furniture industry, accounting for 63.52% of all furniture exports from the continent. That means there are excellent, high-quality rental options out there, so there's no reason to settle for anything less than the best.

Final Checks and Regional Considerations

Lastly, think about your specific location. If your event is in a coastal city like Cape Town, you absolutely need to confirm the rental company is supplying synthetic wicker with rust-proof aluminium frames. Anything else will struggle with the salty, humid air. For an inland event, your main worry might be making sure the furniture arrives sparkling clean and free from dust.

By running through this checklist, you’re not just renting furniture; you’re buying peace of mind. You can finally relax and focus on hosting, confident that your outdoor wicker setup looks fantastic and is exactly what you planned.

Your Top Questions About Outdoor Wicker Furniture Answered

When you're looking at wicker furniture outdoor, a few key questions always pop up. It's only natural. Getting the right answers before you hire or buy is the difference between a picture-perfect event and a setup that doesn't quite hold up.

Let's walk through the most common queries I hear, so you can choose your wicker with total confidence.

Can Wicker Furniture Be Left Outside in the Rain?

This is the big one, and the honest answer is: it completely depends on what it's made of.

Your modern, synthetic wicker is built for the outdoors. It’s usually made from a high-quality resin like HDPE (high-density polyethylene), which is non-porous. Rain simply beads up and rolls right off. So if you're hiring for an event and a classic Cape Town southerly shower rolls in, synthetic wicker will be perfectly fine.

Natural wicker, though, is a different beast entirely. Because it's made from plant materials like rattan or cane, it will soak up water like a sponge. Leave it out in the rain, and you’re asking for trouble—think mould, mildew, and weakened fibres that will eventually rot and fall apart. Natural wicker belongs on a covered patio or veranda, full stop.

How Do I Protect My Wicker Furniture from Sun Damage?

That glorious South African sun can be brutal on outdoor furniture, and wicker is no different. Over time, those harsh UV rays will take their toll.

Natural wicker tends to dry out, becoming brittle and prone to cracking. The sun also bleaches its colour, leaving it looking faded and tired. You can give it a fighting chance with a good quality marine varnish that has UV protectors, but it's a constant battle.

Synthetic wicker is much tougher and more UV-resistant, but you still need to be smart. Cheaper PVC plastics will fade, get a chalky texture, and can crack after just a season or two. This is why we only stock high-grade synthetics.

The absolute best way to protect any wicker furniture outdoor is with shade. A simple furniture cover, a large umbrella, or placing the pieces under a pergola will do wonders for extending their life and keeping them looking sharp.

What Is the Difference Between Wicker and Rattan?

This one trips a lot of people up, but it's actually quite simple when you break it down.

  • Rattan is the material. It’s a specific type of climbing palm vine, known for being strong yet flexible.
  • Wicker is the method. It's the traditional crisscross weaving technique used to create the furniture.

So, you can have a chair made from rattan that has been woven in a wicker style. But you can also have wicker furniture woven from other materials, like bamboo, willow, or the modern synthetic resins we use for event hire. Just think of wicker as the craft, and rattan as one of the many materials a craftsman might use.

Is Outdoor Wicker Furniture Expensive?

The price tag on wicker can swing wildly, and it almost always comes down to the quality of the materials and the level of craftsmanship.

Genuine, hand-woven natural rattan furniture often commands a premium price. The raw material is costly, and the skilled labour required to weave it properly adds to the expense.

Synthetic wicker has a much wider price range. You'll find cheap options out there, but they're often made from PVC that just can't handle our sun. It becomes brittle and cracks, meaning you'll be replacing it before you know it.

Premium synthetic wicker, made from HDPE, is a bigger initial investment. But for that, you get something that looks fantastic, holds its colour, and is durable enough to last for years. For an event or a long-term home setup, it delivers far better value in the long run.


Ready to create a stunning outdoor setting for your next event? ABC Hire offers a premium selection of high-quality synthetic wicker furniture perfect for any occasion in Cape Town and the surrounding winelands. Explore our collection and let us help you design a memorable space. Find out more at https://abchire.co.za.

Chairs for Cafe: How to Choose the Perfect Seating

Choosing the right chairs for your café is one of those decisions that quietly makes a huge impact. It's about so much more than just giving people a place to sit. Think of your chairs as a silent host; they're the very first physical touchpoint a customer has with your brand, and they set the stage for everything that follows.

How the Right Chairs Shape Your Cafe Experience

The perfect chair can turn a quick coffee stop into a long, comfortable stay, which is fantastic for your bottom line and for building a loyal following. Your seating is essentially the handshake of your establishment—it’s a powerful first impression that defines the customer's journey before they’ve even tasted your coffee.

Picture the difference between hard, upright wooden chairs and deep, upholstered armchairs. The first type is perfect for a bustling city-centre spot focused on quick turnover and takeaway orders. The second, however, invites guests to get comfortable, order another round, and maybe even indulge in a slice of cake. This isn't an accident; it's a strategic choice that directly shapes customer behaviour and, ultimately, your revenue.

More Than Just a Place to Sit

The chairs in your café are a core part of its identity and operational flow. They have to work seamlessly with your decor, lighting, and menu to create a single, cohesive vibe. A mismatched or uncomfortable chair can throw off the whole atmosphere, no matter how amazing your brew is.

Here’s what your seating is really doing:

  • Defining Ambiance: Chairs are a massive visual cue. Sleek metal chairs scream industrial and modern, while warm wooden ones give off a rustic, cosy feel.
  • Influencing Dwell Time: Comfort is everything. It's simple: when people are comfortable, they're far more likely to stay longer and spend more. Discomfort is one of the top reasons a customer won't come back.
  • Optimising Space: The size and style of your chairs have a direct say in your seating capacity and floor plan. The right choice helps you make the most of your space without making it feel cramped or tricky for staff and customers to move around.

At the end of the day, café chairs aren't just an expense; they're an investment in the customer experience. They're a functional piece of your brand's story, silently encouraging guests to stay, enjoy, and return.

Finding Your Cafe's Perfect Style and Material

Your café chairs are talking to your customers long before you do. Even before they get a whiff of that freshly ground coffee, the chairs have already set the scene, making a visual promise about the experience they’re about to have.

Think of it like the opening track of a great album. An upbeat, industrial tune signals energy and urban grit, while a soft acoustic melody suggests a place to relax and unwind. Your chairs are the soundtrack to your café; they're not just places to sit, they're key players in your brand's story.

This is especially true in South Africa's buzzing hospitality scene. The local furniture market for hotels, restaurants, and cafés was valued at around USD 10.11 billion in 2022 and is expected to hit USD 12.45 billion by 2029. That growth is driven by new spots opening up in hubs like Cape Town and Johannesburg, all fighting to create a standout vibe. And with chairs making up about 35% of those furniture sales, getting them right is a huge piece of the puzzle.

Matching Chair Styles to Your Cafe Vibe

Choosing a style isn’t just about picking what looks good on its own. It’s about finding a design that cranks up the volume on your cafe's unique personality. Each style brings its own energy to the room.

  • Industrial: This look is all about raw, honest materials like dark metal and rugged, distressed wood. Think Tolix-style steel chairs or simple wooden seats with visible bolts and welds. It creates a rustic, urban, and slightly edgy atmosphere that feels right at home in a converted warehouse or a modern city joint.

  • Scandinavian (Scandi): Defined by its minimalist "less is more" approach, Scandi design loves light-coloured woods like beech or ash, clean lines, and simple shapes. These chairs for cafe settings help cultivate a bright, airy, and uncluttered feeling, perfect for spaces that want to feel calm and simple.

  • Mid-Century Modern: With its signature organic curves, slender tapered legs, and iconic designs (like the Eames-style shell chair), this style adds a sprinkle of retro cool. It’s a great fit for cafés aiming for a classic yet trendy look that feels both nostalgic and totally current.

  • Bohemian (Boho): This is an eclectic, free-spirited style that loves natural textures. We’re talking rattan, cane, and wicker, often paired with colourful cushions and textiles. Boho chairs create a relaxed, artistic vibe that makes customers feel like they've stumbled into a cosy, personal hideaway.

This diagram shows how your chair choice is a balancing act between the atmosphere you want, the layout you have, and the comfort your guests need.

Diagram showing cafe chairs influenced by atmosphere, layout, comfort, and coffee service factors

As you can see, all these elements are linked. A decision you make about style will directly affect everything else.

The Practicality Behind the Prettiness: Material Matters

While style sets the mood, the material is what determines how your chairs will hold up to the daily grind. The right choice has to look good, but it also has to be tough, easy to clean, and fit your budget. It’s a practical decision with long-term consequences.

Choosing a chair material is like picking a team member. You need someone who fits the company culture (your style), but they also have to be reliable, tough, and not need constant supervision (low maintenance).

Let's break down the most common options and see what they bring to the table.

Cafe Chair Material Comparison

Material Pros Cons Ideal Cafe Setting
Wood Warm, classic look; very versatile; durable hardwoods (oak, beech) Can scratch or dent; may require refinishing; heavier Cosy, traditional, or rustic cafes aiming for a timeless feel.
Metal Extremely durable; easy to clean; often stackable; lightweight options (aluminium) Can feel cold or hard without cushions; may dent or rust if not treated High-traffic, industrial, or modern cafes; great for outdoor patios.
Plastic (Polypropylene) Affordable; lightweight; huge range of colours & styles; weather-resistant Can feel less premium; susceptible to scratching; may fade in direct sun Casual, modern, or family-friendly cafes; excellent for indoor/outdoor use.
Upholstered Superior comfort; adds a touch of luxury; good for noise absorption Prone to stains & spills; requires regular cleaning; fabric can wear out Lounges, upscale cafes, or spots where you want guests to linger.

Ultimately, the best material is one that supports your vision without creating a maintenance nightmare for your team.

Here's a closer look at what each material offers:

  • Wood: Wood is a timeless classic, bringing a natural warmth that's hard to beat. Hardwoods like beech and oak are incredibly tough and can handle the busiest of services. For a closer look at their charm, check out our guide on the appeal of wooden tables and chairs. While they can be stained or painted to match any decor, they might need a bit of TLC to prevent scratches over time.

  • Metal: When it comes to pure durability, steel and powder-coated aluminium are the undisputed champions. They’re a breeze to wipe down, incredibly sturdy, and often stackable, which is a lifesaver for storage and cleaning. Metal chairs are the backbone of the industrial aesthetic but can also be designed to feel incredibly sleek and modern.

  • Plastic (Polypropylene): Don't write off plastic! High-quality moulded plastic is a fantastic option. It's lightweight, easy on the wallet, surprisingly resilient, and comes in a rainbow of colours and modern shapes. Many are also UV-resistant, making them a brilliant, flexible choice for both your indoor and outdoor seating areas.

  • Upholstered: For pure, sink-in comfort, nothing beats an upholstered chair. Soft seats covered in fabric or leather are an open invitation for customers to stay for another coffee. The trade-off? They require more upkeep, as spills are just a part of café life. Always opt for commercial-grade, easy-clean fabrics to save yourself future headaches.

Why Comfortable Seating Means Better Business

Sure, style sets the mood and gets people through the door. But it's comfort that convinces them to stay.

Think of it this way: a beautiful chair is an invitation, but a comfortable one is a reason to order that second flat white, add a slice of cake, or lose track of time catching up with a friend. This is where ergonomics—the science of designing for human efficiency and comfort—becomes one of your most powerful business tools.

An uncomfortable chair is a silent profit killer. If your customers are constantly fidgeting or shifting to find a good position, their mind isn't on your delicious menu or the great atmosphere you've created. It's on their aching back. This has a direct knock-on effect on their "dwell time", which is just a fancy way of saying how long they stick around. And the longer they stay, the more they're likely to spend.

Two people sitting in comfortable modern office chairs working on laptop and phone

The Direct Link Between Comfort and Profit

Ergonomics isn't about throwing a few plush cushions around. It’s about the fundamental design of your chairs and how they support the human body. Getting a few key dimensions right reduces physical strain and creates a sense of ease that translates directly into a healthier bottom line.

Pay close attention to these crucial factors:

  • Seat Height: The sweet spot allows someone to sit with their feet flat on the floor and their knees bent at a comfortable 90-degree angle. The standard to aim for is around 45-48 cm. Too high, and their feet will dangle; too low, and their knees will be pushed up awkwardly.

  • Seat Depth: This measures from the front edge of the seat to the backrest. A good depth of about 40-45 cm supports the thighs properly without digging into the back of the knees. A seat that’s too deep is a classic culprit for slouching and poor circulation.

  • Back Support: A well-designed backrest should support the natural curve of the lower spine (the lumbar region). Even a slight, thoughtful curve can make a world of difference over 20 minutes, preventing fatigue and encouraging your guests to truly relax.

Big-name coffee chains have done the research: bringing back cosier, more supportive seating is a core strategy for increasing customer dwell time. When people are comfortable, they visit more often, stay longer, and leave glowing reviews. Your seating can become your best, unspoken marketing asset.

Using Different Chairs to Guide Different Behaviours

Not all comfort is the same. The kind of comfort you provide should match the behaviour you want to see in different parts of your café. You can use various chairs for your cafe as a subtle way to guide the customer experience.

Let's break it down with two common customer types.

The Laptop Worker

This person is here to be productive for an hour or two.

  • Chair Type: An upright chair, perhaps with decent lumbar support.
  • Ergonomics: A slightly firmer seat and a backrest that encourages an alert posture.
  • Goal: You're providing functional comfort that helps them focus. It’s a task-oriented setup.

The Social Catch-Up

This group wants to unwind, chat, and linger.

  • Chair Type: Think lower, wider armchairs or a deeply cushioned booth.
  • Ergonomics: Softer materials, maybe a gentle recline, and armrests for that extra touch of relaxation.
  • Goal: You're creating a cosy, welcoming bubble that says, "it's okay to settle in for a while." This is a leisure-oriented setup.

When you start thinking this way, you're no longer just filling a space with furniture—you're curating an experience. You can create dedicated zones: a few upright chairs near the power outlets for the workers, and comfy nooks tucked away for the socialisers. This clever approach makes sure every customer finds their perfect spot, maximising their satisfaction and, in turn, your revenue. The right seating is an investment that pays for itself, every single day.

Here is the rewritten section, crafted to sound like an experienced human expert in a natural, engaging tone.


Optimizing Your Floor Plan with Smart Seating

Ever walked into a café and just felt… awkward? Maybe you had to squeeze past other tables, or the staff kept bumping your chair. That’s a floor plan problem, and it’s one of the quickest ways to ruin the customer experience. Your layout isn't just about where things go; it's the invisible script that guides how people move, feel, and interact in your space.

The right chairs are your secret weapon here. They dictate the flow, the vibe, and ultimately, how many happy customers you can serve. It’s a classic balancing act: you need enough seats to make money, but not so many that people feel like they’re sharing a table with strangers. A guest who feels cramped is a guest who won't linger for that extra slice of cake. The goal is to create a space that feels buzzy and alive, not just busy and cluttered.

Mapping Your Space for Maximum Flow

Before you even think about placing a chair, grab a piece of paper and sketch out your floor plan. The first thing to map isn't the tables, but the pathways. Think of these as the main roads through your café – from the door to the counter, to the tables, and to the loo.

You need to keep these arteries clear. A good rule of thumb is to leave at least 90 cm for your main walkways. This gives enough room for two people to pass without doing that awkward side-shuffle and allows your staff to move quickly with trays full of coffee. Once you’ve marked out these non-negotiable routes and any fixed objects like support pillars, you'll see the natural zones where your seating can go.

The real measure of a great floor plan isn't how many chairs you can cram in. It's about how comfortably you can seat your guests. A layout that gives people a bit of breathing room will always win, encouraging customers to stay longer and spend more.

Choosing Chairs That Fit Your Floor Plan

The actual size of your chairs is a massive factor. A chair that’s just 5 cm wider might not seem like a big deal, but multiply that by 20 or 30 chairs, and you’ve suddenly lost a whole table or created a frustrating bottleneck.

Luckily, different chair styles are built to solve different space puzzles.

  • Armless Chairs: These are the MVP of space-saving. With no arms, they tuck right under the table and let you place settings a little closer together. They’re brilliant for small two-seater tables where you want to maximise your floor space.
  • Stacking Chairs: If your café doubles as an event space or you like to switch things up, stacking chairs are a game-changer. You can clear a whole section in minutes, giving you incredible flexibility.
  • Slim Profile Chairs: Think of those sleek, minimalist chairs with thin legs. They take up less physical and visual space, which can make a small café feel much bigger and more open.

Creating Diverse Seating Arrangements

One size rarely fits all in a café. A great space offers different seating 'zones' for different types of customers – the laptop-tapper, the couple on a date, the group of friends catching up. Your chairs for your cafe are what define these zones.

Here are a few ideas to get you started:

  1. Intimate Two-Tops: Small tables paired with compact, armless chairs are perfect for couples or one-on-one meetings. They feel private and make the most of your square meterage.
  2. Communal Tables: A long, shared table is fantastic for solo customers who don't want to take up a whole table and for big, bustling groups. Pairing a bench on one side with individual chairs on the other offers great flexibility.
  3. Window Seats: Don't waste that prime real estate! A counter along the window with a row of smart bar stools creates the perfect spot for people-watchers and solo visitors.
  4. Cosy Nooks: Got an awkward corner? Turn it into a feature. Pop in a couple of comfy, soft armchairs and a low coffee table. You’ve just created a premium lounge spot that encourages people to settle in and stay a while.

Selecting Durable Chairs for Indoor and Outdoor Use

Think of a café chair not just as a place for someone to sit, but as one of the hardest-working pieces of equipment you own. It has to endure constant use, day in and day out. Choosing chairs that are built to last isn't just about avoiding a wobbly leg here and there—it's a savvy financial move that protects your investment and keeps your space looking sharp, whether it's a cosy indoor corner or a sun-drenched patio.

Of course, durability means different things in different settings. An indoor chair has to stand up to a relentless cycle of shuffling, spills, and wipe-downs. An outdoor chair, on the other hand, is in a constant battle with the sun, rain, and fluctuating temperatures. The trick is to match the materials and construction to the specific challenges each chair will face.

The South African furniture market is booming, expected to pull in US$1.51 billion in 2025, thanks in large part to our vibrant hospitality scene. This growth means more local cafés are looking for chairs that not only follow international design trends but also have the grit to handle our unique climate. Durability has become a top priority.

Durable black outdoor patio chairs and wooden table on balcony with built to last text overlay

Fortifying Your Outdoor Seating Area

Outdoor seating can be a massive drawcard for any café, but it demands chairs that can brave the elements without fading, rusting, or simply falling apart. Mother Nature is the ultimate stress test, so you'll want to look for a few non-negotiable features.

  • UV-Resistant Materials: The sun's rays can be brutal, bleaching colours and making plastics brittle over time. Look for materials like high-quality polypropylene or resin that have been specifically treated for UV resistance to keep them looking vibrant.
  • Weatherproof Metals: Not all metals are up to the task. You'll want to go for powder-coated aluminium or galvanised steel. That powder coating acts like a tough, protective shield against moisture, which is your best defence against rust and corrosion.
  • Treated Hardwoods: If you love the natural look of wood, choose species like teak or balau, which are naturally resistant to moisture and insects. Just make sure they're finished with a quality outdoor sealant to protect them from the harsh South African sun.

When you're dealing with larger patio areas, thoughtful planning is key. You can find some great ideas for creating welcoming exterior spaces in our guide to choosing outdoor lounge sets.

A classic mistake is using indoor chairs for "occasional" outdoor use. It only takes one unexpected downpour or a few weeks of intense sun to permanently damage a chair that wasn't built for it, forcing you into a costly and premature replacement.

Ensuring Longevity for Indoor Chairs

Indoors, your chairs face a different kind of battle—one of constant, high-frequency use. Here, the focus shifts from weather resistance to solid structural integrity and finishes that can handle the daily grind.

For indoor chairs for cafe settings, strong construction is everything. Check for reinforced joints, especially where the legs and backrest connect, as these are the most common points of failure. Joints that are glued, screwed, and dowelled are in a different league of strength compared to those just held together with staples.

The finish is just as crucial. A scratch-resistant lacquer on wooden chairs or a durable powder coat on a metal frame will keep them looking fresh for much longer. And if you're going for upholstered seats, always choose commercial-grade fabrics. They are specifically rated for high traffic and are a breeze to clean, a small detail that will save you countless hours of maintenance down the line.

To make the decision a bit easier, here’s a quick checklist to compare your priorities for indoor versus outdoor chairs.

Indoor vs. Outdoor Cafe Chair Checklist

Feature Indoor Chair Priority Outdoor Chair Priority
Material Resilience Focus on scratch and stain resistance. Must be UV-resistant, waterproof, and rust-proof.
Construction Look for reinforced joints to handle constant movement. Joints must withstand temperature fluctuations without warping.
Weight & Portability Lighter for easy cleaning and rearranging. Heavier to prevent being blown over by wind.
Finish Durable lacquer or powder coat for high-touch areas. Sealants and coatings must protect against sun and rain.
Upholstery Commercial-grade, easy-to-clean fabrics. Quick-drying, fade-resistant, and mould-proof fabrics.
Maintenance Easy to wipe down and clean daily spills. Requires periodic deep cleaning and potential re-sealing.

This checklist helps highlight that while both need to be tough, the type of toughness required is fundamentally different. Choosing correctly from the start saves a lot of headaches later on.

Your Guide to Sourcing and Budgeting Cafe Chairs

Alright, you’ve got a handle on the crucial roles style, comfort, and durability play in picking the perfect chairs for a cafe. Now it’s time to get down to brass tacks: sourcing and budgeting. This is where your vision meets the real world, and making smart financial decisions is key.

It’s easy to get fixated on the price of a single chair, but that’s a common mistake. A sustainable budget looks at the bigger picture, factoring in the chair's lifespan and any potential maintenance costs. Getting this right means your seating becomes a lasting asset, not a nagging, recurring expense.

Exploring Your Sourcing Options

There’s more than one way to furnish your space, and each path comes with its own pros and cons. The right choice for you will boil down to your brand, your budget, and your long-term plan. Let’s break down the most common routes.

  • Buying New: This is the most direct approach. You get brand-new, untouched chairs, usually with a warranty, and you can order the exact style and quantity you need. It's the perfect way to lock in a consistent aesthetic, especially if you’re launching a new brand and want to make a strong statement from day one.

  • Sourcing Second-Hand: Going for used chairs can be incredibly cost-effective, letting you snag higher-quality pieces for a fraction of what they’d cost new. This is also a brilliant way to cultivate a unique, eclectic vibe. It does take a bit more legwork to find matching sets, and you’ll need to give each chair a thorough inspection for wear and tear, as warranties are rarely part of the deal.

  • Hiring or Leasing: If you're running a pop-up, a one-off event, or just want to test a concept before going all-in, hiring chairs offers fantastic flexibility. It drastically cuts down your initial investment and usually includes delivery and collection. For anyone thinking along these lines, looking into hiring chairs near me is a great way to find a flexible and budget-friendly solution to get started.

Your sourcing strategy really says a lot about your business priorities. A sleek, brand-new cafe might invest in custom chairs to cement its identity, while a quirky, independent spot could build its entire character around unique second-hand finds.

Crafting a Realistic Seating Budget

Building a smart budget is more than just simple multiplication. You need to think about the Total Cost of Ownership (TCO), which gives you a much truer sense of what your chairs will really cost you over their lifetime.

A cheap chair that falls apart in two years is far more expensive in the long run than a sturdier, pricier one that lasts a decade. In fact, studies on cafe chair lifespans show that well-built chairs can last nearly ten years with proper care, even with heavy use. In contrast, poorly assembled ones often fail much sooner, not because of a bad design, but because of shortcuts in how they were put together. It just goes to show that initial build quality is everything.

To figure out your TCO, you need to look at these factors:

  1. Initial Purchase Price: This is the straightforward cost per chair multiplied by how many you need.
  2. Delivery and Assembly Fees: Don’t forget to factor in shipping and whether you’ll need to pay someone to put the chairs together.
  3. Maintenance and Repair Costs: Think about future expenses. Will they need reupholstering, refinishing, or will you be fixing wobbly legs? Higher quality materials usually mean lower maintenance costs down the line.
  4. Expected Lifespan and Replacement: Estimate how long the chairs will actually last. A R1,000 chair that lasts two years costs R500 per year. A R3,000 chair that lasts ten years? That’s only R300 per year.

When you start thinking in terms of annual cost, you shift from just spending money to making a strategic investment in your cafe’s future. This approach makes sure your seating works just as hard for your business as you do.

Your Top Questions About Choosing Cafe Chairs, Answered

Picking out the right chairs for your cafe is a careful balancing act between aesthetics, durability, and customer comfort. It’s easy to feel a bit overwhelmed by the choices, so we’ve gathered the most common questions we hear from cafe owners and answered them in a clear, practical way to guide your decisions.

These insights will help you cut through the noise and select seating that’s a perfect fit for your space, your brand, and your budget.

How Many Chairs Should I Plan for My Cafe Space?

A really solid rule of thumb is to allocate between 1.5 to 1.8 square metres per person. This calculation isn't just about fitting people in; it's about making sure there’s enough room for the table, the chair itself, and clear, comfortable pathways for both customers and staff to move around without constantly bumping into each other.

To put that into perspective, a 100-square-metre dining area could comfortably host between 55 and 65 guests. It’s always, always better to prioritise a smooth, uncluttered flow over squeezing in a few extra seats. Do yourself a favour and map your layout on paper first—it’s a crucial step to visualise the space and avoid creating those frustrating bottlenecks.

What Is the Most Durable Material for a Busy Cafe?

For a high-traffic spot where chairs will be used constantly, you can't go wrong with fully welded metal frames made from steel or aluminium. Their robust construction and sheer strength mean they can withstand the daily grind of a busy cafe without breaking a sweat.

If you love the warm, inviting look of wood, be sure to opt for dense hardwoods like beech or oak, and pay very close attention to how the joints are put together. Another top contender is high-quality moulded polypropylene; it’s incredibly durable, a breeze to clean, and versatile enough for both your indoor and outdoor seating areas.

A crucial takeaway from industry studies is that chair failure often stems from poor assembly, not poor design. Even the best materials can fail if the joints are not properly glued and secured, reinforcing the importance of inspecting a sample before buying in bulk.

Should My Cafe Chairs Have Arms or Be Armless?

The best choice here depends entirely on your space and the kind of vibe you want to create for your customers. Each style serves a very different purpose.

  • Armless Chairs are fantastic space-savers. They tuck neatly under tables and allow you to fit more seating into a compact area, making them perfect for smaller two-seater tables and those quick-turnover zones.
  • Chairs with Arms offer a lot more comfort, sending a clear signal to guests that it’s okay to settle in, relax, and stay a while. This makes them ideal for your cosy lounge areas or more spacious dining spots where you want to encourage a leisurely pace.

Many of the most successful cafes use a smart mix of both, placing armless chairs in bustling areas and tucking armchairs into quiet corners.

How Do I Test a Chair's Quality Before Buying in Bulk?

Whatever you do, never place a large order without getting your hands on a sample first. Ask the supplier to send you a single chair and then put it through a few simple but essential quality checks. First, sit in it for at least 15 minutes to properly get a feel for its comfort and ergonomics.

Next, check its stability by rocking it gently—it should feel completely solid with absolutely no wobbling. Carefully inspect the welds, joints, and finish for any tell-tale signs of poor workmanship. A great cafe chair should feel sturdy and well-built, yet be light enough for your staff to move easily for cleaning. This simple test can save you from a very expensive mistake down the line.


Ready to create an unforgettable atmosphere for your next event without the commitment of purchasing? Explore the stylish and durable seating options at ABC Hire. Find the perfect chairs for your needs at https://abchire.co.za.

Your Guide to Hire of Dance Floor in Cape Town

When you hire a dance floor, you’re not just renting a surface for people to move on. You’re creating the heart of your event, the central point where all the energy gathers. The right material and style can completely transform the atmosphere, guiding how your guests feel and act. It’s a core design element, and getting it right is crucial.

Matching Your Dance Floor to Your Cape Town Event

Picking a dance floor is a creative choice that has to click with your event’s theme, your venue, and the exact mood you’re going for. Here in the Western Cape, with its incredible variety of backdrops, the floor you choose can either melt into the scenery or stand out and make a real statement.

Think about a classic wood parquet floor. It brings a sense of warmth and tradition that feels right at home in a historic Stellenbosch wine estate, perfectly matching that rustic charm.

On the other hand, a modern, high-gloss white seamless floor offers a kind of timeless elegance that’s perfect for a sophisticated wedding in Franschhoek. It does a brilliant job of reflecting light, which makes any space feel bigger and brighter. It also gives you a clean slate for creating dramatic lighting effects, which is why seamless floors are so popular for both classic and contemporary events.

The Impact of Colour and Finish

Don’t underestimate the power of colour and finish. These are your tools for shaping the vibe of the event. A standard black floor, for instance, can ground a really large space and has a formal feel that works well for corporate events. Want something a bit more fun? A checkered black-and-white floor instantly brings a cool, retro energy that’s perfect for themed parties.
And if you really want to make an impression, an LED dance floor can turn a corporate gala at a venue like the CTICC into a totally immersive experience. You can program these floors with amazing colours and patterns that sync up with the music, creating an electric atmosphere that will keep your guests on their feet all night long.

Your dance floor isn’t just a passive piece of equipment; it’s an active participant in your event’s design. Treat it as a foundational element that supports your vision, not as an afterthought.

A great starting point is to look at the different options available and see what sparks your imagination.

Popular Cape Town Dance Floor Options

Here’s a quick look at some of the most popular dance floor hire options around Cape Town to help you decide what might work best for your event.

Floor Type Best For (Event Type) Aesthetic Key Consideration
Wood Parquet Weddings, anniversaries, traditional functions Classic, warm, traditional Excellent for rustic or vintage themes, especially in winelands venues.
White Seamless Modern weddings, corporate events, high-end parties Sleek, elegant, minimalist Creates a bright, open feel. Perfect for custom decals or monograms.
Black & White Chequered Themed parties (50s, retro), birthdays Fun, vibrant, high-contrast Instantly adds a playful, nostalgic vibe to the celebration.
LED/Starlit Floor Corporate galas, milestone birthdays, club-style events Dynamic, high-tech, immersive The ultimate statement piece for creating a party atmosphere.

Each of these options brings something different to the table, and the best choice is the one that aligns perfectly with your event’s unique personality.

Aligning with Venue Aesthetics

The real key is to work with your venue’s existing decor and architecture, not against it. For a marquee wedding looking out over the Paarl mountains, a simple, elegant floor makes sure that the incredible view stays the star of the show. But an edgy, industrial-chic venue in Woodstock might call for a sleek, dark floor to complete its aesthetic.

The event industry in South Africa has certainly seen this need for flexibility, with a noticeable 10-15% increase in the use of portable dance floors since 2020. Around 65% of this market is for indoor rentals, which shows a clear preference for controlled environments. You can dig deeper into these trends over at DataHorizzon Research.

Ultimately, the best choice is one that elevates your decor without stealing the spotlight. A great dance floor hire feels deliberate and perfectly integrated, sending a clear invitation to your guests to come and celebrate. This kind of strategic thinking is what great planning is all about. For more expert tips on putting together a flawless event, check out our detailed guide to event management in Cape Town.

Calculating the Right Dance Floor Size for Your Guests

One of the biggest mistakes we see when people plan an event is getting the dance floor size wrong. If it’s too small, it feels cramped and no one wants to get up. But a dance floor that’s too big can make the room feel empty and completely kill the party vibe. When it comes to the hire of a dance floor, getting the dimensions just right is everything.

The secret isn’t just your total guest count; it’s figuring out how many people will actually be on the dance floor at any one time. From our experience, a good rule of thumb is that only 30% to 40% of your guests will be dancing at the peak of the party. Use this as your starting point to create a space that feels buzzing with energy, but not restrictive.

This simple visual helps break down the main things you need to think about.

Three pastel colored icons representing home, sunshine, and group of people on white background

As you can see, your venue, the overall vibe, and your guest numbers all work together to point you towards the perfect dance floor.

Adjusting for Vibe and Entertainment

That 30-40% rule is just a baseline. You really need to think about the unique energy of your event. The music and entertainment you choose will have a huge impact on how many people hit the floor.

  • Live Band Energy: A fantastic, high-energy live band—a popular choice for weddings at Stellenbosch wine farms—will almost always pull a bigger crowd. You might want to bump your estimate up to 50% of guests dancing.
  • DJ and Genre: A great DJ spinning popular dance tracks will keep the floor full all night. On the other hand, a more chilled-out jazz trio at a corporate event in Paarl will likely see fewer people dancing, probably closer to 20-30%.
  • Event Type: It goes without saying that weddings and 21st birthday parties have a much bigger dance culture than a formal corporate gala. Always consider the main reason people are gathering.

Don’t just plan for the number of guests; plan for their energy. A lively crowd needs more room to celebrate, and giving them that space is one of the keys to a truly successful event.

By thinking beyond a simple headcount and considering these factors, you can make sure your dance floor hire becomes the vibrant heart of your event—perfectly sized to create an incredible atmosphere for everyone.

Why a Site Survey Before Setup Is Essential

You’ve found the perfect dance floor—maybe a classic parquet or a show-stopping seamless white—but what’s underneath it is just as important. The success of your event, and the safety of your guests, literally rests on the foundation. This is where a professional site survey becomes a non-negotiable part of the hiring process, especially for events in Cape Town’s unique and varied venues.

Think about a gorgeous marquee wedding on a lush lawn in Constantia, or a cocktail party on the historic cobblestones of a Franschhoek wine estate. As beautiful as these settings are, the ground is almost never perfectly flat. A quick site visit lets your supplier spot any potential problems before they turn into a day-of disaster.

Professional surveyor conducting site survey with laser level equipment for patio installation project

Assessing Ground Level and Surface Compatibility

The main reason for a site visit is to measure how level the ground is. Even a gentle slope that you might not notice while walking can create a wobbly, unstable, and downright dangerous dance floor. A professional team will assess the surface to figure out exactly what’s needed to build a solid base for the party.

This is a huge deal for outdoor events, particularly those under a gazebo or marquee. Getting the entire setup right from the ground up is key. If you’re planning an outdoor celebration, you can find some great advice in our guide on gazebo hire in Cape Town to make sure your whole structure is secure.

For dance floors on tricky surfaces, the answer is often a subfloor. This is a purpose-built, interlocking system that goes down first, creating a perfectly flat and stable platform. It smooths over any dips, bumps, or slopes in the ground below, protecting your guests from tripping and preventing any damage to the venue’s lawn or paving.

A site survey isn’t just a box-ticking exercise; it’s a vital risk assessment. It ensures the supplier arrives with the right gear—like an adjustable subfloor—to guarantee a flawless installation on any surface, from pristine grass to rustic gravel.

Beyond the Surface: Logistics and Access

A thorough site survey isn’t just about looking at the ground. It also covers all the practical details that can make or break your event day schedule. Your supplier needs to plan exactly how they’re going to get the heavy floor panels from their truck to your venue space.

During the visit, they’ll check for:

  • Delivery Access: Are there any narrow gates, steep driveways, or flights of stairs that will make carrying equipment a challenge?
  • Loading Zones: Where can the delivery truck park without blocking guest access or disrupting the venue’s daily operations?
  • Power Availability: If you’ve chosen an LED or starlit floor, is there a reliable power source close by?

Sorting these details out ahead of time means no last-minute delays or unexpected labour costs on the day. By investing a little bit of time in a site visit, you’re ensuring the hire of your dance floor is a smooth, stress-free part of your event planning.

Understanding the True Cost of Dance Floor Hire

When you start budgeting for a dance floor, the quote you first see is really just the starting point. To get a real handle on the final cost, you have to look past the basic rental fee and dig into all the little things that can shift the price. Thinking about these factors upfront is the best way to compare quotes properly and dodge any last-minute budget surprises.

The biggest driver of cost? The material you choose, hands down. A classic wood parquet floor is often the most wallet-friendly choice, giving you that timeless look without breaking the bank. But if you’ve got your heart set on something more dramatic, like a gleaming seamless white floor or even one with custom-printed vinyl, the price will naturally go up to reflect the premium materials and the specialised skills needed to install it.

Professional examining wood finish samples with calculator while understanding renovation costs and material pricing

Beyond the Base Price

There are a few other elements that add to the total cost. It’s so important to chat through these with your supplier to make sure your quote is the full picture.

  • Customisation: Want to add a personal touch? A custom vinyl monogram, your company logo, or even a full-floor wrap will bump up the cost. It’s a fantastic way to make a statement, but it comes with extra fees for the design, printing, and application.
  • Subflooring: If your venue is a marquee on a lawn or has an uneven surface like old cobblestones, a subfloor isn’t just a nice-to-have—it’s essential for safety. This extra layer adds to the rental cost, but for a stable, secure setup, it’s non-negotiable.
  • LED and High-Tech Floors: Those incredible starlit or interactive LED floors sit at the top end of the price range. They need specialised technicians and dedicated power, all of which is factored into the hire fee.

Your final quote is a combination of the floor itself and the labour required to make it perfect. Always ask for a detailed breakdown so you know exactly what you are paying for, from the panels themselves to the team that builds them.

Uncovering Logistical and Hidden Costs

Logistics can really move the needle on your budget, especially for events happening across the Western Cape. These are the expenses that often get overlooked, but they can creep up if you don’t plan for them.

A huge factor is delivery distance. It makes sense that a wedding in central Cape Town will have a lower delivery fee than one tucked away in a Paarl valley or at a stunning Franschhoek wine estate. Always check if delivery is included in the quote and what the specific charges are for your venue’s location.

Then there’s the timing of setup and pack-down. Many venues have strict rules, meaning your crew might have to install late at night or pack down in the wee hours of the morning. These after-hours labour charges can add a fair bit to your final bill. The same goes for venues with tricky access—think stairs, narrow hallways, or a long haul from the loading bay. You might see an extra fee to cover the extra time and manpower needed.

In South Africa, you can expect rental rates for a quality modular dance floor to range from ZAR 10,000 to ZAR 50,000 per event, depending on the size, material, and tech involved. You can dive deeper into these market trends in this research on event infrastructure.

Your Essential Booking and Logistics Checklist

Getting the perfect dance floor for your event isn’t just a one-off decision; it’s a process that starts months before the first song plays. A solid timeline and a good checklist are your secret weapons for a smooth hire, saving you from last-minute panic and making sure every little detail is nailed down.

To get your head in the game, start by getting organised. Our own event planning checklist template is a brilliant starting point to structure your entire event.

When should you book? Well, that really depends on your event date. If you’re planning a wedding during the peak Western Cape season (that’s roughly October to April), you need to get moving six to nine months in advance. The best suppliers get snapped up fast, especially for popular items like those gorgeous seamless white floors. For corporate functions or off-season parties, you’ve got a bit more breathing room—a three-to-four-month lead time usually does the trick.

Your Hire Checklist: From Quote to Pack-Down

Once you’ve got a few potential suppliers in your sights, it’s time to dig into the details. This checklist breaks down the process, so nothing important slips through the cracks.

First Moves: Quotes & Comparisons (6-9 Months Out)

  • Get in touch with at least three different suppliers for detailed quotes.
  • Make sure every quote is comprehensive. Does it cover the dance floor hire, subflooring (if you need it), delivery, installation, and collection fees?
  • Always compare the total, all-in cost, not just the attractive base rental price.

Locking It In: Contract & Booking (5-7 Months Out)

  • Read the fine print. Go through the terms and conditions with a fine-tooth comb, paying special attention to the cancellation policy, payment deadlines, and liability clauses.
  • Once you’re happy, pay the deposit to officially confirm your booking.

Getting Practical: Logistics & Layout (1-2 Months Out)

  • If your venue or floor choice needs it, get that site survey scheduled.
  • Finalise the delivery and installation times with both your supplier and the venue manager.
  • Give your supplier a clear floor plan showing exactly where the dance floor needs to go.

Final Touches: Last Checks (1-2 Weeks Out)

  • Settle the final payment according to your contract.
  • Double-check the setup and pack-down times one last time to prevent any clashes.
  • Make sure your on-the-day coordinator has your supplier’s contact details handy.

The Make-or-Break Questions for Your Supplier

Before you sign anything, asking a few smart questions can save you a world of pain later. How a supplier answers these will tell you a lot about their professionalism and experience.

Don’t be afraid to ask the tough questions. A reliable supplier will have clear, confident answers about their safety protocols, insurance, and what they’ll do if things go wrong. It’s a sure sign they’re as invested in your event’s success as you are.

Here’s what you need to find out:

  • “What’s your public liability insurance coverage?” You’ll want to get a copy of their certificate for your own records and for the venue.
  • “What’s your plan B?” What happens if their delivery truck breaks down or a crucial piece of the floor is damaged on the way?
  • “What are your safety procedures during installation?” This covers everything from taping down cables to making sure every single panel is flush, level, and securely locked in place.

By ticking off this checklist and asking the right questions, you can book your dance floor with total confidence, knowing every logistical detail is sorted for a flawless event.

Got a Few More Questions About Your Dance Floor?

As you get closer to your event date, a few final questions always seem to pop up. Making sure you have the right answers is key to a stress-free setup. Here are some of the most common queries we get from event planners and couples planning their big day across the Western Cape.

What Happens if it Rains?

This is a big one, especially for those beautiful marquee weddings in Stellenbosch or a garden party in Franschhoek. What’s the plan if the weather turns?

Our professional outdoor dance floors are built to be weather-resistant. When we install them with a proper subfloor, they can handle a bit of dampness and still provide a solid, safe surface for your guests.

But the real MVP here is your marquee or stretch tent. Your primary cover needs to be totally secure and waterproof. No dance floor, no matter how tough, is meant to sit in a direct downpour—it would quickly become a serious slipping hazard.

Does an LED Dance Floor Need Special Power?

Another great question we hear all the time. The short answer? Yes, absolutely. An LED or starlit floor needs its own dedicated, stable power source to light up your night safely and without any flickering.

When we do a site survey or chat during the booking process, we’ll need to confirm there’s a suitable power outlet close to where you want the dance floor. It’s super important that this circuit isn’t shared with other power-hungry equipment, like the DJ’s speakers or the caterer’s warming trays. The last thing you want is a power trip right in the middle of the first dance!

Top Tip: Get your venue manager and your dance floor supplier on a quick call or email chain to chat about power. Sorting this out early saves a massive headache and a last-minute scramble for generators later on.

Are There Any Venue Restrictions I Should Know About?

Sometimes, yes. Many of the stunning historic wine estates and venues with delicate original floors have rules to protect their property. They might insist on protective matting or even say no to certain types of dance floors to avoid scuffs, scratches, or damage.

It’s always a good idea to clarify these points with your venue:

  • Surface Protection: Do they require any specific underlayment or protective covers to go under the dance floor?
  • Weight Limits: Some older buildings, decks, or raised platforms might have weight restrictions. It’s good to know this upfront.
  • Access Times: When can our team get on-site to set up? And when do they need to be out by? Confirming the exact times avoids any clashes with other suppliers.

Ticking these practical questions off your list early on makes the whole process smooth and simple. It gets everyone on the same page and leaves you free to enjoy the party.


Ready to create an unforgettable event with the perfect centrepiece? ABC Hire offers a premium selection of dance floors and event furniture for hire in Cape Town and the Winelands. Explore our options and get a quote today at https://abchire.co.za.

A Guide to Fog Machine Hire in Cape Town

Finding the right fog machine hire is all about matching the gear to the vibe you’re trying to create. It’s not just about pumping out smoke; it’s about crafting an experience, whether that’s a dreamy first dance at a wedding or a high-energy product launch. The right machine can completely transform a room, make your lighting rig look incredible, and create visual moments that people won’t forget.

Choosing the Right Fog Machine for Your Event

When you’re looking at hiring a fog machine, the first question isn’t about the technical specs—it’s about the effect you’re after. The machine that creates a spooky graveyard for a Halloween party is definitely not the one you want for an elegant wedding reception. The trick is to match the fog’s behaviour—how dense it is, how high it floats, and how long it sticks around—to what your event actually needs.

Think about a wedding. For the first dance, everyone wants that magical “dancing on clouds” moment. This is a job for a low-lying fog machine. It works by chilling the fog, making it heavier than the surrounding air so it hugs the floor. You get a beautiful, thick blanket of fog around the couple’s feet without their faces being lost in a cloud of smoke.

Now, flip the script to a high-energy concert or a corporate launch party. The goal there is totally different. You want to make the light beams and lasers slice through the air, creating a dynamic, immersive atmosphere. That’s where a haze machine comes in. It produces a very fine, almost invisible mist that lingers in the air for a long time, perfectly catching every beam of light to add texture and depth to the room.

Bride and groom dancing in dramatic fog effect at elegant wedding reception venue

Fog Fluids and Their Impact

The liquid you put in the machine is just as important as the machine itself. Any professional hire company in Cape Town, including us, will use high-quality, water-based fluids. Why? Because they’re non-toxic, don’t leave a sticky residue on everything, and are perfectly safe for indoor use (as long as there’s decent ventilation). They create a clean, odourless fog that disappears naturally.

You might hear about oil-based fluids, but they’re less common for event hire. They create a much thicker, longer-lasting haze, but they can leave an oily film and are really only suitable for massive theatrical shows or outdoor events where residue isn’t a problem. Always double-check with your supplier that you’re getting a top-notch, water-based fluid for your guests’ safety and comfort.

This isn’t just a niche effect anymore. The South African fogging machine market is set to grow by over 10.37% a year between 2024 and 2029, thanks to the booming event and entertainment industries. This growth means professional-grade fog machine hire is easier to find and more affordable than ever. You can read more about the South African fogging machine market trends for the full picture.

Fog Machine Type Comparison for Events

Knowing your options helps you ask the right questions and pick the perfect machine. Here’s a quick comparison to help you choose the right fog or haze machine based on what you need.

Machine Type Best For Effect Description Typical Fluid Type
Low-Lying Fogger Weddings, Theatre Dense fog that hugs the floor Water-based (Chilled)
Haze Machine Concerts, Clubs, Launches Fine, even mist to enhance lighting Water- or Mineral Oil-based
Standard Fogger Parties, Outdoor Events Bursts of thick, billowing clouds Water-based
CO₂ Jet High-Energy Events Quick, dramatic plumes of cold fog CO₂ Gas (No fluid)

By thinking about the effect you want, the size of your venue, and the type of event you’re planning, you can confidently choose a fog machine hire that will take the atmosphere to the next level and leave a lasting impression.

Getting the Green Light: Venue Rules and Safety Protocols

Two staff members using fog machine at venue entrance with safety check sign displayed

Before you even think about finalising your fog machine hire, the most critical call you need to make is to your venue manager. An atmospheric effect can completely transform a space, but it can also create a massive headache if you haven’t done your homework. Trust me, a surprise fog machine is the quickest way to land on a venue’s bad side.

Your first question is simple: “What’s your policy on atmospheric effects like fog or haze?” You’ll find that many historic venues, especially in places like Stellenbosch or Franschhoek, have very strict rules to protect their interiors and highly sensitive fire systems. Don’t be shocked if they have a blanket ban—it’s far better to know this upfront before you get your heart set on a specific look.

Clearing the Air on Smoke Alarms

If the venue gives you a tentative yes, your very next conversation has to be about their fire alarm system. The particles from a standard water-based fogger are often dense enough to trigger modern smoke detectors, leading to a very unwanted and embarrassing evacuation.

Get on the phone and ask the venue manager these specific questions:

  • What kind of smoke detectors do you have in the event space? Optical or ionisation alarms are almost guaranteed to be triggered by fog. Heat-based detectors, on the other hand, are usually fine.
  • Can the smoke alarms in our specific area be isolated? This is a job strictly for the venue’s fire safety provider. Never, under any circumstances, try to cover or disable a detector yourself.
  • Have other events used fog machines here successfully? Learning from their past experiences can give you a valuable roadmap for your own setup.

A false alarm doesn’t just kill the vibe; it can also land you with a hefty call-out fee from the fire brigade. A ten-minute chat with the venue is a small price to pay to avoid a major disaster.

Proper planning is the cornerstone of any successful event, and it goes way beyond just the special effects. For a deeper dive into coordinating all the moving parts of your big day, our guide on event management in Cape Town offers tons of practical advice for a seamless experience.

Guest Safety and Smart Placement

Beyond the fire alarms, your guests’ safety has to be your top priority. While high-quality fog fluid is non-toxic, good ventilation is still absolutely essential. You don’t want the air to become so thick that it becomes uncomfortable, especially for anyone with respiratory sensitivities.

Chat with both your venue manager and your hire company about where to place the machine. The unit itself can get quite hot, so it needs to be positioned well away from high-traffic areas to prevent any accidental burns or trips over cables. A discreet corner, tucked behind the staging, or near the DJ booth is usually a safe bet. This kind of strategic placement ensures the fog disperses beautifully across the room without becoming a hazard, letting you create that magical atmosphere safely and professionally.

What to Ask Before You Hire a Fog Machine

Getting your fog machine hire sorted should be a simple, transparent part of your event planning. To make sure you’re getting exactly what you need and avoid any nasty surprises on the day, you’ve got to ask the right questions upfront. It’s about more than just the price; it’s about partnering with a reliable Cape Town supplier who actually gets what your event is all about.

First Things First: The Hire Package Itself

A great price doesn’t mean much if it leaves out the essentials. Getting clarity on the little details helps you properly compare quotes and see the real cost.

Before you even think about signing anything, get clear answers on these basics:

  • How much fog fluid is included? Most hires come with a full tank, which sounds great. But is that really enough for a four-hour event with a continuous haze? Always ask what extra fluid costs.
  • How long are the power cables? This is a classic rookie mistake. You need to know if the cables will comfortably reach your power source without becoming a dangerous tripping hazard snaking across the floor.
  • Is delivery, setup, and collection part of the deal? Some companies add these on as extra charges, which can be a real budget-killer. It’s always best to confirm.

Don’t Skip the Fine Print

Once you’ve got the equipment details down, it’s time to look at the hire agreement. This is the stuff that protects both you and the hire company, and glossing over it can lead to unexpected costs if something goes wrong.

A professional company will have no problem walking you through their policies on deposits and potential damages. Having that conversation shows they’re legit and builds trust.

Pro Tip: Always, always ask about their support policy. What’s the plan if the machine packs up mid-event? Knowing their emergency contact number and how quickly they can respond is crucial for your peace of mind.

Thinking About Newer, Modern Options?

It’s also a good idea to ask what kinds of machines they stock, especially if you’re after something a bit more modern. Cordless fog machines, for example, have become incredibly popular for outdoor events or in massive venues where power points are few and far between.

This is a global trend reflected right here in South Africa, as planners look for more flexible and portable solutions. You can actually read more about the expanding fogging machine market and see what’s new.

Finally, just before you book, lock in all the agreement details. Ask about the deposit needed, the damage waiver or policy, and what happens if you need to cancel. Armed with this checklist, you can confidently choose a fog machine hire partner in Cape Town who gives you more than just a machine—they give you a complete, reliable service for your event.

How to Set Up and Operate Your Hired Machine

Alright, the fog machine has arrived, and this is where the fun starts. Getting the setup right is absolutely crucial for creating that amazing atmosphere you’ve pictured for your event. Doing it properly means you’ll get the exact effect you want – whether that’s a moody haze or a big, dramatic cloud of smoke – all while keeping everyone safe.

First up, let’s talk placement. This isn’t just about finding a spot to plug it in; it’s a strategic move that affects both safety and how the fog spreads. These machines, especially the nozzle, can get seriously hot, so you need to put it well out of the way of foot traffic. No one wants an accidental burn. Tucking it into a corner or near the DJ booth usually works a treat, as long as it’s on a solid, flat surface.

You’re aiming for the fog to billow out and fill the space naturally. If your event is in a marquee, placement is even more critical to get right. We’ve actually got some great tips on laying out equipment in our guide on tent hire for parties that you might find useful.

The Initial Setup Process

Before you even think about plugging it in, the first job is to fill the fluid tank. And a word of warning from experience: only use the fog fluid your hire company gave you. Pouring in the wrong stuff can kill the machine for good. You’ll see a fill line on the tank – don’t go past it. Overfilling is a surefire way to make it spit and leak hot liquid everywhere.

With the fluid in, you can connect the power cord and the remote. Most remotes are simple, but take a second to get familiar with the buttons. You’ll likely have options for manual blasts, continuous fog, and maybe even a timer. Once that’s sorted, go ahead and switch the machine on.

Critical Step: The Warm-Up Period
Every single fog machine needs to heat up. It’s non-negotiable. This warm-up time can be anything from 5 to 15 minutes, depending on the model. Be patient. Trying to fire it up too early will just give you a weak puff of smoke or, worse, a sputter of unheated liquid.

You’ll know it’s ready to go when an indicator light (either on the machine or the remote) clicks on. That’s your green light – the heater is at the right temperature, and it’s showtime.

Three step process diagram showing water droplet, electrical plug, and headset icons connected by arrows

This little diagram sums it up nicely: it’s all about managing the fluid, the power, and having the support from us if you need it.

Mastering the Fog Output

Now you get to play the artist. Start with a few short, controlled bursts. This is your test run to see how the fog behaves in the room. You’ll get a feel for how fast it clears and how it plays with your lighting setup. For a big moment like a grand entrance or a drop in a song, a short, powerful blast is perfect.

If you’re aiming for a constant, atmospheric haze (something a dedicated haze machine is built for), you can still get a great effect from a standard fogger by using timed bursts. Many remotes let you set how long the bursts are and how often they happen.

  • For a subtle haze: Try setting it for a quick 2-3 second burst every couple of minutes.
  • For high drama: Hit the manual button for a solid 10-15 second blast to match a key moment in your event.

Just keep an eye on the room’s visibility. Your goal is to add to the vibe, not to blind your guests in a thick whiteout. The difference between a professional-looking effect and an amateur mess is all in the control.

Troubleshooting Common Fog Machine Problems

Even with the best planning in the world, hired equipment can sometimes hit a snag. The key is not to panic. Honestly, most fog machine issues are surprisingly simple to fix right there on the spot, ensuring your event’s atmosphere doesn’t miss a beat.

One of the most common calls we get is for a machine that just won’t produce any fog. Before you do anything else, check the absolute basics. Is the machine plugged into a working power socket and is it actually switched on? It sounds ridiculously obvious, but you’d be surprised how often that’s the culprit. Also, double-check that the remote control is securely connected to the unit.

Next up, have a look at the fog fluid level. If the tank is empty or running on fumes, the machine’s pump can’t draw any liquid, which means zero output. You should always make sure you have more than enough fluid for your event’s duration.

Weak or Sputtering Fog Output

What if your machine is producing a weak, thin mist or seems to be sputtering and coughing? This issue is often related to heat or a blockage. Just give the machine a moment; it might not have fully reached its optimal operating temperature yet. The little indicator light on the remote or the unit itself should be on, which is your signal that it’s ready to go.

A sputtering effect can also point to a partially clogged nozzle. Now, you should never poke anything into the nozzle yourself, but you can try running the machine in a few short, powerful bursts to see if it clears the blockage. If the problem hangs around, it’s best to call your hire company.

A well-maintained fog machine is a reliable one. When you book a fog machine hire, you’re not just renting the equipment; you’re also getting the assurance that it has been professionally cleaned and tested, which drastically reduces the chances of on-site failures.

When to Call for Backup

So, you’ve checked the power, the fluid, and given it plenty of time to warm up, but it’s still playing dead. Now is the time to get your supplier on the phone.

Here are a few scenarios where you need immediate professional support:

  • The machine refuses to heat up at all after 15-20 minutes.
  • It’s continuously leaking fluid from the base, not just the occasional drip from the nozzle.
  • You notice any unusual smells or smoke coming from the unit itself (and not the fog it’s supposed to make).

Being prepared for minor glitches is just part of smart event planning. Knowing these quick checks can save the day, much like having the right tools for other parts of your event. For more insights on event essentials, check out our guide on hiring catering equipment for hire.

Your Fog Machine Hire Questions Answered

When you’re deep in event planning mode, questions always come up, especially when you’re dealing with something cool like a fog machine. Getting straight answers helps you get on with things and plan with confidence. Let’s tackle some of the most common queries we get about fog machine hire right here in Cape Town.

How Much Does a Fog Machine Hire Cost in Cape Town?

You can expect the cost of a fog machine hire in Cape Town to be anywhere from R350 to R800 per day. What you end up paying really comes down to the kind of machine you need and how powerful it is.

A simple, compact fogger, which is perfect for a house party or a small get-together, will sit comfortably at the lower end of that price range. On the other hand, if you’re after a professional-grade haze machine or a low-lying fogger for that dreamy “dancing on clouds” effect at a wedding, you’ll be looking at the higher end.

A Pro Tip: Always double-check what’s actually included in the hire price. A full tank of fog fluid should be standard, but it’s always smart to confirm. Don’t forget to ask about delivery and collection fees – you don’t want any last-minute surprises on your invoice!

Will a Fog Machine Set Off the Smoke Alarms?

This is a big one, and the short answer is yes, it’s a very real possibility. The particles pumped out by a standard fog machine are often dense enough to trigger the optical or ionisation smoke detectors you find in most modern venues.

This is exactly why you must have a chat with your venue manager before you even think about booking a machine. You need their green light. They’ll know if the fire alarm system in your specific event space can be professionally and safely isolated for the time you need it. Whatever you do, never try to cover or mess with a smoke alarm yourself.

If switching off the system isn’t an option, a haze machine might be the way to go since it creates a much finer mist. But even then, you’ll still need the venue’s explicit permission.

How Much Fog Fluid Am I Going to Need?

Working out how much fluid you’ll get through boils down to three things: the machine’s power, how thick you want the fog, and how long the party’s going. As a rule of thumb, a standard one-litre tank of fluid can last between two and four hours if you’re just using it in short bursts for key moments.

But, if you want a constant, thick blanket of fog for the whole night, you could burn through that same tank in just an hour. The best thing to do is give your supplier all the details. Tell them about your venue size, how long the event is, and the kind of vibe you’re aiming for. An experienced hire company will be able to give you a solid estimate and make sure you have extra fluid on hand, just in case.

Is the Fog from a Hired Machine Safe?

Absolutely, as long as you’re hiring from a reputable company. Professional event suppliers only use high-quality, water-based fog fluids that are non-toxic and perfectly safe to breathe for most people.

Having said that, good ventilation is still important. You want to create an amazing atmosphere, not make the air so thick that it’s uncomfortable. While the fog is safe, people with asthma or other respiratory conditions can sometimes be more sensitive. Just stick to the supplier’s safety guidelines, and you’ll ensure a great, comfortable experience for all your guests.


Ready to create an unforgettable atmosphere at your next event? ABC Hire offers a wide range of professional fog machines and special effects equipment to bring your vision to life. Explore our options and get a quote today at https://abchire.co.za.

Candy Floss Machine Hire Cape Town Guide

Thinking of adding a touch of magic to your next event? A candy floss machine hire is one of the easiest and most affordable ways to bring nostalgic fun to any occasion, from elegant weddings to buzzing corporate functions. It’s not just about the sweet treat—it’s about creating an experience, a real talking point that gets everyone smiling.

Why Candy Floss Is Your Event's Secret Weapon

Picture this: guests gathering around, watching fluffy clouds of sugar being spun right before their eyes. Hiring a candy floss machine instantly injects a dose of pure joy into your event. It brings back childhood memories, breaks the ice, and gives people something fun to chat about. And no, it’s not just for kids' parties anymore; it's become a surprisingly sophisticated and whimsical addition to all kinds of gatherings.

We've seen it transform weddings, corporate launches, and festivals all over Cape Town. It turns a simple dessert into an interactive moment. Forget the usual canapés for a second. Experiential entertainment like this gives you a high-impact, low-stress way to delight your guests. The sweet smell and visual theatre of fresh candy floss create an atmosphere that standard catering just can't match.

The Rise of Experiential Entertainment

These days, events are all about creating memorable experiences, and a candy floss stand fits the bill perfectly. The demand for candy floss machine hire in South Africa has been climbing steadily. Between 2015 and 2020, we saw events using them grow by around 25%, largely driven by themed parties and corporate clients looking for something more interactive. You can learn more about these kinds of trends in party hire services.

This move towards more engaging activities really highlights what makes it work so well:

  • It creates lasting memories. People love watching their treat being made from scratch.
  • It gets people talking. The machine naturally becomes a hub where guests can mingle.
  • It’s perfect for photos. That brightly coloured fluff looks brilliant on Instagram and other social media feeds.

Here's the thing: the real value in hiring a candy floss machine isn't just the candy floss itself; it's the performance. It turns a simple sweet into a centrepiece of entertainment, sparking conversations and delighting everyone with a little bit of carnival magic.

This guide will walk you through everything you need to know, from picking the right machine to making sure everything runs smoothly on the day. By the end, you'll see just how simple it is to make your Cape Town event truly unforgettable.

Choosing the Right Candy Floss Hire Package

When you're looking into a candy floss machine hire, it's about more than just the machine itself. You're really choosing a package that needs to click with your event's size, style, and budget. Here in Cape Town, the options vary wildly, and knowing the difference is what gets you the best bang for your buck.

A simple tabletop machine could be the perfect fit for a chilled-out birthday party in the backyard. It’s small, easy to use, and does one thing well: churn out delicious candy floss without any fuss. On the other hand, if you're planning a swanky corporate gala or an elegant wedding, you might want to look at a vintage-style cart. This does double duty, acting as both a serving station and a brilliant, eye-catching centrepiece. Sometimes, the look of the setup is just as crucial as the treat.

The right choice can make a huge impact, turning a simple sweet into a memorable, interactive, and surprisingly low-stress feature for your guests.

Event impact infographic showing three key benefits: memorable, interactive, and low-stress with icons

As you can see, hiring a candy floss machine isn't just about handing out sugar; it's a clever way to boost the entire guest experience.

Standard Inclusions Versus Paid Add-ons

Most basic hire packages are built to be straightforward and affordable. In Cape Town, a standard hire usually gets you the machine and enough supplies for roughly 100 servings. This typically includes classic pink sugar (often a bubblegum or raspberry flavour) and all the sticks or cones you'll need.

But the real fun starts with the add-ons. This is where you can get creative and make the experience a perfect match for your event’s theme.

Some of the most popular extras include:

  • An On-Site Operator: Honestly, this is a game-changer. Hiring a pro removes all the hassle. They manage the setup, spin the floss, serve guests with a smile, and handle the cleanup, leaving you free to actually enjoy your event.
  • Gourmet Flavours: Why stick to just pink? You can often get blue raspberry, green apple, or other unique flavours that will have guests coming back for more.
  • Custom-Branded Cones: A brilliant touch for corporate functions or weddings. Adding your company logo or wedding monogram to the cones is a simple but effective branding opportunity that looks incredibly polished.

The biggest decision you’ll make isn’t about the machine, but whether to get an operator. For a massive event like a school fete, a seasoned operator is non-negotiable for keeping queues moving and the floss consistent. For a small home party, going the DIY route is a great way to keep costs down.

Comparing Candy Floss Machine Hire Packages

Navigating the different hire packages available in Cape Town can feel a bit overwhelming. To make it easier, we've broken down the typical options to help you see at a glance what might work best for your event. This table compares everything from budget-friendly DIY kits to all-inclusive packages with vintage carts and operators.

Package Type Best For Typical Inclusions Common Add-ons
DIY Tabletop Hire Small private parties, kids' birthdays, low-budget events. Tabletop machine, supplies for 50-100 servings (sugar & cones). Extra supplies, different sugar flavours/colours.
Standard Package with Operator School fetes, community events, medium-sized corporate functions. Commercial-grade machine, operator for 2-3 hours, supplies for 100-200 servings. Additional hours, extra servings, custom flavours.
All-Inclusive Cart Package Weddings, high-end corporate events, product launches. Vintage-style cart, professional operator, unlimited servings for a set time, premium flavours. Branded cones, custom cart decor, extended service time.

Ultimately, the right package balances your budget with the experience you want to create. Think about your priorities—is it about feeding a crowd quickly, or creating a beautiful photo opportunity? Your answer will point you to the perfect hire.

Matching the Package to Your Event

Let’s walk through a couple of real-world scenarios.

Imagine you're organising a school fete for 300 kids. Your main goal is speed and volume. In this case, you’d want a robust, no-frills machine with an experienced operator and enough supplies for at least 300-400 servings. The look of the machine is far less important than its ability to churn out floss quickly.

Now, picture a chic wedding reception for 150 guests. Here, aesthetics are everything. A beautiful vintage cart, floss custom-coloured to match the wedding palette, and maybe even those branded cones would create a truly unforgettable moment. Yes, it costs more, but the value is in how the machine becomes a core part of the entertainment and decor.

Always think about your event’s primary goal—is it speed, style, or staying on budget?—before you book your candy floss machine hire.

Your Pre-Booking Logistics Checklist

Booking checklist on clipboard next to laptop for planning candy floss machine hire event

Before you lock in that candy floss machine hire, let’s talk about the practical side of things. It’s easy to get caught up in the excitement of fun flavours, but getting the logistics sorted from the get-go is what really saves you from last-minute stress on the day.

Think of it like a pre-flight check for your event. A few key questions now will make sure everything runs smoothly later. This is all about ensuring the machine doesn't just show up, but can actually be used safely and efficiently, giving your guests that seamless experience you're aiming for.

Power and Placement Requirements

First up: power. A commercial candy floss machine needs a surprising amount of juice to run its motor and heater. These machines often require a dedicated power circuit to avoid tripping the venue’s breakers, which is the last thing you want when the sound system and lights are also running.

Always check with your supplier on the specific power needs. You'll have to make sure your venue has a suitable plug point nearby. Trying to solve the problem with long extension cords is a bit risky, as they can cause a voltage drop and affect the machine's performance.

The physical space is just as crucial. Here’s what to keep in mind:

  • Operating Area: You’ll need a solid, level table and at least a 2×2 metre space for the operator to move around without being cramped.
  • Ventilation: The machine kicks out a fair bit of heat, so a well-ventilated spot is a must, especially if you’re indoors.
  • Queue Management: Think about where your guests will line up. You want to avoid creating a bottleneck or a safety hazard in a busy area.

Pro Tip: Do a quick site visit. Snap a photo of where you plan to put the machine and the closest power outlet, then send it to your hire company. This little step can prevent a mountain of problems on event day.

Deciding on an Operator

Next, you need to figure out who's going to be spinning the sugar. You can either hire a trained operator or give it a go yourself. While the DIY route might seem like a good way to save a bit of cash, it’s not always the right call.

Bringing in a professional operator means you can just relax and enjoy the event. They'll handle everything—setup, serving, troubleshooting, and cleanup—leaving you free to mingle with your guests. Plus, they’re experts at serving quickly, which is a lifesaver when you have a big crowd.
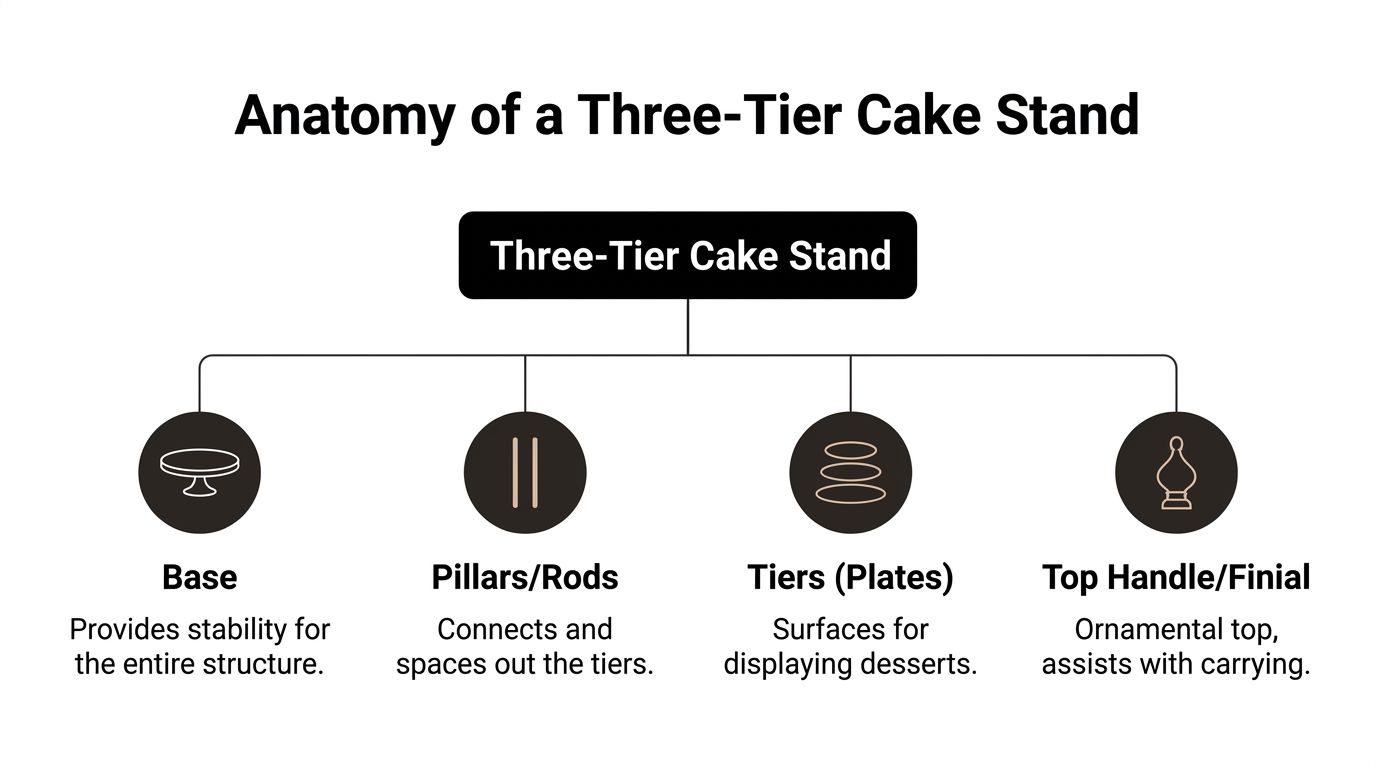
If you do decide to operate it yourself, make sure the hire company gives you a proper demo when they deliver the machine. You’ll need to know how to load the sugar, manage the temperature, and spin the floss properly to avoid a sticky disaster.

For more on organising these kinds of details, our guide on creating a comprehensive event planning checklist template is an invaluable resource. It’s a must-read for anyone juggling multiple suppliers and tasks, helping you make sure nothing falls through the cracks.

Decoding Hire Costs and Budgeting Smartly

Let's talk money. Figuring out the costs for a candy floss machine hire in Cape Town is the key to keeping your budget on track. You might see a base daily hire rate advertised, but it’s often the little extras that add up. Thinking beyond just the machine itself will save you from any nasty surprises down the line.

The final price really comes down to the size and style of your event. A small backyard party for 50 guests probably just needs a simple tabletop machine with the classic pink sugar. But a corporate conference for 300 attendees? That’s going to require a more serious setup, likely with a professional operator and a whole menu of different flavours.
Breaking Down the Budget

Your typical hire fee gets you the machine for a set time, but you need to get clear on what else is included. Does that price cover delivery and collection, or is that an extra fee based on your venue's location? Most suppliers will throw in enough sugar and cones for about 100 servings, but if you've got a bigger guest list, you'll need to budget for more.

The candy floss hire industry in South Africa is a pretty lively business, generating an estimated R9.6 million in direct annual revenue. While you can expect the average daily rental price to be around R500, adding on extra sugars and sticks can bump up the total cost by as much as 30%. It’s a smart model that keeps the initial hire affordable for planners while supporting local suppliers.

Smart Ways to Maximise Value

Getting the best value isn't just about finding the cheapest price; it's about making your money work hard to create the biggest impact. One of the easiest ways to save is to get your serving estimates right. Over-ordering on supplies, especially those fancy premium sugar flavours, is a common mistake that's simple to avoid.

Here's an insider tip: Always ask hire companies about package deals. Many will give you a discount if you bundle the candy floss machine with a popcorn maker or a slush machine. It’s a simple negotiation that can really stretch your budget.

Booking on a weekday can sometimes land you a lower rate, as weekends are always prime time for events. Also, think about the big picture. If you're renting a few different things, finding a one-stop-shop for all your catering equipment for hire can lead to better pricing and much simpler logistics. After all, one delivery fee is always better than paying three separate ones.

Getting It Right on the Day

Worker operating cotton candy machine at outdoor venue with pink candy floss

The big day is here! All the planning for your candy floss machine hire comes down to making sure everything runs like a dream. A little bit of coordination now is all it takes to guarantee a sweet, stress-free experience for everyone involved.

It really just starts with a quick chat with your venue and the hire company.

Give them a call a day or two beforehand to lock in the delivery and collection times. This is your chance to loop in the venue manager so they know exactly when to expect our team and where the machine is going. Trust me, this one simple phone call prevents any last-minute chaos.

If you’ve gone the DIY route, make sure you’re paying full attention when the machine is handed over. Our crew will give you a clear rundown on how to operate it safely, how much sugar to load, and the little trick to spinning that perfect, fluffy cone. Don’t be afraid to ask questions until you feel 100% ready to go.

Setup and Staying Safe

Getting the setup right is absolutely essential, both for performance and for safety. Find a solid, level spot that’s well away from any main walkways to avoid anyone accidentally bumping into it. And don't forget about the power – plugging into a dedicated circuit is always the smartest move to prevent tripping the lights fantastic at the venue.

Safety is everything, especially with excited kids around. That spinning part in the middle, the spinner head, gets incredibly hot.

  • Create a Safe Zone: A simple rope or some decorative ribbon is all you need to create a clear boundary. It’s a gentle way to keep little hands at a safe distance.
  • Keep an Eye on the Kids: Never, ever leave the machine running on its own. An adult needs to be there at all times to manage the queue and keep things in order.
  • Thinking About the Outdoors? If your party is outside, where you put the machine is key. A gust of wind can send sticky floss flying everywhere, creating a mess you don’t want to deal with. Try to find a sheltered spot. For more great ideas on creating a protected station, check out our guide on gazebo hire in Cape Town.

Look, the whole point is for everyone to have effortless fun. A few smart safety steps at the start mean you can relax, knowing the sweet treats can be enjoyed without any worries. It’s all about being proactive so you don’t have to be reactive.

Quick Fixes for Common Hiccups

Even the best-laid plans can hit a tiny snag. Knowing how to sort out minor issues on the spot will keep the floss spinning and the smiles on your guests' faces.

If the machine isn't producing much floss, it's usually down to humidity or the sugar-to-heat ratio. That humid Cape Town air can sometimes make the sugar clump up. The fix is simple: turn the machine off, let it cool down, and then carefully wipe any crystallised sugar off the spinner head with a damp cloth before starting again.

Seeing smoke or smelling burnt sugar? The heat is probably just a bit too high. Turn the temperature down a notch and give it a moment to adjust before you add more sugar. A little patience is usually all you need to solve these common little issues.

Your Candy Floss Hire Questions, Answered

Planning an event involves juggling a lot of details. To help you tick one more thing off your list, I've put together answers to the most common questions we get from event planners here in Cape Town. We’ll cover everything from how much candy floss you’ll actually need to dealing with our city’s famously fickle weather.

How Many Servings of Candy Floss Do I Really Need?

This is the big one! You want enough for everyone without having mountains of sugar left over. For kids' parties, my advice is simple: plan for one serving per child. The excitement is just too high to risk running out.

For events with more adults, like weddings or corporate functions, you can safely aim for about 70-80% of your guest count. Not everyone will grab one, but you'll have more than enough for those who do.

Most standard candy floss machine hire packages in Cape Town will get you started with supplies for roughly 100 servings. A good industrial machine can churn out 60 to 80 fluffy servings an hour, which is perfect for keeping a crowd of 200-300 guests happy over a 4-hour event. It's also worth noting that offering variety is a huge hit—over 70% of our clients now pick at least two different flavours.
Here's a pro tip from years of experience: always have a small buffer. It’s far better to have a few extra cones and a bit of sugar left than to see disappointed faces when you run out mid-celebration. Have a quick chat with your hire company about your guest numbers, and they’ll help you get it just right.
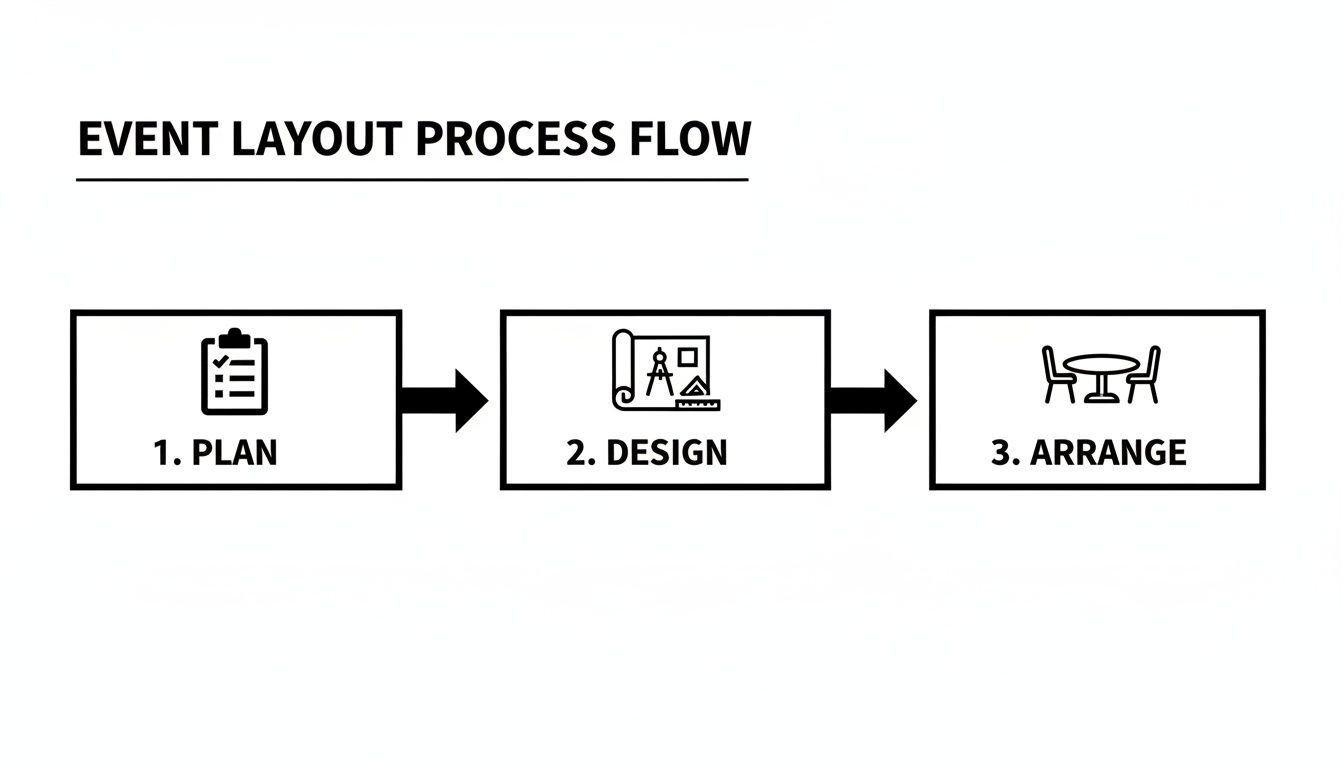
Can I Use a Candy Floss Machine Outdoors in Cape Town?

Yes, you absolutely can! But you need to be smart about it, especially with Cape Town’s famous wind and humidity. A strong Southeaster can turn your candy floss spinning into a chaotic, stringy mess. High humidity is just as bad, making your perfect fluff collapse into a sticky clump in minutes.
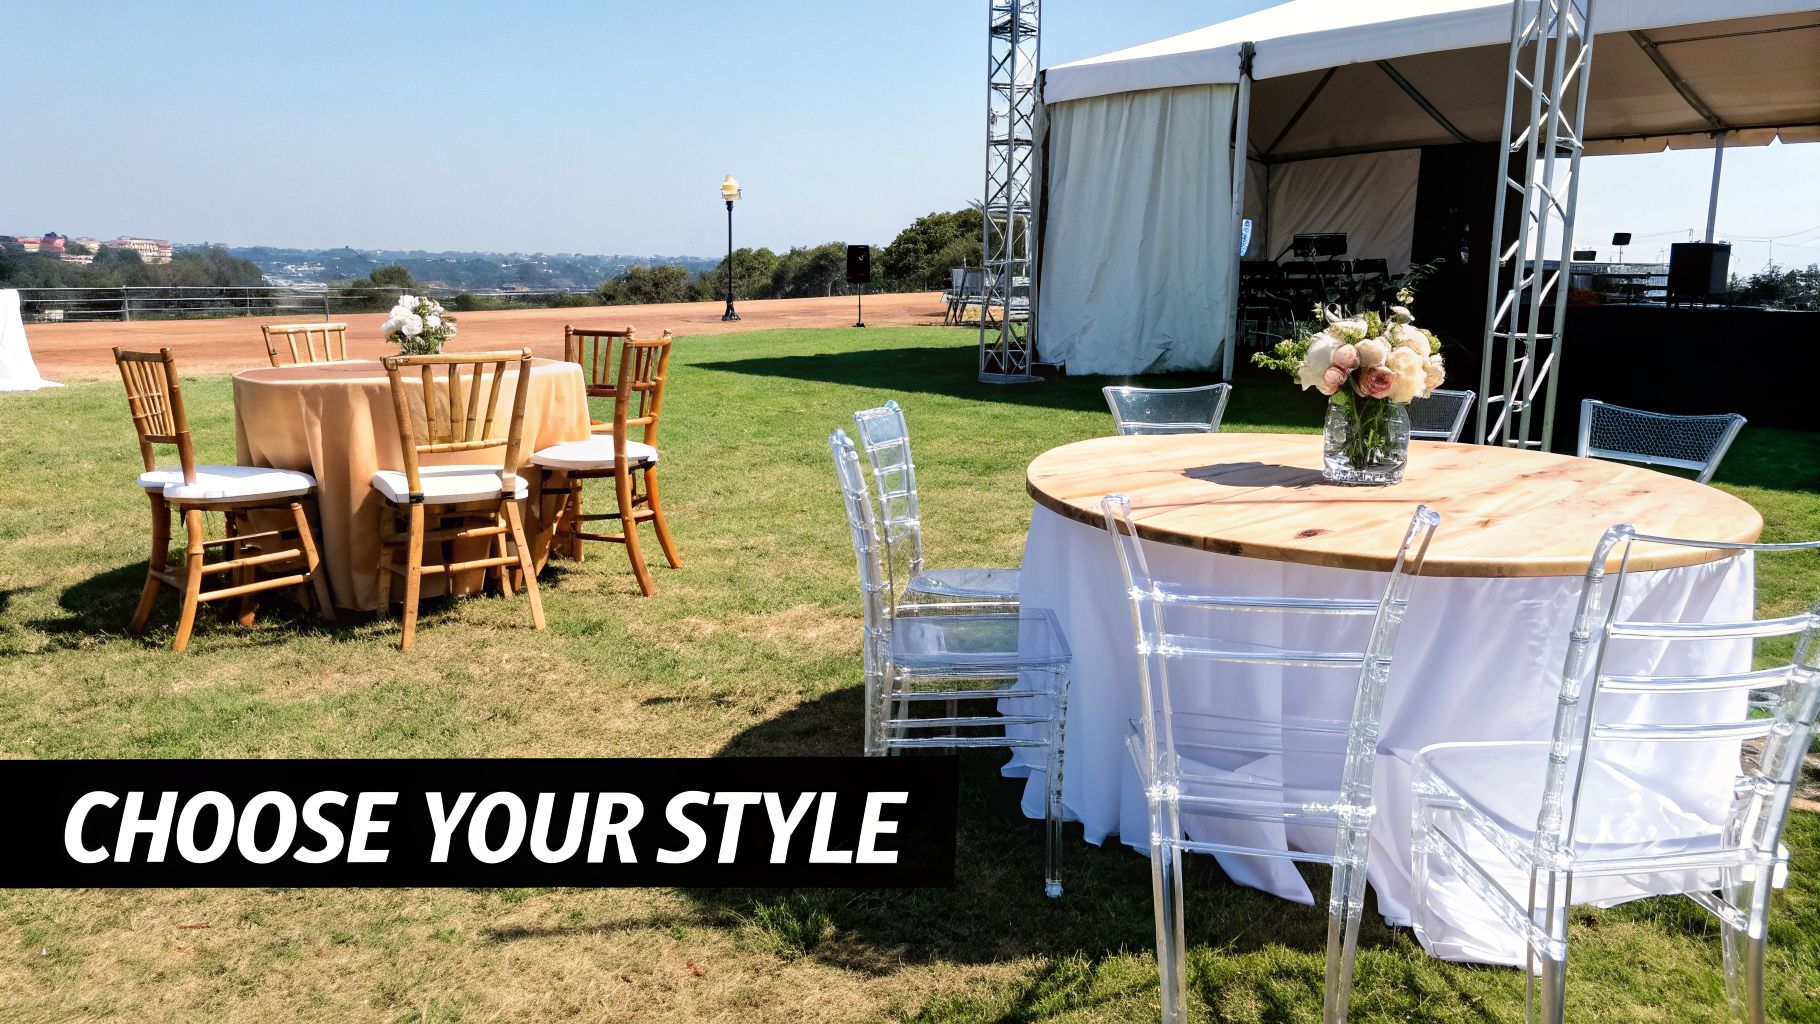
The solution is all about finding a sheltered spot.

  • Tuck the machine under a tent, marquee, or even just a covered patio.
  • Make sure it’s protected from direct wind and any chance of rain.
  • Don't forget to check you have a safe, dry power source nearby.

A little bit of planning here goes a long way. It keeps the machine safe and ensures you can serve up perfect candy floss, no matter what the Cape Town weather throws at you.

What Sugar Flavours and Custom Options Are Available?

The days of only having plain old pink candy floss are long gone! Most suppliers in Cape Town will have the classics on hand—pink (usually a bubblegum or raspberry flavour) and blue (blueberry). These are usually part of the standard package.

But if you want to get more creative, many companies now offer a whole menu of premium flavours as an add-on. Think green apple, yellow banana, or even grape.

For corporate events or weddings with a specific theme, you can often get custom colouring to match your brand or décor. This might need a bit of a heads-up and could cost a little extra, but it's a fantastic way to tie everything together. My best advice? Ask for their full flavour list when you book to see what fun options are on the table.


Ready to add a touch of sweet, nostalgic fun to your next event? ABC Hire offers reliable and high-quality candy floss machine hire in Cape Town, complete with everything you need for a flawless experience. https://abchire.co.za

📍 Cape Town + Winelands