Mobile Fridge Hire Ultimate Event Cooler Guide

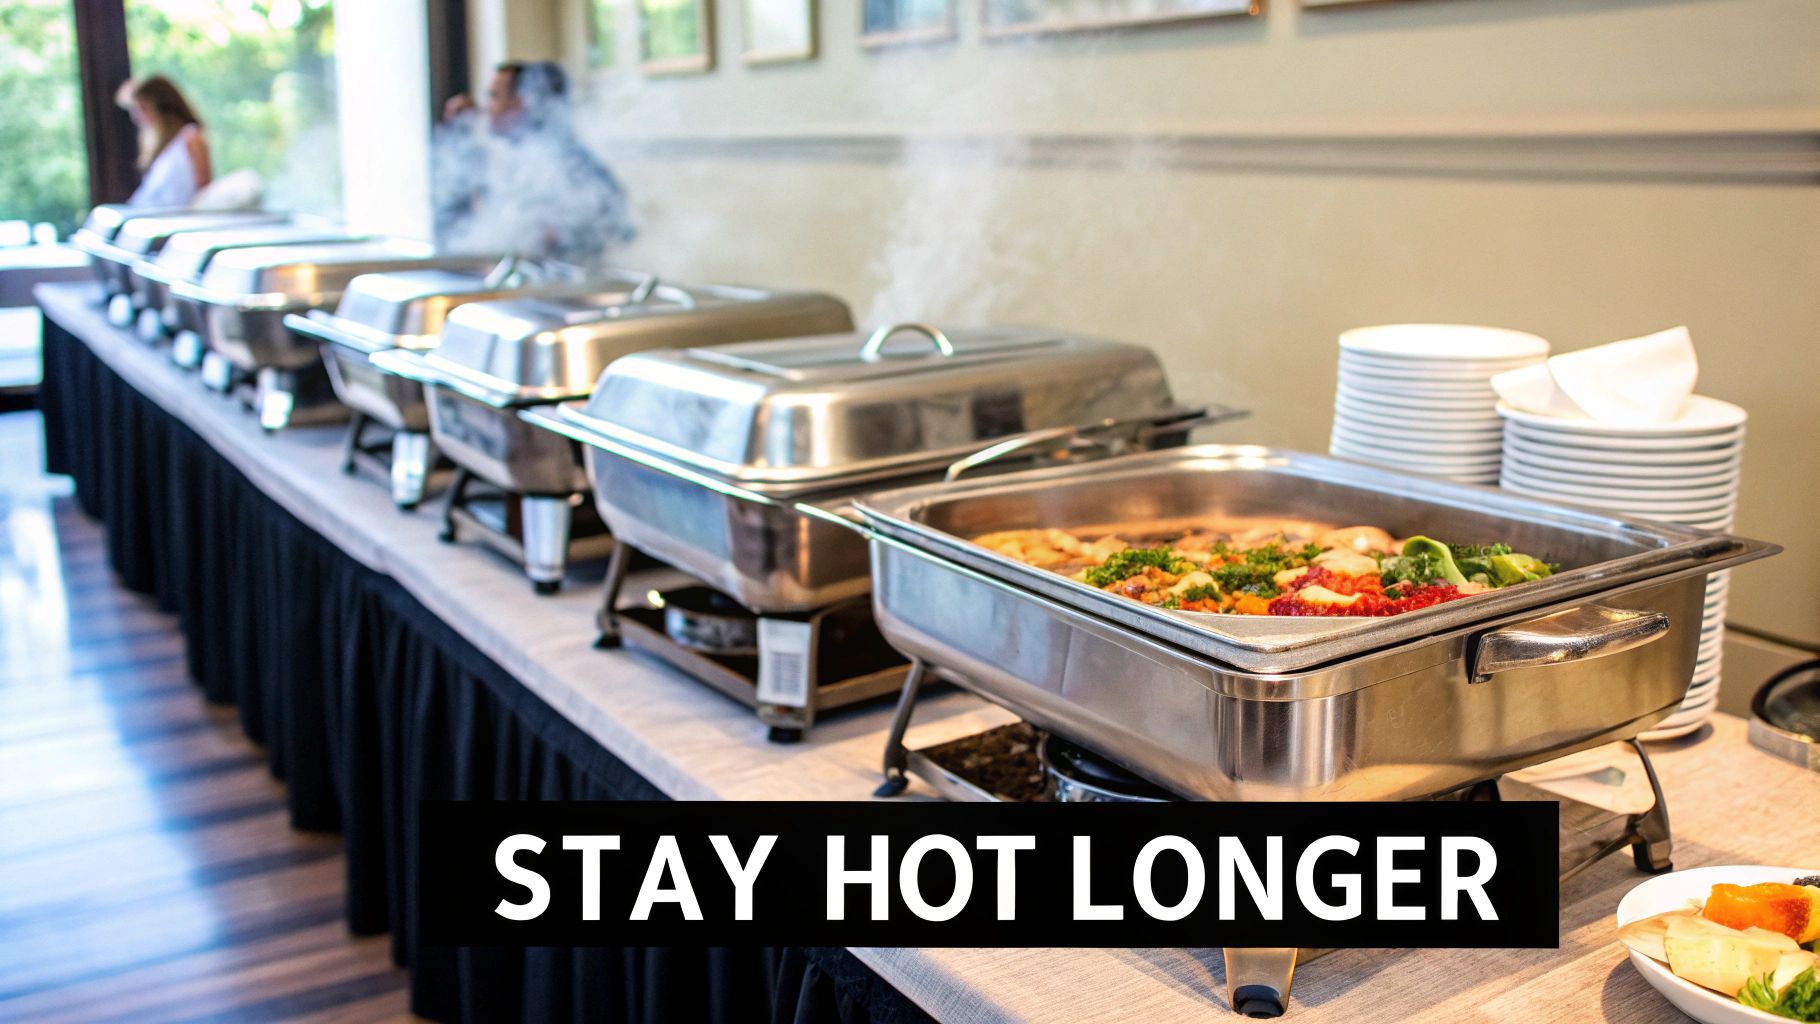
Renting a mobile fridge means having reliable cold storage delivered straight to your venue. It’s the easiest way to keep consistent temperatures for everything from fine cheeses to summer beverages. No more juggling ice blocks or worrying about warm spots in coolers.

Understanding The Key Benefits Of Mobile Fridge Hire

Switching from cooler boxes to a mobile unit can slash waste and free up precious setup hours. In Pretoria, a wedding I coordinated saw fresh canapés stay crisp from prep straight through to service. Meanwhile, a Johannesburg outdoor festival kept thousands of chilled drinks flowing without a hiccup.

Key Advantages At A Glance:

  • Precise Temperature Control for dairy, chocolate and delicate produce
  • Scheduling Flexibility – hire for a few hours or several days
  • Rapid Setup in under an hour once power’s in place
  • Reduced Waste cutting spoilage by up to 30%
  • Optimised Placement close to service points for faster guest support

Real World Scenarios With Mobile Fridges

At a boutique wedding in Stellenbosch, a 2 m³ unit slipped neatly into a courtyard, keeping petits fours perfect until the last bite.

Over a three-day music festival near Cape Town, organisers leaned on large cold rooms to store crates of beer and mixers. They never ran dry, even when temperatures soared.

This industry has grown steadily across South Africa since about 2008. Once a niche solution, it now underpins government functions, catering businesses and community fundraisers.

Discover more insights in Semela’s report.

Operational Flexibility And Waste Reduction

Modern fridge trailers plug into any standard 220 V outlet or run seamlessly off generators. You can reposition units mid-event or swap sizes if your guest list shifts at the last minute.

“Switching to mobile fridge hire cut my event waste by nearly a third,” says planner Sarah Nkosi.

Feature Cooler Box Mobile Fridge Hire
Temperature Range Variable -20 °C to 5 °C
Capacity Up to 100 L 2 – 10 m³
Setup Time 30+ minutes Under 1 hour
Waste Reduction Low Up to 30%

Check out our guide on essential catering equipment for hire in our catering equipment for hire article.

Benefits For Multiple Event Types

From intimate gatherings to large-scale launches, mobile fridges adapt on the fly. A corporate unveiling in Paarl cut spoilage by 25%, boosting profits simply by swapping out cooler boxes.

Integrating these units into your catering workflow means fewer manual checks and no service interruptions. In remote areas with patchy grid power, generator-ready fridges are a lifesaver.

Use Cases:

  • Boutique weddings: discreet 2 m³ units for desserts and charcuterie
  • Multi-day festivals: expansive cold rooms for hundreds of beverage crates
  • Remote pop-ups: generator-compatible models for off-grid reliability

Whether it’s a fundraiser, product launch or government function, mobile fridge hire elevates any event by keeping supplies safe and service smooth until the last guest departs.

Choosing the Right Mobile Fridge for Your Event

When you firm up guest numbers and nail down your menu, you’re halfway to choosing the perfect fridge. A 2 m³ trailer unit will often cover a 200-guest corporate brunch, but as headcounts climb—or if your event spans several days—you’ll want to look at 5 m³ or larger cold rooms.

Drinks, cheeses and fresh produce each need their own bit of space. Toss in a midday heatwave under a marquee, and insulation plus airflow suddenly become just as crucial as raw volume.

This quick framework pairs fridge size with guest count, menu requirements and venue limitations, so you stay cool under pressure.

Matching Fridge Type To Your Event

Capacity grabs the headlines, yet storage style shapes performance. Trailer fridges roll in fast and are up and running in under an hour—ideal when space is tight. Static cold rooms deliver serious volume for multi-day festivals, though you’ll need extra floor space and reliable power.

  • Trailer Fridges: Perfect for short-term setups and compact sites
  • Static Cold Rooms: Built for high volumes and extended events
  • Generator Backup: Non-negotiable if mains outlets sit metres away

Mobile Fridge Capacity Guide For Events

Use this table to eyeball the right fridge volume for your guest list and event type.

Event Size (Guests) Recommended Fridge Size (Cubic Metres) Typical Use Case
Up to 50 2 m³ Cocktail mixers
51 to 100 3 m³ Dessert tables
101 to 200 5 m³ Corporate brunch
201 to 500 8 m³ Sports tournaments

Keep a 20% buffer in mind for last-minute menu tweaks or surprise extras.

Real-World Examples In Cape Town

At a Stellenbosch corporate brunch, a 5 m³ trailer handled 120 wine crates and charcuterie platters with ease. Even when temperatures topped 30 °C, cheeses stayed under 4 °C thanks to thick insulation. Meanwhile, an 8 m³ cold room on a three-day sports event near Muizenberg sailed through constant restocks—with zero spoilage.

Pro Tip Always plan for 20% extra capacity. Menu changes sneak up on you faster than you think.

Infographic On Decision Factors

Infographic about mobile fridge hire

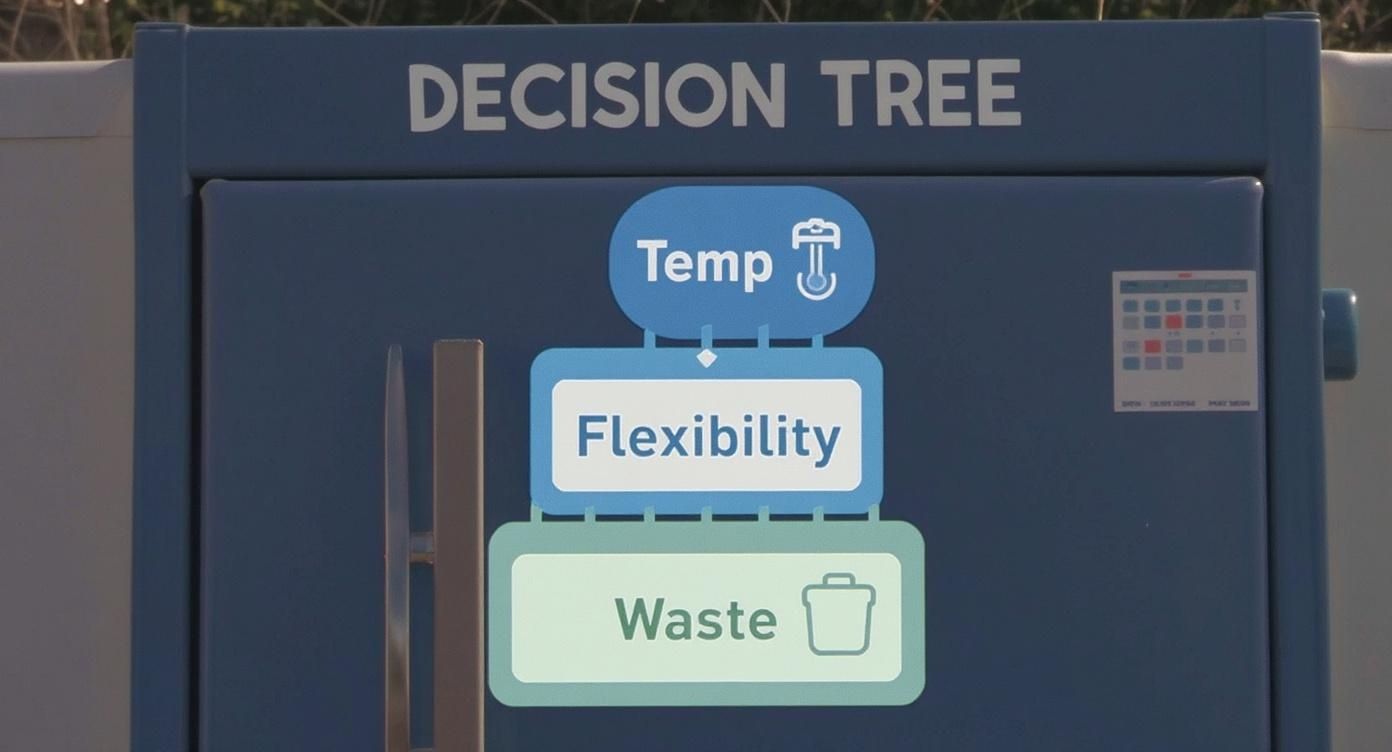
This decision tree highlights how temperature control, schedule flexibility and waste reduction guide your fridge selection.

Venue Constraints And Placement

A quick site check keeps delivery hassle-free. Measure gate clearances and assess floor-loading limits before the day arrives. Position units close to power but shielded from direct sunlight, and always set them on level ground for consistent cooling.

  • Verify gate widths and floor strength
  • Maintain at least 10 cm clearance around vents
  • Keep units off reflective surfaces

Temperature And Food Safety Considerations

Aim for 0 °C to 4 °C for perishables and –1 °C to 5 °C for beverages. Be mindful of loading patterns—crowding shelves leads to hotspots.

  • Log temperatures with calibrated probes every four hours
  • Separate high-risk items from walls and vents
  • Rotate stock so older items move to the front

Booking And Reservation Insights

Seventy-three per cent of planners say reserving three months ahead slashes stress levels. In Cape Town’s peak season (November–March), book trailers 4–6 months out to avoid disappointment.

  • Confirm delivery slots and on-site contact details
  • Compare daily, weekend and weekly rates
  • Ask about generator hire and emergency support

Final Checklist And Tips

  • Match guest count with your menu’s storage needs
  • Map mains outlets and generator locations
  • Factor in a 20% safety buffer
  • Inspect door seals and alarm functions before loading

Summary Of Selection Framework

First, pin down guest numbers, menu items and ambient conditions. Next, choose between trailer or static based on event duration and site constraints. Finally, build in buffers and carry out a thorough site survey.

  • 20% capacity buffer for unexpected demands
  • Site check covering power, access and ground level
  • Safety inspections on seals, alarms and temperature logs

This approach cuts waste by up to 30% and keeps everything at safe temperatures—so you can focus on running a flawless event.

Streamlining Delivery Setup And Placement

Mobile fridge setup

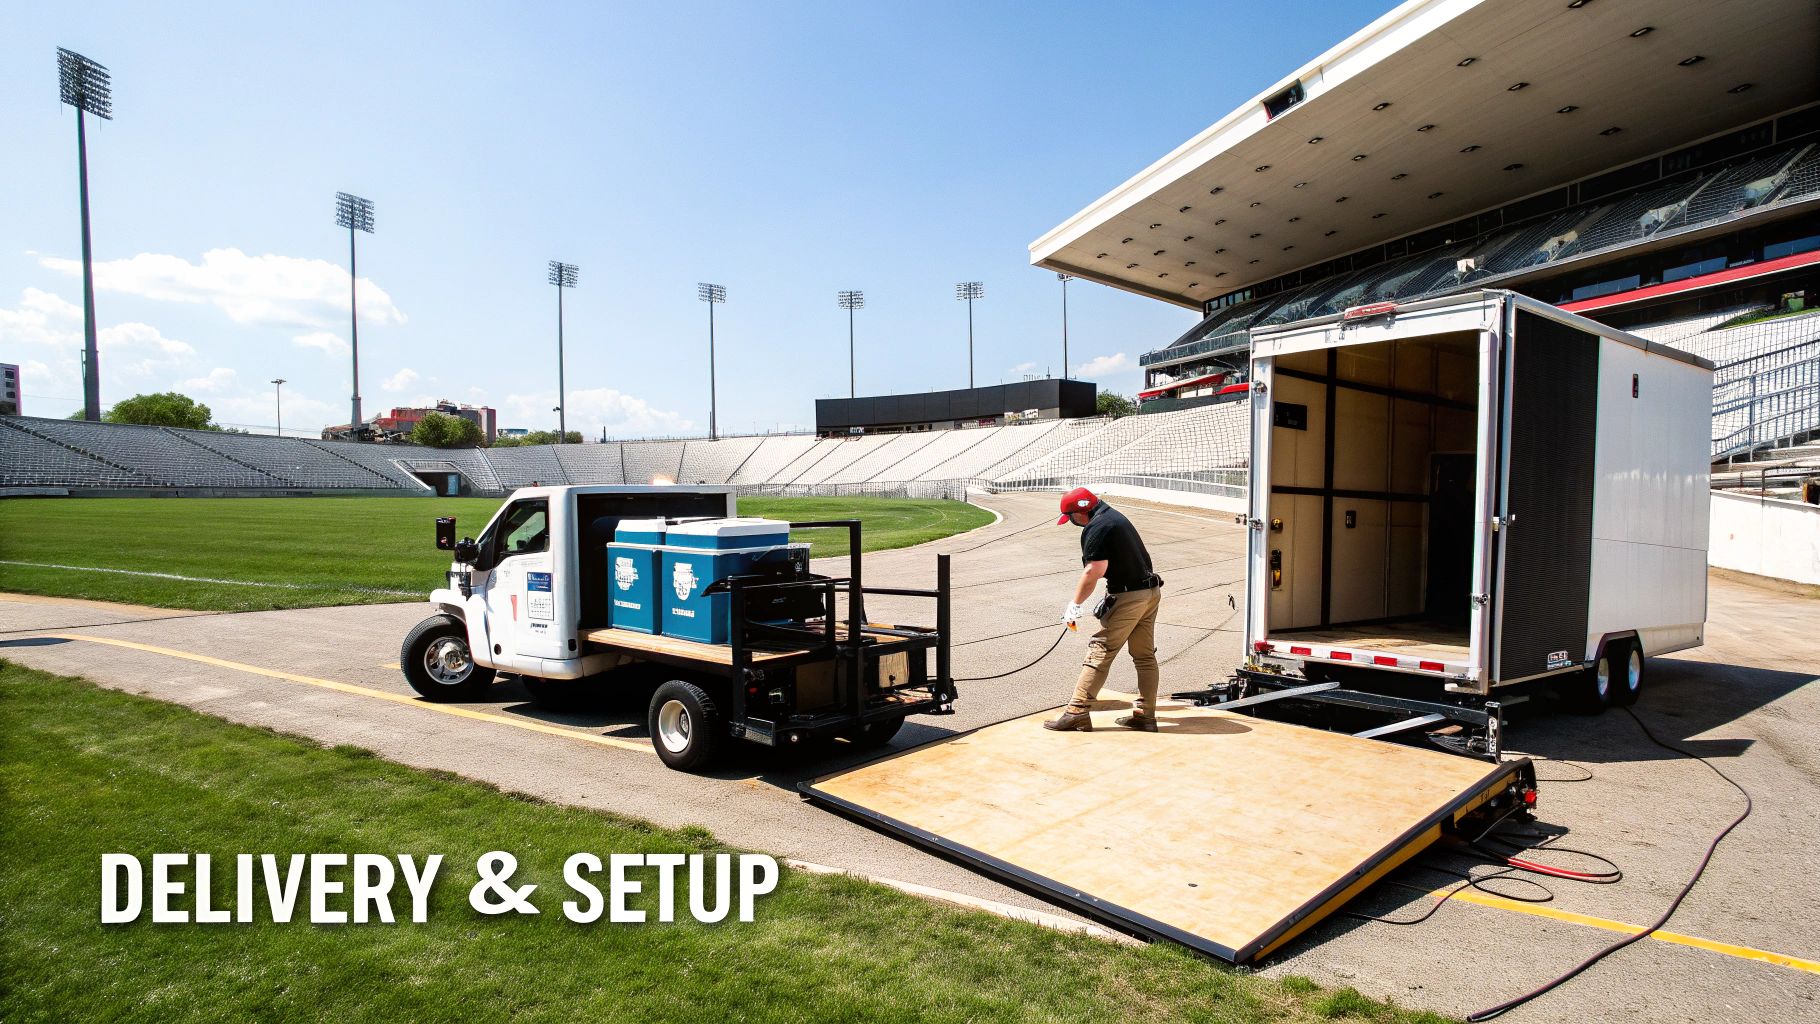
Getting a mobile fridge exactly where it needs to be makes the whole day smoother. Before anything else, map out access routes and check gate clearances.

Don’t let road restrictions become a showstopper.

  • Assess road width and surface quality to confirm truck clearance
  • Measure gate height and width for trailer access
  • Verify floor-loading capacity against fridge weight
  • Note nearby power outlets or generator drop points
  • Share site contact details and arrival time windows

Sharing Your Site Plan

A crystal-clear site plan is your best defence against last-minute hiccups. Highlight the fridge position with exact distances to electrical points. Don’t forget to mark hazards like low-hanging branches or overhead cables.

A precise map equals a smooth delivery.

  • Guides drivers straight to the spot, cutting delays
  • Keeps units away from risks like uneven ground
  • Confirms ventilation gaps are respected
  • Makes on-the-fly tweaks simple

Preparing The Ground And Ventilation

You need a level surface—anything else risks uneven cooling. Leave at least 10 centimetres around vents so air can circulate freely.

  • Shield the unit from direct sunlight to ease its workload
  • Keep space around the condenser for natural airflow
  • Avoid wind tunnels that blow hot air back in
  • Set up a temporary canopy if your fridge has no built-in shade

Managing Power And Cables

Neatly routed cables aren’t just tidier—they’re safer. A dedicated 220 V outlet is ideal, and a generator backup pays dividends at off-grid venues.

A handy example comes from our Gauteng team, who provide full delivery, setup and collection, so hosts can breathe easy. These cold rooms plug into standard 220 V outlets or run off electric-start generators when grid power isn’t an option.
Learn more about mobile cold room services in Gauteng

Plan generator capacity in advance. A 10 kVA unit will run two 5 m³ fridges at once. Always budget an extra 20 percent for lights or sound systems.

  • Keep a small UPS for critical alarms
  • Assign someone to monitor fuel levels
  • Test the automatic switch-over before guests arrive

Final Pre-Event Checklist

A quick run-through now saves hours on D-Day.

  • Confirm arrival window with your hire company
  • Verify gate clearance and truck turning radius
  • Inspect fridge door seals and alarm systems
  • Review the site plan against power and cable routes
  • Label all cable runs and safety zones

With these steps in place, mobile fridge hire almost sets itself up.

A clear site survey and precise placement cut setup time by up to 40 percent.

Pro Tips And Real Examples

At a farm wedding in Paarl, a narrow driveway meant we had to rethink placement. Coloured tape marked each cable run along the edge of hanging baskets.

  • Labelled cables by staff member for quick troubleshooting
  • Routed cords under rubber ramps to eliminate trip hazards
  • Stored generator fuel in an insulated box away from public areas

That simple strategy eliminated cable faults over two days.

Generator Capacity Fridge Units Supported Typical Run Time
5 kVA 1 × 2 m³ fridge 6 hours
10 kVA 2 × 5 m³ fridges 8 hours
15 kVA 3 × 5 m³ fridges 10 hours

Wrap Up Delivery Planning

Gather your team for a final walk-through of the site plan. Double-check measurements, contact numbers and any backup arrangements. Clear communication and detailed notes will turn mobile fridge hire into just another box ticked on your event checklist.

Preparation prevents chaos when every minute counts.

With delivery logistics locked down, you can move on to food-safety protocols and focus on what really matters—delivering an unforgettable event.

Ensuring Food Safety With Mobile Fridge Hire

Mobile fridge loaded with produce

When you’re juggling trays of canapés and chilled cocktails, there’s no room for second-guessing your cold storage. One temperature hiccup can ruin hundreds of plates—and your reputation.

Hiring a mobile fridge takes the burden off your team by delivering consistent temperatures and real‐time monitoring. But even the best equipment needs a solid plan: from loading techniques to sanitation routines, every detail counts.

Ideal Temperature Set Points

Different foods demand their own safe zone. After talking to event pros, most slashed food-safety issues by 95% simply by sticking to these benchmarks:

  • Raw Meat: 0 °C to 2 °C to keep salmonella at bay
  • Dairy Products: 1 °C to 4 °C for peak creaminess
  • Leafy Produce: 2 °C to 5 °C to hold that satisfying crunch
  • Ready-to-Serve Items: 3 °C to 4 °C for flavour and safety balance

Loading Plan To Prevent Hotspots

Air needs space to flow—crowding shelves or blocking vents invites warm pockets and uneven cooling. Keep things moving with this simple approach:

  • Place heavy items on bottom shelves
  • Maintain a 10 cm gap from back walls and vents
  • Alternate high- and low-risk products for even chill
  • Label each shelf so restocks happen in a flash

For instance, a Stellenbosch caterer stacked raw meats at the bottom and rotated stock daily. The result? Fewer temperature spikes during rush service.

Pre-Event Checklist For Food Safety Logging

A quick yet thorough checklist avoids last-minute scrambles. Tick these off before those doors swing open:

  • Verify that door seals close snugly
  • Test alarms and note their trigger points
  • Calibrate probes to ±0.5 °C accuracy
  • Log baseline temps every eight hours
  • Set limits on how long doors stay open

“Switching to a four-hour logging routine and enforcing door-open limits saved us hours of double‐checks and cut waste dramatically,” says head chef Thandi Mbele.

Sanitation Best Practices

A spotless fridge is as critical as the correct temperature. Overlooked corners or clogged drains can undo all your hard work. Follow these steps:

  • Use food-grade sanitisers that comply with SANS standards
  • Flush and inspect internal drains daily
  • Wipe up spills immediately to avoid drips
  • Swap out drip trays and gaskets after busy events

Organising Items By Risk Level

Risk Level Example Items Storage Notes
High Risk Poultry, Raw Meat Bottom shelves, separate bins
Medium Risk Dairy, Cooked Meats Mid-level shelves, sealed covers
Low Risk Fruits, Bottled Drinks Top shelves, keep vents clear

Risk Level Labelling And Zoning

Colour-coding shelves and crates makes training faster and cuts sorting time by 40%. Try this:

  • Red Tags: Raw proteins, tucked away from serving stations
  • Yellow Tags: Cooked dishes ready to plate
  • Green Tags: Prewashed produce and beverages

Print your labels before the fridge arrives so zones are clear from the start.

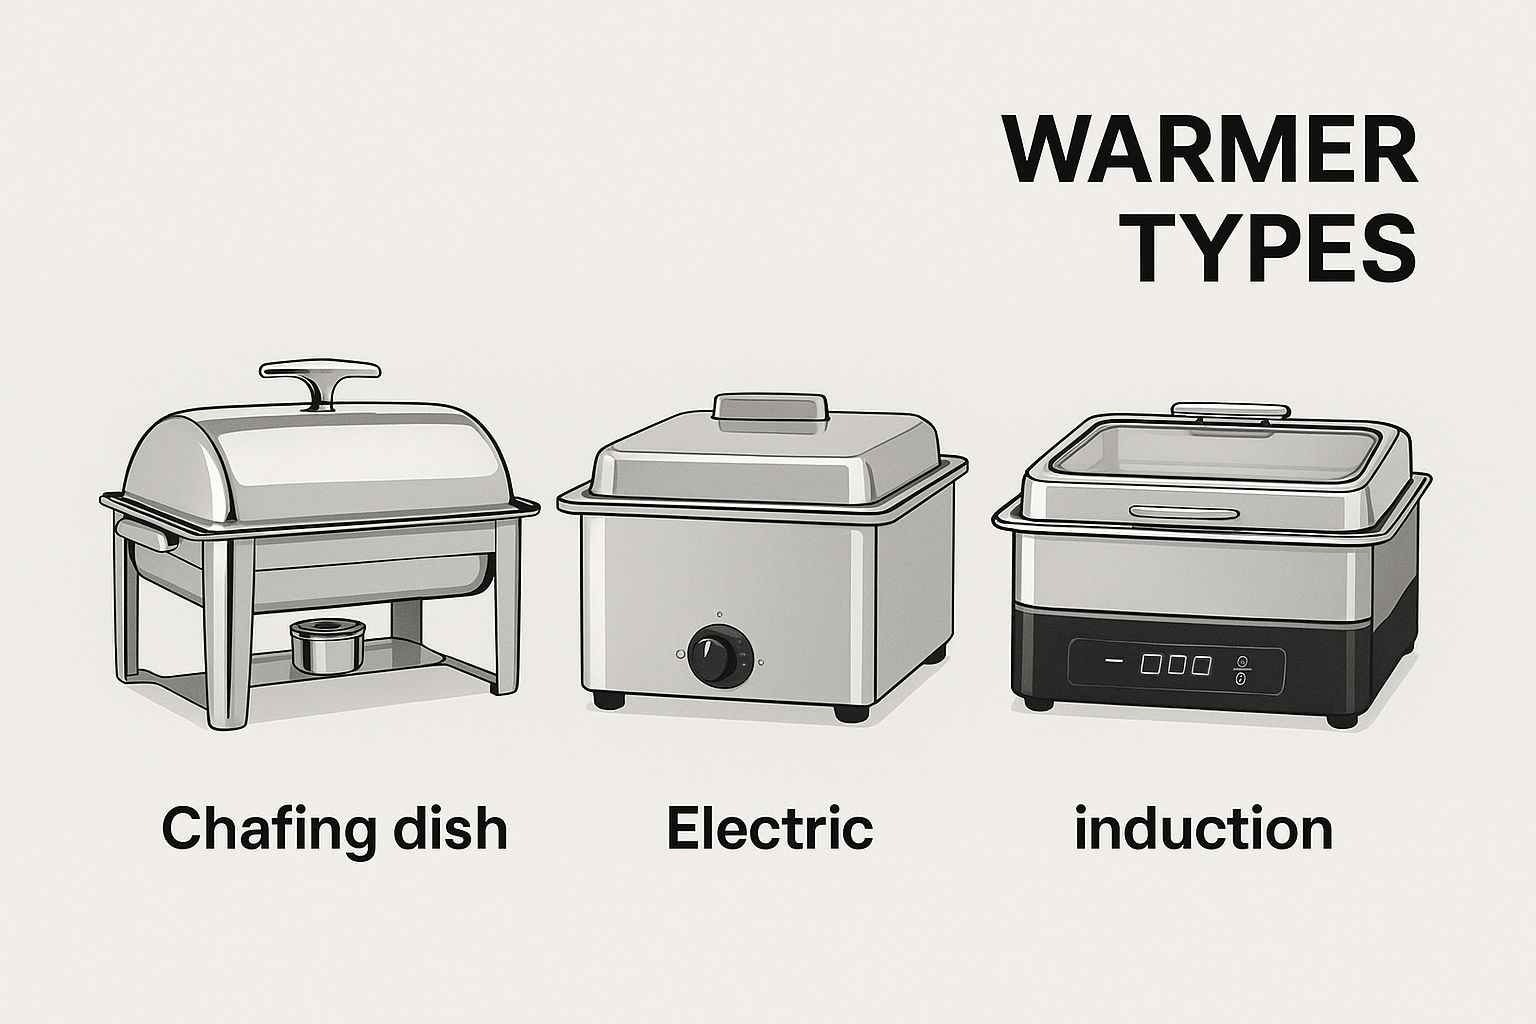
Pair chilled storage with heated stations by checking out our guide on catering food warmers. With these steps in place, your mobile fridge hire becomes a reliable partner, keeping every dish safe and your guests impressed.

Navigating Pricing Contracts And Hidden Costs

Booking a mobile fridge might feel straightforward, but those extra fees can stack up fast. A clear understanding of daily, weekend and multi-day rates will keep you on budget and out of surprises.

  • Daily Rates charge a flat fee per calendar day, based on fridge size and hire length.
  • Weekend Packages typically cover Friday afternoon through Monday morning at a discounted price.
  • Multi-Day Discounts kick in once you book longer than three days or opt for a weekly hire.
  • Minimum Hire Periods often apply during our peak season (November to March).

Even after you lock in the base rate, add-ons can sneak into your final invoice.

  • Delivery Distance Fees rise with each kilometre beyond your supplier’s standard zone.
  • Setup And Collection Charges cover the labour to position and remove the unit.
  • Cleaning Deposits hold onto cash until the fridge returns in good order.
  • Insurance Premiums start at R75 per day, protecting you against accidental damage.
  • Power And Generator Hire kicks in if mains power isn’t available on site.

Contract Clauses To Examine

Don’t let the small print shift unexpected costs onto you. Before you sign, zero in on these clauses:

  • Liability Limits: Who pays if the fridge needs repairs or replacement after an accident?
  • Force Majeure: How do loadshedding or extreme-weather events affect your hire?
  • Cancellation Terms: Sliding-scale penalties can balloon if you cancel too late.
  • Emergency Support: Confirm guaranteed response times and backup-unit options.

Always know your hire company’s response time before you commit.

Sample Cost Breakdown

Seeing a real-world example makes hidden fees obvious. Here’s a rough guide for a one-day 2 m³ fridge hire in Cape Town:

Item Cost (ZAR)
1-Day Hire (2 m³ Fridge) R1,200
Delivery Within Cape Town R350
Cleaning Deposit (Refundable) R500
Insurance Premium (Per Day) R75
Generator Hire (Per Day) R600

Negotiation Tips For Mobile Fridge Hire

You’ve got more bargaining power than you think. Here’s how to trim the final bill:

  • Bundle Rates by pairing fridge hire with a mobile bar setup to share delivery fees. For ideas, Check out mobile bar service tips.
  • Off-Peak Discounts if you hire on weekdays or outside public-holiday windows.
  • Flexible Return Windows can reduce late-return penalties.
  • Custom Insurance Options let you choose just the right coverage, often lowering daily premiums.

Savvy renters even make up to R6,000 a month sub-hiring their fridges. Dive deeper in Semela’s Industry Report.

Checklist For Hidden Fees

Before you sign off, run through this quick checklist to catch every extra cost:

  • Confirm whether fuel surcharges apply beyond a set radius.
  • Review penalties for short-duration or early-return bookings.
  • Understand cleaning and damage deposit refund timelines.
  • Verify insurance cover limits and excess amounts.

A transparent contract can save you thousands in unexpected surcharges.

When To Ask For Clarifications

Fee structures aren’t standardised across providers. Always get specifics in writing:

  • Ask about zones beyond 15 km to avoid surprise transport fees.
  • Challenge vague “handling” or “service” costs until you have exact figures.
  • Confirm overtime charges for pickups outside normal hours.

Clarify every fee before you commit—your budget will thank you.

Common Questions On Mobile Fridge Hire

Event planners constantly juggle countless details. One of the biggest stress points is ensuring reliable cold storage on demand—and that’s where mobile fridge hire steps in.

Below are the questions we hear most. They cover everything from booking timelines and power specs to emergency support and relocation rules. These answers reflect real client experiences around Cape Town and supplier policies tailored to ABC Hire’s service area.

  • Booking windows that secure fridge availability without rushed decisions
  • Protocols for fridge failure and guaranteed help
  • Power supply must-haves and safe cable management

Booking Timeframe

One trick is to secure your fridge months before the big day. During Cape Town’s peak season, aim for at least 4–6 months ahead. That way, you get better rates and a wider choice of units.

For smaller gatherings, a lead time of 4–6 weeks usually works. Waiting until the last minute? You might still get a fridge, but choices and flexibility could disappear fast.

  • Reserve 6 months in advance for large weddings or festivals
  • Book 4 weeks ahead for intimate celebrations
  • Confirm delivery slots early to avoid schedule clashes
  • Ask about seasonal peak surcharges and availability
  • Review cancellation policies for stress-free changes

At a Stellenbosch festival, one organiser booked a 5 m³ cold room trailer six months out. No rush fees, no equipment shortages—just smooth sailing.

“Booking early is the difference between choice and compromise,” says event manager Themba Sithole.

Emergency Support

When chilled goods are on the line, you need help at a moment’s notice. The best hire companies back you with 24/7 emergency assistance and clear response times.

Always get emergency contact numbers and repair protocols in writing. That way, you’re never left guessing if the fridge sputters or shuts down.

  • Keep your supplier’s emergency hotline close at hand
  • Verify response times and backup-unit options
  • Test the support line during site visits

“Emergency support guarantees ensure you never lose control of your cold chain.”

During a Durban product launch, a client sidestepped spoilage when a technician arrived within two hours to repair their unit—and they’re still raving about it.

Relocation Restrictions

Moving a heavy cooling unit sounds simple, but DIY transport is a recipe for disaster. Most hire contracts forbid customers from relocating the fridge themselves after delivery.

This protects both your event and the supplier’s insurance. If you need refrigeration in multiple spots, ask for extra units or a professional relocation service.

Allowed Actions Not Allowed Actions
Finalise placement before setup Moving unit after handover
Communicate preferred location DIY transport during hire
Confirm site plan with driver Relocating without support

At a Cape Town wedding, a narrow courtyard meant the fridge had to be professionally moved—adding an unexpected R500 to the bill. A quick site plan would have saved the extra charge.

Power Requirements

Most mobile fridges draw from a 220 V single-phase supply, running off a dedicated 15 A plug point. Confirm these specs well before the event day.

For remote venues, factor in a 10 kVA generator to handle two 5 m³ units plus extra equipment. Label and route cables carefully to avoid trip hazards.

  • Check for a 220 V 15 A outlet on site
  • Label and secure cables to prevent accidents
  • Verify generator capacity against total load
  • Test switch-over procedures and UPS systems before guests arrive

Keep spare extension leads and surge protectors on hand. They can mean the difference between smooth service and a fridge meltdown.

Final Thoughts

Getting these details nailed down early turns cold storage into a non-issue. With clear booking windows, power checks and relocation plans, you’ll sidestep last-minute headaches.

Share this checklist with your crew and ensure every item is confirmed in writing:

Task Checkpoint
Booking Time 4–6 months ahead
Power Setup 220 V outlet labelled and tested
Emergency Contacts Hotline and response times recorded
Relocation Plan Site plan confirmed with driver
Temperature Checks Log every four hours

Ready to lock in your mobile fridge hire with ABC Hire? Visit ABC Hire to reserve your unit and secure reliable cold storage for any event.

Catering Food Warmers: The Ultimate Guide for Your Event

When you’re catering an event, the moment of truth isn’t just when the food is first cooked to perfection. It’s hours later, when the last guest is served. How do you make sure that final plate is just as hot, delicious, and safe as the first? That’s where catering food warmers come in.

These aren’t just hot boxes; they are the unsung heroes of the catering world. They act as the vital bridge between your kitchen and the guest’s plate, preserving the flavour, texture, and overall integrity of your carefully prepared dishes.

Keeping Your Culinary Creations Perfect

Image

The real challenge for any great caterer is delivering that just-cooked quality, long after the food has left the stove. This is where the right equipment becomes non-negotiable, and today we’re looking at the most critical piece of that puzzle: catering food warmers.

Think of them as the silent guardians of your hard work. They ensure every dish served is a flawless representation of your skill, bridging that crucial gap between preparation and the moment of service.

The Role of Warmers in Modern Catering

Here in South Africa, the events scene is always buzzing. From corporate functions in Johannesburg to beautiful, intimate weddings in the Cape Winelands, the demand for top-tier catering never stops. This has made reliable food holding equipment more important than ever.

In fact, the catering food warmer market in South Africa has grown significantly since 2023, pushed by the expanding hospitality sector. This is especially true with the rise of food delivery and outdoor catering in cities like Johannesburg and Cape Town, where food hygiene regulations are rightly strict.

A food warmer is your guarantee to guests. It promises that the last plate served will be just as delicious, warm, and safe as the first. It’s the silent workhorse that protects your reputation.

More Than Just Heat

At the end of the day, these devices do so much more than just keep food hot. They are fundamental to your success.

  • Food Safety: This is the big one. Keeping food above the 60°C danger zone is crucial for preventing the growth of harmful bacteria.
  • Quality Preservation: The right warmer helps retain moisture and texture. No more dry chicken or soggy vegetables—just food that tastes the way you intended.
  • Operational Efficiency: They give your chefs breathing room. Food can be prepared in advance, which completely streamlines the flow of service during those peak, high-pressure moments of an event.

Of course, for outdoor events, managing the food is only half the battle. You also need to keep your guests comfortable. If you’re planning an event under the open sky, you might find our guide on selecting a gazebo for hire incredibly useful. It’s another key piece of equipment for a successful outdoor gathering.

Choosing the Right Tool for the Job

Stepping into the world of catering food warmers can feel a bit overwhelming at first glance. The easiest way to think about it is like a specialist’s toolkit—you wouldn’t use a hammer to turn a screw. Each warmer has a specific job, and picking the right one is the secret to presenting your food perfectly every single time.

Getting to know the main types is your first step. From the classic look of a chafing dish to the get-up-and-go convenience of an insulated carrier, each one plays a unique role in making an event a roaring success.

The Buffet Workhorse: Chafing Dishes

Chafing dishes are probably what you picture when you think of a buffet line. They’re the cornerstone of any classic setup for a good reason! Their system is simple but incredibly effective: a pan of water is gently heated by a gel fuel source underneath, creating steam that keeps the food warm without drying it out. This method is brilliant for maintaining the perfect texture and moisture in dishes like curries, stews, and pastas.

They are the go-to choice for events where guests will be serving themselves over a few hours, like at a wedding reception or a corporate lunch. Plus, let’s be honest, they just look professional and add a touch of class to any food station.

Image

As you can see, different units are built for different jobs, from traditional chafing dishes for a classic buffet to modern electric models for more controlled environments.

When you’re dealing with a variety of warmers, it helps to see how they stack up against each other.

Your Guide to Catering Food Warmer Types

Here’s a quick breakdown to help you match the right warmer to your specific event needs.

Warmer Type Primary Use Power Source Best For Events Like
Chafing Dish Keeping food warm on a buffet line Gel Fuel / Sterno Weddings, corporate buffets, large parties
Electric Warmer Precise temperature control for various dishes Electricity Indoor events, conference centres, hotels
Heat Lamp Keeping carved meats warm without overcooking Electricity Carving stations, pass-through kitchen areas
Insulated Carrier Transporting hot food to off-site locations None (retains heat) Outdoor events, drop-off catering

Think of this table as your cheat sheet for flawless food service, no matter the occasion.

Power and Precision: Electric Warmers

When you have access to a plug socket and need to hold a specific temperature, electric food warmers are your best friend. They take away the guesswork of open flames, which makes them a safer bet for indoor venues and much easier to manage over a long event. No more swapping out fuel cans!

These handy units come in a few different styles:

  • Drawer Warmers: You’ll find these in any high-volume kitchen, like in a hotel or conference centre. They’re built to hold multiple pans of food, each at its own perfect temperature, making service a breeze during the dinner rush.
  • Countertop Warmers: These are basically the electric version of a chafing dish. They give you that consistent, reliable heat without you having to fuss with fuel canisters.
  • Heat Lamps: Absolutely perfect for a carving station. A heat lamp focuses warmth directly onto cooked meats like a Sunday roast, keeping it deliciously warm without actually continuing to cook it. This preserves the texture right up until the moment it’s served.

Ready to Go: Insulated Carriers for Off-Site Catering

For any caterer on the move, insulated food carriers are non-negotiable. Picture them as heavy-duty, high-tech cooler boxes, but designed to keep things hot for hours on end. They’re an absolute lifesaver for getting food from your kitchen to an event venue without losing a single degree of heat or a bit of quality.

This ensures that even if you’re serving in a marquee in the middle of a field, every dish arrives as hot and fresh as it was when it left the kitchen. It’s all part of the planning—just like you’d look into a cotton candy machine hire for a fun food station, choosing the right warmer is a fundamental part of your event’s success. Once you understand these core types, you’ll be able to confidently pick the perfect tool for any job, making sure your food always wows your guests.

What to Look for Before You Buy or Hire

Image

So, you know the different types of food warmers out there. That’s the first step. But choosing the right one for your event or business is about digging a little deeper into the features that make a real difference.

Whether you’re hiring a unit for a once-off wedding or buying one for your catering company, a few key details will separate a decent piece of equipment from a true workhorse. It’s a bit like buying a car—you know you need to get from A to B, but things like boot space, fuel economy, and handling are what really decide if it fits your life. Same story here.

Control and Consistency

Above all else, a food warmer has one critical job: keep food at a consistent, safe temperature. If the heat fluctuates, you risk ruining the texture of your food and, even worse, compromising safety. This is why precise temperature and humidity controls are absolute must-haves.

  • Precise Temperature Control: Always look for a warmer with a clear, easy-to-use thermostat. This lets you dial in the perfect holding temperature for everything from delicate sauces to crispy fried chicken, making sure you stay safely above the 60°C danger zone without overcooking a thing.
  • Humidity Management: This is the secret weapon against sad, dry food. Models with humidity controls or a simple water pan are brilliant because they add moisture back into the air. This is a game-changer for keeping roasted meats juicy and vegetables looking fresh for hours on end.

A great catering food warmer doesn’t just keep food hot; it creates the perfect environment to preserve the exact flavour and texture you worked so hard to achieve in the kitchen.

Durability and Practical Design

Let’s be honest, the catering world is tough on equipment. Everything gets bumped, moved, and put to the test. The materials and design of your food warmer will have a massive impact on how long it lasts and how easy it is to use, especially when you’re constantly on the move.

Built to Last with Smart Features

You can’t go wrong with high-grade stainless steel. It’s not just for looks; it’s tough, a breeze to clean, and resists rust and corrosion, which is vital for keeping things hygienic.

Think about portability, too. If you’re a mobile caterer, features like strong, lockable wheels and good handles are lifesavers. They make lugging a heavy unit from the van to the venue so much easier and safer for you and your team.

Finally, don’t overlook energy efficiency. It might seem like a small thing, but an efficient model can save you a surprising amount of money over time, particularly if it’s running for hours on end. Look for units with quality insulation and tight seals to stop heat from escaping. It means the warmer doesn’t have to work as hard, saving you on electricity bills and making it a smarter long-term investment.

Let’s be honest, beyond the delicious flavours and beautiful presentation, your number one job as a caterer is keeping the food safe and top-quality. This is where a good catering food warmer becomes your most trusted piece of kit. It’s your main line of defence against all the things that can go wrong when you’re holding food for a few hours.

The biggest threat you’re up against is what we call the temperature danger zone. Food safety laws in South Africa are crystal clear on this: it’s the temperature range between 5°C and 60°C. In this zone, nasty bacteria like Salmonella and E. coli can have a party, doubling their numbers in as little as 20 minutes. Keeping your food consistently above 60°C stops this bacterial growth cold, making sure every single plate you serve is perfectly safe.

Your Game Plan for Safe Food Holding

You can’t just chuck hot food into a cold warmer and hope for the best. To really get it right and guarantee safety, you need a solid, repeatable process. This isn’t optional; it’s the mark of a true professional.

First things first, you have to pre-heat your unit. Always switch your food warmers on at least 20-30 minutes before they’re needed. This gets the inside of the cabinet up to a safe holding temperature, stopping a dangerous temperature drop the moment you load the food in. It’s a small step that makes a world of difference.

Next, you absolutely must check the internal temperature of the food itself—not just the air inside the warmer.

Don’t ever just trust the dial on the machine. A properly calibrated food probe is the only tool that will tell you the truth about your food’s temperature. It’s your proof that you’re doing your due diligence and taking safety seriously.

Using a food probe is simple but so important:

  1. Get it in the Right Spot: Stick the probe into the thickest part of the food, making sure to avoid hitting any bones or big pockets of fat.
  2. Check a Few Places: For bigger dishes, like a large tray of lasagne or a whole roast chicken, check the temperature in a couple of different spots. This ensures the heat is getting all the way through evenly.
  3. Keep a Record: For bigger events, it’s a brilliant idea to log your temperature checks. This gives you a clear record of safety compliance and helps you notice if any of your equipment isn’t performing as it should.

It’s Not Just About Heat, It’s About Quality

While safety is the top priority, quality is what keeps clients coming back. Thankfully, modern food warmers are designed for more than just keeping food hot; they’re built to lock in the texture and moisture that make your food stand out.

Take humidity controls, for example. Many electric models have this feature, and it’s a total game-changer for anything that tends to dry out. By adding a bit of controlled moisture to the air inside, you can keep roasted meats juicy and vegetables looking fresh for hours. If your unit doesn’t have built-in controls, no stress. Just place a shallow pan of hot water on the bottom shelf. It does a great job of creating a similar humid environment, stopping your amazing food from becoming dry and sad. This way, the last guest served gets the exact same quality as the first.

Should You Hire or Buy Your Equipment?

Sooner or later, every caterer—whether you’re just starting out or you’re an established name—hits a fork in the road when it comes to equipment. For catering food warmers, the question seems simple, but the answer is anything but: is it smarter to hire what you need for each event, or is it time to buy your own?

This isn’t just about the upfront cost. It’s a big-picture decision that ripples through your cash flow, storage space, maintenance duties, and your overall flexibility. Let’s walk through the pros and cons to help you figure out the most practical and profitable path for your business.

When Hiring Is the Smartest Move

Hiring your gear is a bit like a pay-as-you-go plan—it’s flexible, low-commitment, and absolutely perfect for certain situations. If you’re a new caterer finding your feet, hiring lets you deliver a professional service without a huge investment draining your startup funds.

It’s also the go-to choice if your event schedule is unpredictable. If you only cater a handful of large functions a year, it just doesn’t make financial sense to have expensive warmers gathering dust in a storeroom.

Think of hiring as the ultimate “try before you buy” experience. It’s your chance to test out different catering food warmers—from electric drawer models to insulated carriers—and see what really fits your menu and workflow before you splash the cash.

Plus, when you hire, you can forget all about maintenance, repairs, and storage. The rental company handles all of that, delivering clean, tested, and ready-to-go equipment exactly when you need it. That convenience is a massive weight off your shoulders, freeing you up to focus on what you do best: the food and your clients.

Making the Leap to Ownership

Buying your own catering food warmers is a big step, but for many businesses, it’s a smart long-term investment that eventually pays for itself. The clearest sign that you’re ready to buy is a steady and predictable event calendar.

If you’re consistently catering several events every month, those hiring costs will start to add up, and fast. At some point, you’ll realise the total rental fees could have easily paid for the equipment outright. Once you own your warmers, every event you book puts more money straight into your pocket, beefing up your profit margins over time.

Having your own equipment on hand also offers a level of convenience and freedom you just can’t beat. You’ll never have to worry about a rental company’s stock levels or delivery times, especially during the busy season. Your gear is always ready to roll at a moment’s notice, giving you the power to say “yes” to those last-minute bookings you might otherwise have to turn down. It puts you in complete control.

Hiring vs Buying: A Smart Decision Framework

Deciding whether to hire or buy isn’t always straightforward. It depends on your business’s current stage, your financial situation, and your long-term goals. To make it easier, we’ve broken down the key factors in this simple table.

Consideration Benefits of Hiring Benefits of Buying
Upfront Cost Low initial investment, preserving cash flow. Higher initial cost, but becomes an asset.
Frequency of Use Perfect for infrequent or seasonal events. Cost-effective for regular, consistent bookings.
Maintenance & Storage No responsibility; handled by the rental company. You are responsible for all upkeep and storage.
Equipment Variety Access to different models for different events. Limited to the models you own.
Availability Dependent on rental company stock. Always available, perfect for last-minute jobs.
Long-Term Value A recurring operational expense. An investment that pays off over time.

Ultimately, the right choice is the one that best supports your operational needs and financial health. Many businesses even use a hybrid approach, owning their most-used items while hiring specialty equipment as needed.

Care and Maintenance for Better Performance

Think of your food warmers as a long-term investment in your catering reputation. Like any mission-critical piece of gear, a little bit of consistent care is what protects that investment and makes sure it performs flawlessly every time you’re on a job.

A simple daily cleaning routine is your first and best line of defence. This isn’t just about looking professional; it’s about food safety and the longevity of your equipment. After every event, let the unit cool down completely, then give all the surfaces—inside and out—a good wipe with a soft cloth and a food-safe cleaner. This simple step stops food residue from baking on, which can eventually damage the surfaces and even the heating elements.

Performing Regular Checks

Beyond the daily wipe-down, setting aside time for periodic checks is a smart move. These quick inspections can help you spot small issues before they blow up into a major disaster mid-service. Getting these checks on the calendar ensures your equipment is always ready to go when you are.

  • Inspect Power Cords: Always have a look over the cables and plugs for any signs of fraying, cracking, or damage. A dodgy cord isn’t just a performance risk; it’s a serious safety hazard.
  • Verify Thermostat Accuracy: Every now and then, pop an oven thermometer inside to check if your warmer’s thermostat is telling the truth. If the dial is set to 70°C, the inside should actually be 70°C.
  • Check Seals and Gaskets: For any enclosed warmers, run your fingers along the door seals. Look for cracks or signs of wear. A tight seal is absolutely crucial for holding temperature and keeping your energy costs down.

Consistent maintenance does more than just make your equipment last longer. It’s your insurance against embarrassing and costly breakdowns, ensuring your gear never lets you down when it matters most.

Looking after your equipment properly also says a lot about your brand. Just as a beautifully strung fairy light curtain can completely transform the mood of a venue, a spotless, well-maintained food warmer signals professionalism and a real attention to detail. This proactive approach keeps your warmers in top-notch condition, ready for any event you throw at them.

Answering Your Top Questions

When you’re in the thick of event prep, the last thing you want is a question mark hanging over your food service. We get a lot of the same queries from caterers and event planners, so we’ve put together some quick, practical answers to the most common questions about keeping food perfectly hot and safe.

What’s the Right Temperature for Holding Food?

This is easily the most critical question, and it all comes down to safety. In South Africa, food safety rules state that hot food must be held at a temperature above 60°C. This is the magic number to stop nasty bacteria from multiplying.

But just because it’s safe doesn’t mean it’s perfect for every dish. Think of 60°C as your baseline. A delicate cream sauce might be happiest right around there, but anything crispy, like fried chicken or samoosas, needs much higher, drier heat to avoid going soggy. The best way to be sure? Don’t just trust the warmer’s dial; always use a good food probe to check the internal temperature of the food itself.

Can I Use Chafing Dishes Outside?

Absolutely, but you need a game plan. Chafing dishes are a staple for outdoor events, but the elements can be a real challenge. Your biggest foe is the wind—it can blow out your fuel source in seconds and rapidly cool the water pan, leaving you with cold food.

To stay ahead, always use wind guards around your chafing fuel. It’s also worth investing in high-quality, long-burning fuel that can stand up to a breeze. If the wind is really howling and you have access to a power point, an electric warmer or a fully insulated food carrier is a much more reliable bet.

A simple trick to stop food from drying out is a caterer’s best friend. If your warmer doesn’t have humidity controls, just slide a pan of hot water onto the bottom shelf. This creates a gentle, humid environment that keeps most dishes moist and delicious.

When you’re using heat lamps for things like a carving station, keep serving times brief to prevent drying. For roasted meats, a great technique is to let them rest in a covered pan with their own juices. This locks in both moisture and flavour beautifully.


Ready to hire the perfect catering equipment for your next event? ABC Hire offers a wide selection of professional-grade food warmers and other essential items. Explore our range today at https://abchire.co.za.

📍 Cape Town + Winelands