A Guide to Using Ice Buckets and Stands for Events

When you're planning an event, it's the small details that make the biggest difference. Ice buckets and stands might seem like a minor point, but they're absolutely essential for keeping drinks perfectly chilled and making sure your guests have a fantastic time. They're not just practical; they’re a mark of a well-thought-out, professional event.

Why Chilling Your Beverages The Right Way Is A Must

Close-up of a hand placing a champagne bottle into an ice bucket, with a banner saying 'KEEP DRINKS COLD'.

Picture this: it’s a gorgeous wedding, and a guest reaches for a glass of bubbly to toast the happy couple, only to find it's gone warm. It’s a tiny thing, but it can put a real damper on the moment. Getting your beverage chilling right isn't just a nice-to-have; it's one of the cornerstones of a great event.

This is especially true in our warmer climate here in Cape Town and the Winelands. In this part of the world, ice buckets and stands aren't just an accessory—they're a necessity for keeping your event running smoothly and looking good. They do more than just cool drinks; they become part of your decor and your service.

How It Shapes The Guest Experience

A stylish ice bucket on a stand does more than just hold a bottle. It sends a clear message to your guests: we’ve thought about your comfort. This simple touch helps you sidestep a few common party problems:

  • No More Warm Drinks: It guarantees that every single celebratory toast is enjoyed with a crisp, perfectly chilled drink.
  • Better Event Flow: It stops queues from forming at the bar by letting guests help themselves at their table or at drink stations.
  • Looks The Part: It adds a touch of class that a clumsy cooler box just can't match, tying your whole event design together.

The demand for these items tells the story. In the busy event scene across Cape Town and the Winelands, rental companies have seen a 45% increase in demand for ice buckets and stands in the last three years. This makes perfect sense when you consider South Africa's wedding boom, with over 120,000 registered marriages recently, many of them right here in the Western Cape. You can see some popular options and learn more about this trend over at Axis Events.

Choosing the right rental items for beverage chilling is a smart investment in your event's success. It shows a level of professionalism and care that guests will definitely notice and appreciate.

Comparing Professional vs. Improvised Chilling Setups

There's a world of difference between a properly planned beverage station and an improvised one. Here’s a quick look at the impact of your beverage chilling choice on the overall event experience.

Event Aspect Professional Setup (Ice Buckets & Stands) Improvised Setup (Cooler Boxes)
Guest Perception Sophisticated, organised, and attentive service. Casual, disorganised, and less polished.
Accessibility Easy access at tables or elegant stations. Awkward bending and digging through ice.
Event Aesthetics Complements decor and enhances the theme. Clashes with decor and looks out of place.
Space Efficiency Utilises vertical space, reducing clutter. Takes up valuable floor space.

Ultimately, dedicated ice buckets and stands elevate the entire experience, while makeshift solutions can bring down the tone of an otherwise beautiful event.

Matching Your Ice Bucket to Your Event's Style

The right ice bucket and stand do more than just keep your drinks cold—they're a vital part of your event's decor. Getting the material and style right is about finding that perfect balance between looks and practicality, ensuring your choice fits the theme and performs perfectly all day or night.

Think about it: a sleek metal bucket brings a touch of class to a corporate gala, while a big galvanised tub is right at home at a rustic Winelands wedding. Your choice of ice buckets and stands is a detail that pulls the whole look together.

Classic and Contemporary Metals

Metal ice buckets are always a solid choice. They’re tough, they look fantastic, and they come in a few key finishes that suit different kinds of events.

  • Stainless Steel: The go-to for any modern, sophisticated event. If you're planning a black-tie wedding, a corporate function, or a chic cocktail party, the clean, reflective look of stainless steel is perfect. It’s also brilliant at holding temperature, which means your ice stays solid for longer.
  • Galvanised Metal: When you want a more rustic or industrial vibe, you can't beat galvanised metal. That matte, slightly weathered finish is ideal for outdoor events, farm-style weddings in Stellenbosch, or even a casual braai. We often see these used as large tubs for self-service drink stations.
  • Copper and Gold Finishes: For a bit of glamour and warmth, buckets with a copper or gold finish are a must. They add a luxurious feel that’s perfect for milestone birthdays, anniversary parties, or an upscale product launch.

These metal options aren't just for show. They are incredibly durable and easy for our team to clean, which is why they're a favourite for event planners and hire companies like us. They can handle anything from a small dinner to a massive festival.

A great tip we always share with clients: make sure your ice bucket material matches other elements like your cutlery, centrepieces, and furniture. It's that consistency that creates a truly polished and professional look.

The Versatility of Acrylic

Acrylic ice buckets are incredibly versatile. They’re lightweight, surprisingly tough, and often a more budget-friendly option compared to metal. But their real strength is how easily they can fit into any theme.

A clear acrylic bucket has a clean, minimalist look that never clashes. It lets the colourful labels of craft beers or the crisp white of a champagne bottle become part of the decor. For corporate events, we can even source customisable acrylic options with logos or brand colours.

Insulated vs Non-Insulated Options

Now for the most important practical decision: should you go with an insulated or a non-insulated bucket? This choice directly affects how long your ice will last—a massive factor for any event, especially on a hot summer's day in Cape Town.

A standard, non-insulated bucket is usually a single layer of metal or plastic. It'll do the job for shorter events or indoor functions where you can control the temperature, but you'll notice the ice melting much faster.

An insulated ice bucket, however, is built with double-wall construction. This simple but clever design creates an air gap between the inner and outer walls, which acts as a barrier and dramatically slows down the ice from melting.

Basically, the inner wall stays cold with the ice, while the outer wall stays closer to room temperature. That air gap in between stops the heat from getting in. This means your ice can last for hours longer, saving you from constantly running for refills and making sure drinks are chilled until the very end.

Another bonus is that insulated models "sweat" a lot less, so you won't get messy condensation dripping all over your tables and linens. They might have a slightly higher hire cost, but for the peace of mind and better performance, we find our insulated ice buckets and stands are almost always worth it for a smooth, seamless event.

How to Calculate Your Ice Bucket and Stand Needs

There's nothing worse than running out of chilled drinks halfway through a party. It kills the vibe, creates a frustrating queue at the bar, and leaves your guests nursing a lukewarm glass of wine.

Luckily, figuring out your ice bucket needs isn't as complicated as it sounds. It just takes a little bit of forward-thinking, much like ordering the food. You wouldn't just guess the catering numbers, right? The same goes for keeping your drinks perfectly cold. By looking at your guest list, the event schedule, and what you’re pouring, you can take the guesswork out of the equation entirely.

Start with the Guest Count and Event Type

Your guest count is the foundation, but the type of event you’re hosting really tells you how to plan. A formal, sit-down dinner has completely different needs from a casual cocktail party where everyone is mingling.

  • For Sit-Down Dinners: The easiest rule of thumb here is one ice bucket per table. It’s an elegant touch that keeps wine or water bottles chilled and within easy reach for your guests. A standard 4-litre bucket is usually perfect, holding one or two bottles without a problem.

  • For Cocktail Parties and Informal Gatherings: People will be moving around, so you want to create centralised drink stations. A good starting point is to plan for at least one large ice trough for every 50 guests. Grouping several large buckets together works just as well. This approach stops bottlenecks from forming and lets guests help themselves.

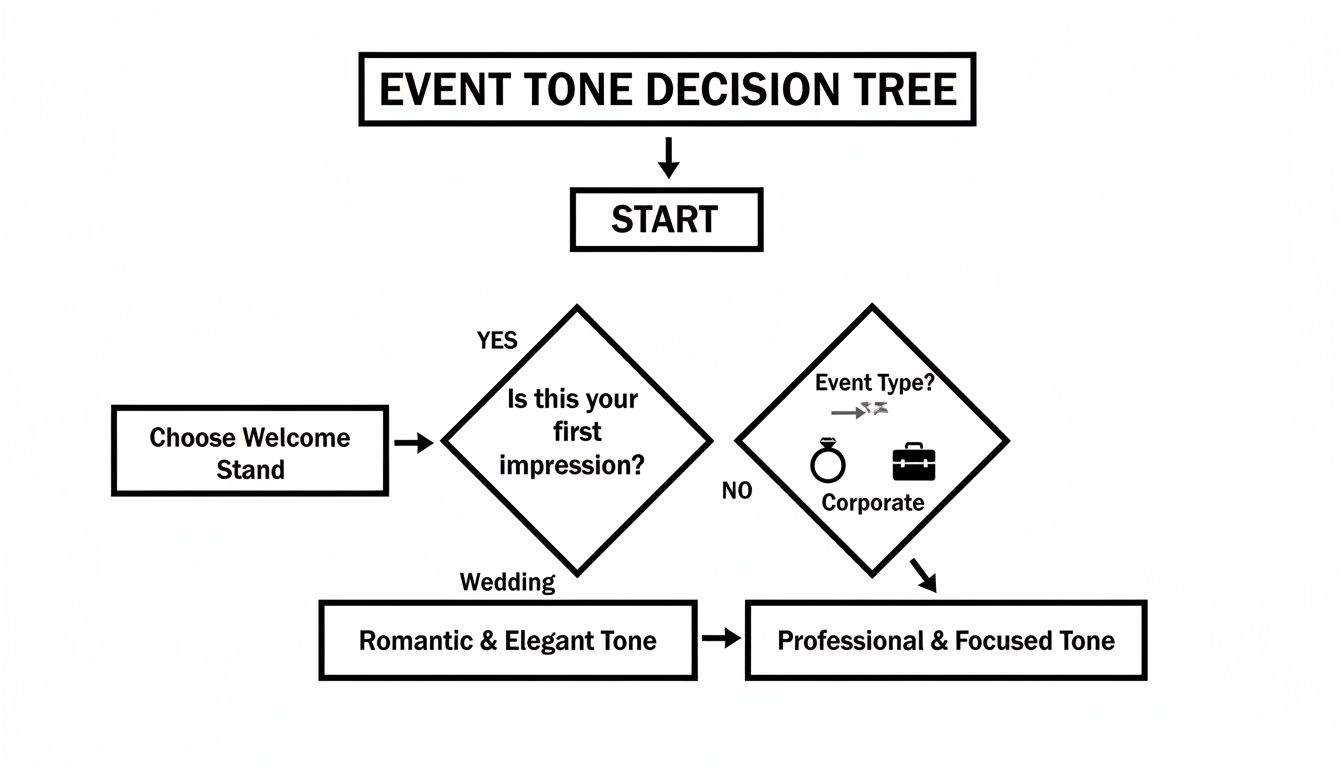
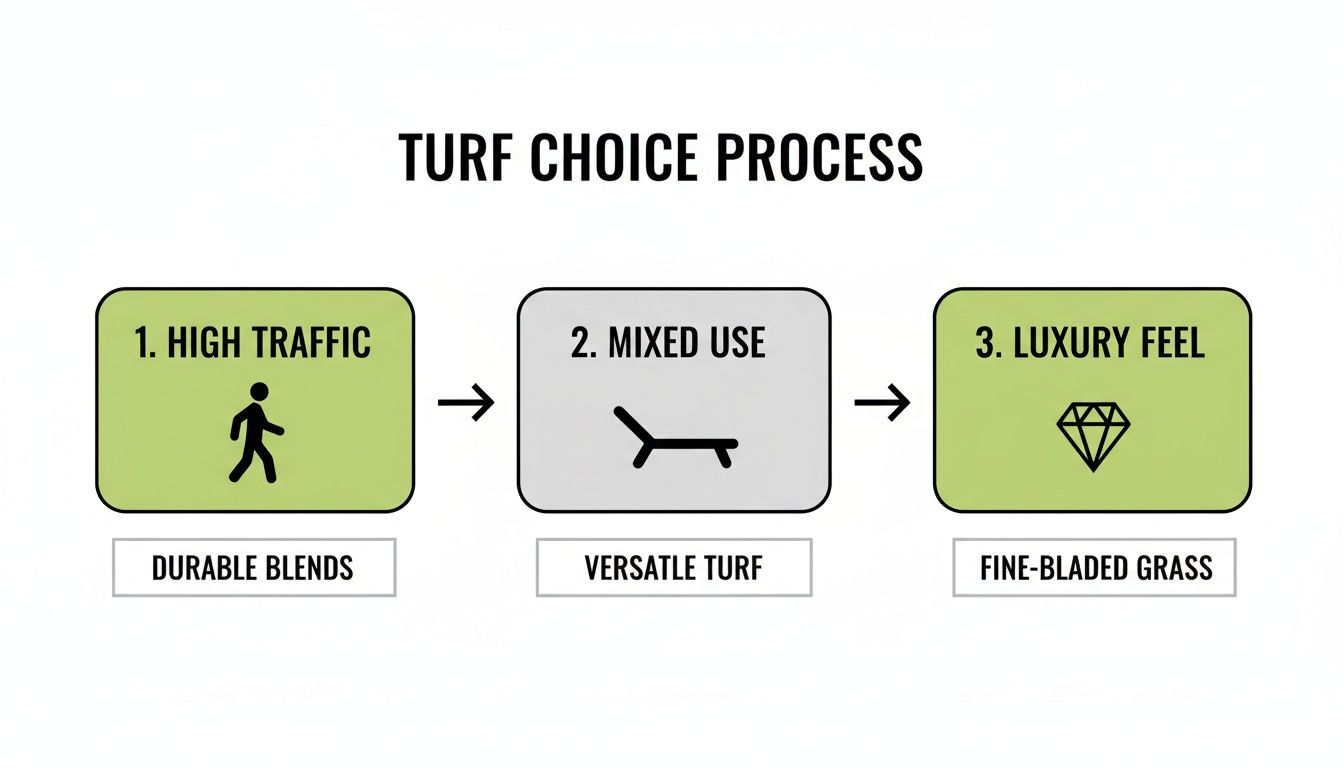
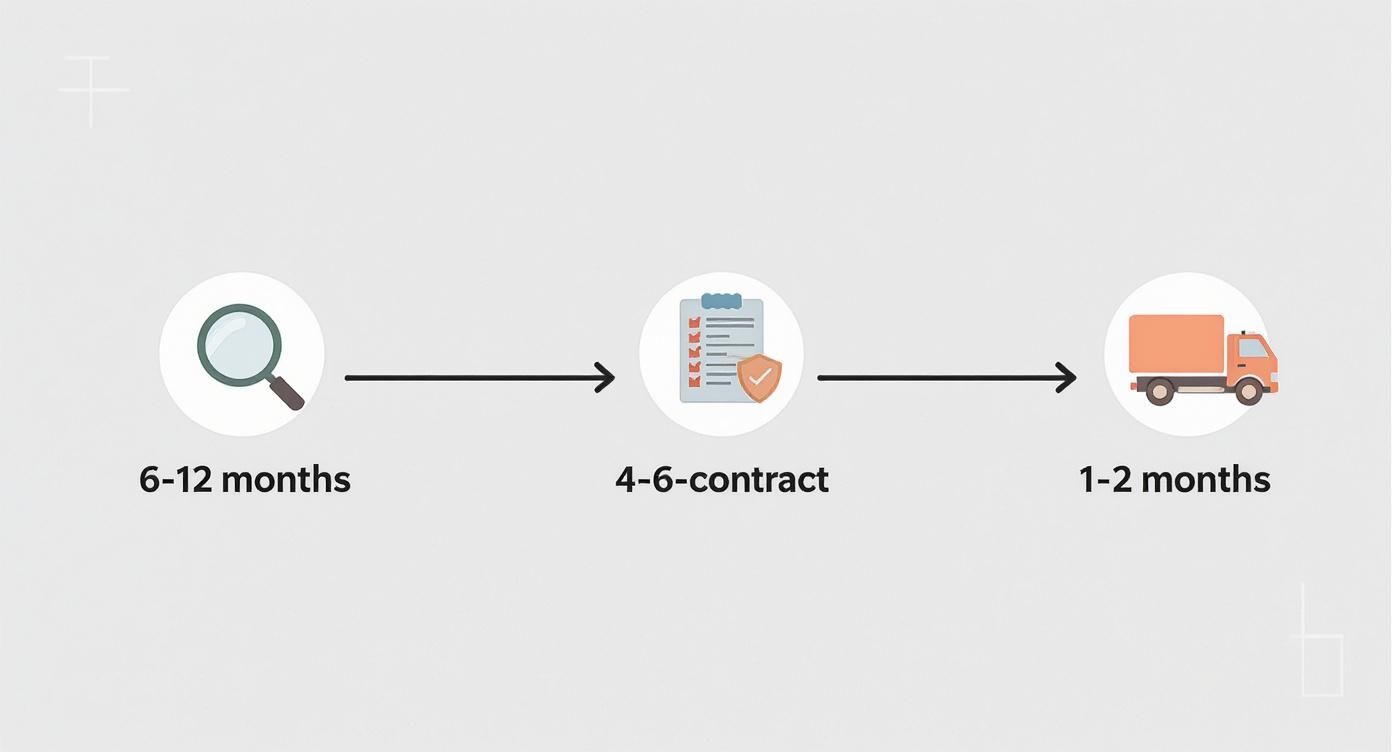
This little flowchart can help you decide on the right style of bucket to match your event’s atmosphere.

Flowchart for selecting ice bucket style: Gala events suggest Stainless, Weddings suggest Galvanized.

As you can see, the formality of your event is a great guide for choosing an aesthetic that enhances your theme instead of clashing with it.

Factor in Event Duration and Beverage Types

Next, you need to think about time and temperature. The ice needed for a two-hour cocktail reception is worlds away from what you'll require for an all-day wedding celebration.

If your event runs for more than three hours, especially in the Western Cape heat, you’ll need a solid plan. It's safe to assume you'll need to restock the ice at least once. This is where insulated ice buckets are a real lifesaver—they can easily double the lifespan of your ice, keeping drinks cold for much longer and meaning your staff aren't constantly running for top-ups.

What you're serving matters, too. Big bottles like champagne magnums will need larger, sturdier buckets to hold them. And if you’re offering a mix of beers, ciders, and soft drinks, you'll find that large tubs or troughs are far more practical than trying to juggle dozens of small, individual buckets.

To help you get a quick visual, here’s a simple table to guide your choices.

Quick Guide to Ice Bucket Sizing and Capacity

Bucket Type or Size Typical Bottle Capacity Best Use Case
4-Litre Bucket 1-2 standard wine bottles Table service at dinners, small gatherings
10-Litre Bucket 3-5 standard wine bottles Small bar stations, VIP areas, larger tables
Large Galvanized Tub 15-20 beers/ciders or 6-8 wine bottles Self-service drink stations, casual parties
Stainless Steel Trough 30+ mixed bottles and cans Main bar area, high-volume cocktail events

This is just a starting point, of course, but it gives you a reliable estimate for the most common event setups. Always think about how your guests will interact with the drinks to make the best choice.

Putting It All Together: A Practical Example

Let's walk through a real-world scenario. Imagine you're planning a wedding for 150 guests in the Winelands, complete with a sit-down dinner followed by dancing.

  1. For the Dinner Service: You have 15 tables (10 guests each). For this part of the evening, you'll want 15 table-top ice buckets—one for each table to hold wine and water.

  2. For the Bar & Dance Floor: Once people start moving away from their tables, you'll need a drink station near the bar. Add two large ice troughs here for beers, soft drinks, and extra bubbly.

  3. Calculating the Stands: To keep table tops clear for place settings and decor, each of the 15 buckets needs its own stand. The two large troughs can be placed on a sturdy table or have their own low stands.

Your final count comes to 15 standard ice buckets and stands, plus two large troughs. This setup makes sure every guest can easily find a cold drink, whether they’re seated for dinner or showing off their moves on the dance floor. For big events, you might also consider extra cooling. Our guide on choosing the right bar refrigerator sizes is a great resource to help you plan for backup chilling.

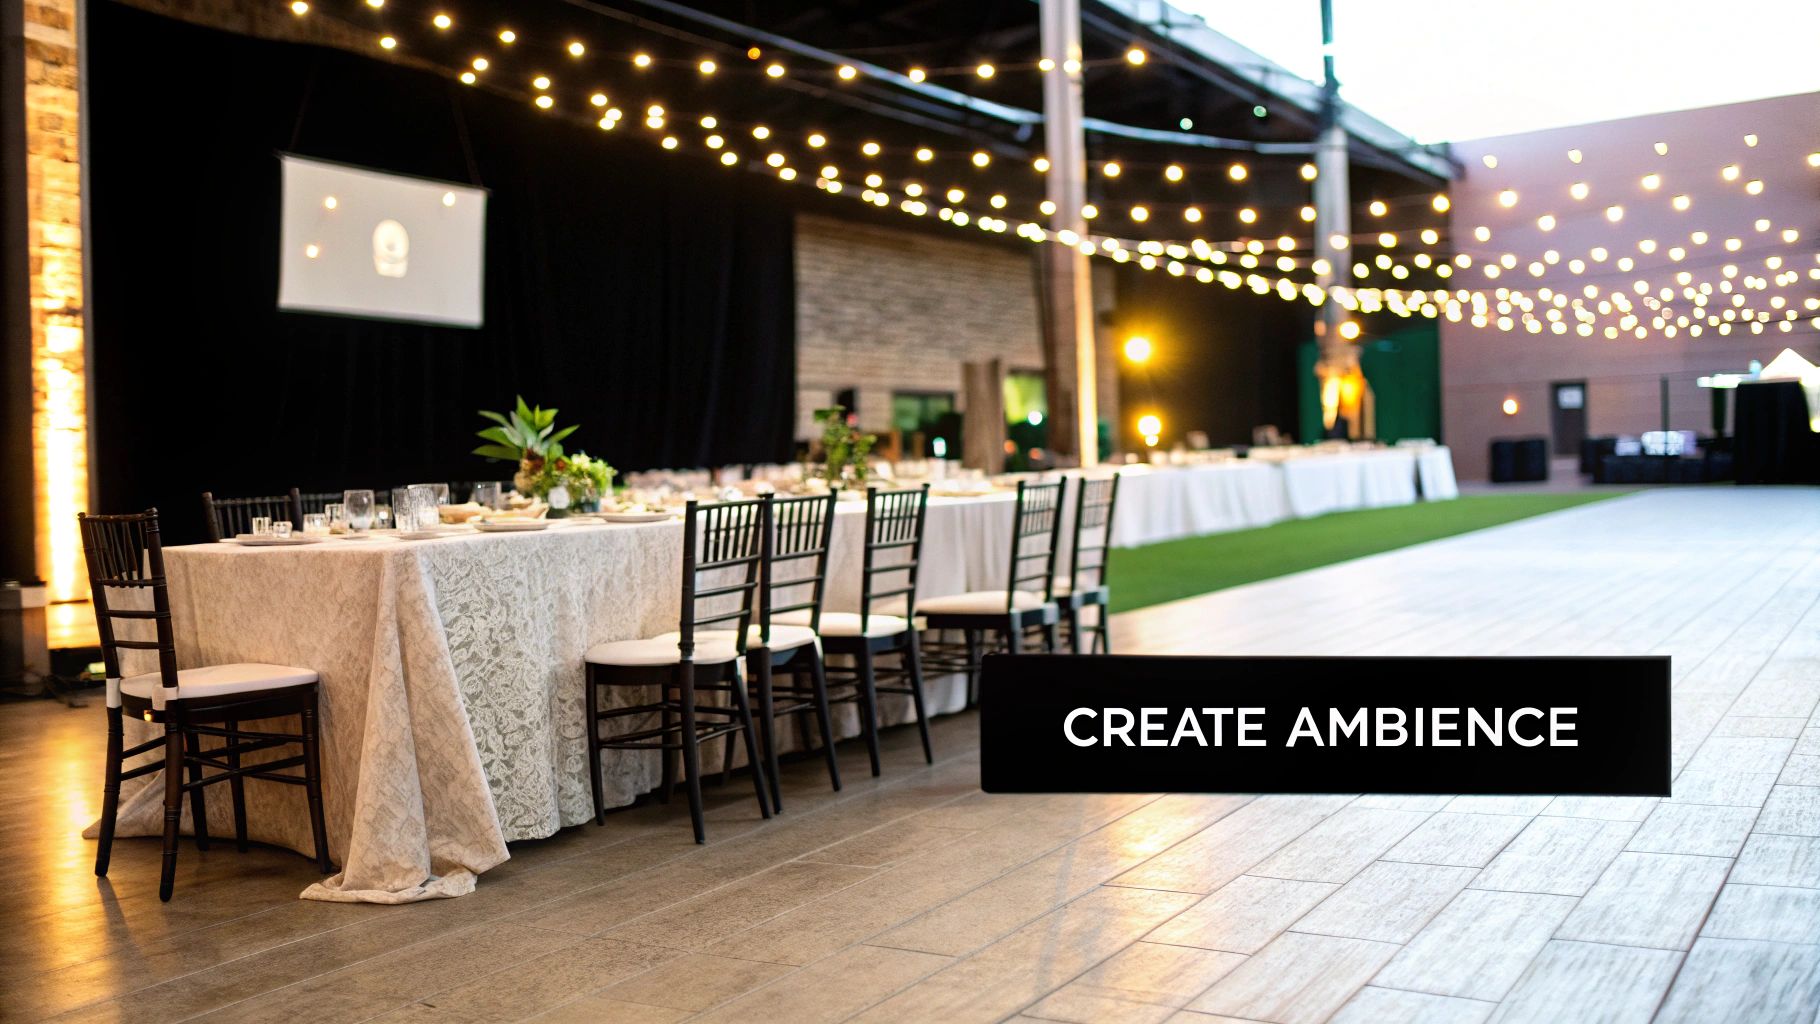
Strategic Placement for Seamless Flow and Style

A large metal ice bucket sits beside a paved pathway leading to an outdoor event setup with tables and umbrellas.

So, you’ve picked out the perfect style and figured out exactly how many ice buckets and stands you'll need. Great! But now for the crucial part: where do you actually put them? This isn't just about finding a spare corner; smart placement is what shapes the entire flow of your event, guiding guests naturally while adding to your overall look.

Think of your beverage stations as destinations. Putting them in the right spots turns a simple necessity into an elegant feature. It draws people in smoothly and prevents those awkward queues and bottlenecks that can kill the vibe.

When the layout feels right, it’s because it’s thoughtful. It anticipates how guests will move, where they’ll likely gather, and what makes the most sense for both their convenience and the visual story you're telling.

Creating Dedicated Beverage Stations

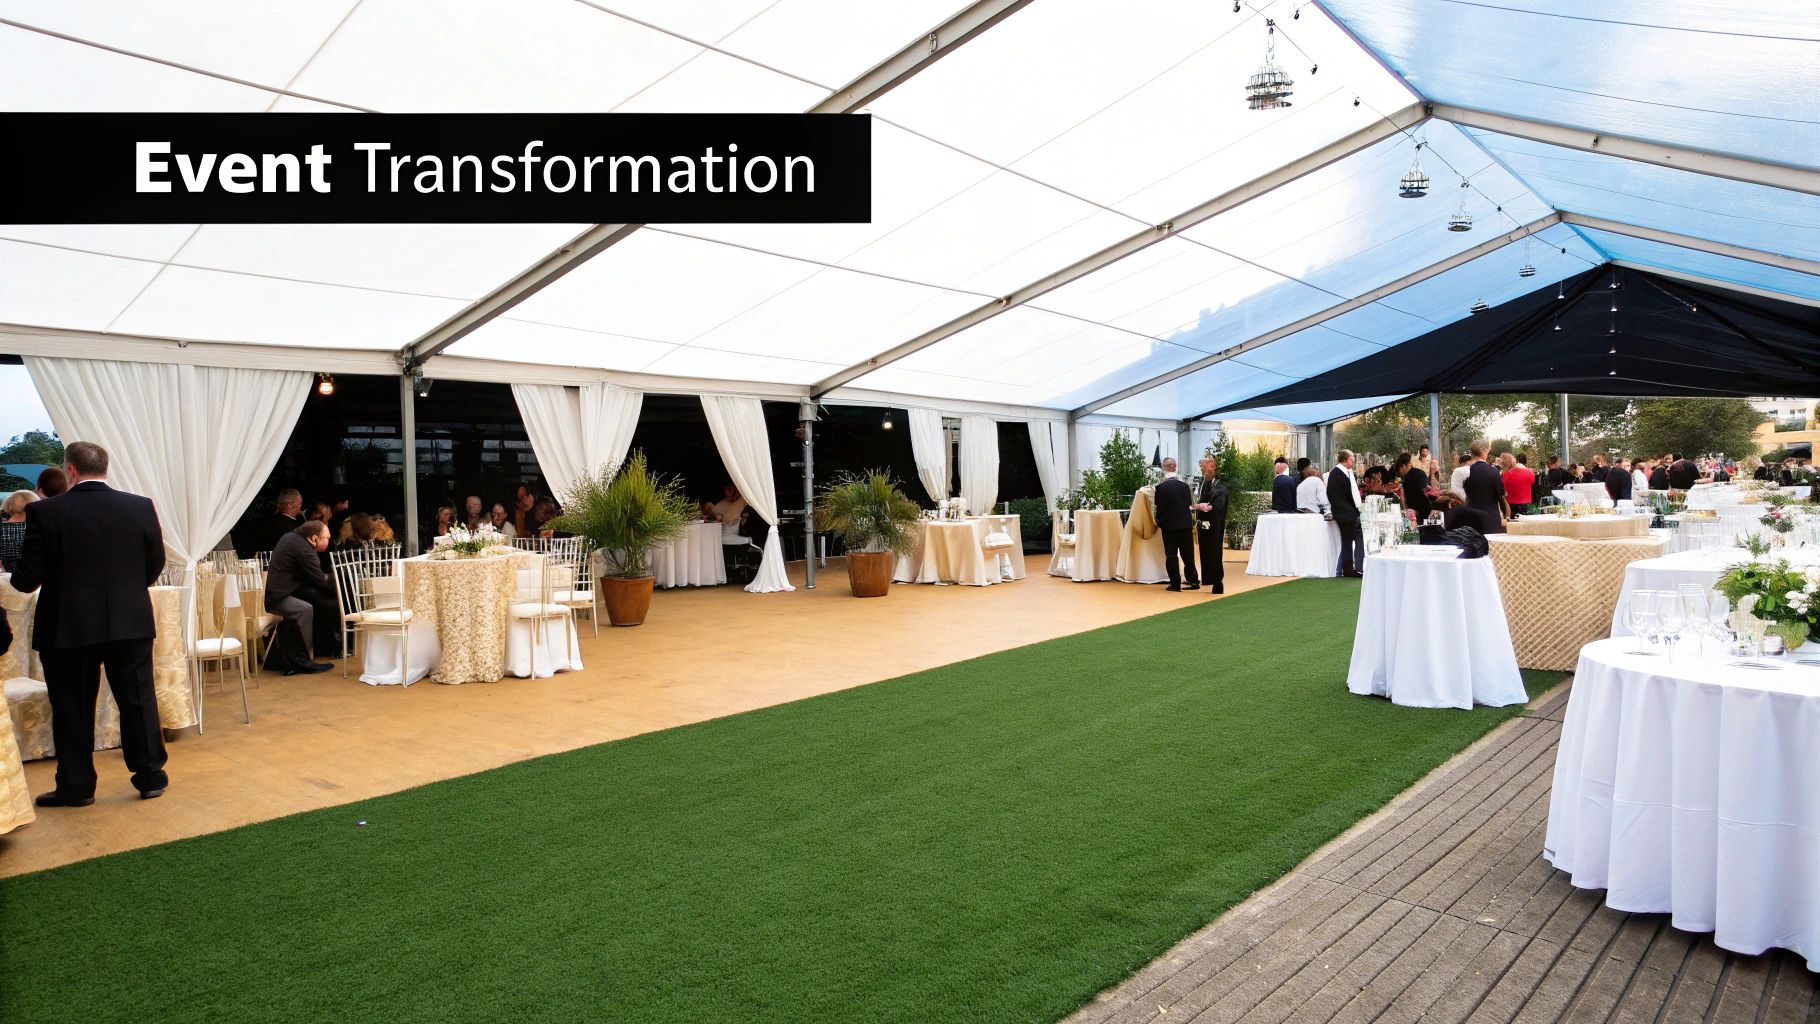
For cocktail hours, brand activations, or any event where guests are up and mingling, you'll want to create dedicated beverage stations. Instead of forcing everyone to a single, crowded bar, you can design several smaller hubs that encourage people to move around and chat. This is where stands really prove their worth.

Using ice buckets and stands, you can set up a stylish, self-service bar area anywhere, even in an open field or a minimalist venue. Try grouping two or three stands with large ice troughs to create a proper station without needing a huge bar counter. This immediately frees up space and spreads your guests out, preventing logjams.

Consider these key placement tips:

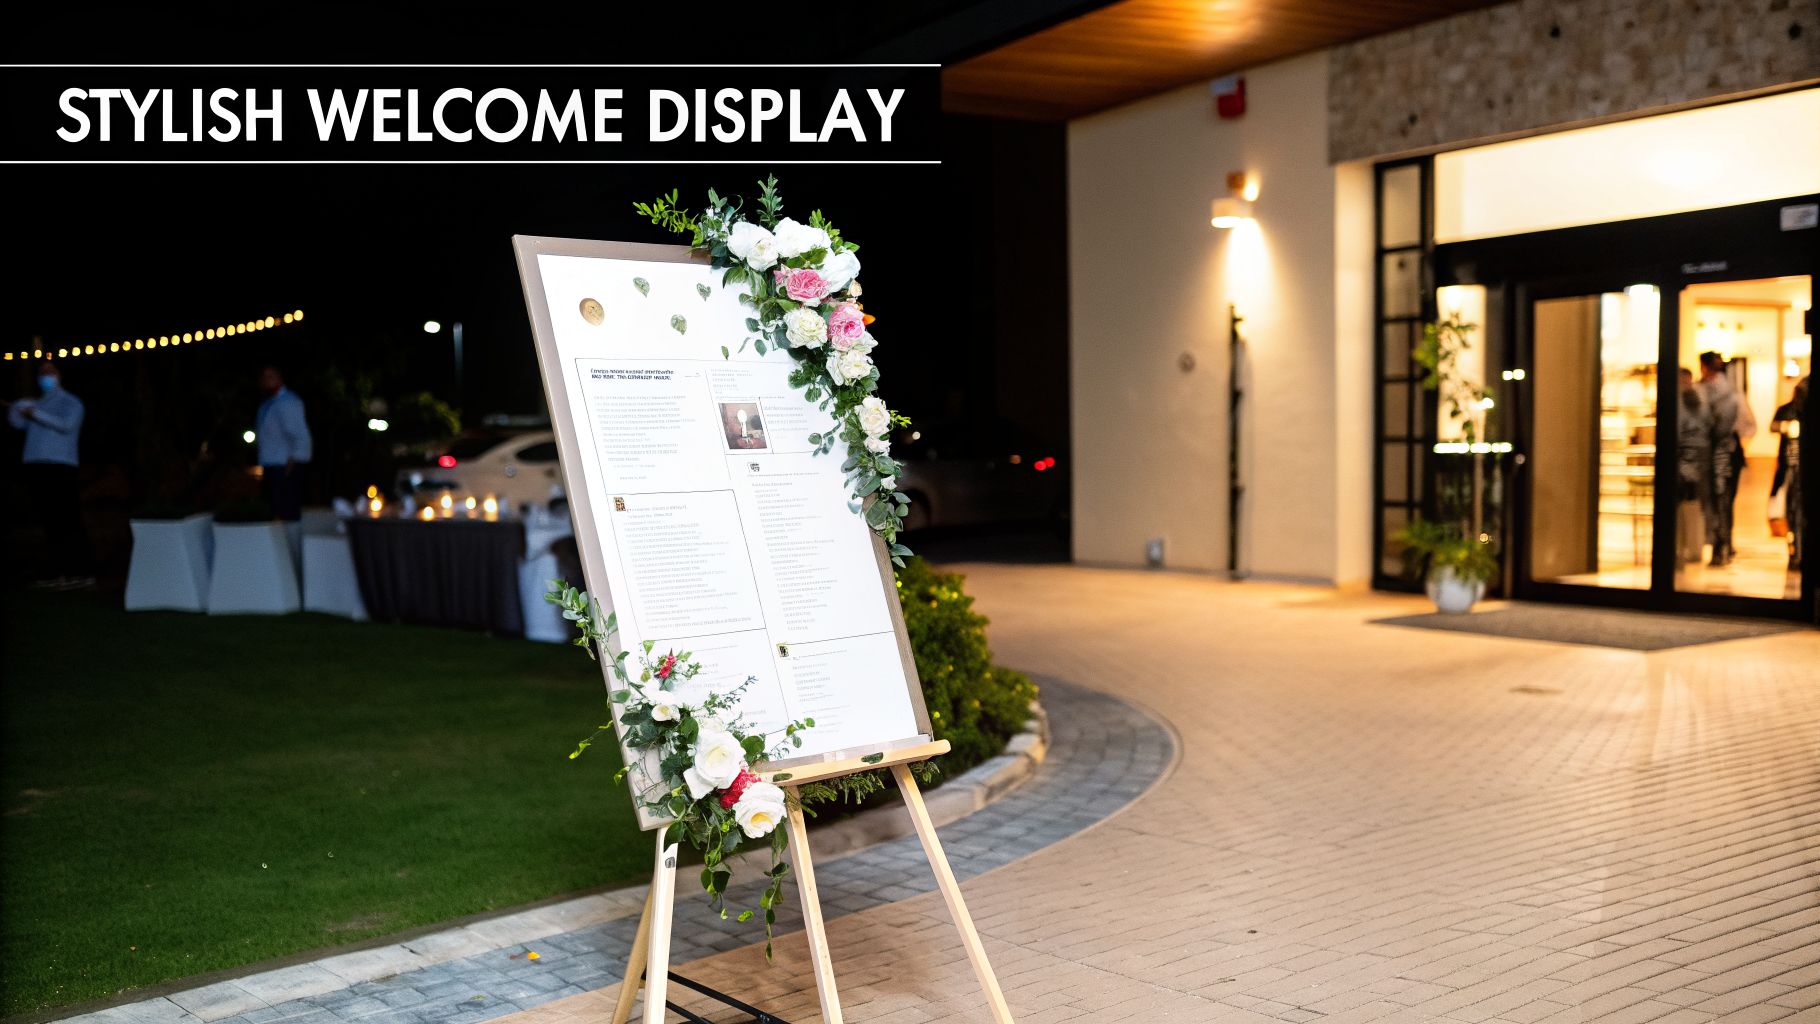
  • Near Entrances and Exits: A station near the main entrance is perfect for that all-important welcome drink. Placing another near an exit to a patio or garden encourages guests to explore.
  • Away from High-Traffic Zones: Make sure stands aren't in narrow corridors or main walkways where they can be easily bumped or knocked over.
  • In Underutilised Corners: Got an empty corner? Turn it into a chic hydration point with a few beautifully arranged ice buckets on stands.

The Elegance of Tableside Service

For more formal, sit-down dinners like weddings or corporate galas, placing an ice bucket on a stand next to each table is a touch of pure class. It’s a simple move that instantly elevates the guest experience, making everyone feel personally looked after.

It’s not just for looks, either—it’s incredibly practical. Guests can top up their wine or water without having to hunt down a waiter, which keeps conversations flowing and gives them a wonderful sense of ease.

The real goal of great placement is to make getting a cold drink feel completely effortless. When your guests don't even have to think about where to find a beverage, you've nailed it.

To create a really cohesive feel, think about how other furniture can work with your ice bucket stations. Our guide on selecting bar tables and chairs has some great ideas for putting together comfortable and stylish social hubs.

Logistical and Safety Considerations

Finally, let's talk about the practical side of things. The safety of your guests and the efficiency of your staff are non-negotiable. Where you place your ice buckets and stands directly affects both. Make sure there’s a clear, easy path for your catering team to get in and out to replenish ice all night long.

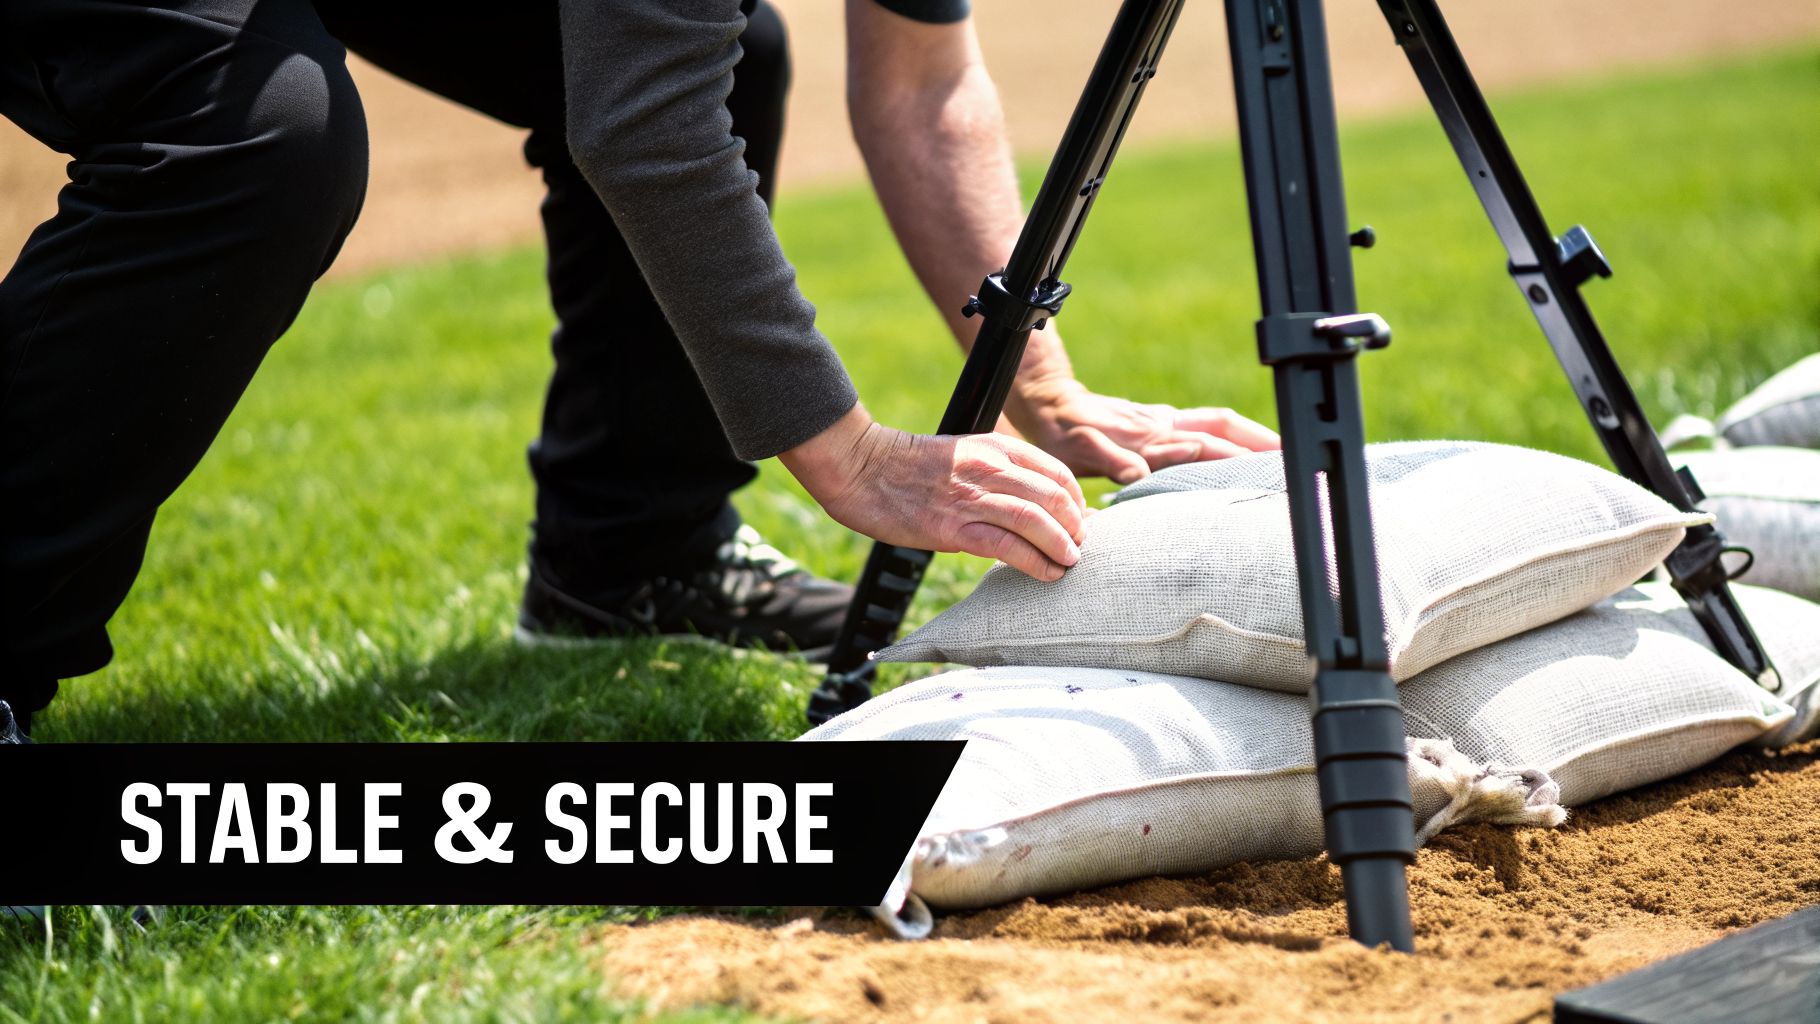
Stands must always be placed on a flat, stable surface. If you’re on grass, do a quick check for dips or uneven ground. For high-energy events with a dance floor, keep the stands well away from the action to prevent any accidents. A little bit of foresight here ensures your event runs smoothly from start to finish.

Essential Accessories and Hygiene Best Practices

An outdoor setup featuring a shiny ice bucket with tongs, stacks of paper cups, and disposable covers, all on a black serving stand.

It’s the small details that really show you know what you’re doing. When it comes to serving drinks, the right accessories for your ice buckets and stands can make all the difference, taking your setup from looking amateur to truly professional. These tools aren't just for show; they’re crucial for hygiene and a smooth guest experience.

Let’s be honest, nobody wants to see guests digging their hands into the ice bucket. It’s not just a bad look, it’s a serious health concern. A simple pair of tongs or a dedicated scoop instantly solves this problem and shows your guests you’ve thought of everything.

This small touch transforms a basic drinks station into a polished, hygienic, and impressive part of your event.

Must-Have Accessories for Every Setup

To get your beverage station running like a well-oiled machine, a few key accessories are simply non-negotiable. Each one has a job to do, improving how things work, keeping it clean, and adding to the overall look.

Here are the essentials that should always go with your ice buckets:

  • Ice Tongs: These are perfect for smaller buckets where guests just need a few ice cubes at a time. Tongs are precise and stop people from rummaging around, keeping the ice sanitary.
  • Ice Scoops: For bigger troughs and party tubs, a scoop is your best friend. Look for one with drainage holes to get rid of meltwater, so your guests get solid ice, not a watery splash in their drink.
  • Drip Trays or Liners: Pop one of these under your buckets and stands to catch condensation. This simple step prevents slippery puddles from forming, which is a major safety win, especially in busy areas.
  • Bucket Liners: Using a non-insulated metal bucket? A plastic liner can be a lifesaver. It adds an extra layer of protection against "sweating," keeping your tablecloths dry and looking sharp.

With these simple additions, you create a self-sufficient, clean, and easy-to-use station that doesn't need constant attention from your staff.

Ice Handling and Hygiene Best Practices

The quality of your ice is just as important as the drinks you're serving. Handling and storing ice correctly is absolutely critical, especially at an outdoor event in the warm Cape Town climate where things can get messy fast.

Think of your ice as a food product. Always start with ice made from clean, drinkable water and keep it in sealed bags until you’re ready to use it. And a golden rule: never, ever handle ice with bare hands. Staff should always use a dedicated scoop.

Here’s an insider tip: the bucket itself matters. When you rent from a reputable supplier like ABC Hire, the equipment is professionally cleaned and sanitised between every event. This gives you a hygienic starting point and removes any risk of contamination from a previous party.

For outdoor events, there's another trick. Keep your backup ice bags in shaded cooler boxes right up until the moment you need to refill the buckets. This will make your ice last so much longer and keep it perfectly fresh.

A Quick Hygiene Checklist

To make sure your beverage service is up to standard, just run through this simple checklist. It’s a straightforward way to keep things safe from setup to clean-up.

  1. Use Clean Equipment: Always double-check that your ice buckets and stands have been properly sanitised before the event starts.
  2. Provide Serving Utensils: Every single ice bucket needs its own tongs or a scoop. No exceptions.
  3. No Hand Contact: Have a strict "no hands" rule for both guests and staff when it comes to touching the ice.
  4. Protect Surfaces: Use drip trays to catch condensation and prevent slips and falls.
  5. Smart Storage: Keep your extra ice in sealed, food-safe bags or containers and out of the sun.

Focusing on these details ensures your event is not only stylish but safe, showing a level of professionalism that every single guest will notice and appreciate.

The Smart Way to Rent Event Essentials in Cape Town

After all that planning, it might be tempting to just buy your event equipment like ice buckets and stands. But for most events, renting is a much smarter, more practical choice. It takes what could be a huge expense and a logistical nightmare and turns it into a simple, cost-effective item on your to-do list.

Hiring your ice buckets and stands isn't just about saving a bit of cash; it's about saving yourself time and a lot of hassle. Think of it as a complete service. You get access to a massive range of top-quality, professional gear without having to buy it or figure out where to put it all when the party’s over.

The Clear Benefits of Renting Over Buying

When you really look at it, hiring your event gear almost always makes more sense. It's a practical move that simplifies everything, letting you focus on what's really important: making sure your guests have an incredible time.

Here are the top reasons why event professionals in Cape Town choose to rent:

  • Significant Cost Savings: Buying dozens of high-quality ice buckets and matching stands is a major investment. Renting gives you the same premium look for a fraction of the price.
  • No Storage Hassles: Where are you going to keep all that bulky equipment afterwards? Renting completely removes that problem, saving you valuable space at home or the office.
  • Zero Cleaning Required: Honestly, who wants to spend hours scrubbing buckets after a long event? Our rental service includes all the post-event cleaning, so you can just pack up and relax.
  • Access to Variety and Style: Your event theme might be sleek and modern one day, and rustic and relaxed the next. Renting means you can pick the perfect style—from shiny stainless steel to charming galvanised tubs—every single time.

Renting lets you create a polished, high-end look for your event without the stress of ownership or breaking the budget. It’s the perfect mix of convenience, style, and smart spending.

Making the Rental Process Work for You

We've made our rental process as straightforward as possible. From your first call to the final pickup, we aim to make it completely effortless. All you do is pick the ice buckets and stands you love from our catalogue, confirm your event date and location, and we take care of the rest.

Our team will get in touch directly with your venue in Cape Town or the Winelands to arrange the perfect time for delivery and setup. This ensures your gear arrives on schedule and is put exactly where you need it, well before your guests start arriving. Once the event is done, we come back to collect everything. You don't have to worry about a thing. For more on how this works, check out our guide on renting furniture for events, which explains the broader benefits.

When you partner with a dependable rental company, you’re not just hiring items. You’re getting peace of mind and making sure your beverage service runs perfectly. It’s the easiest way to bring your event vision to life.

Of course! Here is the rewritten section, crafted to sound natural and expert-driven, following the style and tone of your examples.


Frequently Asked Questions About Ice Buckets

Even the most seasoned event planners have a few last-minute questions. To make sure you feel confident and ready, we’ve put together answers to some of the most common things people ask us about hiring ice buckets and stands for events in and around Cape Town.

Think of this as your quick-reference guide. Getting these details sorted means you can spend less time worrying about logistics and more time focusing on your guests.

How Long Does Ice Last in a Standard Bucket?

This is probably the most practical question we get asked, and for good reason! In a standard, non-insulated bucket at an indoor event, you can expect your ice to last for about 2-4 hours before it starts melting down. If your event is outdoors in the sun, that time can shrink to just 1-2 hours.

For a typical 4-5 hour event, it’s always a smart move to plan for at least one ice top-up to keep things properly chilled.

Pro Tip: For those beautiful events in the Winelands sun, go for insulated buckets or simply place your standard ones in the shade. It’s a small change that makes a huge difference and will seriously extend the life of your ice.

Can I Use Ice Buckets for Drinks Besides Wine?

Absolutely! While they’re the classic choice for wine and bubbly, ice buckets are brilliant for all sorts of drinks. You can use them to set up some really stylish, self-serve stations for almost anything.

  • Craft Beers and Ciders: Big tubs are perfect for showing off a selection of local craft beers and ciders. Guests love being able to browse and grab their favourite.
  • Soft Drinks and Water: Keep canned soft drinks and bottled water ice-cold and easy to reach. This is a must-have for any gathering.
  • Creative Dessert Displays: Here's a fun idea: use smaller buckets on a dessert bar to hold single servings of sorbet or other chilled treats. It's a unique touch that guests will remember.

Their flexibility makes them one of the most useful items you can hire for your event.

What Is the Difference Between a Bucket and a Trough?

The main things setting a standard ice bucket apart from an ice trough are size and how you plan to use it. Knowing which one you need will help you create a much more organised and effective drinks station.

An ice bucket is the smaller option, usually designed to hold one to three bottles. Its neat size is perfect for tableside service at a formal dinner, keeping a bottle of wine chilled and right at hand for your guests.

On the other hand, an ice trough (or tub) is a much larger, often long container built for volume. You can fill it with dozens of bottles or cans at once. Troughs are the go-to solution for a central, high-capacity, help-yourself beverage station at bigger, more relaxed parties where guests can easily see the options and serve themselves.


Ready to find the perfect chilling solution for your next event? From elegant stainless steel stands to large, rustic tubs, ABC Hire has a wide range of high-quality ice buckets and stands to match any theme. Explore our collection at https://abchire.co.za and let us help you keep your celebration perfectly cool.

Your Guide to Choosing the Perfect Welcome Board Stand

A welcome board stand does so much more than just hold up a sign. Think of it as your event's very first handshake—it’s a crucial first impression that sets the whole mood for a wedding, corporate function, or party. It’s the first thing your guests see, offering a warm, organised, and stylish welcome.

Crafting an Unforgettable First Impression

Those first few moments can truly define a guest's experience. That's why a well-placed welcome board stand has become a cornerstone of modern event design, not just a minor detail. It’s what guides your guests from the moment they arrive, making them feel instantly valued and expected.

Whether you're planning an intimate wedding in the Winelands or a large-scale corporate event in Cape Town, this single piece does a lot of heavy lifting. It acts as a guide, a key part of your theme, and a fantastic photo opportunity, all while making sure your event kicks off on a high note.

The Power of a Purposeful Welcome

A great welcome does more than just point people in the right direction. It communicates the exact style and feel of your celebration from the moment guests step out of their cars. A rustic wooden easel, for instance, whispers romance and charm, while a sleek metallic frame communicates a more modern, professional vibe.

The right welcome display can:

  • Set the Event's Tone: It instantly tells guests if the atmosphere is formal, casual, rustic, or glamorous.
  • Provide Clear Direction: No more confusion! It guides everyone to the ceremony, reception, or registration area.
  • Create a Photo-Worthy Moment: It naturally becomes a popular backdrop for guest photos, which often generates a great buzz on social media.
  • Reinforce Your Theme: A good stand integrates perfectly with your colour scheme and decor, tying the whole look together beautifully.

If you're looking for some creative inspiration on how to make your welcome truly pop, it’s worth exploring different Church Welcome Sign Ideas for a warm, inviting atmosphere.

A welcome board stand is your event's silent host. It greets every guest with purpose and style, making them feel attended to before they've even met anyone.

Meeting Rising Event Expectations

These days, guests expect personalised details. Here in the vibrant wedding scene of Cape Town and the Winelands, welcome board stands are now a non-negotiable staple. As local rental suppliers, we’ve seen a 45% increase in bookings for these customisable displays. This demand is part of a bigger trend, especially with Cape Town having hosted over 2,300 weddings recently.

We've also noticed that these stands can boost social media shares by up to 40% among engaged couples in the Winelands, turning a simple greeting into a moment people want to capture and share. A thoughtful welcome isn't a luxury anymore—it's essential for creating that immediate 'wow' factor.

How to Choose the Perfect Stand for Your Event

Your welcome board stand is more than just a prop; it’s one of the first things your guests will see. It sets the tone for your entire event, so getting it right is about balancing style with stability. A beautiful welcome sign deserves a stand that not only looks the part but can also hold it securely.

Think of it this way: a rustic wooden easel just feels right for a relaxed wedding in the Franschhoek Winelands. For a sleek corporate gala in the heart of Cape Town, however, a polished gold or minimalist black metal frame makes a much stronger statement. The stand should feel like a natural extension of your event’s theme.

Matching the Stand to Your Vibe

The material of your stand says a lot. Before you choose, think about the atmosphere you're trying to create. Most of the stands you’ll find fall into a few key categories.

  • Wooden Easels: These are a go-to for anything rustic, bohemian, or outdoorsy. A classic wooden easel brings a warm, organic touch that’s perfect for farm weddings and laid-back celebrations.
  • Metal Frames: This is where you get real versatility. Gold and rose gold frames add instant glamour, making them ideal for formal weddings and milestone birthday parties. For a clean, modern aesthetic at a corporate function, you can’t go wrong with black or silver metal.
  • Acrylic Stands: If you’re after a chic, contemporary look, a clear acrylic stand is a showstopper. It creates a cool “floating” effect that lets your welcome board’s design take centre stage.

To help you visualise the options, here's a quick decision-making guide we've put together based on the events we've helped create.

A flowchart event tone decision tree, guiding choices for welcome stand, wedding, or corporate events.

Welcome Board Stand Selector: Matching the Stand to Your Event

Choosing the right stand can feel overwhelming, so we've created this simple table to help you match the material and style to your event type and venue. It's a quick-reference guide to make sure your choice is a perfect fit.

Event Type Recommended Stand Material Recommended Style Best Suited Venue
Rustic Wedding Wood Natural, Weathered Easel Winelands estates, farms, outdoor settings
Formal Wedding Metal (Gold/Rose Gold) Ornate, Elegant Frame Ballrooms, boutique hotels, upscale venues
Modern Wedding Acrylic or Metal (Black) Minimalist, Clean Lines Art galleries, modern event spaces, city lofts
Corporate Gala Metal (Gold/Black/Silver) Sleek, Professional Frame Conference centres, hotels, convention halls
Birthday Party Metal or Wood Fun, Versatile Easel or Frame Restaurants, private homes, gardens
Baby Shower Wood or Metal (White/Gold) Sweet, Decorative Easel Homes, cafes, garden venues

Use this as a starting point. The most important thing is that the stand complements your overall decor and helps create the atmosphere you've envisioned for your special day.

Getting the Size and Weight Right

But it's not just about looks. Practicality is just as important. The single most important thing to know before you hire a stand is the exact size and approximate weight of your welcome board. A flimsy stand and a heavy, oversized A0 board are a recipe for disaster, especially if there's a breeze!

Most of our stands are designed for standard signage sizes—A2, A1, and A0—with A1 being the most popular choice for welcome boards. Always double-check with us that the stand you're eyeing can handle your board's specific dimensions. It’s always better to go for a slightly sturdier option if you’re unsure.

Pro Tip: If your board is an unusual shape, extra large, or made from a heavy material like solid wood, give us a call. We can recommend a heavy-duty solution to ensure everything stays upright and looks flawless.

Thinking about other ways to create visual interest at your event? For more ideas on how to display everything from floral arrangements to your wedding cake, have a look at our guide on finding the perfect plinth for hire. By carefully considering the style, material, and practical specs, you’ll find a stand that perfectly showcases your welcome board.

Assembly and Placement for a Flawless Display

You've got the perfect welcome board, but a wobbly or tilted stand can spoil the whole look. Getting the setup right is what creates that polished, professional first impression. Luckily, we’ve got a few insider tricks to make sure your display is stable, secure, and perfectly positioned from the moment your first guest arrives.

A person carefully places sandbags around the legs of a black tripod for enhanced stability on grass and dirt.

Most professional stands, from easels to frames, are designed to be set up in minutes. For a typical easel, it's a simple case of unfolding the tripod legs and adjusting the back leg to get that slight, stable backward lean. Frame stands are often even easier—just slot the frame into its base.

The real secret? Make sure every component is fully extended and locked securely in place before you even think about putting the board on top.

Securing Your Stand for Outdoor Events

Outdoor events are stunning, but they come with their own challenges—especially in the beautiful but notoriously windy Cape. The last thing you want is a sudden gust of wind sending your welcome sign flying. Proactively securing your stand isn't just a suggestion; it's a necessity.

Your main goal is to add weight and stability right at the base. Here’s how we do it:

  • Sandbags or Weights: This is the industry standard for a reason. A couple of discreet sandbags or custom weights placed over the legs of a tripod easel will keep it firmly on the ground.
  • Ground Pegs: If you’re setting up on a lawn or any soft ground, you can use ground pegs or stakes to anchor the stand’s feet directly into the earth.
  • Strategic Placement: Think like a sailor and use your surroundings. Tucking the stand into a sheltered spot—against a wall, near a hedge, or under a covered entrance—can dramatically cut down its exposure to the wind.

Don't underestimate the "Cape Doctor"! We always recommend using at least two 5kg sandbags for any outdoor welcome board stand in the Winelands or along the coast. It’s a simple step that provides complete peace of mind.

Weatherproofing Your Welcome Display

Wind isn't the only thing to think about. You also need a plan for sun and potential rain. A little bit of prep work will keep your sign looking vibrant, no matter what the weather decides to do.

If your board is printed on paper or cardstock, it’s going to be vulnerable to moisture. A great little hack is to have a clear plastic sleeve or a piece of acrylic cut to size. Keep it handy, and if the clouds start to gather, you can slip it right over the sign. It offers full protection without hiding your beautiful design.

For sunny days, glare is your enemy. A matte-finish board will always be easier for guests to read in bright sunlight compared to a high-gloss one. We also suggest you think about where the sun will be when your guests are arriving. Try to position the stand to avoid that direct, harsh light that can create reflections and wash out the colours of your board.

Making Your Welcome Display Unforgettable

A stylish welcome display board on an easel, decorated with flowers, at an outdoor evening event.

Your welcome board stand is the first thing your guests will see, so think of it as your event’s opening statement. With a few creative touches, you can turn a simple sign holder into a real showpiece that sets the tone for the entire occasion. It’s all about mixing the right decorative elements with smart lighting to create a first impression that lasts.

For a wedding, especially in a breathtaking setting like the Winelands, you can’t go wrong with lush flowers. We often see a beautiful garland of greenery and fresh blooms draped over a corner of the stand for a touch of soft elegance. For corporate events, it’s more about sharp branding—think sleek, custom logos or using the brand’s colours in the display itself.

How to Attach Decorations Securely

When you're adding decor, you need a gentle hand. The last thing you want is to damage the stand's finish, so things like strong glues, nails, or staples are completely out. Instead, there are a few simple tricks we use to get a secure, professional look without leaving a mark.

Here’s what you’ll need in your toolkit:

  • Soft Floral Wire: This is your best bet for attaching flowers and greenery. It’s flexible enough to bend into any shape but strong enough to hold everything in place, and you can easily hide it in the foliage.
  • Ribbon or Twine: Why not make the ties part of the decoration? Choose a ribbon that complements your colour scheme to tie on any extra embellishments.
  • Fishing Line: When you want something to look like it’s floating, clear fishing line is the secret. It’s practically invisible and perfect for securing lighter items like balloons or draping fabric.

The goal is to make your decor look like it belongs there, not like it was stuck on at the last minute. Make sure everything is tied on tight so it can withstand a bit of a breeze, especially for outdoor events.

Lighting Up Your Welcome Board

Good lighting is what separates a nice welcome display from a truly spectacular one, particularly after sunset. The right light immediately draws attention, makes your decorations pop, and ensures your message is easy to read. A well-lit welcome board creates a bit of magic and makes guests feel instantly invited.

Here are a few lighting ideas that always work:

  • Uplighting: Just place a small, battery-powered uplighter at the foot of the stand and angle it upwards. It creates a dramatic, polished glow that highlights both the board and your floral arrangements.
  • Fairy Lights: For a more whimsical, romantic vibe, you can’t beat fairy lights. We love seeing them wrapped around the stand’s legs or woven through greenery. Warm white lights give off a soft, enchanting feel.
  • Integrated LEDs: Some of our more modern stands have built-in LEDs. They offer a clean, futuristic look that’s a hit at parties and corporate launches.

These lighting tricks have become a massive trend for school formals. For matric dances across Cape Town, a lit-up welcome stand is now a must-have for the perfect entrance photo. In fact, rental suppliers in the Winelands have seen a 38% preference for neon-lit options that really stand out against the night sky. On a practical note, coordinators have also found these clear focal points reduce guest confusion by 45%.

By putting some thought into your decor and lighting, your welcome board becomes more than just a sign—it becomes a centrepiece. It elevates the whole look of your event and creates a warm, engaging atmosphere from the moment guests arrive. For even more ideas on making a statement, check out our guide on using backdrops to hire to perfectly complement your welcome display.

Event Rental Logistics for Local Planners

Sorting out the logistics for your event can feel like a huge puzzle, but hiring your welcome board stand should be one of the easiest pieces to slot into place. For our fellow event planners here in Cape Town and the Winelands, a smooth rental process really just boils down to clear communication and good timing.

We've been doing this for a long time, so let's walk you through the essentials, from your first enquiry right through to the seamless collection after your event is done and dusted. Knowing the flow helps you plan with confidence, and our whole process is designed to be dead simple.

Booking Your Welcome Board Stand

Timing is everything, especially during the mad rush of wedding season from September to May. To make sure you get the exact style you've got your heart set on, we always recommend booking your welcome board stand at least four to six weeks in advance. If you’re eyeing a specific stand or have a popular date, booking even earlier is a very smart move.

When you’re ready to get in touch, having a few key details handy will make the process a breeze.

Try to have this info ready:

  • Event Date and Times: We need the exact date, of course, but also the time your guests are expected to arrive.
  • Venue Name and Full Address: This is essential for our delivery and collection routes.
  • Board Dimensions: Just the height, width, and a rough idea of your welcome board's weight is perfect to ensure we give you a stand that fits perfectly.

With these details, we can quickly confirm availability, give you an accurate quote, and lock in the ideal stand for your big day. To keep all your supplier info in one place, you might find our event planning checklist template super helpful.

Delivery, Setup, and Collection

Coordinating with your venue is a key step we handle for you. We’ll chat directly with the venue’s coordinator to sort out a convenient drop-off time, which is usually the morning of the event or the day before.

Our team will then assemble the welcome board stand right where you want it, making sure it’s completely stable and looking picture-perfect.

After the party’s over, we’ll arrange a collection time that works for the venue. You won’t have to worry about a thing; our goal is to make it a completely hassle-free experience from start to finish.

Our Pro Tip: Think about bundling your rentals. If you’re also hiring tables, chairs, or lighting from us, adding a welcome board stand to the same order can seriously streamline your logistics and often makes your budget stretch further.

The corporate world has definitely caught on. We're seeing more and more corporate event managers in Cape Town using our welcome board stands for brand activations, especially as the Western Cape's corporate scene continues to boom. Our versatile stands—in white, gold, black, or rose gold—have seen a 22% uptake for these types of events in Cape Town, Stellenbosch, and Paarl. Planners often tell us the simple setup helps them cut logistics costs by up to 15%.

To make sure your welcome board fits perfectly with your event's theme, a detailed corporate event planning checklist can be a lifesaver. It helps ensure every little detail contributes to a cohesive and impressive experience for your guests.

Your Welcome Board Stand Questions, Answered

Planning an event in Cape Town or the Winelands means thinking about every little detail. We get a lot of questions about our welcome board stands, so we've put together the answers to the most common ones right here.

This should clear things up and help you tick one more thing off your planning list!

What Size Welcome Board Do Your Stands Hold?

Our stands are built to be versatile. They can securely hold all the standard board sizes, from A2 right up to A0.

Most of our clients, whether for weddings or corporate functions, find that an A1 board is the perfect fit. It’s big enough to make an impact without taking over your entrance space.

When you book with us, just let us know your board's dimensions and rough weight. That way, we can make sure we provide the perfect, most stable stand. If you’ve got something custom-made or unusually heavy, it’s best to have a quick chat with our team so we can recommend a heavy-duty option.

Can I Use a Welcome Board Stand Outdoors?

Absolutely! A lot of our stands are designed for outdoor use. But, as anyone planning an event here knows, you have to be ready for that famous Cape wind, especially in the Winelands or along the coast.

Taking a few extra steps is always a good idea.

We highly recommend using weights, like sandbags, on the legs of any easel-style stand to keep it anchored. It also really helps to place the stand in a sheltered spot, like up against a wall or under a covered patio.

If you’re worried about the wind at your venue, just ask. We’re always happy to point you towards our most wind-resistant stands.

Do You Offer Delivery and Setup Services?

Yes, we do. We offer a full-service experience that includes delivery, professional setup, and collection anywhere in Cape Town and the surrounding Winelands. We’ll even coordinate directly with your venue to make it all happen without you having to worry.

Our team makes sure your stand is delivered on time, assembled properly, and placed exactly where you envisioned it. It’s all about letting you focus on your event while we handle the logistics to make sure your entrance looks perfect.

How Should I Decorate a Hired Stand?

Please do! We love seeing our stands personalised to fit an event's theme. Adding your own touch with floral arrangements, beautiful fabrics, or even balloons is what makes the setup unique.

All we ask is that you use methods that won’t damage the stand’s finish, so it stays looking great for the next event. The best options are:

  • Soft floral wire for attaching flowers and greenery.
  • Ribbon or twine, which can also be part of the decoration.
  • Clear fishing line for an almost invisible look.

Please avoid using anything like nails, staples, or strong glues, as they can cause permanent damage. A little care goes a long way in creating a stunning display!


Ready to create a stunning first impression? ABC Hire offers a wide selection of stylish and sturdy welcome board stands perfect for any event in Cape Town and the Winelands. Explore our range and book the perfect stand for your special day at https://abchire.co.za.

A Guide to Fake Grass Carpet for Cape Town Events

You've probably seen it at a chic wedding or a high-end corporate launch and not even realised it. A fake grass carpet, or synthetic turf, is one of the best-kept secrets in the event industry. It's a man-made surface that looks and feels just like the real thing but without any of the hassle.

For us event pros, it's a total game-changer. It offers a lush, green, and consistently perfect surface for any occasion, instantly elevating a space from ordinary to outstanding.

How Fake Grass Carpet Can Redefine Your Event Space

A formal outdoor event under a large tent with guests, tables, and artificial grass.

Picture this: you transform a standard marquee into what feels like a secret garden, or turn a plain rooftop bar into a vibrant lawn party. That's the real power of fake grass carpet. It's more than just flooring; it’s a tool for creating truly immersive experiences right here in Cape Town.

This versatile surface solves so many common event headaches. It’s perfect for protecting delicate venue floors from stiletto heels and heavy foot traffic. Imagine hosting an outdoor wedding in the Winelands—even if there’s an unexpected downpour, your guests have a clean, mud-free surface to walk on.

Beyond Aesthetics: The Practical Advantages

While the vibrant green look is a huge draw, the appeal of a fake grass carpet goes much deeper. Event planners love it for a whole host of practical reasons that have a direct impact on an event’s success.

  • Venue Protection: Laying down turf is a brilliant way to protect expensive or historic flooring from scuffs and spills. It’s a simple step that helps ensure you get your full deposit back.
  • Comfort Underfoot: Good quality turf is surprisingly soft and comfortable for guests, which makes a huge difference during long events where people are standing for hours.
  • Weather Resilience: Unlike real grass, it won’t turn into a muddy mess in the rain or develop scorched, dry patches under the fierce Cape Town sun. It guarantees a flawless look, no matter the weather.
  • Creative Flexibility: It’s essentially a blank canvas for any theme. It pairs just as well with elegant wedding furniture as it does with modern corporate branding. You can explore even more options by looking into a full décor hire in Cape Town.

A Growing Trend in South Africa

The demand for synthetic turf is definitely on the rise. The South African artificial grass market was valued at USD 16.59 million in 2023 and is set to grow even more. This isn't just a fad; it's driven by real factors like water conservation and the move towards sustainable, low-maintenance solutions—all major considerations in the events industry.

For event professionals, this trend means we have more access to better quality options than ever before. Using fake grass carpet is no longer a niche choice; it’s a mainstream strategy for creating memorable and visually stunning events.

Selecting the Right Turf for Your Event's Vibe

Choosing the right fake grass carpet is about so much more than just picking a shade of green. The turf you select can completely define the atmosphere of your event, turning a plain venue into a luxurious lounge or a high-energy dance floor. It all comes down to matching the turf’s specific characteristics to your vision and the practical needs of the day.

The first thing I always look at is the pile height — that’s just the technical term for the length of the individual grass blades. This one detail has a massive impact on the look, the feel, and even how well the turf holds up underfoot. Think of it like choosing a fabric; some are designed for pure elegance, while others are built to last.

Matching Pile Height to Event Flow

For high-traffic areas, a short, dense pile of around 15-20mm is your absolute best friend. Picture a busy corporate product launch or a cocktail party where guests will be on their feet, mingling for hours. This shorter turf is tough, easy to walk on (even in heels!), and gives you a solid, stable surface for tables and chairs.

If you’re after a more versatile, all-rounder, a medium pile of about 25-30mm strikes the perfect balance. It feels much softer and more cushioned, which is fantastic for creating relaxed lounge areas or defining different zones within a bigger space. It's comfy enough for guests to sit on but still sturdy enough for a good amount of foot traffic. You can get some great ideas on how to pair different turf types with other rental items in our guide to furniture for hire in Cape Town.

And when you really want to dial up the luxury, nothing beats a long, plush pile of 35-40mm. This is what you want for a VIP section, an intimate wedding ceremony, or a dreamy bohemian-style picnic. The softness creates an unforgettable experience, but it’s definitely best kept for lower-traffic, more exclusive areas.

Pro Tip: Don't be afraid to mix and match pile heights for events with different zones. I often use a short pile for the main walkways and dance floor, then switch to a longer, plusher pile for a dedicated chill-out lounge. It creates a brilliant visual and tactile separation between the spaces.

Comparing Fake Grass Carpet for Different Event Needs

Use this comparison to select the ideal turf characteristics for your specific event type and desired atmosphere.

Feature Short Pile (15-20mm) Medium Pile (25-30mm) Long Pile (35-40mm)
Best For High-traffic areas, walkways, exhibitions Lounge areas, garden parties, general event use VIP zones, wedding ceremonies, luxury picnics
Feel Underfoot Firm & stable, similar to a putting green Soft & cushioned, balanced comfort Very plush, deep & luxurious
Furniture Stability Excellent; provides a solid base Good; suitable for most furniture with care Fair; best for low-slung seating & floor cushions
Durability Very high; withstands heavy foot traffic High; great for moderate to heavy use Moderate; suited to lower traffic areas
Appearance Neat, clean & manicured Natural & versatile look Lush, dense & ultra-realistic

Ultimately, the goal is to create a seamless experience for your guests, and the right turf choice is a huge part of that.

Colour and Quality Considerations

The colour of your fake grass carpet also plays a huge role in the final look. A vibrant, bright green is perfect for that fresh, summer lawn feeling. But sometimes, a more subtle, natural tone with hints of brown thatch can give a far more sophisticated and realistic look that works beautifully with an elegant theme.

Beyond how it looks, you have to check the quality of the rental turf itself. For any event here in sunny Cape Town, UV protection is completely non-negotiable if you don't want the colour fading in the sun. Also, take a close look at the backing. A durable, high-quality backing is what keeps the turf lying flat, stops the edges from curling up, and ensures it can handle a busy event day without tearing or shifting around. Getting this right is all about balancing that visual "wow" factor with these essential practical details.

Nailing the Installation for a Flawless Finish

The secret to making fake grass look incredible isn't just the turf itself—it's all in the installation. A rushed job can leave you with visible seams, bumpy surfaces, or trip hazards. Those are the kinds of details that guests (and photographers) always spot. The goal is to make the turf look like it belongs there, creating a completely seamless, lush green floor.

For any high-end event, especially at Cape Town's top venues, a perfect temporary installation comes down to planning long before the truck even arrives. It's about more than just a quick length-times-width calculation; you have to think about the unique quirks of the space.

Measuring for Tricky Spaces

Let's be honest, most event spaces aren't perfect rectangles. You’ll almost always run into pillars, tent poles, curved stages, or built-in bars that you need to work around. The best way to handle these is to ditch the basic measurements and draw a quick floor plan sketch.

  • Measure around obstacles: Take separate measurements for every pillar or fixed object you need to cut around.
  • Add a buffer: This is non-negotiable. Always add an extra 5-10% to your total material order. This "waste factor" is your safety net for any cutting mistakes or tricky angles.
  • Plan your roll direction: Think about the main view for guests. Laying the turf rolls so the grass blades (the pile) all face the entrance or main stage gives you the most natural and professional look.

A great installation is one where you can't see the seams. An invisible join not only looks amazing in photos but also keeps guests safe as they walk around.

Prepping the Venue Surface

You'll be working on all sorts of surfaces, from polished concrete in a warehouse to delicate old wooden floors or even a perfectly manicured lawn you can't damage. The trick is to use non-permanent methods that protect the original flooring and keep the venue happy.

For hard surfaces like concrete, tile, or wood, good quality double-sided tape is your best friend. Run it around the entire perimeter and along any seams to stop the fake grass from shifting. If you're on a sensitive lawn, laying down a temporary sub-floor or geotextile membrane first will prevent any damage. And if you're setting up inside a marquee, our guide on gazebo hire in Cape Town has some great tips for coordinating your flooring with the structure.

This visual guide shows how the demands of your event should steer your turf choice—a key decision you need to make before you even think about installation.

A flow chart detailing the turf choice process: high traffic requires durable blends, mixed use needs versatile turf, and luxury feel uses fine-bladed grass.

As it shows, high-traffic areas need a tough, durable turf, while more luxurious zones can get away with finer, more delicate options.

The Art of the Invisible Seam

Joining two rolls of turf is where a good installation becomes a great one. To make the seams vanish, lay the two edges right next to each other. They should be touching, but never overlapping.

Place a strong seaming tape underneath the join and apply a specialised turf adhesive. Once the glue is on, press the edges firmly together and then use your fingers to ruffle the grass blades along the line. This simple step helps blend the two pieces perfectly, making the seam disappear.

Creative Styling and Design Inspiration

Rooftop event space with artificial grass, comfortable seating, white pergola, and festive string lights.

Alright, your flawless green canvas is laid, and now the real fun begins. A fake grass carpet is the perfect foundation for bringing almost any event vision to life. It’s so much more than just flooring; it's a dynamic design element that can take a space from standard to spectacular.

The secret is to think beyond the turf itself. You need to consider how it’s going to interact with the furniture, the lighting, and all the little décor pieces you bring in.

Picture a corporate event aiming for a modern, high-energy vibe. Pairing that crisp green turf with sleek, white LED furniture creates an instant sense of sophistication. The light bounces beautifully off the grass blades, adding a dynamic glow to the entire venue. We've seen this work wonders for evening events on rooftops or inside marquees.

Crafting Different Atmospheres

Now, flip the script. For a romantic Winelands wedding in Stellenbosch or Franschhoek, you'll want a completely different approach. That same fake grass carpet can evoke a totally different feeling when you style it with rustic elements.

Think natural wooden benches, soft linen throws, and a few scattered floor cushions. This combination creates a relaxed, bohemian feel that’s both elegant and beautifully grounded. It’s this versatility that makes turf one of our favourite tools. You can create distinct zones within a single event space just by changing up your styling.

  • Lounge Area: Mark out a cosy chill-out zone with low-slung seating like bean bags or plush ottomans. A patch of long-pile turf works especially well here.
  • Ceremony Aisle: Create a stunning focal point by lining the aisle with potted plants or floral arrangements that contrast with the perfect green of the grass.
  • Dining Space: Arrange elegant dining tables and chairs directly on a short-pile turf for a unique 'al fresco' dining experience, even when you're indoors.

A well-styled fake grass carpet does more than just cover the ground—it sets the mood. By carefully selecting your furniture and décor, you guide your guests' experience and create unforgettable moments.

The Power of Strategic Lighting

Lighting is your secret weapon, especially as day turns to night. The right lighting can completely change the look and feel of your green carpet, adding depth, texture, and a touch of magic.

One of the most effective methods we use is uplighting. Placing simple uplighters at the base of trees, pillars, or even feature walls will cast a soft glow across the grass. This really accentuates its texture and creates a sense of drama.

For a more whimsical or enchanting atmosphere, you can’t beat the charm of fairy lights. Weaving strands of warm white lights through surrounding trees or draping them overhead creates a magical, starry-night effect that is absolutely perfect for weddings and celebratory parties.

If you want more visual examples and broader design concepts, you can explore design ideas in a look book. Seeing how different elements come together can spark some brilliant inspiration for your own tropical oasis or enchanted forest theme. It just goes to show that a fake grass carpet is the perfect stage for any story you want to tell.

Looking After Your Turf Rental

A great event experience with artificial grass goes beyond just how it looks. True peace of mind comes from getting the logistics right – from on-the-day care to the final pack-up. Knowing what to expect makes working with your rental company a breeze and keeps the turf looking fresh from the moment guests arrive until the very last dance.

Let's be real, even at the poshest events, spills happen. A glass of red wine tipped over or a dropped canapé doesn't have to spell disaster. Most quality rental turf is pretty tough and stain-resistant, so a quick clean-up is usually all it takes.

If it's a liquid spill, get to it fast. Blot the spot with a dry cloth or paper towel – whatever you do, don’t rub it in! For messes that are a bit stickier, like food crumbs or a bit of mud, it's often better to let them dry first. Once dry, you can just brush them off with a stiff-bristled brush.

The Rental Process: What to Expect

Working with a professional hire company like ABC Hire should be one of the easiest parts of your event planning. The whole process is designed to take the load off you so you can focus on the hundred other things on your list.

Here’s how it usually works:

  • Delivery and Setup: The crew shows up at the agreed time, unloads the rolls of turf, and gets straight to work. They’ll handle all the tricky cutting and seaming to get that perfect, seamless look.
  • On-Site Handover: Once everything is laid, someone from the team should walk you through it. This is your chance to make sure you’re happy with the result and ask for any last-minute care tips.
  • During the Event: The turf is all yours! It becomes the lush, green foundation for your amazing event.
  • Collection: When the party's over, the team comes back to roll it all up and take it away, leaving the venue just as they found it.

Taking a moment to understand the rental agreement isn't just a boring formality. It's about making sure everyone knows what's expected and protecting yourself and the venue from any nasty post-event surprises.

Making Sense of the Rental Agreement

Before you sign anything, give that rental agreement a proper read. You’ll want to keep an eye out for a few key clauses that are pretty standard in the event hire world. Knowing what they mean puts you in control.

Key Terms to Look For:

  • Wear and Tear: This bit is important. It explains what’s considered normal use (like scuffs from shoes) versus what’s considered actual damage (like cigarette burns or big rips).
  • Cleaning Fees: The agreement should be clear about the condition the turf needs to be in for collection. You’re expected to handle small spills, but the contract will explain if there are extra fees for serious messes.
  • Venue Protection: A good supplier will have a clause about protecting the venue's own floors. It shows they respect the spaces you work in and that they take responsibility for their setup and removal.

Getting familiar with these points helps build a clear and professional relationship with your supplier. It means everyone’s on the same page, which is exactly what you need for a smooth rental and a flawless event.

Got Questions About Fake Grass Carpet? We’ve Got Answers.

We get it. You want every detail of your event to be perfect, and flooring is a bigger deal than most people think. To help you plan with total confidence, we’ve put together answers to the questions we hear most often from event planners here in Cape Town.

From our wild weather to wardrobe worries, let's clear up any doubts so you can focus on creating an amazing experience for your guests.

Can Fake Grass Carpet Get Wet?

Absolutely, and honestly, this is one of its best features for any Cape Town event. You know how the weather can turn on a dime here!

Our high-quality turf is made with a perforated backing, which means water drains right through it. No puddles, no mess. Even after a classic Cape Town downpour, the surface stays usable and safe for your guests. It provides a clean, dry-feeling surface almost instantly, unlike real grass which would turn into a muddy disaster.

This is a game-changer for outdoor planning. It takes a massive variable off your plate. Rain or shine, you know the ground underfoot will stay pristine, keeping guests' shoes clean and preventing any slips.

What Kind of Footwear Is Best?

One of the great things about modern artificial turf is that you don't have to worry about this. Guests can comfortably wear just about anything – from stilettos to sandals.

The surface is firm and even, which is fantastic news for anyone in heels. Unlike a real lawn where sharp heels sink into the dirt, our fake grass carpet provides a stable foundation. It makes it a much safer and more comfortable choice for weddings, cocktail parties, and any event where people are dressed to the nines. No need to send out a "footwear warning" beforehand!

Is It Safe For Children And Pets?

Yes, it's a brilliant option for family-friendly events. All our rental turf is made from non-toxic, lead-free materials, so it’s perfectly safe for kids and furry friends to play on.

Plus, you don't have any of the chemicals like pesticides or fertilisers that are often needed for natural lawns. The surface is also soft and non-abrasive, which helps cushion any tumbles from the little ones, adding an extra layer of safety to your event.


Ready to transform your next event with a lush, practical, and stylish flooring solution? The team at ABC Hire has a wide range of high-quality fake grass carpet options perfect for any occasion. Explore our event rental solutions at https://abchire.co.za and let's create something unforgettable together.

The Ultimate Guide to Room Screen Dividers for Event Design

Room screen dividers are basically clever, temporary walls you can use to slice and dice a large room into smaller, more intimate zones. For any event, they’re more than just functional; they’re like functional art. They let you sculpt the space, direct the flow of your guests, and create a specific vibe without needing to call in the builders. Think of them as your secret weapon for flexible event design.

How Room Screen Dividers Can Completely Change an Event Space

Picture this: you’ve booked a venue, and it’s a huge, open, cavernous hall. It’s a blank canvas, which is great, but also a bit daunting. This is a situation many event planners in Cape Town face, whether it’s a sprawling wine estate in Stellenbosch or a sleek corporate venue in the CBD. The real challenge is turning that big, empty area into a series of cosy, practical, and inviting spaces. This is exactly where room screen dividers come in to save the day.

They’re so much more than just simple partitions. They’re genuinely transformative pieces that solve common event headaches with a bit of style and a lot of practicality. At their core, their job is to bring structure and purpose to an otherwise wide-open floor plan.

Creating Function and Flow

First and foremost, room screen dividers are all about managing your space. They give you the power to build an event experience from scratch, mapping out dedicated zones for different activities. Getting this strategic separation right is a huge part of a successful event.

  • Defining an Entrance: You can easily create a welcoming entryway or a corridor that guides guests from the front door into the main event, setting the mood right from the get-go.
  • Separating Activities: Got a big ballroom? No problem. Section it off into a cocktail reception area, a formal dining space, and a dance floor. Each part of the evening gets its own special, contained feel.
  • Concealing Operations: Let’s be honest, nobody wants to see the catering prep stations or stacks of extra chairs. You can cleverly use dividers to hide all the back-of-house action, keeping everything looking polished and professional.

Enhancing Aesthetics and Privacy

Beyond just being practical, these dividers play a massive role in the overall look and feel of your event. The idea of using screens to create privacy and control an environment isn’t new; it’s a concept that’s been around for ages. In fact, archival research on South African interior artefacts shows that local communities were using traditional dividers made from woven grasses and reeds as far back as the mid-19th century. You can discover more insights about the historical use of room dividers from this research.

We’ve just refined that classic idea for modern events, where dividers now add layers of visual interest and create exclusive little pockets within a larger space.

Once you add a physical boundary, you instantly change the feel of a space. A simple screen can turn an open corner into a private VIP lounge or a quiet nook for conversation, making guests feel far more comfortable and looked after.

Ultimately, room screen dividers give you total control over the story your event space tells, turning it from something ordinary into something truly extraordinary.

Choosing the Right Divider for Your Event Theme

Picking the perfect room screen divider is a bit like choosing a statement piece of furniture for a room. It has to work, of course, but it also has to reflect the event’s personality. Get it right, and it elevates your theme. Get it wrong, and it just feels… off. It’s not simply about putting up a barrier; it’s about weaving in another layer of texture, colour, and style that ties into your whole vision.

Let’s put it this way: you wouldn’t use a sleek, minimalist metal divider for a rustic farm-style wedding in the Cape Winelands. It would clash horribly with the natural, earthy vibe. A warm wooden or woven screen, on the other hand, would feel like it belongs there. The goal is to make your dividers feel like a seamless part of the story you’re telling.

This diagram nails the core idea—room dividers are all about transforming a space. They create privacy, guide the flow of people, and hide things you don’t want guests to see.

A diagram illustrating space transformation benefits, including creating privacy, improving flow, allowing for visibility, and providing concealment.

The real takeaway here is that dividers do more than just divide. They actively shape how your guests experience the event by controlling what they see and where they go.

Matching Divider Types to Event Styles

The world of room dividers isn’t one-size-fits-all. There are a few key types, and knowing the difference is the first step to making a smart choice for your event.

  • Folding Screens: These are the classic, go-to option for a reason. Usually made of three or more hinged panels, they are incredibly easy to set up, shift around, and pack away. Their flexibility makes them perfect for creating a quick photo backdrop, sectioning off a cosy lounge area, or hiding the DJ booth from view.
  • Hanging Dividers: If you’re after a modern, airy feel, hanging dividers are a brilliant choice. They suspend from the ceiling, creating a sense of separation without completely boxing a space in. These are great for contemporary corporate events or chic private parties where you want to keep that open-plan atmosphere.
  • Modular Systems: For big events where you need proper, configurable walls, modular systems are your answer. These are interlocking panels that can be built into all sorts of shapes and sizes. They offer a much more solid, permanent-feeling division, which is ideal for trade show booths or breaking up a large conference hall.

Your choice of divider type directly shapes the flow and feel of your venue. Folding screens give you adaptability for dynamic events, while modular systems bring solid structure to more formal, large-scale functions.

Selecting Materials to Create Atmosphere

Once you’ve settled on a type, the material is what really brings your theme to life. It dictates the look, the texture, and the overall vibe the divider adds to the room.

Comparing Divider Materials for Event Planners

To make things easier, here’s a quick breakdown of the most common materials. Think of this as your cheat sheet for matching the material to the mood you’re trying to create.

Material Primary Aesthetic Best For Considerations
Wood Warm, classic, sophisticated Weddings, upscale corporate retreats, intimate dinners Can be heavy. Style ranges from rustic to modern carved.
Wicker/Rattan Natural, rustic, bohemian Garden parties, beach weddings, relaxed brand activations Lightweight and allows light through, but less private.
Metal Sleek, industrial, modern Art gallery openings, minimalist events, product launches Durable and strong but can feel cold without soft styling.
Fabric Soft, versatile, elegant Galas (velvet), conferences (sound absorption), brand events (colour matching) Huge variety of colours/textures. Can help dampen sound.
Acrylic/Polycarbonate Contemporary, clean, open Trade shows, modern parties, high-traffic areas Allows light through, maintaining an open feel. Lightweight.

Ultimately, the material you choose should be a natural extension of your event’s decor, not an afterthought.

A Closer Look at the Materials

Natural and Rustic Vibes

For events that need a warm, organic, or bohemian feel, you really can’t beat natural materials.

  • Wood: Wooden dividers just have a timeless warmth and elegance. Whether it’s solid, slatted, or intricately carved, wood provides a sturdy and sophisticated barrier that’s perfect for weddings, intimate dinners, and high-end corporate retreats.
  • Wicker or Rattan: These lightweight, woven materials add a wonderfully relaxed and rustic texture. They’re ideal for creating a laid-back atmosphere at garden parties, beach weddings, or boho-themed celebrations, as they let a bit of light filter through.

Sleek and Modern Aesthetics

If your event is all about a clean, sharp, and contemporary look, these materials will deliver that polished finish.

  • Metal: For a sleek, industrial edge, metal dividers are strong and durable. They fit right in with minimalist themes, art gallery openings, and modern corporate functions where clean lines are a must.
  • Fabric: Soft, versatile, and available in endless colours and patterns, fabric dividers are amazing for adding a pop of colour or a touch of elegance. They are also great for absorbing sound, which helps in creating quieter zones at a bustling reception. Think luxurious velvet for a gala or simple linen for a daytime event—the creative options are limitless.
  • Acrylic or Polycarbonate: These are a fantastic lightweight and shatter-resistant alternative to glass. They create separation while still letting light pass through, which is perfect for maintaining a sense of openness. They’re also easy to clean, making them a practical choice for high-traffic areas at trade shows or product launches.

Strategic Placement to Create Flow and Function

Great event design is about more than just what things look like; it’s about psychology. It’s about guiding your guests through an experience you’ve carefully planned out. When you place room screen dividers, you’re not just breaking up a space—you’re sculpting it to create natural pathways, distinct zones, and even a bit of discovery. The right placement turns a simple screen into a powerful tool for directing foot traffic and shaping the entire mood of the event.

Think of a big, open venue like an open field. Without any paths, people just wander. Room dividers are those gentle, guiding pathways. They create “soft boundaries” that subtly suggest where to go next, preventing that lost feeling and making the journey through your event seamless. It feels intuitive and welcoming, not restrictive.

A spacious event room with wooden and carpeted floors, featuring white room dividers and a black 'CREATE FLOW' banner.

This is the secret that separates a good layout from a great one. It’s the subtle art of making a large, potentially intimidating space feel manageable, intimate, and a breeze to navigate.

Creating Zones for a Seamless Event Journey

One of the best ways to use room screen dividers is for zoning—carving a large venue into smaller, purpose-driven areas. When you do this, you can guide guests through the different parts of your event without any confusion.

Let’s take a typical wedding reception in a big ballroom. You could use some elegant fabric screens to:

  • Form an Entry Corridor: Create a grand entrance that leads guests away from the main door and steers them towards the welcome drinks. This simple funnel builds anticipation right from the start.
  • Define a Cocktail Zone: Section off a dedicated space just for pre-dinner drinks and canapés. This contains the initial buzz and stops guests from wandering into the dining area before it’s time.
  • Reveal the Dining Area: Arrange dividers to hide the main dining setup at first. Then, they can be moved aside for a dramatic reveal when dinner is announced.

The same idea works perfectly for corporate events. You can easily create separate zones for registration, networking, a keynote presentation, and breakout sessions, all within the same hall.

Guiding Movement with Strategic Angles

How you angle your dividers makes a huge difference to how people move. Straight, rigid lines can feel like hard walls, but angled screens can subtly nudge people in a specific direction.

Imagine creating a gentle, curved path with several folding screens. This naturally encourages guests to meander along it, slowing their pace and giving them a chance to take in the decor or chat with others along the way.

On the other hand, a sharp 45-degree angle can effectively steer traffic away from a service entrance or a back-of-house area you’d rather keep private. It’s all about using visual cues to guide behaviour without a single “No Entry” sign in sight. Of course, for any of this to work, pairing your dividers with the right furniture is key. Our guide to choosing the perfect tables and chair rentals can help you finish off the look and function of each zone you create.

Practical Placement Scenarios

Okay, let’s get practical. Here are a couple of common event challenges and how to solve them with smart divider placement:

Scenario 1: The Overlooked Catering Station

  • The Problem: The catering prep area or buffet station is right in the line of sight, creating visual clutter and noise that distracts from the main event.
  • The Solution: Use a series of tall, solid room screen dividers to create a complete visual barrier. Place them a few metres in front of the station—this also gives staff plenty of room to work comfortably behind the scenes. Instantly, the whole room looks cleaner and more professional.

Scenario 2: The Empty Corner

  • The Problem: A large venue has an awkward, empty corner that feels forgotten and just sucks the energy out of the room.
  • The Solution: Use some decorative wooden or rattan screens to section off that corner and turn it into a feature. Add a couple of comfy chairs, a small table, and some soft lighting, and you’ve created an inviting photo booth backdrop or a quiet lounge nook for conversation.

By taking a moment to really look at your venue’s layout, you can spot these opportunities to make big improvements. Running through a mental checklist—identifying high-traffic routes, unsightly spots, and underused spaces—will help you place every single screen with purpose, ensuring it adds both beauty and logic to your event design.

Of course. Here is the rewritten section, crafted to sound completely human-written and natural, following the style and tone of the provided examples.


Essential Technical and Safety Considerations

Getting the look right is one thing, but making sure your event design is practical and safe is a whole different ball game. The last thing you want is a wobbly screen or a speaker that no one can hear. Overlooking these technical details can turn a great-looking divider into a genuine liability.

Think of it as the backstage work that lets the main event shine. Getting the acoustics, privacy, and stability right protects your clients, your guests, and ultimately, your reputation. These are the non-negotiables every planner in Cape Town needs to get right.

Managing Acoustics and Ensuring Privacy

One of the most underrated perks of using room screen dividers is how well they can control sound. Picture a big reception hall with high ceilings and tiled floors – sound just bounces everywhere, making it impossible to hold a conversation. This is where upholstered or fabric-covered dividers become your best friend, acting like sponges that soak up echoes and dial down the background noise.

It just makes the whole space feel more comfortable. In fact, this is a huge trend in office design right now. A 2023 report on the South African market found that 35% of new commercial office fit-outs used modular dividers with sound-insulation to create quieter, more private work areas. The same logic applies perfectly to events. You can read more about these commercial room divider market findings to see how the pros are using them.

For creating genuine visual privacy, keep these points in mind:

  • Height: You’ll want a divider that’s at least 1.8 metres (around 6 feet) tall. Anything shorter, and standing guests will be able to see right over the top.
  • Opacity: Go for solid materials. Wood, thick fabric, or opaque acrylic will get the job done. Things like rattan or slatted screens look great, but they only create a sense of separation, not total privacy.
  • Placement: Make sure you close any gaps. A small opening between panels or against a wall can completely ruin that feeling of a private, secluded space.

A great room screen divider doesn’t just block sight—it manages sound. Using acoustically absorbent panels is the key to creating quiet VIP lounges or ensuring a keynote speaker can be heard clearly over the clinking of glasses.

Prioritising Stability and Safety Protocols

This is the big one: safety. A divider tipping over is a serious hazard, so stability has to be your number one priority, especially when you’ve got guests walking around or kids at the event.

For indoor venues with smooth floors like polished concrete or wood, look for dividers with wide, heavy bases or T-shaped legs. If you’re setting up on thick carpet, check that the feet can sit flat without wobbling. For any outdoor event on grass, don’t even think about skipping the weighted sandbags at the base of each panel. A sudden gust of wind from the Cape Doctor could easily send them flying.

Finally, you have to play by the rules of the venue and public safety. Always remember to:

  1. Never Obstruct Exits: Your layout must keep all fire exits, extinguishers, and emergency routes completely clear. No exceptions.
  2. Check Fire Retardancy: Many venues require all decorative elements to be made from flame-retardant materials. Double-check this with your rental supplier to avoid any last-minute drama with the venue manager on the day.
  3. Secure Tall Dividers: If you’re using a divider taller than 2 metres, it’s always a good idea to secure it to a wall or pillar if you can. It adds that extra layer of stability and peace of mind.

Styling Dividers to Elevate Your Event Decor

Once you’ve figured out the practical side of things, it’s time for the fun part: making these functional items look absolutely stunning. Styling your room screen dividers is how you turn a simple partition into a feature piece, weaving it into your event’s creative vision. This is where a divider stops being just a divider and becomes a memorable part of the décor that guests will be snapping photos of all night.

Think of a plain wooden screen as a blank canvas. For a romantic wedding, you could weave delicate floral arrangements and cascading ivy through its panels to create a lush, organic photo backdrop. At a corporate launch, that same screen can be completely transformed with a custom-branded vinyl wrap, giving it a polished, professional look that reinforces the company’s identity.

Elegant event stage decor featuring rattan screen dividers, white floral arrangements, and green plants.

The possibilities are endless. The trick is to see the divider not as a wall, but as an active, exciting part of your overall design.

The Transformative Power of Lighting

Lighting is your secret weapon when it comes to styling room dividers. Honestly, it’s probably the most powerful tool you have. The right lighting can completely change the mood and appearance of a simple screen, turning it from a background piece into a dynamic art installation. It’s a surprisingly cost-effective way to get a high-impact look.

Here are a few techniques we love to use:

  • Uplighting: This is a classic for a reason. Placing lights on the floor and aiming them up along the divider creates dramatic shadows and highlights its texture. It works beautifully with carved wooden screens or textured fabric, adding a real sense of depth and drama to the room.
  • Backlighting: This one is all about elegance. By placing a light source behind a semi-translucent screen (like one made of shoji paper or thin fabric), you create a sophisticated silhouette effect. The soft, diffused glow is perfect for a chic lounge area or an ethereal wedding backdrop.
  • Gobo Projections: A gobo is just a fancy name for a stencil you put over a light to project a pattern or image. You can project anything onto a plain divider—from abstract textures and company logos to delicate floral motifs. It instantly turns a boring screen into a captivating visual display.

By strategically lighting your dividers, you can paint with light and shadow to craft an atmosphere. A simple backlight can make a screen glow with ambient warmth, while a sharp uplight can turn it into a bold architectural feature.

Creative Styling Ideas for Every Event

Beyond lighting, there are countless ways to physically dress up your dividers to match your theme. The aim is to make them feel like a custom, intentional part of the event design. Whatever you choose, it should enhance the divider, not overwhelm it.

For Weddings and Romantic Occasions

For that soft, romantic feel, you can’t go wrong with natural and delicate touches.

  • Floral and Greenery: Weave garlands of eucalyptus, roses, or even some local fynbos through the panels of a wooden or rattan screen.
  • Draping Fabric: Cascade soft fabrics like chiffon or organza over the top and sides to soften the lines and add a touch of elegance.
  • Hanging Elements: Suspend delicate glass baubles with tea lights, strings of fairy lights, or even macrame hangings from the top for a whimsical, bohemian vibe.

For Corporate and Branded Events

Corporate events demand a look that’s polished, professional, and on-brand.

  • Custom Vinyl Decals: Apply non-damaging, removable vinyl logos, taglines, or event graphics directly onto any smooth-surfaced dividers.
  • Integrated Shelving: Some of the more modern, modular dividers have options for shelving. These are perfect for displaying products, awards, or branded materials.
  • Colour Coordination: Use fabric dividers in your company’s brand colours. It’s a simple way to create a cohesive and immersive brand experience for your guests.

No matter how you style it, the goal is always to enhance the overall theme. Even a simple, well-placed divider can serve as a powerful visual anchor for your space. For more inspiration on creating stunning focal points, check out our guide on finding the perfect backdrop to hire for your event. Many of these same techniques can be used on backdrops to create a truly unforgettable design.

Renting vs Buying Dividers in Cape Town

As any event planner in Cape Town knows, every decision is a balancing act between your budget, the logistics, and the final impact. When it comes to room screen dividers, you’ll face the classic question: is it better to rent or buy?

While owning a set of dividers might seem like a good investment at first, the practical side of things—storage, transport, and maintenance—can quickly become a headache for most event professionals.

Imagine you’ve just wrapped up a gorgeous wedding at a Stellenbosch wine farm. The last thing on your mind should be figuring out how to haul ten bulky wooden screens back to a storage unit. This is exactly why for the vast majority of events, renting is the clear winner. It takes all those logistical nightmares off your plate and gives you far more flexibility.

Why Renting Is the Smarter Choice

Renting gives you access to a massive variety of styles without the long-term commitment or cost. One month you might need sleek, modern acrylic panels for a corporate launch in the CBD. The next, you might want rustic rattan screens for a bohemian beach wedding in Llandudno. A good rental company can provide all of this on demand.

Beyond the sheer variety, the practical benefits are huge:

  • No Storage Costs: You use the dividers for your event, and then they’re gone. No need to sacrifice precious office or warehouse space to store them.
  • Effortless Transportation: Reputable rental companies handle all the delivery and collection. This saves you from the stress of organising a big enough vehicle and the staff to move heavy, awkward items.
  • Zero Maintenance: Scratches, scuffs, and general wear-and-tear? That’s the rental company’s problem, not yours. The dividers simply arrive looking great every single time.

In a city like Cape Town, where making the most of your space is key, these benefits really add up. In fact, reports on the South African market show that demand for space-saving solutions like these has grown a lot. Roughly 23% of urban households now use some form of room divider, which just goes to show how practical they are. You can read more about how room dividers are used in the South African market.

Vetting Cape Town Rental Companies

Once you’ve decided renting is the way to go, the next step is finding the right local partner. And trust us, not all rental companies are created equal. To make sure everything goes off without a hitch, you need to ask the right questions before you sign anything.

Think of it as a job interview. You’re trusting a key part of your event’s design and logistics to this company, so it pays to be thorough.

Make sure you cover these essential points:

  • Inventory and Condition: Ask to see their catalogue or, even better, visit their showroom. Do they have a good selection of room screen dividers? Are the items well-looked-after, clean, and free from obvious damage?
  • Delivery and Setup Services: Get clear on whether their service includes delivery, setup, and breakdown. A full-service option can be a massive time and stress saver on event day.
  • Insurance and Damage Policy: What happens if a divider gets accidentally damaged by a guest? You need to understand their insurance coverage and what you might be liable for. A transparent, clear policy is the sign of a professional company.

The right rental partner is more than just a supplier; they are an extension of your event team. Their reliability, professionalism, and quality of inventory directly reflect on your final product.

Ultimately, choosing to rent frees you up to focus on what you do best: designing incredible experiences. By partnering with a reliable supplier, you get access to a world of decorative possibilities without the burden of ownership. For more ideas on sourcing the best items, our guide on finding top-quality decor hire in Cape Town offers some great additional tips.

Of course. Here is the rewritten section, crafted to sound completely human-written and match the requested style.


Common Questions About Using Room Screen Dividers

Even the most organised event can throw up a few surprises on the day. When you’re on-site and juggling a dozen things at once, you need quick, no-nonsense answers. We’ve put together a few of the most common questions we get from planners about using our room screen dividers, along with practical solutions to help you handle any challenge that comes your way.

Think of this as your back-pocket guide for those last-minute hiccups.

How Do I Make Sure the Dividers Are Stable on Uneven Ground?

This is a big one, and rightly so. We see it all the time with marquee weddings on beautiful lawns or events in older venues with charming, but not-so-level, floors. Safety comes first, so stability is key.

If you’re setting up outdoors on grass or an uneven surface, you’ll want dividers with a nice, wide base. To keep them securely in place, weighted sandbags are the go-to solution. Tucked neatly at the bottom of each panel, they’re fantastic for standing up to a sudden gust of the Cape Doctor. If the ground permits, stakes are another option, but always get the green light from your venue first.

For indoor events on old wooden floors or tiles, dividers with adjustable feet are a game-changer. You can level out each panel individually, so there’s absolutely no wobble.

Pro Tip: When you book your dividers, let your rental company know what kind of surface you’re working with. A good supplier can point you to the right type of room screen divider and provide all the necessary gear to keep it secure, taking one more thing off your plate.

Can I Brand or Customise Rented Room Screen Dividers?

Yes, you absolutely can! It’s a great way to make a rented piece feel like it was made just for your event and tie it into your corporate branding. Most rental companies in Cape Town are more than happy to help with this.

The easiest and most popular option is to use temporary vinyl decals. They can be applied to any smooth-surfaced divider to show off company logos, event hashtags, or branded messages. The best part? They peel off without leaving any sticky residue or damaging the panel.

Some suppliers, like us, also offer custom-printed fabric panels that fit onto the screen frames for a really polished, professional look. Just be sure to always check with your rental company about their approved customisation methods before you start, so you can avoid any unexpected damage fees.

How Far Ahead Should I Book Divider Rentals?

A little bit of planning goes a long way, especially during Cape Town’s peak event season from November to March. For a standard order, booking 4-6 weeks in advance is usually a safe bet. That gives you plenty of time to get what you need without any stress.

But, if you have more specific needs, you’ll want to book a bit earlier:

  • Large Orders: If you’re partitioning a huge space, it’s best to book at least 2-3 months ahead of time.
  • Speciality Styles: Our more unique or popular designs get snapped up fast, so reserve those as early as you can.
  • Custom Jobs: For custom-printed panels, we recommend getting in touch at least 3 months in advance. This gives us enough time for the design, printing, and production process.

Ready to find the perfect room screen dividers for your next event? ABC Hire offers a wide range of high-quality, stylish options to suit any theme or function. Explore our collection and let us handle the logistics, so you can focus on creating an unforgettable experience. Visit us online at abchire.co.za to get a quote today.

Your Guide to Elegant Party Rentals

Elegant party rentals are so much more than just tables and chairs. Think of them as the key ingredients that turn a simple get-together into something truly special – a sophisticated and memorable experience for everyone you’ve invited. The right choices tell a story, craft an atmosphere, and set the stage for an incredible event.

Why Your Rental Choices Define Your Event

Elegant party setup with long tables, flowers, and sophisticated lighting.

Picture a film director, hand-picking every single prop and piece of scenery to build a believable world on screen. That's exactly what you're doing. Every single rental item you choose—from the elegant curve of a chair to the rich texture of a tablecloth—helps to construct the scene for your event and stir up specific feelings in your guests.

When you move beyond just thinking about logistics, you become the designer of your guests' experience. This guide is your roadmap, showing you how to turn any space into an elegant setting, whether you’re a seasoned planner or a first-time host.

We’ll walk you through everything you need to know, from core design principles to detailed planning checklists, making the whole process of creating a polished event feel completely within reach. Our goal is to give you the know-how to make confident choices that perfectly match your unique vision.

Building Your Elegant Atmosphere from the Ground Up

The journey to an elegant event doesn't start in a rental catalogue; it starts with a concept. Before you even think about picking out a fork or a wine glass, you need to nail down the mood you want to create. Is it a dreamy, romantic wedding? A slick, chic corporate gala? Or maybe a warm, intimate birthday celebration? Each one calls for a completely different mix of elements.

"Elegance is not about being noticed, it's about being remembered." – Giorgio Armani

This idea is the absolute heart of choosing elegant party rentals. It’s not about grabbing the most expensive or over-the-top items. It’s about selecting pieces that all work together beautifully to create a space that feels cohesive and makes a real impact.

This means you need to think about:

  • Cohesion: Do your furniture, tabletop items, and decor all tell one, unified story?
  • Guest Experience: How will the layout, seating, and lighting actually make your guests feel and interact with each other in the space?
  • Sensory Details: What textures, colours, and lighting can you layer in to add depth and richness? For instance, soft, ambient lighting can completely transform a room's feel. You can get some fantastic ideas by exploring something like a fairy light curtain.

By focusing on these core ideas, you stop simply filling a room and start curating an experience. That's what this guide is all about – walking you through that process step-by-step, giving you the tools and insights you need to bring your vision to life with real style and grace.

Getting to Grips with Event Design

Before you even start browsing for elegant party rentals, it’s crucial to understand the 'why' behind a beautifully designed event. A stunning setup doesn't happen by accident; it's the result of applying a few core principles that create that feeling of effortless style. When you get these basics right, you can make rental choices that are not just pretty, but smart, functional, and truly memorable.

Think of it like setting up a high-end boutique. Everything from the layout of the aisles to the displays is intentionally placed to guide you, showcase the best items, and create a seamless, enjoyable experience. The exact same logic applies to your event.

The Four Pillars of Great Design

To get that flawless feel, professional designers always come back to four key pillars. These principles are the secret sauce, working together to create a space that feels balanced, pulled-together, and welcoming for every single guest.

  • Balance: This is all about creating a sense of visual stability. Just like you wouldn't shove all your furniture against one wall at home, you need to spread the visual weight of your rentals evenly across the venue.
  • Harmony: This is what makes all your different rental items look like they belong together. It’s that feeling that everything, from the chairs to the cutlery, is part of one cohesive story.
  • Scale and Proportion: This is about how the size of your rental items relates to each other and to the space they're in. Giant, oversized furniture in a tiny room feels crowded, while delicate décor gets completely lost in a massive hall.
  • Flow and Movement: This is the invisible pathway you create for your guests. A well-designed layout guides people naturally, preventing awkward traffic jams and encouraging everyone to mingle.

Keep these four concepts in your back pocket, and you'll be able to turn a simple collection of rental items into a thoughtfully curated experience.

Finding Balance in Your Event Space

Balance is probably the most important design principle of all. When you're planning your layout with elegant party rentals, there are two main types you'll want to think about: symmetrical and asymmetrical.

Symmetrical balance is the more formal, classic approach. It’s like looking in a mirror—whatever you do on one side of a central point, you repeat exactly on the other. Think of placing identical floral arrangements on either side of a stage or setting up chairs in perfect, neat rows. It creates a feeling of order and timeless elegance.

Asymmetrical balance, on the other hand, feels more modern and energetic. Here, you use different items that have a similar visual weight to create that same sense of equilibrium. Imagine a lounge corner where a large sofa on one side is balanced out by two smaller armchairs and a coffee table on the other. It feels less rigid but just as complete.

An event space that lacks balance can feel chaotic or lopsided, which can make guests feel a bit on edge without even knowing why. Your aim is to create a sense of visual calm that lets everyone relax and soak up the atmosphere you’ve worked so hard to create.

Creating a Harmonious and Cohesive Look

Harmony is what gives your event that polished, intentional vibe. You achieve it when every single rental element works with the others, all reinforcing your theme and colour scheme. A lack of harmony is jarring—it’s like pairing rustic wooden tables with sleek, ultra-modern ghost chairs. Something just feels off.

To nail that harmonious feel:

  1. Stick to Your Theme: If you're going for "modern minimalist," choose rentals with clean lines, a simple colour palette, and uncluttered designs.
  2. Limit Your Colours: Pick three to five colours that work well together and use them consistently across your linens, décor, and even your lighting.
  3. Repeat Key Elements: Using recurring shapes, textures, or materials is a great way to tie the whole space together. For instance, if your centrepieces have gold accents, look for gold-rimmed glassware or gold cutlery to create a cohesive, unified look.

This kind of consistency is the trick to making your elegant party rentals look like they were designed specifically for your event, leaving a powerful and lasting impression.

Choosing Your Core Rental Components

Elegant event setup showcasing tables, chairs, and tableware.

With your design principles locked in, it’s time for the fun part: selecting the key pieces that will bring your vision to life. These are the foundational elements of your event’s atmosphere, and choosing them thoughtfully is where your elegant party really starts to take shape.

Think of it like furnishing a new home. You always start with the big, impactful pieces—the sofa, the dining table—before layering in smaller decor. For events, these core components fall into three main categories:

  • Furniture: This covers your tables, chairs, and any lounge areas you plan to create.
  • Tabletop Items: Think linens, cutlery, glassware, and crockery.
  • Structural Pieces: These are the large-scale items like tents, dance floors, and stages that define the space.

Selecting Elegant Furniture

Your furniture choices are arguably the most significant, as they dictate both comfort and style. They're the first thing guests interact with, setting the tone from the moment they arrive. When picking out elegant party rentals, focus on the silhouette, the material, and how each piece ties into your overall theme.

A rustic farm table made of reclaimed wood, for instance, creates a warm, inviting feel that’s perfect for a sophisticated country-style wedding. In contrast, a sleek glass-top table paired with modern chairs immediately signals a chic, contemporary corporate function. You can find some excellent insights on what to consider when renting furniture for events to help guide your decisions.

Don't forget about creating breakaway spaces. A well-placed collection of plush sofas, armchairs, and coffee tables can offer an intimate nook for guests to relax and mingle away from the main dining area.

Curating the Perfect Tablescape

The tablescape is where you can truly let your event's personality shine. The linens, cutlery, and glassware are the fine details that elevate the dining experience from simple to sublime. High-quality linens are the foundation, transforming a basic table into a canvas for your design.

Think about the sensory experience. A heavy, luxurious velvet runner adds tactile depth, while crisp, white linen feels classic and clean. In fact, industry insights show that linens and draping can be responsible for up to 65% of the aesthetic transformation of a venue, which just goes to show their massive impact.

Your choice of cutlery and glassware also matters immensely.

  • Cutlery: Gold or matte black cutlery can offer a modern, sophisticated twist compared to standard silver.
  • Glassware: Crystal glassware with an elegant cut catches the light beautifully, adding a touch of glamour.
  • Crockery: Consider charger plates to frame each place setting and add a pop of colour or metallic shine.

The key is to create layers of texture and visual interest. A well-curated tablescape invites guests to sit, engage, and appreciate the thought you've put into every single detail.

Defining Your Space with Structural Rentals

For many events, especially those held outdoors, structural rentals are non-negotiable. These are the large-scale items that create your venue from the ground up, providing shelter, function, and a real sense of place.

A beautiful marquee tent does more than just protect guests from the elements; it creates an enchanting, self-contained world. A polished white dance floor becomes a natural focal point for the celebration, inviting everyone to let loose. In the same way, a professionally lit stage ensures that speeches and performances are seen and heard by all.

When choosing these larger items, make sure they align with the scale and style of your event. A grand, clear-span marquee suits a large, formal wedding, while a smaller, charming pole tent might be perfect for an intimate garden party.

Comparing Elegant Chair Styles

To help you visualise how different pieces contribute to an event's look, let's compare some popular chair styles. Chairs are a high-impact rental, and the right choice can instantly set the tone for your event.

Chair Style Best For (Event Type) Common Materials Aesthetic Feel
Chiavari Classic Weddings, Galas Wood, Resin Timeless, Formal, Romantic
Ghost (Louis) Modern Events, Chic Parties Acrylic, Polycarbonate Contemporary, Sleek, Minimalist
Bentwood Bohemian, Rustic Weddings Wood (often beech) Vintage, Relaxed, Charming
Cross-Back Vineyard, Farmhouse Events Wood (often oak) Rustic, Elegant, Understated

By carefully selecting each of these core components, you ensure that every element works in harmony. This thoughtful approach transforms a collection of individual items into a cohesive, elegant, and unforgettable experience for every guest.

Using Colour Palettes and Textures

Elegant table setting showcasing a sophisticated colour palette and rich textures.

True elegance isn't just something you see; it's something you feel. This is where your choice of colour and texture comes into play, turning your event into a full sensory experience.

By moving beyond basic colour schemes, you can build a sophisticated atmosphere that feels deliberate and incredibly chic. Suddenly, your elegant party rentals aren’t just functional items—they become the core tools you use to design the entire mood of the room. Think of yourself as an artist with a blank canvas. The venue is your canvas, and everything from the linens to the lounge furniture are your paints and sculpting materials. Get the combination right, and you'll create an emotional impact that stays with guests long after they've left.

Building a Sophisticated Colour Palette

A carefully chosen colour palette is the very foundation of your event's vibe. It’s the thread that ties every other decision together, creating a look that feels polished and whole. Instead of just grabbing colours you like, it’s best to use proven design strategies to build real harmony.

Here are three powerful approaches to consider:

  • Monochromatic: This isn’t about using one boring colour. It’s about exploring all the shades, tones, and tints within a single colour family. Picture an event layered in dusty blue: light blue linens, deep navy velvet chairs, and smoky slate-blue glassware. The result is effortlessly chic and creates a calm, unified feel.
  • Analogous: This method uses colours that are neighbours on the colour wheel—think blush pink, soft rose, and a hint of coral. This creates a beautifully harmonious look that feels rich and layered without ever becoming loud or overwhelming.
  • Complementary: For a bit more drama and energy, you can pair colours from opposite sides of the wheel. A classic, elegant example is a deep emerald green paired with strategic touches of rich burgundy. The secret here is to let one colour take the lead, using the other as a powerful accent.

Your colour palette does more than just decorate a space; it's a silent communicator. It tells your guests if the event is meant to feel romantic and calm, vibrant and celebratory, or formal and distinguished.

Harnessing the Power of Texture

While colour sets the mood, texture is the secret weapon of high-end design. It introduces depth, warmth, and a tactile quality that elevates the entire experience. An event focused only on colour can feel a bit one-dimensional, but when you start layering textures, the space becomes immersive and feels thoughtfully put together.

It's all about the interplay between different materials. Texture creates a subtle contrast that makes your elegant party rentals look even more impressive. It’s the difference between a room that looks good in photos and one that feels incredible to actually be in.

Creating Tactile Richness with Your Rentals

So, how does this translate to your rental choices? It’s all about thinking how different materials will look and feel next to each other. By mixing smooth with rough, or soft with hard, you create a dynamic and interesting sensory landscape.

Consider these stunning combinations:

  1. Smooth and Soft: Imagine a sleek, modern acrylic table paired with plush velvet chairs. The contrast between the hard, reflective surface and the soft, absorbent fabric is instantly sophisticated.
  2. Polished and Natural: Try combining polished gold or copper cutlery with raw silk or natural linen tablecloths. The metallic shine adds a touch of glamour that pops against the organic, earthy feel of the fabric.
  3. Warm and Cool: Place warm, wooden charger plates on top of crisp, cool satin linens. This kind of pairing balances different elements, creating a look that feels both grounded and luxurious.

This careful layering is a sign of high-level design thinking. In fact, some studies on event aesthetics suggest that linens and draping can be responsible for over 60% of a venue's visual transformation, mostly because of the powerful textures they introduce.

By mastering both colour and texture, you stop simply planning an event and start designing an experience. Every rental choice becomes another chance to add a layer of sensory detail, making sure your celebration is not just seen, but truly felt.

Your Event Rental Planning Checklist

Turning a beautiful vision into a real-life, flawlessly executed event isn't just about having great ideas. It's about having a rock-solid, actionable plan. A well-organised checklist is honestly your most powerful tool here, breaking down what feels like a massive task into small, manageable steps. It’s the secret to making sure nothing gets missed, from the big-ticket items right down to the last teaspoon.

Think of this timeline as your roadmap, guiding you from that first spark of an idea to the final pack-down. When you tackle tasks in the right order, you cut down on stress, avoid those frantic last-minute scrambles, and make sure every single one of your elegant party rentals is booked, confirmed, and managed perfectly. A structured approach like this is the key to a smooth, successful, and genuinely enjoyable event.

6-12 Months Before: The Foundation Phase

This is the fun part—the dreaming and scheming stage! It’s where you lay the essential groundwork for everything that follows. The decisions you make now will shape your entire event, so it’s really important to get crystal clear on your vision and budget right from the start.

  • Define Your Vision and Theme: What’s the feeling you want to create? A dreamy, romantic wedding? A sleek, modern corporate gala? Or maybe a relaxed, boho garden party? Your theme will guide every single rental choice you make later on.
  • Set a Realistic Budget: Figure out exactly how much you can set aside just for rentals. It's a good rule of thumb to know that rentals typically account for about 8-10% of a total event budget, according to industry reports.
  • Book Your Venue: You simply can't finalise your rental needs until you know the space you're working with. Lock in your venue and get a copy of the floor plan and a list of any restrictions they might have.
  • Create a Guest List Estimate: Your initial guest count is crucial. It’s the number that will determine how many tables, chairs, glasses, and plates you’ll need to start thinking about.

This early stage is all about big-picture thinking. It's less about picking out specific linen colours and more about setting the boundaries that will guide your search for the perfect elegant party rentals.

4-6 Months Before: The Selection Phase

With your foundation firmly in place, it’s time to start the exciting part: choosing your suppliers and making key rental decisions. This period is all about research, comparing your options, and locking in the major items that will define your event’s look and feel.

Start by looking up rental companies in your area. You want to find ones with a great reputation, a fantastic inventory of high-quality items, and glowing reviews from past clients. A company that specialises in elegant party rentals will have the curated selection you need to bring a sophisticated vision to life.

At this point, your goal is to move from a broad concept to a solid list of potential items. Think of it as creating a detailed mood board, but with actual rental products you can book.

Once you’ve got a shortlist of suppliers, it's time to schedule some consultations. During these meetings, you should:

  1. Discuss Your Vision: Bring your theme, colour palette, and any inspiration photos you’ve collected.
  2. Request an Initial Quote: Ask for a detailed, itemised quote based on your estimated guest count and wish list.
  3. Review Contracts Carefully: Before you sign anything, pay close attention to the payment schedule, cancellation policy, and details about the damage waiver.
  4. Book Your Core Rentals: Don't wait to secure the high-demand items! Go ahead and book your marquee, tables, chairs, and dance floor to avoid any disappointment.

1-2 Months Before: The Finalisation Phase

The home stretch is all about nailing down the details and coordinating the logistics. This is where your checklist becomes absolutely vital for ensuring everything runs like clockwork on the day. Precision is everything if you want a stress-free experience.

Finalise your guest list and update your rental order to match. This is your last real chance to adjust the numbers for chairs, linens, and place settings. Don't forget to add on meals for your vendors (like the photographer or band) and any extra seating you might need. For a super-detailed guide covering every step, our comprehensive event planning checklist template is an amazing resource.

Now, it’s time to focus on logistics.

  • Confirm Venue Measurements: Get out the measuring tape! Double-check the dimensions of your space to be sure everything will fit as planned, especially bigger items like a stage or bar.
  • Plan for Power: Have a chat with your rental company about your power needs, particularly for lighting, sound equipment, or any catering appliances.
  • Create a Weather Contingency Plan: If any part of your event is outdoors, finalise your Plan B for rain or extreme heat. This might mean booking marquee sidewalls, heaters, or cooling units.
  • Schedule Delivery and Pickup: Coordinate a precise timeline for delivery, setup, and breakdown with both your venue and the rental company. Make sure you’ve assigned a clear point of contact for the day.

To help you stay on track, here's a simple timeline you can follow.

Event Rentals Planning Timeline

A simplified timeline for booking and managing your elegant party rentals to ensure a seamless event.

Timeline Key Tasks Pro Tip
6-12 Months Out Define vision, set budget, book venue, estimate guest list. Dream big! This is the time to gather inspiration and define the overall mood and feel of your event.
4-6 Months Out Research rental companies, schedule consultations, book major items. Get quotes from at least 2-3 companies to compare inventory, quality, and service before signing any contracts.
2-3 Months Out Choose linens, tableware, and décor accents. Bring your colour swatches and theme board to your rental consultation to ensure a cohesive look.
1 Month Out Finalise guest count and update rental order. It’s better to slightly overestimate than to be short on chairs or glasses on the day.
1-2 Weeks Out Confirm delivery/pickup times, create a floor plan, share contact info. Provide your venue and rental company with a detailed layout to ensure a smooth and efficient setup.
Event Day Check delivered items against your order, confirm setup placement. Assign someone you trust to be the point person for the rental company on the day of the event.
Post-Event Ensure all items are ready for pickup, check final invoice. Do a quick walkthrough to make sure all rented items are accounted for before the rental team arrives.

Following a structured timeline takes the guesswork out of planning and frees you up to actually enjoy the process of bringing your beautiful event to life.

Common Questions About Elegant Party Rentals

As you start pulling your event vision together, a few practical questions are bound to pop up. Getting straight answers to these common queries is the final piece of the puzzle, giving you the confidence to plan without a hitch.

This handy timeline lays out the key stages for booking your rentals.

Infographic about elegant party rentals

As you can see, the big picture planning starts well in advance, while the finer details get locked in much closer to your event date.

How Can I Get an Elegant Look on a Tight Budget?

An elegant event doesn't have to mean an unlimited budget. It’s all about being clever with where you spend your money. Focus on high-impact items—the things your guests will really notice. For instance, splurging on unique chairs or premium linens can transform a room far more effectively than spending on smaller, less visible details.

Another great trick is to choose rentals that do double duty. A beautiful, stylish bar isn't just a place to serve drinks; it's also a stunning focal point for your decor. And never, ever underestimate the power of lighting. It can create a luxurious, inviting atmosphere for a fraction of the cost of other decorative elements.

What Happens If a Rental Item Gets Damaged?

It happens! Most rental companies will have a damage waiver built into their contracts. This is usually a small, non-refundable fee—often around 5-10% of your total rental cost—that covers accidental scuffs, minor stains, and general wear and tear.

Now, for any significant damage or if an item goes missing entirely, you'll typically be responsible for the full replacement cost. This is why it’s absolutely crucial to read your rental agreement carefully and inspect everything upon delivery.

Make sure you walk through the order with the delivery team. Point out any pre-existing scratches or issues and snap a few photos right then and there. This simple step protects you from being blamed for damage that was already there.

When Should I Hire an Event Planner for Rentals?

For big, complex events like weddings or corporate galas, bringing a professional event planner on board is a game-changer. They already have strong relationships with the best rental vendors, can often secure better pricing, and will handle all the nitty-gritty logistics of delivery, setup, and breakdown.

If you're planning a smaller, more intimate gathering, you can usually work directly with an in-house consultant at your chosen rental company. These experts know their inventory inside and out. They can guide your design choices and make sure all the logistics are covered, giving you professional support without the expense of a full-service planner.


Ready to create an event that people will be talking about for years to come? The team at ABC Hire has a stunning selection of elegant party rentals to bring your vision to life. Explore our collection and get a quote today.

📍 Cape Town + Winelands