Find Event Decor Hire Near Me Your Guide to Local Suppliers

Let’s be honest, planning an event has enough moving parts without adding the stress of sourcing decor. This is where a local supplier for event decor hire near me becomes your best friend. It’s a simple, strategic decision that turns what could be a huge capital expense into a much more manageable operational cost, saving your budget and your sanity.

Why Hiring Local Decor Is Your Smartest Move

Outdoor wedding ceremony setup with white chairs, a brown aisle, and a floral arch, with text 'LOCAL DECOR HIRE'.

Opting to hire decor instead of buying it gives you instant access to gorgeous, on-trend items without the long-term baggage. This is a game-changer for big occasions, like putting together breathtaking wedding decor. Once the party’s over, you just return everything. No need to figure out where to store bulky furniture, delicate centrepieces, or massive backdrops.

Going local with your hiring just makes everything even easier and more practical.

The Financial and Logistical Advantages

Working with a company in your area immediately slashes those delivery fees, which can get pretty steep for large or fragile items coming from far away. Plus, a local supplier knows the lay of the land. They’ll know the best loading bays at a Cape Town convention centre or how to navigate the tricky access roads of a Franschhoek wine estate.

That kind of insider knowledge means a much smoother, more reliable setup on your big day. Because they’re close by, they can also react quickly if you need last-minute changes or a few extra items. Their reputation is built right here in our community, so they have a real stake in giving you fantastic service. If you need more tips on wrangling local suppliers, have a look at our guide on finding reliable event planning near me.

Partnering with a local decor hire company is about more than just renting things; you’re investing in convenience, reliability, and peace of mind. Their local know-how is a secret weapon that can stop logistical nightmares before they even start.

Tapping into a Thriving Local Market

The demand for polished, professional events has created an amazing rental market right on our doorstep. South Africa’s event decor scene is buzzing; the decorations segment alone is valued at US$116.49 million for 2025 and it’s growing fast. For you, this growth means more choice, better quality, and competitive pricing. You can read more on this market expansion and discover the full research on Grand View Research.

This dynamic environment means local suppliers are always updating their stock with the latest styles. You can find everything you need to bring your vision to life, unlocking a world of creative possibilities without being saddled with ownership.

How to Find the Best Local Decor Suppliers

A person holding a smartphone displaying a grid of local photos, with the text 'Search Locally'.

Finding the perfect decor for your event goes way beyond a quick search for “event decor hire near me.” The real magic happens when you get a little strategic, digging deeper to find companies whose style and stock truly get what you’re trying to achieve. It’s all about creating a shortlist of potential partners who not only vibe with your creative vision but are also practically located for your venue.

Your first stop should be the visual platforms where these companies show off their best work. Think Instagram and Pinterest. Instead of just typing in generic terms, start using specific, location-based hashtags. This is how you find real-world examples of a supplier’s inventory in action.

Master Your Visual Search

You need to think like a local event insider. Searching with targeted hashtags will help you uncover those hidden gems and give you a genuine feel for a company’s aesthetic. A supplier might have a massive warehouse full of stuff, but it’s their curated social media feed that shows you how they actually bring it all to life.

Get started with searches like:

  • #CapeTownEvents or #StellenboschWedding to see what’s trending in the area.
  • #WinelandsDecorHire for suppliers who know their way around those stunning vineyard venues.
  • #FranschhoekFurnitureRental if you need to zero in on specific items.

This visual-first approach is a massive time-saver. If you’re planning a rustic farm wedding, you can instantly scroll past the companies showcasing sleek, modern setups. It ensures your initial list is packed with strong contenders right from the start.

Get Specific for Better Search Results

Once you shift from social media to a search engine, that same specific approach is your best friend. Vague searches will only get you generic results, but targeted queries will lead you straight to the specialists. Think about what makes your event unique and weave that into your search terms.

For example, instead of just “furniture hire,” try something like:

  • “Boho furniture hire Paarl”
  • “Luxury tablescape rental Franschhoek”
  • “Vintage decor hire Stellenbosch”

This method is so much more effective. It helps you find suppliers who have the exact niche items you’re looking for, making sure your decor feels personal and thoughtfully curated, not just pulled from a standard catalogue.

A refined search does more than just find a supplier; it finds the right supplier. It connects you with a business that understands your specific aesthetic and has the inventory to execute it flawlessly, preventing logistical headaches down the road.

Don’t just stop at direct searches, though. Dive into local event planning blogs and online directories. These resources often feature hand-picked lists of vetted vendors in the Cape Town and Winelands region, basically acting as a trusted referral network. They’ve already done some of the initial homework for you, giving you a solid starting point for your own shortlist.

Your Vetting Checklist for Decor Hire Companies

A document holder displaying images and text, a pen, a notebook, and a blue folder on a desk.

So, you’ve sifted through the search results for “event decor hire near me” and have a shortlist of promising suppliers. Excellent. Now for the really important part: making sure they can actually deliver on their promises.

This is where you dig a little deeper. A stunning Instagram feed is lovely, but it doesn’t guarantee quality, reliability, or transparent pricing on your big day. Before you even think about putting down a deposit, you need to ask some direct questions. Don’t worry about being difficult – a professional, reputable company will appreciate your attention to detail and answer everything clearly.

Inventory and Quality Assurance

First things first: what’s the real condition of their stock? Those perfect pictures on their website could be from a photoshoot years ago. You need to know what the items look like right now.

When you get in touch, have these questions ready:

  • Item Condition: Can you send me some recent, unedited photos or a quick video of the actual chairs or couches I’ll be hiring? Not just catalogue shots.
  • Back-up Stock: What’s your plan B if an item is damaged by the client before me and suddenly becomes unavailable for my event?
  • Viewing Policy: Is it possible for me to pop by your warehouse to see the quality of your furniture and decor in person?

There’s nothing better than seeing the items with your own eyes. It’s the only way to spot the kind of wear and tear that photos can hide, ensuring everything is up to the standard you expect for your event.

Unpacking the Financials and Fees

The price on the tag is rarely the final price. Hidden costs for delivery, setup, and potential damages can quickly blow your budget out of the water. You need a complete breakdown of every potential charge before you sign anything.

A transparent quote is the hallmark of a professional decor hire company. If a supplier is vague about delivery costs, damage waivers, or setup fees, consider it a significant red flag.

Make sure you get crystal-clear answers on these financial points:

  • Minimum Spend: Is there a minimum hire amount I need to meet?
  • Delivery and Collection: How do you calculate these fees? Is it a flat rate for areas like Stellenbosch or Paarl, or is it based on the travel distance and size of my order?
  • Setup and Breakdown: Are these services included in the price, or do they come at an extra cost?
  • Damage Waiver: How does your policy for accidental damage work? Is there a compulsory, non-refundable waiver fee, or will I need to pay a refundable security deposit?
  • Payment Schedule: What is the deposit amount required to book, and when is the final balance due?

Keeping all this information straight is crucial, especially when you’re comparing a few different companies. To help you stay organised and compare apples with apples, we’ve put together a simple table.

Decor Hire Supplier Vetting Checklist

Use this checklist to track the answers you get from each potential supplier. It makes it so much easier to see who offers the best value and service at a glance.

Vetting Question Supplier A Response Supplier B Response Supplier C Response
Can I see recent photos?
Do you have backup stock?
Can I view items in person?
What is your minimum spend?
How are delivery fees calculated?
Is setup an extra cost?
What is the damage policy?
What is the payment schedule?

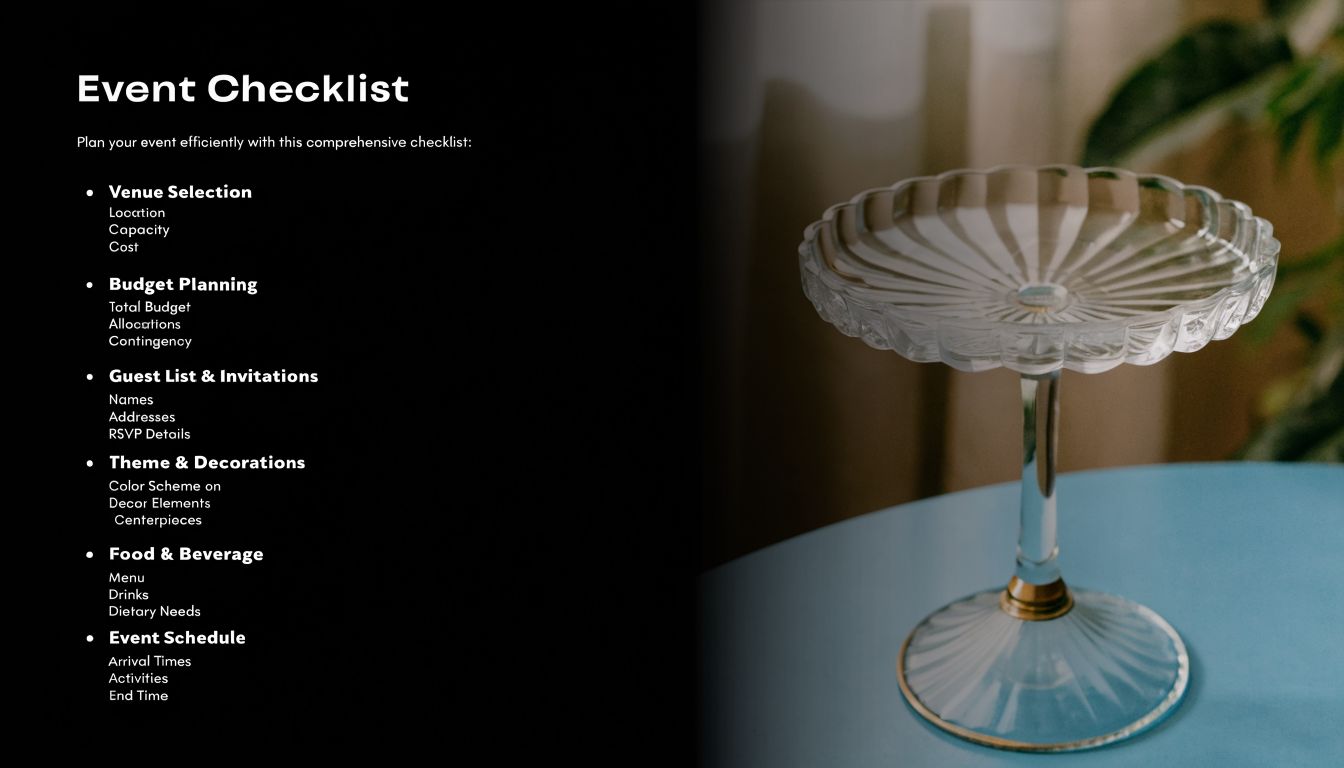
By the time you’ve filled this out, your decision should be much clearer. A great way to manage all these details alongside the rest of your planning is by using a dedicated guide. This event planning checklist template is brilliant for keeping all your supplier info in one organised place.

Current Decor Trends Shaping South African Events

To throw an event that people are still talking about weeks later, you need to tap into what’s happening right now. The South African event scene is buzzing with fresh ideas, moving away from those generic, seen-it-all-before setups towards designs that feel intentional and truly memorable.

When you’re searching for “event decor hire near me,” knowing these trends helps you spot a supplier who gets it – someone who can bring a modern, sophisticated vision to life. Today’s events are about creating a feeling, a whole vibe. Decor is no longer just a backdrop; it’s a central part of the guest experience.

Embracing Sustainability and Natural Elements

One of the biggest shifts we’re seeing is the move towards sustainability. It’s more than a buzzword; planners and hosts are making genuinely eco-conscious choices, and the best decor hire companies are right there with them. This isn’t just about using recycled materials. It’s a whole philosophy built on reusing beautiful things and celebrating natural textures.

Think about bringing in elements like:

  • Living Plants: Why use cut flowers that will be thrown away? Hiring potted trees, lush ferns, or trendy succulents makes a bigger impact and feels so much more alive.
  • Reusable Structures: Good quality, well-maintained furniture, arches, and backdrops are designed to be used again and again. It’s the smart and sustainable choice.
  • Natural Textures: We’re seeing a huge demand for decor made from wood, linen, stone, and rattan. These materials create an organic, grounded atmosphere that feels both luxe and laid-back.

This approach isn’t just better for the planet; it adds a layer of authentic, earthy elegance that instantly elevates any event space.

Sculptural Florals and Immersive Installations

Forget traditional, boring centrepieces. The 2025 event decor scene in South Africa is all about making bold, artistic statements with sculptural floral designs and immersive installations. We’re talking about dramatic hanging arrangements that float above guests, sprawling floral runners that cascade off tables, and freestanding art pieces that create incredible photo moments.

The whole game has changed. Decor is now central to creating a memorable environment, and with costs rising, hiring these statement pieces is much more attractive than buying them outright. You can see more on how these trends are shaping the event industry on Decor-Essentials.com.

The goal is to make guests feel like they’ve stepped into another world. The right decor hire company won’t just drop off items; they’ll give you the building blocks to create an entire sensory experience.

Pulling off this kind of immersive design takes a creative eye and a seriously well-stocked inventory. If you need some visual inspiration, checking out concepts like inspiring trade show display ideas can spark some fantastic creativity for your own event’s look.

When you’re chatting with potential suppliers, make sure to ask to see their portfolio of large-scale or custom installations. This is how you’ll know if they have the skills and creative flair to execute a truly modern vision, ensuring your event feels current, captivating, and perfectly on-trend.

Navigating Venue Logistics in Cape Town and The Winelands

You’ve found the perfect decor pieces—fantastic! But getting them to your venue and set up just right is a whole different ball game. The unique lay of the land in Cape Town and the Winelands can throw a few logistical curveballs, making it crucial to plan ahead, especially after you’ve searched for “event decor hire near me”.

Getting on the same page with your venue manager from day one is absolutely essential. So many venues, especially those beautiful old wine estates in Stellenbosch or exclusive spots in Franschhoek, have their own set of rules for outside suppliers. Trust me, you want to get these details sorted out early to sidestep any day-of drama.

Master the Venue’s Rules of Engagement

Before you even think about putting down a deposit with your decor company, you need to have a rock-solid understanding of what your venue allows. A quick phone call or an email to the venue coordinator can save you a mountain of stress down the line.

Here’s what you need to ask your venue:

  • Supplier Access: Are there strict times for deliveries and collections? Some venues are incredibly specific, like only allowing collections after 10 PM.
  • Loading Zones: Is there a designated spot for loading and unloading? This is a big deal for venues where space is tight.
  • Vehicle Restrictions: Are there any limits on the size of delivery trucks? Those narrow farm roads in Paarl can be a real headache for a large vehicle.
  • Setup Limitations: Are there any no-go zones? For example, can things be hung from the ceilings, or are open flames a definite no?

Having these answers upfront helps your hire company plan their schedule and staff properly, which means a much smoother, more efficient setup for you. And as event decor evolves, this planning becomes even more important.

A timeline illustrating the evolution of event decor trends from 2020s sustainability to 2025s sculptural statements.

As you can see, the move towards more complex and immersive decor means that the logistics have to be flawless.

Create a Synchronised Timeline

Right, you’ve got the venue’s rules. Now it’s time to work with your decor supplier to build a shared timeline. Think of this as your event day blueprint. It gets everyone—from the delivery driver to the venue manager—on the exact same page.

Make sure your timeline clearly maps out these key moments:

  1. Delivery Arrival: The precise time the truck is scheduled to pull up.
  2. Installation Window: The dedicated block of time for the decor team to work their magic.
  3. Final Checks: A little bit of buffer time for you or your planner to do a final walkthrough and make sure everything is perfect.
  4. Breakdown and Collection: The agreed-upon time for the team to come back, dismantle everything, and take it all away.

Here’s the secret sauce: crystal-clear communication between you, your venue, and your decor supplier. A detailed, shared timeline gets rid of any guesswork and makes sure every little logistical detail is covered. No last-minute panic attacks.

If you’re looking for more local advice and a better sense of your options, digging into a dedicated guide on decor hire in Cape Town can offer some really valuable, region-specific insights. By taking charge of these details now, you can relax, knowing the beautiful decor you hired will look exactly as you dreamed it would.

Alright, you’ve narrowed down your choices and are ready to get into the nitty-gritty. This is where the real planning magic happens. As you move from browsing to booking, a few key questions always pop up.

Think of this as the final checklist to run through before you sign on the dotted line. We’re covering everything from timing your booking just right to what happens if that one-of-a-kind velvet sofa you’ve been eyeing is already taken. Let’s get you ready to book with total confidence.

How Far in Advance Should I Book My Decor?

Honestly, the golden rule here is: the earlier, the better. This is especially true if you’re planning an event during the peak season in Cape Town and the Winelands.

For weddings and other big celebrations, I’d strongly recommend locking in your decor six to nine months out. This isn’t just about making sure you get what you want; it also secures your pricing before any seasonal hikes.

Planning a smaller get-together or a corporate function? You’ve got a bit more breathing room. About three to four months is usually a safe bet. But—and this is a big but—if your heart is set on a specific, show-stopping piece like a unique ceremony arch or a particular style of lounge pod, book it the moment your venue and date are confirmed. Those high-demand items go fast.

What If an Item I Want Is Already Booked?

It’s a gut-wrenching moment: you find out the perfect ghost chairs or that rustic wooden bar are already booked for your date. First, take a breath. Don’t panic! Any good decor hire company has a plan B (and C, and D).

Here’s what to do next:

  • Ask for alternatives. They might have something similar that hasn’t even made it onto their website yet. It happens all the time.
  • Talk them through your vision. Don’t just focus on the one item. Explain the overall look and feel you’re trying to create. Their stylists live and breathe this stuff and can probably suggest a different combination of items that nails the exact vibe you’re after.
  • Hop on a waiting list. It’s a long shot, but cancellations do happen. It never hurts to ask them to give you a call if the item frees up.

Do Companies Offer Styling and Setup Services?

Yes, and it’s a game-changer! Many decor hire companies have evolved beyond simple drop-and-go rentals. A growing number now offer styling and setup services, which is a fantastic help if you’re not working with a dedicated wedding planner or event coordinator.

The level of service can vary, so be sure to ask what’s on offer. It could be:

  • Basic Setup: This usually involves placing the larger furniture pieces according to a floor plan you’ve both agreed on. Simple, but it saves you and your family a lot of heavy lifting.
  • Full Styling: This is the whole package. They’ll help you develop a concept from scratch, select every last decor element, and then handle the complete setup and breakdown after the event.

Always clarify what’s included in the quote. Setup is almost always an additional fee, but trust me, it’s usually worth every cent for a polished, professional look without the day-of stress.

A quick pro tip: ask if their styling service includes working with your other vendors, especially your florist. When your decor team and floral designer are on the same page, the result is a beautifully cohesive look that really elevates the entire event.

The demand for professional event services in South Africa is definitely on the rise, thanks to a buzzing corporate scene and everyone wanting a truly memorable celebration. With big international events like the G20 summit and the 2027 Cricket World Cup on the horizon, the bar for exceptional event decor is only getting higher. You can read more about the growth in South Africa’s event industry here to see just how much the landscape is changing.

What Is a Damage Deposit or Waiver?

This is standard practice, so don’t be surprised when it comes up. Every hire company needs a way to protect their inventory. It usually works in one of two ways:

  • A Refundable Damage Deposit: You’ll pay a set amount upfront. After the event, they’ll inspect the items, and as long as everything is returned in good shape, you get the full amount back.
  • A Non-Refundable Damage Waiver: This is a small fee, often a percentage of your total hire cost (say, 5-10%), that you pay with your order. It acts like a mini-insurance policy, covering you for minor, accidental oopsies like a small scuff mark or a drink spill. It means you won’t risk losing a big deposit over a little mishap.

Make sure you’re clear on which system the company uses and exactly what it covers before you sign the contract.


Planning the perfect event starts with the right partners. At ABC Hire, we provide high-quality, stylish furniture and decor to make your Cape Town or Winelands event truly unforgettable. From elegant lounge sets to eye-catching LED bars, we have the inventory to bring your vision to life.

Ready to create something amazing? Browse our collection and get a quote today at https://abchire.co.za.

Discover Wedding Decor Ideas on a Budget: 30+ Stunning Tips for Cape Town 2025

Your wedding day should be a reflection of your love story, not a source of financial stress. Many couples believe that a breathtakingly beautiful wedding is synonymous with a colossal budget, but that's a myth we're here to bust. With a dash of creativity and some savvy planning, you can achieve a high-end look that feels personal, unique, and wonderfully affordable. This comprehensive guide is packed with over 30 actionable wedding decor ideas on a budget, specifically curated to complement stunning Cape Town-area venues.

We move beyond generic advice to provide practical, step-by-step insights that you can implement immediately. You will discover how to transform a space with everything from DIY floral masterpieces using seasonal fynbos to enchanting fairy light canopies that create a magical ambiance. We will delve into clever rental strategies that maximise style while minimising cost, and explore repurposed vintage finds that add character without the hefty price tag.

Whether you're exchanging vows with Table Mountain in the background or celebrating in a chic winelands estate, these tips will help you create an unforgettable atmosphere. This listicle focuses on decor, but the principles of smart, stylish planning can extend to your entire celebration. For even more comprehensive strategies for a beautiful event, consider exploring various creative wedding reception ideas on a budget that don't compromise on style. Let's start crafting a day that looks a million rand, but isn’t.

1. DIY Floral Arrangements with Seasonal, Local Flowers

Creating your own floral arrangements is one of the most impactful wedding decor ideas on a budget, allowing you to bypass significant florist markups while adding a deeply personal touch. By sourcing flowers that are in-season and local to the Western Cape, you not only save money but also infuse your wedding with authentic, regional beauty. Think vibrant fynbos, majestic proteas, and delicate Cape wildflowers that reflect the stunning natural landscape.

This hands-on approach connects your decor directly to the local environment, creating a story that is uniquely yours. It’s an opportunity to design everything from the bridal bouquet to the table centrepieces, ensuring a perfectly cohesive and heartfelt aesthetic.

Two bouquets of seasonal flowers in glass jars on a wooden table outdoors with text 'SEASONAL BLOOMS'.

Why It Works & Cost Breakdown

Florist labour and sourcing for specific, out-of-season flowers are major cost drivers. By taking on the assembly yourself and using what’s readily available, the savings are substantial.

  • Cost Estimate: R2,000 – R5,000 for all wedding flowers (bouquets, boutonnieres, table centrepieces) vs. R15,000+ from a professional florist.
  • Example Savings: A single King Protea stem can be sourced from a local farm or market for R30-R50, whereas a florist might charge upwards of R150 for the same stem.

How to Implement This Idea

  1. Source Smartly: Visit the Cape Town Flower Market in Adderley Street early in the morning for the best wholesale selection and prices. Alternatively, connect with local flower farms in areas like Durbanville or Stellenbosch.
  2. Learn the Basics: Countless free tutorials on YouTube cover essential floral design techniques, from creating a balanced bouquet to building a structural centrepiece.
  3. Prepare Your Blooms: The day before the wedding, snip about 2-3 cm off each stem at a 45-degree angle. Immediately place them in buckets of cool water to hydrate overnight. This simple step ensures they look fresh and vibrant on your big day.
  4. Choose Your Vases: While you can collect your own glass jars, renting a curated set of vases from a supplier like ABC Hire ensures a polished and unified look across all your tables without the cost of purchasing. Consider their elegant Glass Console Jars for a classic, minimalist style.

2. String Lights and Fairy Light Canopies

Harnessing the power of ambient lighting is a transformative yet affordable wedding decor idea on a budget. Creating a magical atmosphere with string lights, fairy lights, or classic bistro lights can elevate any venue, from a rustic barn in the Elgin Valley to a chic urban space in Cape Town, without the high cost of professional lighting designers. The right lighting creates warmth, intimacy, and a stunning backdrop for photography.

This approach is incredibly versatile, allowing you to define spaces, create focal points, and add a touch of romance. Whether you're draping them from the rafters of an industrial venue or creating a glowing canopy for an outdoor reception under the stars, the effect is consistently breathtaking and memorable for your guests.

An outdoor wedding venue at dusk with string lights creating a beautiful canopy over white tables.

Why It Works & Cost Breakdown

Professional lighting installations can run into tens of thousands of Rands. By sourcing the lights yourself or opting for a strategic rental, you can achieve a high-end look for a fraction of the price. The key is in the volume and placement, not the cost of the individual bulbs.

  • Cost Estimate: R1,500 – R4,000 for purchasing or renting enough lights to cover a medium-sized reception area vs. R12,000+ for a custom lighting design package.
  • Example Savings: Purchasing 100 metres of commercial-grade bistro lights might cost R2,500, an asset you can reuse, sell, or split with other couples. A professional might charge over R7,000 to supply and install the same amount.

How to Implement This Idea

  1. Source Affordably: Look for bulk deals on string lights from online retailers or large hardware stores. End-of-season sales are also a great time to buy.
  2. Test Everything: A week before the wedding, plug in and test every single strand of lights to ensure there are no dead bulbs or faulty connections. This avoids any last-minute stress on the day.
  3. Plan Your Installation: Use sturdy hooks, zip ties, or clear fishing line to attach lights securely to beams, poles, or trees. Always confirm with your venue what is permitted for hanging decor.
  4. Rent for Impact: For a truly dramatic effect without the hassle of purchasing and setup, consider renting a pre-made solution. ABC Hire offers Fairy Light Curtains, perfect for creating a dazzling photo backdrop or dividing a large space. To learn more about how to use these effectively, explore our guide on creating stunning backdrops with fairy light curtains.

3. Paper and Cardboard Decorations

Harnessing the versatility of paper and cardboard is one of the most creative wedding decor ideas on a budget, offering impressive visual impact for a fraction of the cost of traditional materials. From intricate paper flower backdrops to charming cardboard signage, these lightweight elements can be customised to fit any wedding theme, colour scheme, and venue. They provide a whimsical, handmade feel that adds immense personality to your celebration.

This DIY-friendly approach allows you to transform a simple material into something extraordinary. Imagine oversized tissue paper pompoms floating above the dance floor or a delicate, hand-cut paper flower arch framing your ceremony. It’s an accessible way to create large-scale installations and personalised details without overspending.

Why It Works & Cost Breakdown

The primary cost of paper decor is time, making it an excellent budget-saver if you are willing to get crafty. Materials like cardstock, tissue paper, and cardboard are incredibly inexpensive compared to florals, fabric, or wood.

  • Cost Estimate: R500 – R1,500 for materials to create significant decor elements (e.g., photo booth backdrop, ceiling installations, signage) vs. R4,000+ for similar items made from other materials.
  • Example Savings: A large floral arch can cost R5,000+, while a stunning paper flower arch can be crafted for under R1,000 in materials.

How to Implement This Idea

  1. Choose Your Projects: Focus on high-impact areas. Popular choices include a ceremony backdrop, hanging pompoms over the reception tables, custom 'Mr & Mrs' signs for chairs, or kraft paper table runners with hand-drawn designs.
  2. Source Quality Materials: Visit craft stores like PNA or Art Board for a wide selection of cardstock, crepe paper, and tissue paper. For sturdy cardboard signs, ask local appliance or furniture stores for clean, unwanted boxes.
  3. Use Templates and Tools: To ensure a professional and consistent look, purchase or download digital templates from sites like Etsy for flowers or lettering. A good quality craft knife, cutting mat, and hot glue gun will be your best friends.
  4. Host a Crafting Party: Turn the preparation into a memorable pre-wedding event. Invite your bridal party over to help cut, fold, and assemble the decorations. This speeds up the process and adds a collaborative, personal touch to the final decor.

4. Thrift Store and Vintage Finds Repurposing

Sourcing unique decor from thrift stores, estate sales, and antique shops is a brilliant way to achieve bespoke wedding decor ideas on a budget. This sustainable approach allows you to discover one-of-a-kind pieces with history and character, from ornate candelabras to mismatched vintage china, which add a layer of storytelling to your reception.

Refinishing or repurposing these finds creates a cohesive, high-end look without the designer price tag. It's an opportunity to curate a wedding aesthetic that feels collected and deeply personal, transforming forgotten treasures into stunning focal points for your special day.

Why It Works & Cost Breakdown

High-quality, unique decor pieces are expensive when bought new. Thrifting bypasses retail markups entirely, offering access to well-made items for a fraction of their original cost. The investment is primarily your time and a small budget for restoration supplies.

  • Cost Estimate: R1,500 – R4,000 for a wide array of unique decor items (mirrors, frames, vases, candle holders, crates).
  • Example Savings: A large, ornate vintage mirror for a welcome sign or seating chart might cost R250-R400 at a Hospice shop or on Facebook Marketplace, compared to R2,000+ for a new equivalent.

How to Implement This Idea

  1. Define Your Palette: Before you start shopping, establish a clear colour scheme and aesthetic (e.g., romantic, rustic, art deco). This focus prevents you from buying items that don’t fit your overall vision.
  2. Hunt Strategically: Regularly visit charity shops in affluent areas like Constantia or Somerset West, and keep an eye on estate sales and online marketplaces for hidden gems. Consistency is key to finding the best pieces.
  3. Plan for Minor Restorations: Budget a small amount for supplies like metallic spray paint, wood polish, or glass cleaner. A quick coat of paint can instantly unify a collection of mismatched frames or candle holders.
  4. Balance DIY with Rentals: While hunting for small treasures is fun, sourcing larger items like furniture can be challenging. For more information about incorporating larger pieces, you can explore the benefits of hiring vintage furniture in Cape Town. To ensure a professional and cohesive look, supplement your thrifted finds by renting key statement pieces, like a classic Vintage Signing Table or elegant lounge furniture from ABC Hire, to anchor your decor.

5. Candles and Candlelight Atmosphere

Harnessing the power of candlelight is a classic and incredibly effective wedding decor idea on a budget. It creates an intimate, romantic, and elegant atmosphere that instantly elevates any space, from a rustic barn in the winelands to a chic urban loft in Cape Town. The soft, flickering glow adds warmth and sophistication far beyond its minimal cost.

This timeless approach is versatile and impactful. Strategic placement of candles in varying heights, colours, and holders can define spaces, highlight architectural features, and create a cohesive, dreamy ambiance. It’s about crafting a mood that feels both luxurious and deeply personal.

Why It Works & Cost Breakdown

The return on investment for candlelight is immense. Candles are inexpensive, especially when bought in bulk, yet they create a high-end, magical atmosphere that would otherwise require complex and costly lighting setups.

  • Cost Estimate: R1,500 – R4,000 for a mix of pillar, votive, and taper candles for the entire venue vs. R8,000+ for professional ambient lighting services.
  • Example Savings: A bulk box of 72 unscented votive candles can be purchased for around R300, providing an affordable way to line walkways or fill table centrepieces with light.

How to Implement This Idea

  1. Buy in Bulk: Source candles from wholesale suppliers like Makro or online retailers to get the best price per unit. Look for long-burn pillar and votive candles to ensure they last the entire evening.
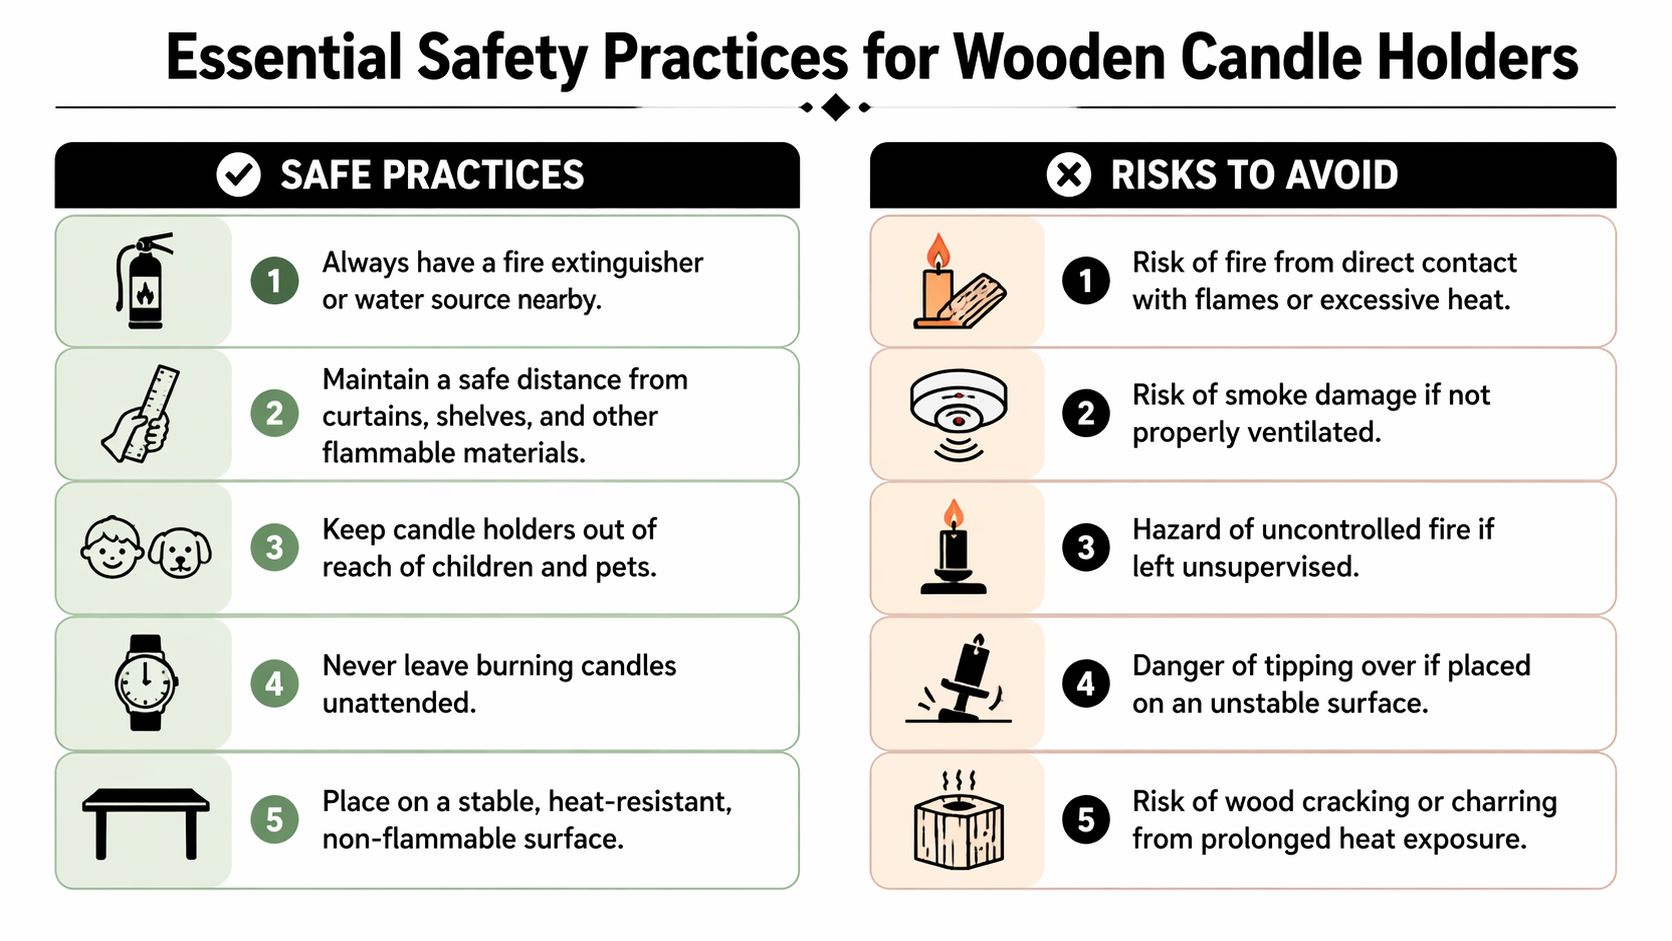
  2. Safety First: Always check your venue’s fire safety regulations. Many venues, especially historic wine farms or those with thatch roofs, may require candles to be enclosed in holders (like hurricanes or lanterns) or insist on high-quality, realistic flameless LED candles.
  3. Group for Impact: For a visually appealing arrangement, group candles in odd numbers (3, 5, or 7) and vary their heights. This creates depth and a more organic, less structured look on tables and focal points.
  4. Rent Your Holders: Instead of buying dozens of candle holders you may never use again, rent them. ABC Hire offers a vast selection, from sleek Glass Cylinder Vases perfect for pillar candles to elegant Brass Candlesticks that add a touch of vintage glamour to your tablescape.

6. Greenery and Foliage-Heavy Designs

Embracing greenery and foliage-heavy designs is a sophisticated and highly effective strategy for wedding decor ideas on a budget. This approach shifts the focus from costly blooms to abundant, textural greenery like eucalyptus, olive branches, and ferns, creating a lush, organic atmosphere at a fraction of the price of traditional floral arrangements.

The beauty of this idea lies in its versatility and impact. You can achieve dramatic, high-end looks, such as a full foliage ceremony arch or long, flowing garlands down banquet tables, without the significant expense associated with flower-dense decor. It’s a perfect fit for venues across the Western Cape, from rustic wine farms to modern urban spaces.

Why It Works & Cost Breakdown

Greenery is significantly less expensive per stem than most flowers, and its volume allows you to cover more space with less product. By using foliage as the primary decorative element and flowers as accents, you can stretch your budget dramatically.

  • Cost Estimate: R3,000 – R6,000 for extensive ceremony and reception greenery vs. R15,000+ for equivalent floral-heavy designs.
  • Example Savings: A bunch of eucalyptus might cost R80-R120 from a wholesaler and can form the base for two to three table centrepieces. In contrast, filling the same space with roses or peonies would cost several hundred rand per table.

How to Implement This Idea

  1. Source in Bulk: Contact local farms or wholesale suppliers in the Cape region for bulk orders of greenery. Penny gum (eucalyptus), olive branches, and Cape fynbos foliage are excellent, hardy local options.
  2. Mix Textures: Create depth and visual interest by combining different types of foliage. Pair the soft, silvery leaves of eucalyptus with the dark, glossy leaves of a salal lemon leaf and the delicate texture of ferns.
  3. Condition Your Greenery: The day before, trim the ends of the stems and place them in buckets of water. This helps them hydrate fully, ensuring they stay fresh throughout your wedding day, even in the warm Cape climate.
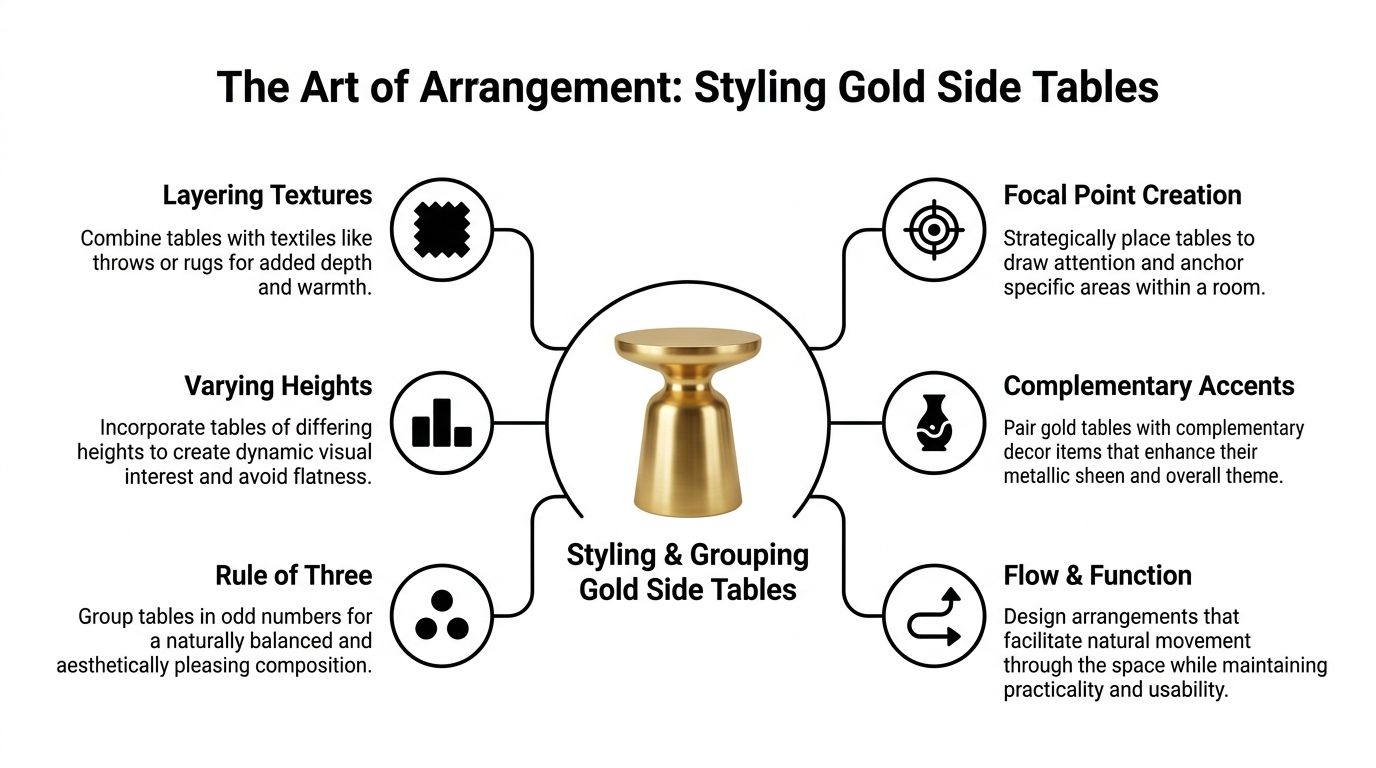
  4. Incorporate Minimalist Accents: To elevate the look, place your greenery arrangements in stylish, modern containers. Renting items like the Gold Geometric Stands from ABC Hire provides an elegant structure for cascading greenery on guest tables or as aisle markers, adding a touch of contemporary flair.

7. DIY Backdrop and Photo Booth Walls

A custom backdrop is a fantastic way to create a focal point for your ceremony, head table, or a dedicated photo booth area. This is one of the most versatile wedding decor ideas on a budget, as it provides a high-impact visual element that also serves a practical purpose, encouraging guest interaction and creating lasting photo memories. From painted plywood to flowing fabric drapes, the possibilities are endless and can be tailored to your specific theme.

This hands-on project allows you to inject your personality directly into the decor, creating a unique background that reflects your story as a couple. Whether it’s a minimalist wooden arch or an elaborate wall adorned with paper flowers, a DIY backdrop guarantees a memorable and photogenic feature at your wedding.

A DIY wedding decor backdrop with a wooden frame, white fabric, artificial ivy, and a cushioned bench.

Why It Works & Cost Breakdown

Professional backdrops can be costly to rent or purchase, often involving delivery and setup fees. Building your own from affordable materials dramatically reduces this expense while giving you complete creative control over the final look.

  • Cost Estimate: R500 – R1,500 for a completely custom DIY backdrop vs. R2,000+ for a standard rental.
  • Example Savings: A sheet of pre-primed plywood from a local hardware store costs around R400-R600. With a bit of paint and creativity, you can create a personalised backdrop for a fraction of the cost of a professional floral wall or custom-printed vinyl.

How to Implement This Idea

  1. Choose Your Base: Select a simple, cost-effective material. A large sheet of plywood can be painted with your initials, a wooden pallet wall offers rustic charm, or a simple PVC pipe frame can be used to hang elegant fabric drapes.
  2. Plan Your Design: Sketch your idea first. For a painted backdrop, use painter's tape to create crisp geometric patterns or lettering. For a fabric wall, choose materials like tulle or chiffon for a soft, romantic feel.
  3. Add Dimension: Enhance your backdrop with layers. Weave fairy lights through fabric, attach a eucalyptus or fynbos garland to a wooden frame, or hang paper lanterns at varying heights for depth and visual interest.
  4. Consider a Hybrid Approach: If a full DIY seems too daunting, focus on personalising a rental. Renting a simple structure like a wooden arch or frame from ABC Hire gives you a professional-grade foundation to decorate yourself. Discover more professional options by reading about backdrop hire for your Cape Town event.

8. Homemade Garland and Draping Installations

Crafting your own garlands and installing fabric draping are transformative wedding decor ideas on a budget that add immense scale, texture, and romance to any venue. This DIY approach allows you to create high-impact installations, like a lush ceremony arch or a soft, elegant ceiling canopy, for a fraction of the cost charged by professional decorators.

By using affordable materials like eucalyptus, fynbos, or even paper, combined with flowing fabric, you can soften architectural lines, define specific areas, and build a cohesive, immersive atmosphere. This method offers complete creative control to design installations that perfectly frame the most important moments of your day.

Why It Works & Cost Breakdown

Professional installation fees for large-scale garlands and draping are significant due to the labour and specialised equipment involved. Creating these elements yourself eliminates that cost, leaving only the expense of raw materials, which can be sourced very economically.

  • Cost Estimate: R1,500 – R3,500 for materials (greenery, fabric, supplies) for a major installation vs. R10,000+ for a professional service.
  • Example Savings: A professionally made 3-metre eucalyptus garland can cost R2,000 or more. Sourcing the greenery yourself from a local farm or market can reduce this to under R500 in material costs.

How to Implement This Idea

  1. Choose Your Materials: For greenery, hardy options like Penny Gum (eucalyptus), fynbos, or olive branches work well in the Cape climate and are cost-effective. For draping, purchase sheer voile or organza in bulk from fabric wholesalers in areas like Salt River, Cape Town.
  2. Construct in Sections: Build long garlands in manageable 1- to 2-metre sections. Use a sturdy base like rope or thick floral wire and attach small bunches of greenery with thinner wire or zip ties, layering them to create a full, lush look.
  3. Plan the Installation: Visit your venue to take precise measurements and identify secure attachment points. Create a clear plan and timeline, allowing at least 2-3 hours for installation with the help of your wedding party.
  4. Enhance with Fabric: While DIY draping is an option, achieving a professional look can be tricky. Consider renting draping panels and the necessary rigging from ABC Hire. Their extensive range of Draping options ensures you have high-quality, clean fabric and the correct support structures for a safe and polished installation.

9. Tablecloth and Linens Alternatives and Rentals

Full tablecloths can quickly become a significant expense, but smart linen choices are one of the most effective wedding decor ideas on a budget. Instead of covering every table completely, focus on strategic alternatives like elegant table runners or layered overlays. This approach adds colour, texture, and sophistication to your tablescapes without the high cost of full-size premium linens.

Renting standard linens and customising them with DIY or purchased runners gives you a high-end look for a fraction of the price. This method allows for creative expression, such as an ombre dyed runner that creates a stunning gradient effect, while keeping your decor budget firmly in check.

Why It Works & Cost Breakdown

Purchasing custom or high-quality linens is expensive, especially for a large wedding. Renting basic linens and accenting them with affordable runners or overlays delivers maximum visual impact for minimal spend. The savings come from using less fabric and avoiding the cost of buying items you'll only use once.

  • Cost Estimate: R1,500 – R3,000 for all tables (renting basic cloths, buying/DIYing runners) vs. R7,000+ to purchase or rent premium, full-size specialty linens.
  • Example Savings: A cheesecloth table runner can be purchased online for R150, or you can DIY one for under R80, compared to renting a full speciality tablecloth which can cost over R400 per table.

How to Implement This Idea

  1. Prioritise Your Tables: Use full, high-quality tablecloths on key tables like the main bridal table or the cake display, and opt for more budget-friendly runners on guest tables.
  2. Explore DIY Options: Purchase inexpensive cotton or linen-blend fabric and use Rit dye (around R50 a box) to create custom-coloured runners. Always test your dye on a small scrap of fabric first to ensure you achieve the desired shade.
  3. Layer for Luxury: Use sheer fabric overlays on top of standard rental cloths to add dimension and an elegant texture. This gives a more luxurious feel without the cost of heavily embroidered or sequined linens.
  4. Rent the Basics: For a crisp, clean foundation, rent your base tablecloths. A supplier like ABC Hire offers a wide range of standard tablecloths in various sizes and colours, like their versatile Polyester Trestle Tablecloths, which provide the perfect neutral canvas for your creative accents.

10. Music, Playlist, and Ambient Sound Design

Crafting a sophisticated atmosphere through carefully curated playlists is a powerful wedding decor ideas on a budget strategy that replaces the significant cost of live musicians or a DJ. Strategic sound design allows you to control the event's energy-from a serene ceremony to an upbeat reception-without compromising on quality or elegance. This approach gives you complete creative control over the sonic backdrop of your day.

By designing the ambient sound, you are essentially "decorating" the space with music, creating a rich, immersive experience that guides your guests' emotions throughout the celebration. It’s an invisible yet deeply impactful element that defines the mood more than many physical decorations might, and it costs a fraction of the price.

Why It Works & Cost Breakdown

Live entertainment is one of the biggest expenses in a wedding budget. A DIY playlist and a high-quality rental speaker system deliver professional-grade sound for an incredibly low investment, channelling thousands of Rands towards other priorities.

  • Cost Estimate: R1,500 – R3,000 for a professional speaker and microphone rental vs. R8,000 – R20,000+ for a wedding DJ or live band.
  • Example Savings: You can access millions of songs through a premium streaming service for around R60/month, compared to a DJ's fee which includes their equipment, time, and music library access.

How to Implement This Idea

  1. Curate Meticulously: Create separate playlists on a service like Spotify or Apple Music for each part of your day: pre-ceremony, processional, cocktail hour, dinner, and dancing. To perfectly complement your chosen aesthetic, explore options to enhance the atmosphere by finding and licensing suitable tracks and exploring music by mood.
  2. Rent Professional Gear: Don’t rely on a small personal speaker. Rent a professional-grade sound system from a supplier like ABC Hire. Their PA System with Cordless Mic is perfect for delivering clear sound for both vows and music across your venue.
  3. Create a Timeline: Map out your entire wedding day and assign specific songs or playlists to each segment. Note key transitions, such as the walk down the aisle or the first dance, and ensure your designated music manager knows the cues.
  4. Test Everything: A week before the wedding, test your entire setup at the venue if possible. Check speaker placement for optimal sound coverage and ensure your playback device connects flawlessly. Prepare a backup playlist on a separate, fully charged device.

Budget Wedding Decor: 10-Item Comparison

Item 🔄 Complexity ⚡ Resource needs ⭐ Expected outcome 📊 Ideal use cases 💡 Key advantages
DIY Floral Arrangements with Seasonal Flowers Moderate — basic floral skills; 1–2 days prep Moderate — bulk seasonal blooms, vases, clippers; $200–500 High — fresh, elegant results when done well Budget weddings, centerpieces, bouquets, intimate ceremonies Significant cost savings vs florists; customization; fresher blooms
String Lights and Fairy Light Canopies Low — simple hanging and testing required Low–Moderate — lights, power/batteries, hooks; $75–300 High — strong ambient impact, very photogenic Evening outdoor/indoor receptions, canopy effects Reusable; one-time investment; solar options available
Paper and Cardboard Decorations Moderate–High — time-consuming crafting Low — paper supplies, adhesives; $30–150 Moderate — high visual impact if well-executed; risk of appearing casual DIY-focused weddings, statement backdrops, craft parties Very low cost; fully customizable; recyclable options
Thrift Store and Vintage Finds Repurposing Moderate — time hunting and occasional restoration Low–Moderate — thrift purchases, cleaning/repair supplies; $100–300 High — unique, characterful decor; varied cohesion Vintage, eclectic, sustainable-themed weddings One-of-a-kind pieces; sustainable; great resale/home reuse potential
Candles and Candlelight Atmosphere Low — simple placement, safety checks needed Low — candles, holders, flameless options; $75–200 High — intimate, flattering light for photos Dinner receptions, aisle decor, romantic ceremonies Affordable ambience; flameless alternatives; reusable
Greenery and Foliage-Heavy Designs Moderate — conditioning and assembly required Moderate — bulk greenery, hydration supplies; $100–250 High — lush, long-lasting texture; fewer focal flowers needed Garden, rustic, minimalist weddings, arches/garlands Cost-effective vs specialty flowers; trendy organic look
DIY Backdrop and Photo Booth Walls Moderate — carpentry/securing skills helpful Low–Moderate — fabric, wood, frames, lights; $50–200 High — strong focal point and photo opportunities Photo booths, ceremony backdrops, reception focal walls Multi-purpose (decor + photo); reusable; Instagram-friendly
Homemade Garland and Draping Installations High — labor- and time-intensive; may need helpers Moderate — greenery/flowers, wire, tools; $150–400 High — dramatic venue transformation when installed well Ceremony arches, staircases, long-table draping Scalable custom lengths; major savings vs florist installations
Tablecloth and Linens Alternatives and Rentals Low — rentals simple; DIY dyeing requires testing Low–Moderate — rental fees or dye supplies; $150–300 (100 guests) Moderate–High — polished look with layered options Large receptions, formal tables, budget-conscious events Cost-effective via rental; variety via layering; no storage/cleaning
Music, Playlist, and Ambient Sound Design Moderate — technical setup and monitoring needed Low–Moderate — speakers, playlist service, backup; $0–500 High — controlled atmosphere; lacks live performer spontaneity Cocktail hours, ceremonies, receptions on a budget Major cost savings vs live musicians; precise timing control

Your Beautiful, Budget-Savvy Wedding Awaits

Creating the wedding of your dreams in a location as stunning as Cape Town doesn't have to mean emptying your savings account. Throughout this guide, we've explored a wealth of creative and resourceful approaches to transform any venue into a magical space that truly represents you as a couple. The journey from engagement to "I do" should be filled with joy, not financial anxiety, and mastering the art of budget-friendly decor is a significant step towards achieving that peace of mind.

The most memorable and beautiful weddings are often those filled with personal touches, ingenuity, and smart, strategic choices. By embracing the ideas we've covered, from the rustic charm of repurposed thrift store finds to the ethereal glow of DIY fairy light canopies, you can design a celebration that is both breathtaking and financially responsible. The key is to find the perfect balance between your vision and your budget, realising that these two elements don't have to be in conflict. In fact, working with a budget can often spark the most innovative and personal ideas.

Key Takeaways for a Stunning, Affordable Celebration

Let's distill the core principles from the many wedding decor ideas on a budget we've discussed:

  • Prioritise with Purpose: Identify the 2-3 decor elements that matter most to you. Is it a stunning ceremony backdrop? Lush, overflowing tablescapes? Focus your budget and energy there, and simplify elsewhere. Not every corner needs a masterpiece.
  • Embrace the Power of Nature: Cape Town's natural beauty is your greatest asset. Leveraging local, seasonal flowers and abundant greenery is not only cost-effective but also creates an authentic, organic aesthetic that complements our region's venues perfectly.
  • The DIY and Rental Hybrid Model: The most successful budget weddings masterfully combine DIY projects with strategic rentals. Crafting your own photo booth props or table numbers adds a personal touch, while renting foundational items like high-quality linens, elegant glassware, or structural marquee tents ensures a polished, professional finish without the long-term cost.
  • Light is Your Most Valuable Tool: Never underestimate the transformative power of lighting. Simple string lights, strategically placed candles, and uplighting can completely alter the mood and atmosphere of a space for a fraction of the cost of elaborate floral installations.

Your Actionable Next Steps

Feeling inspired? It's time to turn these ideas into a concrete plan. Start by creating a mood board that captures your desired aesthetic. Next, audit your list of ideas and categorise them into "Must-Have," "Nice-to-Have," and "Can-Live-Without." This simple exercise will be your roadmap for allocating funds effectively.

Begin sourcing materials for your DIY projects early, keeping an eye out at local markets and second-hand shops. Simultaneously, start a conversation with a reputable rental partner. Discuss your vision and get a clear understanding of costs for those essential, high-impact items. This dual approach of crafting and renting is the secret to achieving a high-end look without the associated price tag.

Ultimately, your wedding day is a celebration of your unique love story. The decor is simply the canvas upon which that story is painted. By infusing your personality, creativity, and resourcefulness into every detail, you are not just saving money; you are creating an experience that is deeply and authentically yours. With these tips and a little bit of planning, you can absolutely have the stylish, memorable wedding you've always envisioned, all while honouring your financial goals.


Ready to bring your vision to life with a flawless foundation? For those key items that provide structure and polish, partner with ABC Hire to elevate your DIY efforts and ensure a seamless, professional finish. Explore our extensive catalogue of affordable, high-quality rental items, from tables and chairs to lighting and catering equipment, on our website: ABC Hire.

Bar Refrigerator Sizes: Bar Refrigerator Sizes Guide for Events

When you’re planning an event, getting the details just right is what separates a good time from a great one. And let’s be honest, perfectly chilled drinks are non-negotiable. The right bar refrigerator is the unsung hero of any successful party, with common bar refrigerator sizes for hire ranging from compact 50-litre units for intimate get-togethers to massive 200+ litre back-bar coolers for major functions.

Matching Your Event to the Perfect Fridge Size

Choosing the right bar fridge is a bit like picking the right tool for a job. You wouldn’t bring a tiny hammer to a massive construction site, and a mini-fridge just won’t cut it for a big wedding. The real trick is to match the fridge’s capacity and footprint to your event’s scale and style. This isn’t just about keeping drinks cold; it’s about making sure they’re easy for guests and staff to grab.

Two black bar refrigerators, one open with drinks, in a modern room with a "PERFECT FRIDGE SIZE" sign.

Think of it this way: a well-placed under counter fridge is essential for the smooth flow of a professional setup, making it a key part of any https://www.abchire.co.za/blog/mobile-bar-service/. On the other hand, a large glass-door unit doubles as both storage and a visual menu, which can seriously speed up service at a busy function. It’s all about operational efficiency.

Key Size Considerations

Here in South Africa, refrigerators are a big deal in home appliances, holding a whopping 27.52% market share in 2024. What’s interesting for event planners is the growing love for smaller, energy-efficient models like bar fridges. These units, typically between 50 and 150 litres, are popular because they’re versatile and fit perfectly under counters.

So, when you’re picking a size, here’s what to keep in mind:

  • Guest Count: More people means more drinks. It’s the most direct factor influencing what you’ll need.
  • Event Duration: A quick two-hour cocktail party has different needs than an all-night celebration.
  • Beverage Type: Cans stack differently than wine bottles, and kegs need their own unique space.
  • Venue Space: Before you order, double-check that the physical dimensions of the fridge will actually fit in the spot you’ve picked out!

For some really practical advice on balancing capacity with the needs of a busy bar, check out this fantastic guide to finding your bar’s perfect fridge. It’s packed with great insights to make sure your bar runs smoothly from the first pour to the last.

A Look at the Different Types of Bar Fridges

Thinking about bar refrigerator sizes is a great start, but it’s just as important to understand that different events need different types of fridges. It’s a bit like a chef’s kitchen – you wouldn’t use a paring knife to chop a pumpkin. A bar setup is the same, and hiring the right kind of fridge can make a massive difference to your service speed and how much your guests enjoy themselves.

Not all bar fridges are built the same. Each type is designed for a specific job, from a small, convenient chiller to a high-volume commercial powerhouse. Let’s run through the main players you’ll come across when planning your event.

Compact and Countertop Models

Think of a compact or countertop fridge as a personal cooler, just with a lot more oomph. These little units are brilliant for tight spots or as an extra chiller where you need one. They’re perfect for a VIP lounge needing to keep a few bottles of champagne cold, or for a small registration desk offering guests a chilled water as they arrive.

Their biggest plus is how versatile they are. You can pop them almost anywhere without needing a full bar setup, which makes them a dead-simple way to add a bit of hospitality to any corner of your venue.

  • Best For: Small, intimate gatherings, welcome drink stations, or as a backup for larger bar setups.
  • Analogy: A handy grab-and-go cooler for immediate needs.

Under Counter Refrigerators

Under counter fridges are the cornerstone of any sleek, professional-looking bar. They’re specifically designed to slot in perfectly beneath a standard-height bar counter, giving you that seamless, built-in look. Not only does this look fantastic, but it also makes the bartender’s workspace incredibly efficient, keeping everything they need right at their fingertips.

These models often come with solid doors for better insulation or glass doors to help staff find specific drinks in a flash. For any event aiming for a polished and smooth bar service, under counter fridges are the way to go.

Back-Bar Coolers

If an under counter fridge is the foundation, a back-bar cooler is the high-performance engine powering your event. These are the absolute workhorses for high-volume parties. They’re typically bigger and almost always have glass doors, serving two critical purposes: holding a ton of stock and giving you instant visibility of what you have left.

Bartenders can see exactly what’s on hand with a quick glance, which cuts out time wasted digging around for a specific drink. That visual access is key to keeping the service lightning-fast during peak hours at weddings, corporate functions, or festivals. For a deeper dive into these specialised units, resources like this guide on Choosing Your Back Bar Cooler are really helpful.

A glass-door back-bar cooler is both a storage unit and a visual menu for your staff. This simple feature can shave seconds off every single drink order, which really adds up to a massive improvement in service speed over a busy evening.

Full-Height and Pass-Through Units

When you’re dealing with the biggest events, full-height and pass-through refrigerators offer the maximum capacity and the slickest operation. A full-height unit is basically a standard commercial fridge, giving you enormous storage space to restock the main bars from.

A pass-through model is even more clever. It has doors on both the front and back, so it works like a service hatch between the kitchen or stock room and the bar itself. Your back-of-house staff can reload it from behind without ever getting in the way of the bartenders out front, guaranteeing a non-stop flow of cold drinks for even the most demanding crowds.

How to Figure Out Your Fridge Capacity

Trying to guess how many bar fridges you need for an event is a recipe for disaster. Get it wrong, and you’re stuck with lukewarm drinks and unhappy guests—a scenario every event planner wants to avoid.

The good news? You can ditch the guesswork. There’s a simple, reliable way to calculate your needs with confidence, and it all starts with a solid rule of thumb.

From Guest Count to Fridge Count

As a starting point, plan on each guest having 2-3 drinks within the first hour of your event. After that initial rush, you can dial it back to about one drink per guest for every hour that follows. This simple formula gives you a great baseline for your total beverage count.

Of course, knowing how many drinks you need is only half the job. Next, you have to translate that number into actual fridge space. This is where understanding different bar refrigerator sizes is key, because the type of drink you’re serving drastically changes how much you can fit inside.

This graphic shows the most common types of bar fridges to help you see what your options are.

An illustration showing three types of bar refrigerators: compact, undercounter, and back-bar designs.

From small, countertop units to professional back-bar models, each style has a different footprint and capacity that will influence what you end up hiring.

To turn your beverage estimate into a concrete number of fridges, you just need a quick calculation. This formula cuts through the noise and gives you a clear, actionable number for your order.

The Fridge Calculation Formula:
(Number of Guests x Drinks per Guest) / Items per Fridge = Total Fridges Needed

Let’s put this into practice. Imagine you’re planning a four-hour wedding reception in Stellenbosch for 100 guests.

  • First Hour: 100 guests x 3 drinks = 300 drinks
  • Next Three Hours: 100 guests x 1 drink/hour x 3 hours = 300 drinks
  • Total Drinks Needed: 300 + 300 = 600 beverages

Now, let’s say you’re hiring under counter fridges that can each hold roughly 120 standard 330ml cans.

  • Calculation: 600 drinks / 120 cans per fridge = 5 fridges

This gives you a precise starting point. It’s always a smart move to add one extra fridge as a buffer for restocking or to handle any last-minute surprises. For more on planning these kinds of details, check out our guide to mobile fridge hire.

Translating Litres into Real-World Capacity

The final piece of the puzzle is figuring out what a fridge’s litre capacity actually means for your stock. Abstract numbers don’t help much when you’re trying to pack a bar.

To make things easier, we’ve put together a table that converts common bar fridge sizes into practical can and bottle counts.

Beverage Capacity by Refrigerator Size

Capacity (Litres) Approx. 330ml Cans Approx. 750ml Wine Bottles
50 – 80 Litres 50 – 80 Cans 15 – 20 Bottles
90 – 130 Litres 90 – 120 Cans 25 – 35 Bottles
140 – 200 Litres 150 – 220 Cans 40 – 55 Bottles

Just remember, these are estimates. The actual number you can fit will depend on the shelving and how you stack everything.

By using this data along with your guest count formula, you can be sure you’re hiring the perfect amount of cold storage every single time.

Navigating Venue Logistics for Fridge Placement

So, you’ve picked out the perfect bar fridges for your event. That’s the easy part done. Now comes the real challenge: making sure they can actually get into your venue. A dream hire can quickly turn into a logistical nightmare if it’s stuck in a narrow hallway or can’t make it up the stairs. This is where a little bit of pre-planning saves a massive headache on the day.

Think of it like moving a new sofa into your home. Before you even think about hiring, you need to grab a tape measure and map out the fridge’s entire journey. That means measuring every single access point – from the main entrance and service lifts to kitchen doorways and tight corners. The height, width, and depth of these spaces will determine the biggest possible fridge you can bring in.

A person in a black uniform measures a door with a yellow tape measure, next to a refrigerator.

One of the most common mistakes we see is planners forgetting to chat with the venue manager. They are your secret weapon! They know the building’s quirks, potential obstacles, and the best spots for placement. They’ll make sure the fridge doesn’t end up blocking a fire exit or creating a traffic jam for your guests.

The Critical Role of Ventilation

Once you’ve confirmed a fridge will fit, you need to decide where it’s going to live during the event. This isn’t just about looks; it’s about making sure the unit can actually do its job. Refrigerators work hard to stay cold, and in the process, they generate a lot of heat. They need space to breathe.

Pushing a fridge right up against a wall or boxing it into a custom-built bar is like asking a marathon runner to sprint with a bag over their head. It’s going to overheat. The compressor will work overtime, struggle to keep things cool, and could even fail when you need it most.

We always recommend leaving at least 5-10 centimetres of empty space around the back and sides of any bar fridge. This isn’t just a friendly tip—it’s essential for proper airflow and prevents the unit from giving up mid-event.

Powering Your Refrigeration Safely

Just as important as space is a reliable power source. Most of our bar fridges plug into a standard wall socket, but the real issue is what else is running on that same electrical circuit. A single circuit can only handle so much before it trips.

Imagine this: your fridges, the DJ’s sound system, and the caterer’s food warmers are all plugged into the same circuit. It’s a recipe for a blackout right in the middle of your event. To avoid this, always try to dedicate a separate electrical circuit just for your refrigeration.

Here are a couple of real-world examples we see all the time:

  • A Rustic Barn in Stellenbosch: These venues are beautiful but often have uneven floors and older, limited power circuits. You’ll need to make sure the fridge is on level ground and that any extension cords aren’t creating a tripping hazard.
  • A Modern Cape Town Conference Centre: Access here is usually a breeze, with wide corridors and service lifts. The challenge is coordinating with the facilities manager to find approved power outlets that won’t interfere with the venue’s own audiovisual gear.

By thinking through these logistical hurdles beforehand, you ensure your hired bar fridge is a seamless part of your event, not a last-minute crisis.

Your Pre-Order Checklist for a Seamless Rental

A great rental experience really boils down to clear communication. Honestly, it’s the last-minute logistical hiccups that can throw a spanner in the works of an otherwise perfectly planned event. To sidestep any misunderstandings and make sure your bar fridge hire goes off without a hitch, it pays to have your details sorted before you call.

Think of this checklist as your secret weapon. Running through these points with our team at ABC Hire means every detail is covered, freeing you up to focus on what matters most: giving your guests an incredible time. Getting this info ready beforehand makes the whole booking process a breeze and wards off those nasty surprises on event day.

Essential Logistical Details

First things first, let’s nail down the timing and placement. Clashing schedules are probably the biggest source of event-day stress, so getting this right is non-negotiable.

  • Exact Delivery Time: Let’s agree on a specific delivery window that works for you, your team, and the venue’s access rules.
  • Precise Collection Time: We also need a firm time for collection to avoid any hassles after the party has wrapped up.
  • Final Placement Location: Know exactly where each fridge needs to go. For sprawling Cape Town venues with multiple entrances, a simple map or very clear directions are a massive help.
  • Contact Person On-Site: Please assign one person as the point of contact to meet our delivery crew and show them where to go.

Equipment and Power Specifics

Once the logistics are sorted, we can move on to the technical bits. Making sure the fridges you’ve chosen are right for the job ensures everything runs smoothly from the first drink to the last.

A classic oversight is forgetting to check the power cord length. Just confirming this small detail ahead of time can save you from a mad dash to find a safe, suitable extension lead.

Here are the final technical points to double-check with us:

  1. Types of Beverages Stored: Tell us what you’re chilling! Stacking wine bottles is a totally different ball game to packing in hundreds of cans, and we can advise on the best shelving setup.
  2. Power Cord Length: As we mentioned, please check that the cord can comfortably reach the nearest dedicated plug point.
  3. Venue Power Availability: Make sure the spot you’ve chosen has a reliable power source that isn’t already straining under the load of other equipment.

Taking a few minutes to tick off these boxes guarantees a smooth rental from start to finish. For more inside tips on kitting out your event, have a look at our complete guide to choosing the best catering equipment for hire.

Answering Your Bar Fridge Hire Questions

When you’re in the thick of event planning, sorting out the details for your bar setup can feel like a mission. But getting the right answers to a few key questions can make all the difference. We’ve pulled together the most common queries we get from event planners across Cape Town to help you nail down your refrigeration needs.

Getting these specifics right from the start means no last-minute hassles, just a smoothly run event. Let’s dive into the questions that might be on your mind.

What Size Bar Fridge Do I Need for a 100-Guest Wedding?

For a wedding of about 100 guests, a great setup is two or three undercounter or back-bar fridges. You’ll want to look for units with a capacity somewhere between 130 and 200 litres each. This doesn’t just give you enough space; it gives your bar staff fantastic flexibility.

Think of it this way: you can dedicate one fridge to beers and ciders, and another to wines and soft drinks. This kind of simple organisation is a game-changer for speeding up service, especially during busy moments like cocktail hour. It also acts as a brilliant buffer, making sure you’re never caught without perfectly chilled drinks.

It’s always a good idea to have a quick chat with your bar service or caterer before you book. They know their workflow best and might have some great input on the ideal number of fridges and where to place them.

How Much Space Does a Rental Fridge Need for Ventilation?

This is a big one. Ventilation is absolutely crucial for a rental fridge to perform at its best all day (and night) long. You absolutely must leave at least 5 to 10 centimetres of open space around the back and sides of the unit. A little bit of clearance on top is a smart move, too.

This gap is what allows the fridge to breathe. It lets air circulate and carry away the heat the motor produces. If you block this airflow, the unit has to work overtime, pulling more power and struggling to stay cold. The last thing anyone wants at a party is a fridge that can’t keep the drinks frosty.

Can I Put a Bar Fridge on Any Surface?

No, you’ll need to place the fridge on a firm, level surface. If the floor is sloped or uneven, the door might not seal properly. That leads to cold air escaping, condensation building up, and energy being wasted. It can also make the motor vibrate and create a lot of noise.

Most of our rental units have adjustable feet, so we can handle minor levelling on-site. The key is to avoid soft surfaces like thick carpets or wobbly wooden platforms. If your event is outdoors at one of the beautiful Winelands venues, make sure the ground is solid. It’s also best to keep the fridge out of direct sunlight and rain to ensure it runs like a dream.

What Kind of Power Supply Does a Rental Bar Fridge Need?

Almost all standard bar fridges run on a regular 220-240V circuit and plug into a normal wall socket. The real question isn’t about the plug, but what else is running on that same circuit.

You need to make sure the fridge has a circuit that isn’t already loaded with other power-hungry equipment. Things like sound systems, lighting rigs, or catering warmers can easily trip a breaker if they’re all drawing power at once. To play it completely safe, give your fridges their own dedicated circuit. When you book with us, just confirm the plug type and power needs, and we’ll help you make sure it’s all compatible with your venue’s setup.


Planning the perfect event in Cape Town is all about the details. For reliable, high-quality refrigeration that fits any occasion, you can trust ABC Hire. Explore our extensive range of bar refrigerator sizes and other event essentials by visiting us at https://abchire.co.za.

Your Complete Guide to the Wood Round Table for Events

A wood round table is so much more than just a place to sit. It’s the heart of your event, a centrepiece that creates a warm, inviting, and genuinely interactive atmosphere. The magic is in its shape; a circle naturally does away with the formal, rigid feel of a rectangular table, encouraging a more communal and engaging vibe for everyone. This simple fact makes it a fantastic choice for any occasion, from weddings to corporate get-togethers.

Why a Wood Round Table Elevates Any Event

There’s a good reason event planners here in Cape Town and beyond keep coming back to the classic wood round table. Unlike long, straight tables that can feel a bit like a boardroom and limit conversation to the person next to you, a round table pulls everyone together. This simple change in geometry has a huge impact on the feel of an event.

Think of it this way: a rectangular setup is like a lecture hall, while a round table is like gathering around a campfire. One feels formal and structured, the other encourages shared stories and makes sure everyone is part of the conversation. Every guest can see everyone else, so interactions feel more natural and inclusive. This is absolute gold for events where connection is key, like weddings, anniversary dinners, or even collaborative workshops.

The Power of Inclusive Design

A circle is democratic by its very nature. There’s no head of the table, which means every seat is just as important as the next. This subtle detail is brilliant for breaking down social barriers and creating a relaxed, communal mood. Guests stop being just attendees and become part of one big, connected group.

Beyond the social perks, wood round tables are incredibly versatile when it comes to style. The natural grain and texture can be used to create all sorts of looks:

  • Rustic Charm: An unfinished or reclaimed wood table is the perfect anchor for a farm-style wedding or an outdoor event in the beautiful Cape Winelands.
  • Modern Elegance: A sleek, dark-stained wood table brings an organic warmth to a slick, contemporary corporate gala.
  • Bohemian Flair: Lighter woods, like pine or ash, look amazing dressed up with eclectic runners and centrepieces for a chilled, chic celebration.

A round table’s design inherently promotes interaction. By eliminating sharp corners and a designated 'head,' it creates a continuous flow that makes every guest feel equally included in the conversation and the celebration.

At the end of the day, choosing a wood round table isn't just about logistics; it's a deliberate design choice. It shows you want to create an event built around warmth, connection, and shared experiences – setting the stage for a truly unforgettable day.

Choosing the Right Size for Your Guest List

Getting the table size right is one of those make-or-break decisions when you're planning an event. It's not just about fitting everyone in; it's about the entire vibe of the day. A table that's too small feels cramped and uncomfortable, but one that’s too big can make even a lively gathering feel a bit empty and disconnected.

The trick is finding that sweet spot. You want a setup that feels welcoming and makes it easy for guests to chat and move around. Before you book anything, take a moment to picture the kind of experience you're trying to create.

A casual, stand-up cocktail party can get away with a cosier arrangement. But if you're planning a formal wedding dinner with multiple courses, you absolutely have to give your guests enough elbow room. It's all about matching the table size to what the event actually needs.

Decoding Table Dimensions and Seating Capacity

Standard wood round tables come in a few key sizes, and each is designed to seat a different number of guests. Knowing these dimensions is your first step to a flawless floor plan. A classic mistake we see is people trying to squeeze in the maximum number of guests, which almost always ends up feeling a bit tight.

Take the 1.8-metre (or 6-foot) diameter table – it's the workhorse of the event world for a reason. This size is perfect for seating 8 to 10 guests. Eight guests will have plenty of space, which is ideal for a formal dinner. If you push it to ten, you create a more buzzy, intimate feel that’s great for social get-togethers.

If you're working with smaller groups, a 1.5-metre (5-foot) diameter table is a fantastic choice, comfortably seating 6 to 8 guests. These are brilliant for creating little conversation zones within a larger event or for those more intimate celebrations where you want everyone to feel connected.

This infographic really nails why round tables are such a go-to choice for creating a great atmosphere.

Infographic detailing round table benefits: connection, versatility, and atmosphere, supported by a bar chart.

As you can see, the shape itself naturally encourages conversation and just works with so many different styles and themes.

Pro Tip: Don't forget to account for your centrepieces! A big, beautiful floral arrangement will eat up table space. You might need to seat one less person per table or just go for the next size up to make it work.

To make things a bit easier, here’s a quick guide to help you choose the right wood round tables for your event.

Wood Round Table Seating Capacity Guide

This little chart is your cheat sheet for matching our standard table sizes with how many guests they can comfortably accommodate.

Table Diameter (cm) Comfortable Seating (Guests) Maximum Seating (Guests) Ideal For
150 cm (5 ft) 6-7 8 Smaller gatherings, intimate dinners, breakout areas
180 cm (6 ft) 8-9 10 Weddings, corporate galas, standard event seating
210 cm (7 ft) 10 12 Large celebrations, maximising venue space

Keep this handy when you’re sketching out your floor plan – it’ll save you a lot of guesswork!

Calculating Your Space and Table Count

Okay, so you've got your guest count and you know which table size you prefer. Now it's time to map it all out. It’s not just about squeezing the tables in; you have to think about the chairs and, most importantly, the space people need to walk around. A good rule of thumb is to leave at least 1.5 metres of space between each table.

This buffer zone is non-negotiable, and here’s why:

  • Guest Movement: It lets guests pull their chairs out without knocking into someone behind them.
  • Service Flow: Waiters and catering staff need clear paths to serve food and clear plates without a fuss.
  • Accessibility: It ensures everyone can get to the dance floor, restrooms, or the bar without having to squeeze past other tables.

To figure out how many tables you’ll need, just divide your total number of guests by how many people you're seating at each table. For instance, if you have 120 guests and you want to seat 8 people comfortably at each table, you'll need 15 tables (120 ÷ 8 = 15). If you end up with a decimal, always round up. It’s far better to have an extra table with slightly fewer people than to cram everyone in. A little bit of planning here goes a long way in making your setup feel both beautiful and practical.

Exploring Different Wood Types and Finishes

The real heart and soul of a wood round table comes from the timber it’s made from and how it’s been treated. This choice goes way beyond just how the table looks; it dictates its weight, how durable it is, and the entire feeling it brings to your venue.

Think of the wood as the table's personality. Is it light and cheerful, or rich and formal? It's all about matching the material to your event's aesthetic. Each wood has its own grain, colour, and texture, giving you a completely different canvas for your tablescape. A rustic, textured wood might be perfect for a wedding in the Cape Winelands, while a sleek corporate function in the city centre probably calls for something more polished and uniform.

Three round wooden tables display various wood types and finishes outdoors next to a white brick wall.

Common Woods for Event Tables

Here in South Africa, we're lucky to have access to some incredible local timbers for event furniture. Pine is a hugely popular choice for a wood round table, loved for its light colour and affordability. It’s a softer wood, which gives it a charming, rustic look—especially when it shows a few signs of character from past celebrations.

Oak, on the other hand, is a classic hardwood. It's known for its strength, heavier weight, and beautiful grain patterns. An oak table feels substantial and traditional, bringing a sense of timeless elegance to any setting. It's tough, so it can handle the hustle of countless events, making it a reliable and sophisticated choice.

Locally, our timber industry is a big deal. In a single year, South Africa produced around 18.21 million cubic metres of timber, with pine and eucalyptus leading the charge. This strong local supply, especially from regions like Mpumalanga and KwaZulu-Natal, means we have a steady stream of beautiful materials to craft our event tables.

Understanding Finishes and Their Impact

The finish is what truly brings the wood to life. It protects the timber, but more importantly, it defines the final look. This is what makes a table feel raw and organic or refined and luxurious. The finish can completely transform the mood of your event.

Here are a few common finishes you’ll come across:

  • Natural/Unfinished: This style is all about celebrating the wood in its raw state. It’s perfect for rustic, bohemian, or outdoor themes where you want to highlight natural textures.
  • Stained: Stains change the wood's colour while letting the natural grain show through. This can be anything from a light wash to a deep, dark espresso, allowing you to perfectly match the table to a specific colour scheme.
  • Polished/Varnished: A clear varnish or lacquer adds a protective layer and a noticeable sheen. A high-gloss polish creates a formal, reflective surface, while a satin or matte varnish offers protection with a more subtle, modern feel.

The finish on a wood round table does more than just protect the surface; it sets the tone. A rustic, matte finish invites a casual, communal atmosphere, while a dark, polished gloss suggests formality and elegance.

The choice of finish is a powerful styling tool. A dark-stained wood round table, for instance, can anchor a dramatic, moody theme, while a light, natural finish keeps the space feeling bright and airy. It’s crucial to think about how the table’s finish will play with your lighting, linens, and centrepieces to create a cohesive look. When you understand the various options, selecting the perfect wooden tables and chairs for your event's theme becomes so much easier.

Ultimately, it’s the combination of wood type and finish that gives each table its unique identity. By considering these elements, you can pick a wood round table that not only does its job but also becomes a key part of your décor, perfectly aligning with your event’s vision.

How to Style Your Table with Linens and Centrepieces

This is where the magic happens. Styling your wood round table is where its personality truly shines, turning a beautiful piece of furniture into a show-stopping focal point that sets the tone for your entire event. Your first big decision? Linens. This choice will fundamentally shape the table's final look.

How you approach linens can range from covering the table completely to letting the natural wood be the star of the show. Each option creates a totally different vibe, so the right path really depends on the theme and formality you're aiming for at your Cape Town gathering.

A round wooden table set for an outdoor event with a burlap runner, floral centerpiece, and glasses.

To Cover or Not to Cover: The Linen Decision

When you've hired a gorgeous wood table, deciding whether to cover it is all about balancing elegance with authenticity. You've really got three main options, and each brings its own unique flavour.

  1. Full Tablecloth: This is your go-to for classic, formal events like weddings or corporate galas. A crisp, floor-length tablecloth in white, ivory, or even a bold colour adds a layer of sophistication and creates a clean, polished look across the room.
  2. Table Runner: We love a runner—it's the perfect compromise! You get to add a pop of colour and texture down the middle while still letting that beautiful wood grain peek through on the sides. This works brilliantly for semi-formal events or rustic-chic themes.
  3. Bare Wood: Sometimes, less is more. If you've chosen a table with a stunning grain or a unique rustic finish, letting the wood speak for itself creates an organic, warm, and effortlessly cool look.

Your choice of linen is a key styling moment. A full cloth signals formality and tradition. A bare table feels modern and connected to nature, celebrating the material itself.

For a rustic farm wedding, a simple hessian runner or one of these beautiful natural round linen tablecloths can be the perfect touch. On the other hand, a sleek corporate dinner might demand the sharp, clean finish of a full, dark-coloured tablecloth. If you're still on the fence, our complete guide on tablecloths for round tables has plenty more tips to help you decide.

Choosing the Perfect Centrepiece

Once your linen choice is sorted, the centrepiece is the crowning glory. A round table is practically made for a central arrangement, but it does come with one challenge: making sure your guests can still see each other!

The goal is to create a visual impact without building a floral wall that kills conversation. A great centrepiece draws the eye and ties the theme together, but never gets in the way of your guests connecting.

When you're picking a centrepiece, think in terms of two height options:

  • Low and Lush: Arrangements that stay below eye level are always a safe—and beautiful—bet. Think sprawling garlands of eucalyptus, clusters of pillar candles at different heights, or a collection of small bud vases with single, delicate stems.
  • Tall and Slender: If you want drama, the trick is to go above your guests' sightlines. Use tall, slim vases with minimal fuss at the base. This lets the main floral feature float high above the table, creating that wow-factor without blocking anyone's view.

Styling Inspiration for Your Event Theme

Your event's theme is your North Star for all styling decisions. When everything on the table tells the same story, your event feels thoughtful, cohesive, and completely immersive.

To get your creative juices flowing, we’ve put together a quick guide to matching your styling to your theme.

Linen and Styling Choices for Different Event Themes

Event Theme Recommended Linen Centerpiece Idea Best Wood Finish
Rustic Farm Wedding Hessian Runner or Bare Wood Wildflower bouquet in a mason jar, lantern cluster Natural or Reclaimed
Modern Corporate Gala Black or White Full Tablecloth Single tall orchid in a slim vase, geometric candles Dark Stain, Polished
Bohemian Celebration Macramé Runner, Coloured Gauze Eclectic mix of bud vases, scattered tea lights Light Pine or Ash
Elegant Formal Dinner Ivory Full Tablecloth Low, classic rose arrangement, silver candelabra Cherry or Oak, Varnished

Ultimately, styling your wood round table is about creating harmony. The wood, the linens, the centrepiece—they should all work together to bring your vision to life, making your tables more than just a place to sit, but a key part of a beautiful, unforgettable experience.

Mastering Your Event Layout and Logistics

Having the perfect wood round table is one thing; knowing how to arrange them to create a space that feels both beautiful and effortless is another game entirely. The layout is the invisible architecture of your event's atmosphere. A well-planned floor plan gets your guests mingling, ensures service runs like clockwork, and makes the whole venue feel balanced and intentional.

On the flip side, a poor layout can create frustrating bottlenecks, awkward empty pockets, or a cramped feeling that kills the mood. You're aiming for a design that not only looks incredible but also works for every single person in the room, from your guests to the catering staff. It’s all about creating flow.

This isn't just about plonking tables down wherever they fit. It’s a strategic game that considers traffic routes, sightlines to key spots like the stage or dance floor, and the overall guest experience.

Crafting the Perfect Floor Plan

Every venue in Cape Town, whether it’s a historic wine estate in Stellenbosch or a slick city centre ballroom, has its own unique footprint. The first rule is to work with the venue's dimensions, not against them. A great layout makes the most of the space while respecting its natural flow and features.

The priorities for your floor plan will change depending on the kind of event you're hosting.

  • Weddings: Here, the layout needs to feel romantic and connected. Think about arranging tables so everyone has a great view of the head table and, of course, the dance floor. You’ll want to create clear pathways to the bar, bathrooms, and any outdoor areas to avoid guest traffic jams.
  • Corporate Galas: For these events, the focus might be on a stage or presentation area. A tiered or chevron-style arrangement is brilliant for ensuring clear sightlines for all attendees. The layout should feel professional and organised, with plenty of room for networking.
  • Conferences: If you're running workshops or collaborative sessions, grouping a few wood round tables together can create fantastic breakout zones. This encourages small-group discussion while still keeping everyone connected to the main event.

A successful floor plan is all about pathways. Try to imagine tracing the journey of a guest from their arrival to their seat, over to the bar, and then to the dance floor. If that path is clear, easy, and logical, you've nailed it.

No matter the event, always prioritise movement. A good rule of thumb is to keep at least a 1.5-metre gap between tables. This isn't just for comfort; it’s absolutely essential for efficient food service and lets guests move around freely without bumping into others.

Nailing the Logistics in Cape Town

Once your floor plan is sorted, the focus moves to the practical side of things: getting your tables on-site and set up perfectly. This is where clear, upfront communication with your rental supplier—like us here at ABC Hire—is non-negotiable for a stress-free experience.

Coordinating the logistics well in advance saves you from any last-minute chaos. You need a solid plan for delivery, setup, and breakdown that works with your venue’s specific rules and your event's timeline.

Key Logistical Steps

  1. Coordinate Delivery Times: Pin down a precise delivery window with your vendor and the venue. Make sure someone is on-site to receive the tables and guide the delivery team according to your floor plan. This simple step stops tables from being dropped in the wrong spot.
  2. Plan for Setup: Don't underestimate how long setup takes. Placing each wood round table, arranging the chairs, and then dressing the tables with linens and centrepieces all add up. Schedule this with plenty of buffer time before guests are due to arrive.
  3. Handle with Care: Wooden tables, especially ones with beautiful finishes, need to be handled carefully to avoid scratches or dings. Check that the setup crew knows how to move and place them correctly to protect both the furniture and the venue's floors.
  4. Organise Breakdown: The end of the night needs just as much planning. Coordinate a pickup time that suits the venue and have a clear process for breaking down tables and stacking them for collection. A smooth exit is just as important as a grand entrance.

Getting these logistical details right means the vision you created on paper becomes a flawless reality, letting you relax and focus on hosting an event to remember.

Budgeting for Your Table Rentals in Cape Town

Let's be honest, figuring out the budget is a massive part of planning any successful event here in Cape Town. When it comes to hiring a wood round table, the final cost isn't just a single number. To avoid any nasty surprises, you need to understand what actually goes into that price.

Think of it this way: the price is a mix of the table's unique features and the services you’ll need. Things like the type of wood, the table's diameter, the finish you choose, and how long you need it for all play a big role. It makes sense, right? A huge, solid oak table with a fancy polished finish is naturally going to cost more to hire than a smaller, rustic pine one.

Key Factors Influencing Rental Costs

To put together a budget that actually works, you need to break down what you're paying for. It’s less about a single price tag and more about a handful of variables you can often tweak to fit what you want to spend.

Here are the main things to keep in mind:

  • Table Size and Type: Bigger tables that can seat more guests simply use more material and are heavier to move around, and the rental price reflects that. Likewise, premium woods like oak will always be a bit pricier to hire than more common options like pine.
  • Finish and Condition: If you're after a table with a special finish, like a dark stain or a high-gloss varnish, expect to pay a little more than for one with a simple, natural look.
  • Rental Duration: Most companies work on daily rates, but if you're planning a multi-day event, you can often negotiate a better overall price for a longer hire period.
  • Delivery and Collection Fees: This is a big one that people often forget. The cost here depends on how far your venue is from the supplier's warehouse, how easy it is to get to, and whether you need them to deliver or collect outside of normal business hours.

When you're budgeting, always, always ask for a fully itemised quote. This transparency is your best friend. It shows you exactly where your money is going and helps you spot any potential hidden costs, like damage waivers or setup charges, before you've signed anything.

A great way to get a handle on your budget is to gather a few quotes from different suppliers. You can easily obtain a table quote to start comparing your options. Getting a full picture of the costs is so important, and our guide on tables and chair rentals dives even deeper into this.

Renting Versus Buying A Wood Round Table

For most one-off events like weddings or corporate functions, renting is almost always the smarter move, both financially and logistically. Buying a whole set of high-quality wood tables is a massive upfront cost, and that's before you even think about where you'll store them, how you'll maintain them, and how you'll get them to your venue. Renting just makes all that hassle disappear.

The furniture market in South Africa is also growing. The national market was valued at around US$2.47 billion in 2024 and is expected to keep climbing. This will likely push up the demand for timber and could affect both the cost and availability of a new wood round table if you were looking to buy.

Renting gives you incredible flexibility. You get access to a huge range of styles without the long-term commitment. This means you can pick the absolute perfect table for your event's theme, and when the party's over, it simply gets taken away. It’s a practical, wallet-friendly solution for creating a beautiful event space.

Your Questions Answered

When you're in the final stages of planning your event, a few last-minute questions always seem to come up. It's completely normal! Getting these details sorted is the key to booking your wood round table hire with total peace of mind.

Here are a few of the things we get asked most often.

How Far in Advance Should I Book?

This is a big one. For the best selection, especially during Cape Town's peak wedding season from October to April, we always suggest booking your tables at least 3 to 6 months ahead. This gives you a much better chance of securing the exact style and number of tables you've got your heart set on.

Rental and Logistical Details

What about the practical side of things, like delivery and setup? We’ve got you covered. We offer a full delivery and collection service across Cape Town and the beautiful surrounding Winelands. While setup isn't included as standard, we can absolutely arrange it for an extra fee to make sure your floor plan comes to life just as you pictured it.

And what if something gets damaged? We get it, accidents happen! Your quote includes a standard damage waiver to cover the usual minor wear and tear. If something more significant happens, we’ll simply chat about the repair or replacement cost as laid out in your rental agreement.

A quick tip from our team: Always double-check venue access times with your coordinator before you finalise delivery and collection slots with us. It’s a simple step that saves a world of stress on the day.

Finally, let's talk linens. While our passion is beautiful furniture, we know the right tablecloths and runners complete the look. We’ve built up a great network of trusted local suppliers and we’re more than happy to point you in the right direction. Just ask, and we'll help you find the perfect linens to go with your chosen wood round tables.


Ready to create an unforgettable atmosphere for your next event? For the finest selection of event furniture in Cape Town, explore the beautiful range at ABC Hire. Find your perfect tables and chairs today at https://abchire.co.za.

Tents for Hire in Cape Town Events

Every event has its ideal canopy. Pop-up, frame, clear-span and pole tents each bring their own strengths. By choosing the right structure for your guest count and site conditions, you avoid last-minute headaches and ensure a smooth setup.

Selecting The Best Tent Type

Before you commit, consider how many people you’re hosting, the ground you’re working with and how fast you need to get under cover.

  • Pop-Up Marquees: Ready in minutes, they handle up to 50 guests on flat lawns or patios.
  • Frame Tents: No centre poles means flexible seating for around 200, perfect on uneven terrain.
  • Clear-Span Tents: Steel-beam construction opens up space for 200+ attendees—ideal for grand weddings or galas.
  • Pole Tents: That classic peaked look accommodates 80–150 guests, provided you have clear anchoring zones.

These overviews help you match style, capacity and site requirements at a glance.

Comparison Of Common Tent Types

Below is a quick reference to guide your decision:

Comparison of Common Tent Types

Tent Type Capacity Range Structure Type Ideal Use
Pop-Up Up to 50 Lightweight Frame Small backyard parties
Frame Up to 200 Alloy Frame Weddings on uneven ground
Clear-Span 200+ Steel Beams Corporate events and galas
Pole 80–150 Centre-Pole Design Festivals and concerts

Use this table to spot which design fits your event vision.

Picture a clear-span canopy draped across a sloping vineyard for a gala dinner. You get unobstructed sightlines, rain-tight walls and enough headroom to suspend chandeliers.

“Frame roofs adapt to rocky surfaces without centre poles blocking sightlines.”

On the flip side, pop-up marquees shine for spontaneous beach birthday parties or corporate lunch breaks.

Infographic about tents for hire

Industry forecasts predict an 11.7% CAGR in MEA party-supply rentals from 2023 to 2030, reflecting growing demand in South Africa’s events market. Read the full report from Grand View Research.

For a different look, check out our guide on stretch tents for hire in Cape Town and discover how those flowing canopies can transform any outdoor space.

When your guest list outgrows one structure, think modular. You can link two pole tents for a seamless aisle or add sidewalls to expand weather protection.

In Cape Town’s coastal breeze, sturdy sidewalls are non-negotiable for stability. Always request precise venue measurements and share a detailed layout with your supplier. That extra step prevents miscommunication and surprise charges on install day.

Matching tent type to your vision—and logistics—delivers real peace of mind. Enjoy seamless hire.

Assess Site Conditions and Secure Permits

Venue terrain overview

You’ll quickly find that ground stability sets the tone for any successful tent hire. A thorough site survey reveals soil type, slope and drainage patterns—details that keep muddy chaos at bay.

Imagine comparing a sandy beach with a lush riverside lawn. Beach locations often call for weighted anchors or ballast systems, while lawns benefit from raised matting to keep your guests comfortably dry.

  • Soil Composition: Guides your choice of anchors and flooring mats
  • Ground Slope: Shapes tent orientation and footprint
  • Drainage Channels: Ensures water won’t pool under flooring panels
  • Power Points: Helps you map cable runs and generator spots
  • Access Lanes: Confirms delivery trucks can reach the setup area

Site Survey Checklist

A series of wide-angle photos becomes your best friend when you’re dealing with planners. Capture each corner from different perspectives to log obstacles and natural features.

Municipal parks in Cape Town often demand precise site coordinates. GPS-marked corners let you draft an accurate plan and avoid map revisions from council at the eleventh hour.

Allow a 5–7 day buffer for basic groundworks like trenching or drainage piping. That way, even unexpected underground pipes won’t derail your timetable.

“We saved hours by mapping power and water lines in advance,” says one Cape Town event coordinator.

Permit Submission Tips

Before you rush to apply, gather every document you’ll need. Typical requirements include:

  • A detailed site plan showing tent footprint, anchor spots and emergency exits
  • Proof of public liability insurance
  • Environmental impact notes where required

Then tick off these actions:

  • Draft the site plan and mark out all anchor locations
  • Submit your temporary use application to the City of Cape Town at least 21 days before your event
  • Arrange electrical inspection certificates for any generator or mains hook-up
  • Pay permit fees and record your confirmation reference for on-site checks

Keep council holiday closures in mind. Around December, service desks handle 30% fewer submissions, so schedule your application early to beat the backlog.

Permit Type Processing Time Fee Range (ZAR)
Temporary Use Permit 10–15 working days 500–1 200
Electrical Inspection 3–5 working days 250–600
Environmental Clearance 7–10 working days 800–1 500

Preparing For Ground Work

Once your permits arrive, map out trailer access and mark off clear zones for forklifts and crew vehicles. A well-planned approach keeps everyone safe and on schedule.

  • Confirm permit numbers are displayed on-site
  • Double-check GPS coordinates with the venue manager
  • Schedule a final site walk-through 2 days before installation
  • Build in buffer time for unexpected ground repairs

Consider using surface protection boards on lawns. Polypropylene boards in 1 m² panels spread weight evenly and prevent turf damage.

“A few trenches saved us from soggy carpets after Cape storms,” recalls a local wedding planner.

Basic levelling and drainage prep typically take 8–12 hours for a 100 m² area. Book your mini-excavator or compactor in advance to avoid last-minute equipment shortages.

Access And Equipment Coordination

Before the big day, verify site entrance dimensions against your trailers—many Cape Town gates are under 3 m wide. Don’t forget to measure overhead clearances for crane lifts.

  • Check trailer turning radius for precise site approach
  • Plan around low-hanging branches and power lines
  • Designate parking zones for crew and equipment
  • Label each equipment batch for swift identification

Align your delivery window with local traffic patterns—avoid peak periods around the V&A Waterfront. Securing a timed slot cuts waiting costs and idle crew hours.

Stay in close contact with venue managers and council liaisons. A shared checklist or simple project tool can keep everyone aligned and ensure installation day runs without surprises.

Choose Accessories And Enhance Guest Comfort

Accessories can turn a blank tent into a space your guests will remember long after the last dance. A well-chosen floor, sidewall design and climate solution keeps everyone cosy and engaged no matter the weather. Drawing on years of event work in Cape Town, I’ve seen how the right details can elevate any gathering.

Luxury flooring often sets the tone. Think polished panels for a chic wedding reception or vinyl-backed carpet rolls that hug your path and absorb footsteps at a product launch. I once fitted foam-backed strips at a beach birthday—bare feet sank into plush softness while echoes faded away.

  • Dance-floor panels: Interlocking MDF or PVC boards built tough for DJs, dancers and high heels.
  • Roll-out carpet: Vinyl-backed strips that go down in minutes and lift up just as fast.
  • Transparent sidewalls: Clear PVC walls that frame mountain views and flood your tent with natural light.
  • Blackout sidewalls: Opaque walls ideal for film screenings or creating an intimate dinner glow.

Elegant tent accessories

Lighting does more than chase shadows. It defines zones and keeps the ambience on point. From backyard parties to black-tie galas, the right fixtures can make or break your event vibe.

Select Lighting And Atmosphere

At an annual corporate gala, I combined warm LED uplights along the peaks with a statement chandelier above the head table. Guests felt drawn to the stage, then ushered into cosy conversation corners. Meanwhile, battery-operated lanterns lined the aisles—no cables snaking across walkways and zero trip hazards.

Cape Town’s unpredictable weather means temperature control is non-negotiable. For crisp winter evenings, gas-powered patio heaters deliver instant warmth under that canvas roof. When summer heat crunches in, evaporation mist fans and portable air-con units can cool the space by 6–8°C in under ten minutes.

You might be interested in advanced tips on gas-powered patio heaters in our article on gas outdoor heating solutions.

Matching temperature control to guest flow can boost revenue by 15% in shoulder seasons.

Accessory Bundle Benefit Example Rate (ZAR)
Basic Seating Saves setup time 150 per guest
Table and Linen Cohesive look 250 per guest
Full Decor Pack Turnkey design 450 per guest

Package Extras For Higher Revenue

Bundling essentials—tables, chairs and linens—can turn quiet months into high-traffic seasons. In Stellenbosch last June, a simple 10% discount on table-and-linen packages saw a 20% spike in bookings. It’s a win-win: clients love the value, and your team spends less time juggling spreadsheets.

Grouping accessories also simplifies the quoting process and keeps your crew focused on flawless execution. When everything comes from one supplier, coordination runs smoothly and peace of mind comes standard.

Plan Delivery and Installation Logistics

On the big day, timing is everything. Working out the delivery window with your tent supplier and venue manager early will save you from last-minute headaches.

Seasoned event pros always build in a 30-minute buffer for traffic snarls around Table Mountain.

Plan early and stage gear zones for swift tent assembly.

Before the crew rolls in, mark the tent outline with spray paint or chalk. Double-check power outlets and water access to avoid unwelcome surprises.

Sample Timeline For Tent Setup

The goal here is clarity. Break down tasks into bite-sized chunks so every team member knows what’s expected.

  • Footprint Marking And Stake Placement
  • Frame And Pole Erection With Weather Checks
  • Sidewall And Flooring Installation
  • Power Hookup Testing And Lighting Setup
  • Final Safety Inspection And Punch-List Sign-Off

Label your crates and designate drop zones at each corner. That way, no one is tripping over equipment—and the tent goes up without a hitch.

Communication Strategies With Vendors

Transparent, consistent communication is the glue that holds logistics together. Share a simple arrival schedule by email and follow up with a quick SMS.

  • Set a 15-minute check-in window for each delivery.
  • Assign one person as the on-site decision-maker.
  • Draft a backup plan for last-minute tweaks.

A quick pre-install call can iron out any questions. When the day wraps, gather your team for a mini-debrief. Note what worked and what you’d tweak next time.

A concise punch list of finished zones—complete with photos—helps everyone see the end result. Tuck that list into your invoice to reinforce transparency and build trust.

Budget Wisely for Tents and Extras

Working out your real costs means looking beyond the tent marquee itself. In my experience, the base hire fee is just the tip of the iceberg.

Small pop-up tents typically start at R2 000, while clear-span giants can climb to R25 000. On top of that, delivery and labour sneak in another 15–20%, and during high season you might see surcharges of up to 30%.

Planning ahead and unpacking every line item will save headaches (and budgets) later on.

Break Down Core Charges

When quotes arrive, ask suppliers to spell out each cost:

  • Base Rental Fee
    Covers only the tent frame and canopy—no extras here.

  • Delivery Charge
    Varies by distance, vehicle requirements and site access.

  • Labour Costs
    Depends on crew size, setup complexity and ground conditions.

  • Seasonal Surcharges
    Peak months often attract higher rates as demand soars.

Seeing all fees laid out side by side helps you spot hidden add-ons before you sign. That clarity makes comparing tents for hire a breeze—and keeps surprises off the final bill.

In South Africa, summer events dominate the tent market. From November through March, utilisation rates spike. Come winter (June–August), things quiet down—and so do prices.

Here’s a quick look at how pricing and demand swing with the seasons.

Seasonal swings in tent hire can really stretch your budget. Below is a snapshot of average rates and margins during busy versus quieter periods.

Pricing Variations By Season
Comparison of average utilisation rates and rental prices during peak and off-peak periods

Season Utilisation Rate Average Rental Price Margin Range
Peak (Nov–Mar) 80% R15 000 25–35%
Off-Peak (Jun–Aug) 40% R8 000 15–25%

Notice how margins tighten outside high-demand months. Use these insights to time your booking and protect your bottom line.

What’s more, labour and delivery costs can climb an extra 20–30% during those summer rushes. Factor that in when you draft your budget.

Negotiate Smartly with Suppliers

Bundling services is a proven way to shave off costs. Industry pros often package heating or lighting with the tent shell—and unlock 10–15% volume discounts.

“Combining services sharpens your negotiating edge and keeps clients happy.”

Set aside a 5–10% contingency fund for permit delays or unexpected weather. I always track every expense in a simple spreadsheet—this level of transparency builds trust and speeds up approval cycles.

Here are a few tactics that consistently work:

  • Ask for flat-rate delivery when securing multiple tent sections.
  • Leverage end-of-season inventory to negotiate lower rates.
  • Propose multi-event contracts to reduce labour charges.
  • Request bundled quotes with a clear cost breakdown per service.

These moves can cut up to 8% off your total spend.

Before signing off, compare the final estimate against your budget sheet. Smart budgeting like this turns tent hire into a predictable—rather than painful—part of event planning.

With these strategies in hand, you’ll hit your financial targets without last-minute surprises. Enjoy the savings and smooth service delivery!

Local Cape Town Event Checklist

Cape Town event checklist

Getting your tent hire sorted in Cape Town means juggling permit windows, venue rules and our famous microclimates. Start by pencilling in deadlines for every public park, heritage site or municipal space on your shortlist.

  • Lodge applications for Kirstenbosch or Green Point Park at least six months before your event.
  • Double-check noise curfews and branding limits with each venue’s manager.
  • Factor in holiday periods that can push approvals out by up to 30%.

“Securing permits early saved us from scrambling when office closures hit in December.”

Assess Local Weather Risks

Shade from Table Mountain can disappear by lunchtime, only to be replaced by gusty coastal winds. Pick a tent and accessories that suit your exact spot.

  • Wind-rated sidewalls for beachside gatherings.
  • Ground sheets or ballast systems on sandy lawns.
  • Reliable power and water suppliers for remote sites.

Since the pandemic, demand has soared — driven by weddings, corporate functions and the tourism sector. Forecasts predict South Africa’s vacation and event rental markets will generate hundreds of millions in revenue every year, with peak seasons from November to March. Learn more about these findings on Statista.

Plan Logistics And Timing

In high season (November–March), build in extra days for delivery and setup. Sync calendars with your tent supplier and the venue so nothing clashes.

Track every milestone with ABC Hire’s checklist:

  • Site surveyed and GPS mapping completed
  • Permits confirmed and insurance documents uploaded
  • Delivery window locked in with your supplier
  • Final walkthrough scheduled 48 hours before the event

Download the event planning checklist template for Cape Town events.

A few well-timed tweaks now will save you last-minute headaches later and keep guests comfortable from start to finish.

Frequently Asked Questions

Knowing how much space to allocate can save headaches. Generally, allow 1.2 m² for each guest who’ll be mingling and 1.5 m² for every diner at a seated banquet. Then tack on a 20% buffer for aisles, service tables and bar stations.

  • Standing Reception: approx 1.2 m² per person
  • Seated Banquet: approx 1.5 m² per person

That extra breathing room keeps queues at a minimum and conversations flowing.

If you’re hosting 100 guests at tables, aim for at least 150 m². A 10×15 m marquee or a pair of linked frame tents hits that mark nicely. Armed with these figures, you’ll get accurate quotes and avoid scrambling for space at the eleventh hour.

Plan your booking well before Cape Town’s peak season. Secure a tent 3–6 months in advance. A 30% deposit typically holds your dates and prices, with the balance due about 2–4 weeks before your big day.

  • Peak Season: book 4–6 months ahead
  • Rush Orders: expect a 10–15% surcharge

These windows align with suppliers’ schedules and seasonal fee structures.

Tent Booking Advance Guide

Your basic hire package includes the canopy, poles and stakes. Everything beyond that – flooring, sidewalls and lighting – is itemised separately. Order anything less than three weeks out, and you’ll likely see a 15% rush fee.

“Flexibility drops off sharply within three weeks of your event,” says a Cape Town event coordinator.

Are Power and Lighting Included?
Most suppliers treat power hookups and LED strips as extras. You’ll find them listed individually so you know exactly what’s covered.

  • LED Strip Section: from R150
  • Generator Hire: from R850 per day

Knowing this upfront avoids nasty surprises on your invoice.

Customisation on Short Notice
Last-minute requests hinge on stock levels. Closer than three weeks, you might find sidewalls or dance floors in short supply. Aim to have 80% of your accessories confirmed before the supplier starts finalising.

Local Permit Requirements

Every venue in Cape Town has its own rules. Most councils ask for permit applications at least 21 days before installation.

  • Keep permit numbers visible onsite for inspectors

Contact ABC Hire, your trusted event partner, for expert tents for hire in Cape Town at https://abchire.co.za today

Stretch Tents Hire Cape Town Your Complete Event Planning Guide

If you're planning an event anywhere in the Western Cape, getting the right shelter sorted is probably high on your list. And when it comes to stretch tents hire Cape Town has options that are more than just practical—they're incredibly stylish and a far better choice than old-school marquees for almost any event you can dream up.

Why Stretch Tents Are the Top Choice for Cape Town Events

Anyone who has planned an event in Cape Town knows that the venue is everything. The city and its stunning surrounds, from windswept beaches to tranquil Winelands estates, offer a spectacular natural canvas. The catch? That famously unpredictable weather. One minute you're basking in sunshine, the next the 'Cape Doctor' is blowing through with a vengeance. This is where a stretch tent really proves its worth.

Forget the rigid, boxy feel of a traditional marquee. A stretch tent gives you incredible adaptability. Their fluid, organic shapes aren't just for looks; they serve a vital purpose, allowing them to be set up in countless ways to work with the landscape, not fight against it.

Mastering the Elements with Style

The real magic of a modern stretch tent is how it handles Cape Town’s notorious "four seasons in a day." Any reputable local supplier will provide you with a structure properly engineered to stand up to the region’s powerful winds and sudden cloudbursts.

For example, companies like Cape Tents, who have been a key part of the local events scene since 2013, use materials that are completely waterproof, fire-retardant, and UV-resistant, all while meeting strict South African safety standards. It’s hardly surprising that industry estimates show stretch tents for weddings alone account for about 40% of all tent rentals in the Western Cape.

Here's a pro tip for any planner: a stretch tent’s stability comes down to the quality of the rigging. Always go with an experienced, insured company that truly understands the local conditions.

Versatility for Iconic Cape Town Venues

Beyond being weatherproof, it's their visual flexibility that really makes them stand out. A stretch tent can completely transform a space, creating an incredible atmosphere without blocking those million-dollar views.

Just picture these scenarios:

  • A Winelands Wedding: Think of a celebration at a beautiful Durbanville or Stellenbosch wine farm. You can rig a stretch tent over a courtyard, perfectly connecting indoor and outdoor areas while framing the views of the vineyards.
  • A Clifton Beach Party: A marquee would be a non-starter on uneven, sandy ground. But a stretch tent can be securely anchored to create a chic, sheltered lounge right on the sand.
  • A Corporate Event in the City Bowl: You can set up a tent over a rooftop terrace or in a historic garden, letting it blend with the existing architecture for a truly unique and sophisticated venue.

This adaptability is what makes them the smartest choice for event planners. If you're looking to coordinate every last detail of your function, our guide to event management in Cape Town has plenty more useful tips. The power to customise the setup ensures every event feels personal and perfectly designed.

How to Choose the Perfect Stretch Tent Size

Getting the size of your stretch tent right is probably the single most important decision you'll make. It’s about more than just fitting everyone inside; it's about crafting the entire atmosphere of your event. A tent that's too small will feel cramped and chaotic. Go too big, and even a packed event can feel strangely empty. The goal is to hit that sweet spot.

Your guest count is the obvious place to start, but the style of your event is what really dictates the space you'll need. A standing cocktail party is a world away from a formal seated dinner with round tables. You have to think about how your guests will actually use the space from start to finish.

Calculate Your Base Space Needs

Before you even look at tent dimensions, you need a baseline number. This calculation all comes down to what people will be doing inside the tent. Think of it as a simple formula: your number of guests multiplied by a specific space factor.

Here are the guidelines we use every day in the Cape Town events scene:

  • Standing Cocktail Function: Aim for about 1.0 square metre per person. This gives everyone enough room to mingle and chat without bumping elbows.
  • Seated Dinner (Rectangular Tables): Plan on roughly 1.5 square metres per guest. This layout is a bit more space-efficient.
  • Seated Dinner (Round Tables): You'll need a little more breathing room here—about 1.8 square metres per person. This allows for chairs to be pushed back and for people to move around the tables comfortably.

To help you get a quick estimate, we've put together this handy reference table.

Quick Guide to Stretch Tent Sizing for Cape Town Events

Use this table as a starting point to estimate the ideal tent size based on your guest count and event style.

Event Style Number of Guests Recommended Tent Size (m²) Typical Dimensions (m)
Cocktail Style 50 50 – 60 m² 6m x 10m
Cocktail Style 100 100 – 120 m² 10m x 12m
Seated (Rectangular Tables) 50 75 – 85 m² 7.5m x 10m
Seated (Rectangular Tables) 100 150 – 160 m² 10m x 15m
Seated (Round Tables) 50 90 – 100 m² 10m x 10m
Seated (Round Tables) 100 180 – 200 m² 10m x 20m or 12m x 15m

Remember, this is just for your guests. You still need to account for all the other elements that make an event tick!

Graphic illustrating stretch tent benefits: adaptable to any terrain, stylish design, and weatherproof against wind and rain.

The real magic of a stretch tent is its adaptability. You can get creative with layouts and work with your venue, not against it, while ensuring everyone stays dry and comfortable.

Planning Beyond the Guest Count

Right, let's move past just the tables and chairs. This is a classic mistake we see all the time—forgetting to account for the functional areas that eat up floor space.

Think about adding extra square metres for these crucial elements:

  • Dance Floor: This is a big one. A good rule of thumb is to assume about a third of your guests will be on the dance floor at any given moment. Adding an extra 0.3 to 0.5 square metres per guest will give you a lively but comfortable space.
  • Catering and Bar Areas: Buffet tables, food stations, and especially a dedicated bar all have a surprisingly large footprint. Chat with your caterer to get a solid estimate of the space they need for setup and service.
  • Entertainment: Are you having a DJ or a live band? A simple four-piece band can easily need a 4m x 3m stage area (12 m²), and that’s before you even think about their gear or a small backstage spot.

By adding up your guest space requirements and your functional area needs, you arrive at a total square meterage. This number is your most powerful tool when you request a quote for a stretch tents hire in Cape Town, ensuring you get accurate pricing from the start.

If you want to dig deeper into the pros and cons of different structures, this detailed overview of tent hire in Cape Town is a great resource. It helps make sure you're not just guessing but making a choice based on solid calculations.

Getting to Grips with Your Venue and Site Assessment

One of the best things about a stretch tent is its sheer versatility, but that flexibility only works if we start with a proper site assessment. Before you can lock in a booking for your stretch tents hire in Cape Town, any reputable supplier will insist on checking out your venue. Trust me, this isn't just a formality. It’s the single most important step to guarantee a safe, seamless setup that doesn't damage the venue.

A professional assessment is far more than just measuring a patch of grass. We're looking at the ground conditions, thinking about how the wind might behave on the day, and planning the logistics of getting everything into place. A little prep work here prevents a lot of headaches later.

Crouching man writes on a clipboard during a site assessment with caution tape and the ocean in the background.

What Lies Beneath: Checking the Ground Surface

The surface we're rigging on has a huge impact on how we anchor the tent—and what it will cost you. Every surface needs a different technique to make sure that tent isn't going anywhere.

  • Grass and Soil: This is the easiest canvas to work with. We use long, heavy-duty pegs driven deep into the earth to create a solid anchor. It's the standard, most affordable way to do things.
  • Sand: Got a beach wedding in mind? Fantastic, but it requires a bit more planning. We'll need to use specialised sand anchors or even bring in a weighted system to keep things secure. Rigging on sand is definitely more labour-intensive.
  • Paving, Concrete, or Decks: When we can't peg into the ground, we have to get creative. The crew will use incredibly heavy weights or find existing structural points to secure the tent. This needs careful calculation to ensure the load is distributed safely.

Before a single peg goes into the ground, it's absolutely crucial to know what's underneath. Hidden irrigation lines, electrical cables, or water pipes can turn a simple setup into a disaster. Always flag any known underground services with both your hire company and the venue manager.

Facing the Wind and Planning Access

In a city famous for its howling South-Easter, you can't ignore the wind. An experienced Cape Town crew knows the local wind patterns inside out. They'll know how to orient the tent to minimise the impact, maybe by dropping one side lower to create a windbreak. It makes all the difference.

The local stretch tent industry has been dealing with Cape Town’s unique weather for years. With some of the pioneers starting back around 2011, today's top suppliers have rigging down to a fine art, capable of handling gusts up to 100 km/h. It’s no surprise that research shows 75% of Cape Town clients now pick stretch tents over old-school marquees—they look incredible and offer far better protection from the elements. You can read more about how these structures have changed the local event scene over at Stretchi.co.za.

Lastly, let's talk about the simple stuff: access. How close can the delivery truck get to the setup spot? A long walk carrying heavy gear means more time and more hands, which will be reflected in your quote. Being upfront about access from the start helps everyone plan better.

Getting to Grips with Stretch Tent Hire Costs in Cape Town

Figuring out the cost of hiring a stretch tent in Cape Town isn't as simple as picking an item off a shelf. The final quote is a mix of a few key things, but it all starts with the base hire fee for the tent itself. Naturally, this comes down to size – the more square metres you need, the higher that initial cost will be.

But you're not just paying for the canvas. Professional rigging is an absolute must for safety and a flawless setup, so the cost of labour for an experienced crew is always part of the deal. These are the guys who make sure your tent is installed perfectly and can stand up to a surprise gust of the Cape Doctor.

What Really Shapes Your Quote

Beyond the basic tent size and the standard rigging, a few other factors will nudge the final price up or down. Knowing what these are helps you make sense of different quotes and plan your budget a lot more accurately.

Here’s what really influences the cost:

  • How long you need it: Most quotes cover a standard 1-3 day hire. If you’re planning a week-long festival or a lengthy corporate activation, the price will be adjusted for the longer period.
  • The complexity of the setup: Rigging a tent on a flat, open lawn is the most straightforward and budget-friendly option. Things get trickier—and a bit more expensive—when you're setting up on a sandy beach, a paved area that needs heavy counterweights, or a tricky multi-level deck. This kind of setup just takes more time, skill, and specialised gear.
  • The time of year: Cape Town’s peak event season, which generally runs from November to April, is when demand skyrockets. If you're planning a summer wedding or a festive season party, it's wise to book well in advance, as prices are often firmer during these busy months.

Don't Forget About Travel and Delivery

Most suppliers based in Cape Town will include delivery within a certain radius of the city bowl in their standard package. If your event is happening a bit further out, you can expect a travel surcharge to be added to your bill. It’s a fair charge that covers fuel and the crew’s extra travel time.

Planning an event in the Stellenbosch Winelands, Franschhoek, Paarl, or up the beautiful West Coast? A travel fee is pretty standard. It's always a good idea to confirm this right at the start when you ask for a quote, just to avoid any surprises.

Looking at the market, prices for stretch tent hire in Cape Town can swing from around R3,000 to over R25,000 per event, which really shows you how much the size and complexity can vary. Their stylish, versatile nature makes them the go-to choice, accounting for roughly 60% of all tent hire enquiries in the Western Cape. You can see more on these local market trends at Snupit.co.za.

While nailing down these specific costs is crucial, it’s just one piece of the puzzle. For the bigger picture on how to pull your entire event budget together, have a look at this a comprehensive guide to budgeting for an event. By understanding all the moving parts, you can compare quotes with confidence and find the perfect tent that fits both your vision and your wallet.

From Your First Call to the Final Takedown

So, you're ready to look into a stretch tent hire in Cape Town? Getting the logistics right might seem daunting, but it’s actually a pretty straightforward process when you know what to expect.

The golden rule, especially for an event during the busy season (that’s November to April for us), is to start your planning early. We always advise clients to begin making enquiries at least three to six months in advance. This gives you the best chance of securing your preferred tent and supplier without any last-minute panic.

Your first step is usually to request a quote. To get an accurate first estimate, you'll need to have a few details ready: your event date, the venue’s location, a rough guest count, and an idea of the event style. Is it a sit-down dinner or a more casual cocktail party? This info helps us figure out what you’ll need right from the get-go.

From Quote to Confirmation

Once you've got an initial quote you're happy with, the next step is absolutely vital: the site visit. Honestly, any professional tent company will insist on this before confirming a booking, and for good reason. It’s our chance to get a proper feel for the space. We'll assess the ground surface, look out for any overhead branches or underground pipes, and figure out the safest, most effective way to rig the tent at your venue.

This is your time to ask all the questions. We’ll chat about everything from truck access for delivery to which way the wind typically blows across the property. It’s also the perfect moment to go through the rental agreement.

Pay close attention to these key details:

  • Payment Schedule: The industry standard is a 50% deposit to lock in your booking, with the final payment due just before we set up.
  • Cancellation Policy: Life happens. Make sure you understand the deadlines and terms if you need to make changes or cancel.
  • Damage Waiver: It's important to be clear on who is responsible for the tent while it’s in your care.

A solid rental agreement is there to protect everyone involved. Don't be shy about asking for clarification on anything that seems unclear before you sign on the dotted line and pay your deposit. Once that's done, your tent is officially reserved!

The Magic of Installation and Breakdown

On the day before your event, our installation crew will arrive to bring your vision to life. A typical setup for a medium-sized tent (around 150m²) takes our team of four to six riggers about three to five hours from start to finish. All you need to do is make sure the area is clear and accessible, and have someone on-site to give the final nod on the tent's position.

After your guests have gone home and the party is over, the takedown is usually much faster. Our crew will return at a pre-arranged time—often the next day—to dismantle and pack up the tent quickly and efficiently. We make sure to leave the venue exactly as we found it, marking the end of a successful event.

Essential Add-Ons to Elevate Your Event Space

A stretch tent gives you a stunning, weatherproof canvas, but the real magic is in the details. The right extras are what turn a functional shelter into an unforgettable atmosphere. When you're looking at stretch tents hire Cape Town companies, always ask what add-ons they have in their inventory—it can make your planning a whole lot simpler.

An outdoor event space with white stretch tents, wooden deck, string lights, and green field.

The foundation of any great tented event is, quite literally, the floor. As lovely as lush grass is, it’s not always the best friend to high heels or a dedicated dance area. Most suppliers offer flooring solutions that completely change the feel of the space.

Creating Comfort and Style from the Ground Up

You can go way beyond a simple groundsheet. Wooden flooring adds a touch of class and gives you a solid, level surface that's perfect for a formal dinner or a wedding reception. If you're after a more rustic vibe, options like coir matting work beautifully. And of course, a classic black-and-white dance floor creates a clear focal point for the party.

Atmospheric lighting is another non-negotiable for getting the mood right, especially as the sun goes down over the Cape. Simple, well-placed lighting can make a huge impact. To really nail the ambience, it's worth checking out this detailed guide to string lights for tents to see what’s possible.

Here are a few popular options you’ll find with local rental companies:

  • Festoon Lights: These classic, larger bulbs give off a warm, ambient glow and a celebratory, almost festival-like feel.
  • Fairy Lights: For something a bit more delicate and enchanting, you can have thousands of tiny lights wrapped around poles or strung across the ceiling.

You can see just how magical lighting can be by learning more about the effect of curtain fairy lights in our article.

A pro tip for Cape Town events: always plan for the cool evenings. Even after a beautiful, warm day, the temperature can drop quickly once the sun is gone. Mushroom heaters or other discreet climate control options are a must to keep your guests comfortable all night long.

Finally, think about functional furniture that helps define different zones within your tent. Chic lounge pods can create relaxed breakaway areas for guests to chat, while a stylish mobile bar quickly becomes a central social hub. It’s these thoughtful additions that really complete the experience.

A Few Common Questions About Stretch Tent Hire

When you're deep in event planning, a few questions are bound to pop up. Most stretch tent hire suppliers in Cape Town have seen it all, but getting quick answers to the common stuff can really set your mind at ease.

Do I Need a Permit for a Stretch Tent in Cape Town?

For an event on private residential property, you generally won't need a permit. But if you're planning something in a public space, on a beach, or at certain venues, you'll likely need an event permit from the City of Cape Town.

Your tent hire company is your best first call for this. Always have a chat with both your venue and your tent supplier about permits—they often have the inside track and can help with the paperwork.

Are Stretch Tents Waterproof and Wind-Resistant?

Yes, absolutely. Any reputable Cape Town supplier will be using high-quality, 100% waterproof fabric. These tents are also specifically engineered to handle our local winds, including the infamous 'Cape Doctor' south-easter.

The real secret to stability in windy conditions is professional rigging. It’s crucial to hire an experienced, insured company that knows exactly how to anchor a tent for Cape Town’s unique weather patterns.

Can You Put a Stretch Tent Up on Any Surface?

Pretty much! That's one of their biggest perks. Stretch tents can go up on grass, sand, paving, and even be rigged over pools or decks. The surface just changes the rigging method.

  • Soft Ground: Standard pegs are used to anchor it securely.
  • Hard Surfaces: This requires weights and sometimes bolts.

Just make sure you tell your supplier about the surface right from the start. It can affect the quote and the gear they bring on the day, so it's good to get it sorted early.


Ready to create an unforgettable event space? ABC Hire offers a premier selection of stretch tents and event furniture to bring your vision to life. Explore our options and get a quote today at https://abchire.co.za.

A Guide To Wedding Tent Hire In Cape Town

Picture this: You’re saying “I do” with the iconic silhouette of Table Mountain watching over you, or maybe you're nestled among the lush, rolling hills of the Winelands. The secret to bringing these incredible visions to life is finding the perfect wedding tent hire. A tent gives you the ultimate freedom, letting you build your dream venue from scratch almost anywhere you can imagine.

Crafting Your Perfect Cape Town Outdoor Wedding

An outdoor wedding here in the Western Cape is a blank canvas like no other. Forget being stuck within four walls; you get to design your entire space from the ground up. It’s a chance to let your personality shine, whether you’re dreaming of a glamorous, high-end affair on a private Franschhoek wine estate or a chilled, barefoot celebration on a secluded West Coast beach.

The beauty of a tented wedding is that you’re in complete control of every single detail. From the floor plan and the lighting to the overall vibe, you get to create a space that tells your unique story as a couple. Of course, all this creative freedom means that getting the initial planning right is absolutely essential for a smooth, stress-free day.

Starting Your Planning Journey

The first few decisions you make are easily the most important. Before you even start looking at tent styles or sizes, you need to lock down the fundamentals of your wedding day.

  • Guest Count: This is the big one. Your number of guests will have the single biggest impact on the size of your tent and, of course, your budget.
  • Wedding Style: Are you thinking of a formal, sit-down dinner? Or is a more casual, cocktail-style reception more your vibe? The answer will completely change your layout and how much space you’ll need.
  • Location, Location, Location: The venue itself is a huge piece of the puzzle. A critical part of crafting your perfect day is choosing the right spot. For some great tips on this, check out this comprehensive guide on how to choose a wedding venue.

A well-chosen tent does so much more than just provide shelter. It becomes the architectural heart of your celebration, framing the incredible landscape and creating a wonderfully intimate atmosphere for you and your guests.

By thinking through these core details first, you're building a solid foundation for everything that follows. For a much deeper dive into getting these elements organised, take a look at our complete guide on how to plan a wedding. A little prep work now makes the search for your ideal wedding tent hire focused and successful, setting the stage for a day you’ll never forget.

How To Choose The Right Tent Size And Layout

Choosing the right tent for your wedding isn’t just a numbers game. Yes, your guest count is the starting point, but the real magic happens when you start thinking about the experience you want to create. It’s about designing a space that flows beautifully and works perfectly for your celebration. Let's get beyond simple square metres and start crafting an intentional layout.

Every single element, from the bar to the band, needs its own dedicated space. You have to think about the dance floor, the DJ booth, buffet tables, and maybe even a cosy lounge area for guests to relax. A formal seated dinner for 150 guests, for example, needs a completely different footprint than a cocktail-style reception for the same number of people. One needs room for big round tables and service aisles, while the other is all about creating space for people to mingle and move around.

Mapping Out Your Space

A classic mistake I see all the time is underestimating how much room the 'other stuff' takes up. That amazing dance floor you’re picturing? It can easily gobble up the same amount of space as three or four guest tables. And if you're dreaming of a live band, they'll need a much bigger stage area than a solo DJ.

My biggest piece of advice: Always go slightly bigger than you think you need. A tent with a little extra room feels grand and luxurious. A tent that's even a fraction too small feels cramped and stuffy for everyone. You're aiming for intimacy, not a squeeze.

Try to imagine your guests' journey through the night. Where do they walk in? How far is the bar from the dance floor? Is there a clear path to the loos? A well-planned layout guides everyone effortlessly through the event, creating distinct zones for dining, dancing, and chatting. This is how you turn a simple tent hire into a custom-designed venue.

This flowchart can help you visualise those first big decisions based on your guest list.

Flowchart illustrating wedding tent selection recommendations based on the number of guests.

As you can see, it all starts with your guest count and wedding style. From there, you can really start to drill down into the specifics of size and layout.

Finding The Right Fit In Cape Town

Once you've got a rough idea of what you need, you can start looking at actual sizes. Here in South Africa, local companies have a fantastic range of marquee tents perfect for weddings. You'll find everything from modular structures starting at 5x10m right up to huge 15x20m setups that can host a massive party. For a deeper dive into the regional market, this Grand View Research report has some interesting insights.

To make things a bit easier, I've put together a quick guide to help you estimate what you might need.

Wedding Tent Size and Capacity Guide

This table is a great starting point for figuring out what size tent you'll need. Just remember, these are estimates—things like the shape of your tables or adding a large lounge area will change the final numbers.

Guest Count Seated Dinner (Round Tables) Cocktail Style (Standing) Seated Dinner + Dance Floor
50-70 ~ 9m x 15m (135m²) ~ 9m x 9m (81m²) ~ 9m x 21m (189m²)
80-100 ~ 10m x 20m (200m²) ~ 10m x 15m (150m²) ~ 10m x 25m (250m²)
120-150 ~ 12m x 25m (300m²) ~ 12m x 20m (240m²) ~ 12m x 30m (360m²)
180-200 ~ 15m x 30m (450m²) ~ 15m x 25m (375m²) ~ 15m x 35m (525m²)

Use this table when you start chatting with your chosen wedding tent hire company. They’re the experts and can help refine these numbers based on your unique plans, whether that includes a grand entrance, a dedicated dessert station, or anything else you've dreamt up. They’ll make sure your final choice is the absolute perfect fit.

Finding Your Perfect Wedding Tent Style

Let's be honest, the tent you choose does so much more than just provide cover. It’s the architectural heart of your wedding day, the first thing guests see, and it sets the entire mood. Think of it as the main character in your venue's story. Nailing the style is absolutely crucial because it shapes everything from the overall vibe to how your guests take in those incredible Cape Town views.

A great place to start is your wedding theme. A glamorous, formal affair at a Constantia wine estate just calls for a different structure than a chilled-out, bohemian party on a windswept Kommetjie beach. Each tent brings its own personality and practical perks to the table.

Two different tent styles, a large white marquee and a cream teepee, on a green lawn with a historic building.

Classic Frame Marquees and Clear-Span Tents

For that timeless, elegant look, you really can’t beat a classic frame marquee. These are the versatile workhorses of the wedding world, known for their clean lines and completely open interiors. With zero central poles getting in the way, you have total freedom to design your layout and put the dance floor, tables, and decor exactly where you envision them.

The modern twist on this is the clear-span tent, which often comes with transparent PVC walls or even a clear roof. This style is a massive hit in the Winelands for an obvious reason: it lets you bring the breathtaking vineyard and mountain scenery right into your reception, no matter what the weather decides to do. Popular models can comfortably seat up to 190 guests, making them perfect for those lavish celebrations we see on Stellenbosch estates.

A clear-span marquee gives you the best of both worlds—full protection from the elements without sacrificing the incredible views that make a Cape Town wedding so special. It’s like having an indoor wedding with an outdoor feel.

Romantic Sailcloth and Stretch Tents

If you're dreaming of something more romantic and whimsical, a sailcloth tent is just beautiful. They’re known for their soaring peaks and a translucent fabric that creates a soft, ethereal glow during the day. Come nightfall, they look absolutely magical all lit up. That sculpted silhouette adds a real touch of fairytale charm to any setting.

For a more modern and relaxed vibe, the stretch tent (often called a Bedouin tent) is a fantastic choice. Its organic, flowing shape means it can be set up in countless ways, which is ideal for unconventional spaces or for creating a less formal atmosphere. They are a brilliant option for beach weddings or garden parties where you want things to feel a bit less structured. If you're planning a smaller, more intimate get-together, you might find our guide on gazebo hire in Cape Town helpful for comparing options.

Unique and Unforgettable Tipis

For couples who want to make a real statement, tipis (or teepees) are an enchanting and unforgettable alternative. They are often linked together to create one large, interconnected space, bringing an incredible sense of warmth and intimacy to the celebration.

  • Atmosphere: Tipis create a magical, almost mystical vibe, especially in the evening with fairy lights and open fires (where the venue permits, of course).
  • Best For: Rustic, bohemian, or festival-themed weddings.
  • Considerations: They do have internal poles, which means you need to be a bit more creative with your floor plan. But this can also be a plus, helping to create cosier, more defined zones within the larger space.

Ultimately, the wedding tent you hire should be a true reflection of your personal style. When you match the tent's character to your wedding's theme, you create a seamless and immersive experience that you and your guests will never forget.

Beyond The Tent: Essential Add-Ons And Finishes

A bare tent is just a shelter; the right details transform it into a breathtaking venue. Think of these elements as the finishing touches that infuse the space with comfort, ambience, and personality, turning a simple structure into an unforgettable experience.

The foundation of your tented venue starts from the ground up—literally. Flooring is one of the most critical, yet often overlooked, parts of a successful wedding tent hire. It gives your guests a stable, clean surface to walk on and completely elevates the look and feel of the space.

Interior of a large white wedding tent with a polished wooden dance floor, elegant string lights, a chandelier, and speakers.

Creating Ambiance With Lighting And Comfort

Lighting is where the real magic happens. It dictates the mood of your entire reception, shifting the atmosphere from bright and celebratory during dinner to romantic and intimate for the first dance. The options are wonderfully diverse and can be layered for maximum impact.

  • Fairy Light Canopies: Draped across the ceiling, these create a dreamy, starry-night effect that is pure romance. For more inspiration, you can learn all about creating stunning backdrops with curtain fairy lights in our detailed guide.
  • Chandeliers: For a touch of classic elegance or rustic charm, a central chandelier acts as a stunning focal point.
  • Uplighting: Placed around the tent's perimeter, these lights can wash the walls in your wedding colours, adding drama and dimension.

Next, you have to plan for Cape Town’s famously unpredictable weather. Even on a warm summer day, the evening can bring a chill, especially in the Winelands.

Professional wedding tents are designed to handle the elements, but ensuring guest comfort is your responsibility. Climate control isn't a luxury; it’s an essential part of creating a welcoming environment.

Discreetly placed heaters can keep the tent cosy after sunset, while powerful air-coolers or fans are non-negotiable for a summer afternoon wedding. A comfortable guest is a happy guest who will stay on the dance floor longer.

Essential Finishes And Unique Touches

Beyond the major elements, smaller details complete the picture. A dedicated dance floor, for instance, isn't just practical—it’s an invitation to celebrate. A beautiful wooden dance floor defines the party space and feels much better underfoot than interlocking plastic or, worse, damp grass.

Modern weddings are also about creating unique experiences. For those looking to integrate modern technology and capture unique memories, you might consider exploring the concept of a digital wedding guest book using a virtual photo booth. It's a fun, interactive alternative to the traditional book that gets everyone involved.

To ensure nothing gets missed, use a checklist when discussing options with your wedding tent hire company. This includes everything from the flooring and lighting right down to the power source (like a generator) and luxury portable toilets if the venue doesn't provide them. These well-planned additions guarantee a seamless, comfortable, and beautiful celebration for everyone.

Navigating The Booking Process And Key Timelines

Securing the perfect tent for your big day, especially in a sought-after spot like Cape Town, really comes down to timing. The wedding season here is in full swing from October through to April, which means demand for high-quality wedding tent hire goes through the roof. If you want to avoid that sinking feeling of discovering your dream tent is already booked, you need to get ahead of the game.

My advice? Start doing your research and sending out initial enquiries 9 to 12 months before your wedding date. This gives you plenty of breathing room to browse different suppliers, compare quotes without feeling rushed, and find a company whose style just clicks with your vision. It also puts you at the front of the line for those super popular dates, like long weekends and festive season holidays.

Making It Official And Locking It In

Once you’ve found a supplier you love and you’re set on the style and size of your tent, it's time to make it official. You should be aiming to sign the contract and pay the deposit no later than 6 to 8 months out. This is what locks in your booking and stops another couple from snapping up the tent you've got your heart set on.

Before you put pen to paper, please, please read the rental agreement properly. Don't just skim it – make sure you understand every single clause.

  • Payment Schedule: Know exactly when the deposit and the final balance are due.
  • Cancellation Policy: Life happens. Understand the financial side of things if your plans have to change.
  • Liability Insurance: Get clarity on who is responsible for what. The hire company will have their own insurance, but it’s worth checking if you need any extra cover from your side.
  • Damage Waiver: This clause explains how any potential damages to the tent or equipment are handled.

A detailed, thorough contract isn't just paperwork; it's the sign of a professional and organised company. It’s there to protect both of you and ensures there are no nasty surprises or hidden costs later on.

The Site Inspection: A Step You Cannot Skip

This is probably one of the most critical steps in the whole process: the site inspection. Your tent hire company absolutely must visit the venue with you, usually a few months before the wedding. Trust me, this isn't just an optional extra; it's a non-negotiable part of making sure everything runs smoothly.

During this visit, the team assesses a few key things. They’ll check the ground conditions to figure out the best way to anchor the tent – are we working with soft grass or hard paving? They'll also map out the delivery route to make sure their trucks can actually get to the site without any drama. Finally, they’ll look for power sources and chat through the logistics for generators if they're needed.

This simple meeting can sidestep so many last-minute headaches. For instance, the supplier might spot potential issues that need special permits, especially if you're on public land or in a nature reserve. They can also make sure their setup plan works with any specific rules your wine estate venue might have. Taking this step guarantees that when setup day arrives, everything runs like a well-oiled machine.

Understanding Wedding Tent Hire Costs In Cape Town

Let's talk money. Budgeting for your wedding can feel like you're trying to hit a moving target, but figuring out the cost of your tent hire doesn't have to be a shot in the dark. I'm going to break down the typical expenses so you can plan with a clear head, making sure there are no nasty surprises down the line.

The final price tag isn't just one number; it’s a combination of the tent itself, all the beautiful extras, and the hands-on labour needed to bring your dream venue to life.

The base hire fee for the tent is your starting point, and this can swing wildly depending on the style and size you need. A simple stretch tent for a chilled cocktail party will obviously be lighter on the wallet than a massive clear-span marquee built to host 200 guests for a formal sit-down dinner.

To give you a rough idea, a standard 10x10m marquee might rent for somewhere between ZAR 15,000 and ZAR 25,000 for the event. On the other hand, a premium wedding setup, complete with elegant chandeliers and solid wood flooring, can easily push past the ZAR 200,000 mark. If you're a numbers person, you can dive deeper into the tent rental service market here.

Key Factors Influencing Your Quote

Beyond the tent itself, a few other things can nudge your quote up or down. Getting a handle on these variables is the key to understanding your quote and knowing exactly where every rand is going.

  • Location and Access: Getting a tent out to a remote farm in the Winelands will naturally cost more than setting one up in the Cape Town suburbs. Think about access, too. If the site has steep slopes, is miles away from where the truck can park, or has any other tricky terrain, it’s going to take more crew and more time, and that will be reflected in the final cost.
  • Installation Complexity: A straightforward setup on a perfectly flat lawn is the dream scenario. But life isn't always that simple. If you need a tent installed on a slope, over a swimming pool, or on a hard surface like paving, it requires specialised gear and anchoring systems, which bumps up the labour costs.
  • Duration of Hire: Most quotes cover a standard 2-3 day period. This gives the team enough time to set everything up before the big day and take it all down afterwards. If you’re planning a multi-day celebration and need the tent for longer, the price will adjust accordingly.

A quick piece of advice: a quote is more than just a number. It's a reflection of the service, quality, and expertise you're investing in. The cheapest option isn't always the best value, especially when you’re talking about the roof over your guests' heads.

Budgeting For The All-Important Add-Ons

The initial tent hire fee is just part one. All those beautiful finishing touches and practical must-haves are priced separately, which is great because it means you can completely customise your space.

These extras are usually quoted per square metre or as individual items. Flooring is a big one, but it's an expense that’s totally worth it for the stability and elegance it adds. Lighting can be anything from simple, charming string lights to dramatic, high-end installations. And please, don't forget climate control! Heaters for a chilly evening or fans for a hot day are non-negotiable for keeping your guests comfortable.

When you get a quote, check that it breaks all these costs down clearly. This way, you can see exactly how the total is calculated and make smart decisions based on what’s most important to you.

Your Wedding Tent Questions, Answered

Planning a tented wedding in Cape Town brings up a few common questions. We get it. You want everything to be perfect. Let's tackle the big ones so you can plan with complete confidence.

What if it rains or gets windy?

This is probably the number one concern for any Cape Town wedding! The good news is that professional wedding tents are built to handle our notoriously unpredictable weather.

Any reputable company will use a frame or clear-span marquee, both of which are fully waterproof and have wind-resistance ratings. Don't be shy to ask for the specs! Side walls are also a standard inclusion, ready to be rolled down if the wind picks up or the heavens open.

Do we need power and toilets?

For most "blank canvas" venues like a wine farm field or a private estate garden, the answer is a definite yes. You'll need to arrange for your own power source and guest facilities.

This usually means hiring a generator (make sure it's a quiet "inverter" type so it doesn't drone over your speeches!) and a set of luxury portable toilets. Your tent hire company has seen it all before and can almost always recommend trusted suppliers for these or even bundle them into your package, which simplifies things immensely.

The Essential Guide to Tablecloths for Round Tables

Choosing the right tablecloth isn't just about covering a table. It’s about laying the groundwork for your entire event's look and feel. This guide is here to take the guesswork out of picking the perfect tablecloths for your round tables, making a tricky decision feel simple. We’ll walk through everything from measuring for that perfect drape to picking fabrics that create just the right mood.

Your Foundation for Flawless Event Design

Whether you're planning a lavish wedding, a sharp corporate gala, or a cosy get-together, the linens you choose really set the scene. The right tablecloth makes your centrepieces shine, pulls your colour scheme together, and creates that polished, intentional look guests always notice. Think of it as the canvas for your entire tablescape.

This guide will give you the confidence and know-how to select linens that don't just fit perfectly but truly elevate your event from start to finish.

We'll cover the essentials:

  • Getting the Measurements Right: Learn the simple maths for calculating the correct size, whether you’re after a dramatic floor-length look or a more casual half-drop.
  • Choosing Your Fabric: We’ll explore which materials work best for your theme, from ever-reliable polyester to glamorous satin.
  • Styling Tips and Tricks: Get inspired with ideas for layering and coordinating your linens for a stunning, cohesive design.

And for anyone curious about the actual craft behind great linens, you can dive into a designer's guide on how to make a tablecloth for a deeper look. Once you get these core details right, you can turn any round table from just okay to completely unforgettable.

Getting the Perfect Fit: How to Measure for Round Tables

Let's be honest, the one thing that can instantly make a beautifully planned event look a bit… off? It’s a badly fitting tablecloth. Too short and it looks like a mistake; too long and it becomes a trip hazard. Getting the size right is the single most important detail for a polished, professional look, and thankfully, it’s easier than you think.

First things first, you need two simple measurements: the diameter of your tabletop (that’s the distance straight across the middle) and its height (from the floor up). Most of our standard event tables here in South Africa stand 76 cm tall. Jot those two numbers down, as they're the starting point for everything else.

This simple flow chart breaks it down perfectly: measure first, then think about fabric and style.

A three-step process flowchart for tablecloth selection showing measure, fabric, and style.

As you can see, getting that measurement right from the start is absolutely crucial. It dictates all your other creative choices down the line.

Understanding the Tablecloth Drop

You'll hear the term "drop" a lot in the events world. It’s simply the industry term for how far the fabric hangs down from the edge of the table. This is where you get to decide on the mood and formality of your setup.

  • Half Drop: This is your go-to for a more casual, relaxed vibe. The cloth hangs about halfway to the floor (roughly 38 cm), making it perfect for daytime functions or informal get-togethers.
  • Full Drop: The gold standard for elegance. For weddings, awards dinners, or any formal occasion, you’ll want a full drop. The fabric just kisses the floor, creating a clean, seamless look that hides table legs completely.
  • Puddle Drop: Want maximum drama? The puddle drop is for you. Here, the fabric drapes extravagantly onto the floor, creating a luxurious "puddle" of material. It's a bold, high-fashion statement for the most opulent events.

The Simple Formula for a Perfect Fit

Once you know your table’s diameter and the kind of drop you want, the maths is dead simple.

Table Diameter + (2 x Desired Drop) = Required Tablecloth Diameter

Let’s run through a quick example. Say you’re using one of our popular 1.8-metre round tables and you want that classic, floor-length look. The drop would be 76 cm (the height of the table).

So, the calculation is: 180 cm + (2 x 76 cm) = 332 cm. You'd be looking for a 3.3m round tablecloth to get that perfect, elegant drape. It's a fundamental step that works for any table style, and you can see more inspiration in our guide on styling a round wooden table.

Getting this right matters. South Africans invest heavily in quality textiles for their homes and events—spending reached R12.5 billion by late 2022. This tells us that quality and appearance are priorities, and having the right size tablecloth is a huge part of that.


Round Tablecloth Sizing Cheat Sheet

To make things even easier, we've put together this quick cheat sheet. Just find your table size and see exactly what you need for a half or full drop.

Table Diameter (cm) Tablecloth for Half Drop (cm) Tablecloth for Full Drop (cm) Seats
90 180 240 2-4
120 210 270 4-6
150 240 300 6-8
180 270 330 8-10

Keep this handy, and you'll never have to guess again. It's our little secret to ensuring your event looks flawless every single time.

Choosing Your Fabric: A Guide to Materials and Textures

Once you’ve nailed down the perfect size, the next big decision is the fabric. This is where the personality of your event really starts to shine through. The material you choose does so much more than just cover the table; it sets the entire mood.

Think of it as dressing your tables. A sleek, high-sheen satin instantly says “glamorous evening affair,” making it a no-brainer for a wedding reception or gala dinner. On the other hand, a textured linen or cotton blend gives off a more organic, relaxed vibe, perfect for a daytime celebration or a rustic-themed wedding. The texture, weight, and finish of the fabric truly bring your theme to life.

Various colorful satin fabric swatches, including black, gold, and blue, draped over a white round tablecloth.

The Most Popular Fabric Choices

In the world of event rentals, some materials have become firm favourites for being both good-looking and practical. Let’s walk through the most common options we see for round tables so you can match the fabric to your function.

  • Polyester: This is the undisputed workhorse of the events industry. Why? It's incredibly durable, handles spills like a champ, and is a breeze to wash. Best of all, it's famous for being wrinkle-resistant, which is a massive win for any event planner. Polyester has a smooth, clean finish and comes in a huge range of colours, making it a versatile and budget-friendly choice for just about any occasion.

  • Satin: If you’re looking to dial up the luxury, satin is your go-to. Its glossy, high-sheen surface catches the light beautifully, creating a rich, elegant atmosphere that feels special. It's an obvious choice for weddings, anniversaries, and high-end corporate events. While it looks absolutely stunning, it can be a bit more prone to snagging or wrinkling than polyester, so it needs a gentle touch.

  • Spandex (Scuba): For a crisp, modern, and totally form-fitting look, spandex is an excellent choice. It stretches tightly over the table, creating a sleek silhouette with zero wrinkles or draping. This material is brilliant for cocktail tables, registration desks, or trade show booths where you want a clean, professional look.

When choosing a fabric for your event, it's always smart to think about both the look and the practical side of things. Below is a quick comparison to help you decide which material is the best fit for your specific needs.

Tablecloth Fabric Comparison for Events

Fabric Type Best For Feel & Appearance Care & Durability
Polyester All-purpose events, corporate functions, family gatherings Smooth, matte finish. Clean and professional. Very High: Stain-resistant, wrinkle-resistant, machine-washable.
Satin Weddings, galas, milestone birthdays, elegant dinners Silky, high-sheen, and luxurious. Reflects light beautifully. Medium: Prone to snags and wrinkles. Requires careful handling.
Spandex Modern events, cocktail parties, trade shows, exhibitions Stretchy, form-fitting, and sleek. Creates a smooth surface. High: Wrinkle-free by design. Easy to clean.

Ultimately, each fabric has its moment to shine. Polyester is your reliable all-rounder, satin brings the glamour, and spandex delivers that sharp, modern edge.

Balancing Aesthetics With Practicality

While it’s easy to fall in love with a fabric's appearance, you have to consider the practical side, especially for a big event. That gorgeous but delicate silk might not be the wisest choice for a lively party with plenty of food and red wine flowing.

The best fabric choice is one that not only complements your event's theme but can also withstand the realities of the occasion. It's a balance between style and sensibility.

Think about the specifics of your event. Is it happening outdoors where wind could be an issue? A lightweight fabric might spend more time flying away than on the table. Is it a formal dinner where spills are practically guaranteed? A stain-resistant material like polyester would be a very smart move.

For more inspiration on creating a specific mood, our guide on using black tablecloths for a sophisticated look has some great ideas. At the end of the day, picking the right material ensures your tables look fantastic from the moment the first guest arrives until the very last one leaves.

Styling Round Tables to Impress Your Guests

You’ve sorted the right size and picked the perfect fabric – now for the fun part. Styling your tablecloths for round tables is where your event theme really springs to life. A beautifully dressed table isn't just a place for plates; it becomes the heart of your guest's experience, tying all your decor elements together into one stunning, cohesive picture.

The goal here is to graduate from just covering a table to actually designing a tablescape. Think in layers, textures, and colours that all work in harmony to set a specific mood. This is your opportunity to turn a simple piece of furniture into a major player in your event's design story.

A round table with white tablecloth, brown runner, place settings, greenery, and a 'Table Styling' screen.

Styling for Weddings

For weddings, it’s all about romance, elegance, and those personal touches that make the day uniquely yours. Layering is your secret weapon here, adding a wonderful depth and sophistication to your round tables.

Start with a classic, floor-length tablecloth in a neutral shade like white, ivory, or soft champagne. This gives you a clean canvas. From there, you can add a pop of personality on top.

  • Sheer Overlays: A delicate organza or chiffon overlay can introduce a soft, dreamy quality without making the table look too busy.
  • Sequin Runners: If you’re after a touch of glam, a sparkling sequin runner down the centre is a showstopper. This is especially effective on the head table or cake table to really draw the eye.
  • Colour Coordination: To create that seamless, professionally-styled look, match your linen colours to your floral arrangements, invitations, or even the bridesmaid dresses. It creates a beautiful consistency that looks incredible in photos.

A well-styled table does more than just look pretty; it makes guests feel special and considered from the moment they take their seats. It’s a subtle but powerful way to show your attention to detail.

Styling for Corporate Events

When styling for a corporate function, the brief changes. The focus shifts to professionalism, sophistication, and reinforcing the brand. The look should be clean, intentional, and a direct reflection of the company's image. Clutter is the enemy here; elegant simplicity is your best friend.

Your tablecloths should look sharp and polished. A high-quality polyester in a classic black, navy, or crisp white usually works best, providing a refined backdrop for the rest of the setting.

From that solid foundation, you can weave in branding elements tastefully.

  1. Incorporate Company Colours: Use the brand’s primary or secondary colours subtly. A coloured napkin or a simple, elegant runner can introduce branding without being overwhelming.
  2. Use Custom-Branded Runners: For a more direct approach, a custom-printed runner featuring the company logo can look incredibly professional, particularly for conferences or product launches.
  3. Choose Professional Fabrics: Stick to materials that communicate quality. A smooth, wrinkle-free polyester tablecloth always projects competence and attention to detail, making sure your brand is presented in the best possible light.

Whether it’s a wedding or a corporate gala, styling your tablecloths is really about creating an atmosphere. By thinking about layers, colours, and the overall message you want to send, you can transform any round table into a stunning focal point that impresses every single guest.

On-Site Setup and Care for Your Rental Linens

A flawless look on the day of your event really comes down to how you handle the linens. Those final touches are what separate an average setup from a truly professional one, ensuring your round tablecloths look just as stunning in person as they did in your plans.

Your rental linens will almost always arrive clean, pressed, and on hangers to keep creasing to a minimum. The first thing you'll want to do is lay them out carefully. Unfolding them on a clean, dry surface is a simple step that prevents any last-minute dirt or snags and makes the whole setup process much smoother.

Nailing the Perfect Drape

Getting a tablecloth to hang evenly on a round table is key. If the drop is lopsided, the entire setting can look off-balance. Luckily, there's a simple professional trick to get it right every time.

  1. Find the Centre: Hold the tablecloth up by its very centre.
  2. Align with the Table: Position the centre of the cloth directly over the centre of the table.
  3. Let it Fall and Smooth: Gently release the tablecloth, letting it fall naturally. Smooth it out from the middle towards the edges, allowing the fabric to drape evenly all the way around.

It’s worth taking a moment to walk around the table just to double-check that the drop is consistent. It's a small detail, but it makes a huge difference to the overall polish of your event.

The Secret to a Crisp, Wrinkle-Free Finish

Even when your linens are delivered on hangers, a few minor creases from transport are pretty much unavoidable. The secret to getting that crisp, smooth finish—a step many people forget—is a handheld garment steamer.

Gently run the steamer over any wrinkles you see, holding it a few centimetres away from the fabric. The steam relaxes the fibres, and you'll see the creases literally fall out. This works like a charm on fabrics like polyester and satin, giving your tables a sharp, pristine look that's immaculate in photos and to the naked eye.

Pro Tip: Always steam your tablecloths after you’ve placed them on the table. This way, you avoid creating new wrinkles while moving them and you can see exactly where any touch-ups are needed for a flawless finish.

How to Handle Spills and Stains

Accidents happen. But a quick response can stop a small spill from becoming a permanent stain and save you from potential damage fees. We always recommend having a little "stain kit" handy with a few clean cloths, some soda water, and a gentle stain remover.

If something like red wine or a sauce gets spilled, immediately blot the area with a dry, clean cloth. Whatever you do, don't rub! Rubbing just pushes the stain deeper into the fabric. A gentle dab with a cloth dampened with soda water can often lift the stain right out.

After the event, all you need to do is shake the linens to get rid of any loose crumbs and pop them into the laundry bags we provide. Please resist the urge to wash them yourself; rental companies use highly specialised cleaning processes. Understanding the ins and outs of professional linen dry cleaning services shows just how specific the requirements can be. Following these steps ensures a smooth, hassle-free return and a perfect presentation every time.

Finding the Right Linen Supplier in Cape Town

The Cape Town event scene is buzzing with options, but choosing the right linen hire partner is what separates a good event from a great one. A reliable supplier does more than just drop off a stack of tablecloths; they’re a key part of your team, making sure everything looks perfect without adding to your stress.

Finding that perfect fit boils down to asking the right questions. Don’t be shy! Get into the nitty-gritty of their stock levels for big weddings, their exact delivery and collection process, and what happens if a little red wine gets spilt. A transparent, professional company will have all these answers ready for you.

Key Questions for Your Potential Supplier

Before you sign on the dotted line, you need total clarity. A supplier worth their salt will appreciate your detailed questions—it shows you’re a pro who cares about the details.

Here are a few non-negotiables to run through with them:

  • What are your delivery and collection procedures? You need to know their timelines and whether they offer a setup service.
  • Can I see fabric swatches in person? This is a big one. What you see on a screen can be worlds away from the real thing. You have to feel the texture and see the colour with your own eyes to know it’s right.
  • What is your policy on damaged or stained linens? It’s always best to know the potential costs upfront. No one needs that kind of surprise after a successful event.

The local market here is strong for a reason—people value quality. In fact, South African household spending on textiles hit a massive R12.5 billion by the end of 2022, a number that really shows how much we all appreciate good-quality fabrics for our homes and events. You can dive deeper into these trends in the latest report from Statistics South Africa.

A great supplier is more than just a vendor; they are a partner invested in your event's success. Their reliability, communication, and the quality of their stock are just as important as the price.

Choosing a local expert with a solid reputation is always a smart move. For a bit more on sourcing the best event items locally, our guide on finding quality decor hire in Cape Town has some extra tips. Do your homework, vet your suppliers properly, and you’ll find a partner who delivers amazing quality, every single time.

Frequently Asked Questions About Round Tablecloths

It's completely normal to have a few questions when you're getting into the finer details of event planning. When it comes to round tablecloths, getting the right answers can be the difference between a setup that’s just okay and one that looks absolutely spectacular. We've put together some of the most common questions we get, with practical, no-fuss answers.

This should help you make those final decisions with confidence, making sure every table looks flawless.

What Is the Most Popular Size for Round Tablecloths?

For most formal events in South Africa, like weddings or corporate galas, the goal is always that elegant, floor-length drop. The undisputed industry favourite is the 3.3m (132-inch) tablecloth. It’s the perfect match for a standard 1.8m (72-inch) round table, which is what you'd typically use for 10-12 guests.

This size gives you that beautiful, seamless look by hiding the table legs completely. If you're using a slightly smaller 1.5m (60-inch) table, a 3m (120-inch) cloth will give you that same stunning floor-length finish.

Can I Use an Overlay on a Round Tablecloth?

Of course! Using an overlay is one of our favourite styling tricks. It’s a brilliant way to add a pop of colour, a different texture, or just a bit more dimension to your tables. You can easily bring in your event's theme colours or add a touch of sparkle without having to use a fully patterned cloth for the base.

A really popular and effective look is to place a smaller square overlay diagonally over a full-length round tablecloth. This creates gorgeous, cascading points of fabric that add real visual interest to the whole setting.

Imagine a rich satin overlay in your wedding colour over a crisp white base – so chic. Or, for a big birthday bash or New Year's Eve party, a sequin overlay can instantly take the glam factor up a notch.

How Do I Get Wrinkles Out of Rented Tablecloths?

While we deliver all our linens on hangers to keep creasing to a minimum, a few wrinkles from transport are pretty much unavoidable. The quickest and safest way to get a perfectly smooth, crisp finish on-site is with a handheld garment steamer.

Steam is gentle enough for most fabrics, like polyester and satin, and it works wonders at relaxing the fibres so the creases just fall away. If you don’t have a steamer, you can sometimes tumble the linen in a dryer on a low heat setting with a damp cloth for about 15 minutes. Just be sure to check with us or your rental provider first to make sure you’re following the specific care instructions for the fabric.


Ready to create a stunning look for your next event? ABC Hire offers a premium selection of tablecloths for round tables and all the event essentials you need in Cape Town. Explore our collection and get a quote today at https://abchire.co.za.

Tent Hire Cape Town: Your Guide to Tent Hire Cape Town Marquees

Hiring a tent can take any spot in Cape Town and turn it into the perfect venue, but figuring out where to start can feel like a mission. It really just comes down to three things: working out your space, nailing down your event's theme, and picking a tent style that brings it all together.

Get these fundamentals right, and your tent hire in Cape Town will be a breeze.

Starting Your Tent Hire Journey in Cape Town

Choosing a tent is your first real step toward creating a truly unique event, whether it's a dream wedding on a wine farm or a slick corporate function with views of Table Mountain. Unlike a brick-and-mortar venue, a tent is a completely blank canvas. But with that freedom comes the need for a bit of smart planning upfront to dodge any potential hiccups.

The journey doesn't actually start with the tent. It starts with your guests and the kind of experience you want to give them. Before you even think about different tent styles, you need to get a solid handle on your numbers and what will be happening inside.

Calculate Your Space and Capacity

First things first: you need to figure out exactly how much room you'll need. This is about more than just getting enough chairs in; you have to think about every single part of your event. A good rule of thumb is to work out the space per guest, but this can change quite a bit depending on your setup.

Think about these key points:

  • Seating Arrangement: Are you picturing long, banquet-style tables or intimate round ones? Round tables almost always take up more floor space per person.
  • Functional Areas: Have you made room for a dance floor, a bar, a catering station, a DJ booth, or maybe even a stage? Each one of these needs its own dedicated patch of real estate.
  • Guest Comfort: You've got to leave enough space for people to move around easily, pull out their chairs, and mingle without feeling like they're in a sardine can.

This initial planning part is so important. As you get started, it helps to see the bigger picture. For a great rundown on the whole process, check out this guide on how to plan a successful event.

Define Your Theme and Select a Style

Once you know how much space you're working with, you can get to the fun part—the look and feel. The style of the tent you choose sets the entire mood for the event.

A beautiful, flowing stretch tent, for example, gives off a modern and relaxed vibe—perfect for a sunset cocktail party in Camps Bay. A classic, structured frame marquee, on the other hand, brings a more formal elegance that's just right for a sophisticated wedding in the Winelands. Let your theme be your guide.

This simple infographic breaks down how your space, theme, and style choices should line up.

Infographic outlining three key steps for successful tent hire planning: space, theme, and style.

As you can see, the practical stuff (space) and your creative vision (theme) have to come together before you settle on the perfect tent. If you need some expert advice on pulling all these elements together, have a look at our insights on event management in Cape Town.

Choosing the Right Tent for Your Cape Town Venue

Two different white event tents are set up on a green lawn with a brick pathway.

The tent you pick does more than just keep your guests dry; it’s the heart and soul of your event, setting the whole mood. It dictates the flow, the style, and the experience. For any successful tent hire in Cape Town, getting to know the main options is the first step to making your vision a reality.

In Cape Town, you’ll mostly come across two popular styles. You’ve got the modern, flowing lines of stretch (or Bedouin) tents, and then there’s the classic, structured elegance of frame marquees for a more traditional feel.

Stretch Tents Modern and Versatile

Stretch tents, often called Bedouin tents, are a massive hit across the Western Cape. You can see why. Their organic, flowing shapes can adapt to just about any landscape, creating stunning, sculptural silhouettes. The flexible fabric is stretched and anchored to poles, which can be set at different heights.

This makes them a fantastic choice for tricky venues with uneven ground or things you can’t move, like trees or flowerbeds. The setup can be customised to work around them. They give off a contemporary, relaxed vibe that’s perfect for cocktail parties, beach weddings, and festivals.

One of the biggest wins for a stretch tent is how it handles the wind. That aerodynamic shape holds up against the infamous Cape Southeaster way better than a boxy, traditional tent.

The only real catch is the internal poles needed to create those beautiful shapes. They can get in the way of sightlines and floor plans. You can get creative and use them to mark out different zones, but it’s something to keep in mind if you need a completely open, clear space inside.

Frame Marquees Classic Elegance and Open Space

For more formal events like gala dinners or big weddings, the aluminium frame marquee is usually the go-to. These are solid, self-supporting structures without any pesky internal poles. This gives you a completely clear-span interior and total freedom with your layout.

Having that unobstructed space is a game-changer when you’re planning for big stages, a proper dance floor, or complicated seating charts. They have a clean, polished look with high ceilings, basically giving you a blank canvas to go wild with lighting and décor.

Frame marquees can be set up on almost any surface, from grass to paving, using heavy weights instead of stakes. For smaller get-togethers, you might not need something so grand; our guide on heavy duty gazebos can point you towards more compact alternatives like a 10×10 screened canopy.

While they are incredibly sturdy, their high, straight sides can act like a sail in a serious gust, so expert installation is non-negotiable. They also have a more traditional look, which might not click with a more modern party theme.

Tent Type Comparison for Cape Town Events

Choosing between these styles often comes down to your event's specific needs, your venue's quirks, and the famous Cape Town weather. Here’s a quick breakdown to help you compare the most common options at a glance.

Tent Type Best For Space Profile Wind Resistance Estimated Cost Guide (per sqm)
Stretch (Bedouin) Tent Weddings, festivals, cocktail events, venues with uneven ground. Flexible layout with some internal poles interrupting the space. Excellent – aerodynamic shape handles wind well. R55 – R90
Frame Marquee Corporate events, large formal weddings, exhibitions, long-term hires. 100% open clear-span interior with no obstructions. Good to Very Good – needs professional securing in high winds. R70 – R120
Peg & Pole Marquee Classic garden parties, country-style weddings on soft ground. Traditional look with centre poles and guy ropes. Moderate – not ideal for extremely windy coastal sites. R50 – R85

This table should give you a solid starting point. Remember to chat with your potential supplier about your venue—their hands-on experience is invaluable for making the final call.

Getting to Grips with Site Logistics and City Permits

A person in a high-visibility vest and cap inspecting an outdoor site, writing on a clipboard.

You’ve found the perfect tent—great! But the real work starts now: making sure you can actually put it up safely and legally at your venue. This is where so many event plans hit a snag. Getting the logistics and permits sorted is one of those unglamorous but absolutely critical steps for any successful tent hire in Cape Town.

Before you even think about paying a deposit, a proper site inspection is a must. This isn’t a quick glance; it's a deep dive to spot any issues that could derail your setup. Your tent company should handle this, but you need to know what they're looking for so you can ask the right questions.

The All-Important Site Inspection

In a perfect world, every venue would be a flat, wide-open field with easy access. But let’s be honest, that’s rarely the case here in Cape Town, where our most stunning venues often come with their own unique challenges. A professional site check is crucial to avoid expensive, last-minute surprises.

Here’s what a proper inspection should cover:

  • Ground Surface and Slope: Is the area actually level? A minor slope can sometimes be managed, but anything more significant will likely require proper sub-flooring to create a safe, stable base. That’s an extra cost you need to know about upfront.
  • What Lies Beneath: You can’t see what’s underground. Are there irrigation pipes for the beautiful gardens? Hidden electrical cables? Septic tanks? The last thing you want is a tent stake going through a water main. It happens.
  • Overhead Clearance: Look up! Low-hanging branches, power lines, or building overhangs can make it impossible to raise the tent to its full height safely.
  • Getting In and Out: How will the delivery truck access the site? If it can't get close, the crew will have to carry everything by hand. That means more time and higher labour costs, which will definitely find their way onto your final bill.

Don't fall in love with a beautiful spot and just assume it'll work. A thorough site visit is your best protection against unexpected problems and ensures the quote you get is the price you'll actually pay.

Untangling City of Cape Town Permits

Okay, the site is physically perfect. Now for the red tape. Putting up a temporary structure, especially for a larger or public event, almost always requires a nod from the City of Cape Town.

You'll probably need a permit if your tent:

  • Is bigger than a certain size (the magic number is often around 100 square metres).
  • Will be standing for more than a few days.
  • Is going up in a public area like a beach, park, or municipal field.

The application usually requires site plans, safety certificates from your tent supplier, and sometimes even an engineer's report to sign off on the structure. Any reputable company offering tent hire in Cape Town will know this process inside-out and should be able to guide you, or even handle the entire application for you.

Ask them about their experience with city permits—it’s a great way to gauge their professionalism and local knowledge. And whatever you do, start this early. Approvals can take weeks, and it’s not something you want to be chasing the week before your event.

Decoding Quotes and Rental Contracts

Getting that first quote for your tent hire is always an exciting moment, but it's vital to look past the big number at the bottom. A good quote is more than just the price of the tent; it's a full breakdown of every single service and item that makes up your final cost. Knowing how to read it properly is the secret to keeping your budget on track and avoiding any nasty surprises down the line.

The best suppliers in Cape Town will give you a fully itemised list, making it dead simple to see exactly what you're paying for. This also lets you compare quotes from different companies fairly—like for like. If a quote looks a bit vague or lumps everything into one fee, don't be shy about asking for more detail.

What to Look For in Your Quote

A professional quote will always separate the core tent rental from all the other services and potential add-ons. Remember, you’re not just hiring a piece of canvas; you're hiring a complete service that covers logistics, labour, and all the necessary equipment.

Make sure you can spot these specific line items:

  • Tent Rental Fee: This is the base cost for the tent structure itself.
  • Labour Costs: This should cover both the setup (installation) and the takedown (strike) of the tent.
  • Delivery and Collection: A fee that’s usually calculated based on how far your venue is from their warehouse.
  • Damage Waiver: Think of this as insurance. It’s a small, non-refundable fee that covers minor, accidental bumps and scrapes.
  • Value Added Tax (VAT): Always check if the price is inclusive or exclusive of VAT. In South Africa, it’s currently 15%, and that can make a big difference to your final bill.

A transparent quote is the hallmark of a professional company. Hidden fees often sneak in when things like labour or transport are bundled into a vague "service charge," so if anything isn't crystal clear, ask for clarification.

Reading the Fine Print in Contracts

Once you’ve settled on a quote you're happy with, the rental contract is the next step. This is a legal document designed to protect both you and the supplier. It’s so tempting to just skim and sign, but taking the time to read it carefully is non-negotiable.

Pay special attention to clauses about cancellation policies, what happens if there’s significant damage, and any terms related to extreme weather conditions. For example, the big industry players like GL Events handle everything from intimate weddings to massive corporate events, and they operate under incredibly strict safety protocols. This level of professionalism, which has become standard since updated regulations came in back in 2015, has massively improved safety across the board. You can get a feel for their standards by reading about their approach to hiring top-quality marquee tents in Cape Town.

Understanding these terms from the get-go means you know exactly where you stand, which gives you complete peace of mind.

Essential Add-Ons to Complete Your Venue

A tent gives you the structure, but it's the right accessories that truly transform that space into a breathtaking and functional venue. These are the details that create atmosphere, guarantee comfort, and make your event run like a dream. For any top-tier tent hire in Cape Town, thinking beyond the canvas is what sets a good event apart from a great one.

Let’s start from the ground up. The surface your tent sits on can make or break the guest experience, especially if the ground is uneven, a bit muddy, or damp. Flooring isn't just about practicality; it sets the entire tone for your event.

A simple yet brilliant option is coir matting. This natural, coconut-fibre carpeting is perfect for nailing that rustic, relaxed vibe. It's fantastic for a country-style wedding or a casual garden party, giving you a firm and clean surface over grass.

Creating the Perfect Foundation and Atmosphere

For a more polished and formal affair, a solid wood floor is the ultimate choice. It creates a completely level, stable surface—which is essential if you're planning a proper dance floor or setting up elegant dining furniture. A solid floor instantly elevates the whole event, turning your marquee into a genuine pop-up ballroom.

With your foundation sorted, you need to think about Cape Town's famously unpredictable weather. A beautiful summer day can easily turn into a cool, windy evening, especially if you're out in the Winelands or near the coast.

Don't let your guests get cold. Planning for a drop in temperature is one of the smartest moves you can make. A comfortable guest is a happy guest who will stay and enjoy the party for longer.

This is where climate control becomes an absolute must-have. For those chilly evenings, a few well-placed outdoor heaters can make all the difference. To figure out what you'll need, you can learn more about choosing the right gas outdoor heater for your event. On the flip side, for a scorching summer afternoon, strategically placed air-coolers will keep the air moving and ensure everyone stays comfortable.

Lighting and Powering Your Event

Lighting is where your creative vision really comes to life. It’s about so much more than just being able to see; it’s about crafting an unforgettable mood. Your lighting plan should be layered to create depth and warmth.

Here are a few key elements to consider:

  • Ambient Lighting: This is your general, overall illumination. Think simple string lights or elegant chandeliers to cast a warm, inviting glow.
  • Task Lighting: This is focused light for specific zones, like the bar, catering stations, or the entrance, making sure these functional areas are well-lit.
  • Decorative Lighting: This is where the magic happens! Uplighters can throw dramatic colours up the tent walls, while fairy lights woven through the ceiling can create a stunning starry-night effect.

Of course, all these amazing add-ons need power. Unless your venue has plenty of dedicated outdoor power points, you will almost certainly need to hire a generator. Chat with your supplier about your total power needs—covering everything from lighting and sound systems to catering equipment—to make sure you have a reliable source that won’t quit on you.

Finally, don't forget the other crucial rentals. High-quality furniture sets the stage for comfort and style, while luxury portable restrooms offer a level of convenience your guests will definitely appreciate. It's the thoughtful combination of all these elements that turns a simple tent hire into a complete, memorable venue experience.

Got Questions About Hiring a Tent in Cape Town?

Once you start digging into the details of your event, a few questions always pop up. To help you plan with total confidence, we’ve put together answers to the most common queries we get about hiring a tent in and around Cape Town. This should clear up any last-minute worries.

One of the biggest concerns for event planners is timing. You don't want to book too late and find everything is taken, but booking too early can feel like a shot in the dark.

How Far in Advance Should I Book My Tent?

For any event planned during Cape Town's peak season (that’s roughly October to April), you’ll want to lock in your tent six to nine months in advance. Weekend dates during this period are gold dust, especially for sought-after wedding spots in the Winelands.

If you’re planning something in the quieter off-season, three to four months is usually plenty of time. But, a word of advice: if you have your heart set on a very specific style, like a unique colour of stretch tent, book it as soon as you can. It’s the only way to guarantee you get the exact look you're going for.

What Happens if the Weather Turns on My Event Day?

Ah, the infamous Cape Town weather—four seasons in one day is a real thing here! Not to worry. Professional tent suppliers use structures engineered to handle pretty much anything the Cape Doctor can throw at them. A correctly installed stretch tent is surprisingly aerodynamic, and a solid frame marquee is built for serious stability.

Always ask your potential supplier about their bad-weather plan. They should be able to show you that their tents are fully waterproof and explain how they secure them with extra weights or specialised pegs if the wind starts pumping.

Here's a pro tip that's easy to miss: flooring. Investing in a solid floor or quality matting is your absolute best defence against a muddy mess if the heavens decide to open.

Can a Tent Be Set Up on Any Surface?

Almost any surface, but there are a few things to keep in mind. Grass is the easiest and most ideal, as it allows for traditional staking—the most secure anchoring method. For hard surfaces like paving, concrete, or even a tennis court, a frame marquee is your best bet. It can be safely anchored with heavy water barrels or concrete blocks instead of pegs.

It's absolutely critical to tell your supplier about the setup surface when you first ask for a quote. This directly impacts the equipment they'll need and, naturally, the final cost. The biggest challenge is very uneven or steeply sloped ground, which might require a custom-built sub-floor to create a level and safe foundation.

Will I Need to Hire a Generator?

It’s very likely, yes. If your event involves professional lighting, a sound system for a DJ or band, catering gear like food warmers, or any kind of heating or cooling, you will almost certainly need more power than a standard wall socket can provide.

The best way to figure it out is to add up the power needs from all your suppliers—tent, catering, and entertainment. Hiring a dedicated, silenced generator is the most reliable way to make sure everything runs smoothly, preventing any awkward power trips from killing the vibe.


Ready to create an unforgettable atmosphere for your next event? ABC Hire offers a premier selection of tents, LED furniture, and all the essential add-ons to bring your vision to life.

Explore our full range of event rentals and get a quote today at https://abchire.co.za.

Curtain Fairy Lights: Curtain Fairy Lights for Cape Town Events

Choosing the right curtain fairy lights is about so much more than just picking a pretty sparkle. It's about matching the light's technical details to the unique vibe and logistical needs of your event.

A soft, intimate glow from warm white lights can transform a Stellenbosch wedding, while crisp, cool white lights bring a sharp, modern edge to a corporate gala at the CTICC. Getting this right from the start is the secret to creating a lighting design that not only looks stunning but actually works flawlessly on the day.
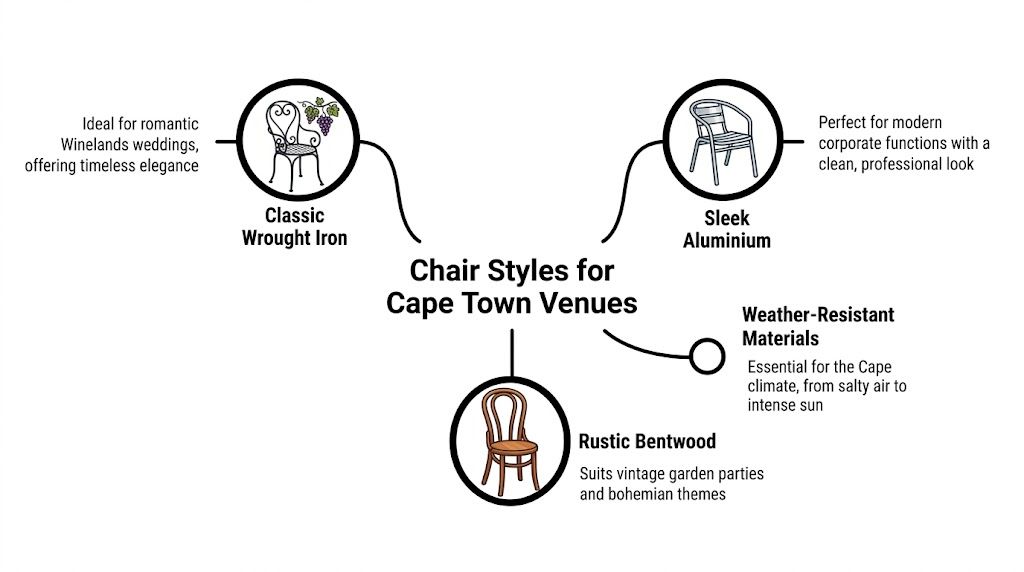
Choosing the Right Curtain Fairy Lights for Your Venue

The magic of a breathtaking lighting design begins long before you plug anything in. For those of us planning events in and around Cape Town, this means thinking about everything from the exact shade of white to whether the lights can handle a surprise southeaster shower. The small details you focus on now make all the difference.

And it’s a choice more and more people are making. The demand for curtain fairy lights in South Africa is absolutely booming, driven by the festive and wedding markets. With festive spending recently jumping by 25% year-on-year, curtain lights snatched a huge 18% of all holiday lighting sales. Just look at social media—hashtags like #FairyLightsZA are flooded with tens of thousands of posts. This isn't just a local trend; it reflects a massive global market expansion. You can dive deeper into the numbers with this market trend analysis from DataHorizzon Research.

Matching Light Colour to Event Mood

The colour temperature of your lights is your most powerful tool for setting the mood. It's measured in Kelvin (K), and even a slight shift can completely change the feel of a space.

  • Warm White (2700K-3000K): This is the classic choice for a reason. It gives off a soft, golden, almost candle-like glow that feels incredibly romantic and welcoming. Think of it draped behind the main table at a rustic winelands wedding—it's pure magic.
  • Cool White (4000K-5000K): With its clean, bright, and almost blueish hue, cool white is perfect for corporate functions, modern-themed parties, or brand activations. It screams energy and sophistication, making it an ideal fit for a sleek event at a contemporary venue like the Zeitz MOCAA.

Getting the Size and Density Right

The physical size of your fairy light curtain is just as important as its colour. One of the most common mistakes we see is choosing a set that’s too small for the wall or window, leaving it looking a bit sparse and lost.

First things first: measure the height and width of the area you want to cover. For a show-stopping backdrop behind a stage or bridal table, you'll need a curtain with a decent vertical drop—say, 3 metres. If you're creating a starry canopy overhead, the horizontal width becomes your most critical measurement.

Next, think about density—how close together are the vertical strands of light? For that full, shimmering "wall of light" effect, look for curtains where the strands are spaced just 10-15 cm apart. You can get away with wider spacing for a more subtle twinkle, but for that signature wow-factor, denser is always better.

Pro Tip: If you're ever in doubt, go slightly larger than you think you need. It's so much easier to bunch up or drape extra length for a fuller, more luxurious look than it is to try and stretch a small curtain to its absolute limits.

Power Source and Weatherproofing

Let's talk practicalities. Between Cape Town’s famously unpredictable weather and the reality of loadshedding, you have to plan for everything.

  • Plug-In vs. Battery: Plug-in models are brilliant for consistent, bright light at indoor events where you have plenty of wall sockets. For outdoor setups, marquee weddings, or venues where power points are few and far between, high-quality battery-operated lights are a lifesaver. They get rid of messy extension cords (a major trip hazard!) and give you a much cleaner look.
  • IP Rating: This is non-negotiable for any outdoor event, whether it's a garden party in Constantia or a beachfront ceremony in Llandudno. Always check the IP (Ingress Protection) rating. The absolute minimum you should look for is IP44, which means it’s protected against splashes of water. This gives you peace of mind that your lights won't fail you if a classic Cape Town drizzle decides to make an appearance.

To make the decision a little easier, here’s a quick-glance checklist tailored for event planners working in the Cape.

Curtain Fairy Light Selection Checklist for Event Planners

This table breaks down the key considerations to help you quickly choose the perfect curtain lights based on your event type, venue, and logistical needs here in Cape Town.

Consideration Wedding/Romantic Event Corporate/Modern Event Key Tip for Cape Town Venues
Colour Temp Warm White (2700K-3000K) for a soft, candle-lit glow. Cool White (4000K-5000K) for a crisp, energetic look. Match the tone to the venue—warm for rustic wine farms, cool for city-centre galleries.
Size & Density Go for a long drop (3m) and dense spacing (10-15cm) for lush backdrops. Width is often key for stage backdrops or entrance features. Always measure the space first. Don't guess! An extra metre is better than being short.
Power Source Battery-operated is great for outdoor ceremonies or marquee receptions. Plug-in ensures consistent brightness for long evening functions. Have a loadshedding plan! Battery backups or generators are essential.
Weatherproofing Minimum IP44 rating is a must for garden or beach weddings. IP44 is still vital for any outdoor welcome areas or terrace setups. The Southeaster can bring unexpected rain. Never risk using indoor-only lights outside.

Choosing the right lights comes down to balancing the creative vision with these practical realities. Thinking through these points beforehand ensures your event lighting will be both beautiful and reliable, no matter what the day throws at you.

How to Measure and Plan Your Installation Like a Pro

A stunning curtain light display is all about the prep work. Honestly, the difference between a professional-looking installation and a messy one comes down to planning, not just hanging. Before you do anything else, grab your measuring tape and get the exact dimensions of your space. It's a simple step, but it's what stops you from running short of lights or having weird, empty gaps on the day.

Start with the basics: measure the vertical drop for backdrops and the horizontal span for canopies. If you’re creating a dramatic backdrop behind the main table in a Winelands marquee, you need the precise height from where you'll hang the lights right down to the floor. For an overhead canopy in a city venue, get the length and width of the ceiling area you want to cover.

Calculating the Right Number of Light Sets

Once you have your measurements, you can figure out how many sets you'll need. But don't just match the length exactly—that's a rookie mistake! You always want to factor in a bit extra for styling. If you're aiming for soft swags or a draped effect, you're going to need more length than a straight, tight hang.

A solid rule of thumb is to add 1.5 times the measured length for a gentle drape. If you want a more dramatic, billowy look, go for up to 2 times the length. This gives you enough slack to play with, creating that luxurious, full effect instead of a taut, stretched-out one.

Insider Tip: Always, always order at least one extra set of lights beyond what you've calculated. This single backup can be a total lifesaver if a set turns out to be faulty on-site or if a last-minute design change calls for more coverage.

Mapping Out Power Sources and Cable Runs

Knowing your dimensions is only half the battle; you also need to know where your power is coming from. Before the event, do a proper site visit specifically to find all the available plug points. Sketch them out on a simple floor plan to get a clear picture of your power grid.

This bit of forward-thinking lets you plan the most discreet routes for extension cords, so you can hide them along walls, under rugs, or behind decor. A clean setup doesn't just look more professional—it’s absolutely essential for keeping guests safe and eliminating tripping hazards.

This quick infographic breaks down the core decisions in your planning process, from colour to power.

A flowchart titled 'Choosing the Perfect Lights' detailing steps for ideal lighting: 1 Color (Warmth, Kelvin), 2 Size (Fixture & Room), and 3 Power (Wattage, Lumens).

It's a great little reminder that successful planning involves a series of technical choices, not just what looks pretty.

Planning for Energy Efficiency

Here in South Africa, being smart about power usage is a massive consideration for any event. The good news is that modern LED curtain lights are incredibly energy-efficient. A standard 3m x 3m curtain setup typically uses only 10-15 watts. That's up to 80% less energy than those old-school incandescent strings!

This efficiency is a game-changer, especially with the constant reality of loadshedding. The industry's move towards LED solutions has been huge, with LEDs now capturing over 40% of the market share as electricity costs climb. You can get a better sense of how LED efficiency helps event setups in this insightful article on lighting trends.

Mastering Safe and Secure Installation Techniques

Man in a high-vis vest carefully installing illuminated string lights onto a stone wall.

Once your lights are chosen and the space is measured, the real work begins. Getting the installation right is non-negotiable—it's about protecting the venue, your guests, and your professional reputation. How you hang the lights will vary wildly depending on the surface, from the delicate walls of a historic Cape Town manor to the open expanse of a large event hall.

The key is to always use the right tool for the job. For many indoor applications, especially in venues where you can't just drill holes, temporary mounting solutions are your best friends. They let you create those stunning effects without leaving a single trace.

Damage-Free Hanging on Delicate Surfaces

Historic venues, like those you find in Constantia or Stellenbosch, often have very strict rules about what you can attach to their walls. This is where damage-free hanging becomes an art form.

  • Command Hooks and Strips: These are the industry standard for a reason. They stick firmly but peel off cleanly. The trick is to use multiple hooks to distribute the weight evenly, especially for larger sets of curtain fairy lights.
  • Specialty Tapes: Gaffer tape is an event pro's secret weapon. Unlike duct tape, it has a serious hold but leaves almost no residue behind. It’s perfect for taping cables to floors but can also work on certain durable surfaces for hanging lightweight items.
  • Clamps and Clips: If you're lucky enough to have a venue with exposed beams, pipes, or ledges, small, rubber-tipped clamps offer a secure grip without scratching or denting the surface.

If you’re ever unsure about a wall's finish, always test your chosen adhesive in a small, out-of-the-way spot first. A quick test can save you from a very costly mistake.

Remember, the goal is to make the installation look effortless. A visible mess of tape or sagging hooks can instantly cheapen an otherwise elegant design. Plan your attachment points to be as discreet as possible.

Rigging for Overhead Canopies and Large Spaces

Creating a breathtaking overhead canopy of curtain fairy lights requires a more structural approach. You’ll need to move beyond simple hooks and start thinking about proper rigging.

Rigging wire or even heavy-duty fishing line is ideal for creating a support grid. Stretch the wires tautly across the ceiling, securing them to existing structural points like beams or support columns. Once your grid is in place, you can easily attach the main horizontal wire of your curtain lights to it using cable ties or S-hooks. This method not only keeps the lights secure but also lets you achieve perfectly straight lines or elegant swags.

Electrical Safety and Weatherproofing

Electrical safety is paramount, particularly when you're connecting multiple light sets or working outdoors. The first rule is simple: never overload a circuit. Check the power rating of each light set and add them up. You need to make sure the total wattage doesn’t exceed the circuit's capacity, which in South Africa is typically around 2,400 watts for a standard 15-amp circuit.

When you're setting up outside, protecting your connections from the elements is critical. The infamous Cape South-Easter can bring unexpected moisture and put a real strain on your setup.

  • Use Weatherproof Connectors: Invest in waterproof connector boxes or use high-quality electrical tape to thoroughly seal every connection point between light sets and extension cords.
  • Secure All Cables: Don't leave any cords hanging loose where they can be whipped around by the wind. Secure them firmly to your structure to prevent them from getting unplugged or damaged.

For a more comprehensive look at managing power for different event lights, our guide on using PAR can lighting has some great tips that apply here, too.

Navigating Loadshedding with Confidence

For any event in Cape Town, having a loadshedding plan isn't just a good idea—it's essential. The last thing you want is for your beautiful light display to suddenly plunge into darkness.

Integrating a backup power solution is the only way to guarantee a seamless event. An Uninterruptible Power Supply (UPS) is perfect for smaller setups, giving you enough power to ride out a short outage. For larger events, hiring a generator is your best bet. Just make sure the generator has enough capacity for your lights, the sound system, and any other critical equipment to keep the party going, no matter what the loadshedding schedule says.

Creative Styling Ideas That Wow Your Guests

A dreamy photo backdrop with white sheer curtains, fairy lights, a floral wooden arch, and a 'DREAMY STYLING' sign.

Once your lights are securely installed, the real magic can happen. A simple wall of lights is lovely, but creative styling is what takes a space from pretty to truly breathtaking. This is where you get to play with texture, depth, and ambiance to create a completely unique atmosphere that your guests will be talking about long after the event.

The secret is to think beyond the lights themselves. Consider how they interact with other materials and elements in your venue. By layering and combining different textures, you can transform a standard set of curtain fairy lights into a bespoke design feature that defines the entire event.

Layering Lights with Fabrics

One of the most effective tricks in the book for creating a soft, ethereal atmosphere is to layer your curtain fairy lights with sheer fabrics. This simple addition diffuses the light, producing a gentle, dreamy glow that’s absolutely perfect for weddings and romantic celebrations in the Cape Winelands.

Imagine draping materials like tulle, organza, or voile in front of your light curtain. The fabric catches the light, softening the individual points into one continuous, shimmering surface. This method is incredibly versatile; a single layer creates a subtle haze, while bunching multiple layers of fabric can build a cloud-like effect with incredible depth. It’s a fantastic way to hide an unappealing wall and create a magical focal point.

Integrating with Natural Elements

For events held in a garden, on a wine farm, or any venue with natural beauty, weaving curtain fairy lights into the environment creates an enchanted forest feel. This approach blends your lighting design seamlessly with the surroundings, making it feel organic and completely intentional.

Here are a few ideas we've seen work beautifully:

  • Floral Arches: Weave the vertical strands of light through a floral or greenery arch. It creates a sparkling entrance or a stunning ceremony backdrop that comes alive as the sun sets.
  • Tree Wraps: Instead of hanging them flat, drape the light curtains around tree trunks or let the strands hang down from large branches. The effect at dusk is just spectacular.
  • Greenery Walls: If you're using a boxwood hedge or a living wall, hanging lights behind it can make the foliage appear to glow from within.

This technique is so effective because it adds an element of surprise, with light appearing from unexpected places and highlighting natural textures.

Expert Insight: Don't be afraid to mix different light modes. A static, warm glow is classic, but combining it with a second layer of lights on a slow "twinkle" or "fade" mode adds dynamic movement and visual interest that really captivates guests.

Defining Spaces with Light

Beyond just being decorative, curtain fairy lights are a powerful tool for styling a space. You can use them to define different zones within a large, open-plan venue, guiding guests and creating distinct areas without needing physical walls.

A brilliant example is creating a grand entrance tunnel. By setting up two parallel rows of curtain lights, you can craft a shimmering walkway that leads guests into the main event space. It immediately sets a magical tone and provides a fantastic photo opportunity right from the start.

Another popular application is creating a dedicated photo booth backdrop. A dense wall of twinkling lights guarantees stunning photos that guests will love sharing. For event planners looking to offer more comprehensive solutions, exploring a range of options is a great move. Our guide on selecting the perfect backdrop to hire offers more ideas for creating picture-perfect settings.

Finally, think about using lights to highlight key features. Drape them behind the main table, frame the dance floor, or wrap them around columns to draw the eye and add sparkle where it matters most.


The right styling can completely transform a venue, and curtain lights are one of the most versatile tools for the job. Here are a few specific ideas tailored to popular event themes we often see around Cape Town.

Styling Concepts for Different Cape Town Event Themes

Event Theme Styling Concept Recommended Fabric/Element Best Suited Venue Type
Boho-Chic Wedding Hang lights behind a macrame wall hanging. Weave in pampas grass and dried florals. Macrame, dried pampas grass, linen Wine farms (e.g., Stellenbosch), rustic barns, outdoor forest settings
Modern Corporate Gala Create a sleek light wall behind the main stage or bar. Use a single, dense curtain of cool white lights. None – let the lights be the clean focus Conference centres, contemporary art galleries, city hotels (e.g., V&A Waterfront)
Romantic Garden Party Drape lights loosely from tree branches over dining tables, mingling with hanging greenery. Trailing ivy, jasmine vines, sheer organza Botanical gardens (e.g., Kirstenbosch), private estates, historic manor houses
Beachside Celebration Form a canopy of lights over the deck or stretch tent, mimicking a starry sky. Lightweight white cotton, driftwood accents Beach clubs (e.g., Camps Bay), coastal restaurants, venues with sea views

These are just starting points, of course. The best designs come from mixing these ideas with your own creative vision to craft something truly unique for your clients.

Thinking About Post-Event Care and Rentals

Once the last guest has left and the music fades, the real work begins. The breakdown is just as critical as the setup, especially with delicate items like curtain fairy lights. Getting this part right not only protects your gear but saves you a massive headache on the next job.

First things first: dismantle with care. It’s tempting to just pull everything down in a rush, but don't. Work methodically. Unplug every power source before you even think about touching the lights, then gently remove them from their hanging points. This simple habit prevents a world of pain from damaged bulbs and wiring.

The Art of Detangling and Storage

Let's be honest, the number one enemy of any fairy light is the dreaded tangle. A knotted mess can burn hours of your time and almost always leads to broken wires. The secret to avoiding this nightmare is all in how you pack them away.

Whatever you do, don't just coil the lights into a loose ball. Find a solid piece of cardboard or a purpose-made plastic winder. Secure one end of the main horizontal wire and wrap the curtain neatly around it, making sure the vertical strands lie flat as you go. It might feel a bit tedious, but this one step will save you so much time and frustration later.

Store your neatly wrapped lights in a proper plastic container, not just a bag. This protects them from getting crushed in transit and keeps them dry and dust-free until you need them again.

A Quick Tip: Before packing them away, give the lights a quick wipe with a dry microfibre cloth. This gets rid of any dust or grime they picked up at the event, keeping them looking bright and new for longer.

Navigating the Cape Town Rental Market

For a lot of event planners, buying and storing a massive inventory of lights just isn't practical. This is where hiring comes in as a brilliant alternative. It gives you flexibility and access to pro-grade equipment without the big upfront cost and storage headaches.

The demand for decorative lighting hire is booming. In fact, some South African event companies have seen a 30% year-on-year increase in bookings for fairy light backdrops, especially in hotspots like Cape Town and Gauteng. This trend shows just how popular and convenient rental services have become. You can read more on these event rental market statistics.

When you’re choosing a supplier, you need to ask the right questions. Don’t just look at the price tag.

  • What’s included in the fee? Does it cover delivery, professional installation, and collection? You need to know the full picture.
  • What condition are the lights in? Always ask to see them switched on before you commit. Look for consistent brightness across all the strands and check for any dead bulbs.
  • What’s their damages policy? Make sure you read the rental agreement carefully so you understand what you’re liable for.

A good, reputable company will be upfront and transparent about all its terms. For a more detailed look at what to watch out for, our guide on decor hire in Cape Town offers some great local insights for picking the right partners.

Buying Versus Hiring: A Financial Breakdown

Deciding whether to buy your own curtain fairy lights or hire them for each event is a big call. Both have their pros and cons, and the best choice really depends on how often you're running events.

Buying gives you total control. The lights are yours, ready to go whenever you need them, and you can build an inventory that perfectly matches your brand's style. If you use them a lot, the cost-per-use can drop to almost nothing over time. The trade-off? You’re on the hook for storage, maintenance, testing, and eventually, replacement.

Hiring, on the other hand, is all about flexibility. You can pick different styles, sizes, and colours for every event without shelling out a fortune. It also means you don’t have to worry about storage or repairs. The downside is that rental fees add up, and you’re always dependent on your supplier's availability and the quality of their stock.

For many event businesses, a hybrid approach works best. Owning a core collection of versatile, go-to fairy lights while hiring speciality items for unique themes often gives you the perfect balance of control and flexibility.

Your Top Questions About Curtain Fairy Lights, Answered

Even the most experienced event pros run into questions on the day. When you're on-site and the pressure is on, you need quick, practical answers. We get it.

Here are the most common queries we hear from planners around Cape Town. Think of this as your field guide for sorting out those last-minute lighting hiccups with zero stress.

Can You Connect Multiple Sets Together?

Yes, absolutely. For those big, impressive backdrops, you’ll almost always need to link several sets. Professional-grade fairy light curtains are designed for this, letting you create a massive, seamless wall of light from just one plug point.

But—and this is a big one—there’s always a safety limit. You have to check the manufacturer’s instructions for the maximum number of sets you can connect. Pushing it too far can overload the circuit, which might just make the lights dim or flicker, but could also create a serious fire risk. A good rule of thumb for standard LED sets is no more than three or four linked together, but always, always read the label first.

How Do You Hide the Wires and Power Packs?

A flawless setup is all about making the mechanics disappear. Nothing kills the magic faster than a mess of visible wires, extension cords, and bulky power packs. Hiding them properly just takes a little forward-thinking.

Here are a few tricks we use all the time:

  • Work with the venue. Tuck wires along skirting boards, hide them behind pillars, or run them neatly over door frames. Gaffer tape that matches the wall or floor colour is your best friend for making cables almost invisible.
  • Use your décor. Fabric backdrops, floral installations, and greenery are perfect for concealment. Weave cables behind drapes or through foliage, and no one will ever know they’re there.
  • Get creative with planters. A strategically placed pot plant or a decorative urn at the base of your light curtain is the ideal hiding spot for a chunky power adapter or an extension cord connection.

The aim is simple: guests should only see the glow, not the grid.

Pro Tip: Before you even start setting up, find your nearest power socket. This lets you map out the cleanest, most direct cable route from the get-go, saving you from having to hide a long, messy extension cord later on.

Are Curtain Fairy Lights Safe to Use Outdoors?

This is a huge question for events in Cape Town, and the answer is critical: it all comes down to the specific lights you choose. You can’t just hang any set of fairy lights outside and hope for the best. With the risk of a sudden downpour, morning dew, or the salty sea breeze, you must use lights rated for outdoor use.

Check the packaging for an IP rating. For any outdoor event, IP44 is the bare minimum you should be looking for. This certifies that the lights are protected against water splashing from all directions. If your event is in a more exposed spot or happening during the rainy season, it’s much safer to go for a higher rating like IP65, which offers better protection against dust and even jets of water. Using indoor lights outside isn't just a bad idea—it's a serious safety hazard.

What Do I Do if a Section of Lights Goes Out?

It’s that heart-stopping moment: you plug everything in, and one vertical strand—or a whole panel—stays dark. First, don't panic. This is usually a really simple fix.

Modern LED curtain lights are wired in parallel, which is fantastic because it means one dead bulb won't kill the entire string. If a single strand is out, it's almost always a loose connection where it plugs into the main horizontal wire. Just find that connection point and make sure it’s pushed in securely.

If a whole set in a connected chain is dark, the problem is likely the connection between that set and the one before it. Unplug them and reconnect them firmly. If that doesn’t solve it, swap in your backup set (you always bring a backup, right?). This will instantly tell you if the fault is with the lights or the power source.

Can the Brightness Be Adjusted?

Yes, and this feature is a game-changer for controlling the atmosphere of an event. Many higher-quality fairy light sets are dimmable, allowing you to fine-tune the mood as the evening progresses.

You could have a bright, welcoming sparkle as guests arrive, then dim the lights down for a soft, romantic glow during dinner. Later on, you can crank the brightness back up for speeches or to get the dance floor going. This is usually controlled with a small remote or a controller box on the power cord. When you’re hiring or buying lights, make sure to ask for dimmable models—it gives you so much creative flexibility.


Ready to create a truly unforgettable atmosphere at your next event? At ABC Hire, we provide a wide range of high-quality lighting and event furniture to bring your vision to life.

Explore our event rental solutions at abchire.co.za

📍 Cape Town + Winelands