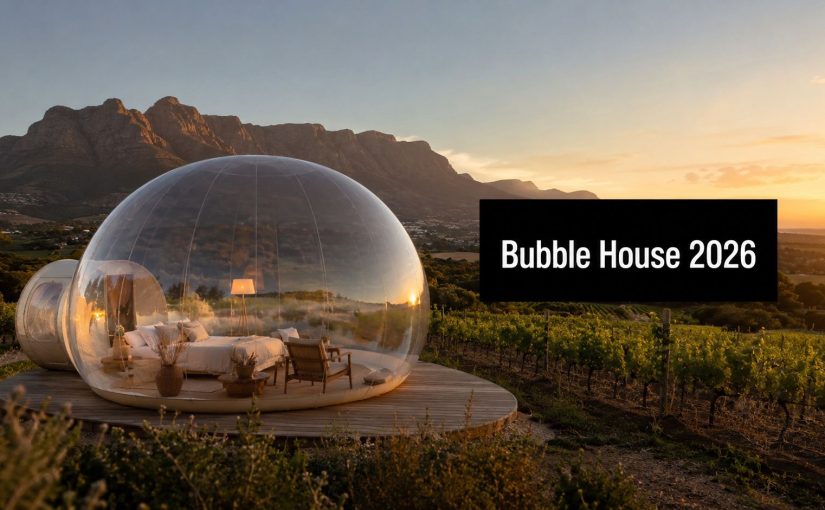
Bubble House for Sale: Your 2026 Cape Town Buyer’s Guide

You've searched bubble house for sale because you want something memorable. Maybe it's a wedding feature in Franschhoek, a brand activation in Cape Town, or a private celebration that needs more than another standard marquee. The gap is that individuals searching this phrase often look for two very different things, and South Africa treats them very differently.

One is the dream: an iconic round architectural home, the kind you see on international design feeds. The other is the product you can realistically use here: an inflatable clear bubble tent for events. If you don't separate those two ideas early, you waste time chasing a product that isn't showing up in the local property market, or you buy the wrong event structure for Cape wind, venue rules, and practical use.

Dreaming of a Bubble House in Cape Town

Cape Town is exactly the sort of place that makes the bubble-house idea irresistible. Ocean views. Mountain backdrops. Vineyards. Glassy sunsets. If you're planning a luxury wedding, a proposal setup, or a photo-driven event, a bubble structure sounds like the perfect fit.
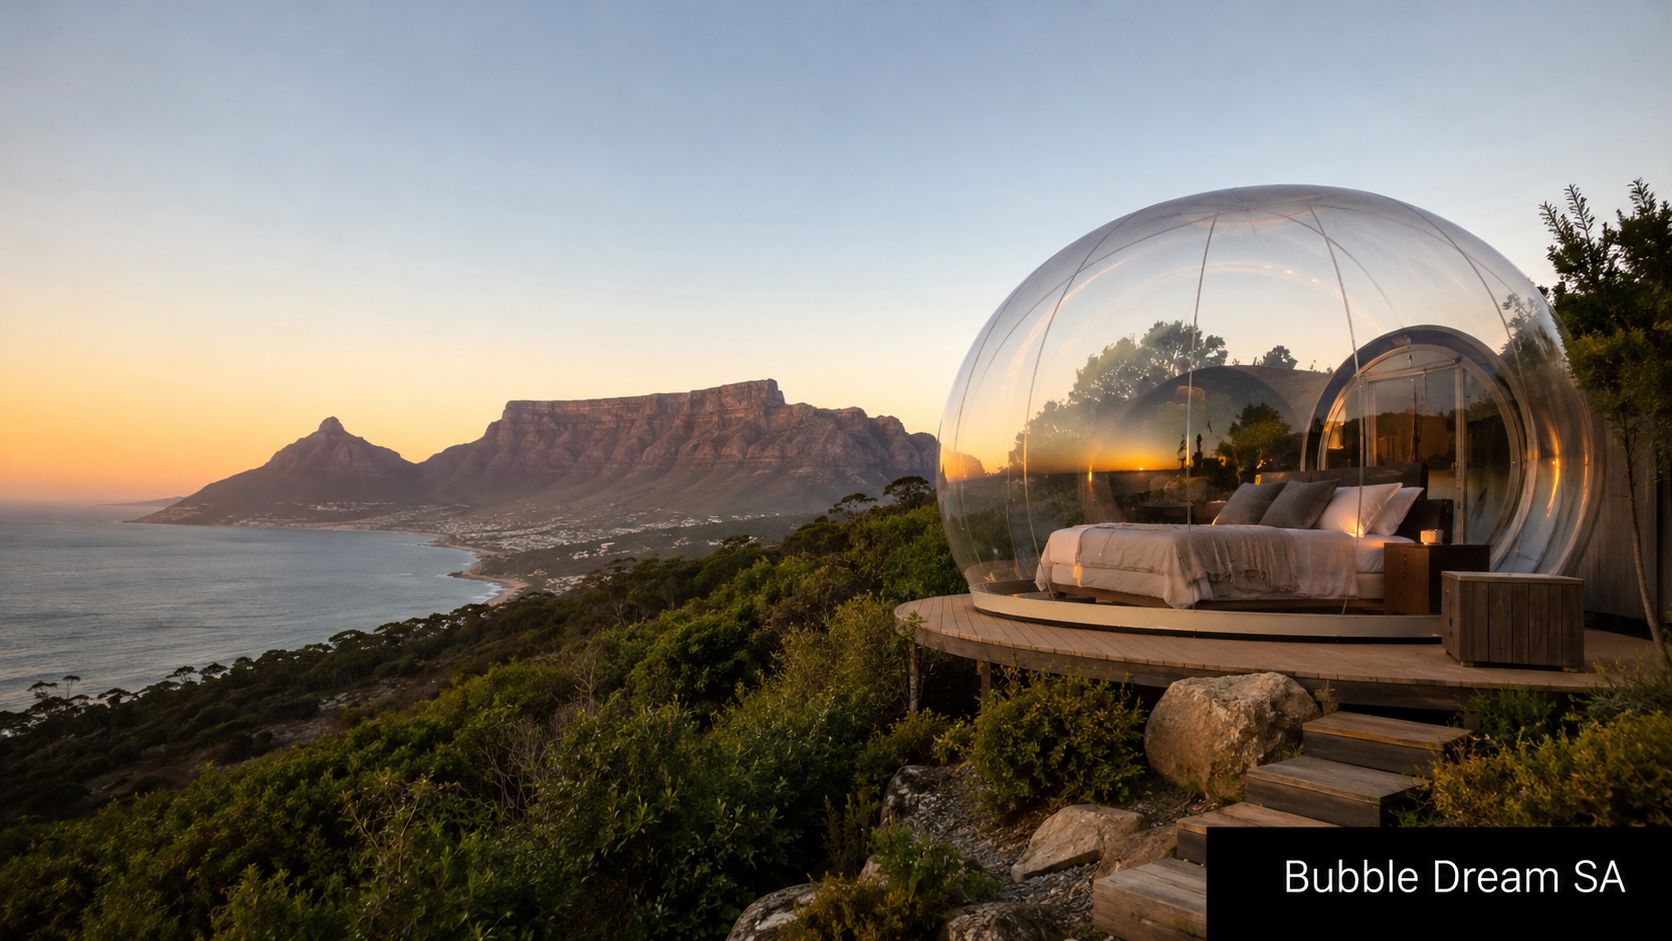
A luxurious transparent bubble dome bedroom overlooking the ocean and Table Mountain in Cape Town at sunset.

What most buyers mean when they search

In practice, people usually mean one of these:

  • A permanent statement home with rounded architecture and a futuristic look
  • A venue feature for weddings, birthdays, or proposals
  • A branded event space for launches and activations
  • A rentable visual experience that looks premium in photos

That confusion isn't theoretical. In the South African market, most content around bubble houses blends event rentals with permanent structures, which leaves couples and planners unclear about whether they can buy one for a venue or only rent one. Local listings such as Home in 1's inflatable clear bubble house offering are marketed as rentals for events like weddings and showers, not as architectural homes for sale.

A Stellenbosch planner might ask for a bubble house thinking of a romantic overnight structure. A Paarl venue owner might mean a semi-permanent feature for ceremonies. A brand team in the CBD might need a transparent dome for one weekend. Those are three different procurement decisions.

Practical rule: If your main goal is atmosphere, photos, or a temporary guest experience, you're not shopping for a house. You're shopping for an event structure.

Why this distinction matters in the Winelands

In the Winelands, the wrong assumption creates expensive problems. A permanent dwelling involves planning, engineering, foundations, compliance, and long-term maintenance. An inflatable event bubble involves transport, blower setup, anchoring, weather judgement, and venue permission.

The visual overlap fools people. Both can look rounded, clear, and dramatic. But one is a property purchase category. The other sits much closer to tenting, event hire, and temporary installation.

If you're trying to solve a real event need in Cape Town, Stellenbosch, Franschhoek, or Paarl, the smart move is to stop searching for the fantasy object and define the use case first. Overnight accommodation, ceremony cover, lounge zone, branded activation, kids' play feature, or photo booth. Once that's clear, the market gets much easier to manage.

Permanent Dream vs Inflatable Reality

The cleanest way to approach a bubble house for sale search in South Africa is to split the category in two.

The first category is the permanent architectural bubble home. The second is the inflatable event bubble tent. They share a visual language, but that's where the similarity mostly ends.

What exists in the market

There are no recorded sales of a “Bubble House” in the South African real estate market, based on the absence of such listings in national property databases and major portals, as noted in this South African property market reference. If you're searching local residential listings hoping to find an iconic circular bubble home in Cape Town or the Winelands, you're not missing a hidden niche. It isn't appearing as a recognised tradable residential product.

Internationally, the best-known example in the current conversation is the Michigan Bubble House, but that's useful mainly as a reminder that the architectural version is an overseas curiosity, not a local buying category.

Permanent Bubble Home vs Inflatable Bubble Tent

Attribute Permanent Architectural Bubble Home Inflatable Event Bubble Tent
Purpose Residential or long-term architectural use Temporary events, styled setups, activations
Availability in South Africa No recorded sales in local property databases Available through event suppliers and rental channels
Mobility Fixed structure Portable and relocatable
Installation Construction project with approvals and engineering Event setup with blower, anchoring, and site prep
Use case Living, hospitality, landmark property Weddings, parties, launches, photo moments
Weather strategy Built into structural design Depends heavily on anchoring, placement, and event-day conditions
Ownership model Property purchase Usually better suited to hire or occasional purchase
Buyer profile Property developer, specialist owner-builder Planner, venue, host, activation team

Where buyers go wrong

The biggest mistake is comparing these options as if they sit on the same decision tree. They don't.

A permanent bubble home is closer to commissioning a niche build than buying a tent. You'd be dealing with land use, structural design, compliance, contractors, and a build methodology that's unusual in the South African residential market. That's why search demand doesn't translate neatly into property listings.

An inflatable bubble tent is much more straightforward. You can source one, transport it, inflate it on site, style it, and remove it after the event. That doesn't make it simple, but it does make it real.

If your event is in the Winelands and your date is already locked, the inflatable route is the only route that behaves like a normal event procurement decision.

The useful decision filter

Ask one question first: Do you need a place to live, or a place to host an experience?

If it's the second, stop evaluating bubble homes and start evaluating event tents. That one shift saves weeks of false research and pushes you toward the details that matter, such as material quality, blower reliability, anchoring method, storage, and venue permission.

Choosing Your Inflatable Bubble Tent

What does the right bubble tent look like for a Cape Town event once you stop searching for a fantasy “bubble house” and start buying a working event structure?

It starts with the job the unit must do on site. A proposal dome at a Clifton villa, a tasting lounge in Stellenbosch, and a branded activation at a city venue may all use clear inflatable structures, but they do not need the same entrance design, blower setup, or wear tolerance. Buyers who choose on appearance first usually pay for it later in setup time, guest flow problems, or material damage after only a few uses.

Use case should drive the shortlist.

A photo-led installation benefits from a cleaner profile and minimal visible hardware. A guest lounge needs easier access, better ventilation planning, and enough usable floor area for furniture without making the dome feel cramped. Brand activations need repeatable setup, practical power routing, and surfaces that still look good after heavy foot traffic. If you are comparing options across the wider event market, this guide to different types of event tents helps place a bubble tent in the right category rather than treating it as the answer to every brief.

Material quality shows up fast in Cape conditions

Transparent PVC always looks impressive in product photos. The real test is how it performs after transport, inflation, sun exposure, cleaning, and pack-down.

In Cape Town and the Winelands, clear material takes strain from UV, dust, grass stains, damp morning setups, and frequent handling. If the PVC is too thin or poorly finished, it marks easily, loses clarity, and starts looking tired long before the unit has paid for itself. Buying guidance from Inflatable-Zone's bubble tent overview notes that thicker commercial-grade PVC is generally preferred for repeat event use because it holds shape better and handles wear more reliably than lighter novelty-grade material.

Ask direct questions before you buy. What is the PVC thickness? Is it intended for commercial hire stock or occasional private use? How are the seams finished? Can you get matching repair patches locally, or will every minor repair turn into a parts chase?

The specification sheet matters more than the promo photos

Good buyers spend time on the boring details because those details affect every setup.

  • Blower pairing: The blower must match the unit properly for stable inflation and presentable shape.
  • Entrance style: Tunnel entry, zipped opening, or airlock-style access changes guest movement and styling options.
  • Anchoring layout: Anchor points should be clearly positioned and suited to the surfaces you use.
  • Power requirements: You need realistic cable planning, especially at vineyards and private homes where power points are not always close.
  • Pack-down logic: Clear domes that are difficult to dry and fold become expensive to own.
  • Repair support: After-sales guidance, patch kits, and spare components matter more than a low headline price.

One practical point often gets missed. A bubble tent that works well on a level lawn can be awkward on gravel, paving joints, or mixed surfaces. That comes up often at Cape venues where the pretty setup area is not always the easiest technical setup area.

Shape should match the event format

Different layouts solve different operational problems.

Format Best fit Main caution
Single clear dome Proposals, styled shoots, intimate lounge setups Heat build-up and condensation need active management
Tunnel-entry dome Guest arrivals, premium experiences, controlled access Takes more discipline to position and inflate cleanly
Multi-zone inflatable layout Brand activations, kids' experiences, interactive spaces More components mean more setup complexity and more points of failure

For venue owners and planners, the safest choice is usually the model that covers your repeat work, not your most aspirational booking. If the dome will spend most of its life doing styled photo moments, small luxury installs, or occasional cellar-door activations, buy for that pattern. Transparent inflatables are high-maintenance stock. They reward careful handling and punish casual ownership very quickly.

Budgeting the True Cost of Ownership

How much does a bubble house for sale really cost once it lands in Cape Town?

This is the point where the local confusion starts. Buyers searching for a permanent bubble home in South Africa usually end up looking at event-grade inflatable domes instead. Those are two completely different purchases. In the Cape Town and Winelands market, the money question is rarely just the unit price. It is transport, labour, storage, maintenance, power planning, and how often the tent earns its keep.

The listed price is only the starting point

A clear inflatable dome can look affordable on a supplier page and still become expensive stock to own. The cost sits around the tent, not only inside the invoice.

Expect to budget for:

  • Freight and offloading to Cape Town or the Winelands, especially for imported units
  • Clean, dry storage with enough room to prevent careless folding and pressure damage
  • Cleaning time and materials to keep the PVC clear enough for photographs and guest-facing use
  • Consumables and repairs such as patching materials, replacement fittings, and seam work
  • Blower contingency if the primary unit fails before or during an event
  • Setup labour from people who know how to anchor, tension, and present the dome properly

Professional installation is often treated as optional. In practice, it is often the difference between a dome that photographs well and one that looks creased, cloudy, or unstable. For buyers comparing ownership with event-by-event hiring, it helps to benchmark against broader tents for hire pricing and use cases rather than focusing only on the purchase figure.

Labour and downtime catch owners off guard

The biggest ownership mistake is assuming the dome will look after itself between bookings.

It will not.

Someone needs to inspect it after every use, test the blower before loading, check anchoring points, manage extension cables safely, supervise pack-down, and make sure the material is fully dry before storage. If that work falls to an untrained in-house team, the savings disappear quickly. If it falls to a contractor each time, ownership starts to look a lot like repeated hire costs.

I see this often with Cape venues that buy for one high-impact season, then discover the dome is only suitable for a narrow set of bookings. A proposal setup on a lawn is one thing. A public-facing activation in wind, dust, or mixed surfaces is another. The prettier the dome needs to look, the stricter the operating discipline needs to be.

Budget for the boring costs

The boring costs are the ones that damage margin.

Power backup matters. Call-out labour matters. Vehicle space matters. So does the lost booking if the dome comes out of storage marked, damp, or missing a working component. Imported inflatable stock can also mean slower turnaround on spares, which matters if your calendar is tight over wedding season.

For businesses marketing these structures online, clear wording also matters. Sellers who blur the line between fantasy housing searches and temporary event products create the wrong leads. The same principle shows up in digital visibility work such as optimizing local search for estate agents. Precise intent brings better enquiries. In this niche, that means saying clearly whether you are selling an event dome, not implying a permanent bubble home that the local market does not really offer.

A practical ownership test

Before buying, answer four questions carefully:

  1. Will the dome be used often enough to recover storage, maintenance, and labour costs?
  2. Do you have a trained team and a backup blower plan?
  3. Can you store it properly through damp weather and quieter months?
  4. Does your booking mix suit an inflatable event structure, rather than the idea of a permanent bubble house?

If the answers are weak, renting is usually the cleaner decision. If the dome will be used repeatedly by a disciplined venue, planner, or activation company, ownership can make sense. In this category, profit usually comes from operational discipline, not from getting the lowest purchase price.

Site Prep Permits and Local Regulations

Can your site take a bubble structure, and will the venue, insurer, and municipality allow it on the day?
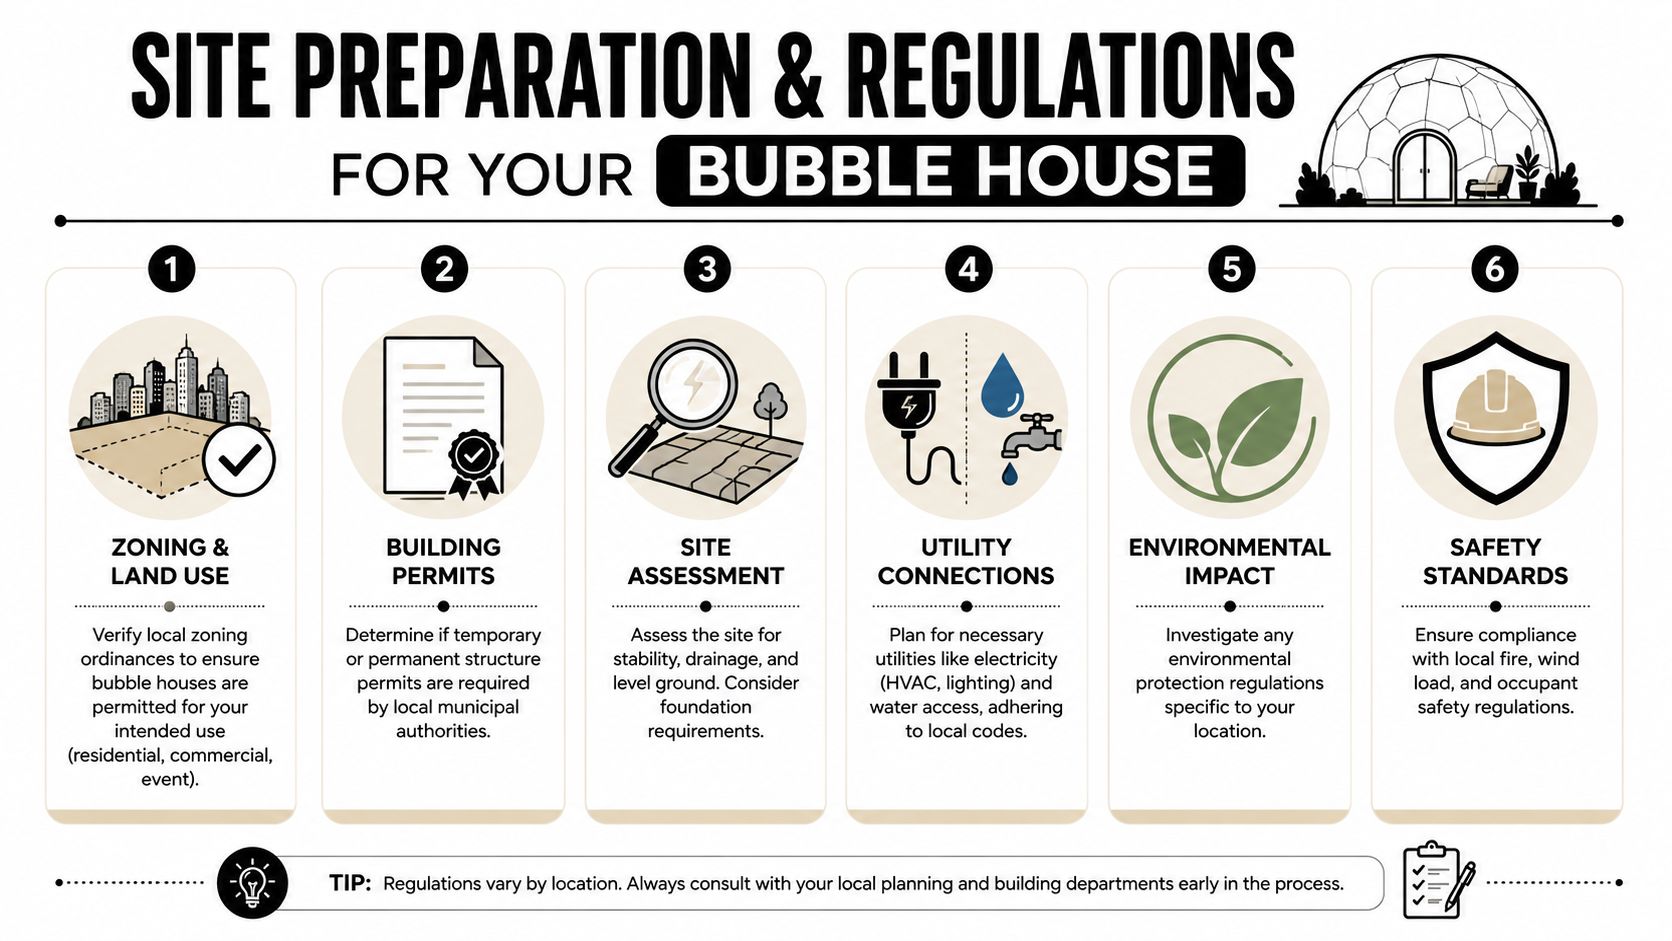
A six-step infographic guide detailing site preparation and regulatory requirements for setting up a bubble house.

In Cape Town and the Winelands, many buyers realise they are not dealing with a quirky “house” purchase at all. They are dealing with a temporary event structure that needs flat ground, safe power, secure anchoring, venue approval, and a realistic weather plan. The search term causes confusion. The site rules remove it quickly.

Start with the ground, not the product

A bubble tent only performs well on a clean, level area with enough working room around it for anchoring, access, and safe guest movement. Manufacturer setup guidance from Bubbling Bubbles makes the same practical point event crews already know. You need extra perimeter space beyond the visible dome itself, and you cannot treat the quoted dome size as the full site requirement.

That catches people out at wine estates and private homes. A lawn may look generous until you account for irrigation heads, sharp gravel edges, planting beds, low branches, cable runs, and the route guests will use. I always assess the full operating area, not just the patch where the dome will sit.

Power needs the same level of attention. The blower must run from a reliable supply, and extension leads cannot become a trip hazard or sit where rainwater collects.

Permanent bubble home rules are a different category

In South Africa, the phrase “bubble house for sale” encompasses two very different things. A permanent dwelling falls into building compliance. An inflatable event dome falls into temporary structure and event operations.

South Africa's residential norms and standards set baseline requirements for formal housing, including minimum floor area and prescribed foundation standards for stand-alone dwellings, according to the National Norms and Standards for residential construction. That alone explains why there is no meaningful local market for ready-made architectural bubble homes for sale. Even before design and engineering costs, you are in full building-regulation territory.

For Cape Town sites, wind exposure also changes the conversation fast. Coastal venues, valley funnels, and exposed farm lawns can be calm at site visit stage and difficult on event day. Temporary domes are far less forgiving than many clients expect.

On a Stellenbosch lawn or Atlantic Seaboard site, wind is not a minor detail. It is often the decision-maker.

What to check with venues and municipalities

Public guidance is patchy, so the organiser has to ask direct questions early. Do not assume an inflatable dome is treated the same way as a standard marquee. Some venues will allow it only in specific positions. Some insurers will ask for extra detail. Some municipalities may want clarity on event setup, public safety, or temporary structure conditions depending on the site and the scale of the function.

The practical route is simple:

  • Get written venue approval: Confirm the exact position, access times, and any restrictions on pegging, ballast, or power use.
  • Ask the local authority the right question: Describe it as a temporary inflatable event structure, not a “bubble house.”
  • Check insurer acceptance: Confirm public liability and whether the structure changes your event cover conditions.
  • Inspect the actual surface: Grass, compacted earth, paving, and gravel all affect anchoring and guest safety differently.
  • Set a weather stop point: Agree in advance who makes the call if wind or rain makes use unsafe.

For venue-side comparisons, this guide to tents for hire in Cape Town gives a more realistic frame for temporary structure planning than dream-home style bubble content. If your marketing or listing language targets unusual property-style searches, optimizing local search for estate agents is a useful example of how precise local wording filters out the wrong enquiries. That matters here because the Cape market rarely offers true bubble homes for sale, while event clients are usually looking for a temporary dome solution.

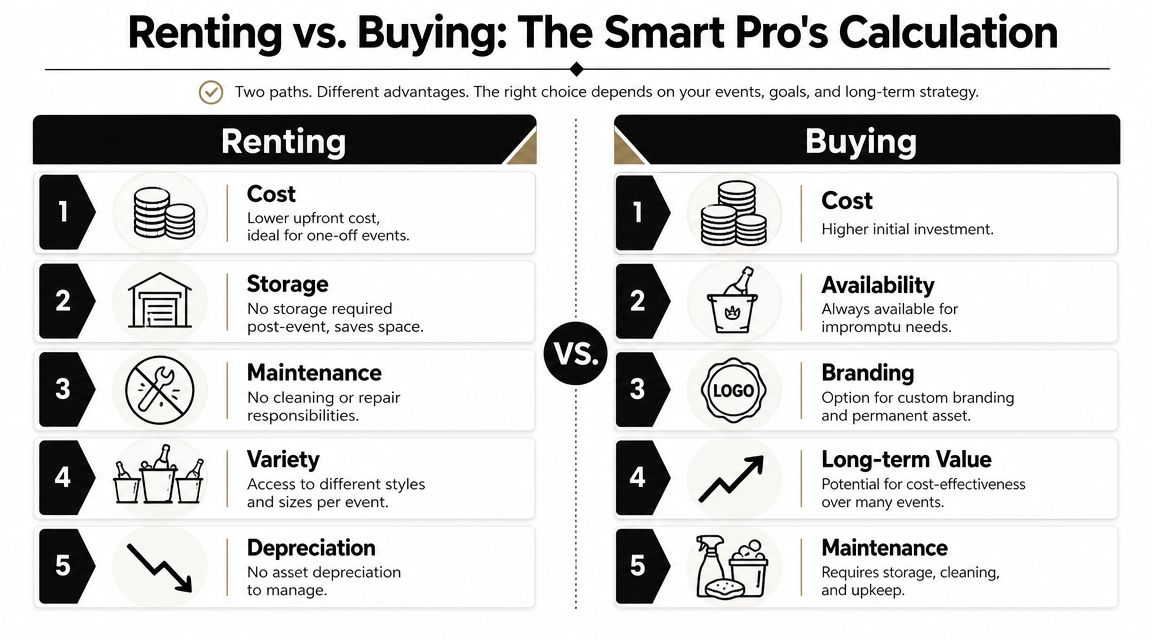
Buying vs Renting for Your Event The Smart Choice

Should you buy a bubble house for sale in Cape Town, or are you better off renting an inflatable bubble tent for the event you have in mind?

In this market, that distinction matters. A true architectural bubble home is not what event clients in Cape Town, Stellenbosch, Franschhoek, or Paarl are usually buying. They are almost always choosing between renting a temporary inflatable structure for a specific date, or purchasing one and taking on the operational burden themselves.

For most private functions, brand activations, and wedding installations, renting is the safer commercial decision. Ownership only starts to make sense when the structure will be used often enough to justify storage, transport, repairs, and trained setup crew.

Why renting suits most events

The pressure point is not inflation time. It is control on the day. These structures are lightweight, weather-sensitive, and only perform properly when they are anchored, monitored, and used within the supplier's operating limits. The South African Weather Service issues public warnings and forecasts that event teams should treat seriously, especially in the Cape where wind can shift quickly between morning setup and guest arrival.

That is why experienced rental suppliers earn their fee. They are not just sending out a tent. They are managing setup method, ballast, blower requirements, positioning, and the call on whether conditions are still acceptable for use.

What buying really commits you to

A purchased unit can look economical on a spreadsheet, especially if you expect repeat use. In practice, buyers usually underestimate the admin around it.

Ownership means handling:

  • transport to and from each site
  • crew training for setup and pack-down
  • weather monitoring before and during the event
  • drying, cleaning, and mould prevention after use
  • safe storage between bookings
  • repair planning for seams, punctures, and worn fittings

Miss one of those, and the savings disappear quickly.

Rent if the structure supports one event or a short campaign. Buy if it forms part of your operating model and you already have the team, vehicle space, and storage discipline to support it.

Where renting stays flexible

Rental also gives planners better options when the brief changes. A launch in the Winelands may need a different footprint from a beachfront event in Camps Bay. A wedding venue may approve one temporary structure and reject another based on access, lawn protection, or visual impact. If you own one bubble tent, there is a temptation to force it into every brief, even when a different tent form would work better.

That same logic applies to other event equipment. This article on a podium for sale for event use is a useful comparison. Some items are practical to own because they are easy to store and repeatedly usable. Larger, weather-exposed structures often cost more to keep than buyers expect.

Presentation still matters, especially if the event supports a venue brand, development launch, or property-facing campaign. Broader branding thinking can help here. Resources that level up real estate marketing are useful because they focus on how people experience the finished environment, not just the asset list behind it.

The practical answer is simple. If you want the bubble look for a wedding weekend, a matric dance, a product reveal, or a seasonal activation, rent it. If you run events regularly and can support the logistics properly, then buying can work.
Screenshot from https://abchire.co.za

If you're planning an event in Cape Town, Stellenbosch, Franschhoek, or Paarl and want the bubble-house look without the buying mistakes, ABC Hire can help you choose the right event setup for your venue, guest flow, and weather realities. Their range of event furniture, tenting support, and styling-ready hire stock makes it easier to build the experience you want, with practical guidance that fits local conditions.
Gold Cutlery Sets: Cape Town & Winelands Wedding Guide

The florist has signed off. The menu is locked. Your seating chart has changed for the third time, but it's finally workable. Then you look at the table setting and realise something important. Everything is correct, but it still doesn't feel complete.

That final lift usually doesn't come from adding more. It comes from choosing one detail that changes how the whole table reads. In Cape Town and across the Winelands, I've seen that happen with lighting, with linen, with chargers, and very often with gold cutlery sets.

Gold flatware does something silver rarely does. It warms the table immediately. In a vineyard setting, it catches late-afternoon light and softens the whole look. In a city venue with glass and concrete, it stops the table from feeling cold. At weddings, it makes white crockery feel more considered. At brand events, it gives a standard plated dinner a sharper, more editorial finish.

The mistake is treating it like a novelty add-on. Used well, gold cutlery is part of the design language. It can make a simple place setting look layered, expensive, and camera-ready without pushing the décor into excess. That's why it works for black-tie receptions, long-table harvest lunches, matric dances, milestone birthdays, and polished corporate dinners alike.

The Midas Touch for Modern Events

A couple will often spend weeks choosing napkin folds, candle heights, and menu cards, then leave the cutlery decision until the end. That's usually where the table either settles into “nice” or moves into “memorable”.

At a Winelands wedding, for example, you might have oat-coloured linen, soft ivory flowers, clear stemware, and stoneware plates that feel beautifully restrained. Add standard stainless steel cutlery and the table stays safe. Swap in gold, and the whole setting picks up warmth. Suddenly the candles make more sense, the florals feel richer, and the photographs gain contrast where they need it.

Corporate clients run into the same problem in a different form. The brief is often modern, clean, and premium, but the venue's house setup can look generic once the room fills. Gold cutlery gives the place setting a point of view. It tells guests that someone paid attention to the guest experience rather than making a basic meal service order.

Why it changes the table so quickly

Gold works because it behaves like décor while still doing the job of a practical item. Chargers and centrepieces sit in the background. Guests notice them, but they don't touch them as often. Cutlery is handled constantly, so it becomes part of the sensory experience of the event.

A few styling effects show up again and again:

  • Warmth against neutrals. White, cream, taupe, sand and greige all look more intentional when paired with gold.
  • A stronger photographic finish. Gold creates definition around the plate, which helps tables read better in close-up images.
  • A premium feel without visual clutter. You can keep the rest of the table relatively quiet and still get impact.

Gold cutlery works best when it doesn't have to fight for attention. If every element is shouting, the finish gets lost.

That's why the smartest tables aren't always the most decorated ones. Often, they're the most edited.

Decoding the Glow of Gold Cutlery

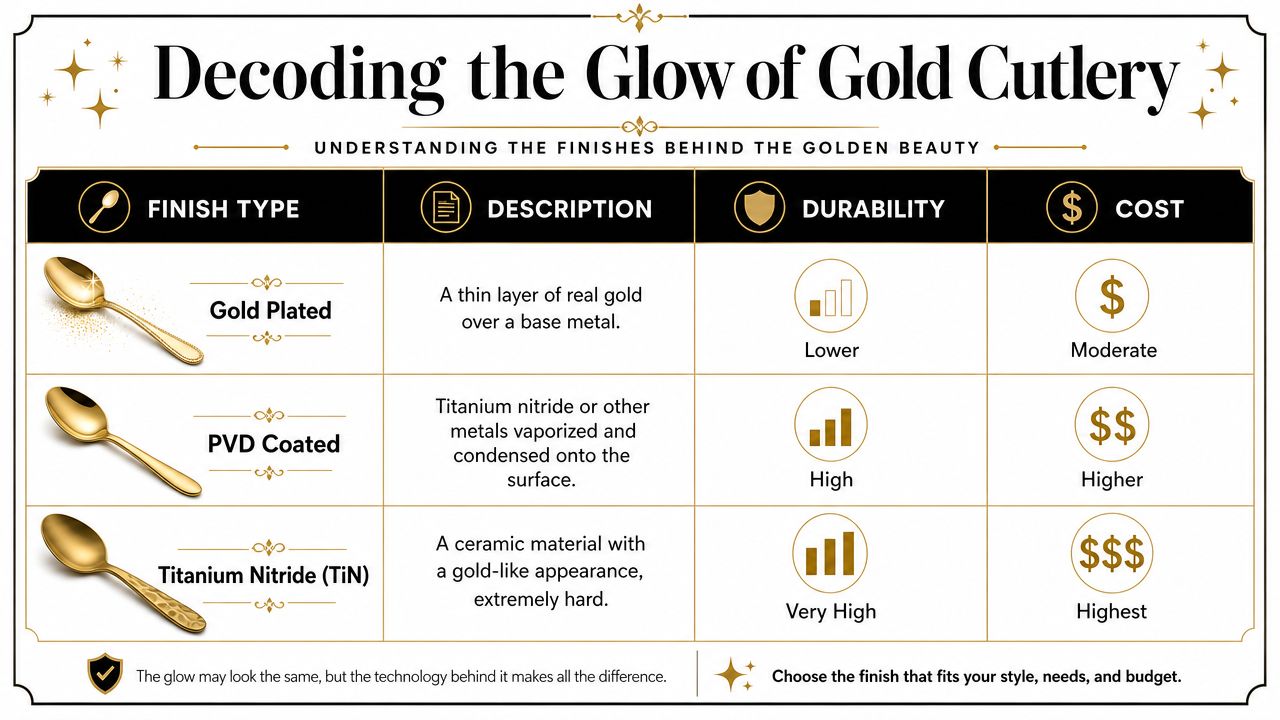
Before choosing a style, it helps to know what “gold” means in practical terms. In this category, gold cutlery sets typically refer to stainless steel tableware with a gold-plated or gold-coloured finish rather than solid gold, and South Africa doesn't have official trade data for this niche item category, with availability shaped mainly by retailers and rental companies, as noted on this South African gold stainless steel tableware product listing.

That distinction matters because it sets the right expectations. You're choosing a finish and a style, not investing in precious metal tableware. For events, that's exactly what you want. The base needs to be practical. The finish needs to look elegant under venue lighting and hold up through service.

A comparison chart explaining the differences between gold plated, PVD coated, and titanium nitride cutlery finishes.

The finishes you'll come across

Not all gold reads the same on a table. The finish changes the mood more than is often realized.

Finish Best for What it looks like Watch-out
Polished gold Formal weddings, gala dinners, classic hotels Reflective, bright, dressy Shows fingerprints more easily
Matte gold Contemporary receptions, minimalist styling Soft, muted, understated Can disappear if the table lacks contrast
Brushed gold Textured, layered tablescapes Slight texture, relaxed luxury Needs the right crockery to avoid looking too casual
Champagne or rose-toned gold Romantic dinners, feminine florals, modern celebrations Warmer and gentler than bright gold Can clash with very yellow gold décor

What usually works best in real venues

In Cape Town light, polished gold looks strongest at evening events. Candles, glassware, and low ambient lighting give it enough sparkle to feel celebratory rather than flashy. It pairs beautifully with crisp white porcelain and clear wine glasses.

Matte and brushed finishes are often better for daytime weddings and Winelands venues. They sit more comfortably with timber tables, raw linen, and natural florals. If the setting already has mountain views, vines, and soft earth tones, a quieter gold usually looks more expensive than a high-shine finish.

Practical rule: Match the cutlery finish to the room before you match it to the Pinterest board.

A useful way to choose

If you're still torn, make the decision using three questions:

  1. What time is the event? Evening can carry more shine. Daytime usually prefers restraint.
  2. What is the plate finish? Glossy crockery can handle polished gold. Handmade or matte plates usually suit satin or brushed tones.
  3. How formal is the service? The more structured the meal, the more refined the cutlery should look.

When those three line up, the table almost always feels resolved.

Composing the Perfect Cutlery Set

Once the finish is sorted, the next question is simple. What do you need on the table?

A common challenge for hosts involves either over-ordering or missing key pieces. A place setting should follow the menu, not the mood board. If guests are having a plated starter, mains, and dessert, the set needs to support that sequence cleanly. If it's a canapé evening with grazing stations, a full formal setting can feel unnecessary and even awkward.

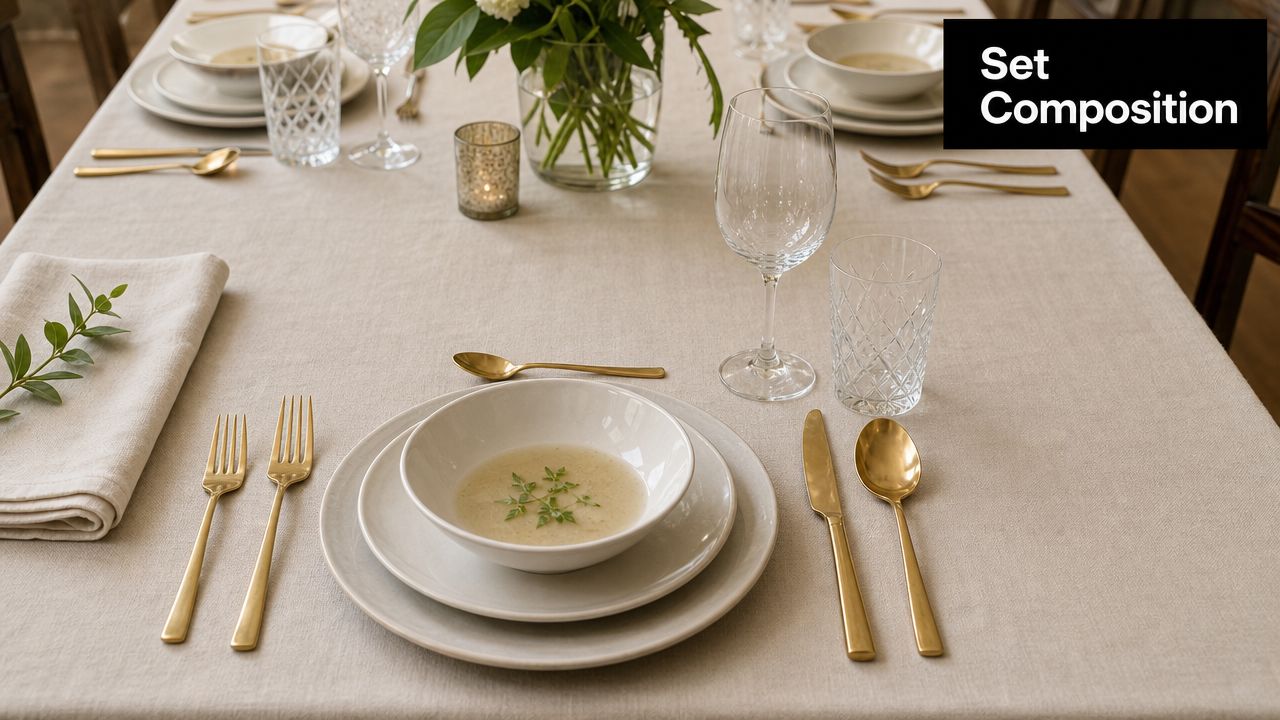
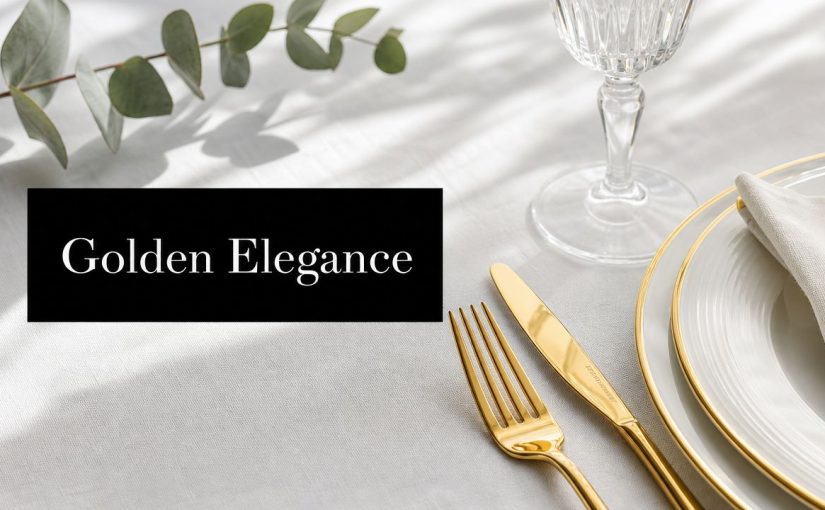
A sophisticated table setting featuring elegant gold cutlery, white ceramic bowls, and crystal glassware on a neutral tablecloth.

Match the cutlery to the menu

A well-composed setting usually falls into one of these event types:

  • Formal seated dinner
    Use a dinner knife and fork as the foundation. Add a starter fork or spoon if the first course needs it, and include dessert cutlery if dessert is served at the table.

  • Shared feast or family-style meal
    Keep the personal setting clean. A dinner knife and fork often do the heavy lifting, while serving pieces on the table handle the rest.

  • Cocktail-style event
    Small forks, tasting spoons, or dessert forks may be all you need. Full place settings can look decorative but won't always be used.

  • Cake-and-coffee celebration
    Cake forks and teaspoons matter more than dinner pieces, resulting in many birthday and kitchen tea setups becoming over-styled and under-practical.

A simple planning checklist

Use this before confirming quantities and piece types:

  1. Read the final menu, not the draft menu. Caterers often change plating style close to the event.
  2. Check whether dessert is plated, passed, or stationed. That decides whether dessert cutlery belongs at the setting.
  3. Ask if soup, pasta, or seafood needs specialist pieces. Don't assume standard cutlery will cover every course.
  4. Review children's tables separately. Smaller guests often need a simpler, less crowded setup.

A strong table setting also depends on the glasses alongside it. If you're planning wine service, this guide to choosing crystal wine glasses for events helps you keep the whole place setting balanced rather than focusing on cutlery in isolation.

What often goes wrong

The most common mistake is laying every possible piece from the start, even when the meal doesn't justify it. That can make the table feel busy and old-fashioned. The opposite mistake is trying to keep things “minimal” and then discovering guests have no proper dessert spoon or no knife for the main course.

If a guest has to ask the waiter for basic cutlery during service, the table wasn't finished properly.

Good styling never gets in the way of service. It should make service feel smoother.

The Art of Styling Your Tablescape

Gold cutlery earns its place when the rest of the table supports it. That doesn't mean everything has to be gold. In fact, the best tables usually use gold as the punctuation mark, not the whole sentence.

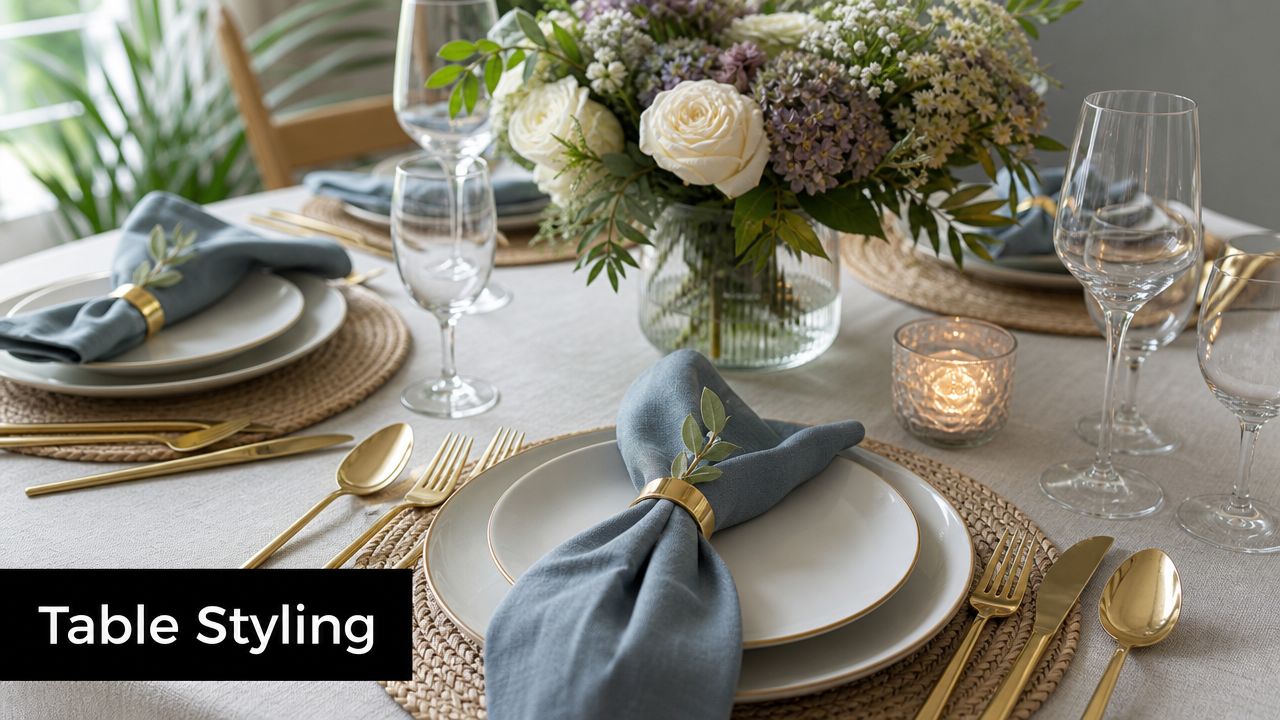
A beautifully set dining table featuring elegant plates, blue napkins, gold cutlery, and a vibrant floral centerpiece.

The modern minimalist table

This look suits city venues, rooftop dinners, gallery launches, and contemporary weddings. Start with white or bone-coloured crockery, then add slim gold cutlery with a cleaner silhouette. Keep the linen plain. Stone, chalk, ivory, or soft mushroom all work.

The trick here is restraint. Don't pair bright gold with too many competing reflective surfaces. Clear stemware, low florals, and neat folded napkins keep the setting sharp.

For extra depth, use black menu cards or dark taper candles sparingly. The contrast gives the gold definition without tipping the table into something harsh.

The rustic Winelands table

In Stellenbosch, Franschhoek, and Paarl, the most convincing gold tables rarely feel glossy. They feel grounded. Think textured runners, natural linen, ceramic plates with a handmade edge, and floral work that looks gathered rather than tightly formal.

Brushed or matte gold cutlery sits naturally in that environment. It echoes candlelight and sunset tones without looking too urban. Pair it with warm neutrals, muted greens, dusty blush, or soft terracotta. Timber tables can be left partially visible so the metallic finish has something earthy to play against.

A useful outside reference for mood-building is 1021 Events' event decoration guide, especially if you're trying to turn a broad theme into practical table decisions.

The classic glam table

Polished gold excels in formal environments. A ballroom wedding, black-tie fundraiser, or luxury awards dinner can carry more formality and more shine. Use white porcelain, full stemware, pressed napkins, and symmetrical place settings.

Then layer in depth with glass chargers, mirrored details, or candle holders that repeat the metallic tone. If you're exploring that direction, these ideas for gold candle holders in event styling are useful because they show how to repeat the finish without making the table look overly themed.

Pairings that usually land well

A few combinations are reliable because they balance warmth, texture, and contrast:

  • Gold with white and clear glass creates a timeless formal table.
  • Gold with navy or deep green napkins feels rich without becoming heavy.
  • Gold with sand, oat, and stone tones suits vineyard and garden venues beautifully.
  • Gold with blush or toffee florals softens the setting for romantic events.

Don't chase matching. Chase harmony. Gold cutlery doesn't need every surrounding item to be gold-toned.

Florals matter here too. Bright tropical arrangements can compete with gold unless the rest of the table is simplified. Loose whites, creams, soft apricots, olive foliage, and seasonal textures usually allow the cutlery to shine without turning the whole setup into a metallic statement.

Essential Care and Handling for Gold Cutlery

Gold finishes look refined because the surface is more visually sensitive than ordinary stainless steel. That means handling matters, especially once service starts and the table is no longer under the stylist's control.

The first rule is simple. Treat the finish like part of the décor, not like back-of-house utility stock. Staff should avoid tossing pieces into tubs, scraping them roughly against plates, or stacking them in ways that create avoidable friction.

During the event

A few habits make a noticeable difference:

  • Clear thoughtfully. Servers should lift cutlery with plates rather than sweeping pieces together in a pile.
  • Keep acidic residue moving. If pieces have been used with lemon, vinegar-heavy dressings, or tomato-based sauces, don't leave them sitting dirty for hours.
  • Separate from harsh metal contact. Mixed heaps of service tools and cutlery can create scratches fast.

If there's a prep area on site, assign one person to oversee collection. That single point of responsibility usually prevents the rough handling that happens when everyone assumes someone else is managing the returns.

Cleaning and packing

For hired pieces, always follow the supplier's return instructions first. If light rinsing is requested, use mild soap, warm water, and a soft cloth or sponge. Avoid abrasive scourers, harsh powders, and aggressive dishwasher cycles unless the rental company has specifically approved them.

A practical return routine looks like this:

  1. Remove food residue early so it doesn't dry onto the finish.
  2. Rinse gently if required rather than scrubbing.
  3. Dry before packing if instructed to avoid water spotting or trapped moisture.
  4. Repack neatly in the containers or wraps provided.

The finish usually suffers more during pack-down than during dinner service.

What doesn't work

A few shortcuts create problems quickly:

Avoid this Why it causes trouble
Abrasive sponges They can mark the coloured finish
Long soaking It makes residue easier to forget and can dull the look
Harsh dishwasher detergents They're often too aggressive for specialty finishes
Wet repacking It encourages spotting and messy returns

Good care isn't fussy. It's disciplined. If the team treats gold cutlery as a styling item right until the final crate is sealed, it usually comes back looking as elegant as it did on the table.

Hiring vs Buying Gold Cutlery in Cape Town

For most events, hiring makes more sense than buying. That isn't because buying is always wrong. It's because ownership brings jobs that most hosts don't want.

When people buy gold cutlery sets for a large event, they're often buying into a chain of extra decisions. Where will it be stored? Who will wash and dry it properly? Does the style still suit the next event? What happens when a few pieces go missing and the set no longer matches perfectly?

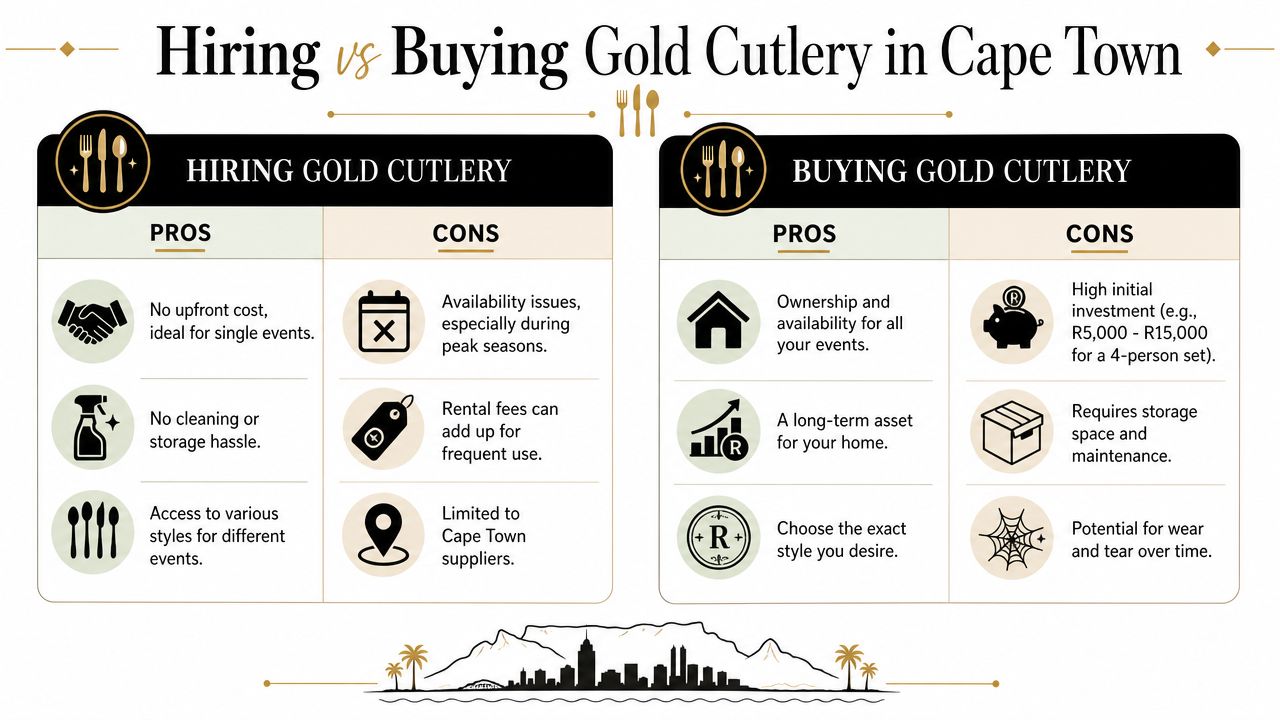
A comparison chart outlining the pros and cons of hiring versus buying gold cutlery sets in Cape Town.

When buying makes sense

Buying can work well if you host often, have secure storage, and know exactly which finish suits your long-term style. It can also make sense for private dining, boutique guesthouses, or venues creating a permanent in-house look.

But even then, consistency becomes the challenge. Replacement pieces may not match older stock perfectly. Colour tone, handle shape, and surface finish can vary from batch to batch. That's frustrating if your brand depends on a polished table presentation.

Why hiring is usually the smarter event choice

For weddings, matric dances, product launches, milestone birthdays, and one-off corporate dinners, hiring is often the cleaner decision.

  • You choose for the event, not forever. A Franschhoek harvest table and a CBD gala dinner don't need the same finish.
  • You avoid storage and maintenance. No boxes in the garage. No post-event washing marathon.
  • You keep flexibility. If the theme changes late, you're not stuck with inventory that no longer fits.

There's also the local convenience factor. In Cape Town and the Winelands, event timelines are often tight. Delivery and collection to venues in Stellenbosch, Franschhoek, and Paarl can remove a major layer of logistical pressure for planners and couples already juggling florists, coordinators, and catering teams.

If you're weighing décor spend across the full event, this roundup of affordable wedding planning advice is useful because it helps separate “worth it” splurges from details that are better handled through smart hiring choices.

A practical comparison

Here's the decision in plain terms:

Consideration Hiring Buying
Best for Once-off events, changing themes, larger guest counts Frequent use, permanent collection
Aftercare Usually simpler for the host Fully your responsibility
Storage No long-term storage burden Needs protected storage space
Flexibility Easy to match to each event style Limited by what you already own

If you're planning a fuller tabletop package, this guide to cutlery and crockery hire for events is a helpful next step because it frames cutlery as part of the entire dining setup rather than a stand-alone item.

Hire when the event has a clear visual brief and a clear end date. Buy when you're prepared to maintain a collection properly.

That's the line one should use.

Create Your Unforgettable Golden Moment

Gold cutlery has a rare advantage in event styling. It feels luxurious, but it doesn't have to be complicated. Choose the right finish for the venue, match the pieces to the actual menu, and style the table with enough contrast for the metallic tone to read cleanly.

That's where the best tables succeed. They don't overload the guest with decoration. They use a few disciplined choices that make the whole setting feel resolved. Gold cutlery can do that on a long vineyard table, a polished ballroom setup, or a contemporary corporate dinner just as effectively.

The practical side matters just as much as the visual side. A well-chosen set should support service, survive pack-down gracefully, and fit the event without creating unnecessary buying, cleaning, or storage headaches. For most Cape Town and Winelands occasions, hiring keeps the process simpler while still delivering that high-end look people remember.

If you're planning an event and want the table to feel finished rather than merely furnished, gold cutlery is one of the smartest details you can choose.


If you're ready to style your event with confidence, ABC Hire can help you pull the whole table together. From Cape Town to Stellenbosch, Franschhoek, and Paarl, their team offers event rental options that make it easier to achieve a refined look without the hassle of buying, storing, and maintaining specialty pieces yourself.

Cabana Tent for Wedding: Perfect Celebrations 2026

You're probably somewhere between excited and slightly overwhelmed right now. You've found the venue, or at least narrowed it down to a few beautiful farms in Stellenbosch or Franschhoek. You can already see the ceremony on the lawn, the long lunch or elegant dinner, the photos under the mountains, and that soft white tented backdrop that makes the whole day feel polished without losing the outdoor atmosphere.

Then the practical questions start. Will guests be warm once the sun drops? What happens if the wind picks up? Will the tent fit the tables, bar, dance floor, and service space, or will it feel cramped the moment everyone sits down? These are the questions that matter in the Winelands, and they matter more than Pinterest usually admits.

A cabana tent often ends up being the right answer because it gives you shelter, shape, and a refined wedding look without closing off the setting that made you choose a Winelands venue in the first place. It works beautifully for couples who want something airy and elegant, especially for a classic white wedding style.

I've seen many couples arrive at the same point. They want the romance of an outdoor celebration, but they don't want to gamble on comfort. If you're drawing inspiration from destination celebrations, these Italian wedding weekend details are useful because they show how structure, flow, and atmosphere come together over several events, not just during the ceremony itself.

Your Dream Winelands Wedding Starts Here

A Winelands wedding usually starts with a feeling before it becomes a floorplan. It's the light on the vineyards, the mountain line behind the ceremony, the thought of guests gathering outside with a glass in hand while the reception space glows in white and warm gold.

That's exactly why so many couples land on a cabana tent for wedding celebrations. It protects the event without making it feel boxed in. You still get the outdoor scenery. You still get natural light. You still get that sense that the celebration belongs to the setting rather than being dropped on top of it.

The mistake is treating the tent as an afterthought. In the Winelands, the tent is part venue, part weather plan, part design framework, and part logistics puzzle. When it's chosen well, everything feels easy. When it's chosen badly, the problems show up fast. Guests queue awkwardly, caterers fight for space, draping hangs beautifully but the sides rattle in the evening breeze, and the dance floor steals room from the dining setup.

A good tent doesn't just cover the wedding. It helps the whole day flow properly.

Couples who plan best usually ask practical questions early. Not only “Will it look beautiful?” but also “Where will guests enter?”, “Where does catering work from?”, and “How will the space feel after sunset?” Those are the questions that separate a pretty setup from a comfortable one.

In the Cape, especially at exposed venues, comfort and elegance have to work together. You shouldn't have to choose between them.

What Is a Wedding Cabana Tent

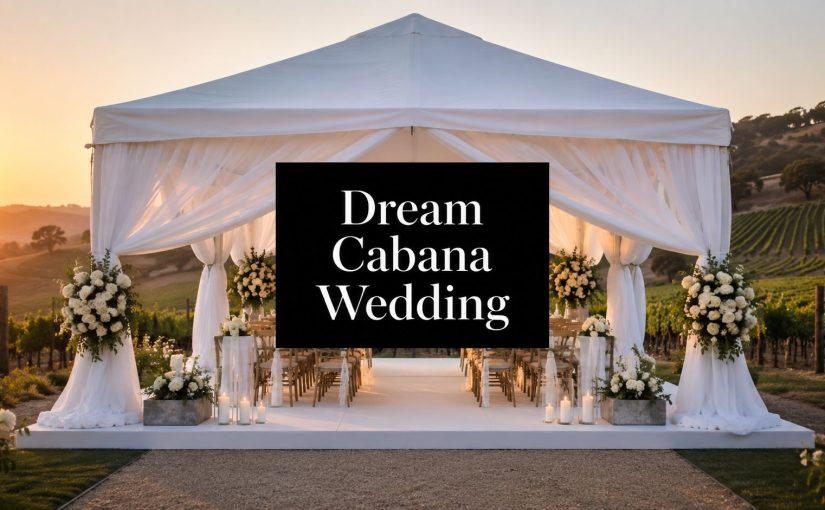
A cabana tent for wedding use is a framed event tent designed to create a light, formal, open-sided setting. It's known for its clean lines, peaked roof profile, and the way it takes draping, florals, and lighting. For South African weddings, it has become closely tied to the classic white wedding look.

The visual appeal is straightforward. The frame gives structure. The roofline adds height. The open sides keep the setting connected to the surroundings. Decorative draping softens the interior and turns a plain frame into something romantic and polished.

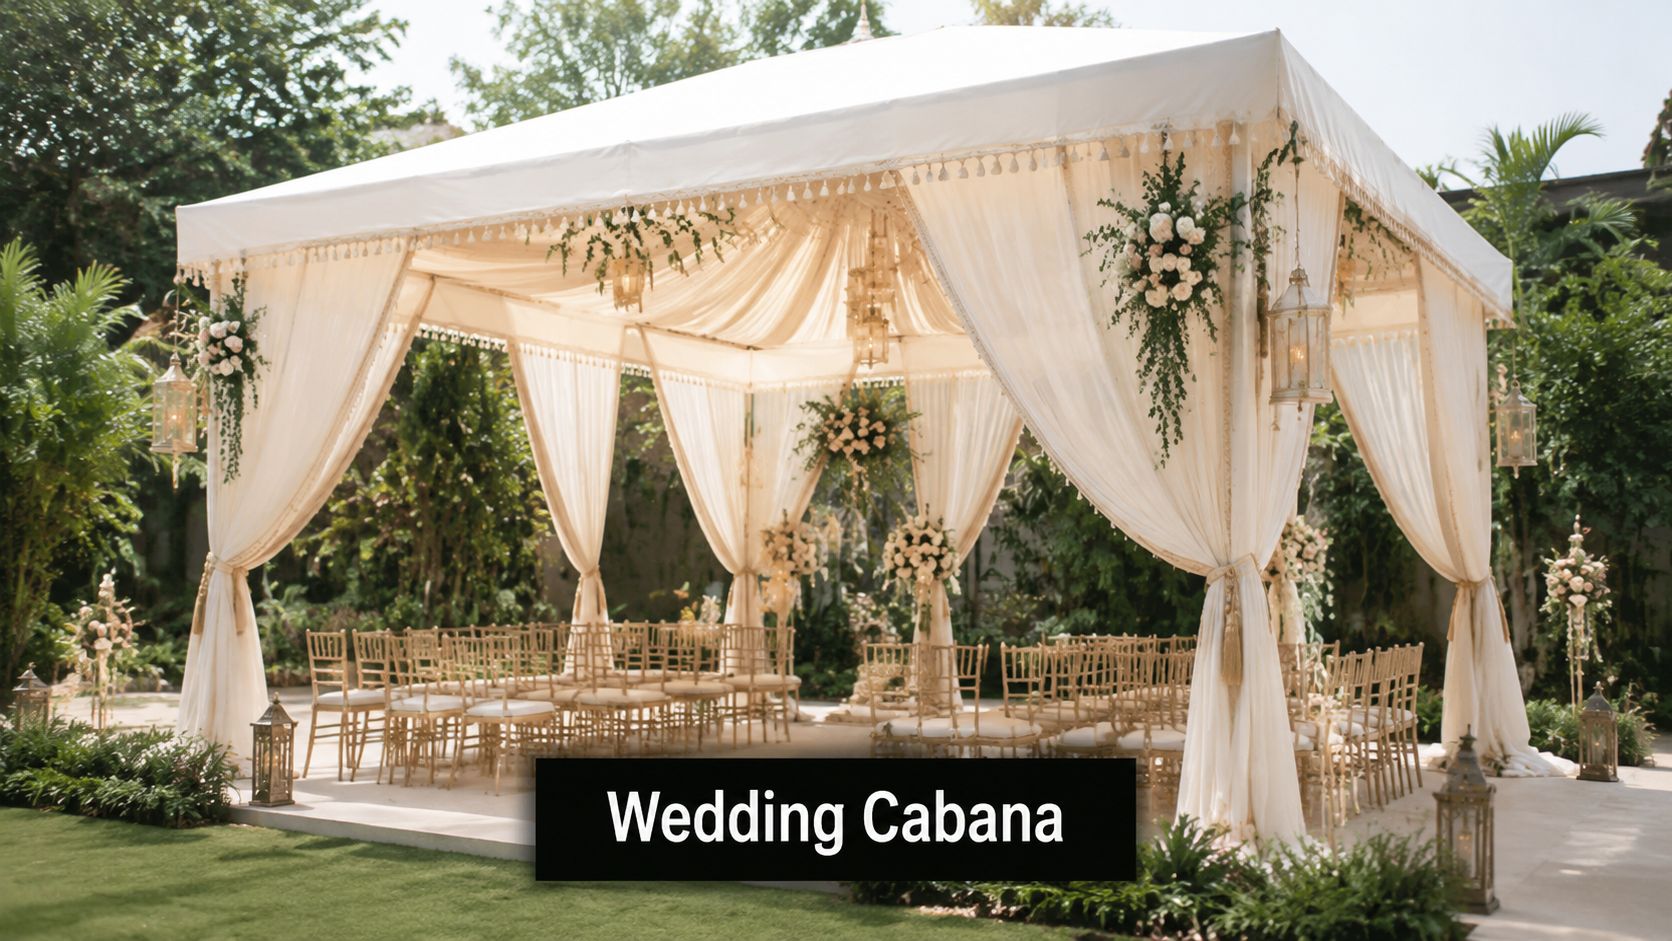
An elegant outdoor white wedding cabana tent decorated with flowers and gold chairs on a lawn.

Why couples choose this style

The strongest reason is aesthetic. The cabana tent is widely recognised as the top choice for the white wedding aesthetic in South Africa, and demand for white draping and fairy light decorations has seen a 40% increase over the past three years for engagements and formal wedding ceremonies, according to this South African wedding styling reference.

That increase makes sense on the ground. White fabric reflects light well during the day, photographs cleanly, and creates a neutral base for almost any floral palette. It also works across very different venue styles, from formal estates to more relaxed garden settings.

How it compares with other tent options

If you're deciding between tent styles, the biggest differences come down to shape, mood, and weather behaviour.

Tent type Best known for Where it works well Main trade-off
Cabana tent Elegant white wedding styling, draping, formal reception look Ceremonies, seated receptions, classic wedding layouts Open-sided feel can be less forgiving in wind and cold
Marquee More enclosed event shell Formal events where a sealed environment matters more Can feel heavier and less visually open
Stretch tent Organic shape and relaxed feel Cocktail-style events and less formal celebrations Different aesthetic, less suited to a crisp white wedding look

If you're comparing structures in more detail, this overview of different event tent styles is a useful starting point.

Practical rule: If the look in your head includes white draping, layered lighting, and a formal aisle or dining layout, a cabana tent usually gets you there more naturally than a stretch tent.

What a cabana tent does best

Cabana tents shine when you want the setting to feel dressed, not improvised. They work especially well for:

  • Ceremony and reception in one area where the tent needs to shift mood through the day
  • Classic round-table dining with a defined entrance and central visual focus
  • Layered décor schemes using ceiling draping, chandeliers, fairy lights, and floral installations

The style is elegant. The planning around it needs to be equally disciplined.

Choosing the Right Cabana Tent Size and Capacity

A couple books a beautiful Winelands venue, sees a 6×9 on a hire list, and assumes it will cover dinner, a bar, a DJ, and a bit of dancing. On installation day, the tables go in, the service aisles get marked out, and the tent suddenly feels far smaller than it did on paper.

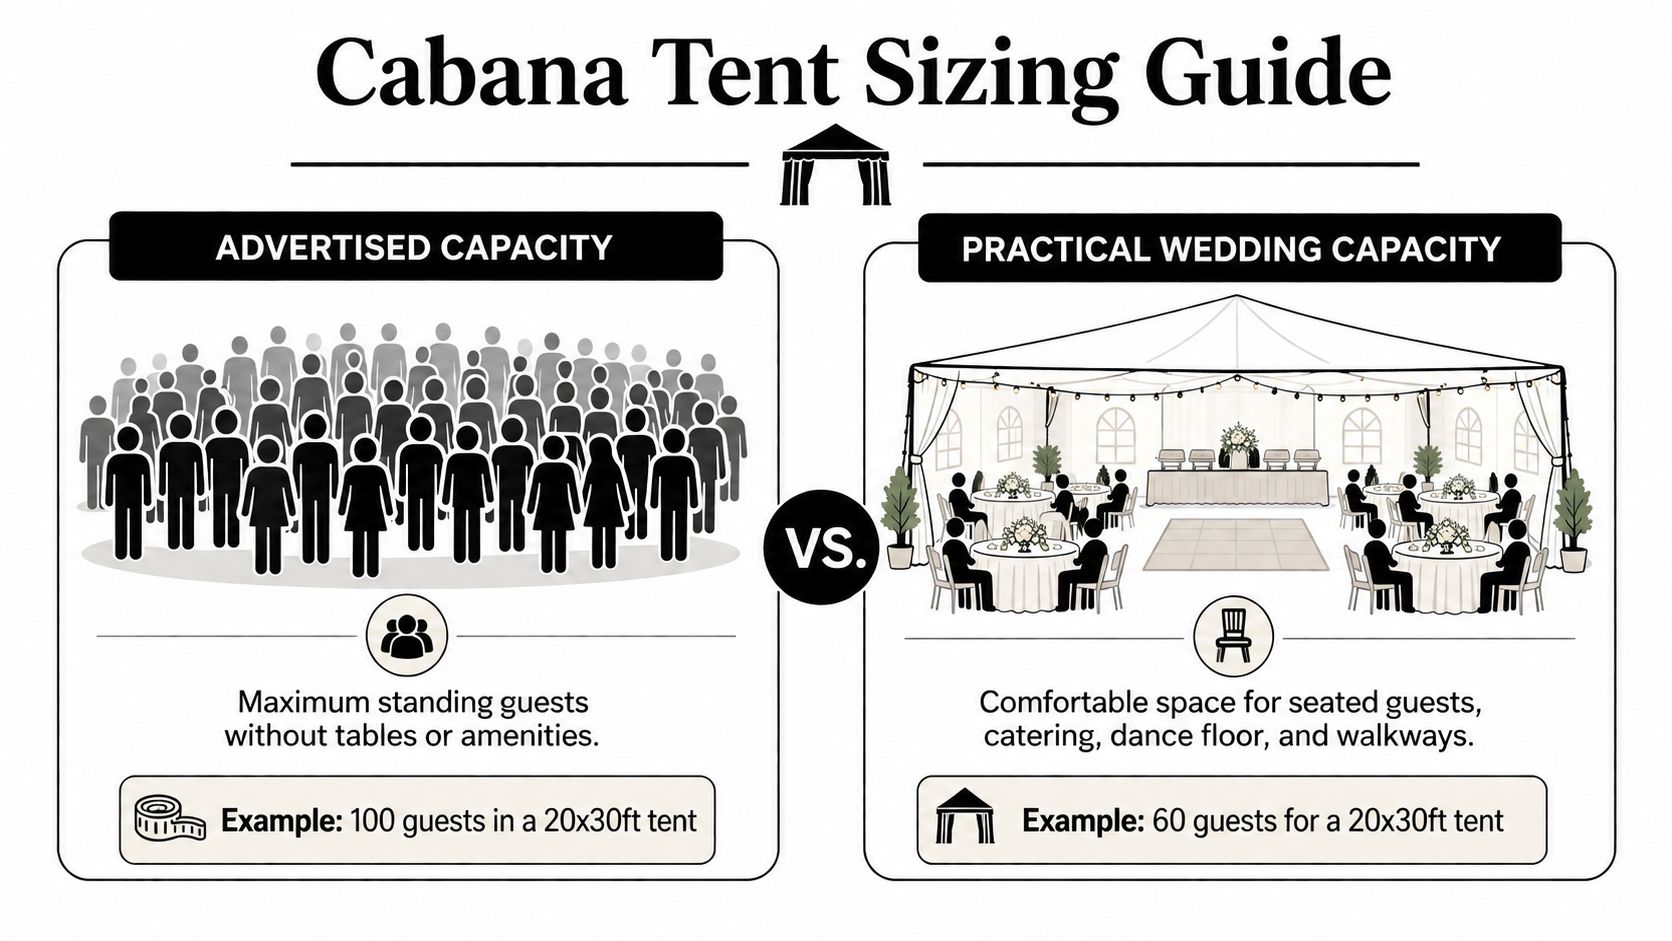
That mistake is common because advertised capacity usually reflects a basic layout, not a real wedding floorplan. A cabana tent must carry furniture, staff movement, décor, and often a weather plan for the Cape. If we are planning for a Winelands wedding, I size for comfort first and headcount second.

A sizing guide infographic comparing maximum standing capacity versus comfortable seated wedding capacity for cabana tents.

The sizes that matter most

A 6m x 9m cabana tent gives you 54 square metres of covered space and suits a smaller seated wedding if the layout stays disciplined. Suppliers such as Lillybees Events list a 6×9 cabana tent for intimate to medium functions, but the practical result depends on what else needs to live inside that footprint.

A 6m x 12m cabana tent is often the point where couples get useful breathing room. Hire companies in South Africa commonly position this size for mid-sized functions, and this 6×12 frame tent listing from Events Guys is a better reference for that size than a duplicated source elsewhere in the article. In practice, whether it handles around 100 guests depends on table shape, bar placement, and whether you are keeping one side more enclosed against the wind.

For a fuller reception with dining and a dedicated dance area, a 12×18 metre cabana tent is usually the safer starting point. It gives the planner more freedom to separate dining from circulation, which matters once staff are carrying plates and guests are leaving tables in heels on a cool evening.

Seated dinner versus cocktail flow

Guest count alone does not decide tent size. Layout does.

A formal seated wedding uses space quickly because the tent must accommodate:

  • Dining tables and chairs
  • Service aisles for catering staff
  • Clear routes to exits and bathrooms
  • A gift table, cake table, or welcome drinks station
  • Entertainment equipment, a DJ table, or a dance floor

Cocktail layouts can hold more people, but they also create pinch points. I see this often when the bar, grazing table, and lounge furniture all land in the middle of the tent. The result is not shortage of space. It is poor use of space.

Choose the size for your floorplan, not the maximum number printed on the quote.

A practical way to decide

Use this guide as a starting point:

Tent size Better suited to What usually works best
6x9m Intimate weddings Seated lunch or dinner for a smaller group, with limited extras inside the tent
6x12m Mid-sized gatherings Works well for a reception where the layout is planned carefully and circulation stays clear
12x18m Larger receptions Better for dining, dancing, and weather contingencies under one structure

If your wedding will blur into a more social, party-style setup later in the evening, this guide to tent hire for parties and events helps with the movement side of planning, which is usually where capacity assumptions fall apart.

What works in the Winelands

The Winelands adds its own constraints. A tent that works on a flat school field in town can lose usable capacity on a vineyard lawn with a slight slope, a row of uneven pavers, or a wind-exposed edge. Once the team widens aisles for safe service and adjusts table positions to keep chairs level, your original guest plan can tighten up fast.

There is also the Cape weather factor. If you expect a temperature drop after sunset and want heaters, side panels, or a more enclosed edge on the windward side, protect space for that from the start. Those decisions affect comfort, but they also affect how open and spacious the tent feels.

Start with your seating plan. Then add the bar, catering paths, entertainment footprint, and your bad-weather backup. That number is the one worth trusting.

Site Selection and Setup Logistics

The prettiest patch of lawn isn't always the right place for the tent. At Winelands venues, the best tent position usually comes from balancing the view with access, stability, and service flow.

The first thing to inspect is the ground itself. Cabana tents want a site that is as level as possible. Even a mild slope can complicate table setup, flooring, and guest comfort. Glassware, candle holders, and cake tables don't forgive uneven surfaces. Neither do formal dining chairs.

What to check on your site visit

Walk the route from the venue entrance to the setup point and look at it from the installer's perspective, not only the couple's.

  • Vehicle access: Delivery teams need a clear route for the tent frame, draping, tables, and any additional equipment. Narrow farm roads, soft verges, and sharp turns can slow setup.
  • Ground condition: Grass is fine if it's firm and reasonably even. Muddy, steeply sloped, or heavily rutted areas create avoidable problems.
  • Power availability: Lighting, sound, and any heating or cooling equipment need practical power access. Long cable runs need planning.
  • Drainage: If there's any chance of rain, low-lying areas can collect water and make the entire space uncomfortable.
  • Orientation: Position the open sides to capture the view without exposing dining guests directly to the strongest prevailing wind.

The view should work with the floorplan

Many couples choose a spot because the ceremony photos will be beautiful. That matters, but it's only half the story. The reception needs a sensible back-of-house rhythm too. Caterers need access. Staff need a service path that doesn't cut through family photos. Guests need to arrive without stepping around extension leads or stacked hire items.

A good layout often places the focal point toward the best view, while tucking practical areas to the least visible side of the structure. That could mean:

  • Bar to one side, not blocking the central sightline
  • DJ or band placed where sound projects well without dominating the room
  • Food service near the most efficient access point for kitchen or prep support

If installers have to fight the site, the wedding will feel harder than it needs to.

Questions worth asking the venue

Before you confirm the exact spot, ask:

  • Can vehicles reach the lawn safely for setup and breakdown?
  • Are there underground irrigation lines or restrictions on staking?
  • Where is the nearest power source?
  • Does the venue already know which areas become windy after midday?

Those answers save time, money, and stress. In the Winelands, local site knowledge is often more valuable than a pretty map.

Weatherproofing for the Cape Climate

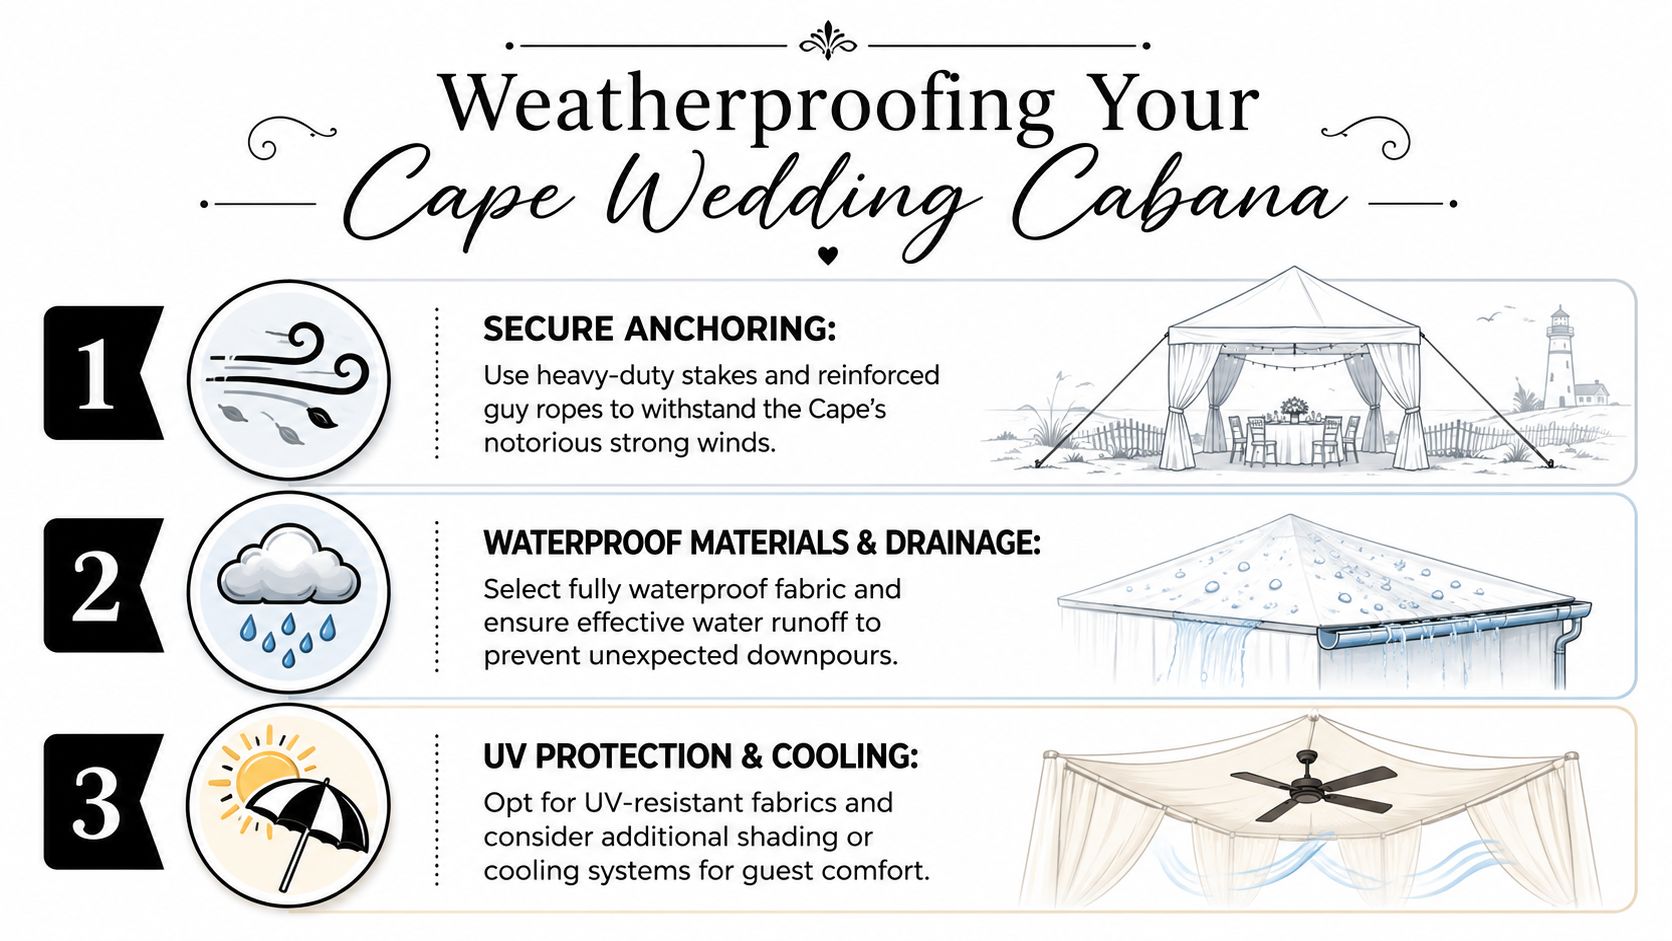
You can have a calm, warm Stellenbosch afternoon at 4pm and a cold, gusty dinner service by 7pm. I see that shift catch couples out every season. With a cabana tent, weather planning starts at booking stage, because the same open look that suits the Winelands so well also lets wind move straight through the reception.

An infographic detailing three essential steps for weatherproofing a wedding cabana tent against wind, rain, and heat.

Wind needs a plan before decor goes in

Around Cape Town and the Winelands, wind is usually the first comfort problem, not rain. The structure may be secure, but guests still feel every draft during speeches, every flap in the sidewalls, and every temperature drop once the sun disappears behind the mountain.

A 6m x 12m steel-framed cabana can work well for a wedding setup of around 100 guests if it is installed correctly and suited to the site. The detail that matters is not the catalogue photo. It is the anchoring method, the exposure of the lawn, the condition of the ground, and whether side panels are available where the wind hits hardest. For frame and wind-loading guidance, I prefer to work from supplier specs and engineering notes such as those published by Tent Manufacturer, then match that to the venue conditions on the day.

On exposed estates, I usually advise couples to budget for more protection than they think they need. It is easier to leave a panel open than to wish one existed once glassware starts rattling.

Evening cold changes the mood fast

The Winelands can feel generous in late afternoon and sharply cold after sunset. That matters most at dinner, because guests are seated, less active, and often dressed for photographs rather than warmth.

The best fixes are practical:

  • Sidewalls ready on the windward sides, even if you keep them open at first
  • Portable climate-control hire, planned with enough power and the right placement
  • Dining tables positioned away from direct draft paths
  • A technician or hire team briefed to adjust the setup as conditions change

The weak approach is hoping body heat will warm the tent or leaving every side open because the room looked better earlier in the day.

Guest comfort shapes the memory of the night.

A weather plan that works on real wedding days

For Cape weddings, I recommend making three weather decisions well before the final week.

  1. Confirm how the tent will be secured
    Pegging, weighting, and site-specific installation all affect performance. A tent on soft lawn behaves differently from one on compacted ground or paving, and the installer should plan for that.

  2. Choose a sidewall strategy in advance
    Decide which sides protect the dining area, which side can stay open for the view, and who has authority to close panels if the wind picks up. That decision should not wait until guests are already seated.

  3. Treat heating or cooling as part of the floorplan
    Climate-control units need power, space, and sensible positioning so they do the job without creating noise or clutter. This is also worth coordinating with the evening programme, especially if you are planning creative wedding celebration ideas that keep guests moving between the dance floor, lounge areas, and outdoor spaces.

A good weatherproofing plan protects more than the structure. It protects the atmosphere.

Designing Your Dream Interior Decor and Lighting

Once the structure is right, the tent becomes a blank canvas in the best sense. At this point, a cabana tent for wedding styling earns its place. The frame gives you order, and the soft finishes create mood.

For a classic Winelands reception, white draping overhead with warm lighting is still one of the most reliable combinations. It flatters the room during daylight and then shifts gracefully into evening. The change feels natural rather than dramatic, which is exactly what you want at a wedding.

Screenshot from https://abchire.co.za/

The elements that make the space feel finished

A beautiful tent interior usually comes from layering, not from one oversized feature.

  • Ceiling draping: This softens the frame and draws the eye upward. It also helps the tent feel intentional from every angle.
  • Fairy lights or chandeliers: Fairy lights create warmth and softness. Chandeliers add formality. Some weddings use both, with chandeliers over key zones and softer lighting elsewhere.
  • Flooring: Flooring changes the feel more than generally anticipated. It gives guests confidence underfoot and visually anchors the room.
  • Furniture pockets: Lounge corners break up the dining layout and give older guests or non-dancers a place to settle comfortably.

How to avoid a flat-looking tent

The most common styling mistake is treating the whole interior as one visual note. White on white can be elegant, but it still needs contrast. That contrast can come from:

  • Gold or black chair frames
  • Textured table linen
  • Timber, mirrored, or gloss accents
  • A defined dance floor
  • Low lounge seating that shifts the silhouette of the room

A wedding tent should have movement inside it. Guests should be able to circulate from dining to dancing to quieter conversation without feeling like they're walking through one large blank rectangle.

Good décor creates zones without building walls.

Small details that lift the room

Some of the strongest results come from practical design choices rather than expensive floral excess. A well-lit entrance, a clear focal point behind the couple, and a lounge nook near the dance floor often do more for the atmosphere than scattering décor evenly everywhere.

If you're looking for ideas beyond flowers and tables, these creative wedding celebration ideas are helpful for thinking about how the reception can feel once guests are inside the space.

A strong tent interior always supports the way people use the wedding. That's why the best-styled spaces don't just photograph well. They host well too.

Your Cabana Tent Rental Checklist and Timeline

The smoothest wedding hires usually follow a simple rhythm. Decide early, confirm the practical details properly, and don't leave layout or weather items to the final week.

A cabana tent booking should happen as soon as your venue and approximate guest count are stable. Popular dates in the Cape fill quickly, especially for spring and summer weekends, so delay limits your options on tent size, flooring, and supporting items.

Early planning stage

When you first enquire, have these basics ready:

  • Your venue name and area
  • Estimated guest count
  • Whether the event is ceremony, reception, or both
  • Preferred style, especially if you want a formal white wedding finish
  • Any known site constraints, such as slopes, restricted access, or no-stake areas

This is also the moment to ask what is included in the tent setup. Some configurations include draping and installation, while others may require separate decisions on walls, flooring, lighting, or climate items.

Before you approve the final setup

Once your guest list firms up, review the tent layout with real wedding functions in mind.

Check for:

  • Dining configuration
  • Service aisles
  • Cake and gift table placement
  • Bar location
  • DJ or band footprint
  • Dance floor position
  • Weather side closures if needed

A useful planning companion at this stage is this broader wedding planning checklist, especially if multiple suppliers are feeding into the same setup window.

Final week checks

The week before the wedding should be for confirmation, not redesign.

Use this short final check list:

  • Reconfirm delivery and collection times
  • Verify the exact setup point with the venue
  • Confirm power access for lighting and any climate equipment
  • Check who is responsible for being on site at delivery
  • Make sure the quote reflects every required item
  • Review weather exposure and backup sidewall decisions

If rain or wind is in the forecast, don't improvise emotionally. Use the plan already agreed.

On the day and after the event

Leave enough setup time for proper installation and dressing of the tent. Rushed installs create avoidable stress for every supplier who follows. After the event, make sure personal décor items are separated clearly from hire stock before collection starts.

The goal isn't only to hire a beautiful structure. It's to remove uncertainty from a very full day. When the checklist is handled well, the tent fades into the background in the best possible way. Guests experience a wedding that feels comfortable, polished, and well organised.


If you're planning a Winelands celebration and want a cabana tent setup that looks refined and works properly in Cape conditions, ABC Hire can help with the practical pieces that make the biggest difference, including furniture, lighting support, and climate-control equipment for Cape Town, Stellenbosch, Franschhoek, Paarl, and surrounding areas.

Candles for Wedding: Ultimate Guide to Styling & Safety 2026

You've probably saved a dozen images of glowing tables, taper-lined aisles, and candlelit receptions that look effortless. Then the practical questions start. Which candles work in a Cape Town venue? What survives a Winelands breeze? What belongs on the table, and what only looks good in a styled shoot?

That's where candles for wedding décor either become magical or maddening.

Used well, candlelight makes a room feel warmer, more intimate, and more expensive than it is. Used badly, it creates clutter, blocks conversation, burns too fast, or gives your venue manager a reason to say no. The difference is rarely about taste alone. It's about scale, holders, placement, wind, burn time, and how the whole lighting plan fits your venue.

Setting the Scene with Candlelight

As the sun drops behind the mountains or off the Atlantic, candlelight changes a wedding from pretty to atmospheric within minutes. In Cape Town and the Winelands, that shift is especially noticeable because the natural light is already doing part of the work. Candles then take over gently, warming the room, softening hard venue lines, and giving tables a sense of depth that overhead lighting rarely achieves on its own.

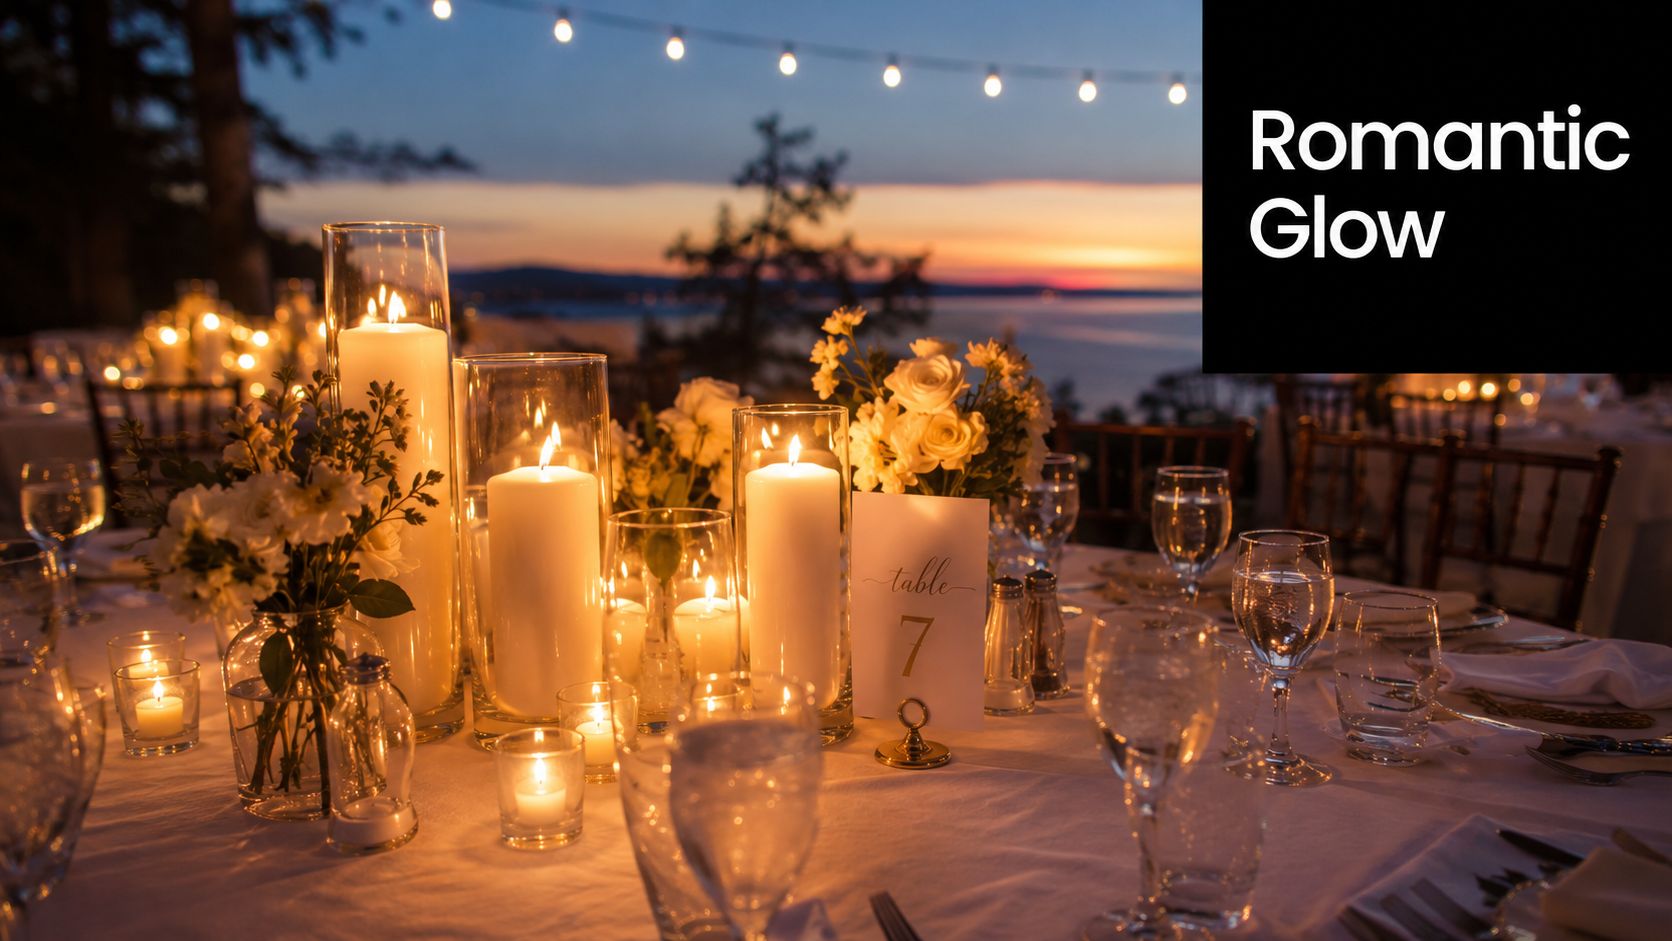
Elegant wedding table setting with glowing pillar candles and white flowers during a beautiful sunset ocean view.

The strongest candle schemes usually begin with one area that carries the mood. That might be the head table, a long harvest table, the ceremony aisle, or the entrance where guests first step into the space. Once that focal point is right, the rest of the candles can support it rather than compete with it. The result feels polished instead of busy.

Couples often ask for "lots of candles" when what they really want is a room that feels intimate and flattering after sunset. Those are not always the same thing. Fifty small flames scattered without structure can read messy. Fewer candles, scaled properly and placed with intent, usually give a better result and are easier to light, protect, and clear with the venue team.

A candle plan needs to answer practical questions early:

  • Where should candlelight matter most? Ceremony aisle, reception tables, bar, entrance, lounge areas, powder rooms.
  • What will the venue allow? Some estates permit open flame on tables but not on floors or near draping.
  • What will the weather do? Cape Town wind changes styling decisions fast, especially for tapers and exposed flames.
  • Are you renting or buying? For one-night impact, hired hurricanes and holders often make more sense than purchasing mixed pieces you may never use again.

Intentional placement matters more than quantity.

Local context changes everything. A beachfront reception in Camps Bay needs sheltered flames, heavier holders, and less reliance on delicate taper moments. A cellar dinner in Franschhoek can carry richer density and lower, moodier pools of light because the environment is naturally protected. I also treat modern all-candle looks differently from classic floral-and-candle tables. The first demands stricter planning around burn time, replacement stock, and who manages relighting during service.

Good candle styling starts with the venue itself. The room tells you how much glow it can hold, where candlelight will be seen, and whether real flame is the right choice for the conditions. That is what makes the final effect feel romantic rather than forced.

Your Guide to Wedding Candle Types

Each candle type solves a different styling problem. Choose the shape for the job first, then choose the finish and quantity.

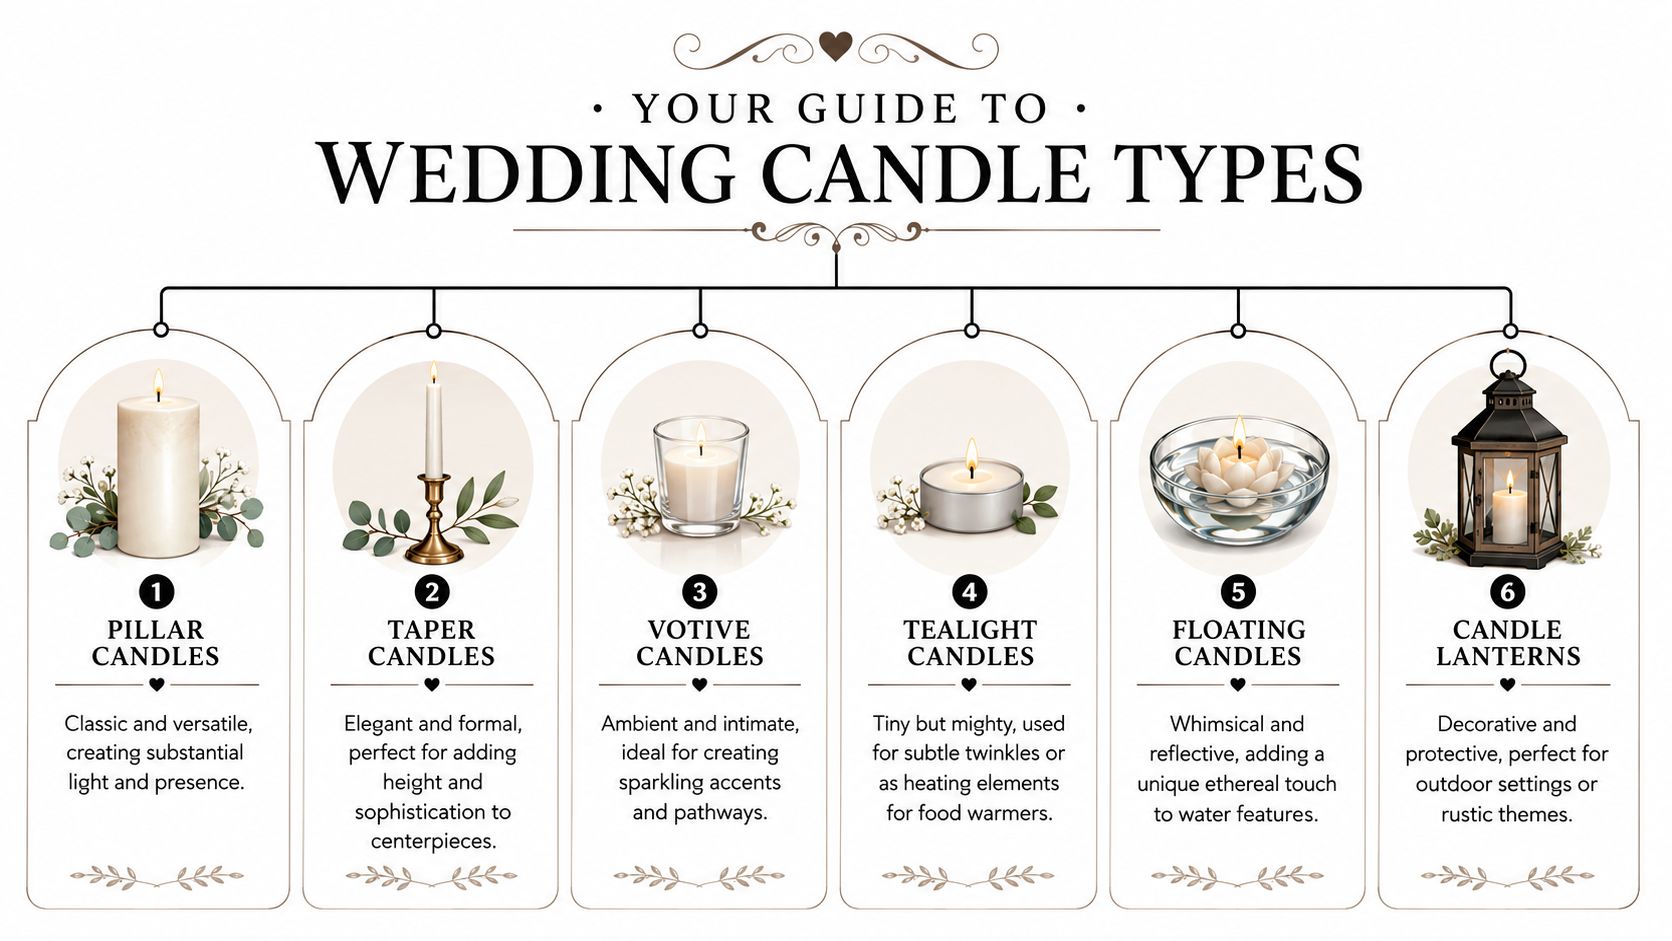
A guide displaying six different types of wedding candles including pillar, taper, votive, tealight, floating, and lanterns.

Pillars for visual weight

Pillar candles give a table presence. I use them where a design needs body, especially on round guest tables, welcome displays, bars, ceremony plinths, and anywhere florals sit low.

They also photograph well because they read clearly from a distance. The trade-off is bulk. If every pillar is the same height and width, the arrangement can feel static very quickly.

They work well for:

  • Low centrepieces with garden-style florals
  • Lantern styling outdoors
  • Mantel or staircase installations
  • Aisle clusters in glass sleeves or hurricanes

Tapers for height and line

Taper candles bring height without adding visual heaviness. They suit long tables, formal dining layouts, and cleaner designs where the eye needs a vertical rhythm.

They are less forgiving than pillars. A slightly uneven holder, a soft table surface, or a breeze from an open barn door can make the whole row feel unsettled. In sheltered interiors, though, tapers sharpen a tablescape beautifully and give floral designs a stronger frame.

A practical rule I use often: low, loose flowers usually benefit from a few disciplined taper lines.

Votives and tealights for atmosphere

Votives and tealights do the quiet work. They fill the gaps between larger elements and create that scattered glow guests notice once the room dims.

Votives usually give a richer result because the holder becomes part of the styling and the flame sits high enough to be seen. Tealights are useful for layering, especially in large numbers, but they can disappear on oversized tables or in venues with strong ambient lighting.

If the budget is tight, I would usually keep fewer pillars and protect the spend on votives. The room often feels warmer because of it.

Floating candles for reflection

Floating candles are strongest where water already belongs in the design. They suit bowls at an entrance, troughs on a bar, fountain details, and lounge areas where guests pass close enough to notice the reflection.

Used well, they add movement and softness that standard table candles cannot. Used badly, they look like an afterthought. The vessel matters as much as the candle. Scale, water depth, and the surrounding light all affect whether the effect feels polished or makeshift.

Lanterns and LED alternatives

Lanterns are not a candle type, but they change how candlelight performs. They shield the flame, add structure, and make outdoor styling feel considered, especially at Cape Town venues where wind can shift during the course of one evening.

Then there are LED candles. For some weddings, they are the sensible choice. I recommend them for high-traffic areas, venues with strict flame policies, installations near fabric, and late-night spaces where no one wants to manage relighting. Good LED candles still need editing. Skip the bright blue-toned versions and use warm, realistic options in proper holders so they read as part of the design, not a compromise.

Choosing Candles for Your Venue and Theme

The best candle choice isn't the prettiest one on its own. It's the one that suits the room, the weather exposure, and the tone of the wedding.

Wine estates and heritage venues

Historic Winelands venues tend to suit candlelight naturally. Stone walls, old wood, textured plaster, and long dining tables all respond well to warm, low light. In those settings, pillar candles in glass sleeves or lanterns usually look right at home. They add warmth without fighting the architecture.

For a Stellenbosch or Franschhoek estate wedding, a good approach is to keep the candle shapes slightly organic. Mixed pillar heights, soft ivory tones, and a few metal or ceramic holders often feel more grounded than ultra-polished crystal.

Modern city venues and clean-lined spaces

Contemporary Cape Town venues often need a crisper hand. If the room has steel, concrete, glass, or sharp architectural lines, go cleaner with your candle choices. Tapers in sleek candlesticks and disciplined clusters of votives usually work better than bulky, rustic arrangements.

The mistake here is over-softening the room. Too many mixed holders can make a modern venue lose its edge.

A better fit often looks like this:

  • Minimalist theme: black, clear, or brushed metal holders with evenly spaced tapers
  • Modern chic: a restrained mix of tapers and votives, with symmetry doing most of the work
  • Editorial styling: statement candle groupings that feel sculptural rather than decorative

Beach, garden, and exposed outdoor venues

Outdoor weddings need a tougher candle plan. The prettier the open-air setting, the more disciplined you need to be.

At beachside venues, open tapers are usually the first thing I remove from a design draft unless the ceremony and dinner areas are very sheltered. For gardens and courtyards, lanterns and enclosed cylinders give a much more reliable result. They still feel romantic, but they don't spend the evening fighting the breeze.

If your venue manager starts talking about wind patterns before you've even discussed flowers, take that seriously and adapt the candle plan early.

Matching the candle language to the theme

A few combinations tend to work consistently well:

Theme Candle approach
Classic romance Tapers, pillars, and votives in a soft layered mix
Minimalist elegance Fewer candles, cleaner holders, stronger spacing
Bohemian or garden style Clusters of pillars and votives with softer variation in height
Black-tie modern Tall tapers, reflective surfaces, disciplined repetition

The common thread is cohesion. Candles for wedding décor should echo the room and the styling language already in place. They shouldn't try to rescue a mismatched concept.

Designing with Light Styling and Centrepiece Ideas

Good candle styling isn't about quantity alone. It's about layering light at different heights so the eye moves across the table and around the room.

A reliable recipe for round guest tables

For 5 ft round intimate wedding tables, a strong benchmark is 2 to 3 large pillar candles or 4 to 5 small pillars, paired with 5 to 7 votive candles and 3 to 4 taper candles to balance glow and safety, according to wedding candle table benchmarks.

That formula works because each type handles a different visual task:

  • Pillars build the centre of the arrangement
  • Votives spread light outward and fill the dead space
  • Tapers lift the eye and stop the design from feeling squat

If you're planning your table décor in detail, it also helps to consider what sits underneath the candles. Reflective bases and warm metallic accents can make a candle grouping feel far richer. A useful reference for that layered look is this guide to Wedding gold charger plates, especially if you want the place setting to carry some of the warmth.

How to keep centrepieces elegant, not crowded

The most common styling mistake is putting every decorative element in the middle of the table at once. Candles, flowers, menus, table numbers, favours, and charger plates all compete for the same visual space. The result looks expensive in pieces and messy as a whole.

A cleaner method is to choose one hero element and let the candles support it. If the florals are lush, reduce the number of large candles. If the candles are the main statement, keep the flowers lower and looser.

For couples who want more table arrangement ideas beyond candles alone, this roundup of a centrepiece for table styling is a helpful planning reference.

Creating candle moments beyond the table

Some of the best candle styling happens away from the guest tables.

Consider using candles in these areas:

  • Ceremony aisle edges: Keep the spacing consistent and use protected holders if there's any breeze.
  • Entrance styling: A grouped lantern or pillar installation creates a strong first impression.
  • Cake or champagne table: Candles frame details beautifully in photographs.
  • Lounge corners: Small clusters help these areas feel finished rather than forgotten.

A room feels immersive when candlelight appears in repeating pockets, not only at the dining tables.

Height, repetition, and restraint

Professional-looking candle design usually follows three principles.

First, repeat shapes. If every holder is different, the table looks unsettled. Second, vary height deliberately. Too much sameness kills the glow. Third, leave negative space. The eye needs a place to rest.

That's what separates a romantic candle setup from a decorative pile-up.

The Practicalities of Burn Time and Safety

The candles looked perfect at sunset. By the time mains were served, half the votives were low, two tapers had gone crooked in the breeze, and wax had marked the linen on the family table. I see versions of this often at Cape Town and Winelands weddings. Candlelight is romantic, but it only works when the practical side has been planned just as carefully as the styling.

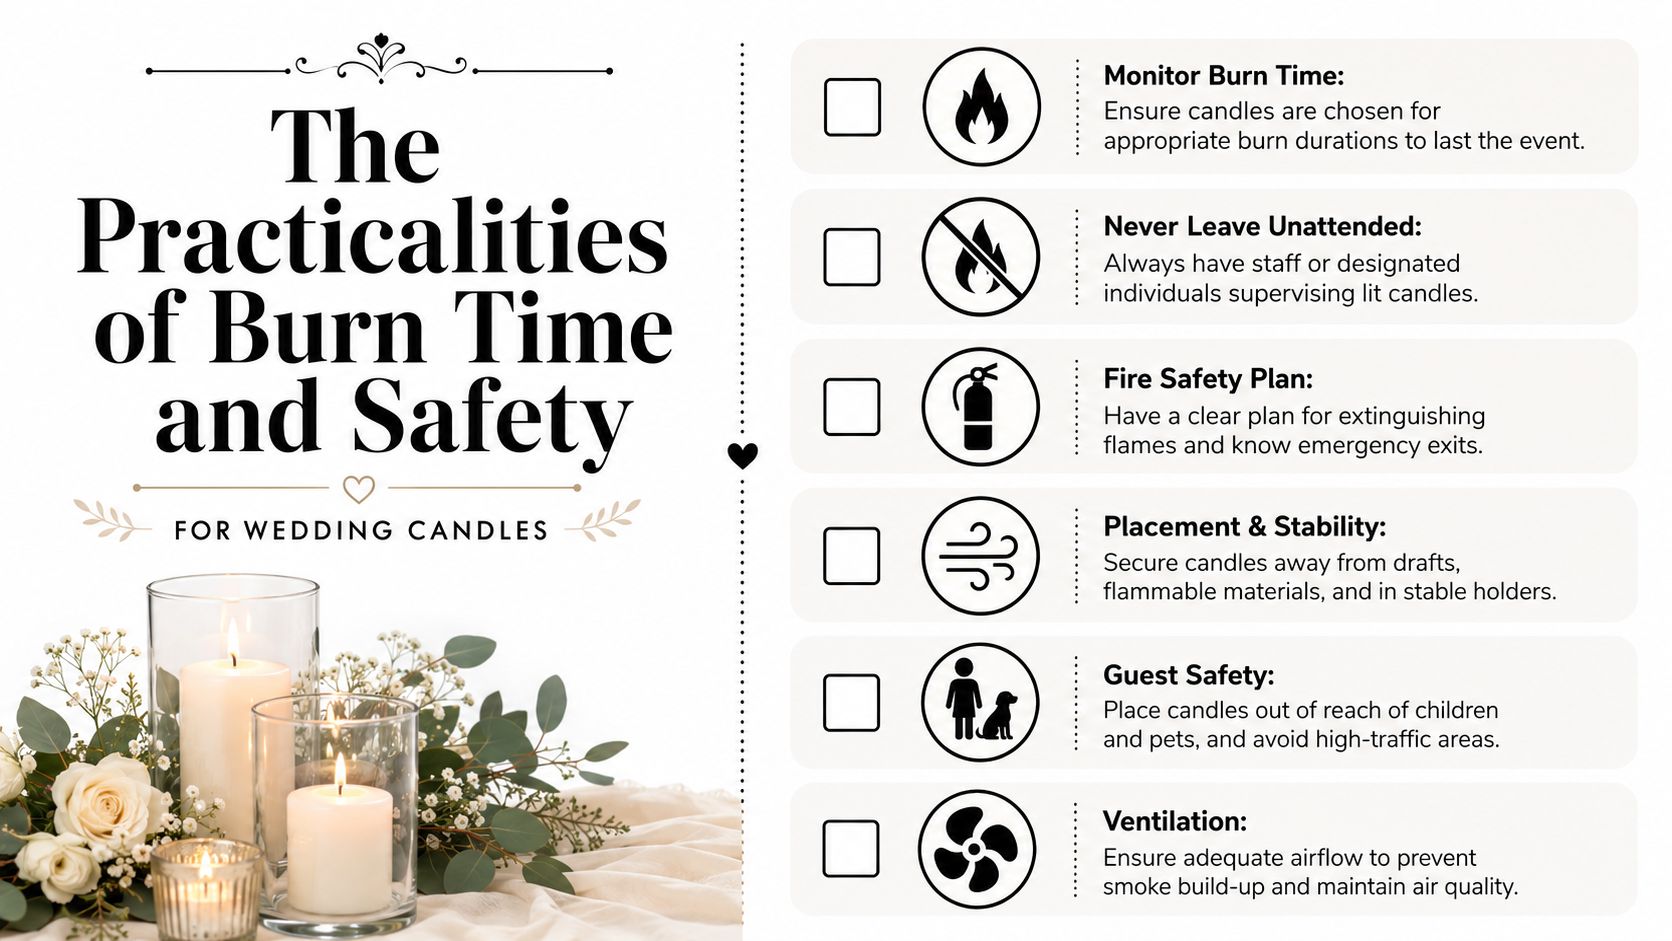
An infographic titled The Practicalities of Burn Time and Safety for Wedding Candles listing six safety tips.

Burn time starts with your event schedule

Burn time should be matched to the actual flow of the wedding day. That means setup, guest arrival, any delay to the ceremony, dinner service, speeches, and the point when photographs of the room are still being taken. A candle may technically burn for hours and still be the wrong choice if it tunnels badly, throws off too much heat, or looks tired halfway through service.

Ask suppliers for the expected burn range of the exact candle size you are ordering, not a general promise across the whole range. Wax blend, wick size, draft exposure, and container shape all affect performance. In practice, I would rather use a candle with a consistent, tidy burn than chase an impressive number on paper.

A simple rule helps. If the candle needs to perform for a five-hour guest-facing window, build in a margin rather than buying to the minimum.

Wind changes everything in the Western Cape

Generic wedding advice often ignores the local problem. Cape Town wind can turn an elegant candle plan into a maintenance job within minutes, especially on wine farms, coastal venues, and terraces that feel sheltered until the temperature drops.

Open flames on exposed tables are rarely the best use of budget in those settings. The flame flickers hard, wax burns unevenly, and staff end up relighting candles instead of serving the room. Tall, unprotected tapers are usually the first to struggle.

The safer options are usually the most reliable-looking ones too:

  • Hurricane vases for tables with any cross-breeze
  • Heavy lanterns for entrances and pathways
  • Glass sleeves around pillar candles
  • Flameless candles in thoroughfares, near draping, or around children

Treat wind as part of the brief from the start. If the venue coordinator says, "It gets breezy after six," believe them and plan accordingly.

Safety rules that matter on the night

Venue rules should be checked before you place a single order. Some venues allow only enclosed flames. Others permit real candles on tables but not along aisles, staircases, or bars. Those restrictions affect the design, staffing, and budget.

Keep flames clear of hanging florals, loose napkins, dried foliage, and guest traffic routes. Use stable holders that cannot tip if a table is bumped. Assign one person or one team to light, monitor, and extinguish candles. Shared responsibility usually means nobody owns the job.

For a general reference, this guide to safe candle enjoyment covers sensible flame-care basics.

Real flame is not always the best answer

Some weddings absolutely benefit from live candlelight. Others are better served by a mix of real candles and alternatives. If the venue is windy, the tables are tight, or staff access will be limited once dinner starts, portable lighting often gives a calmer result and better consistency in photos.

For couples who want warmth without open flame in problem areas, rechargeable table lamps for events are a practical option for bars, lounge pockets, and outdoor dining tables.

The best candle plan is the one that still looks composed at 9 pm.

Cape Town and Winelands Candle Logistics

The candle plan often looks simple on paper. Then the south-easter picks up at cocktail hour, the venue only allows enclosed flames on the veranda, and someone realises the quote covered wax but not cylinders, lighters, transport crates, or the team to light everything on time.

That is why logistics deserve their own budget line. In Cape Town and the Winelands, candles are rarely just a styling purchase. They are a styling and operations decision.

What candles usually cost locally

Local candle spend varies widely because the final number depends less on the candle alone and more on the full setup around it. A few dinner tables with tealights and hired holders is one budget. A large reception with premium pillars, storm cylinders, aisle lanterns, backup stock, and setup labour is another entirely.

Couples often underestimate four line items:

  • holders and wind protection
  • delivery and collection
  • setup and strike time
  • breakage or wax damage to hired pieces

That is usually where budgets drift. The wax is visible. The support system is what changes the quote.

Screenshot from https://abchire.co.za

Rent or buy depends on the job

Buying works well when the candle itself is part of the design brief. Specific ivory tones, hand-finished tapers, oversized pillars, or a particular wax texture can justify the spend if those details matter in person and in photographs.

Renting usually makes more sense for the infrastructure. Glass hurricanes, lanterns, cylinders, mirror bases, and protective vessels are bulky to transport and annoying to store after one event. For outdoor receptions and estates with long setup routes, hiring those pieces is often the cleaner decision.

Here is the practical trade-off.

Factor Buying Candles Renting Candles & Holders
Design control Best for exact wax colour, size, and finish Best when the vessels and support pieces shape the look
Budget shape Higher product spend as quantities grow Easier to manage for one-day use
Transport You still need safe packing and delivery Often simpler if pieces arrive event-ready
Outdoor use Risky without proper protection Better suited to wind covers and enclosed options
After the wedding Leftovers need storing, reselling, or disposal Nothing to keep afterwards

The hybrid approach works well here

For many Cape Town weddings, the strongest plan is a split one. Buy the candles that carry the visual identity. Rent the technical pieces that make them work safely and neatly in the venue.

I use that approach often for Winelands properties and coastal venues because conditions can change between site visit and wedding day. A calm courtyard at noon can be exposed by sunset. A cellar venue may need candlelight moved quickly from ceremony to reception. Hired holders and lanterns give far more flexibility in those situations than a purchase-only plan.

If you are comparing candles with other rental items, this guide to wedding decor hire in Cape Town helps put the broader styling costs in context.

Local planning choices that save stress

A few decisions make a noticeable difference on the day:

  • Order by zone, not only by quantity. Ceremony, dining tables, bars, bathrooms, and entrance points each need different holders and burn plans.
  • Check access times before confirming quantities. Some estates allow long setup windows. Others compress everything into a tight afternoon turnaround.
  • Ask who is responsible for relighting or replacing candles after sunset. If nobody owns that task, half the room can look uneven by the first course.
  • Keep backup stock for wind-exposed areas. Outdoor candles rarely burn at the same pace across a full event.

The most polished candle styling in this region is not always the most elaborate. It is the plan that still looks composed once the wind changes, dinner runs late, and the room is full.

Your Wedding Candle Checklist and Timeline

By the time guests walk into dinner, candlelight should feel effortless. It only looks that way when the planning is done early, the quantities are realistic, and someone specific is responsible for lighting, checking, and clearing it.

Six to eight months before

Start with venue rules and access. Ask where open flame is allowed, whether every candle must be enclosed, and which areas are usually affected by wind after sunset. In Cape Town and the Winelands, that last question matters more than couples expect. A courtyard that feels calm at a site visit can become exposed once the temperature drops and the breeze shifts.

Set your styling direction at the same time. Decide whether candles are there to soften the room, frame key moments, or carry the whole atmosphere after dark. That choice affects everything from holder style to setup time.

Three to four months before

Map the candle plan by area, not just by item count.

Use practical zones:

  • Ceremony: aisle, signing table, altar, entrance
  • Reception: guest tables, main table, bar, cake table
  • Secondary spaces: bathrooms, lounge corners, pathways, welcome table

Then confirm the format. Buy candles if you want full control over colour and finish. Rent holders if you want flexibility, less storage, and fewer breakages to manage. For outdoor sections, a mixed plan often works best, with real flame in protected spots and LED candles where wind or venue rules make live flame unreliable.

The neatest installations are planned with purpose. Every candle should already have a place and a job.

One month before

Review quantities against your floor plan and your schedule. Careful analysis here often reveals over-ordering. A long imperial table needs a different rhythm of candlelight from round tables, and a late winter dinner needs more coverage than a midsummer reception that starts in daylight.

Confirm responsibilities in writing:

  • Who lights the candles
  • What time each zone is lit
  • Who replaces or relights candles outdoors
  • Who extinguishes everything at the end of the night

If any part of the wedding is outside, test one arrangement in real conditions if possible. I have seen beautiful taper groupings fail on a Stellenbosch lawn because the holders were too light and the flame too exposed.

In the final week

Pack and label by zone. Ceremony candles should be separate from reception candles, and outdoor spares should be easy to grab without opening every box. Include lighters, matches, cloths, drip trays if needed, and a printed lighting list for the setup team.

Edit the plan if timing is tight. A smaller candle scheme, lit properly and placed well, looks far better than an ambitious one rushed in the last twenty minutes.

On the day, place candles according to the floor plan, light them in sequence, and do one final check once guests are seated. That last walk-through catches the details that matter. A table left unlit, a lantern blown out at the entrance, wax drips on a linen runner.

If you're planning a wedding in Cape Town, Stellenbosch, Franschhoek, or Paarl and want the wider décor and lighting pieces around your candle styling to feel just as polished, ABC Hire can help with event furniture, LED options, and practical rental support that makes the whole setting work beautifully.

Guide to Champagne Ice Buckets for Cape Town Events

You're often down to the final version of the function sheet when this catches you. The menu is signed off. The floorplan works. Glassware counts are sorted. Then someone asks, “Are we putting champagne on tables, at the entrance, or both?” and suddenly champagne ice buckets stop being a small décor decision and become a service problem.

That's usually where events either look polished or start to feel improvised.

In Cape Town and the Winelands, that decision carries more weight than people expect. A bucket affects how quickly bottles come down to serving temperature, how much table space disappears, how many staff touch each bottle during service, and whether your reception reads as premium or patchy. At a summer wedding in Franschhoek, the wrong bucket setup can leave sparkling wine warming too fast between pours. At a corporate launch in the city, too many buckets on small cocktail tables can make the whole room feel cluttered before guests have even settled in.

The point isn't just to have buckets. It's to choose the right type, place them where service needs them, and order enough to support the way the event will run.

The Overlooked Detail That Defines Your Event

You see the pressure point early at a Cape Town summer reception. The sparkling wine is due on arrival, the terrace is already warm, and the venue team asks where the buckets are going. If that answer is vague, service starts slipping before the first proper pour.

Champagne ice buckets affect temperature control, staff movement, table spacing, and the overall read of the room. In the Winelands, where heat, sun and longer outdoor service windows are common, they need to be treated as working equipment with a styling role attached, not the other way around. I plan them the same way I plan glassware drops or back-of-house ice runs, because once guests arrive, there is very little time to correct a weak bucket setup.

A good bucket setup keeps bottles cold, reduces unnecessary handling, and stops staff from improvising with whatever spare vessel is nearest. It also protects the visual balance of the event. One oversized bucket on a small round can crowd candles, florals and bread plates faster than clients expect. If you are weighing options beyond champagne service, this guide to ice buckets and stands for event use is a useful reference point.

What goes wrong when this is treated as an afterthought

The failures are usually practical.

  • Service backs up when too few buckets are shared between too many tables or stations.
  • Tables lose usable space when the bucket footprint is larger than the layout allows.
  • Ice melts too quickly when the vessel is shallow, badly insulated, or placed in direct afternoon sun.
  • The hire bill creeps up when the fix happens late and the replacement stock does not match the original brief.

Guests may not identify the bucket as the problem, but they notice warm pours, wet tablecloths and staff reaching across them too often.

What good planning looks like

The bucket has to suit the event format first. At a seated wedding, that means leaving enough room for shared plates, décor and comfortable service access. At a product launch, the bucket may need to support the brand look while still being light enough for fast resets. At a matric dance or high-volume private function, durability often saves money because the equipment works harder during setup, service and strike than many clients realise.

When the choice is right, the room feels controlled. Bottles stay at serving temperature for longer, staff work cleanly, and the bucket adds to the table instead of fighting with it.

Choosing Your Buckets Material Style and Size

The wrong way to choose a bucket is by finish alone. The right way is to ask three questions first. Who will handle it, where will it sit, and how long does it need to perform before the next reset?

That narrows the field quickly.

Material decisions that affect the event

Stainless steel works well when service discipline matters. It suits formal dinners, black-tie receptions and premium corporate events because it reads clean and controlled. It also tends to feel more substantial in hand, which helps during tray or table service.

Acrylic is often the practical rental choice for busy events. It's lighter, easier to move in quantity, and less stressful in high-traffic venues where breakage is a real concern. Clear acrylic also disappears visually into many table designs, which can help when you want the bottle on show without adding visual heaviness.

Glass or crystal can look exceptional in the right room, especially under candlelight or in classic ballroom styling. But they demand calm service conditions. In outdoor Winelands settings, where staff may be moving between gravel, lawn, decking and uneven surfaces, the fragility can outweigh the elegance very quickly.

Copper and mixed-metal finishes work best when the styling brief is doing more of the talking. Rustic-luxe weddings, harvest-table aesthetics and branded experiences with warmer palettes can carry them well. The trade-off is maintenance. Fingerprints, water marks and finish wear show faster.

A comparison guide showcasing the features and benefits of stainless steel, acrylic, glass, and copper champagne buckets.

Why size and shape matter more than most people think

A bucket can be beautiful and still fail in service.

A commercially available clear plastic champagne bucket used for beverage service measures about 10.6 in (L) × 8 in (W) × 7.8 in (H) and holds 3.7 quarts, with built-in handles and a stable base designed to reduce spill risk during table service, according to this product specification for a plastic champagne bucket. In practical terms, that size works because it can take a standard 750 ml bottle plus ice without turning into a balancing act.

Practical rule: If the bucket can't comfortably take the bottle and enough ice-water around it, it's not a champagne bucket for event service. It's a prop.

Oval versus round

Oval buckets usually make more sense for table service. They sit neatly, present the bottle well, and often feel easier to carry because the handles fall into a more natural grip. Round buckets can work on bars and stations where symmetry matters more than footprint.

Deep buckets are better for chilling. Shallow buckets may look sleek in product photos, but they often force the bottle to sit too exposed above the ice line. In warm weather, that costs you consistency.

Matching bucket style to event type

A simple way to decide:

  • Formal wedding reception: stainless steel or refined clear acrylic
  • Outdoor vineyard wedding: acrylic or other durable break-resistant options
  • Corporate launch: modern acrylic, branded options, or minimal metal finishes
  • Matric dance or large private party: durable, easy-to-replace, easy-to-carry buckets
  • Styled table moment: use a bucket with a stand so the tabletop stays usable

If you're weighing table footprint against presentation, ice buckets and stands for event layouts are often the cleaner solution because they move the bucket off the eating surface without losing the visual cue of premium drinks service.

Calculating Capacity How Many Buckets You Need

A planner can get the glassware, linen and lighting right, then still lose the drinks service by under-ordering buckets. In Cape Town and the Winelands, that mistake shows up fast. Afternoon heat, dry air and long outdoor service windows warm bottles quickly, especially when the bar is under pressure.

Guest count helps, but bucket count comes from service flow.

Start with the bottle journey

Map where each bottle will be chilled, opened and held before you count a single unit. For most events, the pattern falls into three setups:

  1. Arrival service from a station or roaming team
  2. Table service where bottles remain with guests
  3. Self-serve or semi-self-serve points where guests return to a drinks station

Each setup creates a different demand on your stock. A welcome drinks station may show only a few buckets to guests, but staff still need chilled replacements ready behind the scenes. Table service uses more buckets in view because each active table needs its own cold-holding point.

Working ratios that planners can actually use

These ratios are planning tools, not fixed rules. They work well for keeping service tidy without spending money on units that add no value.

Service Style Recommended Ratio Notes
Welcome drinks station One bucket per active serving point Keep backup buckets off-floor so staff can swap quickly instead of rebuilding in front of guests.
Seated table service One bucket per table receiving sparkling wine service If only selected tables get bottles, count those tables only.
Self-serve bar or drinks point One bucket per bottle position guests can access at once Too many small buckets can make the area wet and messy. A larger cooling setup may be cleaner.
Bridal table or VIP zone Dedicated bucket for each featured bottle service point Presentation matters here, so do not rely on shared buckets.
Toast-only service Fewer visible buckets, with chilled reserve back-of-house Plan around timing rather than placing a bucket everywhere.

Local planning considerations

Warm-weather events need a rotation plan, not just a display plan. Bottles should be brought down to serving temperature before they reach the floor, and replacement bottles should already be in chilling buckets before the current round runs out. If you only count the buckets guests can see, service will stall.

I usually split the order into two groups. Visible buckets are placed on tables, bars or stations. Working buckets stay back-of-house for the next wave. That second group is what saves you at a Franschhoek wedding in summer, or at a Stellenbosch venue where the bar run from prep area to lawn is longer than it looked on the site visit.

If the venue has limited cold storage, add that into your numbers early. In many cases, mobile fridge hire for event drink service is cheaper than over-ordering buckets and burning through extra ice to compensate.

How I plan by event type

For a wedding, I separate ceremony, canapés and reception service. The same bucket rarely does all three jobs well unless the timeline is tight and the staff team is strong. Reception tables usually need their own allocation, while arrivals and photo-hour service can run from a smaller pool with quick resets.

For a corporate launch, fewer bucket points often look sharper. Central stations are easier to manage, easier to brand and less likely to clutter high-value guest areas. That also reduces the staff load, because one controlled drinks point is simpler than chasing half-finished bottles across the room.

For a matric dance or large private party, durability and speed matter more than finesse. Count for turnover, not styling. These events often have compressed setup times, and staff need buckets that can be filled, moved and reset without fuss.

Count buckets according to how many bottles must stay cold at the same time, not how many bottles you bought for the full event.

Common counting mistakes

A few planning errors come up again and again:

  • Counting by guest numbers alone instead of by service points and timing
  • Ignoring reset time between an empty bottle leaving and the next one arriving cold
  • Assigning a bucket to every table when only some tables are receiving bottle service
  • Forgetting back-of-house holding capacity during speeches, meal pacing and toasts
  • Underestimating weather exposure at outdoor venues where buckets lose chill faster than expected

A clean plan usually looks restrained. Enough buckets to keep bottles cold and service moving. Not so many that the room starts reading like a temporary bar.

The Art of the Chill Ice and Chilling Best Practices

A bucket full of dry ice cubes looks convincing, but it doesn't chill champagne as effectively as people think. The bottle only touches the ice at a few points. That slows the pull-down and creates uneven cooling.

The professional method is an ice-water slurry.

A common service approach is to fill the bucket about halfway with ice and add roughly 1 to 1.5 cups of water, because the water improves thermal contact around the bottle and cools it faster than dry ice alone, as explained in this demonstration of champagne chilling technique. The same reference notes that a well-managed slurry also helps maintain a more constant low temperature over service.

What staff should do before guests arrive

The best chilling plan starts before the first bottle is visible.

  1. Set buckets in place early so you're not styling around wet equipment later.
  2. Pre-chill the bucket briefly if possible, especially on hot days.
  3. Build the slurry close to service time so you don't waste ice before it starts working.
  4. Insert the bottle deep enough for the cold mix to do the job properly.
  5. Assign someone to top up during long service windows.

An infographic detailing five best practices for chilling champagne bottles in an ice bucket effectively.

What works in the Winelands and what doesn't

In Stellenbosch or Franschhoek summer conditions, sunlight and ambient heat punish lazy setup. Buckets placed in direct sun will burn through ice faster and leave staff chasing the problem all afternoon. Even in shaded spaces, warm airflow through marquees and open-sided venues can shorten your holding window.

What works is discipline:

  • Keep reserve bottles in proper cold storage
  • Use buckets for active service, not full stockholding
  • Top up little and often instead of waiting for total melt
  • Move buckets away from heat sources and sun patches as the light shifts

What doesn't work is filling every bucket too early, then hoping the ice holds.

Buckets versus cold storage

A bucket is not a substitute for refrigerated staging. It's a final-service tool. If the event has a long drinks period or staggered bottle release, pair your buckets with mobile fridge hire for event cold hold so replacement bottles arrive cold before they ever touch the floor.

A cold bottle in a good bucket stays guest-ready. A warm bottle dropped into a struggling bucket puts the whole service team on the back foot.

The small details that protect the guest experience

Wipe condensation from the exterior before service. Don't let labels disintegrate in dirty meltwater. Replace tired ice before speeches and toasts, not during them. And if you're working a premium room, train staff not to overfill the bucket so water sloshes onto linen when the bottle is lifted.

Guests don't talk about the slurry. They notice that their glass is cold, the pour is clean, and the bottle looks cared for.

Staging and Styling Buckets for Your Event

A champagne bucket earns its keep twice. First in temperature control. Then in how it contributes to the room. If you stage it well, it becomes part of the visual rhythm of the event rather than a necessary object someone forgot to hide.

That matters because the bucket carries a long hospitality history. Ice-bucket use goes back to the early 18th century, and champagne service became more standard through the 19th century, with global champagne production rising from 300,000 bottles a year in 1800 to 20 million by 1850, while Adolphe Jaquesson invented the muselet in 1844, according to this history of ice buckets and champagne service. In modern event terms, that's why a bucket still reads as ceremony, welcome and controlled service rather than just cold storage.

A champagne bottle cooling in a silver ice bucket on a table with flowers and votive candles.

Rustic Winelands wedding

At a vineyard wedding, the bucket should feel grounded in the setting. Polished silver can still work, but only if the rest of the table is formal enough to support it. Otherwise, simpler metal or clear buckets often sit more comfortably with textured linens, wooden tables and garden florals.

I prefer to group bucket styling with the table story. If the flowers are loose and seasonal, the bucket shouldn't look too sharp or futuristic. If the room is soft and natural, avoid finishes that reflect too aggressively in afternoon light.

Sleek corporate launch

Corporate events need more restraint. The bucket should support the brand environment, not compete with it.

That usually means cleaner lines, fewer visible units, and more intentional placement near bars, reception points or product reveal areas. Acrylic can work well here because it feels contemporary and keeps the bottle label visible. If the event includes formal pours, pair the setup with champagne coupe glasses for styled drinks service so the cold-holding equipment and the glassware speak the same design language.

Keep the bucket where the camera can justify it. If it lands in every background shot for no reason, it's in the wrong place.

Private parties and milestone celebrations

Birthdays and anniversary events can carry more personality. For such occasions, coloured acrylic, light-up options and bolder placement can work, especially for evening functions. The key is not to let novelty break service logic.

A bright bucket still needs stable placement, enough room for ice-water, and a clear path for guests or staff reaching in. If it glows beautifully but causes puddles on a narrow cocktail table, it hasn't done its job.

Placement choices that improve both look and function

Some setups consistently work better than others:

  • At the entrance bar: strong for welcome pours and first impressions
  • On stands beside feature tables: preserves dining space
  • At a dedicated bubbly station: useful when guests are expected to serve themselves
  • At the bridal or VIP table: creates a focal point without overloading the whole room

The best styling decisions don't separate beauty from practicality. They use the bucket to make service feel intentional.

Renting Champagne Buckets in Cape Town and the Winelands

A bucket that looked perfect on the styling board can become a nuisance by 4 pm in Franschhoek heat, or arrive at a farm venue with no plan for return packing after midnight. That is why rental usually suits event work in Cape Town and the Winelands better than buying.

The main advantage is operational, not sentimental. Planners need the right quantity, the right finish, and stock that arrives clean, matched, and ready for service. They also need a supplier setup that can cope with city hotels, estates with tight access windows, and venues where staff are striking while guests are still on the dance floor.

Why rental solves the real problems

A lot of advice about champagne buckets stays focused on appearance and basic chilling. However, the critical planning pressure sits elsewhere: quantity, replacement ice, loading space, breakage exposure, and whether the bucket choice still works once the wind picks up or the afternoon turns hot. As noted earlier in this localised look at bucket planning gaps, those are the questions that affect service quality more than the bucket itself.

In the Cape Town and Winelands market, transport matters. Collection timing matters. So does the admin around missing items, wet repacking, and next-day venue clearance. Rental reduces those headaches, especially for one-off weddings, launches, and school or corporate functions where nobody wants to store a stack of bulky buckets afterwards.

What to confirm before you book

Before approving the rental list, check the practical points that tend to cause problems on event day:

  • Is the bucket right for active service, or only for display
  • Will delivery and collection fit the venue's access times, especially outside central Cape Town
  • Are stands, glassware, tubs, or other chilled-service items needed as part of the same order
  • Who handles cleaning, drying, and repacking after the function
  • What is the process if guest numbers or the drinks plan changes late

One local option is ABC Hire, which offers event rental stock in Cape Town including ice buckets and related event equipment. That matters when the bucket is one line item inside a larger bar, staffing, and layout plan.

Buying still has a place

Ownership can make sense for venues with a repeat format and a fixed service standard. A permanent bar team with storage, cleaning capacity, and predictable stock counts may save money over time by buying.

For planners, private hosts, and teams running occasional events, rental keeps the decision flexible. You can choose stainless steel for a formal dinner, acrylic for poolside service, or larger formats for a cellar launch without being stuck with one style long after the brief has changed.

If you're planning a wedding, launch, matric dance or private celebration in Cape Town or the Winelands, ABC Hire can help you match champagne ice buckets to the actual service plan, not just the styling board. That means choosing the right quantity, material and supporting equipment so your sparkling wine service looks clean and runs smoothly on the day.

Cake Stand with Dome: Perfect Your Event Display

You're probably looking at a cake order, a venue layout, and a table plan all at once, and the dessert display is starting to feel less like a detail and more like a risk. The cake has to look polished in photos, survive transport, and still be presentable by the time guests see it. In Cape Town and the Winelands, that gets harder fast when the venue is outdoors, the setup window is tight, or the cake table ends up in a breezy tasting room doorway.

That's where a cake stand with dome earns its place. It isn't just decorative serveware. It's a display tool that gives the cake height, protects it during service, and helps the whole dessert station feel finished rather than improvised.

The Essential Role of a Cake Stand with Dome

By the time a cake reaches the venue, several things have already worked against it. It has travelled in traffic, sat through setup delays, and landed on a table that may be indoors, half outdoors, or right in a busy guest path. In Cape Town and the Winelands, that combination is common. The display has to do more than look good for five minutes.

A cake stand with dome gives the cake presence and cover at the same time. The stand raises it above the visual clutter of linen, menus, candles, and florals. The dome keeps the finish cleaner for longer while guests arrive, staff pass by, and the room warms up.

Why height changes the whole table

A cake placed flat on a crowded table disappears fast. I see this often at wine farm weddings where the décor is generous, the tables are long, and the cake itself is fairly modest in size. Once you add bottles, glassware, signage, and flowers, the cake needs some lift or it starts looking like an afterthought.

That extra height also helps in photographs. The cake reads as a focal point instead of another object on the table. For event planners, that matters because the cake table is rarely viewed in isolation. Guests see it from across the room, and photographers shoot it against whatever is happening behind it.

Height is not about formality. It is about visibility.

In local event work, that matters most at:

  • Wine farm weddings where textured décor and long tables can swallow a smaller cake
  • Corporate functions where desserts, branded elements, and gifting displays compete for attention
  • Private celebrations where the cake table needs to carry the styling without looking overdone

Practical rule: If guests are meant to notice the cake before it is cut, give it enough height to stand clear of the table dressing around it.

Why the dome earns its keep

The dome solves a different problem. It buys you time.

At many Winelands venues, the cake is styled well before service starts. The room might still be open to suppliers. Doors open and close. A breeze moves through a courtyard or tasting room. Insects find sugar quickly, especially in warmer months. A dome will not keep a cake cold, but it does protect the surface from dust, curious fingers, and the general traffic that comes with event setup.

That matters even more at venues with transport quirks. If a cake arrives after a drive over gravel roads or up a hill to a reception space, the last thing anyone wants is more handling than necessary. Put it in place, cover it, and leave it alone until service. That reduces fuss and lowers the chance of avoidable damage.

Used properly, a cake stand with dome does two jobs well. It improves how the cake reads in the room, and it protects the finish during the long stretch between delivery and cake cutting. For real event conditions around Cape Town, that is usually the difference between a display that still looks composed at showtime and one that already looks tired.

Anatomy of the Perfect Cake Display

Not every cake stand with dome performs the same way. Some are purely decorative. Others are stable enough for real event work, repeated handling, and transport over farm roads or up venue staircases. The difference usually comes down to fit, proportion, and materials.

A detailed infographic titled Anatomy of the Perfect Cake Display breaking down parts of a cake stand.

The stand does more than lift the cake

The stand has three working parts. The base carries the weight and resists tipping. The pedestal or stem creates height and changes the visual style. The plate or platform supports the cake board itself.

If any one of those is wrong, the whole setup feels off. A narrow base under a tall dome can look elegant in a product photo and become awkward on an uneven venue table. A platform that's barely larger than the cake board can also make slicing messier because there's no working room for service staff.

Here's how the parts behave in practice:

Part What it needs to do What goes wrong when it fails
Base Hold weight and keep the display planted Tipping, wobble, nervous handling
Stem Add height without making the piece top-heavy Visual imbalance and unstable lifting
Plate Support the cake board cleanly Overhang, awkward cutting, icing damage

The dome is a technical piece, not just a cover

The dome should seat properly on the stand. That sounds obvious, but many mixed sets often fail in this regard. Independent product specifications show that domes are normally designed for paired stand sizes such as 6-inch, 9-inch, or 11-inch formats, which is why near-fit combinations are a bad idea in service settings, as shown in these dome sizing examples.

If the rim fit is loose, the dome can shift sideways when guests lift and replace it. If it's too tight, staff end up forcing it into place. Neither works well at a formal event.

A matched set is easier to pack, safer to handle, and far less likely to look improvised on the table.

Material changes both look and handling

Glass remains the classic choice because it shows the cake clearly and suits formal tables. Metal-and-glass combinations can feel more architectural. Wood works when the setting is rustic, but only if the finish is refined enough for the rest of the tableware. Acrylic is practical for some functions because it's lighter, though it doesn't always give the same premium feel in close-up photography.

Proportion matters just as much as material. Example retail specifications show one typical glass dome stand at about 12.4 inches high by 12.9 inches wide, while another larger unit is listed at about 12.2 inches high by 17.7 inches high in the product record, illustrating how dome clearance changes with design and intended cake profile, according to these product dimensions.

For event work, the lesson is straightforward:

  • Higher dome: more room for florals, piping, toppers, and taller decoration
  • Wider heavier base: better stability when the dome is lifted repeatedly
  • Smaller footprint: easier on compact tables, but less forgiving on uneven surfaces

The best displays don't just look elegant. They stay calm under handling.

How to Choose Your Stand by Cake Event and Style

Selection starts with the cake itself. Not the theme board, not the linen sample, not the florist's brief. The cake's width, height, finish, and fragility decide the stand first. Everything else follows.

An infographic guide explaining how to choose a cake stand based on event, size, and aesthetic style.

Start with the cake, not the décor

A heavy buttercream cake needs a stable platform. A tall cake with fresh flowers or sculpted work needs vertical clearance. A neat single-tier cake can sit beautifully on a finer profile stand, but only if the stand still gives enough room around the base for neat service.

Three practical checks help:

  1. Board clearance
    The cake board should sit comfortably inside the display area without crowding the rim.

  2. Decoration height
    Toppers, florals, and piped edges need breathing room under the dome. Tight clearance almost always leads to last-minute decoration damage.

  3. Service access
    If staff need to remove the dome and cut quickly, they need hand space and plate space. A stand that looks delicate but leaves no room to work becomes a problem fast.

For cake makers who also decorate on a turntable, Monopack ltd's professional guide gives useful context on how stand type affects handling and finishing. It's aimed at cake work rather than event styling, but the handling principles carry over.

Match the stand to the event mood

Material and finish should support the room, not fight it. In the Winelands, rustic doesn't mean rough. Modern doesn't mean cold. The best pairings usually feel deliberate but restrained.

A simple guide works well:

  • Wine farm wedding: timber, soft neutral finishes, clear glass, and shapes that suit florals and candlelight
  • City corporate event: cleaner lines, polished metal, glass, or minimalist clear styling
  • Milestone celebration at home or a venue: something more personal, often warmer in tone and less formal than a wedding setup

If you're comparing natural finishes with refined table styling, this closer look at a wooden cake stand for event styling is useful for understanding where timber works best and where it can feel too heavy.

Think about climate and timing

A dome helps most when the cake needs to stand on display before cutting. Its main job in warm conditions is reducing airflow, which slows drying for cakes like sponge or buttercream. It doesn't refrigerate, but that airflow reduction helps preserve presentation quality during long events and can help reduce waste, as explained in this review of cake stand function and freshness.

That matters in Cape Town because many functions run through warm afternoons into evening service. A cake can look perfect at setup and tired by cutting time if it's left open to moving air.

Choose the stand for structure first, the dome for protection second, and the style third. That order prevents most hiring mistakes.

Styling Your Dessert Station for Maximum Impact

Guests notice the dessert table long before they walk up to it. At a wine farm venue, they often see it from across a lawn, through a tasting room, or under shifting afternoon light. If the cake stand with dome is going to carry the table, the rest of the station needs to support it without fighting for attention.

A beautifully decorated cake under a glass dome displayed alongside various pastries on a rustic wooden table.

Wedding tables need layers, not clutter

The strongest wedding setups in the Winelands use height with restraint. The cake should read as the centrepiece first, then the eye should move outward to smaller elements in a clear order. That usually means one dominant stand, two or three lower supporting pieces, and enough open table surface that the display still feels polished in photos.

Outdoor venues make this more practical than decorative. Wind catches loose signage, napkins, and lightweight florals. Uneven timber tables can also make a crowded dessert station feel messy fast. A dome helps the cake hold its presence, but styling needs to stay controlled around it.

A layout that works well is simple:

  • Romantic wedding look
    Clear glass dome, low florals, candles kept beneath cake height, and soft spacing between each item

  • Rustic refined setup
    Natural timber tones, neutral linen, restrained greenery, and pastries plated on low servers so the main stand stays dominant

  • Classic formal table
    Balanced placement, cleaner symmetry, polished finishes, and clear negative space around the cake

Natural textures can work beautifully here, but only if they do not make the table feel heavy. This guide to a wood display stand for event tables is useful if you want that warmer look without losing definition.

Corporate events need cleaner lines

Corporate dessert stations get judged hard in photographs. The cake often sits near branding walls, name cards, product displays, or registration points, so the stand has to fit the brief instead of looking like it came from a wedding store room.

In practice, cleaner styling works better. Fewer items. Tighter spacing. More discipline with finishes.

Event type Styling move that works What to avoid
Product launch One strong central cake with neatly grouped branded treats on lower platters Florals or props that pull attention away from the brand
Awards evening Glass or metallic stand with deliberate lighting and a tidy backdrop Too many finishes on one table
Office celebration Clear central display with easy access for guests and staff Positioning the dome where traffic will knock it

I also recommend checking sightlines before service starts. At Cape Town venues, dessert tables often get placed wherever there is spare room late in setup. That can leave the cake half-hidden behind an ice bucket, coffee station, or floral arrangement. A good-looking stand cannot fix bad placement.

Keep the tallest item central. Step the rest down in a clear visual order. If guests can understand the table in one glance and reach it without bumping the dome, the styling is doing its job.

Renting vs Buying a Cake Stand in Cape Town

For most events, the better question isn't whether a cake stand with dome looks good. It's whether it makes more sense to rent one or buy one. In Cape Town, the answer usually depends on frequency of use, storage space, and how much variety you need across different jobs.

An infographic comparing the pros and cons of renting versus buying a cake stand in Cape Town.

Renting suits most one-off events

If you're planning a wedding, milestone party, matric dance, or a once-off corporate function, renting is usually the practical option. You get the style you need for that specific brief without having to store a fragile dome afterwards or hope the same look works for the next event.

That matters more than people think. Large domes take up awkward shelf space, and glass pieces don't age well when they're packed badly or moved often between cupboards, garages, and venues.

Renting also makes sense because the category isn't disappearing or becoming irrelevant. One industry report valued the global cake stands market at US$1.53 billion in 2025 and projected it to reach US$2.43 billion by 2034, with a 5.2% CAGR, according to this cake stands market outlook. For local event suppliers, that points to presentation ware remaining a live category rather than a short-lived styling fad.

Buying makes sense for repeated use

Buying works better for a bakery showroom, a venue that hosts regular in-house celebrations, or a planner who repeatedly uses the same display language. Ownership gives control. The piece is always available, and you can build your styling kit around it.

But buying has trade-offs:

  • Storage becomes your problem when the dome is bulky or fragile
  • Cleaning standards stay with you after every event
  • Style flexibility drops if your purchased stand only suits one kind of brief

A glass dome can still be worth owning if you use it often enough. This practical look at a glass cake dome for events and display is useful if you're weighing the handling and presentation side of that decision.

The local reality

Cape Town events vary wildly. One weekend can include a polished city launch, a wedding on a Stellenbosch estate, and a family celebration in Paarl. Renting lets you choose to fit the brief each time rather than forcing one stand to work across all of them.

For occasional use, that flexibility usually beats ownership.

Event Day Logistics and Setup Checklist

A cake stand with dome can leave the storeroom looking perfect and still fail on the day if the handling is sloppy. Most problems happen during transport, unpacking, or rushed placement on site. That's especially true at Winelands venues where access roads, gravel parking, and remote setup zones add another layer of risk.

Before the stand leaves for the venue

Pack the stand and dome separately. Never transport them assembled. Even when the fit is excellent, movement in transit puts stress on the rim and increases the chance of chips, hairline cracks, or internal shifting.

Use this pre-departure checklist:

  • Clean the full set properly before packing, especially the inside of the dome where fingerprints and dust show immediately
  • Wrap the dome independently so it can't knock against the base
  • Check the handle or knob grip to make sure the lifting point feels secure and dry
  • Confirm the cake dimensions with the baker or coordinator so the dome clearance matches the final decoration

If the stand arrives before the cake, keep the dome wrapped until final placement. Open glass attracts fingerprints during setup.

What to check on site

Venue tables aren't always level. Farm tables can have a slight bow, linen can hide surface issues, and outdoor stations can shift once the ground settles or wind picks up.

When you place the stand, check these points in order:

  1. Surface stability
    Press lightly on the table edge and centre. If the table rocks, the stand needs to move.

  2. Guest traffic
    Keep the display away from bar queues, service doors, and child-height corners.

  3. Sun and heat
    Don't place the cake where direct afternoon sun will hit the dome and warm the display.

  4. Wind exposure
    Courtyards, verandas, and barn entrances can create steady airflow. A dome helps, but poor placement still causes problems.

Final setup before guests arrive

Once the cake is placed, lower the dome with both hands if it's a larger piece. Don't tilt it in from one side. Tilting increases the chance of catching florals, toppers, or piped borders.

Then do one last visual pass:

  • Check for smudges on the glass
  • Check the dome seat at the rim
  • Check nearby décor height so nothing competes with the cake
  • Check cutting access for the person removing the dome later

The most polished setups usually look calm because someone handled these small details early. That's what keeps the display elegant when the room fills up.

The Final Flourish for Your Memorable Event

A cake stand with dome does two jobs that matter equally. It gives the cake presence, and it gives the cake protection. That combination is what makes it more than a pretty extra on the table.

For Cape Town and Winelands events, the practical side matters as much as the styling. The right stand has to travel well, suit the venue, support the cake safely, and still hold its own in photographs. The dome has to fit properly, lift cleanly, and protect the finish without turning service into a fuss.

The strongest results usually come from simple decisions made well. Match the stand to the cake first. Choose a finish that suits the event rather than overpowering it. Think about setup conditions, not just the Pinterest version of the table. If it's a one-off event, renting often gives you the best balance of flexibility and polish.

When all of that lines up, the cake doesn't just sit on a table. It becomes part of the event atmosphere, which is exactly what a good display piece should do.


If you need reliable event-ready display pieces for weddings, corporate functions, or private celebrations in Cape Town and the Winelands, ABC Hire can help you choose the right option for the brief, the venue, and the practical demands of setup day.

Crystal Champagne Glasses: An Event Host’s Rental Guide

A lot of hosts arrive at the same point. The venue is booked, the menu is sorted, the Cap Classique is chosen, and then someone asks a deceptively simple question: what glasses are we using for the toast?

That choice seems small until the event is real. In Cape Town and the Winelands, glassware has to do more than look elegant on a styled table. It has to survive transport up a gravel drive, suit the service style, work in warm afternoon conditions, and fit the budget once breakage and collection are factored in. Crystal champagne glasses can enhance a celebration beautifully, but they aren't always the smartest option for every guest, every pour, or every venue.

The right answer depends on what matters most at your event. Sometimes that's visual impact for the main toast. Sometimes it's aroma and tasting quality during a food-led service. Sometimes it's reducing risk at a high-volume function where staff are moving fast and guests are standing. The best rental decisions usually come from balancing those priorities early, before the tablescape is locked in.

Setting the Scene for the Perfect Toast

A Stellenbosch wedding often looks effortless from the guest side. The light drops behind the mountains, speeches wrap up, servers move into position, and every place setting suddenly catches the last bit of gold from the sun. Then the toast starts, and all eyes go to the glasses.

A diverse group of friends celebrating with a toast holding crystal champagne glasses outdoors at sunset.

That moment is why many couples and planners ask for crystal champagne glasses rather than basic event stemware. Crystal catches light differently, photographs cleanly, and gives the table a sharper, more finished look. On a long harvest table in Franschhoek or a formal ballroom setting in town, it changes the mood immediately.

But the toast is only one part of the job. The glass has to suit the drink being poured, the way staff are serving, and how the event will move. A refined seated dinner with Cap Classique pairings needs a different approach from a rooftop launch where guests are circulating with canapés.

The best glassware choice is the one that still feels like the right choice once delivery, handling, service pace, and collection are added to the conversation.

Hosts usually start with style. Experienced planners start with use. If you're hiring for a Cape Town wedding, a corporate activation, a matric dance, or a milestone birthday, crystal can absolutely be worth it. You just want to know where it adds value, where it creates avoidable risk, and when standard glass is the more sensible call.

Why Choose Crystal Over Standard Glass

The difference between crystal and standard glass isn't only visual. In service, guests notice it through touch, temperature, aroma, and the overall sense that the drink has been presented with care.

What crystal changes in the drinking experience

For sparkling wine service, crystal can be drawn thinner than standard glass while retaining strength, which reduces rim thickness and improves sensory delivery. It lowers lip contact and helps concentrate aroma, while a narrow bowl profile slows CO₂ loss and preserves effervescence longer, according to this guide to different champagne glass types. That same source notes that the classic flute typically holds about 6 to 10 ounces.

A thinner rim matters more than many hosts expect. A heavy rim makes a drink feel blunt. A fine rim lets the pour feel cleaner and more deliberate. At a wedding toast, guests may not describe that difference out loud, but they register it.

Crystal also tends to look crisper on the table. In event photography, that means less visual heaviness around each place setting and a brighter sparkle when candles or sunset light hit the stems.

A comparison chart outlining the key differences between crystal glasses and standard glass for dining and drinking.

Why this matters in Cape Town conditions

At local events, heat is part of the planning brief. Stemmed champagne glass designs are intended to prevent hand heat from warming the wine, while shaped bowls funnel aromas toward the nose rather than letting them disperse, as outlined in this champagne glass overview. That's especially relevant at summer garden weddings, lawn ceremonies, and outdoor receptions where glasses are often in guests' hands for longer than planned.

Crystal champagne glasses earn their place. They aren't just prettier. They support the actual serving conditions.

A useful way to think about it is this:

  • For appearance: Crystal gives you more brilliance, finer lines, and a more premium table finish.
  • For feel: The finer rim makes the first sip more elegant.
  • For service quality: Stem and bowl design help preserve temperature and direct aroma.
  • For event positioning: Crystal signals intention. It tells guests this isn't a casual pour.

If you're comparing options for a broader wine service setup, this practical look at wine glasses and crystal is useful because it frames the decision as a service choice, not only a décor one.

Practical rule: Choose crystal when the glass is part of the guest experience. Choose standard glass when the glass is mainly there to get the drink from tray to hand with the least risk.

The Three Main Styles of Champagne Glass

Not every crystal champagne glass serves the same purpose. For event work, three styles come up repeatedly. Flute, coupe, and tulip. Each one solves a different problem.

Flute

The flute is the familiar tall, narrow option. It suits formal toasts, neat tray service, and events where you want guests to see a clean stream of bubbles rising through the pour.

Its shape is engineered around bubble retention. The tall, slender form reduces the liquid surface area exposed to air, which helps slow dissipation and keeps carbonation visible for longer. For speeches, arrival drinks, and classic wedding moments, that visual effect still matters.

Flutes work especially well when:

  • The toast is central: A coordinated raise of matching flutes always reads clearly in photographs.
  • Staff are tray-serving: The straight profile is easy to line up and present.
  • The pour is brief: Guests receive, toast, sip, and move on.

The drawback is aroma. If the bowl is too narrow, the wine doesn't open up much.

Coupe

The coupe is theatrical. It brings vintage glamour immediately, which is why themed events, black-tie birthdays, and champagne towers often lean in this direction.

The style has real history behind it. The crystal coupe debuted in Europe in the early 1830s and remained the dominant style for nearly 110 years, according to this history of champagne glasses. By the mid-19th century, Benjamin Disraeli described it as "a saucer of ground glass mounted on a pedestal of cut glass", which captures both the silhouette and the craftsmanship that made it distinctive.

What the coupe gives you:

  • Strong visual identity
  • Excellent fit for Art Deco, Gatsby, or old-Hollywood styling
  • A broad surface that shows cocktails beautifully

What it doesn't give you is control. The wide bowl lets carbonation go more quickly, and it's less practical for moving guests through a standing crowd.

If the event brief is “make it feel cinematic”, the coupe is often the right answer. If the brief is “protect the drink and keep service tidy”, it usually isn't.

Tulip

The tulip sits between the two. It has a fuller bowl than a flute and a narrower opening at the top, so it gives the wine more room to open while still guiding aroma upward.

For better sparkling wine service, that shape often makes the most sense when the drink itself matters. If you're pouring a quality Cap Classique with canapés or alongside a plated menu, the tulip tends to feel more considered than a narrow flute.

This is the glass I'd usually point to for guests who are expected to taste rather than toast.

Champagne Glass Styles at a Glance

Style Best For Ideal Event Theme Notes
Flute Formal toasts and tray service Classic weddings, awards evenings, polished corporate functions Prioritises bubble presentation and a clean, elegant silhouette
Coupe Visual impact and themed styling Gatsby parties, vintage receptions, statement cocktail service Looks striking but sacrifices practical control during busy service
Tulip Sparkling wine with food and slower appreciation Premium brand events, Winelands lunches, chef-led celebrations Better suited to aroma expression while still feeling refined

Matching the Glass to Your Cape Town Event

The right style becomes clearer once you stop asking which glass is best and start asking what the event needs the glass to do.

A diagram illustrating how to match different types of crystal champagne glasses to specific events in Cape Town.

Wedding toast first, tasting second

For a classic wedding in Stellenbosch, Paarl, or Franschhoek, the flute is still the safest fit when the key moment is the toast itself. It looks formal, reads well in photos, and keeps the presentation neat when glasses are preset or passed on trays before speeches.

That works particularly well when:

  • The sparkling pour is brief: welcome drink, speech, toast, done.
  • The room is highly styled: the vertical line of the flute complements structured table settings.
  • The planner wants consistency: one glass shape across all guest tables simplifies setup.

If, however, the couple has chosen a serious Cap Classique and built food pairings around it, the decision can shift. A narrower flute keeps bubbles, but it can also limit aroma release.

Food-led Winelands events need a different lens

For Cape Winelands lunches and dinners, aroma often matters more than spectacle. Independent guidance notes that flutes retain bubbles but can be too narrow to release aromas well, and for food-led events where Cap Classique is paired with cuisine, a glass that enhances aroma, like a tulip, can be more important to the guest experience than one that solely preserves carbonation, as explained in this practical discussion of whether champagne glasses make a difference.

That's why I'd match glasses like this:

  1. Ceremony toast at a formal wedding
    Use flutes. The event needs crisp presentation and smooth service.

  2. Chef-led estate lunch with paired sparkling wine
    Use tulips. Guests are smelling and tasting, not just clinking.

  3. Art Deco birthday or branded soirée with a theatrical bar
    Use coupes. The visual identity does more work than technical retention.

  4. Large mixed-format corporate event
    Split the service. Keep crystal flutes or tulips for VIP tables and standard stemware for high-traffic bar areas.

Matching the glass to the event usually saves money because you stop over-specifying every guest touchpoint.

When standard glass is the smarter move

Not every event benefits from all-crystal service. For a relaxed brunch, a daytime garden party with sparkling cocktails, or a campus formal where movement is constant, standard white wine glasses or standard flutes can be the better operational choice.

That doesn't mean the event looks cheap. It means the hire plan is aligned with reality. High-volume standing service, uneven outdoor surfaces, and quick reset pressure all increase the chance that delicate crystal becomes a liability instead of a feature.

The Rental Logistics Everyone Forgets

Crystal champagne glasses only work well when the logistics are as considered as the styling. This is the part hosts often leave until the final week, and it's where unnecessary costs usually appear.

A checklist infographic titled The Rental Logistics Everyone Forgets displaying six essential event planning rental considerations.

Fragility changes the whole rental equation

The same thin walls that make crystal attractive also make it more fragile. Independent glassware guidance highlights that this delicate construction increases risk compared with heavier glassware, which is why planners need to think about breakage, replacement exposure, and staffing before confirming quantities, as outlined in this champagne glass guide from Waterford.

That matters most at:

  • Outdoor receptions: uneven ground and mobile service trays create handling risk.
  • High-turnover functions: school formals, launches, and networking events move fast.
  • Remote venues: longer transport routes raise the stakes if packing is poor.

When you hire crystal, you're not only hiring the glasses. You're hiring a transport and handling system.

Questions worth asking before you sign

Rental contracts can look straightforward until there's damage after collection. Ask specific questions early, not by email at midnight the week of the event.

A good checklist includes:

  • What condition do the glasses arrive in: polished and rack-packed, or bulk packed?
  • How are they transported: specialised crates, glass racks, or general event tubs?
  • What is the breakage policy: replacement per item, waiver option, or assessed after count-back?
  • What is the cleaning policy: return dirty, rinse-ready, or fully washed?
  • Who is handling them on site: your caterer, venue staff, or hired bar team?

If the event includes ice-heavy drinks, welcome stations, or bottle service points, your cooling plan affects glass logistics too. This guide to choosing a large ice bucket is useful because poor beverage station planning often leads to rushed, messy glass handling later in service.

Rental problems rarely start with the glass itself. They start with unclear handoff points between supplier, venue, caterer, and collection crew.

Mixed-service setups often make the most sense

One of the most practical solutions is not all crystal or all standard. It's a combination.

Use crystal champagne glasses where guests will notice them most:

  • Head table settings
  • VIP lounges
  • The formal toast
  • Styled feature bars or tower displays

Use sturdier alternatives where the pressure is highest:

  • General standing reception zones
  • Outdoor lawn bars
  • Dance-floor adjacent service stations
  • Large guest-count activations

That approach protects the premium feel without pretending every service point has the same risk profile. It's often the difference between a polished event and an expensive clean-up exercise.

Styling Your Tablescape with Crystal Glasses

Glassware changes the table before a single drink is poured. The shape of the bowl, the length of the stem, and the amount of visual space around each setting all affect how formal, relaxed, modern, or romantic the room feels.

Three looks that work

A minimalist city wedding usually suits the flute best. Set alongside a crisp charger, clean folded napkin, and restrained florals, the flute adds height without cluttering the table. Its slim silhouette keeps the place setting sharp and architectural.

A vintage reception tells a different story. Coupes soften the line of the table and bring a little theatre even before service begins. Add candlelight, brass accents, and layered textures, and the glasses become part of the décor rather than an accessory to it.

For a Winelands lunch under trees or on a verandah, tulip glasses pair beautifully with natural linens, seasonal florals, and less rigid place settings. That shape feels polished but not stiff, which suits events that lean into food, conversation, and a slower pace.

Placement matters as much as the glass

Stemmed champagne glasses are designed to reduce hand heat on the bowl and guide aroma toward the nose, which means they need enough space to be lifted easily and used as intended. Crowding them into an over-styled place setting undermines both presentation and function.

A simple working rule is to keep sparkling glassware from fighting with centrepieces, charger edges, and clustered cutlery. If the guest has to reach past décor to pick up a glass, the table is too tight.

For planners shaping the broader look of a reception, this expert guide to event furniture hire is useful because glassware styling only lands well when the chairs, tables, and layout support the same design language. And if candlelight is part of the look, these glass candle holder ideas help tie reflective surfaces together without overloading the table.

Your Cape Town Crystal Rental Checklist

A good crystal hire decision is usually a sequence, not a guess. Start with the event goal, then narrow the glass style, then pressure-test the logistics.

Use this shortlist when speaking to a rental company:

  • Define the role of the glass: Is it mainly for a formal toast, a premium tasting experience, or visual styling?
  • Choose the style accordingly: flute for presentation, tulip for aroma-led service, coupe for theme and atmosphere.
  • Decide where crystal is necessary: every guest place setting, selected tables, or only key service moments.
  • Ask how the stock is packed and transported: crystal quality means very little if delivery handling is careless.
  • Clarify damage terms in writing: don't rely on assumptions about breakage, shortages, or post-event counts.
  • Check the cleaning return standard: this affects staffing, pack-down speed, and venue close-out.
  • Match the glass to the service team: delicate stemware needs competent bar and floor staff.
  • Plan around venue realities: stairs, gravel, wind, lawn service, and long collection windows all matter.

One supplier option in Cape Town is ABC Hire, which offers event rental stock across the region and is relevant if you're coordinating furniture and accessories alongside glassware. The key point is to choose any supplier the same way. Ask precise questions, request clear handling terms, and make sure the glassware plan suits the event you're running, not the one in the mood board.

The smartest hosts don't rent crystal because it sounds premium. They rent it where it adds something visible, tactile, and useful. Everywhere else, they stay practical.


If you're planning a wedding, launch, private celebration, or formal function in Cape Town or the Winelands, ABC Hire can help you coordinate the rental details around your event setup. Use the checklist above when you enquire so you can compare styles, quantities, handling terms, and service needs with confidence.

Choosing Your Large Ice Bucket for Cape Town Events 2026

Warm drinks ruin good events faster than almost any décor mistake. You can recover from a late floral install. You can recover from a missing candle or a crooked seating chart. You can't recover gracefully when guests walk up to the bar, grab a bottle, and realise it's barely chilled.

That's why a large ice bucket isn't a styling extra. In Cape Town, it's part of your service infrastructure. If you're dealing with a Winelands wedding, a rooftop launch in the city, or a private party with full sun and patchy shade, your beverage setup has to work under pressure, not just look polished in supplier photos.

Planners often leave this decision too late. They focus on glassware, bar menus, staffing, and layout, then treat ice buckets as filler stock. That's backwards. If drinks aren't kept at service temperature, the whole bar operation starts slipping. Timing gets messy, staff start improvising, and guests notice.

Good planning fixes that early. If you're tightening your run sheet and service flow, this practical resource on steps for planning corporate events is useful because it forces the same discipline you need for beverage staging, staffing, and backup equipment.

Keeping Your Cool The Event Planner's Essential Introduction

A large ice bucket earns its place when refrigeration can't do the whole job on site. That's common in Cape Town. Venues look beautiful but don't always give you ideal back-of-house access, enough cold storage, or short service distances. Beach properties, estates, schools, and private homes all come with constraints.

The job of the bucket is simple. Hold temperature at the point of service. Not in the kitchen. Not in a prep room. Where guests are being served.

Why this matters in the Western Cape

Cape Town events put pressure on cold service in very specific ways.

  • Outdoor exposure: Sun, warm air, and wind all speed up service problems.
  • Long distances: The bar may be far from the catering prep zone or fridge bank.
  • Intermittent demand: Guests often arrive in waves, which means chilling needs spike hard, then settle, then spike again.
  • Visual standards: Weddings and launches need beverage service to look intentional, not improvised.

If you only rely on fridges, staff spend the event running stock back and forth. That wastes labour and slows service. A proper large ice bucket turns one service point into a controlled cold station.

Practical rule: Use the bucket to reduce bar movement, not to replace all refrigeration.

It's not just a container

South Africa's modern hospitality setup sits on a long shift from old-fashioned ice storage to widespread refrigeration. A refrigeration history source notes that mechanical refrigeration became widespread in the early 20th century, and that plastics-based coolers and ice containers became common in the 1950s, with many portable coolers later shifting to polypropylene and expanded polystyrene because they're insulated and low cost (history of refrigeration and cooler materials). That matters because modern event equipment in the local market favours lightweight, insulated designs over heavy metal-only pieces.

That's the lens you should use for every decision in this article. Don't ask, “Does this bucket look premium?” Ask, “Will this bucket help my team keep drinks cold, move fast, and maintain a clean setup?”

If the answer is no, it doesn't belong on your event floor.

Choosing Your Vessel Materials and Insulation Explained

Material choice affects three things immediately. How long the ice lasts, how awkward the unit is to move, and whether the setup still looks controlled halfway through service.

Cape Town planners often get this wrong at quote stage. They approve a bucket that looks good in a catalogue, then discover on load-in day that it is heavy, slippery when wet, awkward to stack in transport, or useless once the wind picks up at an outdoor venue. Choose for service conditions first. Finish comes after that.

An infographic titled Choosing Your Vessel comparing materials like stainless steel, plastic, acrylic, and wood, plus insulation types.

What the materials actually do

Stainless steel is the best hire choice for formal events and longer service windows. It handles repeated use well, cleans up properly, and looks right on a serious bar. The drawback is obvious. It is heavier, louder in transport, and more expensive to replace if staff dent it during strike.

Acrylic is useful where guests need to see stock fast. That makes it practical for casual bars, launches, and self-serve points. It is lighter than steel, but it scratches, clouds over time, and looks tired quickly if the hire fleet is not maintained.

Basic plastic earns its place on busy jobs. It is lighter, cheaper, and easier for crews to carry in volume. For back-bar chilling, school functions, sports events, and support stations, it often makes more sense than paying premium rates for a prettier finish.

Decorative metal tubs and timber-wrapped options are styling pieces first. Use them only if you have confirmed the lining, drainage, and insulation. If not, they sweat badly and burn through ice.

Food-grade plastics also matter if you are sourcing utility stock for prep areas or beverage support. If you are comparing polymer options, these 10 gallon HDPE food buckets give a useful reference point for the kind of material commonly chosen when durability, washability, and cost matter more than presentation.

Insulation is what saves your service

Insulation and lid design decide whether a bucket performs for an hour or for a full service cycle. Double-wall builds hold temperature better. Lids slow warm air exposure. Rubber bases help on slick floors and bar counters that get wet early in service.

One insulated stainless steel unit on the market shows the principle clearly. It is sold with a floating lid and rubber base, and the product spec focuses on bottle capacity plus heat control rather than looks alone (7 L insulated bucket specification).

That is the right way to assess any large ice bucket. Ask how it handles heat gain, condensation, grip, and refill speed. If you also need backup cooling nearby, match the bucket plan with the right bar fridge size for event service so staff are not crossing the venue every time stock runs low.

What to choose in real event conditions

Use this comparison before you sign off on hire quantities:

Material or Build Best use Main trade-off
Insulated stainless steel Formal service, outdoor weddings, premium bars Heavier and usually pricier
Acrylic Self-serve stations, casual parties, display-focused setups Scratches and can feel less durable
Basic plastic High-volume utility use, back bar support, school functions Less visual impact
Decorative metal tub Rustic or themed styling Often weak at temperature control

My recommendation

For seated service, brand launches, and any event where bottles need to stay cold without constant staff intervention, hire insulated stainless steel with a lid.

For fast turnover, lighter transport loads, and self-serve setups, use acrylic or plastic and accept that function matters more than polish.

Do not pay for a material that creates extra labour. If the bucket is hard to carry, hard to reset, or quick to lose temperature, it is the wrong vessel for the job.

Capacity Planning How Big is Big Enough

A common mistake is asking the wrong question first. They ask how many bottles fit. You should ask how many people need cold drinks from this station before staff can reset it.

That's how professionals size a large ice bucket.

A practical guide to bucket selection makes the key point clearly. Choose by guest throughput, not just bottle count, because an ice bucket is a point-of-service temperature-control vessel. One bucket suits a small table or bar station, while larger beverage tubs make more sense when many bottles need chilling at once in high-traffic service (guide to choosing the best ice buckets).

Start with the service style

A seated dinner needs something different from a launch party.

If bottles are being opened and poured by staff, a large ice bucket can support a focused service point very well. If guests are grabbing drinks themselves in waves, the bucket may become a bottleneck. In that case, you need multiple stations or a switch to larger tubs.

Use this sequence:

  1. Map the bar points: Count every place guests can reasonably collect drinks.
  2. Decide who's serving: Staffed bars can work with fewer, better buckets. Self-serve setups need wider access.
  3. Match bucket type to traffic: Small focused station equals bucket. Broad high-volume station equals tub.
  4. Check cold backup: If the event already has solid fridge support, buckets can stay on the floor longer without chaos. This guide to choosing the right bar fridge size helps when you're balancing front-of-house chilling with back-of-house storage.

Ice Bucket Capacity Quick Guide

Bucket Size (Litres) Approx. Bottle Capacity Best For
7 L Roughly 3 to 4 wine or champagne bottles, or 6 to 8 beer bottles Small table service, focused bar point, VIP section
Large tub format Qualitatively suited to many bottles at once Self-serve bars, welcome drinks, busy outdoor stations

The 7 L benchmark is useful because it's already marketed for party service, but don't stretch it into a whole-event solution. It's a station tool, not a storage strategy.

Where planners get sizing wrong

They under-spec for movement. Guests don't drink in a neat pattern. They cluster.

A wedding drinks table after the ceremony is different from the same crowd during dinner. A matric dance has bursts. A product launch has dead periods and then a rush when speeches finish.

That's why I prefer to think in zones:

  • Low-demand zone: One bucket can work neatly.
  • Moderate-demand zone: Use more than one point of service so guests don't crowd one vessel.
  • High-demand zone: Move to tubs and fridge support.

If you're comparing utility containers for prep, transport, or non-display holding, it's worth understanding heavier-duty formats like 10 gallon HDPE food buckets. They're not event-facing styling pieces, but they help planners think more clearly about food-safe storage, load handling, and operational separation behind the scenes.

Don't force one attractive bucket to do the work of a proper beverage system.

Strategic Use Cases for Your Cape Town Event

The right large ice bucket changes with the event type. This isn't about taste alone. It's about where guests stand, how they move, and whether the vessel supports the mood instead of interrupting it.

A social gathering in Cape Town with champagne bottles chilling in a large ice bucket overlooking mountains.

Winelands wedding

At a Stellenbosch or Franschhoek wedding, I'd use insulated buckets for elegant bottle service and reserve bigger tubs for back-up chilling out of sight. The front-of-house requirement is simple. It must look refined and hold temperature without puddling onto linen or timber bars.

Place buckets where they support service rhythm:

  • beside the couple's table
  • at the welcome drinks point
  • on satellite wine service stations near long guest tables

A generic tub at a luxury wedding immediately drags the look down. If the bar is polished, the cold service must match.

City Bowl product launch

For a corporate launch, function beats romance. Guests move constantly, brand teams need clean photos, and staff can't fight through crowds every few minutes to restock.

Use a bar layout that creates obvious pickup points. One bucket can anchor a tasting or premium pour area, while larger high-volume chilling sits behind or beside the main activation. If the event includes a staffed drinks focal point, this guide to mobile bar service options is useful because service layout and chilling strategy should be planned together, not separately.

Clifton beach house or private milestone party

Planners often underdo the equipment. They assume a relaxed party needs relaxed logistics. It doesn't. Private venues often have awkward kitchens, stairs, limited fridge space, and service areas split across decks and living rooms.

For this format, I'd choose lightweight vessels that are easy to carry and reposition. Put one near the primary social cluster, another near food, and keep reserve stock chilled elsewhere. If the event runs into sunset and guests spread out, fixed central service starts failing fast.

The best bucket setup is the one guests barely notice because drinks stay cold and access feels effortless.

Renting vs Buying The Smart Pro's Calculation

Buying looks cheaper when you only compare the item price. That's amateur math. Real event maths starts after the event ends.

A large ice bucket only makes sense to own if you can store it, transport it safely, clean it properly, dry it fully, and get it ready again without slowing your next job. If you can't do that consistently, buying creates admin, not value.

A comparison infographic showing the pros and cons of renting versus buying event equipment like ice buckets.

What ownership really includes

For South African rental businesses, the overlooked issue isn't the purchase price. It's operational efficiency. The primary test is stackability for transport, durability, and how quickly the item can be cleaned and turned around for another hire (event equipment logistics perspective).

That's exactly how planners should think too.

Buying means you take on:

  • Storage pressure: Bulky equipment eats shelf and vehicle space.
  • Cleaning responsibility: Wet gear can't just be packed away and forgotten.
  • Breakage risk: Cheap acrylic cracks. Decorative finishes mark.
  • Transport inefficiency: Beautiful pieces that don't stack well become a delivery headache.
  • Style lock-in: What suited one client may look wrong at the next event.

When renting makes more sense

Renting is the better call when your events vary a lot in style, scale, or venue type. It also makes sense when the bucket is a visible styling item, because you can match the look to the job instead of forcing one owned set onto every brief.

Here's the clean decision rule:

Situation Better choice
One-off event or occasional private hosting Rent
Different event styles across the year Rent
Tight storage and transport capacity Rent
Repeated use of the same format in-house Possibly buy
Strong internal cleaning and warehousing systems Possibly buy

My blunt view

Most planners should rent the visible stock and only buy utility stock.

Own the things that stay in the back, get used constantly, and don't need to impress anybody. Rent the pieces that clients see, photograph, and judge. That includes many large ice bucket options, especially premium insulated designs.

Buy if the item fits your operations. Rent if the item only fits your mood board.

If you run a venue with repeat bar layouts and reliable storage, ownership can work. If you're a planner moving across estates, homes, schools, and corporate spaces, flexibility wins almost every time.

Staging and Styling for Maximum Impact

A large ice bucket should help the room read better. It should support movement, reinforce the event style, and keep the service area from looking like an afterthought.

That's why placement matters as much as product choice.

A large hammered silver ice bucket filled with ice and several chilled wine bottles at a party.

Place it where guests already pause

Don't hide the bucket in a dead corner and expect it to work. Put it where guests naturally slow down:

  • At an arrival drinks point
  • Near a lounge cluster
  • At the edge of a buffet or grazing setup
  • Beside a secondary bar where queues tend to build

The bucket should be easy to reach without blocking circulation. If guests have to bend awkwardly, squeeze between chairs, or interrupt table service, the setup is wrong.

Match the vessel to the visual language

The old West Bend Penguin Hot & Cold Server proves a useful point. It was sold from the 1940s to the 1970s, reached its heyday in the 1950s and early 1960s, had a two-quart capacity, and was designed as both an insulated practical server and a statement piece. It could keep contents cold for 5 to 6 hours or hot for 1 to 2 hours, thanks to an insulated inner container that didn't touch the outer shell (history of the Penguin server). Good serviceware has always done both jobs. Function and style can live together.

That still applies now.

  • Sleek metal suits formal dinners and luxury weddings.
  • Clear acrylic works for modern activations where product visibility matters.
  • Rustic finishes suit farm venues, but only if they still perform operationally.
  • Branded events can go further with details like custom cubes or logo-led presentation. If that's part of your brief, this guide for brand managers on custom ice is worth reviewing because branded beverage presentation only works when the service setup around it is equally disciplined.

Day-of checklist that actually helps

Use this on event day:

  1. Pre-position tongs or scoops: Guests and staff shouldn't dig by hand.
  2. Assign ownership: One staff member must own refills and wipe-downs.
  3. Protect surfaces: Even a good setup needs moisture control underneath.
  4. Separate display from reserve: Don't overload the visible bucket with backup stock.
  5. Check sightlines: Buckets should support the table design, not block florals, menus, or guest conversation.

A well-staged bucket looks effortless because someone planned it properly.

Essential Ice Bucket FAQs for Event Planners

Should I use a large ice bucket or a tub

Use a large ice bucket when you want temperature control at a specific service point. Use a tub when the event needs broad self-serve access and many bottles chilled at the same time. If you're deciding between standalone vessels and more formal presentation setups, these notes on ice buckets and stands for events help clarify when elevation and structure improve service.

Do I really need a lid

If the bucket is outdoors or the service window is long, yes. A lid helps control heat gain and keeps the station neater. It also reduces the visual mess of half-melted exposed ice.

Can I use a large ice bucket instead of fridge support

No. Use it as a front-of-house cold station, not your whole cooling system. Fridges handle reserve stock. Buckets support active service.

What about cleaning after the event

Clean immediately. Dry thoroughly before storing. If you leave moisture sitting in seams, lids, handles, or bases, the item becomes unpleasant fast and harder to turn around for the next job. This matters even more if you own stock.

How do I stop the station looking wet and messy

Choose insulated units when appearance matters, avoid overfilling, and keep one cloth dedicated to the station. Refill little and often instead of letting the bucket collapse into meltwater.

Is a premium insulated bucket worth it

Yes, when the bucket is visible, the event is outdoors, or the service period is long. No, when you only need short-run chilling for a casual self-serve setup and function matters more than finish.


If you're planning an event in Cape Town and need ice buckets, bars, furniture, or practical hire advice that reflects local event conditions, ABC Hire is a solid place to start. Their range covers weddings, corporate functions, private parties, and venue setups across Cape Town and the Winelands, which makes it easier to build a beverage service plan that looks sharp and works properly on the day.

Stunning Round Table Linens for Cape Town Events

You're often standing in an empty venue when the hardest styling decisions happen. The tables are in place, the light is doing something beautiful through the windows, and yet the room still feels unfinished. At that point, many people focus on flowers first, or candles, or charger plates. In practice, the round table linens usually decide whether the room reads polished, relaxed, formal, modern, or slightly off.

That matters more in Cape Town than people expect. A vineyard venue in Stellenbosch, a glass-fronted hotel ballroom in the city, and a lawn reception in Franschhoek all ask different things of the same table. Generic linen advice doesn't help much when the wind picks up, when suppliers use mixed table sizes, or when your event needs to look premium in photographs from every angle.

The Foundation of Your Event's Style

A round table without linen looks like furniture. A round table with the right linen looks like part of the event design.

That's the difference couples and planners notice during a site visit, even if they don't say it in those exact words. In a Cape Town hotel, a smooth full cloth can make the room feel clean and architectural. In a Winelands venue, a softer drape can make timber, stone and glass feel warmer. The linen becomes the base layer that everything else sits on, from candles to cutlery to florals.

Why linen still signals quality

There's a reason table linen still carries such visual weight. Historically, tablecloths were tied to status in European dining culture, and in medieval Europe the whitest linen signalled the highest rank because keeping cloth bright white required serious labour before modern washing methods, as noted in this history of the tablecloth. That legacy still shows up in South African event culture. In Cape Town and the Winelands, a properly dressed round table still reads as premium service.

That doesn't mean every event needs white. It means linen still communicates standard, intention and finish before a guest sits down.

Practical rule: If you want guests to feel that an event is elevated, don't treat the linen as a background item. Treat it as the visual floor of the room.

The tablecloth is the canvas

In real event work, the cloth usually decides how all the smaller details behave. Metallic cutlery feels sharper on matte neutrals. Glassware pops more on darker tones. Florals either float or fight, depending on the base colour under them.

If you're refining your place setting as well, ideas around incorporating gold charger plates in your wedding can help you think through how metallic accents sit against linen colour and texture. That combination often makes the difference between a table that looks assembled and one that looks designed.

What works in Cape Town venues

A few patterns show up again and again:

  • Classic estates: Crisp neutrals and controlled drape usually work better than overly shiny finishes.
  • Urban launches: Stronger contrast, darker cloths, or textured fabrics can hold their own against modern interiors.
  • Private celebrations: Softer tones often make a room feel less hired-in and more considered.

The key isn't choosing the most dramatic cloth. It's choosing the one that gives the rest of your styling somewhere solid to land.

Perfecting the Fit How to Measure for Round Tables

The fastest way to make an expensive setup look wrong is poor fit. Too short, and the table feels underdressed. Too long, and guests catch it with chairs, heels or bags.

The sizing method itself is simple. Use this formula:

Table diameter + (desired drop x 2)

That gives you the required linen size.

Start with the drop, not the cloth size

Many hosts ask, “Do I need a 90-inch or 108-inch round?” The better question is, “How far do I want the cloth to fall?”

The drop is the amount of fabric hanging from the table edge. That one choice affects the look, guest comfort, setup speed and safety.

For a typical 60-inch round table that's roughly 30 inches high, a 90-inch cloth gives a formal 15-inch drop, and 90-inch to 102-inch round cloths are used on about 78% of premium wedding bookings in the region, according to this linen sizing guide. The same source notes that a 120-inch cloth on a 30-inch table can pool heavily on the floor, which is especially problematic at outdoor Winelands venues.

A quick guide you can actually use

Here's a practical reference for 76 cm/30-inch high tables.

Round Table Linen Sizing Guide (for 76cm/30" High Tables) Lap Drop (30cm) Full Drop (76cm)
76cm table / small round 136cm cloth 228cm cloth
90cm table / small round 150cm cloth 242cm cloth
120cm table / 4 to 6 guests 180cm cloth 272cm cloth
152cm table / 8 to 10 guests 212cm cloth 304cm cloth
183cm table / larger round 243cm cloth 335cm cloth

For smaller dining setups, this guide to a small round table is useful when you're matching linen proportions to compact floorplans and tighter guest counts.

Which drop suits which event

A lap-length or half-drop often makes more sense than people think.

  1. Outdoor receptions
    Shorter drops are easier to manage in wind and high foot-traffic areas. They also reduce the chance of guests stepping on the cloth when tables are tightly spaced.

  2. Formal seated dinners
    A longer, cleaner drop gives a more finished look, especially in venues with polished flooring, chandeliers or strong symmetry.

  3. Brand activations and networking events
    Movement matters more than drape. If people will be circulating constantly, a practical drop usually wins.

If guests will move chairs in and out repeatedly, test the linen with a real chair before sign-off. The chair tells you more than the measuring tape does.

The mistake to avoid

The common error isn't measuring badly. It's choosing by appearance in isolation. A cloth can look luxurious in a sample room and become a nuisance the moment service starts.

What works is simple. Measure the actual table. Decide the drop based on venue conditions. Then check the result with chairs, foot traffic and weather in mind. That's how round table linens look intentional instead of improvised.

Choosing Your Fabric and Colour Palette

Fabric choice changes how a table behaves, not just how it looks. In Cape Town, that matters because the same event can begin in still air and end with a breeze pushing through an open venue.

A person with elegant jewelry arranging colorful fabric circles on a dark tabletop surface.

Most generic guides stop at colour and drop. That misses the practical side. For South African events, linen choice needs to balance elegance with local conditions, especially the Western Cape's weather volatility and growing sustainability awareness, as discussed in this piece on weather-resistant and sustainable event planning angles.

What different fabrics do in the real world

Not every fabric earns its place at every event.

  • Polyester blends work hard. They're generally easier to manage, hold colour well, and suit events where setup speed and repeated handling matter.
  • Cotton-rich options can feel softer and more natural, but they usually ask for more care to keep them looking crisp.
  • Satin and high-sheen finishes catch light dramatically. In evening venues, that can look glamorous. In harsh daylight, it can sometimes feel too reflective.
  • Velvet or crushed textures add depth fast, especially in winter functions or moody indoor rooms, but they can feel heavy if the rest of the table styling is already visually busy.

Matching fabric to venue conditions

The easiest way to choose is to think about pressure points.

Outdoor settings

A heavier cloth is often more stable on exposed terraces, lawns and wine farm courtyards. Lightweight fabric may move too much, especially when guests stand, sit or brush past.

Fast-turnaround events

Corporate functions, school formals and multi-phase celebrations usually benefit from fabrics that recover well after transport and handling. A material that looks good only when perfectly steamed can create unnecessary stress.

Sustainability-minded planning

Reusable linen has clear practical value when the same event infrastructure moves through multiple hires. The trade-off is maintenance. Some fabrics wash and press more easily than others, so durability and laundering demand should be part of the decision, not an afterthought.

The smartest fabric is the one that still looks right after delivery, setup, guest use and pack-down.

Building a colour palette for Cape Town venues

Colour isn't only about trend. It's about what the venue already gives you.

A few dependable pairings:

  • Wine estates and farm venues: warm neutrals, soft stone, muted green, dusty tones
  • City hotels and modern venues: black, charcoal, crisp white, deep navy, metallic accents
  • Coastal or summer events: sand, pale blue, sage, off-white, restrained texture
  • Matric dances and formal evenings: richer jewel tones or contrast combinations with stronger lighting response

If you're exploring layered colour combinations and pattern relationships, these artisan blanket design ideas are surprisingly useful for thinking through balance, contrast and warmth in event styling too.

The best palette usually has one quiet base, one supporting tone and one accent. If every element tries to lead, the table gets noisy. If the base cloth does its job well, the rest of the styling can breathe.

Advanced Styling with Linens

Once the base cloth is right, styling gets interesting. At this point, round table linens stop being a practical item and start doing design work.

A guide illustrating five advanced styling techniques for decorative table linens including layering, runners, and drapes.

The trick is restraint. A layered table should look considered, not crowded. In mixed-format Cape Town events, that becomes even more important because many layouts include different table sizes, tighter footprints, or unusual room shapes. Most guides assume standard rounds, but planners often need more operational guidance for irregular setups, as highlighted in this discussion of linen decisions for mixed inventories and venue constraints.

Five styling moves that hold up on event day

Overlay layering

An overlay can add depth without changing the whole cloth inventory. This works well when the base linen is neutral and you want a secondary tone on selected tables such as a cake table, registration point or VIP area.

Runners with purpose

Runners are most effective when they create direction. On a round table, they can frame a low centrepiece, separate candle groupings, or introduce texture where the main cloth is plain.

Napkins as the accent

If the room already has strong architecture, use the cloth as the anchor and let napkins carry the colour accent. That often feels cleaner than adding another full textile layer.

Texture contrast

Pairing a matte base with a more tactile element usually works better than combining several glossy surfaces. For example, a soft woven runner over a smooth cloth can add detail without glare.

Controlled drape

A dramatic drop can be beautiful, but only where circulation allows it. On sweetheart tables or display tables, extra drape can look generous. In compact guest seating, it quickly becomes impractical.

Good styling solves a room. It doesn't just decorate a table.

Handling mixed table sizes without visual chaos

Experienced planners save an event in this scenario. If one supplier sends smaller rounds and another sends larger ones, using identical linen sizes can make the room look inconsistent very quickly.

A better approach is to build consistency through these elements:

  • Keep the base colour constant across all guest tables.
  • Vary only the drop intentionally where layout demands it.
  • Repeat one texture or accent tone so the eye reads the room as connected.
  • Use feature tables strategically so visual emphasis goes where you want it.

For additional tabletop styling ideas that pair well with linen decisions, these woven table mats are useful when you want to define place settings without overloading the table.

Styling examples that work

A black base cloth with a metallic or sequin runner can suit a matric dance or evening gala. White or soft ivory with a natural-texture runner can suit a farm wedding. A muted neutral cloth with precise napkin colour can sharpen a corporate dinner without making it feel wedding-like.

The room doesn't need more elements. It needs the right relationship between the elements already there.

Renting vs Buying Your Linens

Buying sounds sensible until you deal with volume, storage, stain management and colour consistency. For most once-off or occasional events, renting is the more practical route.

That isn't just a modern convenience. The broader history of table linen points in the same direction. Textile production became more accessible during the 18th and 19th centuries, and modern rental continues that shift by giving planners access to coordinated linen packages without needing to own everything, as noted in this brief history of table linens.

Two neat stacks of colorful round table linens placed side by side against a dark background.

When buying makes sense

Buying can work if you host the same style of event repeatedly and control your venue conditions closely. A restaurant group, venue operator or event business with stable inventory needs may prefer ownership for standard white or neutral basics.

Even then, ownership only pays off if you can manage:

  • Storage conditions that keep cloth clean and dry
  • Laundry and pressing
  • Replacement planning for stains, tears and fading
  • Accurate quantity control across event dates

Why renting is usually easier

For weddings, milestone functions, school events and most corporate bookings, renting removes the least glamorous parts of linen management.

You gain flexibility on colour, quantity and size without carrying long-term responsibility for the stock. That matters when guest numbers change, layouts shift, or a planner wants to refine the look closer to the date.

A few practical advantages stand out:

  • Variety without commitment
    You can match linen to the venue and mood instead of forcing one owned stock range onto every event.

  • No post-event laundry problem
    After a full event, the last thing most hosts need is fabric recovery logistics.

  • Better fit for mixed requirements
    One event may need guest table cloths, cake table linen, buffet draping and cocktail table covers in different proportions.

  • Cleaner coordination
    A rental partner can often align tables, seating and linen choices more efficiently than separate suppliers working in isolation.

If you're comparing options, this guide to table cloth hire gives a useful overview of what to ask before confirming quantities and styles. For Cape Town event setups, ABC Hire is one local option for coordinating furniture and related event equipment alongside linen planning.

The real trade-off

Buying gives control. Renting gives adaptability.

For most clients, adaptability wins. Events change. Venues differ. Weather interferes. Guest counts move. Linen is one of those categories where flexibility often saves more stress than ownership ever removes.

Event Day Logistics and Final Checks

Even the right round table linens can fall flat if the final checks are rushed. Event day is where styling decisions meet real conditions.

Use a simple sequence and the room will settle faster.

The checks that matter

  • Confirm delivery timing early so the setup team isn't dressing tables around other suppliers.
  • Open and inspect a few cloths first before the full room is laid. Look for obvious creasing, colour mismatch or incorrect sizing.
  • Dress one sample table completely with chairs pushed in and then pulled out. Problems show up quickly at that stage.
  • Keep a handheld steamer available for minor travel wrinkles, but don't rely on last-minute steaming to fix a poor fabric choice or wrong fold method.
  • Walk the room from guest height rather than only from standing height. Seated sightlines reveal bunching, uneven drops and cluttered layering.

What planners often miss

The final visual check should happen after place settings and centrepieces are in. A cloth can look perfect on its own and then feel too dark, too shiny or too busy once the table is fully built.

If one table looks wrong, stop and correct it before the whole room is finished. Small linen issues multiply fast.

For broader run-sheet planning, transport timing and supplier coordination, a comprehensive event planning checklist can help you keep the day organised around more than just styling.

Returns are usually straightforward when linen is rented. The important part is knowing what the supplier expects after service, especially if the event runs late or includes outdoor use. Clarify collection timing, packing instructions and any separation needed for heavily soiled items before the event starts, not after it ends.

Round table linens do a lot of quiet work. They shape the mood, support the styling, influence guest comfort and help the room feel finished. Get the size right, choose fabric for the venue you have, and style with discipline. That's usually what separates a good-looking table from one people remember.


If you're planning an event in Cape Town or the Winelands and want help matching tables, linen sizing and venue conditions, ABC Hire can help you build a practical setup that looks polished on the day.

Double Electric Fryer: Your Cape Town Event Guide

You're usually not thinking about a double electric fryer until the menu is already set and the service plan starts to wobble.

The chips need to go out hot. The chicken strips can't wait behind calamari. Half the guest list wants vegetarian options kept separate. Then someone at the venue says the catering team will be sharing power with the bar, coffee station, and DJ. That's when fryer choice stops being a kitchen detail and becomes an event-planning problem.

In Cape Town, that problem shows up fast at weddings, corporate functions, school events, and private parties. A fryer can help you serve a crowd smoothly, or it can become the bottleneck that holds up the whole line. The difference usually comes down to two things: power planning and menu strategy. Get both right, and a double electric fryer is a very useful tool. Get either wrong, and you'll feel it during peak service.

Why Your Event Needs Smarter Frying

A single fryer works until the rush starts.

The trouble begins when every guest seems to want hot food at once. One basket is tied up with chips, the next batch is waiting, and the queue grows while oil temperature drops between loads. Staff start rushing. Quality slips. Service slows down at the exact moment you need it to feel organised.

That's where a double electric fryer changes the flow. Its value comes from a dual-basket design with two independent cooking zones, each with separate temperature and timer settings, which helps solve the single-basket limitation for large groups and improves service speed at weddings, matric dances, and corporate functions where demand peaks all at once, as noted in this overview of dual-zone fryer development.

Two vats change the pace of service

Think of it as moving from a single-lane road to a dual carriageway. You're not just doubling space. You're reducing the stop-start delays that happen when different foods all need the same fryer at different moments.

One side can run chips continuously while the other handles snack items in smaller batches. Or one vat can stay dedicated to a high-volume menu item while the second gives you flexibility for late additions, dietary requests, or a second serving line.

Practical rule: If your event menu includes more than one fried item, a single fryer often creates a queue inside the kitchen before guests ever see a queue at the counter.

That matters because frying isn't only about cooking. It's about recovery, timing, and holding a rhythm. When staff can drop two batches independently, they make fewer compromises. They don't have to choose between delaying one item or overcrowding one basket.

Better output, not just more equipment

A lot of people hear “double fryer” and assume it's a larger version of a countertop appliance. In practice, it's a workflow tool.

Here's where it helps most:

  • Large guest arrivals: Wedding canapés after the ceremony, school function intervals, and brand activation lunch rushes often hit in one wave.
  • Mixed menus: Chips, chicken, fish bites, samoosas, spring rolls, or doughnut service all compete for fryer time.
  • Service consistency: Two independent vats let staff keep food moving without constantly interrupting one product for another.

If you're still refining your fried menu ideas, seasonings matter too. For teams testing flavour profiles before event day, these Smokey Rebel air fryer rub ideas are a useful reference for thinking through coating and seasoning combinations that can translate into fryer-friendly menu planning.

A double electric fryer doesn't remove pressure from service. It gives your team a better structure for handling it.

Key Fryer Features and Catering Capacity

Spec sheets can look impressive without telling you what matters on event day. For caterers, venues, and planners, three things matter most: temperature range, oil volume, and recovery behaviour.

A commercial stainless steel Key Fryer for foodservice catering displayed with images of fried foods.

Commercial double fryers commonly offer adjustable thermostats from 60°C to 200°C, with tank sizes ranging from 3 L per vat for smaller functions to 8 L or more per vat for heavier service. Larger oil volume gives more thermal inertia, which helps the fryer recover faster after each batch and keeps food quality more consistent during busy periods, as shown in this commercial fryer specification overview.

Why oil capacity matters more than most people expect

Small tanks can work well for lighter jobs. They're easier to place, easier to transport, and often fine for short runs of snack service. The problem starts when cold product keeps hitting the oil.

Every fresh load pulls heat out of the vat. If the oil mass is small, the temperature drop is sharper and recovery takes longer. That affects colour, texture, and timing. Chips can turn pale and greasy. Battered items can lose crispness. Staff then compensate by holding food too long or overloading the next batch.

A larger vat gives you more room to absorb that shock.

Fryer feature What it means in service
3 L per vat Better suited to lighter, lower-frequency batches
Mid-size vats More forgiving for mixed-event service
8 L or more per vat Better for repeated batches during peak demand

Temperature range affects menu control

The thermostat range also matters. A fryer that can hold lower and higher setpoints gives the chef or caterer more options across one event.

That helps with:

  • Chips and high-moisture foods: These need stable high heat for clean frying.
  • Delicate snack items: Lower settings can reduce over-browning on lighter products.
  • Split menus: One vat can run one product profile while the second runs another.

A fryer that looks “big enough” on paper can still underperform if the tanks are small and the event menu calls for repeated cold loads.

When comparing models, don't stop at basket count. Look at the tank size and thermostat range first. Those are the two figures that tell you how the unit is likely to behave once the first wave of orders lands.

If you want a visual reference for the kind of unit caterers often compare in this category, this electric countertop twin tank fryer shows the basic layout and format that many event teams are assessing when choosing between compact and higher-capacity options.
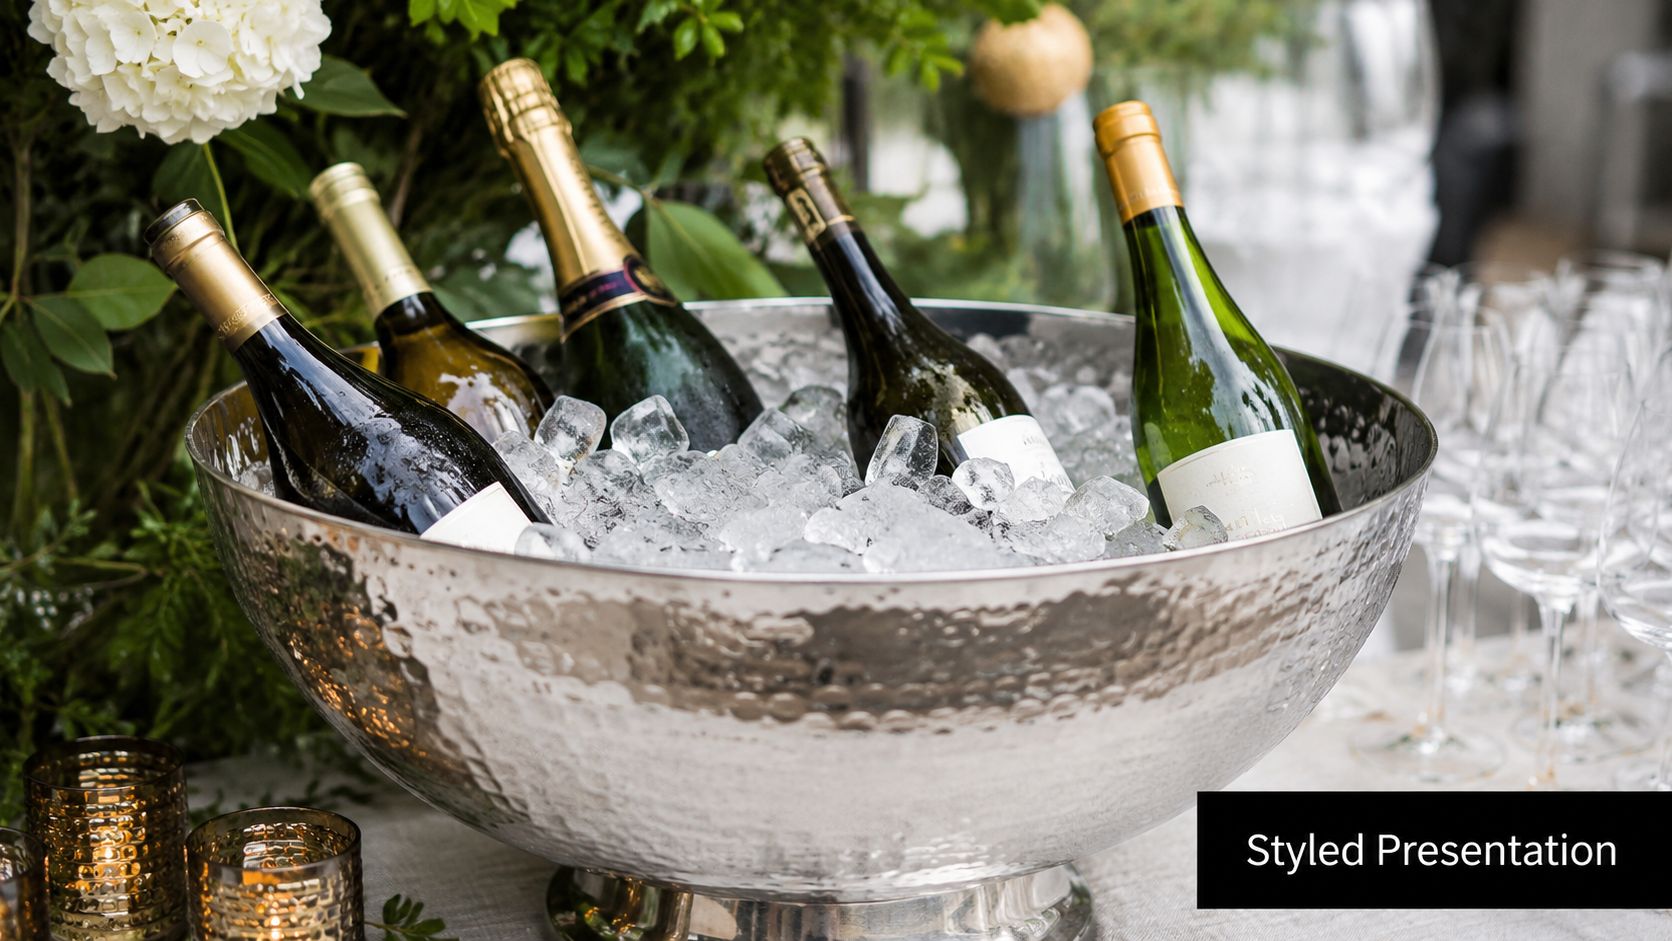
Powering Your Fryer in Cape Town A Practical Guide

This is the part many planners leave too late.

A double electric fryer can be completely practical for a Cape Town event, but only if the venue supply, extension run, and backup plan are sorted before the equipment arrives. In South Africa, the limiting factor often isn't basket size. It's the electrical load and the reliability of the supply available on site.

An infographic guide for operating electric deep fryers in Cape Town including power and safety tips.

Commercial double electric fryers can draw from 3.5 kW up to 7.2 kW on a 220 V system, and because each vat has its own heating element, one side can recover after a cold batch while the other continues frying. That benefit only holds if the venue circuit or generator can support the load consistently, as outlined in this double fryer power specification example.

Start with the venue, not the fryer

Before you confirm the menu, ask the venue or site manager very direct questions.
  • What supply is available at the catering point? You need to know whether the fryer is running on a suitable circuit, not just whether “there's a plug nearby”.
  • Is the catering supply shared? Shared circuits with coffee machines, urns, hot trays, or bar fridges can create trouble under load.
  • What happens during an interruption? Outdoor setups, marquees, and temporary kitchens need a realistic backup plan.

In Cape Town and the Winelands, this matters more than generic product pages admit. A fryer may perform perfectly in a test kitchen and badly at a venue if the supply is unstable or undersized.

What works and what usually doesn't

What works is simple. Short cable runs, known circuit capacity, and a dedicated power plan.

What often doesn't work is treating the fryer like a casual countertop appliance. It isn't one. If the unit pulls serious power, then plugging it into a random socket through a long extension shared with other heating equipment is asking for poor recovery, nuisance trips, or inconsistent service.

A proper extension setup matters too. If you're dealing with distance between the kitchen position and the supply point, this guide on choosing a 20 m extension cord for event equipment is worth reviewing before the event layout is finalised.

Don't ask only whether the fryer can switch on. Ask whether it can hold temperature properly for the full service window.

Questions to settle before event day

Use this checklist with your venue, caterer, or hire company:

  1. Confirm the fryer's exact power draw. “Double fryer” is not specific enough.
  2. Ask what plug type the unit uses. Don't assume standard convenience sockets are appropriate.
  3. Check whether the circuit is dedicated. Shared event power causes most surprises.
  4. If using a generator, confirm headroom. The fryer won't be the only load.
  5. Plan around load shedding risk. If service must continue, backup power needs to be part of the kitchen plan, not a last-minute add-on.

For some events, gas equipment may be easier. For others, an electric setup is cleaner and more practical. The right answer depends on the venue infrastructure, not on brochure language.

If you're hiring through a provider such as ABC Hire, this is the conversation to have before confirming the booking. Ask for the actual electrical requirement of the fryer, the operating assumptions, and whether the intended venue setup supports it.

Strategic Menus for Your Double Fryer

The best use of a double electric fryer isn't cooking more of the same thing. It's separating jobs that shouldn't compete with each other.

That's where the equipment starts earning its keep. One vat can handle a high-volume savoury item, while the other protects dietary separation or supports a different service rhythm. For professional catering, that menu flexibility is often a key advantage.

The key benefit isn't only capacity. A double fryer allows physical separation of foods for allergen management and dietary needs, such as vegetarian items apart from meat, which improves food safety and workflow for events serving mixed guest requirements, as discussed in this commercial fryer buying guide.

Use each vat with a purpose

A smart fryer plan usually looks like one of these setups:

  • Vegetarian and meat split: Spring rolls or vegetable samoosas on one side, chicken strips or fish bites on the other.
  • Core item and rotating special: Chips in one vat all service long, with calamari, nuggets, or snack platters in the second.
  • Low-risk separation: Keeping products apart helps reduce flavour transfer and supports cleaner service for guests with specific preferences.

This matters more now because event menus are rarely one-track. A wedding may need a vegetarian late-night snack alongside standard fried options. A school function may need simple crowd-pleasers with clearer separation. A corporate event may want branded snack boxes with different fried components delivered quickly.
Build the menu around service peaks

The strongest menus are the ones that match the fryer's workflow.

Good examples include:

  • Chips and calamari combo: One vat stays dedicated to chips. The second handles seafood to avoid flavour crossover.
  • Samoosas and mini doughnuts: Savoury on one side, sweet on the other, which keeps flavours cleaner.
  • Chicken strips and vegan spring rolls: A practical split for mixed dietary service.

For support equipment, coordinated holding matters just as much as frying. If part of your menu needs to stay hot while later batches finish, these catering food warmers for events are useful to consider alongside the fryer rather than as an afterthought.

Separate vats don't just protect food. They protect your service plan.

Hygiene discipline still matters

Two tanks help with separation, but they don't replace kitchen discipline. Staff still need clear utensil control, basket control, and product handling rules.

A practical kitchen team should define:

  • Which basket belongs to which menu group
  • Which prep trays feed each vat
  • How used oil and crumbs are managed during service
  • Who is responsible for wipe-downs and contamination checks

If your team needs a refresher on cleaning routines around active service, this checklist of essential commercial kitchen hygiene tasks is a helpful starting point.

A double electric fryer gives you flexibility. The kitchen still has to use that flexibility properly.

Renting vs Buying A Fryer for Your Business

For most event businesses, the question isn't whether a double fryer is useful. It's whether ownership makes sense.

That answer depends on frequency of use, storage space, maintenance tolerance, and how predictable your event calendar is. If you're frying at high volume every week in a permanent kitchen, buying can make sense. If your use comes in bursts around weddings, activations, school functions, and seasonal bookings, renting is often the cleaner decision.

In the wider market, deep fryers sat in a category valued at USD 549.8 million in 2023, with projected growth ahead, which signals durable foodservice demand. For local operators, that also means commercial-grade equipment remains a serious purchase with ongoing upkeep, while renting gives access to maintained equipment without the upfront capital commitment, as noted in this commercial fryer market and history overview.

The practical comparison

Factor Renting from ABC Hire Buying Your Own
Upfront cost Lower event-by-event spend Higher initial outlay
Maintenance Usually handled by the hire provider Your responsibility
Storage No long-term storage burden Needs secure storage between jobs
Flexibility Match equipment to event type You use what you own
Idle periods No issue if not used for weeks Asset may sit unused
Cleaning and wear Shared as part of hire workflow and terms Full long-term wear sits with you

When renting usually makes more sense

Renting is a strong fit if your pattern looks like this:

You run occasional larger events rather than daily fryer service. You need the fryer for peak periods, not every week. You don't want to carry storage, transport, and maintenance on equipment that spends long stretches off the floor.

That's common in the event world. A planner may need fryer capacity for one wedding this month, two school functions next month, and nothing the month after. Ownership in that case ties up money in a machine that isn't producing value most days.

For broader event kit planning, this range of catering equipment for hire is a useful reminder that fryers usually work best when hired as part of a coordinated kitchen setup rather than as a standalone item.

When buying can make sense

Buying becomes easier to justify when the fryer is part of your normal operating base. A fixed-site caterer or takeaway kitchen with regular fried output may prefer to own, maintain, and standardise around one unit.

But ownership comes with hidden work:

  • Cleaning after every use
  • Servicing and replacement parts
  • Storage and transport protection
  • Downtime if the unit fails before an event

If you're not set up for those realities, rental is often the more sensible business decision.

Your Double Fryer Hiring Checklist

A fryer booking should never end with “Please reserve one for Saturday.” You need details. The more specific the conversation, the fewer surprises you'll face during setup and service.

A professional checklist guide for hiring a skilled kitchen staff member to operate a double fryer machine.

Use this checklist before you confirm the hire.

Ask these questions first

  • What are the exact power requirements? Ask for the unit's load, voltage requirement, and plug format.
  • Is the fryer suitable for my venue setup? Mention indoor kitchen, outdoor marquee, mobile catering station, or shared prep area.
  • What comes with the unit? Confirm baskets, lids if applicable, and any handling instructions.
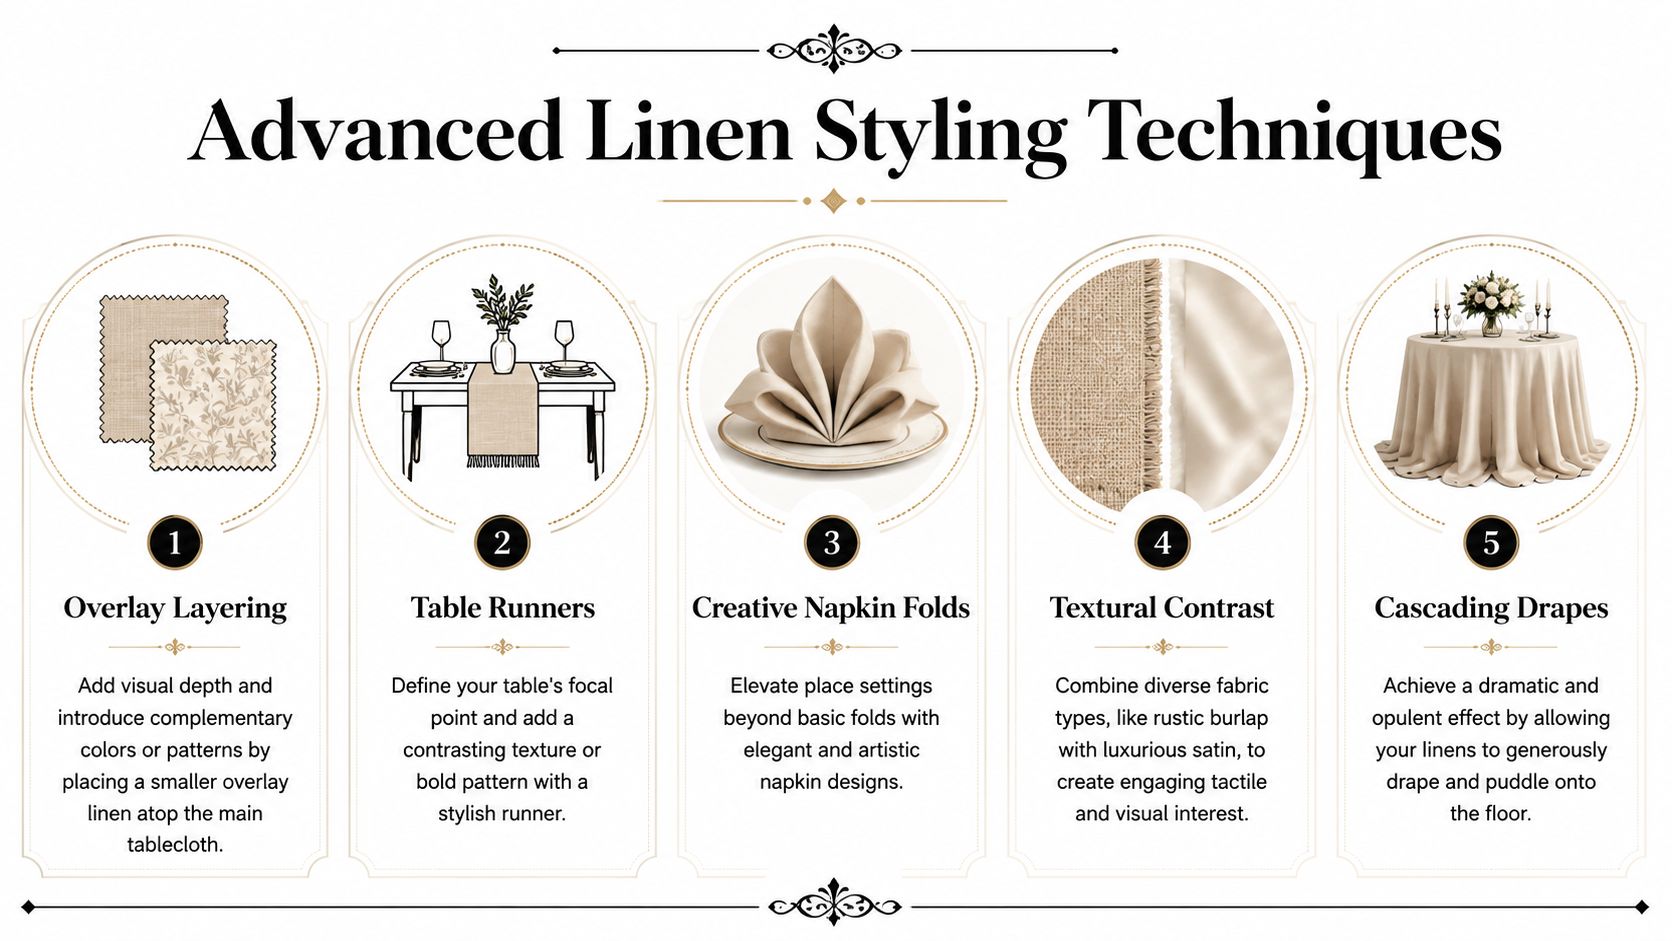
  • Who is responsible for cleaning and oil handling? Set expectations before collection day.
  • What are the delivery and collection arrangements? Timing matters when kitchens are being built on site.

Clarify the service plan

Some events need more than equipment. They need an operator who understands frying rhythm, safe loading, and menu separation.

Ask:

  1. Who will run the fryer during peak service?
  2. Has the menu been matched to the fryer setup?
  3. Do we need warming equipment alongside it?
  4. What is the backup if venue power becomes unreliable?

The best fryer hire is the one that fits the venue, the menu, and the power supply before the first basket goes in.

Final check before sign-off

Run through these last points on the week of the event:

  • Venue power re-confirmed
  • Extension route planned
  • Menu split between vats decided
  • Operator briefed
  • Delivery access cleared
  • Collection timing agreed

A double electric fryer is a very practical piece of event equipment when it's chosen for the right reason. Not because it looks professional on a spec list, but because it solves a real service problem. In Cape Town, that usually means better queue control, cleaner menu separation, and a power plan that won't let you down halfway through the rush.


If you're planning an event and need to check whether a double electric fryer suits your venue, menu, and power setup, ABC Hire can help you work through the practical requirements before you book.