Elegant Glass Cake Stand Rentals for Cape Town Events

You’re often down to the last handful of decisions when the cake stand suddenly becomes important. The florist is confirmed, the seating plan is nearly closed off, the cake is booked, and then someone asks a simple question: what is it going to sit on?

That choice matters more than most clients expect. A glass cake stand doesn’t just hold dessert. It changes how the cake reads in the room, how the dessert table photographs, and how polished the whole setup feels from the first guest arrival to the final toast.

In Cape Town, that decision also comes with local realities. Venue access can be awkward, transport routes can be long, and many celebrations are once-off events where buying a delicate display piece makes far less sense than people assume. The right stand needs to suit the cake, the table, the setting, and the practical side of the day.

The Centrepiece of Your Celebration

A cake can be beautifully made and still look underwhelming if it’s placed on the wrong base. I’ve seen this happen at elegant Winelands weddings and slick city launches alike. The cake itself was excellent, but the stand was too flat, too small, too heavy-looking, or disconnected from the rest of the styling.

A glass cake stand fixes that when it’s chosen well. It lifts the cake physically, but it also lifts the visual importance of the whole display. Clear glass works because it doesn’t compete with the cake. Instead, it gives height, catches light, and keeps the focus where it should be.

A three-tiered white wedding cake decorated with gold leaves and pink flowers on a crystal stand.

What the stand changes in the room

At a Franschhoek reception, for example, soft candlelight and low floral arrangements can make a cake table feel intimate. In that setting, a clear pedestal stand helps the cake sit above the surrounding décor without making the table look crowded. At a corporate launch near the Waterfront, the same principle applies differently. Clean lines and a simple glass profile make the display feel organised and deliberate.

That’s why I treat the stand as part of the event design, not an afterthought.

A good stand can do several jobs at once:

  • Create height: It helps the cake hold its own among flowers, candles, signage, and glassware.
  • Add polish: Even a simple iced cake looks more refined on a proper raised stand.
  • Support the theme: Modern, romantic, formal, or playful styling all read differently depending on the stand.
  • Improve photographs: Clear glass reflects light neatly and keeps the cake from looking visually heavy.

Practical rule: If the cake is one of the visual anchors of the room, its stand should be chosen with the same care as the linen, flowers, and candles.

If you’re still refining the wider dessert display, it helps to look at broader stunning dessert table ideas so the cake stand isn’t selected in isolation. The best results come when the cake, stand, plinth or table, and supporting sweets all feel like they belong together.

Understanding Glass Cake Stand Varieties

Not every glass cake stand does the same job. Clients often use the term for anything that lifts cake, but in practice there are a few very different formats. Choosing the right one gets easier when you think of each type as a different kind of stage.

A solo performance needs one platform. A full cast needs levels. An outdoor setup may need a cover as much as a base.

A display of four different colored glass cake stands titled Classic Pedestal, Modern Tiered, Cloche-Covered, and Footed Platter.

Pedestal stands for one clear focal point

The classic pedestal glass cake stand is the workhorse. It has a raised base and one top plate, and it’s usually the safest choice when the cake itself is the hero. This is the stand I’d favour for a wedding cake, a milestone birthday cake, or a polished corporate centrepiece cake with branding details.

Its strength is simplicity. It gives separation between cake and table, which improves presence without cluttering the setup.

Use it when:

  • The cake is detailed: Sugar flowers, textured buttercream, gold leaf, and clean fondant work well on a plain glass pedestal.
  • The table is already busy: If florals and candles are doing a lot of visual work, the stand should stay quiet.
  • You want versatility: Pedestal stands fit most formal and semi-formal events.

Tiered stands for variety and volume

Tiered glass stands are useful when one cake isn’t carrying the whole dessert table. They suit cupcakes, mini tartlets, macarons, petit fours, or mixed sweet tables. They also help when you need vertical interest without taking up too much table width.

This is less about showcasing a single object and more about organising many smaller items so they don’t disappear into the tablecloth.

A few practical notes:

  • They work best for bite-sized items, not heavy celebration cakes.
  • They suit high-tea styling, showers, and branded dessert displays where variety matters.
  • They need disciplined arrangement, otherwise they can look fussy very quickly.

If you’re planning smaller confections alongside your main cake, a guide to the perfect cake pops stand can be useful for thinking through how upright sweets should be displayed without overcrowding the main stand.

Domed stands for protection and presentation

A glass stand with a dome, also called a cloche-covered stand, adds two things: protection and ceremony. It’s especially useful when the cake or pastries will be displayed for a while before serving, or where airflow, insects, or dust are realistic concerns.

That’s one reason domed stands show up so often at outdoor receptions, garden venues, and Winelands events. They keep the display cleaner and give the dessert a slightly more curated, boutique feel. For a closer look at where a covered stand works best, this guide on a glass cake dome is worth reading.

A dome doesn’t suit every cake. Very tall or highly sculpted cakes can feel cramped under glass, and opening and closing the cover during service needs a steady hand.

Pressed glass versus crystal look

Clients also ask whether the stand should sparkle or stay understated. In real event terms, that usually means choosing between a more everyday pressed-glass look and a more decorative crystal-style finish.

The trade-off is simple:

Style Best for Watch out for
Pressed glass Minimalist weddings, birthdays, corporate functions Can look plain if the cake is also very simple
Crystal-style cut glass Romantic weddings, formal dinners, vintage styling Can feel too ornate for sleek modern setups
Smooth contemporary glass Product launches, gallery-style events, monochrome décor Shows fingerprints more easily

The right answer isn’t “fancier is better”. It’s whether the stand supports the event language already in the room.

Sizing Your Stand for a Perfect Fit

The fastest way to make a good cake look awkward is to put it on the wrong-sized stand. Too small, and the cake looks precarious. Too large, and it can seem lost in the middle of the plate.

The simplest rule is this: the stand should be at least slightly wider than the base of the cake. A visible border around the cake helps with both stability and presentation. It gives the eye a clean edge and gives the baker or venue team room to place the cake properly.

A practical sizing rule

Use a stand that leaves a modest glass edge visible around the cake base. That margin doesn’t need to be dramatic. It just needs to look intentional.

When choosing, confirm three things with your baker or caterer:

  1. The final base diameter of the cake
  2. Whether the cake has overhanging décor
  3. Whether the cake board sits hidden or visible beneath the cake

That last point matters. Some cakes are delivered on boards that are wider than the sponge itself, and if you size for the sponge only, the stand can end up looking too tight.

If you’re between sizes, go up rather than down. A slightly larger stand looks deliberate. A too-small stand looks risky.

Cake-to-Stand Sizing Guide

Cake Diameter Recommended Stand Diameter Common For
Small single-tier cake Slightly larger than the cake base Engagement dinners, baby showers, intimate birthdays
Medium single-tier cake Slightly larger than the cake base Standard celebration cakes, office functions
Large single-tier cake Slightly larger than the cake base Big birthdays, school formals, shared dessert tables
Two-tier cake Sized to comfortably support the bottom tier and board Weddings, anniversaries, formal family events
Three-tier cake Wide, stable stand with a substantial base Weddings and large statement events

Height matters too

Diameter gets most of the attention, but height changes how the cake reads across the room. A taller pedestal works well in larger venues where guests will see the dessert table from a distance. It also helps when surrounding décor is low and spread out.

Lower stands suit more intimate settings. They’re often better for long dessert tables where multiple items need to sit together without one piece overpowering everything else.

This offers a useful perspective:

  • Tall stand: better for drama, visibility, and a single showpiece cake
  • Mid-height stand: the most versatile option for mixed event styles
  • Low stand: better for layered dessert styling and relaxed setups

Table surface and stand footprint

Don’t size the stand in isolation. Check the table width and the amount of décor sharing that surface. A well-sized stand can still fail if the table itself is too narrow, uneven, or crowded with candles and signage.

That’s why the best cake displays are measured from the table upward, not from the cake downward. The stand has to fit the physical environment as much as it fits the cake.

Aligning Your Stand with Your Event Theme

A glass cake stand should match the tone of the event, not just the cake design. This is where many setups go off track. Someone chooses “beautiful” in isolation, but the stand needs to be beautiful in the same visual language as the venue, florals, furniture, and service style.

In Cape Town, event styling changes dramatically from one setting to the next. A Winelands wedding doesn’t ask for the same display language as a product launch in the city, and neither of those should be styled like a twenty-first birthday at home.

A Franschhoek wedding needs softness and texture

At a romantic wedding in Franschhoek, the setting usually does part of the work. You already have mountains, vines, soft natural light, and often a venue with layered textures such as stone, wood, or heritage interiors. In that environment, a plain ultra-modern stand can feel too sharp.

What tends to work is glass with some detail. Not excessive ornament, but enough visual texture to catch candlelight and echo the rest of the styling. A cut-glass or vintage-inspired pedestal often feels settled in that setting.

For this style of event, I’d usually steer away from:

  • Overly thick modern glass forms that read heavy
  • Very stark cylindrical bases that feel corporate
  • Tiered stands for the main cake unless the entire dessert concept is multi-level

A Cape Town corporate event wants clarity

Corporate clients usually need a cleaner result. At a launch or brand activation, the cake often supports the wider brand environment. The stand shouldn’t pull attention away from signage, product placement, or a carefully controlled palette.

That’s where a sleek pedestal stand earns its place. Smooth glass, restrained profile, and no visual fuss. The stand acts almost like gallery display equipment. It frames the cake, but it doesn’t decorate it.

A useful comparison is the difference between glass and timber styling. If you’re weighing up whether a warmer material would suit the room better, a look at this wooden cake stand discussion helps clarify when wood brings character and when glass keeps things more refined.

The more structured and brand-led the event, the less decorative the stand should be.

A birthday setup needs flexibility more than formality

Private birthday events are where people often overcomplicate things. For most birthday cakes, especially at home or at relaxed venues, the stand doesn’t need to prove anything. It needs to be stable, easy to position, and visually neat.

For a colourful birthday table in the Southern Suburbs, a simple glass stand usually does the job better than an ornate one. Balloons, candles, sweets, toppers, and bright icing already bring enough energy. The stand should support that, not compete with it.

In practical terms, the best match often comes down to these questions:

  • Is the venue formal or relaxed
  • Is the cake detailed or simple
  • Will the stand be one of many styled elements or the main display piece
  • Does the room need softness, sparkle, or restraint

The strongest event styling always looks like one person made all the decisions, even when several suppliers were involved. The cake stand plays a small role, but it has to speak the same design language as everything around it.

The Smart Choice Renting a Glass Cake Stand

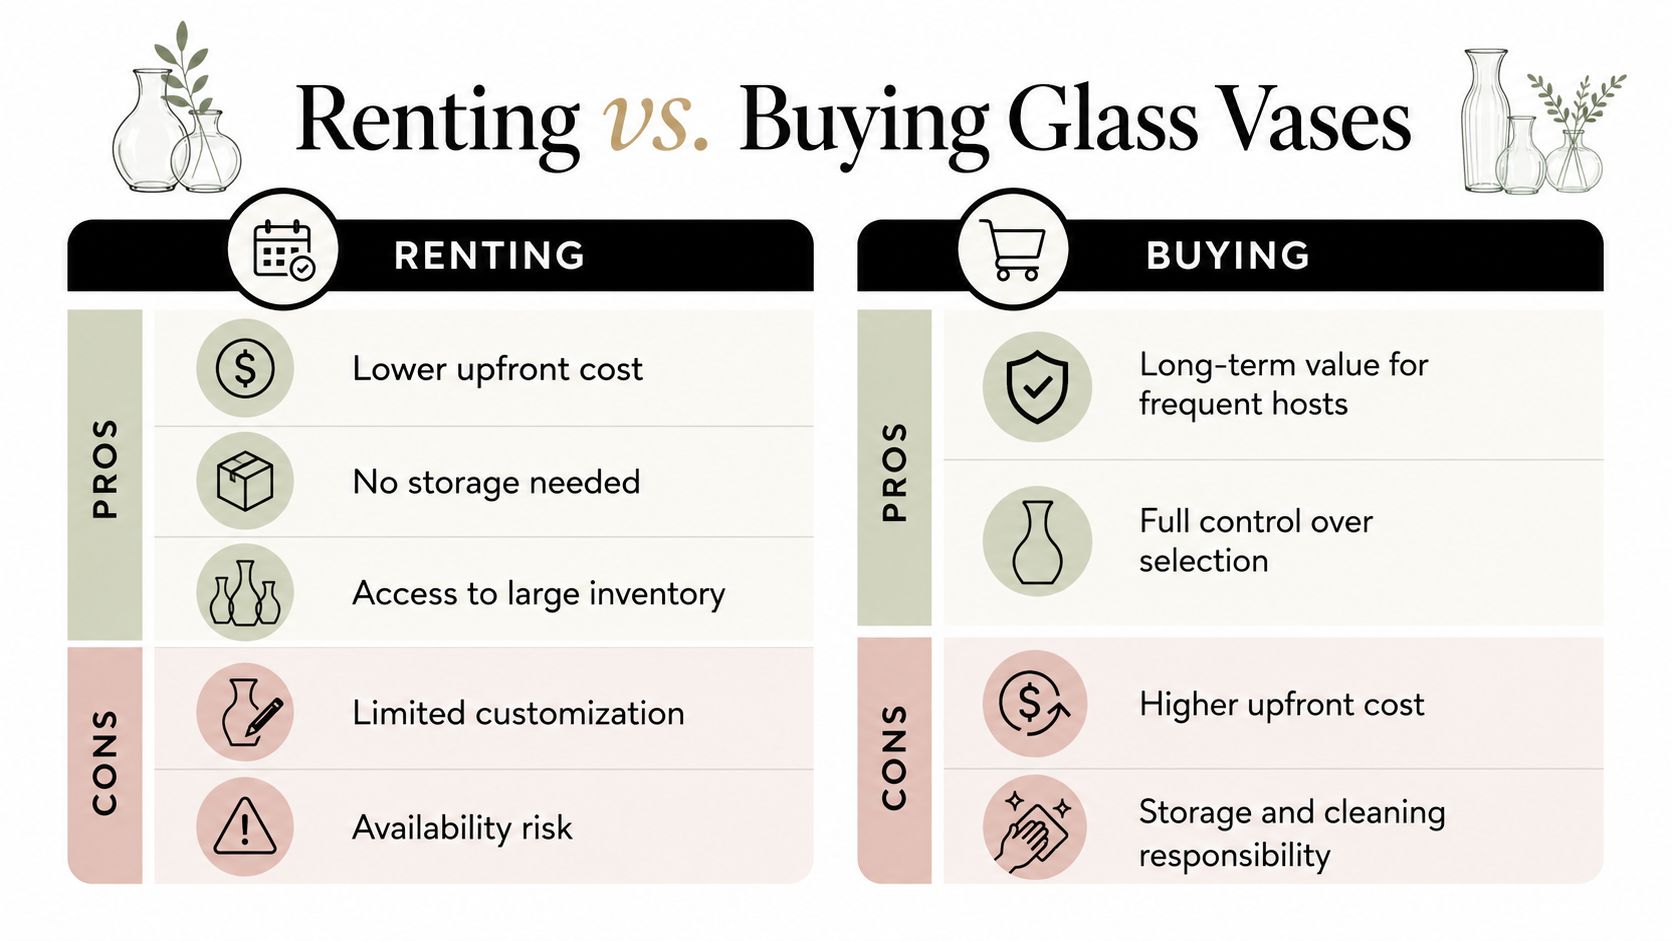
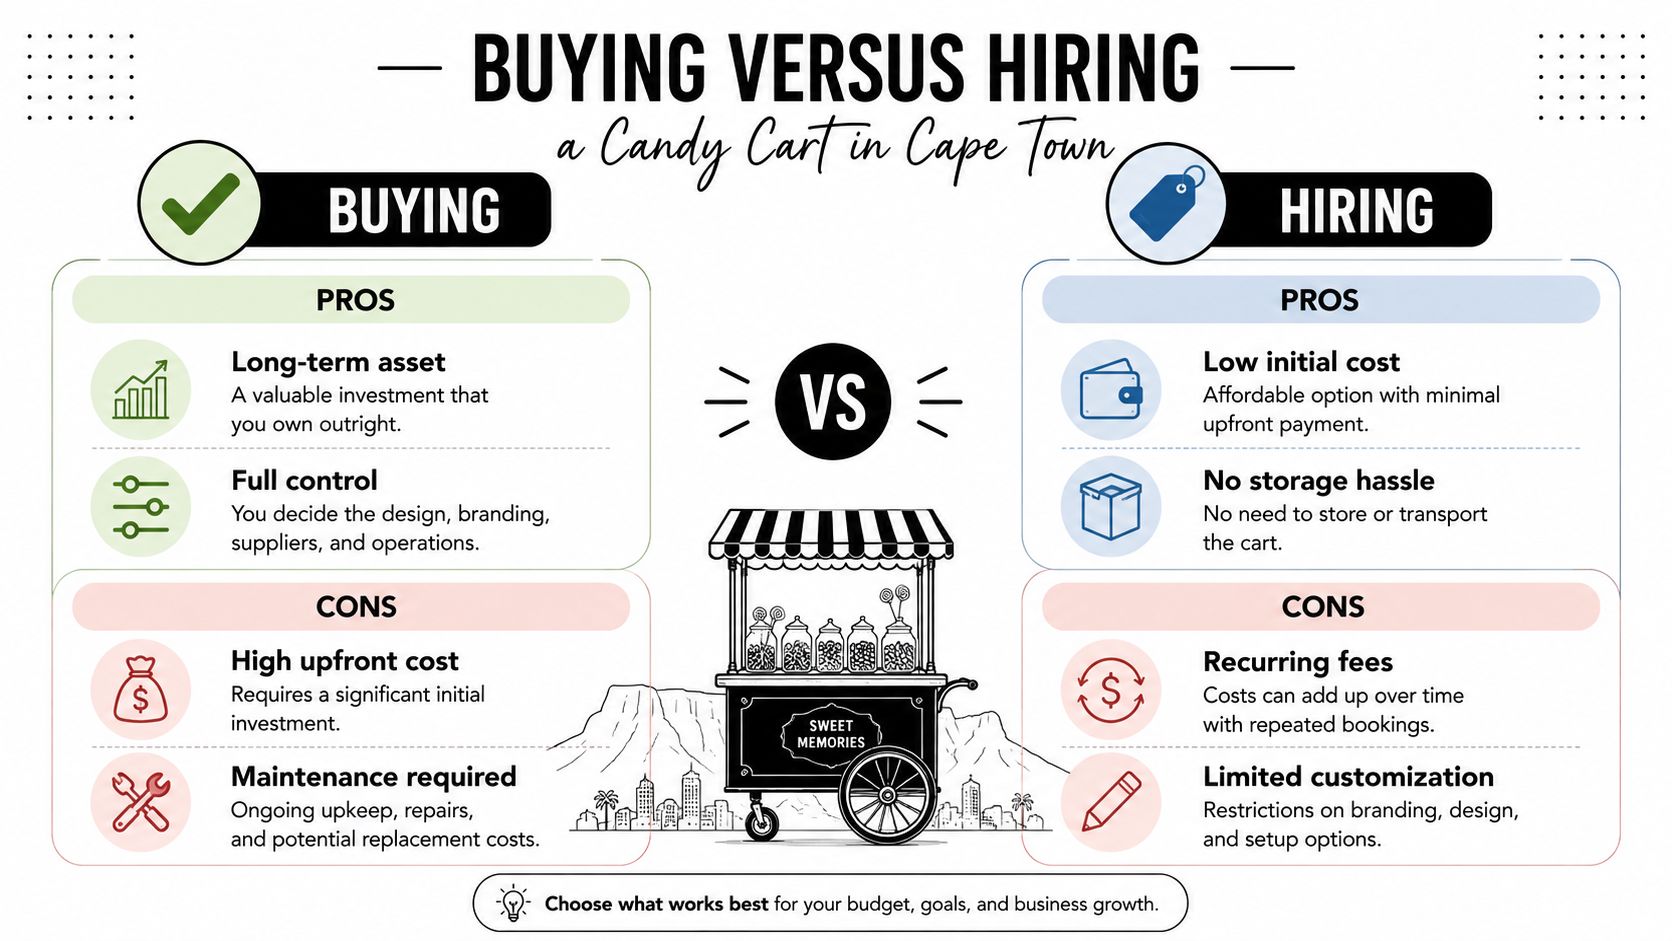
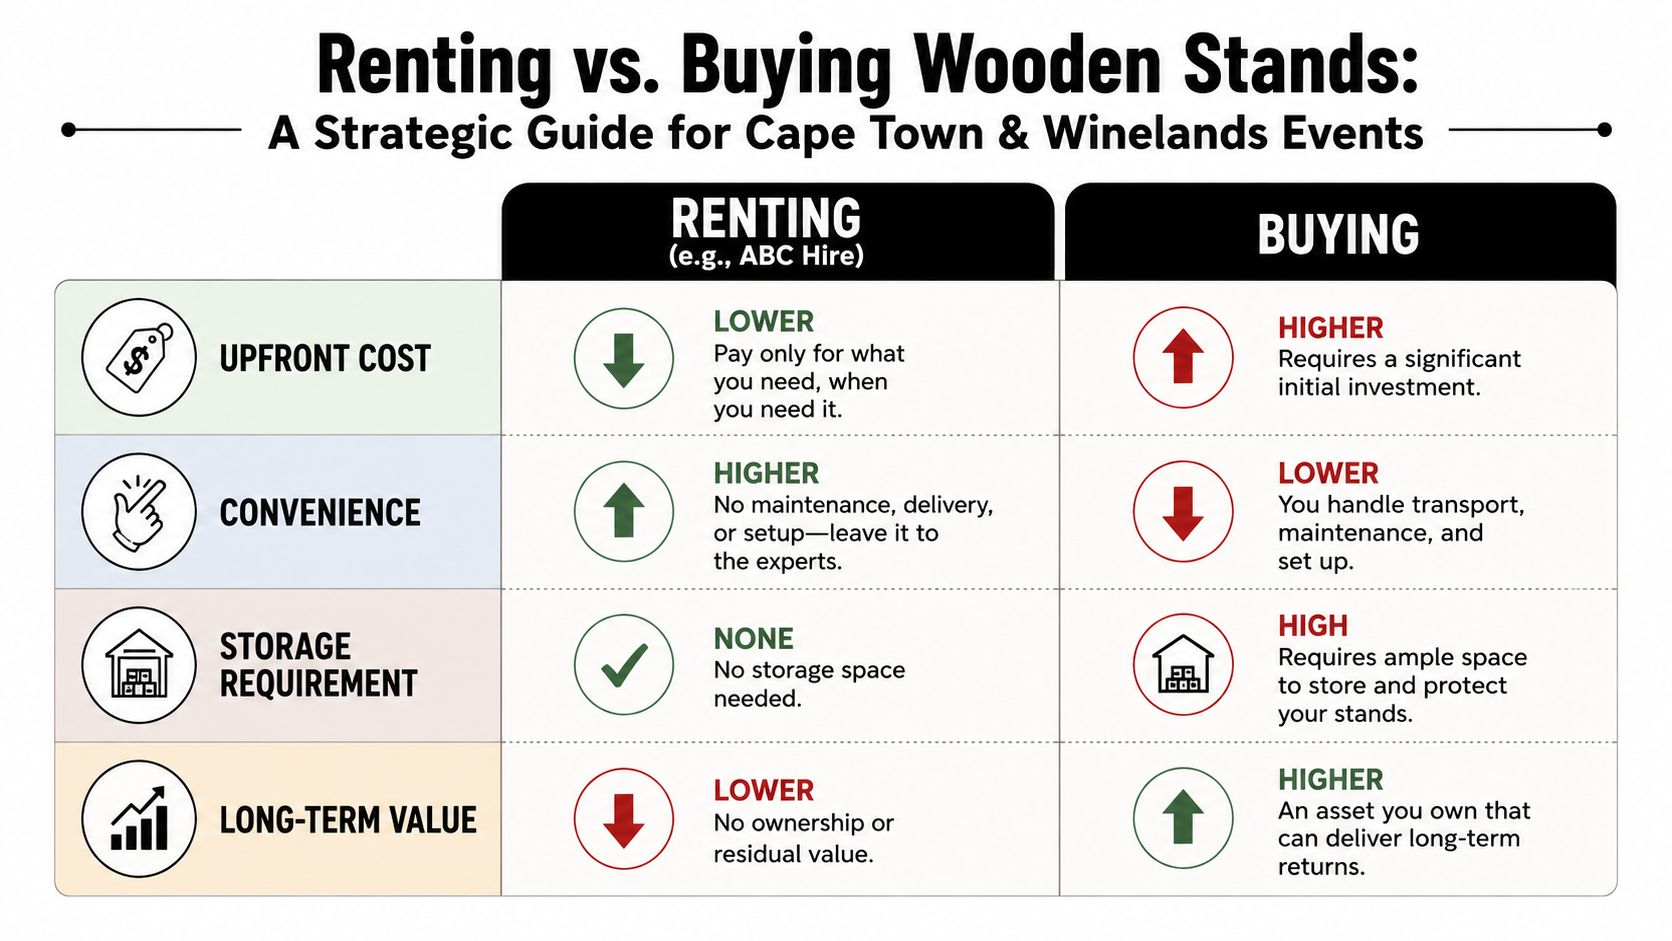
Buying a glass cake stand sounds sensible until you look at the local event realities. If you host regularly, ownership can make sense. But for most Cape Town weddings, launches, and once-off celebrations, renting is the cleaner decision financially and operationally.

The main reason is straightforward. A quality glass cake stand for Cape Town events typically costs between R400 and R800 to purchase, while local rental rates are often around R100 to R150, which works out to a 70 to 80 percent saving per event according to the South African customs tariff context and local rental pricing referenced here: South Africa customs tariff 2023.

A comparison chart outlining the pros and cons of renting versus buying glass cake stands for events.

Why buying often looks cheaper than it is

People tend to compare the purchase price with the rental fee and stop there. That misses the actual cost of ownership.

When you buy, you also take on:

  • Storage responsibility: Glass stands need safe, dedicated space where they won’t be chipped or scratched.
  • Transport risk: Delicate glassware doesn’t travel well when packed casually with other event items.
  • Cleaning and upkeep: Fingerprints, wax marks, packaging dust, and minor damage all become your problem.
  • Style lock-in: You own one look, even though your next event may need something completely different.

For many Cape Town clients, the biggest hidden issue is that the stand won’t be used again. Wedding couples rarely need one after the wedding. Corporate teams may need a different style for the next activation. Private hosts often discover that a fragile glass piece is awkward to store long term.

Local conditions make rental more sensible

South African import costs change the equation further. High import duties on glassware in the 25 to 40 percent range are part of why purchased glass stands can feel expensive for what is, in many cases, a single-use event item. The same customs reference linked above supports that local pricing pressure.

Then there’s breakage. Delicate items at Winelands events carry a 15 percent claim rate for breakage, which matters when your celebration involves loading, unloading, venue setup, clearing, and travel on regional roads. That same verified data point is included in the customs-linked source context above.

Renting shifts the risk away from ownership thinking. For one event, that’s usually the smarter mindset.

What rental does better

Rental suits the way events work. You choose the stand for the one event in front of you, not for a hypothetical future event that may never happen.

That gives you practical advantages:

Renting Buying
You choose for the specific venue and cake You adapt the event to the stand you already own
No long-term storage issue You need safe storage after the event
Better for once-off celebrations Better only if repeated use is realistic
Less commitment to one style One purchase can limit future styling choices

There’s also a softer benefit that planners understand immediately. Rental encourages better decision-making. People feel free to choose the stand that actually fits the brief because they aren’t trying to justify a permanent purchase.

When buying still makes sense

Buying isn’t wrong. It’s just more limited in who benefits from it.

It can make sense if:

  • You run a venue or styling business and will reuse the same piece often
  • You host frequently enough that repeated use is realistic
  • You have proper storage and transport systems
  • You want one signature display item and are prepared to maintain it

For everyone else, especially couples planning a single wedding or companies organising a one-day activation, renting keeps the budget cleaner and the logistics lighter.

Handling Your Glass Cake Stand Like a Pro

A glass cake stand can arrive in perfect condition and still look poor on the day if it’s handled casually. Smudges, wobble, bad placement, and rushed setup are the usual problems. None of them are difficult to avoid, but they do need attention before the cake goes on.

The goal is simple. By the time the baker, caterer, or coordinator places the cake, the stand should already be clean, level, and in its final position.

Clean it at the right time

Don’t polish the stand too early and assume it will stay pristine. Event setup creates dust, fingerprints, and stray marks from handling. Glass should usually get its final wipe once the table styling is largely done and just before the cake is placed.

Use a lint-free cloth and work gently. Hold the stand by its base or underside as much as possible so you don’t keep re-marking the display surface.

A few mistakes to avoid:

  • Don’t use heavily perfumed cleaners near food presentation items.
  • Don’t polish in direct harsh light only and assume it’s clean. Check from guest eye level too.
  • Don’t leave the final wipe to the baker unless that has been agreed in advance.

Check the surface before the stand goes down

Many “unstable stand” problems are really table problems. Uneven trestles, linen bunching, soft runners, and decorative chargers under the stand all create movement.

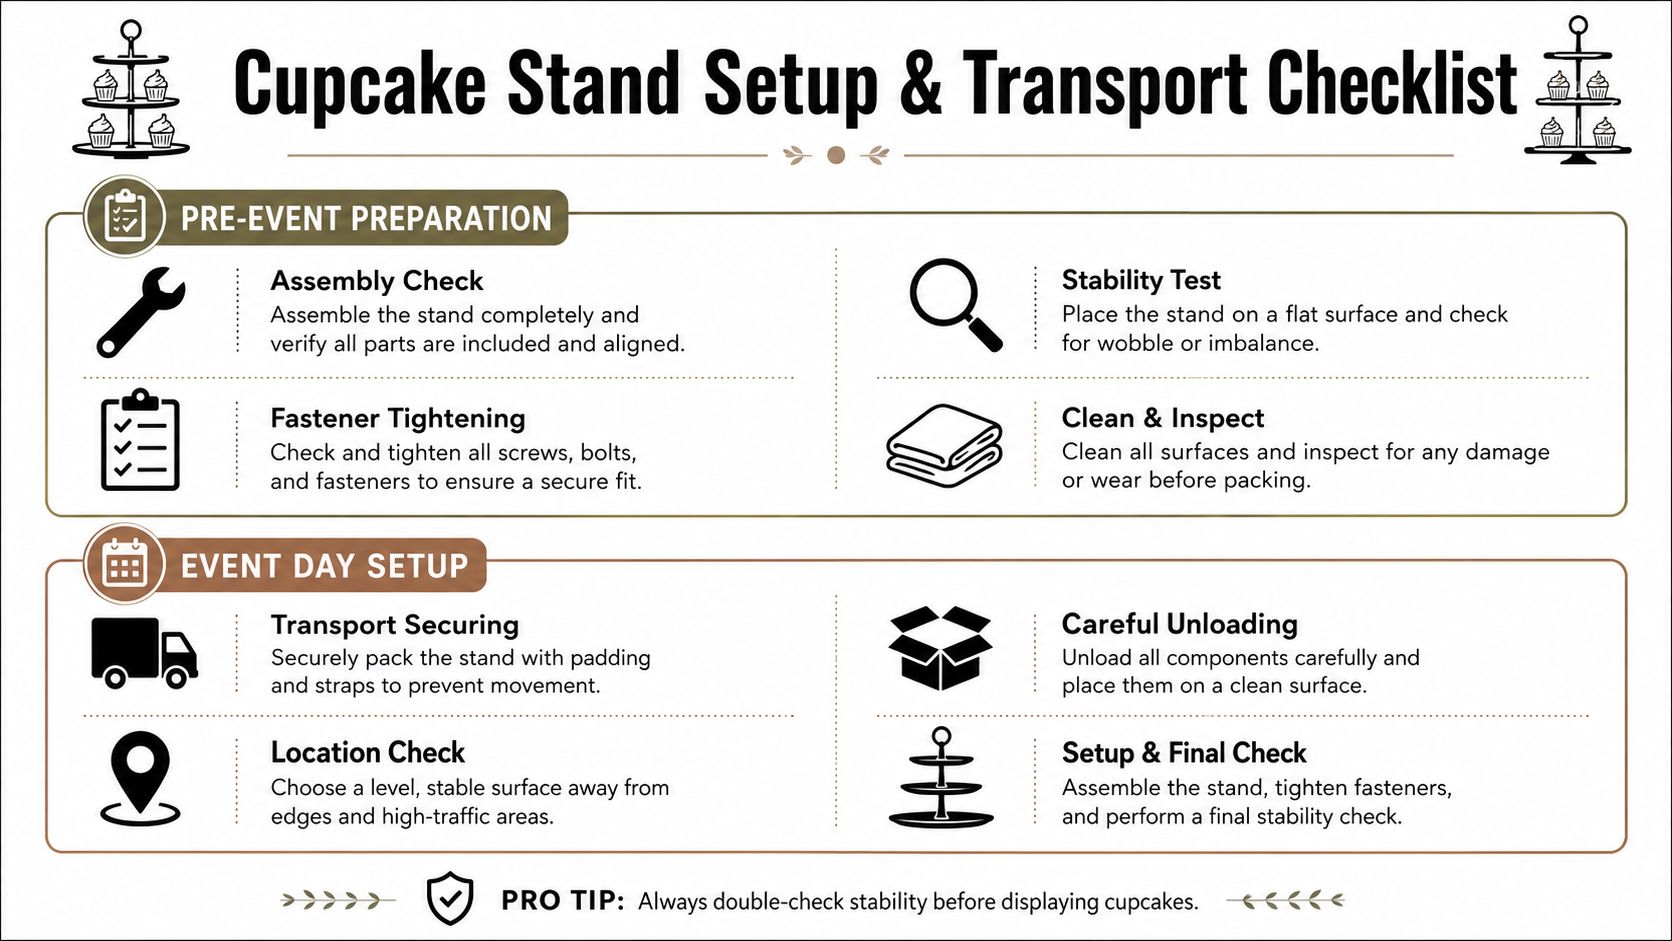
Before the cake arrives:

  1. Place the stand in its intended final spot.
  2. Press lightly around the top edge.
  3. Confirm there is no rocking.
  4. Adjust the linen or reposition if needed.

A beautiful stand on an uneven table is a risk, not a feature.

This matters even more at venues where floors or furniture may be older and less uniform. In those settings, a quick stability check saves stress later.

Transport needs more care than most people expect

If you’re collecting the stand yourself, transport it upright, cushioned, and separate from heavier décor items. Don’t wedge it between boxes and hope for the best. Glass edges chip easily, and small damage that seems minor in daylight becomes obvious under venue lighting.

If the stand has multiple parts, pack them so they can’t knock together during the drive. On arrival, unpack it before the room gets crowded and store it somewhere safe until the cake table is ready.

The safest option is always to have delivery and collection handled professionally where possible. That removes one more fragile job from a day that already has enough moving parts.

Placement affects service too

The stand should look good, but it also has to allow clean cake cutting and easy guest access if the cake is on display before serving. Avoid pushing it so deep into a decorated table that nobody can work around it later.

Good placement usually means:

  • Enough space behind or beside the cake for cutting access
  • No dangling florals or candles too close to the glass edge
  • A line of sight from the room entrance or key photo angle
  • Distance from direct wind if outdoors

That combination gives you the polished look clients want without making the service team fight the setup.

Your Glass Cake Stand Event Checklist

By the final week before an event, nobody wants another vague decision. You want a short list that confirms the important details are locked in. For a glass cake stand, that means checking fit, style, logistics, and table readiness in one pass.

A sophisticated glass cake stand sits on a blue table, beside an event planning checklist.

Final planning checklist

Use this before the event week gets busy:

  • Confirm the cake dimensions: Get the final base size from the baker, including any board beneath the cake.
  • Match the stand to the venue style: Keep the stand in the same visual language as the room, flowers, and table setup.
  • Check the table size: Make sure the stand will sit comfortably with all other décor items.
  • Decide on height: Higher for more presence, lower for a relaxed or layered dessert table.
  • Clarify transport: Know who is collecting, delivering, unpacking, and returning the stand.
  • Plan the placement: Choose the exact table position before the cake arrives.
  • Schedule the final clean: Leave the last polish until close to cake placement.
  • Confirm responsibility on the day: Someone specific should oversee stand setup, not “whoever is free”.

One final coordination step

The stand choice often gets delayed because it sits between suppliers. The baker cares about size, the florist cares about surrounding styling, the venue cares about placement, and the host assumes someone else has covered it.

That’s why a simple planning document helps. If you’re pulling the whole event together, a broader event planning checklist template makes it easier to assign who confirms what and by when.

The stand is a small item. The coordination around it isn’t. Clear ownership prevents last-minute scrambling.

When this checklist is done properly, the cake table feels calm on the day. That matters more than people realise.

Frequently Asked Questions

Question Answer
Is a glass cake stand only suitable for weddings? No. It works for weddings, corporate launches, birthdays, school formals, baby showers, and any event where the cake or dessert display needs a cleaner finish. The key is choosing the right style for the setting.
Does clear glass disappear too much on a decorated table? Usually the opposite. Clear glass lets the cake stand out while still catching light. If the table is very busy, glass often performs better than a coloured or heavily textured base.
Can a glass cake stand work outdoors? Yes, but the setup needs more care. Wind, dust, insects, and uneven surfaces all matter more outdoors. A domed option is often the better choice when the cake will stand for a while before serving.
What if my cake is very simple? A simple cake can look excellent on glass. In fact, glass often helps a minimalist cake feel more refined because it adds elevation and light reflection without adding visual noise.
Should the cake stand match other serving pieces exactly? Not necessarily. It should coordinate, but it doesn’t need to be identical to every platter and tray on the dessert table. Exact matching can sometimes make the setup feel flat.
Is a tiered glass stand suitable for a main celebration cake? Usually no. Tiered stands are better for smaller sweets, pastries, cupcakes, and mixed dessert displays. A main celebration cake generally needs a stable single platform.
Who should place the cake on the stand? Ideally the baker, caterer, or a coordinator who is used to handling display items. The stand should already be clean and in place before they arrive with the cake.
Does a glass cake stand suit modern events, or is it too traditional? It suits both. The shape matters more than the material. Smooth, minimal glass works well for modern styling, while cut-glass or more ornate profiles suit romantic or classic events.
What causes most stand-related problems on event day? The usual issues are wrong sizing, unstable tables, rushed setup, fingerprints, and poor transport. None of these are design problems. They’re handling and planning problems.
Is renting better for a once-off event? In most local cases, yes. For one celebration, renting is often the more practical option because it avoids storage, transport pressure, and the commitment of buying a delicate item you may never use again.

If you’re planning a wedding, launch, birthday, or formal event in Cape Town and want the practical option without compromising on presentation, ABC Hire is a strong local partner to speak to. Their event rental range serves Cape Town, Stellenbosch, Franschhoek, Paarl, and surrounding areas, which makes it easier to source the right display pieces with logistics in mind, not just looks on a product page.

Wooden Candle Holders: A Cape Town Event Styling Guide

You’re often choosing between two pressures at once. You want candlelight because it softens a room, flatters tables, and makes a venue feel lived in. But you also need decor that travels well, suits the venue, won’t fight with Cape weather, and won’t create problems during setup, service, or breakdown.

That’s where wooden candle holders earn their place. In the Winelands especially, they bridge the gap between polished and relaxed. They can sit comfortably on a harvest table in Franschhoek, on a corporate dinner setup in Stellenbosch, or at a birthday under a sail tent where you need warmth without fuss.

Why Wooden Candle Holders Elevate Every Event

A good event rarely depends on one hero item. It depends on layers. Linen, flowers, glassware, chairs, lighting, spacing. Wooden candle holders work because they add warmth without shouting for attention.

In the Cape Winelands, that matters. Many venues already give you stone, timber beams, vineyard views, old plaster walls, or long farm tables. Glossy decor can feel disconnected in those spaces. Wood tends to settle in naturally. It doesn’t compete with the setting. It supports it.

There’s also a reason wooden candle holders never feel like a passing idea. The history of candlesticks recorded by Britannica notes that the earliest domestic candlesticks were often simple blocks of wood with an iron spike, and that form remained in use until the early 19th century because it was so practical. That history still shows in modern styling. Even when the piece is refined, the appeal comes from the same thing. Honest material, simple shape, useful glow.

Mood does more than decorate

At table level, wood changes the tone of candlelight. Metal can feel formal. Clear glass can feel airy and pretty. Wood adds weight and softness at the same time.

For weddings, that usually reads as intimate. For brand dinners, it can make a room feel less corporate and more considered. For private celebrations, it helps avoid the “hired everything yesterday” look.

A few situations where wooden candle holders work especially well:

  • Long banquet tables: They break up repetition and stop a long table from feeling flat.
  • Mixed centrepieces: They pair easily with fruit, foliage, bud vases, and textured runners.
  • Day-to-night events: They still look good before candles are switched on, which matters for afternoon ceremonies and lunch events.
  • Rustic-luxe styling: They bring in natural texture without making the table look rough.

If you’re still deciding how the centre of the table should carry the whole design, this guide to a centrepiece for table styling is a useful reference point.

Wooden candle holders don’t just fill space. They give a table visual temperature.

They help guests feel the event

The best decor choices don’t ask guests to notice them. They shape how the room feels. Wooden candle holders do that well because they add familiarity. People instinctively read them as grounded, tactile, and welcoming.

That’s why they work across very different event types. The same material can feel romantic with draped linen and roses, or editorial with black cutlery and structured florals. The holder doesn’t force the mood. It absorbs the rest of the styling around it.

Selecting the Right Wooden Candle Holders for Your Theme

Choosing wooden candle holders isn’t about picking “rustic” or “not rustic”. It’s about matching material, scale, and finish to the room you’re styling.

A diverse collection of modern wooden candle holders in various shapes, sizes, and colors against a white background.

Start with the wood itself

Not all wood reads the same way. Some pieces feel raw and earthy. Others feel formal and architectural.

In the Winelands, locally rooted styling has gained real traction. A 2025 Cape Town Tourism survey found that 68% of wedding planners prioritise eco-friendly rentals, which is one reason wooden candle holders made from reclaimed timber or indigenous woods such as yellowwood have become more desirable in local event styling, according to this Winelands decor trend reference.

Here’s how I’d think about common looks:

  • Rooikrans-style pieces: Best when you want texture and a more relaxed, natural finish. They suit farm venues, outdoor receptions, and tables with plenty of foliage.
  • Yellowwood or smoother indigenous timber looks: Better for refined weddings where you still want warmth, but not a rough surface.
  • Dark stained wood: Strong for winter dinners, whisky tastings, and corporate functions where you need depth against black, charcoal, or deep green.
  • Reclaimed timber: Ideal when the brief leans sustainable and character matters more than perfect uniformity.

Match the holder to the candle type

This is where people often get it wrong. They fall in love with the holder first and only later realise it doesn’t suit the candle size, burn style, or event format.

A holder for a taper does a very different job from one designed for a votive, tealight, or LED pillar. If you’re comparing formats, this overview of different kinds of candles is useful because it helps you match candle behaviour to the setting instead of choosing on looks alone.

A practical rule:

  • low holders create glow close to the table
  • medium holders add rhythm
  • tall holders create drama, but can interfere with guest sightlines if overused

Size should follow the table, not the Pinterest board

A large hall can handle stronger scale. A narrow restaurant table can’t. At a wine estate, that distinction matters because many reception layouts mix table shapes in one event.

Use this quick guide when you’re deciding:

Setting Holder size that usually works What to avoid
Narrow guest tables Low and compact holders Wide bases that crowd glassware
Long harvest tables Mixed heights in repeated clusters Identical pieces spaced too evenly
Cocktail tables One small statement holder or tight cluster Tall pieces that feel top-heavy
Corporate dining Cleaner profiles with controlled finish Overly rustic pieces with rough edges

Selection rule: If the holder looks better on its own than it does with cutlery, florals, and glasses around it, it’s probably too dominant.

Finish changes the message

Finish is often more important than shape. A matte, lightly weathered holder says relaxed vineyard lunch. A polished dark piece says evening launch dinner. A softly sealed natural timber piece says understated wedding.

Look at the other hard surfaces in the room:

  • Timber tables: choose holders with contrast in tone or shape
  • White linen tables: wood can be the grounding element
  • Black or stone surfaces: lighter timber usually lifts the table visually
  • Gold details: warmer wood tones tend to integrate better
  • Chrome or acrylic styling: choose simpler, cleaner wooden forms so the contrast feels deliberate

For broader event furniture combinations, this guide to wooden tables and chairs for events helps when you’re trying to keep the whole room consistent rather than styling the holders in isolation.

Uniform or mixed

Uniform holders look organised. Mixed holders look collected and layered. Both can work.

Choose uniform when the event is formal, brand-led, or very symmetrical. Choose mixed when the room needs movement and softness.

What doesn’t work is accidental mismatch. If you mix shapes, keep one thing consistent, such as wood tone, candle colour, or overall silhouette. That’s usually enough to make the arrangement feel intentional.

Creative Styling and Arrangement Techniques

The strongest wooden candle holder styling usually comes from grouping, not from one piece placed in the middle and forgotten. You want movement across the table, not a single object doing all the work.

A collection of wooden candle holders and a textured vase displayed on a black reflective table.

The deconstructed runner look

For long banquet tables, one of the most reliable approaches is a deconstructed runner. Instead of using a dense floral runner from end to end, place wooden candle holders in small repeating groups and let the table breathe between them.

A typical layout might use low holders, a few medium-height pieces, bud vases, and loose foliage. The spacing matters as much as the objects. Guests should see rhythm, not clutter.

This works beautifully at Franschhoek weddings because those venues often already give you visual richness in the architecture or natural surroundings. A table that’s too packed can start to feel heavy. Wooden candle holders help keep the centre line grounded while still allowing glass and flowers to catch the light.

Use an odd number of holders in each cluster when you want the arrangement to feel looser and more natural.

Pools of light for cocktail setups

Cocktail events need a different strategy. Guests move constantly, staff cross between clusters, and tables are smaller. Here, low-profile wooden candle holders are usually more effective than tall statement pieces.

On a high table, I’d rather see a tight cluster of compact holders with one small textural accent than a single oversized item. The effect is quieter, but better. Guests can still set down a drink, talk across the table, and move around it without bumping decor.

For evening corporate events in the CBD, wood also stops the setup from feeling too cold. If the venue has concrete, glass, or black finishes, the candle holders soften the palette without turning the event rustic.

Pairing wood with other textures

Wood becomes more refined when it isn’t asked to do all the visual work alone. The right companions matter.

Good pairings include:

  • Stonewashed or textured linen: softens the overall table and gives the wood something matte to sit against
  • Glass votives or bud vases: add reflection and stop the styling from feeling visually dense
  • Brushed brass or antique gold cutlery: brings warmth without looking too shiny
  • Ceramic vessels: useful when you want organic shapes without overloading the table with timber
  • Fresh greenery: helps tie the holders into outdoor venues and vineyard settings

A few combinations are less successful. Very orange-toned wood with cool silver can look disconnected. Heavy log-style holders with oversized flowers can make the whole table read bulky. Ultra-sleek modern venues often need cleaner wooden silhouettes, not chunky rustic pieces.

Styling by event type

Different events call for different candle holder behaviour.

Wedding tables in the Winelands

For wedding receptions, I prefer layered softness. Wooden candle holders can sit among tapered linen runners, bud vases, and florals that spill lightly rather than stand upright in rigid domes.

The goal is glow, romance, and depth. If every holder is the same height and every arrangement is mirrored exactly, the table can feel stiff. Weddings usually benefit from a little asymmetry.

Brand dinners and launches

Corporate work needs discipline. Wooden candle holders can still be used, but the styling should feel edited.

Try a repeated pattern down the table. Keep finishes consistent. Limit colour shifts. Let the holders support the brand palette rather than introducing a separate story.

In polished corporate styling, restraint usually looks more expensive than abundance.

Private celebrations

Birthdays and anniversary dinners can handle more personality. Mixed woods, family-style serving platters, small florals, and layered candles often work well because the atmosphere is meant to feel convivial rather than formal.

The easiest mistake is overfilling the centre. Leave room for serving dishes, wine bottles, hands reaching across the table, and natural conversation.

Essential Safety Practices for Wooden Candle Holders

Real flame is beautiful. It’s also where styling stops being decorative and becomes operational.

That matters more with wooden candle holders than people sometimes admit. Wood is part of the charm, but it’s also the reason you can’t treat these pieces casually. Venue rules, airflow, guest movement, draping, dried florals, and service patterns all affect whether a table is safe or risky.

A local benchmark makes the point clearly. Western Cape Fire Services data linked 15% of event-related fires between 2024 and 2025 to untreated flammable decor, which is why holders with metal inserts, intumescent coatings, or LED candle pairing are the practical route for SANS 10400 compliance, as noted in this local fire safety reference.

A safety infographic titled Essential Safety Practices for Wooden Candle Holders listing safe practices and risks.

Why LED is often the professional choice

For many indoor events, high-quality LED candles are the smartest answer. Not because they’re trendy. Because they remove several points of failure at once.

They don’t drip. They don’t scorch the holder. They don’t react to drafts from doors, air-conditioning, or evening wind. They also make setup easier when a room needs to be dressed well before guests arrive.

If you want the candlelit look without the operational mess, LED is often the better decision. That’s especially true in venues with dry floral installations, fabric-heavy styling, or strict safety sign-off.

For smaller glass-and-candle formats that often pair well with wood, this guide to votives with candles is worth reviewing alongside your broader table plan.

If using real candles, control the risk properly

There are events where real flame is still approved and suitable. When that happens, the holder itself must be only one part of the safety plan.

Key checks should include:

  • Use inserts or protected cups: Never let flame sit directly against exposed timber.
  • Keep distance from soft materials: Drapes, napkins, menus, foliage, and hanging installations need clear separation.
  • Check stability on the actual table: A holder that seems fine in storage can wobble on uneven flooring, loose linen, or outdoor furniture.
  • Factor in airflow: Cape wind doesn’t only affect outdoor events. It moves through marquees, verandas, and open barn doors too.
  • Assign supervision: Someone on the floor needs to notice if a candle burns low, tips, or starts smoking.

Placement is not a styling afterthought

A beautiful arrangement can still be badly placed. Safety often comes down to where the holder sits in relation to everything else.

A few practical placement rules make a big difference:

Placement issue Better approach
Near draped fabric Move the holder inward and lower the flame point
At table edge Bring it into the centre line to reduce knocks
Under hanging florals Switch to LED or relocate completely
In windy passages Use enclosed or flameless options
Beside busy service zones Keep decor compact and low

Real flame should never be the default. It should be the option that survives every safety check.

What usually goes wrong

The biggest problems aren’t dramatic styling ideas. They’re ordinary oversights. A candle is placed too close to foliage. A holder is used without an insert. A coordinator assumes the venue allows open flame when the venue only permits enclosed candles. Someone adds decor late in the setup and changes airflow or spacing around the table.

Wooden candle holders can absolutely be used safely. But safe use comes from discipline, not optimism. If the room is complex, the weather is shifting, or the brief includes lots of fabric and dried material, LED isn’t a compromise. It’s the professional solution.

Managing and Maintaining Your Rented Holders

Most clients don’t see what happens after collection. They see the styled table, then the event ends, and everything disappears into crates. But rental stock stays beautiful only if clients and suppliers handle it properly.

Professional companies usually inspect each item on return. A 10-point inspection is common, and SA Event Rental Metrics 2025 shows that 78% of damage charges come from improper returns, including wax residue and water damage from incorrect cleaning attempts, according to this rental maintenance reference.

What clients should do after the event

The safest approach is simple. Don’t try to “fix” the holders yourself unless your rental provider specifically asks you to.

A good return process usually looks like this:

  • Remove loose accessories: Take out LED units, batteries, inserts, or glass components if that was part of the handover instruction.
  • Keep like with like: Group matching holders together so collection and recounting are faster.
  • Leave wax alone: Don’t scrape hardened wax with knives or metal tools.
  • Avoid soaking wood: Water and timber rarely end well together, especially after an outdoor event.
  • Report breakage accurately: It saves time and usually prevents arguments about what happened.

What not to use

Clients often mean well and still cause the damage they were trying to avoid. Strong cleaners, dish soap, abrasive pads, and soaking methods can mark sealed finishes or swell the grain.

If you want a general sense of what wood surfaces respond to and what they don’t, these tips for cleaning wood furniture are a helpful baseline. Rental decor is its own category, but the same common-sense principle applies. Gentle handling beats enthusiastic scrubbing.

If a wooden candle holder comes back with untouched wax, that’s usually easier to manage than a holder that someone tried to clean aggressively.

Why rental policies can feel strict

From the client side, some return conditions can seem fussy. From the rental side, they’re usually there because wood remembers bad treatment. Heat marks, swollen fibres, chipped edges, and stained finishes don’t always show immediately, but they shorten the life of the piece.

That’s why the best client behaviour is cooperative rather than corrective. Stack carefully. Keep holders dry. Pack them as instructed. Leave specialist cleaning to the supplier.

Your Rental Checklist for a Flawless Event

When wooden candle holders are chosen well, they do more than decorate a table. They tie the venue, flowers, furniture, and lighting together in a way guests feel immediately. The key is asking the right questions before the booking is final.

Use this checklist when you speak to your rental provider.

Wooden Candle Holder Rental Checklist

Item to Confirm My Requirement / Question Provider's Confirmation
Event type Wedding, corporate dinner, private celebration, matric dance, launch event
Venue style Farm venue, cellar, restaurant, ballroom, marquee, private home
Table format Long banquet, round guest tables, cocktail tables, mixed layout
Desired mood Romantic, modern, rustic-luxe, heritage, minimal, formal
Wood finish Natural, reclaimed look, dark stain, smooth polished, textured
Candle format LED, votive, tealight, taper, enclosed flame option
Safety compliance Are these holders suitable for the venue’s fire rules and setup requirements?
Insert protection Do the holders have metal inserts or another protected flame barrier if needed?
Outdoor suitability Will they work in wind-prone or damp conditions?
Height mix Do I need low-only pieces, or a combination of heights?
Sightlines Will guests still be able to talk comfortably across the table?
Linen and florals Will these holders work with my planned runner, foliage, and centrepiece style?
Quantity How many holders are needed for the table count and layout?
Setup responsibility Who places the holders on site, and in what position?
Candle supply Are candles or LED units included, or rented separately?
Return handling What should be removed, packed, or left untouched after the event?
Cleaning instructions Should any wax or residue be left for the rental team to manage?
Damage policy What counts as normal event wear versus chargeable damage?
Collection timing When will breakdown and collection happen?
Backup plan What’s the alternative if open flame is not approved on the day?

Final practical checks

Before the event, confirm three things in writing:

  • Approval: the venue accepts your candle format
  • Placement: the styling plan leaves enough room for service and guest comfort
  • Fallback: an LED alternative is available if conditions change

That last point saves a lot of stress. Weather shifts, venue managers change instructions, and final safety walk-throughs can alter what’s possible on the day. The planners who stay calm are usually the ones who built in a workable Plan B from the start.


If you’re planning a wedding, corporate function, matric dance, or private celebration in Cape Town or the Winelands, ABC Hire can help you source event-ready decor and furniture that looks good in the room and works on the day. Reach out for practical guidance on styling combinations, venue suitability, and rental options that make setup smoother and the final result more polished.

Gold Side Tables: Your Ultimate Event Styling Guide

You’ve finalised the florals, the candles are on brief, the linen works, and the room still feels a little unfinished. That usually happens in the last layer of styling. The large items are doing their job, but the guest experience between those hero elements still needs shape, shine, and somewhere practical to rest a drink, a clutch, or a small arrangement.

That’s where gold side tables earn their place. In a Cape Town wedding lounge, they can lift a soft neutral palette without making it feel heavy. In a Stellenbosch corporate launch, they give a seating cluster a polished edge and make the room feel considered rather than merely furnished. They’re small pieces, but they read like jewellery in a venue.
The Midas Touch That Elevates Every Event

A planner will often walk into a venue and know immediately that the layout is correct but the mood isn’t landing yet. The sofas are in place. The bar is built. The lighting is working. What’s missing is a reflective accent that catches candlelight, LED glow, or late afternoon sun and ties the styling together without adding clutter.

Gold side tables offer unobtrusive support. They don’t fight with a statement floral install or a dramatic dancefloor. They support it. Place one beside a velvet occasional chair, or between two lounge seats with a low arrangement and glassware, and the whole area feels more intentional. That’s why they work so well as event pieces rather than just furniture.

South Africa’s connection to gold gives that finish extra resonance. The Witwatersrand Gold Rush of 1886 helped shape a long cultural familiarity with gold as a marker of celebration, craft, and status, and the country historically produced over 50% of the world’s gold supply according to this background on gold history. In the Western Cape event world, that affinity still shows up in how clients respond to gold-accented décor.

Gold works best when it’s used as punctuation, not as noise.

For planners building out a coordinated look, it helps to think of these tables as companions to other warm metallic seating details. If your event already includes gold Tiffany chairs, a side table in a matching or complementary finish can stop the room from feeling visually disconnected.

The effect is strongest when the table is doing two jobs at once. It needs to look elegant from across the room and still be useful at arm’s reach.

A Spectrum of Gold Exploring Styles and Finishes

Not every gold side table says the same thing. Some read clean and architectural. Others feel romantic, decorative, or overtly glamorous. Choosing well starts with understanding both style and finish, because clients often ask for “gold” when what they really mean is a specific mood.

A collection of various gold side tables with unique designs arranged against a dark wall background.

Modern gold side tables

Modern gold side tables suit venues where the architecture is already doing some of the work. Think clean-lined wine estate interiors, glass-heavy reception spaces, or corporate lounges where branding needs to remain the focal point. These tables usually rely on slim frames, geometric bases, and restrained tops.

They’re useful when you want metal detail without visual heaviness. A round top with a simple gold frame can sit next to a boucle chair, hold a drink and a candle, and still leave the setup feeling airy.

A modern shape also plays well with black, stone, white, taupe, and smoked glass. If the event palette includes contemporary materials, browsing pieces similar in spirit to marble top end tables can help clarify whether you want the gold to feel warm and decorative or structured and architectural.

Vintage and decorative styles

Vintage-inspired gold side tables bring more personality. You’ll see curved legs, patterned metalwork, Art Deco references, mirrored shelves, or detailing that feels softer and more ornamental. These are often the right choice for weddings, milestone birthdays, or any event where romance matters more than restraint.

They work especially well with:

  • Textured seating: Velvet, tufted ottomans, and upholstered benches.
  • Layered tabletops: Bud vases, votives, champagne coupes, and folded napkins.
  • Warm lighting: Candles, festoon lighting, and amber-toned LEDs.

Use them carefully, though. If the venue already has highly decorative chandeliers, patterned carpeting, and ornate tableware, an overworked side table can push the room into visual clutter.

Practical rule: The more detailed the venue and floral styling are, the simpler the side table should be.

Mirrored and high-glam options

Mirrored gold side tables are the statement-makers. They bounce light, photograph beautifully, and can make a smaller lounge area feel brighter at night. They’re ideal near dancefloors, champagne stations, or entrance moments where reflection adds energy.

The trade-off is maintenance during service. Fingerprints, condensation rings, and cake crumbs show quickly on mirrored surfaces. For formal events with attentive staff, that’s manageable. For high-traffic parties, a less fussy surface is usually easier.

Understanding finishes properly

Clients often use “gold”, “brass”, and “metallic” interchangeably, but the finish changes the feel of the room. The easiest way to think about it is to compare tables to jewellery.

Finish How it reads in a venue Where it works best
Brushed brass Softer, muted, less reflective Romantic weddings, earthy palettes, textured lounges
Polished brass High-shine, formal, more noticeable Black-tie events, glamorous receptions, evening bars
Gold lacquer Smooth and even in colour Modern styling where consistency matters
Gold-plated metal look Richer and more jewellery-like Feature pieces, premium lounge moments

A matte gold finish behaves like brushed jewellery. It adds warmth without shouting. A polished finish behaves like a dress piece. It catches every light source in the room.

That matters when pairing side tables with larger rentals. If your lounge also includes metallic statement surfaces, it’s worth reviewing related styling examples such as gold coffee tables so the metallic elements feel related rather than mismatched.

What usually works and what doesn’t

A few patterns come up repeatedly on real event floors:

  • Works well: One clear metal story across the lounge cluster. Warm gold with warm glassware and cream florals feels coherent.
  • Often fails: Mixing yellow gold, rose gold, chrome, and copper in the same small area without a deliberate reason.
  • Works well: Letting one finish dominate and using other materials to soften it.
  • Often fails: Choosing the table from a product photo without considering what the venue lighting will do to the finish.

The best choice isn’t the most ornate table. It’s the one that keeps the room balanced.

Function Meets Form Selecting the Right Table for Your Occasion

A beautiful table that’s too low, too narrow, or too unstable becomes a nuisance within the first hour of service. Selection should start with use, not with colour. Ask what guests will place on the table, how long they’ll occupy the area, and whether staff need to move around it carrying trays, coffee service, or branded materials.

In Cape Town’s event market, gold-finished side tables account for 12% of premium furniture rentals for night-time events, and a 2024 industry report noted more than 2,500 units rented annually across over 1,200 weddings, which tells you two things at once: they’re popular, and planners need to choose them deliberately rather than treat them as filler pieces. That market context was noted in the earlier gold heritage discussion and is part of the same source base already referenced there.

Start with height and reach

A side table should be easy to use without guests leaning awkwardly forward or twisting in their seat. In lounge clusters, the top should sit comfortably near the arm height of the seating around it. If it’s noticeably lower, glasses end up on chair arms. If it’s too tall, the setup feels stiff and slightly commercial.

For practical selection, use this decision lens:

  • Beside a single chair: Choose a compact top for one drink, one phone, and one small accent item.
  • Between two seats: Allow enough surface area for shared use. Two glasses and a candle arrangement fill space faster than people expect.
  • At a welcome drink point: Prioritise top stability and easy access over decorative base detail.

Event type changes the brief

The right table for a wedding is not always the right table for a product launch or matric dance. The styling may overlap, but the pressure on the furniture doesn’t.

Weddings

Wedding lounges usually ask the table to do three jobs at once. It has to photograph well, support drinks, and leave room for a small floral or candle element. Round tops often work best because guests move around them easily and they soften the look of a seating cluster.

Corporate events

Corporate events need cleaner functionality. If attendees are networking with a drink in one hand and a phone or notebook in the other, the table needs a clear usable surface. Intricate decorative edges can look good in photos but reduce practical space.

Parties and formal dances

High-energy events are where stability matters most. If the floor is busy and guests are circulating constantly, a delicate-looking table with a narrow base can become a headache. In these settings, a sturdier build and simpler top are usually the smarter call.

If guests have to think about using the table, the table is wrong for the event.

Don’t ignore traffic and flooring

Venue flooring changes how a table performs. A polished indoor floor is forgiving. Lawn, gravel, paving joints, and slightly uneven heritage venue surfaces are not. For Winelands events, this becomes a genuine styling decision because the prettiest placement spot isn’t always the most stable one.

Check these before confirming your quantity:

  1. Surface condition: Flat indoor floor, decking, lawn, gravel, or mixed terrain.
  2. Guest density: Quiet lounge corner or high-traffic circulation zone.
  3. Service style: Passed canapés, plated dining, self-pour stations, or coffee service.

A side table succeeds when nobody comments on it. Guests use it, and the room feels finished.

The Art of Arrangement Styling and Grouping Gold Side Tables

One gold side table can be elegant. A well-grouped set can define a whole area of the event. Placement is what turns these tables from isolated accents into layout tools that shape movement, conversation, and photo opportunities.

An infographic titled The Art of Arrangement showing six tips for styling gold side tables.

When planning visual zones, product stylists often talk about background control, reflection, and visual hierarchy. Those same principles apply to events, and the thinking behind crafting the right background for your product is surprisingly useful when deciding how metallic furniture will sit against draping, walls, branding panels, or floral installs.

The Conversation Pod

This is the most reliable arrangement for lounge areas. Use three small tables with slight variation in height or visual weight around a sofa-and-chair grouping. The cluster shouldn’t feel perfectly symmetrical. A little irregularity makes the setup feel lived-in and softer.

Use this when the seating area is meant to keep guests there for a while. One table can take florals, another drinks, and the third can remain open for practical use.

  • Best for: Cocktail lounges, bridal lounges, VIP seating.
  • Avoid if: The footprint is tight and service staff need a direct through-route.
  • Styling note: Keep at least one tabletop mostly clear.

The Elegant Welcome

A single gold side table near an entry point can do far more than fill space. It gives arriving guests a visual cue that they’ve entered a curated event environment. Add a candle, a welcome sign detail, a single arrangement, or pre-poured drinks if staffing and timing allow.

This setup works because it’s restrained. Don’t overcrowd the tabletop. A side table at an entrance should read instantly.

A good arrival moment tells guests what kind of evening they’re walking into.

The Cake Annex

Cake displays often look beautiful in isolation but become awkward in use. Guests need somewhere for flutes, forks, napkins, or small dessert accompaniments, and those practical items can ruin the central display if they’re placed on the main cake table itself.

Two flanking gold side tables solve that neatly. They frame the hero piece and absorb the useful items without diluting the photograph.

The Lounge Bridge

This arrangement is useful in larger venues where separate seating pockets can start to feel disconnected. Place gold side tables between adjacent lounge zones to visually “stitch” them together. The tables don’t need heavy styling. Their repeated finish creates continuity.

This approach works particularly well when the room has multiple conversational clusters and you want a coherent metallic thread running through the floor.

The Photographic Corner

Create a small feature area with one statement chair, one gold side table, and a controlled décor item such as a vase, lamp, or champagne bucket. This gives guests a natural spot for portraits and candids without needing a full photo booth structure.

A few simple rules make these arrangements stronger:

  • Vary heights: Flat lines look static in photos.
  • Use odd numbers: Groupings of three usually feel easier on the eye than pairs.
  • Mind clearance: Guests still need to move naturally around the space.
  • Edit accessories: If the table itself is striking, reduce tabletop clutter.

The strongest styling plans don’t use more pieces. They place the right pieces with intent.

The Smart Choice Renting vs Buying for Cape Town Events

For one-off events, buying gold side tables is usually the expensive answer to a short-term problem. Purchase can make sense for a permanent venue with consistent styling needs and available storage. For planners, private hosts, schools, and most corporate teams, it usually creates extra cost and extra admin.

The local market gap makes that even clearer. For one-off events, renting gold side tables can deliver over 40% cost savings compared with buying, and the same source context notes that no major ZA rental platforms list these items for local hire, while 62% of Cape Town schools report challenges with furniture reuse after events like matric dances according to the source set tied to gold side table purchase listings. That combination matters. If reuse is difficult and storage is inconsistent, ownership becomes wasteful very quickly.

What buying really adds to the job

Buying sounds simple when you’re looking at a product page. The hidden work starts afterwards. Someone has to receive the tables, inspect them, store them, transport them, protect them during loading, wipe them down, and deal with wear across multiple events.

That’s manageable if furniture management is part of your operation. It isn’t manageable if your team is already occupied with guest lists, technical suppliers, catering deadlines, and venue access windows.

Where renting makes more sense

Renting is usually the better route when the event brief changes from one job to the next. A romantic Winelands wedding might need brushed gold with soft edges. A city launch might need something cleaner and more structured. Hiring lets the furniture follow the brief instead of forcing the brief to fit what you already own.

For planners who need broader event inventory as well, a local option such as furniture for hire in Cape Town is one way to keep lounge pieces, seating, and support items aligned within the same logistics plan.

Rental vs purchase comparison for gold side tables

Consideration Renting (with ABC Hire) Buying
Upfront spend Lower commitment for the event period Higher initial outlay
Storage after the event Not your problem once collected You need secure, clean storage
Style flexibility Choose a look that suits each brief You’re tied to what you own
Transport Usually coordinated as part of rental logistics You arrange vehicles, loading, and returns
Maintenance Event-level care during use Ongoing cleaning, repairs, and wear management
Quantity changes Easier to scale up or down per event Difficult if demand changes suddenly
Use case Best for weddings, launches, formal dances, private functions Better suited to permanent venues with repeated use

Buying works for stock rooms. Renting works for events.

The less obvious trade-off

Ownership can also narrow your creative options. Once a venue or planner has spent money on one style, there’s pressure to use it repeatedly whether or not it’s the best fit. That’s how rooms start to look recycled instead of perfectly suited.

With rented gold side tables, the decision can stay where it belongs. On the event concept, the venue conditions, and what guests will do in the space.

Logistics and Care for Hired Tables in the Cape

A gold side table can leave the warehouse spotless and still arrive at a venue facing three local realities: narrow access times, mixed terrain, and weather that changes faster than the running order. Good logistics matter as much as good styling, especially across Cape Town, Stellenbosch, Franschhoek, and Paarl.

A person crouching down while carefully positioning a polished gold side table on a paved outdoor surface.

The outdoor side of the market has become harder to ignore. Source data notes a 22% increase in outdoor corporate events in the Winelands and an 18% rise in rainfall, with 35% of event cancellations avoided by using appropriate rental furniture over owned pieces that are more vulnerable to coastal humidity or UV exposure, as summarised in the source context linked to gold side table category listings. That tells planners something practical. Outdoor furniture selection isn’t decorative fussiness. It’s risk control.

Getting placement right on site

The first step is always surface assessment. A polished table on a flat indoor floor behaves very differently from the same table on paving joints, timber decking, or compacted lawn. Before styling starts, test each placement point for wobble and adjust the plan if the ground isn’t fully true.

A few habits prevent most problems:

  • Check before dressing: Confirm stability before adding glassware, candles, or florals.
  • Keep weight centred: Don’t place heavy objects on one edge of a narrow top.
  • Allow breathing room: Avoid squeezing tables into pathways where guests or staff will clip them.

Caring for the finish during service

Gold finishes look refined when they stay clean and dry. During the event, the biggest threats are condensation, abrasive cloths, sticky spills, and improvised cleaning. If a table gets marked, gentle handling matters more than aggressive wiping.

Use soft cloths only. Avoid harsh cleaners, rough scrubbers, or anything that can dull the finish. If drinks service is heavy, ask staff to keep an eye on condensation rings and wipe them promptly with appropriate materials.

Outdoor use in Cape weather

Outdoor setups need a stricter eye. Even when a table is suitable for event use outside, that doesn’t mean it should sit fully exposed for hours if rain threatens or sea air is particularly sharp. Positioning under a stretch tent, marquee edge, verandah, or covered lounge zone is usually the safer call.

For Winelands events, keep these in mind:

  1. Morning setup is not the whole forecast: Conditions can shift by late afternoon.
  2. Metal reflects heat and light differently outdoors: What looked subtle in a showroom may read brighter in direct sun.
  3. Collection condition matters: Clearing standing water and obvious residue before pickup helps avoid unnecessary issues.

The planners who have the smoothest event days usually treat hired furniture as part of operations, not just décor. That’s what keeps the room looking sharp from guest arrival to final pack-down.

Your Questions Answered

Do gold side tables only suit formal events?

No. They suit styled events. That includes formal weddings and black-tie dinners, but it also includes contemporary brand launches, birthdays, engagement parties, and polished matric farewells. The key is choosing the right shape and finish. A sleek, restrained gold table can feel modern rather than traditional.

How many gold side tables do I need?

Start with function, not symmetry. A lounge area usually needs enough tables so guests don’t have to balance drinks on chair arms or window ledges. If there’s a cake zone, welcome point, or portrait corner, count those separately. It’s better to place fewer tables well than scatter too many without purpose.

Can gold side tables work with silver cutlery or black décor?

Yes, if one finish clearly leads and the others support it. Gold side tables pair well with black, white, stone, glass, and many neutral linen colours. Mixed metals can work too, but only when the contrast feels intentional. If every metallic tone is competing for attention, the room starts to look unresolved.

The safest way to mix finishes is to choose one hero metal and let the rest stay quieter.

Are they practical for drinks and canapés?

They are, provided the top size suits the setting. In cocktail lounges, guests need enough room for glassware and a small styling element. For packed standing events, they should be placed where people can approach them comfortably rather than in circulation bottlenecks.

What if my event is outdoors?

Outdoor use is possible, but placement matters. Covered positions are usually preferable, especially in the Cape where weather can shift during the course of an event. Stability, moisture exposure, and guest traffic all need to be considered before final placement.

Do I need matching gold pieces everywhere?

Not at all. Matching everything can flatten the room. A better result usually comes from repeating gold with restraint. You might use gold side tables in the lounge, a separate metallic detail at the bar, and keep dining tables more neutral.

What causes the most styling mistakes with gold side tables?

Usually one of three things:

  • Choosing by photo alone: The venue lighting changes how the gold reads.
  • Over-accessorising: Too many candles, flowers, menus, and props can hide the table itself.
  • Ignoring scale: A tiny table beside a large sofa looks decorative but not useful.

When the finish suits the room and the proportions suit the guest experience, gold side tables rarely feel like a risky choice.

Add a Touch of Gold to Your Next Event

Gold side tables do more than fill corners. They sharpen lounge layouts, support service, catch light beautifully, and help an event feel finished. In Cape Town and the Winelands, they’re especially effective because the venues often ask furniture to do double duty. It must look refined in photographs and still perform well through setup, guest flow, and pack-down.

The strongest results come from making a few grounded decisions. Choose the right finish for the room. Match the size to how guests will use it. Place each table with purpose. And for one-off events, avoid turning a styling need into a storage problem.

If you’re planning a wedding, activation, formal dance, or private function, hiring is usually the cleaner route. It gives you flexibility, removes the burden of long-term ownership, and lets the furniture fit the event rather than the other way around.


If you’re planning an event and want to use ABC Hire for gold side tables and related event furniture, the simplest next step is to review the available style direction, request a quote, and confirm delivery details for your venue in Cape Town or the Winelands. That gives you clarity on quantities, finishes, and logistics before the styling plan is locked.

Folding Wooden Chairs: Rent Perfection for Your Event

You’re probably choosing between looks, budget, and logistics at the same time. The venue wants something elegant. The client wants the photographs to feel warm, not clinical. The operations side wants quick load-in, quick strike, and no last-minute wobble when guests sit down.

That’s exactly where folding wooden chairs earn their place. In Cape Town and the Winelands, they solve a design problem and an event management problem at once. They suit vineyards, city venues, church halls, private estates, matric dances, and polished corporate functions. But only when the chairs are well built, correctly specified, and handled properly for local conditions.

A lot of generic chair advice falls apart the moment you apply it to a Stellenbosch lawn, a Franschhoek cellar door, or a CBD venue with a tight delivery window. Local planners need sharper guidance than “wood looks nice” or “store them dry”. They need to know what holds up, what photographs well, what moves efficiently, and what fails under pressure.

Why Wooden Folding Chairs Elevate Cape Town Events

A planner standing on a Winelands site visit usually sees the problem straight away. The setting is beautiful, but empty space can feel flat until the furniture gives it structure. Chairs do more than seat guests. They define the aisle, frame the ceremony, shape the dinner layout, and influence how formal or relaxed the event feels.

That’s why folding wooden chairs remain such a strong choice in the Western Cape. They bring warmth, texture, and visual discipline without making a venue feel overdesigned. A beach ceremony, a mountain-facing lawn, and a polished warehouse launch all ask for different styling, but timber adapts well across those settings.

Guests seated on folding wooden chairs at an outdoor wedding ceremony in a scenic vineyard landscape.

Why the style works so often

Wooden folding chairs sit in a useful middle ground. They’re more refined than basic utility seating, but they don’t demand the formality of a banqueting chair with a cover. That makes them effective for planners who need one seating solution to carry a full event from ceremony to canapés to dinner.

They also have real local history. The history of folding chairs in South Africa notes that wooden folding chairs became staples in churches and community halls by the early 20th century, and by 1980 they made up 35% of rented event furniture in Cape Town and the Winelands, with over 50,000 units circulated annually.

Wooden folding chairs don’t just fill a venue. They give the event a visual rhythm that cheaper seating often misses.
Where they outperform other options

They’re especially effective when the brief calls for any of the following:

  • A natural finish in the photographs that softens stone, steel, glass, or vineyard backdrops
  • Fast transitions between ceremony and reception layouts
  • A chair that can stand alone without needing a cover, sash, or heavy dressing
  • Mixed-use events where one chair style needs to serve formal and informal moments

The mistake is treating all folding wooden chairs as equal. They aren’t. Some are built for repeated commercial use. Some are built for occasional light duty and start showing weakness quickly. That distinction matters far more than many new planners realise.

Understanding Wooden Chair Construction and Types

When you inspect folding wooden chairs properly, stop looking at the silhouette first and look under the bonnet. A chair can look polished on delivery and still be the wrong product for heavy event use. The key questions are about wood, joints, hardware, and finish.

A diagram outlining the construction of wooden folding chairs, including materials, elements, types, and durability factors.

Start with the frame, not the stain

A dark stain can make a weak chair look expensive. Don’t let colour distract you from build quality. In event work, the frame has to survive repeated loading, unloading, setup, strike, and storage.

The most important construction point is the joint. According to the wooden folding chair specification sheet from Forever Redwood, structural integrity depends heavily on joint construction methodology and wood thickness specifications. Premium versions use 2-inch thick boards with notched cross-piece connections rather than simple screw fastening, and the combination of wood glue and mechanical fastening can extend chair lifespan from an estimated 3 to 4 years for screw-only builds to 6 to 8 years for reinforced builds.

That matters because the first failure point in cheaper chairs is rarely the seat surface. It’s movement in the frame. You’ll hear it before you see it. A slight creak. A little side flex. Then one chair in a row becomes the chair nobody wants to sit on.

What to look for during inspection

Use this quick physical check when assessing stock:

  • Check the joints first. If the frame relies only on visible screws without stronger joinery, treat that as a warning sign for high-frequency use.
  • Test for lateral movement. Hold the backrest and seat and apply light pressure side to side. Excessive flex means trouble later.
  • Inspect the finish closely. Chips, exposed edges, and rough touchpoints tend to worsen quickly during transport cycles.
  • Look at the folding action. It should open and close smoothly without catching or forcing the frame out of line.

Practical rule: If a chair looks good but feels nervous when you handle it, it won’t improve on event day.

Common types and when they suit the brief

Planners often shop by look first, which is understandable. But style should follow use.

Chair style Best fit Watch for
Classic slatted wooden folding chair Weddings, formal dinners, school events Finish quality and joint strength
Padded-seat wooden folding chair Long ceremonies, conferences, dinners Cleanliness and seat condition
Outdoor-focused timber look Garden events, estate functions Protective finish and moisture handling

If you’re comparing timber seating with complementary furniture, it helps to see how the whole event palette works together. A useful reference is this guide to wooden tables and chairs for events, especially when you’re balancing chair finish against table style and venue mood.

The best planners don’t ask only “Does this match the mood board?” They ask, “Will this still be stable, clean, and presentable at the end of a long event day?”

Sizing Dimensions and Guest Comfort Factors

Guest comfort starts with the specifications. If the chair is too low, dining posture feels awkward. If the frame feels light but unstable, guests notice it immediately. If the folded profile is bulky, the logistics team pays for that problem all day.

A reliable benchmark comes from the commercial beechwood folding chair specification sheet. It lists a 300 lbs weight capacity, a 17.5 inch seat height, and folded dimensions of 17.5"W x 2.5"D x 35"H. It also notes that this compact profile allows approximately 40 chairs to fit on a standard storage shelf, reducing warehouse footprint by up to 60%.

The numbers that matter on site

The 17.5 inch seat height matters because it sits comfortably with formal dining tables and works well for ceremonies where guests may be seated for a while. A chair that’s too low looks stylish in isolation and becomes irritating during dinner service.

The 300 lbs weight capacity is the spec that separates decorative furniture from proper event stock. It signals that the chair is built for broad guest use, not just for lightweight occasional seating. New planners sometimes focus on colour and forget to confirm load rating. That’s backwards. Capacity should be confirmed before finish options are even discussed.

Comfort isn’t only about the frame

Padded seats aren’t always necessary, but they do change the guest experience in the right setting.

Use them when the schedule includes:

  • Long ceremonies where guests won’t move for an extended stretch
  • Corporate presentations that require people to stay focused and seated
  • Multi-course meals where comfort affects how relaxed the room feels

Skip them when the event leans more casual, the seated portion is short, or the bare timber look is part of the design language.

There’s also a planning connection between chair comfort and room layout. Even a good chair feels cramped if the rows are too tight or the table spacing is off. If you’re refining flow and spacing, this guide on how to place furniture is a useful visual reference for thinking through circulation, focal points, and guest movement.

A comfortable chair in a bad layout still feels like a bad seating choice.

Why folded dimensions matter more than most planners think

Transport crews notice folded depth immediately. A slim folded profile speeds loading, reduces clutter in holding areas, and helps when venues offer limited back-of-house space. That’s particularly useful when ceremony chairs need to be cleared quickly before the reception reveal.

For planners, the lesson is simple. Ask for the exact chair spec, not just the finish name. “Wooden folding chair” is a category, not a standard.

Styling Wooden Chairs for Weddings and Corporate Functions

The reason folding wooden chairs stay relevant isn’t nostalgia. It’s range. They can blend into a minimalist setup or become part of the visual story when you dress them well.

For weddings, they create softness without fuss. For corporate events, they remove the coldness that standard conference seating often brings. The same chair can feel romantic, restrained, modern, or grounded depending on layout and styling choices.

A rustic wooden folding chair decorated with a soft sage green fabric sash and floral bouquet.

Wedding setups that feel intentional

On a lawn ceremony, folding wooden chairs work best when the rows are crisp and the aisle is clearly defined. Don’t rely on the surroundings alone to do the visual work. The chair lines should create structure, especially in open venues where the eye needs an anchor.

A few styling approaches work consistently well:

  • Leave the chairs mostly bare when the venue already offers strong scenery such as vineyards, mountains, mature trees, or stone buildings
  • Add a small floral tie or fabric accent to selected aisle chairs rather than decorating every chair in the same way
  • Use signage sparingly on the first row or selected reserved seats so the chair remains elegant rather than cluttered

For reception dining, wood pairs well with textured linen, tapered candles, and natural florals. If the planner starts layering too many decorative treatments onto the chair itself, the look can become busy very quickly.

Corporate use that doesn’t feel makeshift

Corporate teams often assume wooden folding chairs are only for weddings. That’s too narrow. In the right venue, they help a brand event feel considered and human rather than temporary.

They work particularly well for:

  • Product launches in design-led spaces
  • Panel discussions where standard conference seating would feel flat
  • Team gatherings in the Winelands where polished but relaxed styling suits the setting

The trick is discipline. Straight rows. Consistent spacing. Clear sightlines. Enough legroom. Minimal branding on the chair itself.

A corporate event doesn’t need sterile seating to feel professional. It needs order, comfort, and a setup that matches the venue.
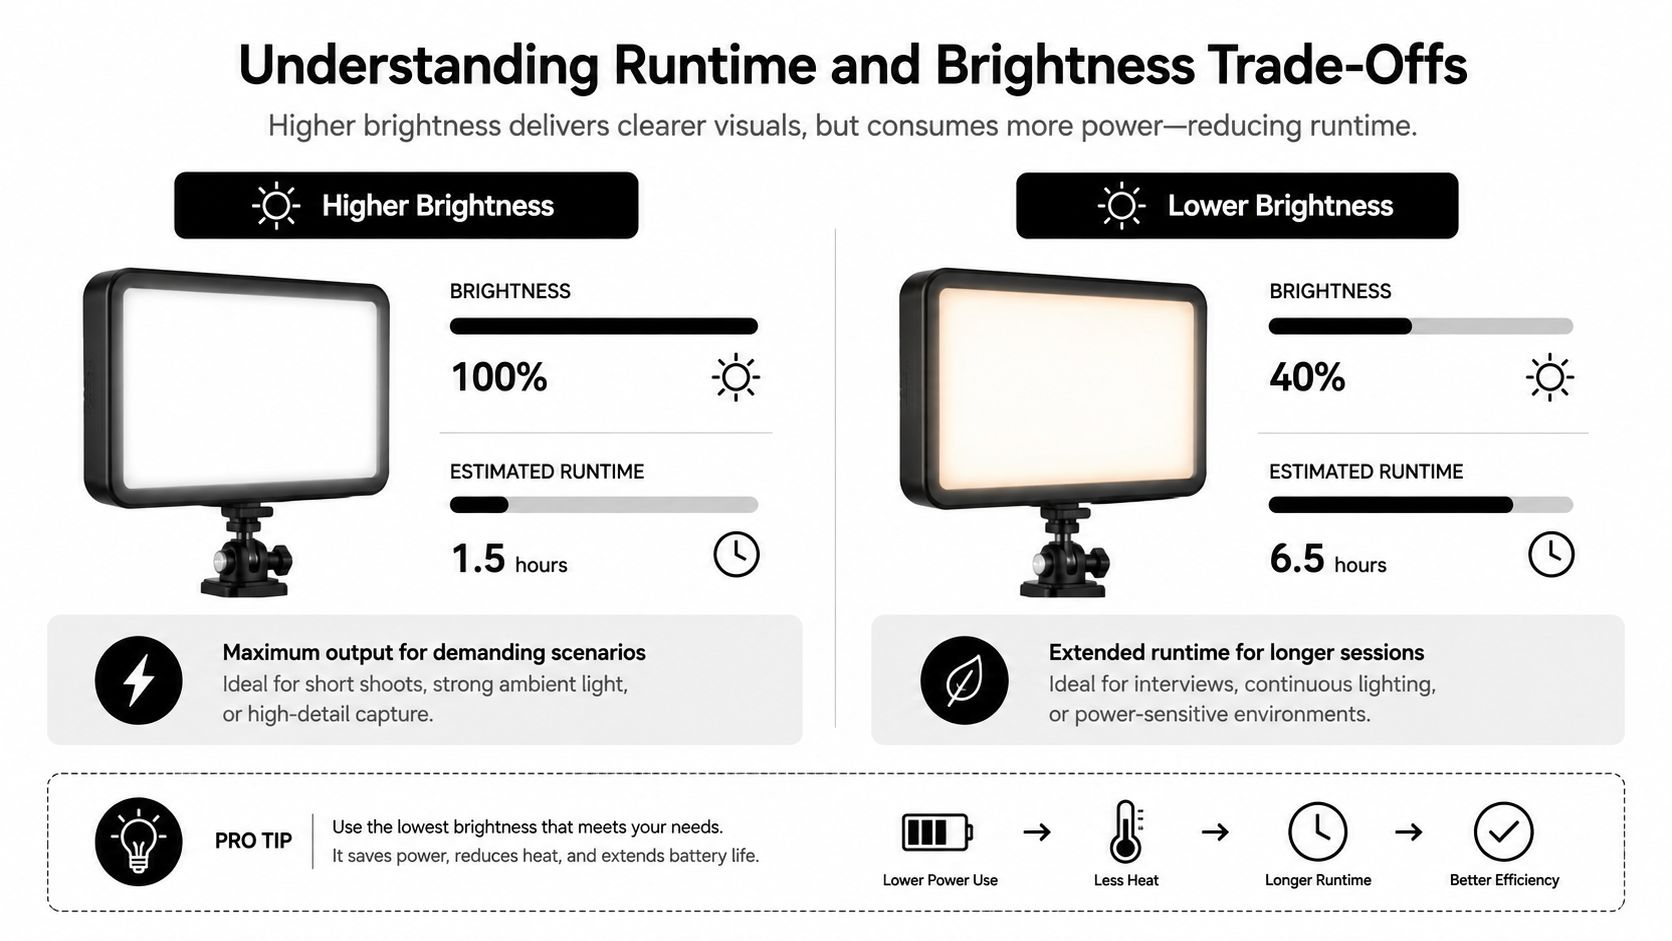
If you’re building a ceremony or reception look and want to compare seating styles more broadly, this guide to chairs for wedding events is a useful planning reference.

When not to overstyle them

Some chairs should be left alone. If the timber finish is attractive and the venue has character, extra décor can dilute the effect.

Avoid heavy chair dressing when:

  • the aisle already has floral structures,
  • the tablescape carries most of the detail,
  • or the event leans modern and clean rather than romantic and layered.

The chair should support the room, not compete with it.

Rental Versus Purchase A Practical Cost Analysis

A planner booking 120 chairs for a Franschhoek wedding and a venue manager setting 120 chairs every weekend are solving two different problems. That is why the rent-versus-buy decision needs to start with usage pattern, not sticker price.

For many Cape Town planners, rental is the better financial decision because it keeps costs tied to confirmed events. Cash stays available for items that change from brief to brief, such as styling, transport, weather cover, and staffing. If you need a broader benchmark for local chair hire options for events, compare the quote against your expected annual usage, not against a single purchase invoice.

Why rental fits the Western Cape event market

The Western Cape has treated chair hire as a standard part of event operations for decades. As noted earlier in the article’s historical source, folding chairs have long been circulated through the Cape Town and Winelands rental market for weddings, community events, and venue setups.

That local pattern makes sense. Event formats here change fast. A planner can move from a beachside ceremony to a cellar dinner to a school function in the same month. Hiring lets you match chair quantity, timber finish, and seat style to the venue instead of forcing every event into one stockholding decision.

It also reduces exposure when guest numbers move late.

Understanding ownership costs

Buying starts to make sense when chairs are used often enough to justify storage, maintenance, and transport systems. That usually suits venues with regular in-house functions, estates with dedicated staff, and businesses running repeated setups from one base.

For everyone else, ownership tends to cost more than expected because the hidden work sits outside the purchase invoice:

  • Storage space that stays dry, secure, and organised
  • Cleaning between events, especially after dust, mud, wine spills, or coastal moisture exposure
  • Maintenance checks for loose screws, worn feet, finish damage, and wobble
  • Transport planning with suitable vehicles, loading protection, and labour on both ends
  • Stock replacement when damaged chairs leave you with a mismatched set

In Cape Town and the Winelands, those costs show up quickly. A chair that lives in a damp storeroom near the coast ages differently from one kept in a dry, controlled venue store inland. A set used on gravel farm roads, lawn ceremonies, and frequent load-ins will need more touch-ups than many first-time buyers allow for in their budget.

When purchase does work

Purchase can be the right move for a venue with steady demand and a fixed event profile. If the same style is used week after week, the numbers can work. Control also improves. Your team knows the condition of the stock, the stacking method, and the setup standard.

But planners should be honest about volume. If you run occasional events, changing formats, or client-led styling, rental usually protects cash flow and avoids being locked into last year’s buying decision.

Choice has value. So does flexibility. In this region, both often matter more than ownership.

Managing Logistics and Care for Cape Town and Winelands Venues

A ceremony can start under clear skies in Franschhoek and end with chairs being rushed under cover twenty minutes later. On the Atlantic Seaboard, salt air settles on timber faster than many planners expect. In Cape Town, chair logistics are never only about quantity and style. Site conditions decide whether your setup stays clean, stable, and presentable through the event.

A row of wooden folding chairs with light beige fabric seats stacked neatly in a room.

Handle the venue before you handle the chairs

The biggest mistakes usually happen before unloading starts. A planner approves a layout from photos, then the crew arrives to find a sloped lawn, loose gravel, a narrow gate, or a ceremony area far from the nearest vehicle access.

Check the route in practical terms. Where does the truck stop? Is the path firm enough for trolleys, or will every chair need to be carried by hand? Is there a shaded or covered holding area if the room is still being turned or the weather changes?

That matters even more in the Winelands. Many estates look easy on a site visit, but long farm roads, cellar entrances, and split-level lawns can slow setup and increase handling damage.

What actually protects wooden folding chairs on local sites

Bring chairs out as late as the run sheet allows. Early setup sounds organised, but hours of sun, wind, dust, or damp air create extra cleaning and a higher risk of finish wear before guests even sit down.

Use a simple event-day routine:

  • Inspect the exact seating footprint before unloading the full batch
  • Test a few chairs on the actual surface, especially on lawn edges and gravel
  • Keep covers or moving blankets nearby if weather exposure is possible
  • Assign one crew member to check row spacing and wobble by hand, not by eye alone
  • Wipe down seats and top rails just before guest arrival

I advise planners to leave labour room for one reset. In this region, that buffer saves events.

Weather plans need a real fallback area

A weather plan is only useful if the fallback space is ready and reachable. "We can move inside if needed" is not enough if the inside room still has supplier cases stacked in it, or if staff need twenty minutes to clear it.

Choose the backup position in advance. Mark the route. Confirm who gives the move instruction. If wind picks up in Camps Bay or mist rolls in over a Stellenbosch lawn, hesitation causes more damage than the weather itself.

For planners comparing suppliers, this guide to chair hire for Cape Town events gives helpful context on matching stock and service levels to different venue types. Wedding teams juggling the wider reception schedule can also pair chair planning with this ultimate wedding reception planning checklist.

Post-event care decides how the next setup looks

Good-looking chairs are often lost at strike, not during service. Wet chairs get folded too soon. Chairs are stacked with grit between frames. Hardware gets forced by tired crew trying to load quickly at the end of a long day.

Dry each chair before stacking or returning it. Check for mud on the feet, moisture on the seat, and new scratches around hinges and top rails. Stack evenly, avoid over-tight load packing, and keep timber out of damp storerooms after coastal or rainy events.

That discipline is what keeps a wooden folding chair set presentable across a full Cape Town season.

Your Actionable Chair Hire and Staging Checklists

Good chair decisions rarely come from taste alone. They come from asking the right questions before booking, then running a clean setup on event day. These two checklists do exactly that.

Chair hire checklist for planners

Use this when speaking to any rental company.

  • Confirm the build quality. Ask how the joints are constructed and whether the chairs are intended for commercial event use.
  • Request exact specifications. Get the seat height, folded size, weight capacity, and whether the seat is padded.
  • Ask about finish condition. Find out how the supplier checks for scratches, chips, wobble, and loose hardware before dispatch.
  • Discuss venue conditions openly. Tell them if the event is on grass, gravel, paving, or indoors, and whether weather exposure is likely.
  • Clarify delivery and collection timing. Tight venue windows need planning long before event week.
  • Check contingency handling. Ask what happens if weather forces a timing or layout change.

For wedding clients managing a bigger planning workload, this ultimate wedding reception planning checklist is a useful companion resource because seating decisions are easier when they’re tied to the rest of the reception plan.

Event day staging checklist for your team

Run this on site before guests arrive.

  1. Walk the seating area first
    Check slope, soft ground, drainage risk, and wind exposure before placing a single row.

  2. Set the first row carefully
    If the first line is crooked or unstable, every row behind it becomes harder to fix.

  3. Open and test sample chairs as you go
    Don’t assume every chair in the batch is identical. Catch issues early.

  4. Keep spacing consistent
    Guests notice uneven gaps immediately, especially in ceremony layouts and theatre-style setups.

  5. Do a final wipe and visual sweep
    Remove dust, marks, leaves, and any chair that looks out of line with the rest.

The last ten minutes before guest arrival matter more than the first hour of setup.

  1. Break down with care
    Fold properly, keep damp chairs separate if needed, and avoid dragging or stacking carelessly during strike.

If you need reliable event seating across Cape Town, Stellenbosch, Franschhoek, Paarl, and surrounding areas, ABC Hire can help you match the right chair style to the venue, layout, and occasion. Reach out for practical guidance on hiring furniture that looks right, handles well, and arrives ready for service.

Your Guide to Renting Bistro Table Chairs in Cape Town

Picture a sunset wedding in the Stellenbosch Winelands or a chic corporate launch party looking out over the Cape Town city bowl. What's the secret ingredient? Intimate, stylish seating that draws people together. Bistro table chairs are often the unsung heroes of these events, doing far more than just providing a place to sit—they shape the atmosphere and spark connection.

The Essential Role of Bistro Chairs in Cape Town Events

When it comes to planning an event, furniture isn't just about filling a space; it's about setting the stage for memories. Bistro table chairs, with their classic look and small footprint, are masters at creating those perfect little pockets for conversation. It's best to think of them not just as seats, but as complete "conversation nooks" for two or three guests to relax and connect. For anyone hosting an event in the Western Cape, that makes them an incredibly valuable tool.

A scenic patio with a wicker bistro table and two chairs overlooking a beautiful mountainous landscape.

This guide is your go-to resource for hiring these iconic pieces from ABC Hire. We’ll walk you through everything, from picking the right style for your venue to getting your layout just right. Our goal is to show you exactly how these simple sets can turn any spot—from a huge wine estate to a sleek city terrace—into an unforgettable setting.

Why Bistro Sets Are a Top Choice

So, what makes bistro sets such a popular choice for events in our area? It all comes down to a perfect mix of practicality and good looks. Their small size means you can place them almost anywhere, letting you make the most of your space without it feeling cluttered. You can easily line them up along a balcony, group them in a garden, or create a relaxed, café-style zone.

The real magic of a bistro set is its ability to create intimacy. Unlike big, formal dining tables, they naturally bring people closer, making them ideal for networking at corporate events or for offering a quiet moment at a busy wedding.

Transforming Spaces with Style and Function

At the end of the day, your seating is a cornerstone of great event design. It directly impacts how your guests move, how comfortable they are, and the overall vibe of the day. For a bigger picture on making your event a hit, check out guides on how to plan a successful event that cover all the moving parts.

As we dive in, you’ll see how choosing the right bistro table chairs is a huge part of that puzzle. For even more seating inspiration, you can explore our comprehensive guide to hiring chairs for any occasion.

Matching Chair Styles to Your Cape Town Venue

Choosing the right bistro table chairs is about so much more than just giving guests a place to sit. It's the detail that pulls your entire event's look together, setting the mood and defining the space. The right chair sends a message, creating an atmosphere that feels effortless and intentional.

For anyone planning an event in Cape Town, this is a crucial step. A romantic wedding tucked away in the Franschhoek vineyards demands a completely different feel than a slick corporate party at a modern V&A Waterfront venue. Your chairs are the bridge between your theme and the location itself.
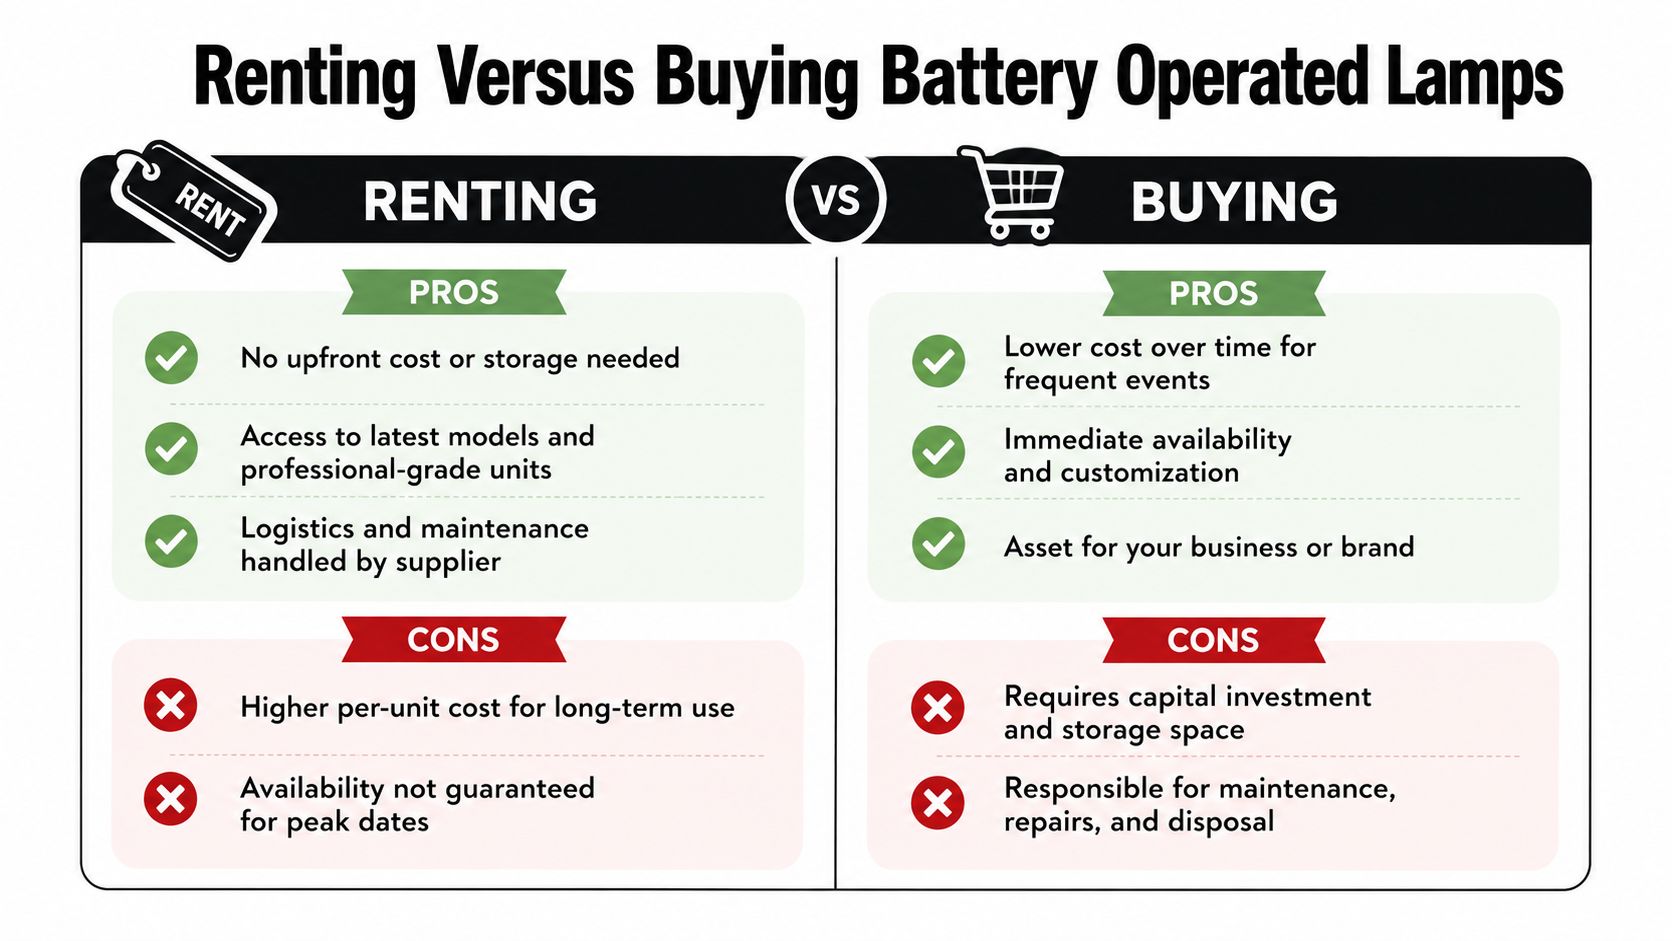
Classic Elegance for Winelands Romance

When your backdrop is the rolling hills and historic Cape Dutch estates of the Winelands, you need chairs that whisper timeless sophistication.

  • Wrought Iron Chairs: These are the quintessential choice for a garden party or vineyard wedding. Their elegant scrollwork and solid frame bring to mind a classic European bistro, feeling right at home among the oaks and vines of Stellenbosch or Paarl.
  • Bentwood Chairs: With their graceful, steam-bent curves, these chairs offer a look that is both rustic and incredibly refined. They're perfect for bringing a vintage or bohemian vibe to life, especially when set alongside natural wood tables.

What's great about these styles is that their open designs don't feel heavy or block the view. They complement the stunning scenery, rather than competing with it, letting the natural beauty of the Winelands remain the star.

One thing every Cape Town planner knows is that you have to be ready for the weather. Your furniture needs to stand up to our brilliant sun and the sudden arrival of a coastal breeze, so durable materials are a must.

Modern Lines for Urban Chic Events

Hosting your event in a contemporary city space—a sleek art gallery, a rooftop bar, or a minimalist conference centre? Your chairs need to match that sharp, modern energy. This is where clean lines and industrial-inspired materials really shine.

For these settings, aluminium or powder-coated steel bistro table chairs are a fantastic choice. Their minimalist design feels crisp and professional, making them perfect for corporate functions, product launches, or sophisticated cocktail parties. They come in a range of colours, from classic black and white to bolder shades, so you can easily match them to your brand or event palette.

These materials are also incredibly practical. Aluminium is surprisingly lightweight, which makes setup and last-minute layout changes a breeze. Powder-coated steel, on the other hand, is exceptionally tough, resisting scratches and chips to keep looking flawless all night long. If you're looking for more ideas on creating a unified look, see how we approach pairing wooden tables and chairs.

Weathering the Cape Climate with Smart Material Choices

The Western Cape's unique climate means your furniture has to be as tough as it is beautiful. From the salty sea air on the Atlantic Seaboard to the intense UV rays beating down in the Winelands, choosing weather-resistant materials for an outdoor event isn't just a good idea—it's essential.

Always look for bistro table chairs that are built to handle the outdoors.

  1. Powder-Coated Finishes: This process seals metal chairs with a tough protective layer, guarding them against rust and corrosion from that salty sea spray.
  2. Weather-Treated Wood: If you love the look of wood, make sure the chairs are properly sealed to resist moisture and prevent fading or cracking in the sun.
  3. Durable Synthetics: High-quality resin or plastic chairs can be a brilliant, low-maintenance solution that delivers on style without the weather worries.

By thinking through both the style and the substance of your chairs, you can be confident they won't just look incredible, but will also perform perfectly. It's that peace of mind that lets you focus on your guests and enjoy the day.

Designing Your Event Layout with Bistro Sets

Great event design is all about flow. It’s not just about filling a space with furniture; it's about choreographing how your guests move, connect, and experience the day. Think of your floor plan as a map for a great time, and bistro table chairs are one of your best tools for creating memorable spaces.

Getting the layout right is what separates a good event from a truly fantastic one. It’s about creating an atmosphere that feels effortless and inviting. Here’s our guide to planning your space with bistro sets, turning that blank venue floor into a vibrant, functional setting your guests will love.

Creating Flow and Function with Your Floor Plan

First things first: what is each area for? Are you picturing a buzzing cocktail zone, quiet nooks for conversation, or a scenic spot for guests to simply catch their breath? Bistro sets are incredibly adaptable and can work wonders in all these scenarios.

For a big wedding reception, you could use bistro sets to create small, intimate clusters away from the main dining area. This gives guests a comfortable place to chat without having to shout over the DJ. Or, on a narrow hotel balcony, a few sets lined up can create a VIP feel, making the most of a space that might otherwise be overlooked.

The real secret is to avoid bottlenecks and create clear, intuitive pathways. A good layout guides guests naturally through your event, encouraging them to explore different areas and mingle. As a rule of thumb, always make sure your main walkways are at least 1.2 to 1.5 metres wide.

This visual guide shows how different chair styles can complement various Cape Town event settings, helping you picture the perfect fit.

An infographic showing three styles of chairs suitable for outdoor venues in Cape Town, South Africa.

As the infographic shows, your venue and theme really point the way. Romantic wrought iron feels right at home in the Winelands, while sleek, modern aluminium is perfect for a chic city function, highlighting how important material choice is for handling the Cape’s unique weather.

Calculating Guest Capacity and Spacing

Once you have your zones mapped out, it's time to think about the numbers. Nothing kills the vibe faster than an overcrowded room where guests feel trapped.

A simple way to plan is to think about 'guest density'. For a standing cocktail-style event with some seating, you should aim for about 1 to 1.5 square metres of floor space per person.

When placing your bistro sets, spacing is everything—for both comfort and looks.

  • Between Sets: Leave at least 1.5 metres between the edges of your tables. This gives guests enough room to pull out their chairs and allows people to walk between tables without bumping into anyone.
  • For Pathways: In main traffic areas, like the path to the bar or restrooms, open that gap up to 2 metres. This creates a clear, wide lane and prevents frustrating logjams.
  • Against Walls: Always leave a minimum of 1 metre between a pulled-out chair and any wall or barrier. This gives people plenty of room to get in and out of their seats comfortably.

To make planning even easier, here’s a quick calculator to help you figure out how many sets you might need and how to arrange them.

Bistro Set Spacing and Capacity Calculator

This table gives you some handy estimates for planning different types of events. Use it as a starting point to make sure your layout feels spacious and works for your specific needs.

Event Type Recommended Space Per Set (sq. metres) Guests Per Set Layout Tip
Cocktail Reception ~4 sq. m 2 Scatter sets to create mingling zones and prevent crowding near the bar.
Casual Dining ~5 sq. m 2 Arrange in neat rows or small clusters for a relaxed café feel.
Lounge/Breakout Area ~6 sq. m 2 Space sets out generously to create private, comfortable conversation nooks.

Remember, these are just guidelines. The key is to visualise your guests moving through the space and adjust accordingly for maximum comfort. For a broader look at all your options, check out our complete guide to table and chair rentals.

Layout Ideas for Cape Town Venues

Let’s bring this to life with a few classic Cape Town scenarios. These examples show how a little strategic placement of bistro table chairs can totally transform a venue.
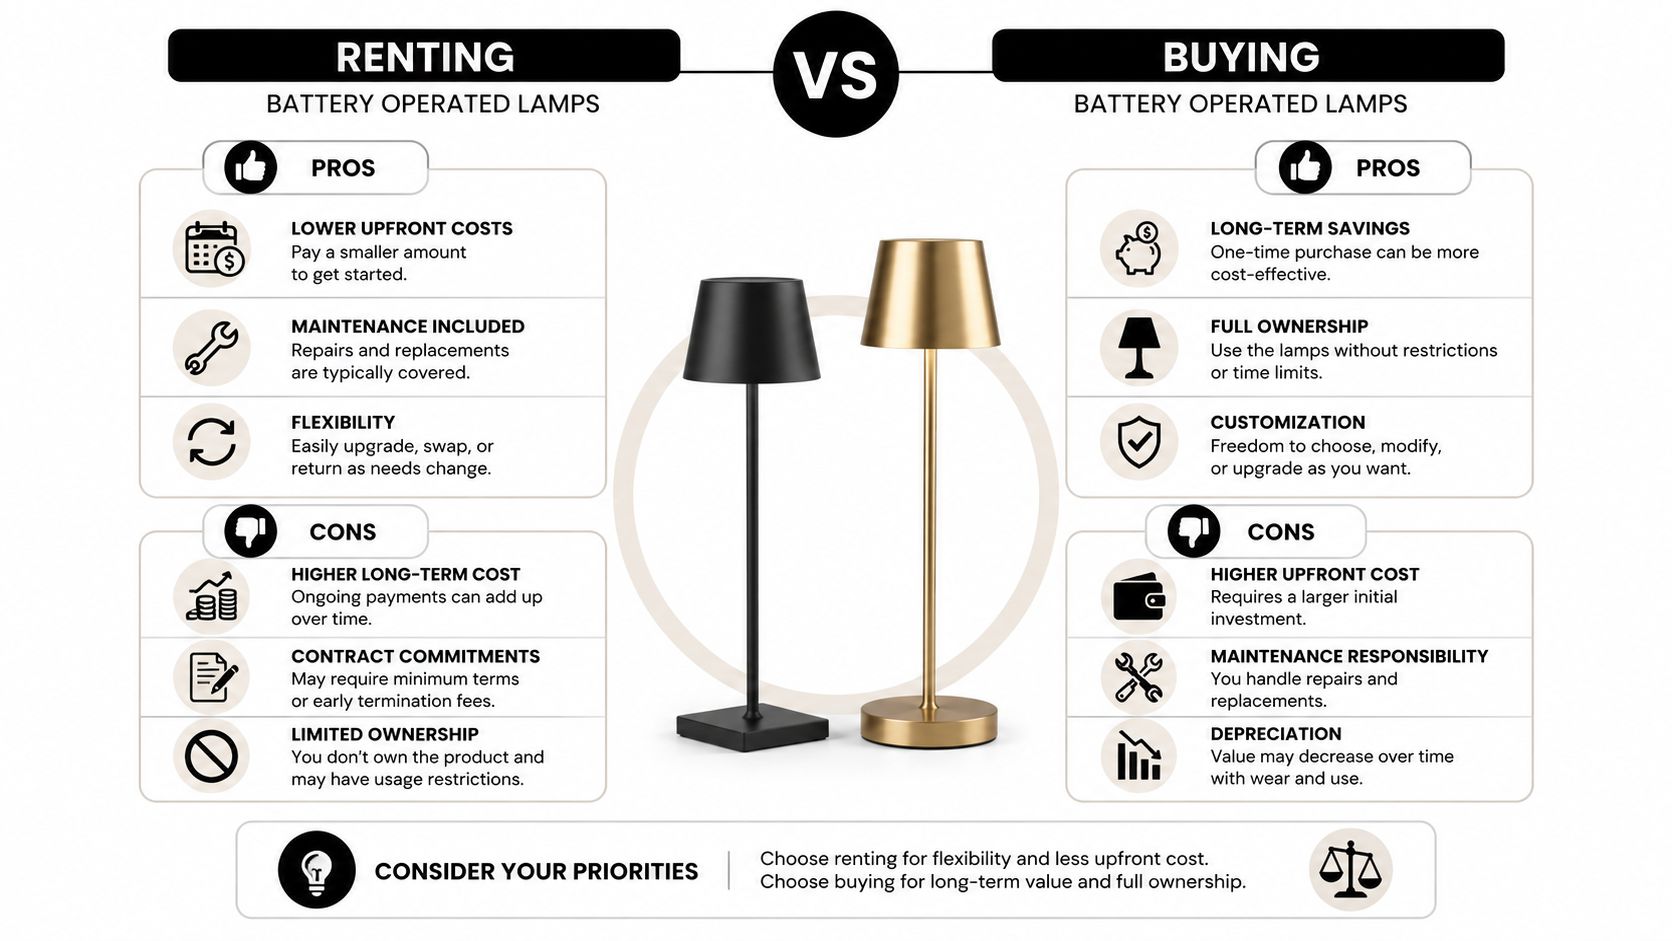
1. The Winelands Wedding Reception
Picture a gorgeous Stellenbosch wine farm. You could scatter bistro sets under the old oak trees or along a veranda overlooking the vineyards. This creates perfect little informal spots for guests to relax with a drink during cocktail hour, away from the more formal dining setup. The spacing can be generous here, adding to the feeling of serene, open luxury.

2. The Corporate Rooftop Party
For a swanky networking event on a city rooftop with those killer Table Mountain views, use bistro sets to break up the open space. Arranging them in small groups encourages conversation. We love placing them along the edge so guests can take in the view, just making sure the paths to the bar and food stations stay wide and clear.

3. The Intimate Courtyard Celebration
In a sheltered courtyard in the City Bowl, a handful of bistro sets can create an incredibly charming, European café vibe. It’s a layout that’s perfect for a milestone birthday or an engagement party. Here, you can group the sets a little closer to build a cosy, intimate atmosphere while still leaving enough room for everyone to move around comfortably.

Styling Bistro Chairs: From Sunny Daytime Charm to Evening Glamour

One of the best things about bistro table chairs is just how versatile they are. Think of them as the perfect starting point, a foundation you can dress up or down to suit any theme, whether it’s a relaxed daytime affair or a chic evening soiree. With a few creative touches, you can transform these simple seats from purely functional items into statement pieces that your guests will definitely notice.

A row of outdoor bistro chairs adorned with blue and white fabric draped over green cushions.

Good styling is about more than just making things look pretty; it's about creating a whole vibe. It’s those little details—a soft cushion, a sprig of fynbos, the glow of a lantern—that all work together to tell your event's story. Let’s walk through how you can take your bistro sets from a fresh, daytime look to a truly glamorous evening setting.

Mastering Daytime Décor with Linens and Florals

For daytime events, the aim is usually to create a fresh, inviting atmosphere where guests feel comfortable. This is where fabrics and a few natural touches can really work their magic, adding colour and personality to your bistro tables.

It’s just like how a great accessory can completely change an outfit; the same idea applies here.

  • Cushions and Seat Pads: A non-negotiable for both looks and comfort. Pick colours that match your event's palette—think crisp white for a classic wedding or bright floral patterns for a garden party. They instantly make metal or wooden chairs much more comfortable for those long, lazy chats.
  • Fabric Draping: For a bit of soft romance, try draping light, flowing fabric over the backs of the chairs. A sheer organza or natural linen will catch the Cape breeze beautifully, adding a touch of gentle movement.
  • Table Linens: While bistro tables look great left bare, a simple table runner or a small circular cloth can add another layer of sophistication and colour.
  • Minimalist Floral Touches: You don’t need much. A single protea stem in a bud vase or a small posy of fynbos on each table is often all it takes to connect your space to the gorgeous natural scenery of the Cape.

All these small elements pull together to create a welcoming daytime vibe that feels thoughtful and personal, encouraging your guests to sit back, relax, and soak it all in.

The Magic of Lighting for Evening Ambiance

As the sun dips below the horizon, lighting becomes your secret weapon. It has the power to completely shift the mood, turning your functional seating areas into something truly enchanting. The right lighting doesn’t just help people see; it creates an atmosphere.

For instance, stringing fairy lights above a cluster of bistro sets creates a magical canopy that’s perfect for a romantic evening. The soft, warm glow is incredibly flattering and makes the space feel intimate. Placing lanterns on or around the tables adds another layer of warmth, with gentle, flickering light that invites guests to linger longer.

That moment when day turns to night is a key part of any event. By cleverly using lighting, you basically give your space a ‘second reveal,’ wowing your guests all over again as the evening's personality comes to life.

Creating a 'Wow' Factor with LED Furniture

If you really want to make a statement, try mixing classic bistro chairs with modern tech. This blend of old and new is where you can create that unforgettable 'wow' factor. Here at ABC Hire, we’re seeing more and more planners combine our traditional furniture with our innovative LED pieces.

The trend is clear right here in Cape Town. In 2026, bistro table chairs made up 32% of all furniture hires, thanks to a 55% jump in demand for private parties. And for evening events, ABC Hire's LED-enhanced options are now used to light up 70% of night-time receptions, adding a modern twist to a timeless look. You can get more insights on why this classic café style is so enduring from Metropolis Magazine.

Just imagine pairing rustic, industrial-style metal bistro chairs with our glowing LED cocktail tables. The contrast is fantastic. The raw charm of the chairs gets a boost from the futuristic glow of the tables, creating a look that’s both edgy and sophisticated. It’s a brilliant move for brand launches, 21st birthdays, or modern weddings that want to break the mould.

You can set the LED furniture to a single colour that matches your theme or let it cycle through different hues, adding a dynamic, interactive feel to your party. This combination makes sure your event space looks incredible and stays exciting long after the sun goes down.

The ABC Hire Process: What to Expect When You Rent with Us

Planning an event means you have a million things to worry about. Your furniture rental shouldn't be one of them. Think of us as an extension of your team—the people who handle the tables and chairs so you can focus on creating an unforgettable experience for your guests.

This is our straightforward guide to hiring bistro table chairs from us for your event in Cape Town or the Winelands. From your first call to the final pickup, we make sure the entire process is simple, clear, and reliable.

Your Step-by-Step Rental Journey

We’ve refined our process to be as efficient as possible. It’s all about getting you the right gear for your event, without any fuss.

Here’s how it works when you partner with ABC Hire:

  1. Getting Your Quote: It all starts with a chat. Tell us your event date, your venue, and how many guests you're expecting. We'll help you pin down the perfect style and number of bistro chairs, then send over a clear, itemised quote.

  2. Clear Pricing: No surprises here. Your quote will break everything down: the hire fee for each item, delivery costs based on your location (whether you're in the city bowl or a remote wine farm), and the details of our damage waiver.

  3. Locking It In: Once you give us the green light, your order is confirmed. Our logistics crew then gets in touch with you or your venue manager to lock in the best times for delivery and setup, working around your event schedule.

Delivery, Setup, and Collection Made Easy

This is where a great rental partner proves their worth. Our team knows the Western Cape like the back of their hand, from navigating the narrow streets of Bo-Kaap to accessing the grandest wine estates in Franschhoek. We do the heavy lifting so you don’t have to.

Our crew will deliver and place your bistro table chairs exactly where you want them, following your floor plan. After the party's over, we'll be back at the agreed-upon time for a quick, quiet collection, leaving your venue just as we found it. It’s a complete service designed to give you total peace of mind.

And it's a popular choice for a reason. Bistro table chairs made up 41% of all furniture we rented for weddings in Franschhoek and Paarl between 2025 and 2026. With a 98% on-time delivery record to venues in these key areas, you can trust them to be there when you need them. You can learn more about the history of these classic sets from Lazy Susan Furniture.

Pro Tip: Always send us your floor plan or layout diagram beforehand. It helps our delivery team get everything set up quickly and accurately, saving you precious time on the day of your event.

Key Questions to Ask Your Rental Company

To make sure you're working with the right people, it helps to have a few questions ready. This checklist covers the important details and shows you the kind of transparency you should expect from any professional supplier.

  • Do you have a minimum order for delivery?
  • How are your delivery and collection fees calculated?
  • What does your damage waiver cover if something gets broken?
  • Do you offer a full setup service, or is it just a drop-off?
  • What is your cancellation policy?

At ABC Hire, we're always ready with clear, honest answers to these questions. We're here to build a partnership you can rely on, ensuring your event in Cape Town or the Winelands is a huge success.

Common Questions About Renting Bistro Chairs

When you're in the thick of planning an event, the questions can start piling up. From finalising guest numbers to figuring out a plan B for Cape Town's fickle weather, it's natural to want clear answers. We get it. We're not just a supplier; think of us as part of your event team, ready to share our experience.

We've pulled together the most common questions we hear from clients about hiring bistro table chairs. Our aim is to tackle these head-on, so you can feel confident in your decisions and get back to the more exciting parts of planning.

How Many Bistro Sets Do I Need for a Standing Cocktail Event?

This is easily the most important question we get asked. For a cocktail-style event where you want guests to mingle, you definitely don't need a chair for every person. In fact, too much seating can kill the social buzz you're going for. The trick is to find that perfect sweet spot between encouraging people to move around and offering them a comfy place to land.

As a rule of thumb, we suggest providing seating for about 30% to 40% of your guest count.

For a cocktail party with 100 guests, that means having enough seats for 30 to 40 people. Since our classic bistro sets seat two, you'd be looking at hiring around 15 to 20 bistro table and chair sets. This ensures there are always a few inviting spots for guests to take a break, set down their drinks, and have a proper chat.

This approach keeps the energy of the party up while making sure everyone stays comfortable. It's the ideal recipe for a successful, social event that feels lively but never disorganised.

What Is the Plan if It Rains During My Outdoor Event?

Ah, the classic Cape Town question! Our weather loves to keep us on our toes, and planning for "four seasons in one day" is just smart thinking around here. While many of our bistro chairs are built from tough, weather-resistant materials like powder-coated steel, your guests' comfort always comes first.

We always, always recommend having a solid backup plan. This could be:

  • A marquee or stretch tent ready to go.
  • An indoor area at your venue that can be set up quickly.
  • Plenty of large, sturdy umbrellas to cover the bistro sets.

Our crew has plenty of experience with last-minute changes. If the weather turns, we can work with you or your venue manager to get everything moved and rearranged in your backup spot. Sorting out this Plan B from the beginning takes a huge amount of stress off your shoulders on the day.

Can I Mix and Match Different Chair Styles?

Absolutely! We actually love it when clients do this. Mixing and matching different chair styles is one of the best ways to create a space that feels unique, interesting, and full of personality. It’s a great trick to avoid that uniform, "rented" look.

The secret to pulling it off is to have one thing that ties it all together. For example, you could pair our rustic bentwood chairs with some of our more industrial metal ones, but use the same style of table throughout. Another idea is to stick to a strict colour scheme—like black, white, and natural wood—while playing with chairs of different materials and shapes.

Our team is always happy to help you brainstorm. We can act as your styling consultants to help you pick a combination that looks deliberate, chic, and fits the vibe of your event perfectly.

Are There Budget-Friendly Options That Still Look Chic?

Definitely. You don't need a massive budget to create a stylish, memorable event. We have some fantastic options that give you a high-end look for a really accessible price. Our powder-coated steel bistro table chairs, for instance, are hugely popular because they have such clean, modern lines.

Think of them as a blank canvas. They look sleek and sophisticated all on their own, but you can also dress them up easily. A simple colourful cushion, a bit of fabric draped over the back, or a single flower on the table can completely change the look.

In Cape Town's buzzing event scene, this mix of style and smarts has become a major trend. We've seen rental demand for bistro table chairs jump by 45% since 2022 alone. In fact, 68% of local wedding planners now favour bistro sets for intimate setups, and their stackable design can save up to 30% more space during transport and on-site. You can read more about the rise of classic bistro furniture from BistroPatio.com. By picking a versatile, wallet-friendly chair, you free up more of your budget for the other details that make a huge impact.


Ready to create an unforgettable atmosphere for your next event? The team at ABC Hire is here to provide the perfect seating solutions tailored to your vision. Explore our extensive range of bistro table chairs and other event essentials on our website. Visit abchire.co.za to get your free quote today!

Plinths for Sale & Rent: A Cape Town Event Guide

You’ve booked the venue. The menu is sorted. Lighting is on the brief. Then you walk the space and something still feels unfinished. The room looks flat. Your flowers disappear into the table line, your cake has no presence, or your product display blends into the background instead of stopping people in their tracks.

That’s usually the moment plinths enter the conversation.

In Cape Town and the Winelands, plinths aren’t just decorative extras anymore. They’ve become one of the fastest ways to give a wedding, launch, matric dance, or private function a clear focal point without rebuilding the whole layout. Demand reflects that shift. ABC Hire reported a 35% year-over-year increase in plinth rental demand from 2024 to 2025 among wedding planners and corporate event managers in Cape Town and the Winelands according to this event rental market report.

If you’re searching for plinths for sale, you’re probably not looking for a museum pedestal or a permanent architectural base. You’re looking for something event-ready. It must look sharp in photos, hold up through setup and service, and work in real Western Cape conditions, whether that means a city venue, a Stellenbosch estate, or a windy outdoor function in Paarl.

Elevating Your Event from Standard to Stunning

You see it most often during final setup. The venue is good, the brief is clear, the suppliers have delivered, and the room still lacks impact. In Cape Town and the Winelands, that usually happens in spaces that already have plenty of natural character, vineyard views, heritage architecture, mountain backdrops, polished interiors. If the styling all sits at one level, the room can read as flat in person and even flatter in photos.

Plinths fix that quickly because they introduce height with purpose.

Used properly, a plinth gives one element clear priority over everything around it. That could be a cake at a Franschhoek wedding, a floral arrangement at a Stellenbosch estate, or a product display at a city launch. Instead of asking guests to work out where to look, the room does that job for them.

I see the same problem across different event types. Wedding setups often need stronger focus at the ceremony entrance, signing table, cake area, or welcome moment. Corporate functions usually need cleaner presentation at registration, on-stage branding points, awards displays, and product reveal zones. The venues differ, but the requirement is the same. Certain items need presence.

A plinth also helps you use décor more efficiently. One good floral arrangement on the right plinth often has more effect than several smaller pieces spread thinly across tables. The same applies to branded items, candles, gifting details, and statement signage. You are not adding bulk. You are creating a focal point.

Why local planners keep using them

Cape Town events are highly visual and heavily photographed, so placement matters. Venues in the region also come with their own styling constraints. A modern white plinth can look sharp in a city venue but feel too stark at a rustic wine estate. An acrylic option can disappear beautifully in a clean indoor setup, then become a poor choice on uneven grass or in afternoon wind. Those are local decisions. Generic overseas guides rarely cover them well.

Three common uses come up repeatedly:

  • Wedding ceremonies: Lift florals, urns, or signing details so they do not get lost against open space or scenery.
  • Corporate launches: Give products and branded elements a clean, controlled display area.
  • Private celebrations: Build one strong photo moment instead of scattering décor across the room.

Practical rule: If guests should notice an item before the furniture around it, place it on a plinth or give it similar height.

Why “for sale” isn’t the whole question

Clients often start by searching for plinths for sale because buying feels simple. For event work, a better question is usually which plinth will suit the venue, the item on display, the setup window, and the weather risk.

That distinction matters in the Western Cape. A plinth for an indoor hotel ballroom is not always the right plinth for a lawn wedding in Paarl or a wind-exposed function in Somerset West. Material, finish, weight, transport, and stability all affect whether the setup looks polished or starts causing problems during install.

A good plinth should do three jobs well. It must present the item cleanly, hold it safely, and fit the visual language of the event. When those three line up, the room feels considered rather than merely furnished.

What Exactly Is An Event Plinth

An event plinth is a raised display base used to spotlight something important in the room. The simplest way to think about it is this. A spotlight uses light to direct attention. A plinth uses height and placement to do the same thing.

That’s why plinths matter even when they seem visually simple.

A plain white cube, a matte black column, or a clear acrylic stand can do more for a setup than a larger table dressed with linen. The plinth strips away clutter and gives one item a cleaner stage. Guests understand that instinctively. They read the height difference as significance.

More than a pedestal

In event work, a plinth isn’t the same as a permanent architectural base or a gallery pedestal designed for long-term installation. An event plinth is chosen for mobility, styling flexibility, clean lines, and setup practicality.

It helps with more than display:

  • It creates visual hierarchy so key elements don’t get lost.
  • It improves guest flow by marking entrances, focal zones, and transitions.
  • It adds professional polish because the room feels composed instead of improvised.

That last point matters. Guests might not say, “the visual hierarchy was excellent,” but they do feel when a space looks resolved.

What plinths do in a room

A room without height variation often feels unfinished. Everything sits on one plane. Tables, chairs, bars, and décor all compete at similar levels, which weakens the effect of even well-chosen styling.

Plinths break that pattern.

A ceremony aisle gains rhythm when florals sit at staggered heights. A product launch gains authority when the hero item stands alone instead of sharing a table with brochures and water glasses. A welcome area feels intentional when signage, candles, and florals are layered instead of lined up.

A plinth doesn’t need to be dramatic to be effective. It just needs to make the featured item feel deliberate.

Thinking like a designer

When choosing whether to use a plinth, ask three quick questions:

  1. What do guests need to notice first
  2. Does this item deserve its own visual space
  3. Is the current layout too flat

If the answer to any of those is yes, a plinth is usually worth testing.

There’s also a functional side. Plinths can separate delicate or high-value items from busy service surfaces. That’s useful for cakes, veils, awards, floral installations, premium beverages, or branded objects that shouldn’t be handled casually.

Here’s what doesn’t work. Using plinths as random filler. If they’re dropped into the room with no relationship to the layout, they can look awkward or obstructive. The strongest installs use plinths with purpose, either to frame a moment, support a practical use, or build a clean line of sight through the venue.

Choosing the Right Plinth Material and Finish

Material choice is where many event decisions go right or wrong. A plinth can look perfect in a product photo and still perform badly once it spends a day in bright sun, coastal humidity, or a busy install environment.

For Western Cape events, the material needs to suit the venue first and the style second.

A collection of cylindrical plinths made from various materials including wood, metal, glass, and stone.

MDF for controlled indoor setups

MDF is often the starting point because it’s familiar, clean-looking, and easy to finish in matte white, black, or custom colour. For indoor venues, it can be a sensible option when the brief is straightforward and the plinth won’t face harsh conditions.

MDF works well when you need:

  • A painted finish: It gives a smooth, uniform look for minimalist weddings and formal corporate rooms.
  • Short-term indoor use: Ballrooms, conference venues, and controlled interiors are the safest fit.
  • Simple branding applications: Vinyl and surface treatments tend to sit neatly on well-prepared MDF.

Where MDF struggles is outdoors, especially in Cape Town’s coastal and Winelands conditions. Moisture, repeated handling, and exposure all reduce its margin for error.

Acrylic and Perspex for outdoor and premium looks

For outdoor events in the region, acrylic usually outperforms MDF by a wide margin. For outdoor events in the Winelands, acrylic or Perspex is often superior to MDF, as it exhibits 92% UV resistance and can withstand 30kg impacts without cracking, according to this display plinth material guide.

That changes the recommendation for vineyard weddings, matric dances, and high-traffic activations.

Acrylic is a strong fit when you need:

  • Weather resistance: Sun exposure is less of a problem than with painted board materials.
  • A premium finish: Clear, frosted, smoked, or coloured acrylic can look sharper under event lighting.
  • Night-time effect: Acrylic pairs especially well with LED elements because it catches and carries light cleanly.

If the event includes LED lounges, glow furniture, or illuminated bars, acrylic plinths usually feel more integrated than heavy matte units. The whole scheme reads as one design language instead of a mix of separate rentals.

For readers comparing support hardware for other event surfaces, it’s also worth looking at engineered table bases that prioritise stability on uneven ground. The same principle applies to plinth selection. A good-looking top means very little if the base condition is poor.

Finish matters as much as the core material

Clients often ask for “white plinths” as if that settles the decision. It doesn’t. White can be matte, satin, high-gloss, textured, warm-toned, cool-toned, or translucent. Each one behaves differently in photos and under lighting.

A quick comparison helps:

Finish type Best use What to watch
Matte painted Clean weddings, formal corporate styling Shows marks from repeated handling
High gloss Modern launches, polished indoor venues Reflects light strongly and shows scratches
Clear acrylic Contemporary installs, LED styling, product display Needs clean handling to avoid fingerprints
Frosted acrylic Softer luxury look, evening events Can lose impact if lighting is too flat
Branded wrap or logo finish Activations and launches Must align neatly with edges and seams

On site insight: The finish that looks calm in daylight can become overly reflective at night. Always judge the plinth against the event lighting plan, not in isolation.

What usually works best

For a one-day indoor conference, painted MDF can be perfectly adequate if the install is careful and the room is controlled. For an outdoor Franschhoek celebration, acrylic gives a far safer result and usually a cleaner visual payoff. For luxury evening work, especially with LED furniture, transparent or frosted acrylic tends to feel current.

The wrong material creates problems that guests won’t name but will notice. Warping, surface scuffs, visible chips, and tired paint all reduce the standard of the room. A plinth should make the event look tighter, not introduce one more risk to manage.

Selecting the Perfect Plinth Size and Shape

A plinth can be made from the right material and still look wrong if the size is off. Most sizing mistakes come down to proportion. The plinth is too short, too narrow, too bulky, or too delicate for the item it’s meant to support.

For many Cape Town events, there’s a reason one format keeps coming up. The optimal display plinth dimension for many Cape Town events is 30x30x100cm, as it provides a stable base-to-height ratio for outdoor conditions and places items at an ergonomic viewing level for the average guest, according to this plinth dimension guide.

A collection of various marble and granite plinths in cylindrical and rectangular shapes on a floor.

Why that size works so often

A 30x30x100cm plinth hits a useful middle ground. It’s tall enough to lift arrangements, products, candles, or décor into clear view, but not so tall that it starts looking unstable or disconnected from the room.

That size often works because it gives you:

  • A balanced footprint: Wide enough for many floral bases and display objects.
  • Better guest viewing: Objects sit at a more natural visual level.
  • Cleaner floor use: It creates presence without taking up table-scale space.

That doesn’t mean every event needs the same size. It means this is the specification many planners can use as a reliable reference point.

Matching size to purpose

The item on top should always decide the plinth, not the other way around.

For example:

  • Cake displays: The plinth must feel substantial enough to support the cake visually, not just physically. A tiny top under a statement cake looks nervous.
  • Florals: Tall arrangements need enough base width to look planted rather than perched.
  • Product launches: Small premium items can sit on a narrower profile if the room is sleek and controlled.
  • Signage and welcome pieces: Slightly broader tops often help because styling elements rarely sit as neatly as product samples do.

A useful rule on site is to look at overhang. If the item appears to crowd the edges of the plinth, the top is too small. If the plinth overwhelms the item, the scale is too large and the object loses importance.

Choosing between square, rectangular, and round

Shape changes the mood of the install.

Square plinths

Square plinths are the workhorse option. They’re easy to place, simple to align, and suited to most wedding and corporate applications. They read as crisp and architectural, which is why they pair well with modern venues and symmetrical styling.

Rectangular plinths

Rectangular units work best when you want stronger horizontal presence. They suit welcome displays, grouped florals, product lines, or installations where one object isn’t the focus and the plinth becomes part of the composition.

Round or cylindrical plinths

Round plinths soften a room. They’re useful in wedding styling where straight lines already dominate through tables, bars, and staging. They also help break up rigid layouts in industrial or contemporary spaces.

Sizing shortcut: When the venue already has many square edges, a round plinth can add relief. When the room feels visually loose, square plinths usually restore order.

Grouping plinths well

Plinth clusters can look striking, but only when the height relationship is intentional. If every unit is near the same height, the display looks hesitant. If the difference is too dramatic, the grouping can feel gimmicky.

A stronger approach is:

  1. Pick one lead plinth for the hero item.
  2. Use supporting heights for secondary objects.
  3. Leave breathing space so the grouping reads as a composition, not a storage area.

This matters in ceremony backdrops, entrance moments, and brand activations where several plinths need to work together. The goal isn’t just variety. It’s hierarchy.

Creative Plinth Styling for Weddings and Corporate Events

The best plinth styling starts with function, then builds into visual effect. If a plinth has a job to do, the styling usually feels natural. If it’s only there to fill a corner, it often looks forced.

That’s why plinths work across so many event types. They aren’t limited to flowers or sculpture-style display. Beyond simple display, plinths are functionally versatile and can be used to create raised beverage stations, small stages for speakers, or to add significant height variation in flat venue spaces to improve sightlines, as noted in this product page discussing plinth applications.

Elegant display featuring a beige terrazzo plinth on a blue base decorated with fresh floral arrangements.

Wedding styling that feels intentional

In the Winelands, many venues already bring strong scenery. Mountains, vines, stone walls, and established gardens do a lot of visual work. That means the event décor doesn’t need to fight the venue. It needs to frame it.

Plinths are useful because they add structure without closing the space down.

For weddings, they often work best in these placements:

  • Ceremony aisle markers: Instead of low arrangements disappearing into the grass or pathway edge, raised florals define the aisle line and photograph more clearly.
  • Altar or vow area framing: A pair or cluster of plinths can shape the front of the ceremony without building a heavy backdrop.
  • Cake and champagne moments: A dedicated plinth gives the cake breathing room and keeps the surrounding area from becoming a catch-all service point.
  • Welcome displays: Signage, candles, flowers, and favours look more refined when layered on different heights.

If you’re developing the whole table story around the same event, a set of thoughtful center table decoration ideas can help keep the plinth styling and table styling in the same visual family.

Building feature zones instead of clutter

One mistake shows up often at weddings. Décor is spread evenly across the venue, which sounds balanced but usually weakens impact. Plinths let you put more energy into fewer zones.

That might mean:

  • a stronger welcome area,
  • a more sculpted ceremony front,
  • one hero corner for cake and champagne,
  • a focused photo backdrop.

For ceremony and reception installs that need height behind the couple or key feature areas, pairing plinths with hired backdrop elements creates a much cleaner result. A useful reference is this guide to backdrops to hire, especially when you want the plinths to support a layered focal area rather than stand alone.

A room looks expensive when the eye knows where to go. Plinths help create that certainty.

Corporate event and activation uses

Corporate clients often think of plinths as purely decorative until they see how practical they are in a live environment.

At launches and activations, plinths can serve as:

  • Product hero stands for one key item or a small premium range
  • Registration points where tablets, branding, or welcome packs need a cleaner footprint
  • Speaker support surfaces near small presentation zones
  • Beverage display points that separate featured drinks from the main bar
  • Merchandise islands that make samples easier to spot in crowded rooms

For brands, a plinth helps reduce visual noise. That matters when a product needs to stand apart from draping, guests, waiters, and ambient décor. A simple raised object often photographs better than a more elaborate display because the product reads immediately.

Height variation in flat venues

Some venues are excellent operationally but visually flat. Conference spaces, school halls, marquees, and large private properties often need help creating rhythm.

Plinths are one of the quickest solutions because they introduce vertical variation without requiring full scenic build.

A few ways to use them well:

  • Place staggered plinths near an entrance to create an arrival sequence.
  • Use them beside lounges so the furniture grouping feels anchored.
  • Break up long, uninterrupted wall lines with display moments.
  • Create mini stages for speeches, performers, or announcement points where a full platform would be excessive.

What tends not to work

Not every styling idea deserves a plinth.

Avoid these common errors:

  • Too many identical plinths: The effect becomes repetitive and starts to look like stock staging.
  • Overloaded tops: If the plinth surface becomes a dump zone for candles, florals, signage, and favours all at once, it loses definition.
  • Mismatched function: A plinth used as a drinks station must still be practical for guests to approach and use.
  • Ignoring sightlines: A beautiful feature placed too low or hidden behind seating won’t deliver.

The strongest plinth styling is restrained. One object, one zone, one purpose. If more is needed, build a composition with clear levels and spacing.

Buying vs Renting Plinths The Smart Decision for Event Professionals

If you searched for plinths for sale, you’re probably weighing ownership against convenience. That’s a fair question, especially if you plan events regularly. But in the Cape Town market, buying isn’t automatically the smarter move.

The practical issue is supply. Sourcing plinths in South Africa can be challenging due to supply chain gaps, making local rental from a provider like ABC Hire a more reliable and logistically simple option than purchasing and importing for event-specific needs, according to this market gap reference.

A comparison chart outlining the pros and cons of buying versus renting event plinths for businesses.

When buying makes sense

Owning can work well for a venue, production company, or stylist who uses the same format repeatedly and has proper storage, transport, and maintenance systems in place.

Buying is usually more defensible when:

  • Your event style is consistent: You need the same finish and dimensions often.
  • You have storage: Units can be kept clean, dry, and protected between jobs.
  • Your team handles transport carefully: Damage often happens in loading, unloading, and stacking, not during the event itself.
  • You want permanent branding control: Bespoke finishes and logos are easier when the units are yours.

The problem is that many event professionals don’t just need one plinth type. They need variety. Different sizes, shapes, colours, and materials suit different briefs. Ownership can lock you into a narrow look unless you build a large inventory.

Where ownership becomes expensive in practice

The visible cost of buying is only the start. The hidden costs are what catch people later.

Common ownership burdens include:

  • Storage pressure: Bulky items take up valuable space quickly.
  • Transport risk: Edges chip, acrylic scratches, and painted surfaces mark easily.
  • Maintenance time: Someone must clean, repair, touch up, and inspect them.
  • Style limitations: Your stock may not suit the next brief, even if it suited the last one.

A planner working across weddings, launches, school formals, and private functions rarely benefits from being stuck with one standard finish.

Why renting is often the stronger operational decision

Renting gives you access to the right item for the specific event instead of forcing the event to work around what you already own. That’s a major advantage in a region where venue styles vary so widely between city, coast, and Winelands properties.

A practical comparison looks like this:

Decision factor Buying Renting
Variety across event styles Limited to owned stock Greater flexibility per event
Storage and upkeep Your responsibility Provider handles it
Upfront commitment Higher commitment Pay when needed
Last-minute design changes Restricted by inventory on hand Easier to adapt if stock is available

For planners reviewing wider event furniture strategy, this guide on renting furniture for events is useful because the same logic applies across more than plinths. Flexibility often beats ownership in event work.

Decision point: If your business needs adaptability more than repetition, renting usually wins.

The local advantage matters

Imported purchasing can look attractive online until you factor in lead times, finish mismatch, replacement difficulty, and the fact that one chipped or warped unit weakens the whole set. Local rental avoids much of that friction.

For most wedding planners, brand teams, schools, and private hosts, renting is the cleaner decision because it shifts the burden of sourcing, storing, maintaining, and moving the units off your team. You keep the design benefit without taking on the operational drag.

Buying can still be right in some cases. But for event professionals who need range, reliability, and less admin, renting is usually the more useful answer than owning a stack of plinths that only suit half the jobs.

Your Partner for Plinth Hire in Cape Town and The Winelands

A plinth looks simple until you choose the wrong one. Then every weakness shows up at once. The finish doesn’t suit the lighting, the size feels off in the venue, the top is too small for the arrangement, or the material struggles outdoors.

That’s why successful event plinth selection comes down to three things. Choose the right material for the conditions, choose the right size for the item and the room, and use the plinth for a clear purpose rather than as filler. Once those decisions are right, the venue starts to read differently. Key features stand out, guest sightlines improve, and the styling feels resolved.

In Cape Town and the Winelands, those decisions need local judgement. A city launch, a Stellenbosch wedding, a Paarl garden party, and a Franschhoek formal event don’t place the same demands on event furniture. Ground conditions, venue access, natural light, wind exposure, and the overall styling brief all shape what will work well on the day.

That’s where a specialist hire partner makes the process easier. Instead of trying to interpret generic international advice or sorting through plinths for sale that may not suit event use in the Western Cape, it helps to work with a team that already understands local venues, event formats, and setup realities.

If you’re planning an event and want a clearer sense of what style, material, or size will suit your brief, this overview of plinth for hire is a useful next step. It helps narrow the options before you commit to a layout.

The right plinth won’t carry the whole event. But it often changes the way the whole event is seen.


ABC Hire offers practical, event-ready plinth solutions for weddings, corporate functions, matric dances, private celebrations, and styled venue installs across Cape Town, Stellenbosch, Paarl, and Franschhoek. If you need guidance on the right plinth style, material, or setup for your event, speak to ABC Hire for expert local support and a hire solution that fits your brief.

Bag Toss Game Your Ultimate Event Entertainment Guide

Guests have arrived. The drinks are poured, the music is right, and the room or garden looks polished. Then the awkward gap appears. One group hovers near the bar, another checks phones, and the people who don’t already know each other stay in their own corners.

That’s usually the moment planners start looking for an activity that doesn’t feel forced.

A bag toss game solves that problem better than most entertainment add-ons because it gives guests something to do without demanding too much from them. It’s easy to understand, quick to join, and relaxed enough for weddings, corporate functions, birthdays, matric events, and venue open days. In the Cape Town and Winelands event scene, that matters. You need activities that work in polished settings, outdoors or indoors, and with mixed-age guest lists.

The value isn’t just the game itself. It’s what the game does to the space around it. It creates a natural gathering point. People stop, watch, laugh, offer advice, take a turn, and stay a little longer. That’s useful when you’re trying to fill the lull during wedding photos, keep a corporate breakout area active, or give guests at a private party a reason to mingle beyond their own table.

An Introduction to the Ultimate Social Game

The bag toss game is simple on purpose. Players stand opposite a raised board and throw square bean bags toward a hole in the board. Some guests will know it as cornhole, others as bean bag toss. Either way, the appeal is the same. The rules are light, the learning curve is short, and the game doesn’t intimidate first-timers.

A diverse group of friends smiling and laughing while playing a casual outdoor bag toss game.

At events, that simplicity is a strength. Guests don’t need specialist clothing, prior skill, or much confidence to join in. Someone can watch one round and understand enough to play the next. That’s why it works so well across formal and casual environments, especially when the brief is to keep people engaged without turning the event into a sports day.

Why it works so well at live events

A good event activity should do three things. It should be visible, easy to join, and flexible enough to suit different energy levels. The bag toss game ticks all three.

  • Visible from a distance because the raised boards and throwing action catch attention
  • Easy to join midway because there’s no complicated setup for a new player
  • Flexible in tone because it can be social and light, or structured into a mini-tournament

That mix is why planners often use it in cocktail spaces, networking zones, garden receptions, and casual lounge areas. It gives guests a low-pressure reason to interact.

Practical rule: If guests need an explanation longer than a minute, participation drops. Bag toss avoids that problem.

A game with real staying power

This isn’t a novelty that appeared out of nowhere. Cornhole, commonly called bag toss, gained documented traction in the US from the late 19th century. A 2022 Ipsos poll named cornhole America’s most played sport, surpassing bowling and swimming, and a 2017 championship broadcast on ESPN drew nearly 300,000 viewers according to the documented history of cornhole.

That matters for one reason. A game doesn’t reach that level of popularity unless it’s easy to replay, easy to watch, and easy to enjoy with a group.

For corporate planners, that social quality makes it a strong fit alongside broader team-building event ideas for corporate functions. For wedding coordinators, it gives guests something elegant but informal to do between formal moments. For private hosts, it fills dead air without needing an MC to drive the energy every minute.

Where it fits best in the Cape Town and Winelands market

In this region, the bag toss game works particularly well because so many events use indoor-outdoor flow. Guests move between lawns, terraces, courtyards, tasting areas, marquees, and reception spaces. A bag toss setup can sit comfortably inside that rhythm.

It doesn’t need a stage. It doesn’t need amplified sound. It doesn’t compete with the main event. It supports it.

That’s the difference between entertainment that looks good in a brochure and entertainment that helps a live event feel warm, active, and connected.

Mastering the Rules and Official Scoring

The best version of a bag toss game at an event is one that nobody needs to argue about. That starts with clear rules and visible scoring. When guests know exactly how to play, rounds move faster and the game keeps its casual energy.

The basic setup

A standard game uses two boards placed facing one another. Players throw from one side to the other, taking turns. You can play as singles, with one player on each side, or doubles, with partners standing opposite each other.

The official throwing distance is 27 feet. That’s the regulation spacing used for standard play. At events, some hosts shorten the distance slightly for children or for very relaxed social rounds, but if you want a proper competitive feel, keep the full setup.

How a round works

Each player throws all of their bags in turn toward the opposite board. Then the other player or team does the same from the other side. Once all bags have been thrown, you score the round.

The game feels intuitive once the first round starts, but a quick briefing helps. Keep it simple:

  1. Stand beside the board at your end.
  2. Throw underarm toward the opposite board.
  3. Alternate throws with the opposing player or team.
  4. Score after all bags land.
  5. Continue until one side reaches the agreed winning score.

For event use, a printed rules card beside the game helps a lot. It reduces staff interruptions and lets guests self-start.

The scoring system guests should know

Bag toss scoring is one reason the game stays engaging. A player can recover from a weak throw, block an opponent, or steal a round with a clean finish.

The standard points are:

  • Bag on the board earns 1 point
  • Bag through the hole earns 3 points
  • Bag that misses or hits the ground first does not score

Many groups use cancellation scoring. That means one side’s points cancel out the other side’s points in each round, and only the difference is added to the score.

Here’s a simple example:

Result in the round Team A Team B
Bags on board 2 points 1 point
Bags in hole 3 points 3 points
Total before cancellation 5 4
Score added after cancellation 1 0

This method keeps matches closer and gives spectators more reason to stay interested.

A guest doesn’t need perfect technique to enjoy bag toss. They just need one good throw to feel part of the action.

Common terms worth using at events

You don’t need heavy tournament language, but a few common terms help guests follow along.

  • Woody refers to a bag resting on the board for 1 point
  • Hole-in or cornhole refers to a bag going through the hole for 3 points
  • Blocker describes a bag that lands in a difficult spot and interferes with the opponent’s path
  • Airmail means a throw that goes directly into the hole without touching the board

These terms are useful if you’re running a corporate challenge or MC-led wedding tournament because they make the game sound lively without making it complicated.

What works best for first-time players

Most beginners try to throw too hard. That usually sends the bag flat into the board or off the back. A softer toss with a controlled arc works better, especially on a regulation board.

Give guests these quick coaching points:

  • Use a relaxed grip so the bag can leave the hand cleanly
  • Aim for a smooth arc instead of a dart-like throw
  • Release consistently rather than changing style every turn
  • Play the board first if the hole feels too ambitious

For mixed-ability groups, don’t over-coach. A bag toss game is at its best when players feel free to improve casually while still chatting, watching, and rotating in and out.

Event-friendly rule adjustments

At formal events, strict rules don’t always help. The right adjustment depends on the crowd.

For weddings, shorter social rounds keep momentum up. For team-building, paired doubles usually work better than singles because they create more conversation. For schools and family events, a shorter throwing line makes the game inclusive without changing the feel too much.

The key is consistency. Once you choose the format for your event, keep it the same for everyone. That keeps the game fair and avoids confusion later.

Deconstructing the Game Equipment

At a Cape Town wedding, guests will forgive a lot. They will not keep queueing for a lawn game that feels awkward after the first few throws. Equipment quality decides whether bag toss becomes a natural social magnet or a prop people try once and leave.

Three colorful bean bags with the Bag Toss logo resting on a circular green and black target board.

What regulation boards look like

A proper set follows standard dimensions for a reason. Regulation bag toss boards are 48 x 24 inches, with a 6-inch hole centred 9 inches from the top, and regulation bags are typically 6 x 6 inches and 14 to 16.5 oz, as shown in these regulation bag and board dimensions.

Those measurements affect play in practical ways. A full-size board gives beginners enough landing area to stay engaged, while the correct hole position makes scoring feel earned rather than random. Bag weight matters too. Bags that are too light tend to flutter in wind or die on contact. Bags that are too heavy can hit the board hard and bounce away.

For event work, consistency matters more than technical purity. If one board grips and the other slides, guests assume the game is unfair.

Why board build quality changes the experience

Board construction changes how the game feels from the first round. Good sets sit firmly on grass, paving, decking, or temporary flooring, and the incline stays consistent once the legs are opened. Poor sets wobble, shift, or develop a soft bounce that makes accurate throwing harder than it should be.

Some event-grade boards are built from sealed wood for a more polished look. Others use moulded weather-resistant materials that travel better and need less care between hires. The trade-off is simple. Wood usually looks better at weddings and winery functions. All-weather sets generally cope better with repeated transport and mixed venue conditions.

Transport also affects setup time. Some units fold to 3-3/8 inches thick for easier loading and venue movement, according to this product specification for a 48×24 bean bag toss game board.

That matters for planners because it affects:

  • Load-in efficiency at venues with limited access
  • Reliable setup when staff need to build quickly before guests arrive
  • Presentation quality in spaces where every visible detail counts

If you are comparing formats for family days or carnival-style zones, it also helps to look at games such as Kangaroo Toss. The visual style and target shape can change how quickly guests understand the game and decide to join.

Bags matter more than most hosts expect

The bags usually decide whether the game feels satisfying. A well-made bag should feel balanced in the hand, land with enough weight to hold its line, and react predictably on the board surface.

Cheap bags cause most of the frustration I see at private events. Loose stitching changes the shape. Inconsistent fill changes the flight. Slippery or rough fabric changes how the bag behaves once it lands. Guests do not describe those problems in technical terms. They just say the game feels off.

That is why matched sets matter. Four bags that feel one way and four that feel another way will slow down play and start unnecessary debates during a team challenge or wedding tournament.

Local conditions change equipment choices

Cape Town and the Winelands are harder on event gear than many generic guides admit. Afternoon wind in Stellenbosch, heat on a Franschhoek lawn, dust at a farm venue near Paarl, and damp morning setup conditions all affect how boards and bags perform over a full event day.

For local planners, the actual choices look like this:

Equipment choice Best use Trade-off
Sealed wooden boards Weddings, premium private parties, winery venues Heavier to transport and more prone to cosmetic wear
All-weather boards Corporate roadshows, schools, repeat hires, mixed indoor-outdoor use Less natural in rustic styling schemes
Corn-filled bags Traditional feel for short, dry events Less practical in moisture or repeated outdoor use
Synthetic-filled bags Reliable for varied weather and frequent handling Slightly different feel from classic bags

For a vineyard wedding, appearance and stable play usually matter more than shaving a few minutes off load-out. For a branded corporate activation, I would usually prioritise durability, easy cleaning, and a surface that can handle decals or logos cleanly. If guests will be seated nearby between rounds, adding picnic tables and benches for a relaxed game zone often improves dwell time and makes the area feel intentional instead of improvised.

The difference guests notice immediately

Guests may never ask about board dimensions or bag weight. They notice the result straight away. Solid boards, matched bags, and a surface suited to the venue make the game feel fair, inviting, and easy to join.

That is the standard worth hiring for. In live event conditions, better equipment reduces stoppages, keeps play moving, and gives the game a stronger return as a social feature.

Strategic Placement for Maximum Event Engagement

A bag toss game can be well chosen and still underperform if it’s placed badly. Location does most of the work. Put it in a dead corner and only the determined guests will find it. Put it in the middle of a tight walkway and you’ll create congestion instead of atmosphere.

The best placements invite people in without disrupting service, speeches, or circulation.

Weddings and cocktail-hour flow

At weddings, the strongest position is usually near the drinks reception or garden cocktail area, especially while the couple is in photographs or the room is being reset. Guests already have a drink in hand, they’re standing rather than seated, and they’re open to light interaction.

The game works best when it sits just outside the main catering path. It should be visible from the bar or canapé zone, but not so close that staff carrying trays need to weave around players. That balance turns the game into a social anchor rather than a traffic obstacle.

A nearby seating cluster helps too. Some guests want to play. Others want to watch, comment, and wait for a turn.

Corporate functions and networking zones

At corporate events, placement should support conversation. The bag toss game works well in breakout spaces, expo edges, terrace lounges, and activation zones where people naturally pause between sessions or presentations.

The game’s strength in South African event settings is its accessibility. Its simple rules and low physical barrier to entry let it fit into multi-generational, culturally diverse guest experiences, from formal weddings to casual team-building, as discussed in this article on mastering the art of cornhole.

That matters for networking because not everyone wants to begin a conversation face-to-face over a high table. A shared activity gives people something to do while they talk.

Placement rules that prevent common mistakes

A few practical checks make a big difference:

  • Keep a clear throwing lane so players don’t feel rushed by passing guests
  • Avoid direct alignment with entry points because bags and foot traffic don’t mix
  • Use level ground where possible so the board sits correctly
  • Leave spectator room because a game people can’t comfortably watch tends to stall

If you want the area to be self-explanatory, clear wayfinding helps. Good effective outdoor event signs can show where the game is, where to queue, or whether a branded challenge is in progress.

A bag toss game should sit where guests already slow down, not where you’re trying to force them to stop.

Private parties and milestone celebrations

For birthdays, anniversaries, engagement parties, and family celebrations, central visibility usually wins. Guests at private events are less likely to wander in search of activities, so the game should be placed where they’ll encounter it naturally.

Good locations include:

  • A patio edge beside lounge furniture
  • A lawn area visible from the main food and drinks setup
  • A courtyard corner with enough room for a small crowd
  • A side zone near relaxed seating for longer social rounds

If you’re building out a casual outdoor layout, pairing the game with nearby picnic tables and benches for event seating helps create a complete interaction zone instead of a standalone activity.

Local site realities in Cape Town and the Winelands

Regional venues often have beautiful but uneven outdoor spaces. Lawns slope. Gravel shifts. Wind picks up in open courtyards. Late afternoon sun can hit one player directly in the face. These are small details until gameplay starts.

Walk the throwing line before final placement. Check the sun direction, nearby glassware, service routes, and whether the surface stays stable under repeated foot traffic. If the game is close to a dance floor, consider noise carry and evening crowd movement as the event changes gear.

The best placement isn’t just about where the game fits. It’s about where the game helps the whole event feel more connected.

Brand Activation and Customisation Ideas

For corporate events, a bag toss game shouldn’t be treated as background entertainment only. Used properly, it becomes an interaction tool. It can draw people into a stand, create repeat engagement, and give your brand a physical presence that feels playful rather than pushy.

That’s especially useful when you need an activation to be approachable.

A diverse group of young adults playing a fun interactive bag toss game outdoors together.

What to customise first

If the goal is visual brand recognition, start with the obvious elements. The board face is your main canvas. A branded wrap, colour palette, campaign slogan, or event-specific artwork makes the game read as part of the activation rather than a borrowed lawn toy.

Custom bags can support that look, especially when colours align with the stand design or team identities. Keep readability in mind. Strong contrast is usually better than overdesigned graphics that disappear at a distance.

Three customisation choices usually work best:

  • Board graphics for the clearest visual impact
  • Branded scoring signage so guests understand the challenge quickly
  • Colour-coded bags for teams, departments, or campaign groups

Turn the game into a reason to engage

A branded game gets attention. A branded mechanic creates participation.

Instead of asking guests to “come chat”, give them a small challenge. Let them scan a QR code to join a throw-and-win moment. Use the game as a team station in a wider event trail. Reward participation with a branded item, leaderboard placement, or entry into a draw.

What works best depends on the audience:

Event type Useful activation idea
Expo stand One-turn challenge after a product demo or QR registration
Internal company event Department-versus-department doubles ladder
Product launch Branded target zones linked to campaign messaging
Client appreciation event Casual host-led mini matches with light prizes

The point is to make the game support a business objective without making it feel like admin.

Guests engage more freely when the branded activity feels social first and promotional second.

Team-building applications that feel less forced

A lot of team-building activities lose momentum because they demand too much energy too quickly. A bag toss game avoids that because people can join at different levels. Some will compete seriously. Others will contribute as partners, scorers, or spectators.

That flexibility makes it useful for:

  • Mixed-confidence groups where not everyone wants centre stage
  • Open networking sessions where guests arrive at different times
  • Short rotational formats where teams move between stations
  • Leadership events where the tone should stay polished and relaxed

The game also works well when you need a visible focal point in a breakout lounge but don’t want amplified entertainment dominating the room.

Presentation choices that improve the result

Branding only works when the setup still looks clean and playable. Don’t over-clutter the zone with too many stands, flags, plinths, and prize tables. Guests need a clear line of sight to the board and enough room to throw comfortably.

Use branded elements that support the action:

  • a simple rules board
  • a compact leaderboard
  • a defined waiting area
  • one host who can explain the challenge without over-talking it

For premium corporate events in Cape Town, the strongest activations usually feel integrated into the event design. The game doesn’t sit off to the side as an afterthought. It becomes part of the guest journey.

Renting vs Buying The Smart Choice for Your Event

A planner books a wine estate in Franschhoek, adds lawn games for the cocktail hour, and then discovers the set still needs collecting, storage after the event, and a backup plan if the weather turns. That is usually the moment the rent-versus-buy question becomes practical instead of theoretical.

Buying a bag toss game can work. For most event planners, it only makes sense if the game will be used often enough to justify the storage space, transport effort, cleaning, and upkeep that come with ownership. For weddings, once-off parties, and occasional corporate functions, renting is usually the better operational choice because it removes tasks from an already crowded event schedule.

A comparison chart outlining the pros and cons of renting versus purchasing a bag toss game set.

Local conditions matter more than planners expect

Cape Town and Winelands events put equipment under real pressure. Afternoon sun, dust on farm roads, damp morning air, and uneven outdoor surfaces all affect how a set looks and plays over the course of a season.

That is where ownership often gets misjudged. A retail set may look fine for casual home use, but repeated event use exposes weak stitching, faded graphics, chipped board edges, and bags that no longer feel consistent. For client-facing events, presentation matters as much as playability.

A side-by-side comparison

Here’s the practical comparison.

Consideration Renting from ABC Hire Buying Your Own
Upfront commitment Lower commitment for one-off and occasional events Full purchase required before the first use
Equipment quality Professional event-ready set selected for hire use Quality varies widely by retailer and budget
Storage No need to keep boards and bags between events You need dry, clean storage space
Transport Handled as part of event logistics You manage collection, loading, and unloading
Maintenance Wear, cleaning, and condition are managed for you You clean, repair, and replace damaged parts
Weather resilience Better suited to repeated outdoor use Consumer sets may struggle outdoors over time
Scalability Easier to add more sets for bigger events Expansion means more purchases and more storage
Long-term custom branding Less suitable if you need permanent ownership of branded stock Better if the same branded set will be used repeatedly

When buying makes sense

Buying suits a narrow but real set of cases. A venue that keeps games on site and has staff to maintain them can justify ownership. The same applies to an agency or brand that runs the same activation repeatedly and wants full control over colours, finish, and permanent branding.

In those cases, the numbers can work.

The trade-off is consistency. Owned equipment needs proper storage, routine checks, replacement bags, and transport protection. Without that, the set slowly drops below event standard even if it is still technically usable.

When renting is the practical choice

Renting suits planners who need the game to arrive ready, look polished, and leave without creating another admin stream after breakdown. That is why it tends to be the stronger option for wedding coordinators, corporate event teams, and private hosts managing multiple suppliers across one day.

Renting is usually the better fit when:

  • The event is a once-off
  • The layout changes from venue to venue
  • You need equipment that still looks presentable in a premium setting
  • Outdoor use is likely
  • You may need more than one set for guest flow
  • Your team does not want another item to transport and store

If you are comparing this decision against other event items, the same logic applies when you rent party equipment for an event. The useful question is whether ownership reduces work over time, or adds another asset to manage.

What planners often underestimate

Storage is the first issue. Boards are bulky, bags go missing, and branded extras such as scoreboards or signage rarely stay packed as neatly after the third or fourth use as they did on day one.

Condition is the second. A set that is "good enough" at home can look tired quickly at a wedding or corporate function, especially in the Cape Town and Winelands market where venues, décor, and guest expectations are often high.

For planners in Stellenbosch, Paarl, Franschhoek, and the broader Cape Town area, the smarter choice is usually the one that keeps the game easy to run on the day. Renting keeps bag toss in its proper role. A guest engagement tool, not another logistics problem.

Frequently Asked Questions

How much space does a bag toss game need at an event

For proper regulation play, the boards are set 27 feet apart. Beyond that, leave extra room around the throwing lane so players and spectators aren’t pressed into walkways or service routes. In practice, the game works best when it has a dedicated zone rather than being squeezed between furniture pieces.

Is the bag toss game suitable for children

Yes, as long as the setup matches the audience. Children usually enjoy it because the basic idea is easy to understand and each turn is short. For younger players, many hosts shorten the throwing distance and keep the atmosphere casual rather than score-heavy.

Can it be used indoors

Yes, provided the venue has enough clear space and the flooring is suitable. Indoor use often works well in halls, large reception rooms, covered terraces, and conference venues with breakout areas. The main checks are ceiling clearance, guest circulation, and whether nearby glassware or décor could be disturbed by off-target throws.

What happens if the weather turns

That depends on the venue and event plan, but the safest approach is to decide on a weather backup before the event begins. If you’re using the game outdoors in the Winelands, think about wind, strong sun, and the possibility of moving the activity under cover. A sheltered patio, marquee edge, or indoor backup zone usually solves the problem.

Does it work at formal weddings, or is it too casual

It works very well at formal weddings when placed and styled correctly. The bag toss game doesn’t need to dominate the look of the event. On elegant lawns, terraces, and cocktail areas, it can feel refined and inviting, especially when used during the transition between ceremony and reception.

Can multiple sets be used for larger events or tournaments

Yes. Multiple sets work well for corporate family days, school events, university socials, and large private functions. If you’re planning a tournament, keep the rules, spacing, and signage consistent across each lane so guests don’t get confused from one game area to the next.

What kind of surface is best

Level grass, paving, decking, and hard flooring can all work. The main issue is stability. If the board rocks, leans, or shifts during play, guests will notice immediately. Always test the final position before guests arrive.

Is the game only for competitive guests

Not at all. That’s one of the reasons it works so well. Some people will play to win, but many join because it gives them a reason to stand, chat, laugh, and take part without much pressure. It’s one of the few event games that supports both competition and conversation at the same time.


If you’re planning a wedding, corporate function, party, or activation in Cape Town or the Winelands, ABC Hire can help you add a polished bag toss game setup that fits your event flow. From practical rental guidance to the wider furniture and event equipment that supports the space around it, the team makes it easier to create an occasion that feels lively, organised, and guest-friendly.

Votives With Candles: Perfect Event Ambiance

You’re often making the candle decision late in the planning process. The venue layout is mostly set, florals are booked, and then someone asks the question that changes the whole mood of the room: are we doing real candlelight, LED, or no candles at all?

In Cape Town and the Winelands, that choice isn’t only about style. It affects venue approval, setup time, wind exposure, cleanup, staffing, and whether your reception feels soft and layered or flat under house lights. Votives with candles can transform a space beautifully, but they need to be chosen and used with local realities in mind.

The Enduring Allure of Candlelight at Events

The sun drops behind the mountain, the first course lands, and a Cape Town venue can change character in ten minutes. A dining room that felt plain at 6:30 suddenly feels intimate once the votives are lit. On a Winelands table, that low glow pulls the eye down to the glassware, softens the linen, and gives the whole setting a sense of occasion without adding visual noise.

A stone walkway in a vineyard illuminated by many glowing candles in glass votives at twilight.

That staying power is why votives with candles never disappear from event styling. They flatter faces in photographs, warm up stone and concrete, and make large venues feel less exposed after dark. I see this constantly at Cape Town properties with high ceilings, old cellar walls, or outdoor courtyards where overhead lighting alone can feel cold and a bit unforgiving.

They also suit the way many local venues are built and used. Historic manor houses, working wine farms, and city venues in converted industrial buildings already have strong textures. Candlelight works with those materials instead of fighting them. It adds atmosphere without asking for a full styling overhaul, which is often the better call when the budget is already carrying florals, furniture, and service staff.

There is also a familiarity to votives here that imported trend pieces often miss. In churches, private homes, memorial settings, and formal celebrations, candles have long been part of how people mark important moments in Cape Town. That cultural thread explains why votives rarely feel forced. They feel appropriate, whether the event is a Constantia wedding, a winter dinner in Stellenbosch, or a milestone birthday in the city bowl.

Why they still outperform trend pieces

Candlelight earns its place because it does several jobs at once.

  • It creates atmosphere without clutter. Even a simple table can feel layered and considered.
  • It supports florals instead of competing with them. Good arrangements read better beside a steady glow.
  • It works across venue styles. A glass box in town, a Franschhoek cellar, and a garden marquee all benefit from the same principle of low light at eye level.
  • It scales well. A few votives can sharpen an intimate dinner, while larger quantities can carry a 120-guest reception if they are grouped properly.

For planners comparing finishes and holder styles, this guide to glass candle holders for events is a useful reference point. If you want a decorative wax option for smaller-format styling, a Diva votive candle can work nicely in the right holder, though I still advise checking burn behaviour and venue rules before committing to a full table plan.

The mistake is rarely candlelight itself. It is weak distribution. Too few votives, badly spaced, can make a table look patchy and underplanned. Done properly, candlelight feels effortless, but it is never accidental.

Choosing Your Votives and Candles

Not every votive setup behaves the same way on a table. The holder shape, the glass finish, the wax type, and the burn profile all affect the final look. If you want a result that feels polished, start by choosing for the venue and service style, not only for Pinterest appeal.

A collection of various lit candles in glass, stone, and metal containers on a natural slate surface.

Holders that change the mood

Clear glass is the workhorse. It throws the most light, suits nearly any linen colour, and reads cleanly in modern venues. If you’re styling a white-marquee reception in Paarl or a minimal city dinner, it’s usually the safest choice.

Mercury glass gives a richer, more speckled glow. It’s useful when you want the light source itself to feel decorative, especially on winter tablescapes or more formal indoor functions. Coloured holders can work well too, but only when they tie into a wider palette. Random amber, green, and pink glass on one table often looks like leftovers, not styling.

For anyone weighing different glass options, this guide to glass candle holders for events is a practical place to compare styles and suitability.

Wax choice matters more than most people think

Beeswax tends to suit premium, intimate setups because it gives a softer, natural feel. Paraffin is often easier when you need consistency across a larger setup and don’t want variation in appearance from one candle to the next. Scent is another decision planners sometimes overlook. For dining events, unscented is usually the right call. Fragrance and plated food don’t always coexist well.

If you’re choosing candles for a smaller celebration or gift table and want to understand how a finished votive product looks in a styled context, a product like the Diva votive candle is a useful reference point for scale and presentation.

Match the candle to the event, not the other way around

A short cocktail event can handle a smaller flame profile. A full wedding reception with speeches, dinner, and dancing needs candles that still look intentional hours after sunset. That’s why professionals think in use-cases rather than categories.

Here’s the practical way to choose:

Setup need Best fit
Brightest visible glow Clear glass holder
Softer decorative shimmer Mercury glass holder
Strictly styled colour palette Tinted holder used sparingly
Premium natural feel Beeswax votive
Large-volume consistency Paraffin votive
Food-heavy event Unscented candle

Practical rule: If the holder is beautiful but doesn’t protect the flame properly, it’s not a good event holder. Looks come second to stable burning.

One more point that often gets missed. A votive should never feel oversized for the table. On smaller guest tables, bulky holders can crowd glassware and bread plates very quickly. Good candle styling leaves enough breathing room for service staff to pour, clear, and reset without knocking through the décor.

Strategic Placement and Styling for Maximum Impact

A beautiful candle plan can fall flat in a Cape Town venue for one simple reason. The planner treated votives as scattered décor instead of part of the room design.

Weak candle setups often fail because the planner thinks in singles. One candle near the menu, one at the bar, two on the signing table. Guests register those as isolated points of light. A strong setup uses repetition, density, and placement that supports how people move through the space.

A checklist infographic titled Strategic Votive Placement and Styling with five tips for using decorative votives.

Use clusters that read from across the room

Single votives disappear fast in big-volume venues, especially in white marquees, cellar spaces, and halls with high ceilings. Grouping fixes that. I usually place votives in odd-numbered clusters, then repeat that cluster logic across the room so the candlelight feels intentional rather than random.

For centrepieces, these layouts work well:

  • On round tables. Keep the candles close to the floral base or main vessel, with clear space left for wine service, bread plates, and shared items.
  • On long trestles. Run smaller repeated groupings down the full length. One heavy cluster in the middle leaves the ends looking forgotten.
  • At bars and lounge areas. Use tighter clusters with less spread, so the candlelight supports the setting instead of competing with glassware and stock.

Scale matters as much as style. If you’re balancing candles with florals, vessels, or hired décor pieces, this guide to centrepiece for table styling helps get the proportions right.

Place light where guests feel it

The best votive placement is not always on the dining table. At Winelands venues, I often get more atmosphere from entrance tables, cloakroom consoles, stair landings, bathroom counters, and the route from pre-drinks to dinner. Those are the places where guests notice a glow and remember it.

Some local surfaces and settings respond particularly well:

  • Stone passages and cellar entrances reflect low candlelight beautifully.
  • Raw timber tables suit clear or smoked holders because the material already adds warmth.
  • White tented spaces need more repetition than planners expect, otherwise the candles get visually swallowed.
  • Outdoor lawns and gravel areas need disciplined placement in contained runs or anchored clusters, or the whole look starts to drift once service begins.

One practical rule from events around Constantia, Stellenbosch, and Franschhoek. Style for the guest journey, not just the hero table.

Mix finishes with restraint

Votives work best as part of a layered table, not as the only decorative move. Glass, linen, polished cutlery, greenery, and a few reflective surfaces help the light travel. Too many shiny elements under venue lighting can look restless, though, particularly in modern city venues with pin spots or uplighting already in play.

A cleaner approach is to choose one dominant finish and one supporting texture.

Venue style Votive approach Why it works
Historic Cape Dutch venue Clear and mercury glass mix Adds warmth without looking overly formal
Modern industrial space Mostly clear glass Keeps the look sharp and architectural
Garden reception Low holders tucked into greenery Brings in glow while keeping sightlines open
Corporate dinner Uniform holders in repeated lines Feels ordered and polished

Styling mistakes that show up on event day

These problems are common, and they usually come from styling in photos rather than styling for service:

  • Candles spread too thinly across the room. The setup never builds enough glow to change the atmosphere.
  • Everything at one height. The table reads flat, especially in photographs.
  • Votives pushed too close to menus, napkins, or favour boxes. Staff have no room to clear and reset properly.
  • Candles added to every possible surface. The room loses focus and starts to feel cluttered.
  • Outdoor candles placed without considering wind channels. Courtyards and farm venues can extinguish half the setup before starters land.

I also recommend checking who on the venue or planning side is responsible for extinguishers and service-access points before finalising your floor plan. A quick review with a venue manager, plus a practical guide to fire extinguisher inspections, helps avoid styling choices that look good at setup and create problems once guests are seated.

The strongest candle styling is disciplined. Choose fewer surfaces, place candles with intent, and repeat the pattern properly. That is what gives a Cape Town or Winelands event real atmosphere.

Ensuring Safety and Navigating Local Fire Codes

The room can look perfect at 16:00. Then the south-easter starts pushing through a vineyard-facing deck, napkins lift, dried stems shift, and the candle plan that looked fine during setup becomes the biggest risk on site. That is why candle safety in Cape Town and the Winelands needs a venue-specific check, not generic advice pulled from an overseas wedding blog.

A hand carefully touches a green candle holder surrounded by several vibrant, lit glass votive candles.

Fire rules also vary more than clients expect. Some venues allow real flame only in enclosed glass. Some ban it on timber decks, near thatch, or in outdoor areas during dry periods. Others are happy with candles indoors but want service staff, extinguishers, and access routes confirmed before sign-off. In the Western Cape, especially near fynbos and farm properties, those restrictions are practical, not fussy.

Start with three direct questions for the venue manager or coordinator:

  1. Is open flame allowed in this exact area? Ask by space, not by venue. A cellar, courtyard, terrace, and marquee may all have different rules.
  2. What holder standard do they require? “Enclosed” can mean different things from one property to the next.
  3. Who monitors candles during service and who has final authority to remove them if conditions change?

If your team needs a compliance refresher before the event, this practical guide to fire extinguisher inspections is a useful reference.

Problems rarely come from the candle itself. They come from placement.

The trouble spots are predictable. Votives too close to menu cards. Flames beside dried florals. Holders set on uneven outdoor tables. Candles placed where waiters are reaching across to clear mains. I see more risk from rushed floor plans and last-minute styling additions than from the wax or wick.

A safer setup usually comes down to disciplined choices:

  • Use enclosed, weighty holders that are difficult to tip and that protect the flame from passing movement.
  • Keep clear distance from paper, fabric, and preserved botanicals, especially on smaller guest tables where everything sits close together.
  • Avoid open flame on exposed edges, including steps, bar counters, bathroom counters, and narrow passage areas.
  • Assign one person to check candles during the event, relight only where permitted, and remove any unit that starts burning unevenly.
  • Have a backup lighting plan ready. At some venues, a switch to rechargeable table lamps for events is faster and safer than trying to rescue a real-flame setup in worsening wind.

Outdoor Winelands events need the strictest judgement. Fynbos conditions, dry summer evenings, and gusty farm weather can change fast after sunset. In those spaces, I usually keep real flame to sheltered interiors or protected courtyards and treat pathways, deck perimeters, and lawn edges as no-go zones for exposed candles.

That approach protects the atmosphere as much as the venue. A controlled candle scheme looks polished. A table of struggling flames, scorched menus, and staff rushing in with snuffers never does.

The Smart Alternative LED Votives

A planner can spend hours building a candlelit mood, then lose it in one venue meeting when the coordinator says no open flame on the deck, no naked candles near the draping, and nothing burning outdoors if the south-easter picks up. In Cape Town and the Winelands, that happens often enough that LED votives should be treated as a working option from the start, not a last-minute substitute.

The newer units are far better than the harsh, blue-toned versions many people still picture. Good LED votives give a warmer glow, and once they sit inside smoked, amber, or frosted holders on a set table, guests read the atmosphere first. They are not identical to real flame at close range. They are convincing enough in the spaces where real candles cause the most admin, the most objections, or the most risk.

Where LED makes the job easier

LED votives earn their place in venues with strict house rules, in breezy courtyards, and anywhere staff cannot keep a constant eye on the setup. I use them regularly for pathways, bar surrounds, restroom counters, pool zones, shuttle drop-off points, and outdoor lounge pockets where wind can turn a beautiful styling plan into a maintenance problem within minutes.

They also save effort after the event.

No wax on linen. No half-melted tealights to clear. No relighting round after round once speeches run long. For planners working a fast strike in Stellenbosch, Franschhoek, or a city venue with a hard load-out time, that difference is practical, not cosmetic.

LEDs also sit well with other low-level lighting. If the brief calls for a safer layered glow rather than a traditional candle-only look, rechargeable table lamps for events pair cleanly with LED votives and keep the visual warmth without adding another fire approval issue.

Where real flame still earns its keep

There are settings where wax candlelight has more character. Quiet indoor dinners, chapel-adjacent ceremony spaces, and winter receptions in sheltered halls still benefit from the movement and softness of a real flame. On those tables, especially in enclosed holders, the difference is noticeable.

The decision is usually not LED versus candle across the whole event. The smarter call is zone by zone.

Event need Real votive LED votive
Natural flame movement Stronger Good with quality flicker units
Performance in wind Weak Strong
Approval at rule-heavy venues More limited Usually simpler
Reset and cleanup More labour Minimal
Use in unattended styling areas Poor fit Better fit

For many Cape Town events, a mixed setup works best. Keep real flame on protected guest tables or focal moments where it will be seen properly. Use LED votives for circulation areas, outdoor edges, and any venue zone where management has drawn a clear line. That gives you the atmosphere people want, while keeping the plan realistic for local weather, local rules, and the way local venues operate.

Making the Call Rental vs Purchase in Cape Town

By the time you’ve chosen your holder style, settled the flame question, and checked venue rules, one practical decision remains. Should you rent the votives with candles, or buy them outright?

For most one-off events, rental is the cleaner decision. Weddings, corporate dinners, formal functions, launch nights, and milestone birthdays need quantity, consistency, and fast turnaround. Buying means sourcing matching holders, transporting them, cleaning wax residue, replacing breakages, and then storing everything after one use. That’s a lot of admin for décor that may never be used again.

When rental usually makes more sense

Rental tends to suit:

  • Large guest counts, where visual consistency matters across many tables
  • Tight setup windows, where pre-selected stock saves decision time
  • Venue-restricted events, where you may need to pivot from real flame to LED quickly
  • Travelling planners, who don’t want to move fragile glass between Cape Town, Stellenbosch, Paarl, and Franschhoek

A supplier such as ABC Hire can provide votive and tealight holders as part of a broader event rental plan, which is useful when candles need to work with the furniture, lounge pieces, or lighting already booked for the same event.

When buying can still be sensible

Buying makes more sense for repeated use in a stable setting. Think restaurant tables, boutique accommodation, or a venue that uses the same candle holders every week and has proper storage and cleaning systems in place.

It can also work for very small private events where the quantities are modest and the host wants to keep the pieces afterward. Even then, I’d be careful. Cheap holders often become expensive once you factor in breakage, inconsistent appearance, and the time spent trying to make mixed batches look cohesive.

If you need quantity for one night, rent. If you need repeatability for ongoing service, buying becomes more defensible.

A quick decision checklist

Ask these questions before you commit:

  • How many separate surfaces need candles. Guest tables only, or also bars, bathrooms, pathways, and signing tables?
  • Is the venue exposed to wind or strict on flame. If yes, flexibility matters.
  • Who handles setup and post-event cleanup. If the answer is “the planner somehow”, rental often saves the day.
  • Will you use these exact pieces again. Not similar ones. These ones.
  • Do you have safe transport and storage for fragile glass and unused wax or batteries?

The best candle plan is the one that still looks good once the actual event starts. Guests sit down. Waiters move quickly. Wind picks up. Glasses clink. If your setup can handle that, you’ve chosen well.


If you’re planning an event in Cape Town, Stellenbosch, Paarl, or Franschhoek and need a candlelit look that fits the venue, the fire rules, and the mood you’re after, ABC Hire can help you work through the practical options. That includes choosing between real and LED votives, matching holders to your tablescape, and building a lighting setup that looks organised from first guest arrival to final pack-down.

Cape Town Chocolate Fountain Machine Guide

You’ve got the venue booked, the timeline is tight, and the brief sounds familiar. The event needs one feature that feels festive, photographs well, and gives guests something to do the moment they arrive. In Cape Town and the Winelands, a chocolate fountain machine often fills that role better than a static dessert table.

It works across very different events. A wedding in Franschhoek needs elegance. A matric dance needs movement and theatre. A corporate launch in the CBD needs a station that draws people in without slowing service. A good fountain does all three when it’s chosen and run properly.

Why a Chocolate Fountain is Your Event's Secret Weapon

A fountain earns its place because it does more than serve dessert. It creates a point of activity. Guests gather around it, compare dipping choices, take photos, and keep returning through the evening.

A luxurious chocolate fountain surrounded by various fresh fruits including watermelon, pineapple, strawberries, and blueberries.

In the Western Cape, that appeal isn’t new. Chocolate fountain machines became a cornerstone of Cape Town’s event scene in the mid-2000s, with adoption rising alongside a 150% surge in luxury event catering demand, and by 2015, 72% of high-end weddings in Stellenbosch and Franschhoek featured interactive chocolate stations according to local catering surveys cited at candy-buffets.co.uk.

It gives guests something to do

Some event features look good but don’t change the atmosphere. A fountain does. People interact with it.

That matters at:

  • Weddings where guests need a soft ice-breaker between formal moments
  • Corporate functions where people mingle in waves rather than sit for a full plated dessert
  • Private celebrations where a host wants a centrepiece without building an entire dessert room

It pairs well with other interactive details

The strongest events usually combine one edible talking point with one personal keepsake or participation element. If you’re already planning a guest experience beyond food, a thoughtful Guest book alternative can complement the same kind of interactive flow without feeling gimmicky.

For more playful dessert-station inspiration, this look at https://www.abchire.co.za/blog/candy-floss-machine-hire/ is useful when you’re deciding whether to build one hero station or combine two.

A fountain works best when it’s treated as part dessert, part entertainment, and part visual anchor.

Why planners still come back to it

The reason planners keep booking fountains is simple. They solve a common event problem. You need one feature that feels generous without overcomplicating service.

A well-run fountain station looks abundant, suits formal and informal events, and gives you flexibility with fruit, baked items, and sweets. That mix is hard to beat.

How a Chocolate Fountain Machine Actually Works

One might look at the falling chocolate and assume the machine is complicated. It isn’t. The core system is straightforward once you break it into parts.

Think of it as a warm chocolate loop. The basin holds melted chocolate, the motor drives an internal auger upward, and the chocolate spills over the top before returning to the base to repeat the cycle.

A diagram explaining how a chocolate fountain works through motor, auger, tiered tower, and collection basin components.

The four parts that matter

Heated base and basin

The chocolate sits and stays fluid. Without steady heat, the whole system fails because the chocolate thickens before it can circulate properly.

Motor

The motor turns the internal lifting mechanism. If the machine is underpowered for the amount of chocolate inside, flow becomes patchy and the unit strains.

Auger

The auger is the key mechanical piece. It’s a spiral shaft, based on the Archimedes screw concept, that carries melted chocolate from the base to the top of the tower.

Tiered tower

Once the chocolate reaches the top, gravity does the rest. It cascades over each tier and returns to the collection basin below.

The fountain doesn’t “pour” chocolate down. It lifts it first, then lets gravity create the curtain effect.

Why chocolate consistency matters

A chocolate fountain machine needs chocolate that stays fluid under heat. If it’s too thick, the auger still pushes it upward, but the curtain won’t form cleanly across the tiers.

That’s why operators pay attention to:

  • Heat stability
  • Chocolate viscosity
  • How quickly the machine was preheated
  • Whether the machine is level

Common machine sizes in event use

Different events need different machines. In practical hire use, you’ll usually see:

Machine style Best suited to Practical note
Small 3-tier units Intimate private parties Easier to place on compact buffet tables
4-tier professional units Weddings, matric dances, corporate events Better for steady service and stronger visual impact
5-tier commercial units Larger guest counts and formal setups More dramatic presence, but need careful placement and setup

Capacity and service style

Commercial units used in event hire often sit in the middle ground between dramatic enough to draw attention and practical enough to clean and transport. Some models are built for long service windows, while others are better for shorter dessert bursts.

The machine itself is only half the equation. The operator still needs to match the right amount of chocolate, the right temperature, and the right dippables. Get those aligned and the fountain looks effortless. Miss one of them and the machine gets blamed for a chocolate problem.

Renting vs Buying a Fountain for Your Event

This is one of the most common planning decisions, especially for venues, caterers, and private clients who host more than once. A chocolate fountain machine can be rented for a single event or bought outright, but those two choices suit very different needs.

A large and a small chocolate fountain machine side by side with the text Rent or Buy

Renting makes sense for most one-off events

For weddings, birthday parties, product launches, and matric functions, renting is usually the cleaner decision. You get a machine that suits the event, you don’t have to store it afterwards, and you avoid the less glamorous side of ownership.

That less glamorous side includes:

  • Transporting a food machine safely
  • Cleaning chocolate out of all removable parts straight after service
  • Storing the unit somewhere dust-free
  • Testing it before each use
  • Replacing worn parts over time

Buying only works when usage is regular

Ownership becomes reasonable when the same person or business uses the machine often enough to justify maintenance, storage, and staff training. That tends to be a better fit for permanent hospitality operations than occasional hosts.

Here’s the practical comparison:

Consideration Renting Buying
Upfront cost Lower immediate commitment Higher initial spend
Storage No storage after event You need secure, clean storage
Maintenance Usually handled by hire company You handle cleaning and upkeep
Flexibility Choose a different size for each event You’re locked into what you own
Risk on event day Lower if supplier tests equipment well Entire performance depends on your prep

If you’re hosting occasionally, buying often feels cheaper only until you factor in transport, setup errors, and cleaning time.

The hidden burden is cleanup

Chocolate fountains look polished during service and messy immediately after. That’s normal. The issue isn’t just wiping the outside. Proper cleanup means dismantling the tiers, auger, and other removable parts while the chocolate is still workable.

If someone waits too long, cleanup becomes a project instead of a quick reset.

Renting also gives you event-fit choice

Rentals offer planners a clear advantage over ownership. A small engagement party and a large corporate activation don’t need the same fountain. Renting lets you scale the machine to the room, the table layout, and the guest flow.

When renting is the practical move

  • You’re hosting once or only a few times a year
  • You don’t want staff worrying about operation
  • You need setup and collection handled professionally
  • You want flexibility on machine size

When buying can be justified

  • You run recurring events
  • You have staff who know food equipment
  • You can clean and store the unit properly
  • You accept responsibility for event-day troubleshooting

For most Cape Town event clients, renting removes more problems than buying solves.

Selecting the Right Machine for Your Guest List and Venue

A Paarl wedding with 120 guests needs a very different fountain setup from a 30-person birthday in Sea Point. The machine has to suit the pace of service, the table space available, and the venue’s power setup. In Cape Town, heat, wind, and load-shedding can turn a good-looking booking into a messy service point if the machine is chosen on appearance alone.

Start with guest flow, not just headcount.

Two events can have the same number of guests and need different machines. A plated wedding dessert service puts less pressure on the fountain than a corporate launch where people arrive in waves and queue at once. For heavier service, a taller commercial unit with a larger chocolate capacity holds temperature and flow more reliably over several hours. Smaller fountains work well for private homes, baby showers, and compact venues where the fountain is one dessert feature, not the main attraction.

Match size to service style

Ask these questions before confirming the unit:

  • Will guests serve themselves throughout the event, or during one short dessert window
  • Is the fountain a visual centrepiece or a secondary station
  • How long does the service need to run
  • Will children, large groups, or high table traffic increase dipping frequency

Those details matter more than a simple “small, medium, or large” choice.

Venue constraints decide more than people expect

I usually look at the table first. If the venue can only offer a narrow or slightly uneven surface, that limits the machine options immediately. A chocolate fountain needs a level, stable base or the curtain runs unevenly and the presentation suffers.

Cape Town and Winelands venues also bring local quirks. Outdoor setups in Stellenbosch or Franschhoek can be beautiful, but wind carries dust and cool evening air affects flow. Indoor venues near the coast often deal with humidity, which can affect surrounding dippables and the general neatness of the station. In tighter city venues, the issue is often access. If staff must carry equipment up stairs, through a service passage, or across a busy function room, a large fountain may be more trouble than value.

Power planning is part of machine selection

A fountain may fit the guest list and still be the wrong choice if the power supply is unstable. That is a real concern in Cape Town. Before confirming a machine, check whether the venue has a reliable plug point near the dessert station, whether extension leads are allowed, and whether the inverter or generator can handle catering equipment without tripping.

For Winelands venues and outer-route properties, I treat backup power as a planning item, not an afterthought. If the venue already runs key service areas on inverter support, choose a fountain that can work comfortably within that setup.

Ask the venue manager one direct question: “What happens at this table if mains power drops during service?”

A practical selection guide

Choose a smaller fountain when

You have a modest guest count, limited table space, or a mixed dessert table where the fountain is only one element.

Choose a larger commercial fountain when

You expect steady traffic, want stronger visual impact, or need the station to run for a long service window without struggling to maintain flow.

Prioritise easy transport and setup when

The venue has stairs, narrow access points, strict setup times, or uneven event flooring.

Prioritise backup power compatibility when

The venue is in a load-shedding-prone area or depends on inverter or generator support during functions.

One more practical point. The fountain should also suit the chocolate style you plan to serve. Visual planning helps here, especially if the station needs to match the rest of the dessert table or event palette. A quick comparison of dark and milk chocolate options can help when deciding how prominent the fountain should be in the room.

The best machine is the one that fits the venue, holds a steady curtain during peak service, and does not create extra work for staff halfway through the event. That is usually what separates a fountain people photograph from one people avoid.

Choosing the Best Chocolate and Dipping Items

The machine gets attention first. The chocolate decides whether guests come back for a second dip. Frequently, event setups misstep, focusing on the fountain hardware and treating the chocolate as a simple grocery item.

It isn’t.

Start with the right chocolate

For event use, couverture chocolate is usually the strongest choice because it’s made for better melt and flow characteristics. It gives you a smoother curtain and a cleaner mouthfeel.

Compound chocolate can work in some settings, but it often doesn’t deliver the same finish. If the event is premium, the difference shows.

A useful visual reference for comparing dark and milk chocolate options can help when you’re building a flavour profile for the station.

Dark, milk, or white

Each creates a different event feel.

Chocolate type Best for Watch out for
Milk chocolate Broad guest appeal, family events, corporate functions Can feel too sweet if all dippables are sugary
Dark chocolate Elegant weddings, adult audiences, richer fruit pairings Not every guest prefers the intensity
White chocolate Visually striking dessert tables Usually fussier in flow and heat handling

Dippables that work consistently

The best dipping items have structure. They should hold on a skewer, survive sitting out, and pair naturally with warm chocolate.

Classic crowd-pleasers

  • Strawberries for colour and instant recognition
  • Pineapple chunks because the acidity cuts sweetness
  • Marshmallows for easy dipping and broad appeal
  • Pretzels when you want a sweet-salty contrast

Strong buffet-table performers

  • Brownie bites if they’re cut small and kept firm
  • Mini doughnuts for a more indulgent station
  • Pound cake cubes because they’re neat and hold shape well

Items to use carefully

  • Very soft fruit can slip or break apart
  • Crumbly pastries make the basin messy quickly
  • Wet ingredients can interfere with the chocolate and the station hygiene

A fountain station improves when the dipping menu gets shorter and better, not longer and random.

Build around the event mood

For weddings in the Winelands, fruit-heavy selections usually look cleaner and more refined. For school formals and milestone birthdays, guests often expect marshmallows, brownies, and sweeter bakery items.

A practical mix usually includes:

  • something fresh
  • something soft
  • something crunchy
  • one indulgent baked option

Presentation matters more than variety overload

Too many bowls crowd the table and slow guest movement. A tighter, well-styled arrangement looks more generous than an oversized spread with poor organisation.

Keep skewers visible, napkins close, and the most popular items within easy reach. If guests can understand the station at a glance, they use it more confidently and the fountain feels more polished.

Expert Setup and Troubleshooting for a Flawless Flow

A chocolate fountain can look perfect in the prep area and start misbehaving 20 minutes into service. I see it most often at Cape Town weddings and Winelands functions where the setup looked fine, but the table was slightly uneven, the venue had a warm draft from an open door, or the power point was nowhere near the dessert station.

A person carefully assembling a three-tier green and gold decorative chocolate fountain machine on a tabletop.

Good flow starts before any chocolate goes into the basin.

Start with the table, power, and room conditions

Put the fountain on a firm, level table with enough space for platters, skewers, napkins, and guest movement. Avoid the edge of the dance floor, the main path to the bar, and any spot near an open window or venue entrance. Even a light breeze can cool the chocolate and disturb the curtain.

Power planning matters more than clients expect. If the venue layout forces a longer cable run, use a safe setup and plan it before decor goes in. This guide to a 20 m extension cord for event equipment is useful when the power point is not close to the dessert station.

Outdoor-adjacent venues in Stellenbosch, Paarl, and Franschhoek need extra care. Dust, afternoon heat, and damp coastal air can all affect performance.

Follow a proper setup order

Commercial fountains generally perform best when they are assembled fully, preheated, and only then filled with prepared chocolate. The heating element needs time to bring the basin up to working temperature. Starting the motor too early with thick chocolate puts unnecessary strain on the auger.

A reliable setup sequence looks like this:

  1. Assemble the fountain completely and make sure every tier is seated properly.
  2. Check level from more than one side. A table can look straight and still be slightly off.
  3. Preheat the machine first before adding chocolate.
  4. Add melted, ready-to-flow chocolate rather than solid pieces.
  5. Start the motor only after the basin is warm enough.
  6. Watch the first cycle closely and correct small issues before guests arrive.

That short testing window saves a lot of stress later.

Level affects everything

An uneven fountain rarely fixes itself once service starts. One side will run thin, the curtain will break, and the return to the base will become inconsistent. Staff often blame the chocolate first, but in practice the table level is one of the main causes.

This shows up often at heritage venues and wine estates where floors are not perfectly flat. A folding table on lawn, paving, or old timber can shift once the machine is filled. Check it again after loading the basin, not only during assembly.

In Cape Town and the Winelands, “bad chocolate” is often a setup problem in disguise.

Handle humidity, heat, and load-shedding properly

Local conditions change how a fountain behaves. Warm, humid weather can thicken the flow or make the finish look dull. At farm venues, dust can get into the basin during long setup periods. At private homes and smaller halls, load-shedding planning is part of the job.

Use a practical approach:

  • Keep the fountain away from doors and breezeways
  • Store chocolate out of direct sun before setup
  • Cover the unit if the room is being reset or cleaned around it
  • Run a short test shortly before guest arrival
  • Confirm the venue’s power plan in advance, especially if a generator will be used

If the event is scheduled during a risky power window, ask the venue exactly which circuits stay live and whether the dessert area is covered. A fountain is not the item to leave on an uncertain plug point.

Quick fixes for common problems

The chocolate curtain has gaps

Check the level first. Then check heat. If both are correct, the chocolate is probably too thick for the machine.

The flow is slow

The usual causes are underheating, chocolate that is too thick, or starting the motor before the unit was properly warmed. If thinning is necessary, do it cautiously and in small amounts. Too much added oil can hurt the taste and texture.

The machine sounds strained

Stop and inspect the load on the auger. Thick chocolate, poor preheating, or an uneven base are the common reasons. Continuing to run it usually makes the problem worse.

Chocolate is pooling badly in the base

Look for a tilt in the table or a blockage from partially set chocolate. This can happen fast in an air-conditioned room if the fountain sits in direct airflow.

Cleanup needs to happen quickly

Break the unit down while the chocolate is still warm. Stainless steel parts are much easier to clean immediately after service than once the residue has set hard. This is one reason professional crews stay close to the end of service instead of leaving the fountain standing until venue strike.

A fountain that runs well for three hours usually comes down to boring, disciplined prep. Position it properly, level it carefully, test it before doors open, and respect Cape Town conditions instead of treating it like an indoor mall display.

Understanding Rental Costs in Cape Town and the Winelands

Rental pricing confuses people because they compare one number without checking what’s included. A chocolate fountain package is rarely just the machine standing on its own.

What a professional rental usually includes

In practice, a proper package often bundles several elements together:

  • The fountain machine itself in a size suited to the event
  • Chocolate supply based on expected service needs
  • Basic service accessories such as skewers and napkins
  • Delivery and collection, depending on the location
  • Sometimes an attendant, especially for larger or more formal functions

That’s why two quotes can look far apart while offering completely different levels of support.

What pushes the price up or down

A CBD corporate function and a wedding in Franschhoek don’t carry the same logistics. Even if the machine is similar, the event context changes the cost structure.

The main variables are usually:

  • Guest count, because it affects chocolate volume and station pressure
  • Hire duration, especially for long-running functions
  • Travel distance, particularly for Paarl, Franschhoek, and outlying estates
  • Staffing requirements, if the station needs active management
  • Machine type, because larger or more heavy-duty units involve different handling

What clients should ask before approving a quote

Is chocolate included

Some providers include it. Others price the machine and chocolate separately.

Is setup part of the package

This matters more than many clients realise. A fountain that arrives without proper setup support can cost you time and stress on event day.

Who handles breakdown and cleaning

That changes the real value of the hire.

Is backup power compatibility available

For some venues, that question matters just as much as the dessert selection.

For a wider view of what tends to sit inside a professional food-service rental brief, this guide to https://www.abchire.co.za/blog/catering-equipment-for-hire/ helps frame the broader catering equipment side of event planning.

The cheapest fountain quote often leaves out the labour, delivery detail, or service support that actually makes the station run well.

Budgeting properly

The best way to budget is to treat the fountain as a managed feature, not a standalone object. If you only compare machine price, you miss the primary cost drivers. If you compare setup, staffing, travel, chocolate, and risk reduction, the quote becomes much easier to judge.

That’s how experienced planners assess value.

Frequently Asked Questions from Event Planners

Can I supply my own chocolate

Sometimes, yes. In practice, it’s often a bad idea unless the supplier confirms the chocolate is suitable for fountain use.

The issue isn’t taste alone. Flow, consistency, and heat behaviour matter just as much. A chocolate that tastes great in a slab can perform poorly in a fountain.

How early should I book for wedding season

Book as early as you can once the venue and date are confirmed. Peak Western Cape wedding periods compress supplier availability quickly, especially for feature items tied to catering and dessert service.

If your venue is in the Winelands, don’t leave it until the final weeks. Travel logistics and high-demand dates narrow your options.

What if my guest count changes late

Tell the rental partner immediately. A small increase might only affect chocolate quantity and service layout. A bigger increase can change the recommended machine and the amount of table space needed.

Late guest-count changes are manageable when they’re communicated early enough.

Does the fountain need an attendant

Not always, but larger events usually benefit from one. An attendant keeps the station tidy, monitors flow, tops up dippables, and catches small issues before guests notice them.

For formal events, that extra oversight often improves the whole presentation.

Can the fountain be used outdoors

Only with caution. Outdoor use adds wind, dust, uneven surfaces, and temperature swings. In the Cape Town area, even venues that feel semi-sheltered can expose the machine to air movement that affects flow and hygiene.

Indoor placement is usually the safer choice.

What’s the biggest mistake clients make

They focus on the visual and ignore the operating conditions. A fountain needs the right table, the right power access, the right chocolate, and enough room around it.

When those basics are sorted, the station feels easy. When they aren’t, even a good machine struggles.


If you’re planning a wedding, corporate function, matric dance, or private celebration in Cape Town or the Winelands, ABC Hire can help you choose the right chocolate fountain setup for your venue, guest flow, and power realities. The right machine, properly matched and properly run, turns a dessert station into one of the most memorable parts of the event.

House Party Rentals A Cape Town & Winelands Guide

You’ve picked a date, sent a few messages, and suddenly a simple gathering has turned into a proper event. The guest list has grown. Your patio now needs to work as a lounge. The dining room might become a drinks station. The garden looks perfect until you remember the South Easter, one overloaded plug point, and the fact that half your guests won’t want to stand all night.

That’s usually the moment people start searching for house party rentals.

In Cape Town and the Winelands, hiring for a house party isn’t just about adding extra chairs. Local homes vary wildly. A compact city courtyard behaves very differently from a Franschhoek lawn, a Stellenbosch wine estate cottage, or a split-level family home in the Southern Suburbs. Wind, heat, access gates, gravel driveways, load-shedding planning, and late-night noise management all affect what you should hire and how it should be set up.

I’ve seen the same pattern many times. Hosts start with the fun items first, often lighting, bar furniture, bean bags, a slush machine. Then the practical gaps appear. Not enough surfaces for drinks. No shaded area for older guests. Tight walkways around the braai. A beautiful layout on paper that blocks the kitchen door in real life.

Good house party rentals solve those problems before guests arrive. If you’re also thinking about access control, valuables, and entry points for a rented or shared property, this guide on Rental Property Security Standards is worth a read alongside your event planning.

Your House Party Vision Starts Here

The strongest house parties don’t start with a product list. They start with a clear picture of how the night should feel.

A birthday at home in Newlands often needs one thing. Easy flow between indoors and outdoors. A milestone dinner in Stellenbosch usually needs another. Comfortable seating that still looks polished in photos. A matric after-party in Paarl needs a different balance again, with more open space, fewer fragile styling pieces, and lighting that carries the energy after sunset.

Start with the mood, not the catalogue

Ask three practical questions first:

  • How do guests arrive and gather. Quiet dinner style, drop-in social style, or full evening celebration?
  • Where will people naturally stay. Around the kitchen island, under the patio, near the pool, or on the lawn?
  • What changes after dark. Temperature, lighting, wind exposure, and traffic flow all shift once the sun goes down.

Those answers shape every rental decision that follows.

A common mistake is trying to make every part of the house “event ready”. That rarely works. It’s better to choose two or three strong zones and make each one function properly. One social zone. One seating zone. One service zone for food or drinks.

Use rentals to direct behaviour. Guests follow light, seating, and surfaces more reliably than signs.

Think like a host, not a venue manager

Your home already has character. Don’t fight it.

If your best feature is a deep covered patio, build the party around it. If the lawn is level and open, use it for soft seating or cocktail furniture. If your indoor area is small, avoid bulky pieces that make the room feel cramped within the first hour.

In the Winelands, the backdrop does a lot of the heavy lifting. Mountain views, vineyards, old oaks, and whitewashed walls don’t need over-decorating. They need smart support. The right tables, comfortable seating, and controlled lighting usually beat overfilling the space with too many hire items.

That’s the difference between a party that feels effortless and one that feels assembled.

Building Your Rental Wishlist What and How Many

The shopping list matters, but quantity matters more. Most first-time hosts either under-hire seating and surfaces, or over-hire decorative items that don’t earn their space.

For a typical private party in South Africa, furniture and décor account for a significant portion of the rental budget, with a revenue share of nearly 30% for rental companies (party rental industry statistics). That’s why it pays to get the basics right before adding statement pieces.

Build the list in layers

Start with the essential requirements.

Layer 1 is seating and tables.
Guests need somewhere to sit, somewhere to place a drink, and enough room to move between both.

Layer 2 is service equipment.
This includes buffet tables, bar counters, ice bins, glassware support tables, and anything the caterer or bartender needs to work cleanly.

Layer 3 is atmosphere.
LED cubes, bean bags, bar stools, feature benches, and decorative extras belong here.

If you want a more detailed look at event furniture choices, this guide on renting furniture for events is a useful companion.

A practical way to estimate quantities

Don’t count only people. Count behaviours.

For a standing cocktail-style party, many guests will rotate. For a family birthday or engagement celebration, seating demand stays higher for longer. Older relatives, parents with children, and guests arriving early nearly always claim seats first and keep them.

Use this as a planning tool.

Item Category Guideline Per 20 Guests Pro Tip
Chairs 12 to 16 If it’s a mixed-age crowd, lean higher. If it’s a younger standing party, keep some room for movement.
Cocktail tables 3 to 4 Spread them out. One near food, one near the bar, one in the social centre.
Dining or buffet tables 1 to 2 One often becomes a catch-all. Keep one dedicated to food service only.
Lounge seating pieces 2 to 4 Group them in small clusters, not a single long line against a wall.
LED cubes or side tables 4 to 6 These work best when they double as both lighting and drink-resting space.
Bean bags 4 to 8 Better outdoors or in a relaxed after-party zone than near formal dining.
Bar unit or drinks station 1 Place it away from the kitchen entrance to avoid cross-traffic.
Slush machine or feature equipment table 1 support table per unit Leave elbow room for serving and refilling.

Match items to the type of party

A few examples make this easier.

  • Birthday at home: Prioritise mixed seating, easy-clean surfaces, and a defined drinks station.
  • Engagement party: Add more polished lounge pieces and fewer casual soft seats.
  • Matric or university party: Open floor area matters more than excess furniture.
  • Garden lunch in the Winelands: Shade and stable surfaces matter more than dramatic styling.

Practical rule: If an item doesn’t improve comfort, service, or atmosphere, it probably doesn’t need to be on the quote.

What hosts often forget

The missing pieces are usually small but important:

  • Side surfaces: Guests need places for phones, handbags, sunglasses, and drinks.
  • Service backs: Caterers and bartenders need hidden working space.
  • Queue room: Bar areas and food tables need breathing room around them.
  • Weather backup: A patio party can become an indoor party quickly.

A good rental wishlist feels slightly restrained on paper. On site, it feels organised, generous, and easy to use.

Designing the Vibe Layout and Lighting Secrets

A house party can have beautiful furniture and still feel awkward if the layout is wrong. Guests notice flow before they notice style. They feel it when they can’t reach the drinks table without brushing past a dining chair, or when a lounge setup looks good in photos but traps people in a dead corner.

A cozy, sunlit indoor lounge area featuring modern seating, colorful drinks, and fresh fruit for hosting.

Create zones that feel natural

The easiest way to design a home event is to think in movement lines.

Guests need to move from arrival to drinks, from drinks to seating, and from seating to food or the dance area without crossing every other activity. In Cape Town homes, the pressure points are usually doorways, kitchen access, patio steps, and narrow passages beside pools.

Use furniture to guide people, not to fill every available metre.

A simple structure works well:

  1. Welcome zone near the entrance with one clear drop point or greeting area.
  2. Social core where the bar, cocktail tables, or central standing area sits.
  3. Comfort zone with lounge seating, benches, or bean bags away from the busiest traffic.
  4. Service edge where catering, ice, refills, and clearing can happen without becoming part of the party.

If you’re adding decorative lighting indoors or on a covered patio, a fairy light curtain can soften blank walls and define a focal point without taking up floor space.

Light the party in layers

Lighting changes everything. It’s the fastest way to stop a house feeling like a regular home and start it feeling like an event.

The most useful approach is layered lighting:

  • Ambient light sets the overall mood. This should be soft enough to feel warm, but bright enough for guests to move safely.
  • Feature light draws attention. Use it at the bar, entrance, photo spot, or lounge cluster.
  • Functional light keeps food stations, bathrooms, paths, and steps usable.

High-quality photo galleries of layout and lighting ideas can make decision-making easier, and galleries have been linked to a 2.5x increase in conversions for rental services (party and event rental market report). The practical takeaway is simple. Don’t choose from a list alone. Ask to see full setup examples.

Good lighting isn’t about making everything brighter. It’s about deciding what should stand out and what should fade into the background.

Where LED furniture works best

LED furniture earns its keep when it does two jobs at once. It gives guests something useful, and it shapes the room visually.

It works especially well in these spots:

  • Bar fronts: A glowing bar creates an anchor point immediately.
  • Poolside edges: Low LED cubes or benches make the perimeter visible after dark.
  • Dance spill-out areas: Guests who leave the dance floor still stay within the energy of the party.
  • After-party lounges: Soft seating plus lit cubes creates a relaxed second phase for the evening.

What doesn’t work is scattering LED pieces everywhere. The result usually feels busy. Group them with intent. A pair of LED benches, a cube cluster, or a lit bar setup reads far better than isolated pieces with no relationship to each other.

In Winelands properties, where the setting is often already beautiful, restraint is usually what makes the look feel expensive.

The Unseen Essentials Power and Climate Control

Most rental problems at house parties don’t start with furniture. They start with infrastructure.

The setup looks perfect at 4 pm. By 7 pm the extension leads are overloaded, the slush machine is sharing a circuit with the sound system, and a closed tent has become too warm to use. These are planning issues, not bad luck.

Power planning before anything is delivered

Make a list of every powered item first. Sound, DJ equipment, fridges, slush machines, decorative lighting, catering warmers, coffee stations, and climate equipment all compete for the same supply.

Then map where each item will run.

In many homes, outdoor sockets are limited and indoor plugs get pulled into service through doors and windows. That’s manageable for a small setup, but once multiple equipment types are involved, cable routing becomes part of the event plan. The safest approach is to separate heavy-load items wherever possible and keep guest walkways clear of power runs.

Ask these questions before booking:

  • What needs constant power
  • What cycles on and off during service
  • Which items can share safely
  • Will rain, dew, or sprinkler systems affect cabling
  • Does the property have a realistic backup plan if supply drops

Climate control matters more than most hosts expect

Cape Town’s weather doesn’t behave politely for event planners. Summer evenings can stay hot well into the night, especially under tents, enclosed patios, and still-air garden corners. In the Winelands, daytime heat often lingers after sunset.

A practical benchmark helps here. A single 5kW evaporative cooler can cool a 100m² tent or enclosed patio space and achieve an ambient drop of up to 10°C. That’s from the same set of South African party rental figures already noted earlier in the article.

That doesn’t mean every event needs one. It means climate planning should be deliberate.

Match the solution to the site

Use the venue conditions to choose the equipment.

  • Covered patio with side exposure: Focus on air movement and shaded seating.
  • Tent on lawn in summer: Cooling becomes far more important.
  • Winter city party with outdoor mingling: Heating near the social edges works better than one heater in the centre.
  • Poolside event: Plan for temperature drop after dark, even if the day felt warm.

If guests are too hot or too cold, they won’t describe the party as beautiful. They’ll describe it as uncomfortable.

The same logic applies to wind. Open-sided structures, lightweight décor, candles, and loose linens all behave differently in Camps Bay, Somerset West, or on a valley-facing property near Franschhoek. Weighting, anchoring, and equipment placement should be settled before setup day, not improvised on arrival.

Comfort is one of the least glamorous parts of house party rentals. It’s also one of the biggest reasons a party either lasts comfortably into the evening or starts thinning out early.

Budgeting and Booking Your Rentals Like a Pro

Most rental stress comes from timing and unclear quotes. Not from the actual items.

Hosts often leave the enquiry too late, ask for a broad package without a proper brief, then compare quotes that aren’t built on the same assumptions. One includes setup. Another doesn’t. One includes delivery within a certain radius. Another adds transport later. The cheapest quote can become the most expensive once the practical extras appear.

A house party rental timeline infographic outlining key steps for budgeting and booking event equipment rentals.

Use a simple booking timeline

A straightforward timeline prevents most problems.

4 to 6 weeks out
Research suppliers, confirm your date, and send a proper brief with guest count, suburb, access notes, and party style.

3 to 4 weeks out
Lock in the core pieces. This matters most in peak periods when the best stock moves quickly.

1 to 2 weeks out
Refine quantities once RSVPs settle. This is the moment to adjust seating, tables, or lounge pieces.

1 day before
Confirm the delivery window, access instructions, and final payment details.

Party day
Be on site or have one responsible person present to receive and check the order.

Know your real budget range

The average spend for a private party in South Africa ranges from R8,000 to R12,000, and hidden delivery fees can push cart abandonment as high as 30% if they aren’t communicated clearly upfront. That’s why transport, setup, stairs, distance, and collection timing should be discussed early rather than assumed.

If you want a broader planning framework, this guide on budgeting an event is a useful reference for structuring costs before you start collecting supplier quotes.

What to ask before paying a deposit

Don’t stop at “What’s the price?” Ask what the quote covers.

Use a checklist like this:

  • Delivery details: Is transport included, and for what area?
  • Access conditions: Are stairs, narrow passages, gravel driveways, or long carrying distances relevant?
  • Setup and strike: Does the team place items, or only drop them?
  • Collection timing: Same night, next morning, or later?
  • Damage policy: What counts as wear and what counts as chargeable damage?
  • Change window: How late can quantities be adjusted?
  • Weather flexibility: What can be swapped if conditions change?

Save money in the right places

There are smart trims and false economies.

Good savings usually come from reducing duplicate seating areas, simplifying décor, or using multi-purpose items like LED cubes that work as both styling and function. Bad savings usually come from under-ordering tables, skipping climate control, or leaving setup support out of the quote and expecting the day to run smoothly anyway.

A strong booking process feels calm. You know what’s arriving, where it’s going, and what the final cost includes. That confidence is worth nearly as much as the furniture itself.

The Big Day Delivery Setup and Your Final Checklist

By party day, the job changes. Planning stops. Execution starts.

Small oversights quickly become apparent. A locked side gate. Cars parked in the delivery path. Wet grass where the lounge setup was meant to go. No one available to approve placement decisions. The smoother the handover, the calmer the rest of the day feels.

A professional bartender preparing a variety of cocktails behind a bar for a social gathering.

Get the site ready before the truck arrives

Do these checks first:

  • Clear access: Open gates, move vehicles, and mark the easiest route in.
  • Protect the setup area: Keep pets, sprinklers, garden tools, and loose clutter out of the work zone.
  • Confirm placement decisions: Know where the bar, main seating, and service tables must go.
  • Check power points: Make sure the required outlets are accessible and working.
  • Nominate one contact person: One decision-maker avoids confusion.

If you want a broader event-day prep list, this event planning checklist template is a practical tool to keep nearby.

Do a proper handover check

Modern rental companies can achieve 98% stock level accuracy by using cloud-based software and RFID tags, which helps ensure the booked items are the ones delivered on the day. Even so, the host should still do a quick physical check before the crew leaves.

Look at:

  1. Item count
  2. Colour or style match
  3. Visible condition
  4. Power-up test for electrical items
  5. Placement accuracy

This doesn’t need to take long. It just needs to happen while the team is still on site.

A two-minute check on delivery prevents a thirty-minute panic just before guests arrive.

Protect the hire items during the party

Once the event starts, the best protection is simple management.

  • Keep drinks stations stable and away from soft seating where possible.
  • Don’t drag furniture across rough paving.
  • Keep children away from equipment that isn’t meant for play.
  • Sort ashtrays, bins, and spill cloths before guests need them.
  • If weather turns, move vulnerable pieces early rather than after damage starts.

Collection goes fastest when obvious waste is cleared and access is open again. You don’t need to deep-clean event furniture unless the supplier requires it, but you should leave items reasonably ready for pickup and report any breakage.

That makes the close-out easy for everyone.

Frequently Asked Questions About House Party Rentals

Can I change my order after booking

Usually, yes. The practical limit is stock availability and timing. Final guest count changes are common, so update quantities as soon as you know them instead of waiting until the last minute.

What if something gets spilled on the furniture

Minor party wear is different from serious damage. Ask for the supplier’s damage policy before you pay. That avoids arguments later and helps you understand what care level is expected during the event.

How much space does a delivery team need

It depends on the items and the property access. A narrow side passage, steep driveway, stairs, or long walk from the gate all affect setup time. Mention those details early when requesting a quote.

Do I need to be home for delivery

It’s best if either you or one responsible person is present. Someone needs to approve placement, answer access questions, and check the order on arrival.

What if Cape Town weather changes suddenly

Have a fallback layout ready. Moveable lounge pieces, covered service areas, and a plan for wind or heat matter more than decorative extras when conditions turn.

Are house party rentals worth it for smaller gatherings

Yes, if the hired items solve a real hosting problem. Even a smaller event feels easier with proper seating, serving surfaces, and lighting that suits the space.


If you’re planning a celebration in Cape Town, Stellenbosch, Franschhoek, Paarl, or nearby, ABC Hire can help you put together the right mix of furniture, lighting, climate control, and event extras for a house party that feels polished and easy to host.

📍 Cape Town + Winelands