Rechargeable Bedside Lamp Guide for Events and Stays

You've set the tables at a guesthouse in Franschhoek, the flowers are in place, and the evening light is beginning to soften. Then someone asks where the nearest socket is. A cable appears across the table, another lamp loses its position, and the warm, relaxed mood starts to feel like a technical exercise. A rechargeable bedside lamp solves that small but important problem by bringing light to the table, bedside, welcome station, or quiet corner without tying the design to a wall outlet.

South Africa's lighting story makes this especially relevant. Statistics South Africa reported that the share of households connected to mains electricity rose from 76.7% in 2002 to 90.2% in 2024 (Statistics South Africa household electricity data). In other words, a rechargeable lamp usually isn't replacing a home's main lighting. It adds flexibility, atmosphere and resilience where fixed lighting can't deliver the right experience.

Introduction to Rechargeable Bedside Lamps for Modern Hosting

For a wedding host, a cordless lamp might begin beside the guest book and later move to the dessert table. In a boutique room, it can sit on a nightstand without forcing the bed, side table and charging point into one fixed arrangement. At a birthday dinner, several small lamps can create pools of warm light between floral arrangements, helping guests see one another without flooding the room with overhead brightness.
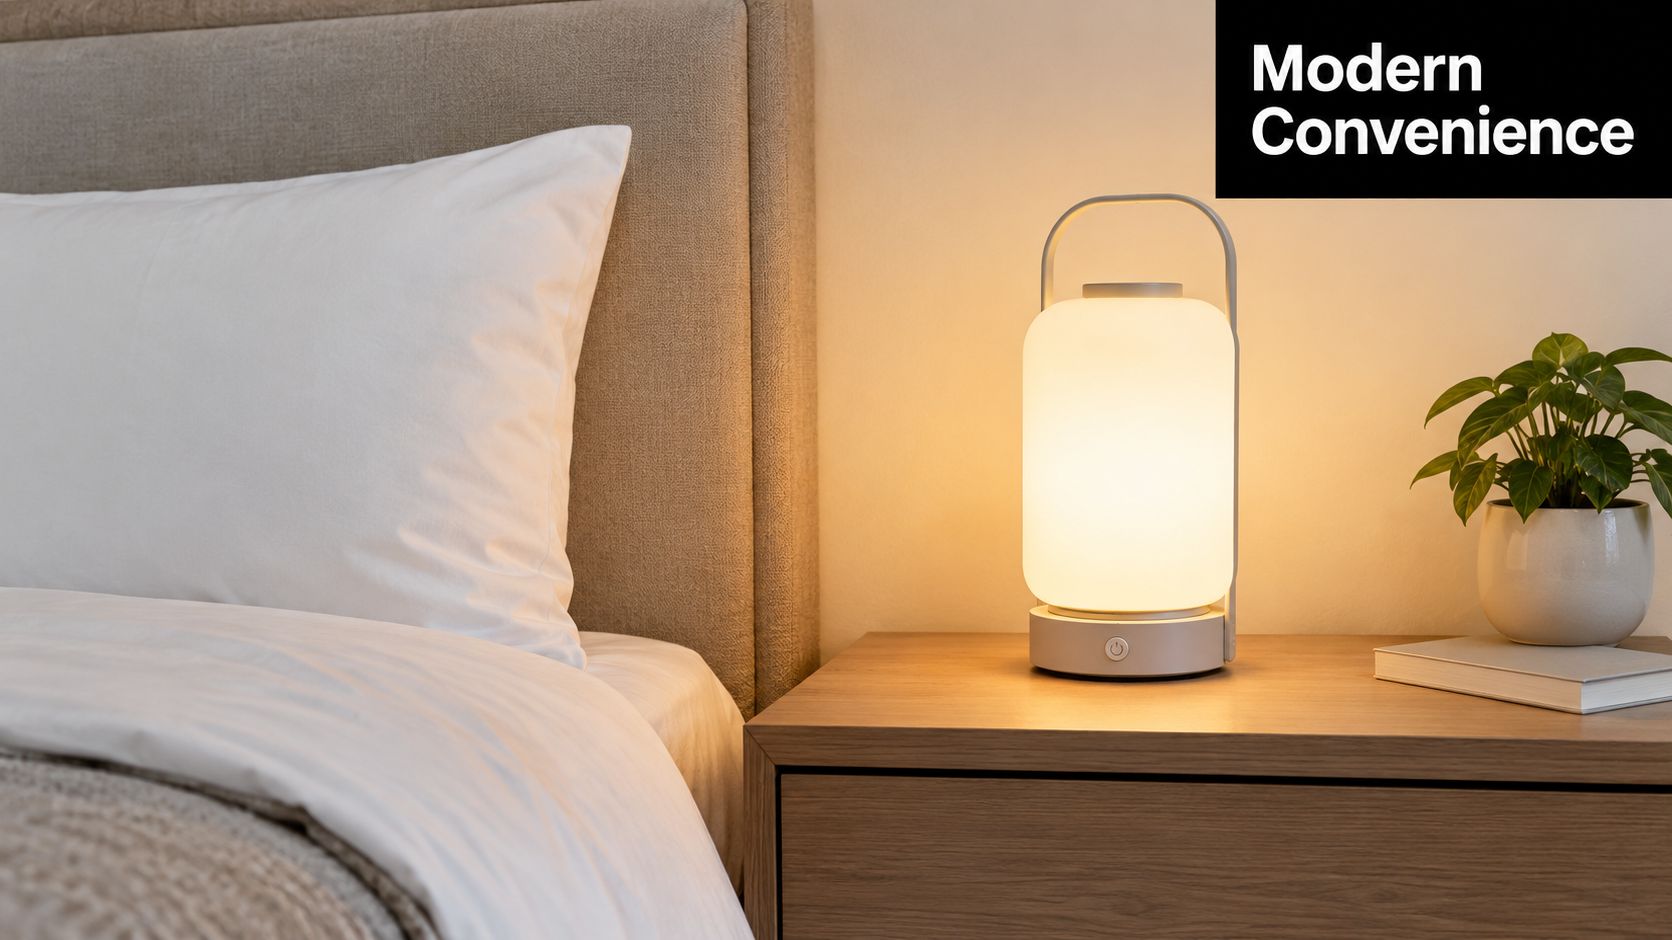
A modern rechargeable bedside lamp glowing softly on a wooden nightstand next to a comfortable bed.

That freedom changes the way you plan a space. A mains-powered bedside lamp has to remain close to its socket. A rechargeable model can be placed where the guest needs a gentle glow, where the photographer wants a detail to read, or where the table needs a little visual rhythm. You can also remove it quickly when the room needs to be cleared.

This matters during power interruptions too, but load shedding is only one part of the story. The 2022 Census recorded electricity as the main lighting source for 94.7% of South African households, up from 84.7% in 2011, with Western Cape at 96.5% and KwaZulu-Natal at 96.7% (Census 2022 statistical release). A rechargeable lamp fits the next stage of that journey. It gives an electrified home, venue or guest room a portable layer of light for interruptions, reading, arrivals, dining and styling.

Hosting principle: Use the lamp to shape how people feel in the space, not merely to fill a dark patch.

For accommodation owners, lighting also contributes to the small details guests remember. A calm bedside glow, an uncluttered nightstand and a lamp that can be moved to a reading chair all make a room feel considered. Practical guidance such as After 8 B&B profitability lessons can help owners think about guest comfort as part of the wider operating experience.

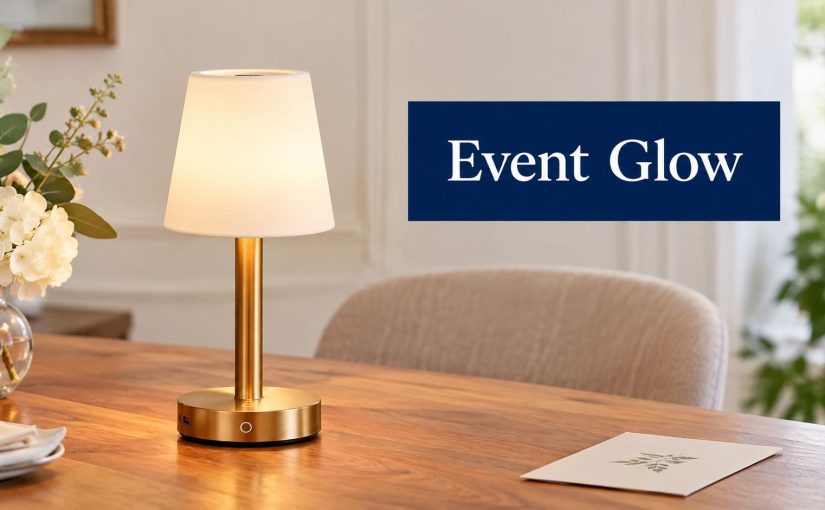
If you're planning a Cape Town event, review rechargeable table lamps alongside your table layout, rather than treating lighting as an afterthought. The important choices include brightness, colour, runtime, charging habits and whether hiring or buying gives you the better fit.

How a Rechargeable Bedside Lamp Actually Works

A simple way to understand the product is to think of it as a power bank joined to a lantern. The battery stores energy, the LED turns that energy into light, and the control system decides how much power reaches the light source.
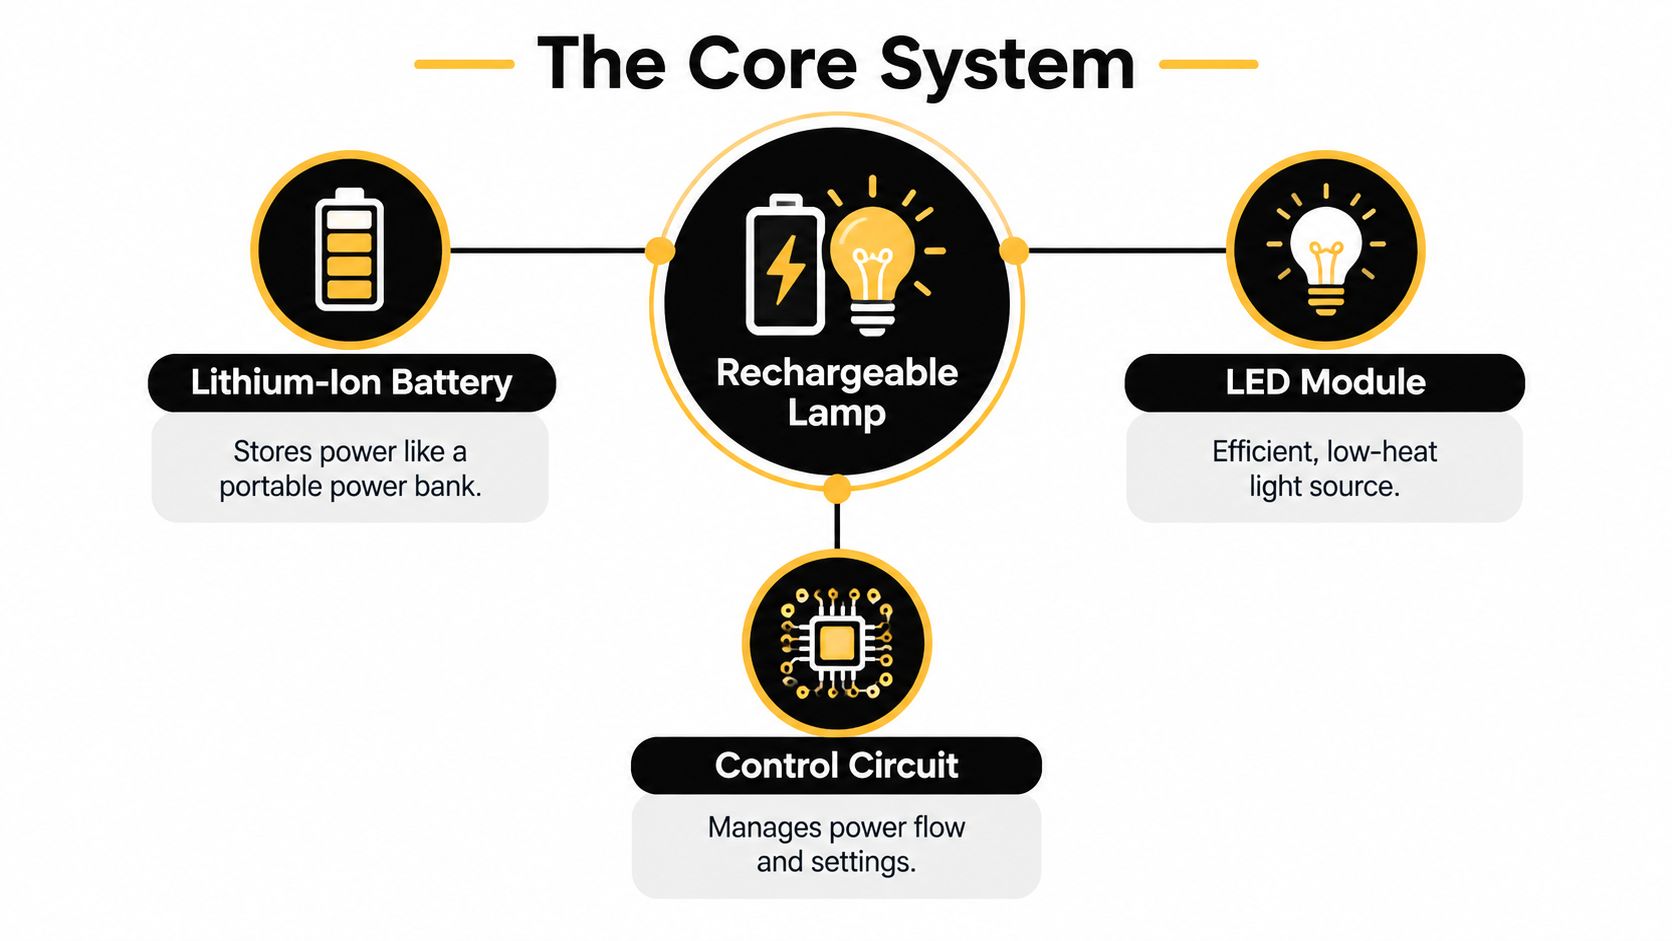
A diagram illustrating the core components of a rechargeable lamp, including battery, LED, and control circuit.

The battery stores energy

Inside the base or body is a rechargeable battery. You connect the lamp to its charger while power is available, and the battery holds that energy for later use. Once charged, the lamp can operate away from a socket, which is what makes it useful on a dining table, reception desk, patio or nightstand.

The battery doesn't produce light by itself. It supplies electricity to the LED module, much as a power bank supplies electricity to a phone. The lamp's available runtime depends on the battery, the brightness selected and the way the model manages power.

The LED creates the glow

An LED module is the light-producing part. It uses electricity efficiently and gives manufacturers more control over the character of the light than older bulb designs typically allowed. For hospitality, that control matters because a guest room, ceremony table and late-night walkway don't all need the same intensity.

A warm setting can make timber, linen and florals feel softer. A cooler or brighter setting may be more useful when a guest is reading, a venue team is checking place settings, or staff are clearing tables.

The control circuit manages the experience

The control circuit links the battery, LED and user controls. It regulates power, responds to a switch or touch control, and may allow dimming or colour adjustment. A touch button is convenient beside a bed because the user can change the light without searching behind the lamp.

Charging behaviour is just as important as the visible design. Some models charge through USB, while others use a dedicated charger or charging dock. Before an event, confirm which cable is required, how many charging points are available and whether the lamps can remain safely connected between uses.

Key Features to Look For Before You Choose

A lamp can look beautiful in a product photograph and still be awkward for a venue. Start with the job it must perform. A soft bedside glow has different requirements from a lamp that will sit on a busy reception table throughout an evening.
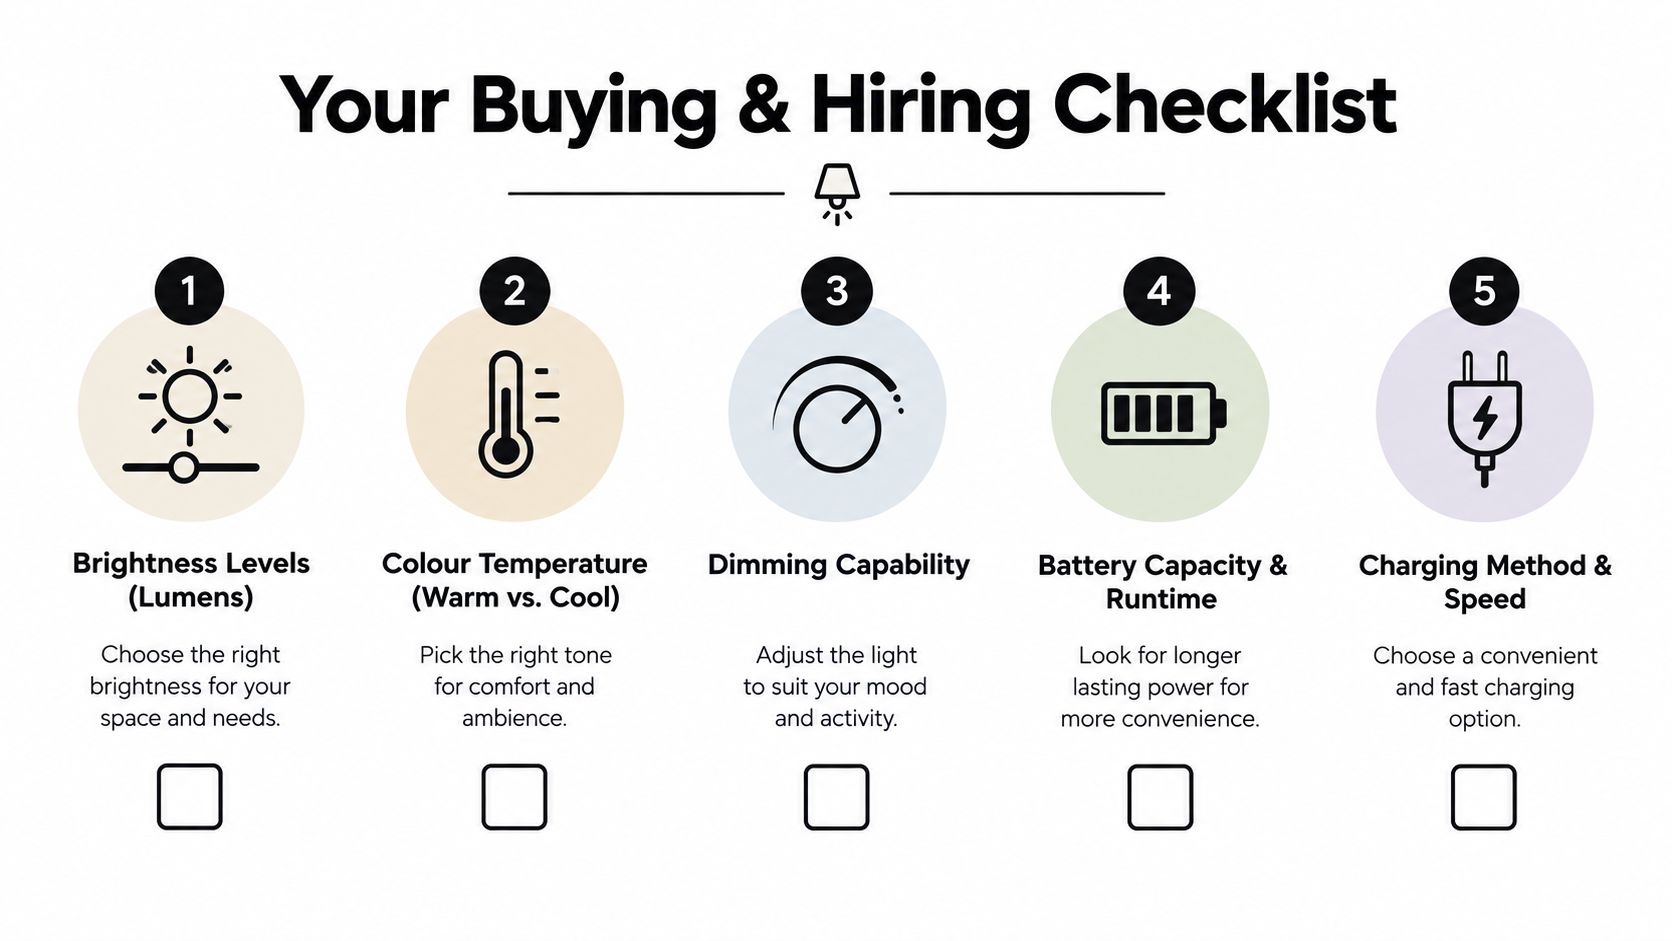
A five-step infographic guide for choosing a rechargeable bedside lamp based on brightness, temperature, dimming, and battery.

Brightness should match the setting

Look for adjustable brightness rather than a single output. A guest room may need a low level for winding down, while a welcome table needs enough light for names, menus or cards to remain readable. If a supplier describes brightness in lumens, use that figure for comparison, but test the actual lamp if possible because shade shape and diffusion change how the light feels.

A small light can create a strong visual effect when several are spaced across a long table. One very bright lamp may be less comfortable than multiple dimmer points.

Colour temperature sets the mood

Warm light generally supports an intimate, restful atmosphere. It works well with candlelight, timber furniture, neutral linen and evening celebrations. A cooler setting can feel clearer and more functional, but it may fight the relaxed character of a wedding dinner or boutique bedroom.

Ask whether the colour temperature is fixed or adjustable. For a hire collection, consistency matters. Lamps that produce noticeably different whites can make a carefully styled table look unplanned.

Dimming gives you control

Dimming is valuable because the room changes during the event. During arrivals, guests may need more visibility. Once dinner begins, you may want the lamps lower so conversation and décor take centre stage. A gradual dimmer is easier to style than a lamp with only a bright and a dim preset.

Battery indicators prevent guesswork

A battery indicator helps the person managing the venue identify which lamps are ready and which need attention. This is particularly useful when lamps are distributed across bedrooms, tables and service areas. A lamp that gives no warning before switching off can create unnecessary pressure during a live event.

Build, stability and storage matter

Choose a stable base for tables where guests, children or staff may brush against the furniture. Smooth, wipeable materials are practical for hospitality use, while heavier finishes can give a more substantial appearance. Check whether the lamp's handle or body makes it easy to carry between rooms.

Portability doesn't mean every lamp needs to be tiny. The right size depends on the table, the arrangement and the visual weight of the décor. If you're comparing compact designs for tight rooms, these space-saving lamp options offer useful inspiration for thinking about footprint and placement.

Before hiring, ask a rental partner:

  • What is included: Confirm chargers, docks, cables and replacement arrangements.
  • What has been tested: Ask how runtime was assessed and at which brightness.
  • What happens on collection: Clarify whether lamps need to be returned charged, clean or packed in a particular way.
  • How consistent the set is: Check that the lamps share the same style and light character.

Battery Life Charging and Load Shedding Realities

Runtime is never a single promise that applies to every evening. A lamp consumes more energy at maximum brightness and less energy when dimmed. Independent South African testing found that rechargeable bulbs lasted about two hours at full brightness, while dimming to 50% or 25% extended operation to roughly three to five hours (MyBroadband runtime testing).

That difference changes the planning question. Instead of asking, “How many hours does this lamp last?”, ask, “At the brightness my guests need, how long will it remain useful?” A lamp used as a gentle bedside glow may last longer than one run at full output to light a preparation area.
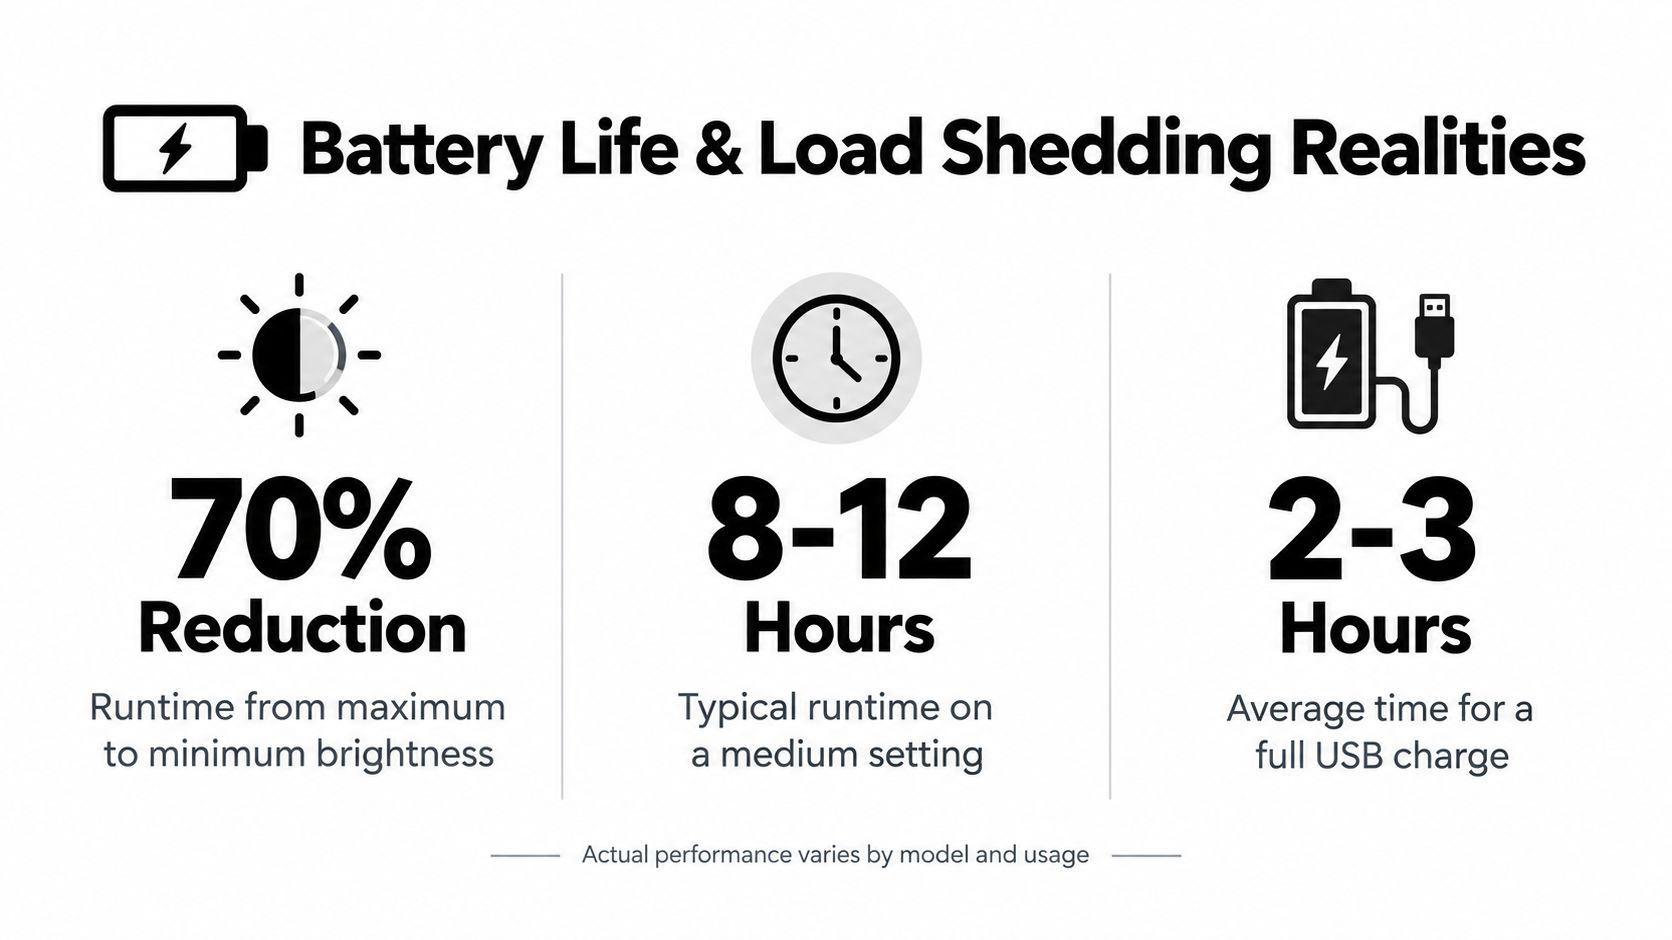
An infographic detailing battery life and charging times for a rechargeable bedside lamp with three key statistics.

Charge before the event, not during the panic

Many rechargeable lamps charge only while the switch remains on and mains power is available. That detail is easy to miss. A lamp may be plugged in beside a bed, but if its wall switch is off, it might not be gaining charge.

Charging times vary widely, from about three to 24 hours, according to South African product pages and testing discussed by MyBroadband (South African rechargeable emergency-light guidance). For a venue, that means a same-day charging plan can be risky, especially when you're preparing several rooms or a large event set.

Use a written charging routine:

  1. Charge as soon as the lamps return from use. Don't leave the task until the afternoon of the next event.
  2. Keep the switch and power source active. Confirm that the indicator shows charging.
  3. Label or group the lamps. This makes it easier to identify a lamp that missed the charging cycle.
  4. Test a sample at the intended brightness. A brief real-world check is more useful than relying only on packaging.
  5. Stagger use when necessary. A few lamps can remain in reserve while others provide light.

Practical rule: Plan for the brightness your guests will actually use, then keep a reserve rather than treating the advertised maximum as the event plan.

A bedside lamp for an overnight stay needs a different approach from a short dinner. In a guest room, leave the lamp charged and explain its controls clearly. At an event, assign responsibility for charging and collection. For broader battery-operated lighting ideas, see battery-operated lamps, especially when you're coordinating several cordless light sources.

Hiring Versus Buying for Events and Accommodation

The hire-or-buy decision depends less on the lamp itself than on how often you'll use it. A couple hosting one wedding may not want to store, charge and maintain a coordinated collection. A guesthouse that uses bedside lamps every week may value ownership, provided someone manages the batteries and keeps the set consistent.

Decision Factor Hiring Best For Buying Best For
Event frequency A one-off wedding, launch or formal dinner Regular accommodation or repeated functions
Quantity A coordinated group needed for one date A small collection used across rooms
Storage Hosts with limited cupboard space Businesses with an organised storage area
Style changes Events requiring different looks A stable house style
Maintenance Users who prefer a rental partner to prepare the items Owners able to charge, clean and inspect lamps
Flexibility Large occasions where extra pieces may be needed Everyday use where lamps must always be available

Hiring also reduces the pressure of matching every lamp yourself. A rental partner can supply a group that suits the table plan, while you focus on furniture, linen, florals and guest movement. For one-off events, that coordination can be more valuable than owning the objects afterwards.

Buying makes sense when the lamp has a clear second life. A guesthouse can use it in rooms, move it to a breakfast area, and keep it available during maintenance or power interruptions. A venue might buy a small core collection and hire additional pieces for larger celebrations.

Think about the complete workload, not only the purchase price. You'll need somewhere safe to store the lamps, a charging system, a way to identify missing cables and a process for checking performance before guests arrive. For a wider view of must-have family event items, consider how lighting fits alongside seating, serving equipment and décor.

ABC Hire offers rechargeable table lamps for hire as part of its event and wedding lighting options. If you're building a broader styled setup, decor for hire can help you consider lamps within the full visual arrangement rather than as isolated accessories.

Real World Uses From Weddings to Guest Rooms

At a Winelands wedding, the strongest use may be at the reception table. Place a cordless lamp near the centre of a long arrangement, leaving enough space for guests to see menus and one another. Its low position creates a more intimate layer than overhead venue lighting, while the lack of cables keeps the table clean.

For a ceremony moving into dinner, portable lamps also make the transition easier. The same pieces can be collected from the ceremony signing table and placed on the reception tables without asking the stylist to redesign around power points.

Guesthouses and boutique stays

A rechargeable bedside lamp suits rooms where the furniture arrangement changes between guests or where the nightstand has limited cable space. It can provide a soft reading light, a welcoming glow for late arrivals and a practical option during an interruption.

Leave simple instructions beside the lamp. Guests should know how to switch it on, how to dim it and where the charging connection sits. If the lamp is intended as emergency lighting, staff should check its charge as part of room preparation rather than assuming that the previous guest left it ready.

Matric dances and formal school events

A formal school event often needs atmosphere without fragile open flames. Lamps can sit on registration tables, lounge furniture, gift tables or quieter seating areas. Their portability helps organisers shift the visual focus as guests move from arrival to dinner, photographs and dancing.

Use stable models on surfaces that may receive frequent contact. Keep brighter lighting near entrances and service areas, then use softer settings in lounge zones where the purpose is conversation.

Home celebrations

At a milestone birthday or intimate dinner, place one lamp on a drinks station, another beside the cake table and a third near the seating area. Varying the positions creates a connected visual thread without making every surface identical.

For children's rooms or family gatherings, a rechargeable lamp can offer gentle, movable light without a cable trailing beside the bed. Keep the lamp on a stable surface and follow the manufacturer's guidance around charging, heat and placement.

Hospitality and brand activations

A brand activation can use cordless lamps to guide attention to a product display, sampling counter or conversation area. The light doesn't need to be dramatic. A carefully positioned warm glow can separate a small activation from a busy venue without competing with the brand message.

The same principle works for caterers and venue teams. Portable lamps provide a quick styling tool when the room feels flat, the weather changes, or a table must move away from its planned socket.

Choosing the Right Rechargeable Bedside Lamp for Your Next Event

Start with the space, not the catalogue. Mark the tables, beds, welcome points and service areas that need light, then decide where you want guests to feel relaxed, where they need to read, and where staff need practical visibility. This separates mood lighting from task lighting, which prevents one lamp from being asked to do everything.

Next, choose the operating plan. For a small home collection, you may prioritise compact storage and simple USB charging. For a wedding or corporate function, you'll need a consistent set, clear responsibility for charging and a backup plan if the event runs late. For accommodation, ease of cleaning, reliable controls and repeatable room presentation may matter more than decorative novelty.

Use this short decision check:

  • Placement: Can the lamp stand securely where guests will use it?
  • Light quality: Does the colour suit the room, tableware and décor?
  • Control: Can users dim it without confusion?
  • Runtime: Has it been tested at the brightness you need?
  • Charging: Can your team charge every lamp before the next use?
  • Ownership: Will you use the lamps often enough to justify storage and maintenance?
  • Hiring: Would a coordinated rental set give you a more polished result for a single date?

The best rechargeable bedside lamp is the one that supports the guest journey. It should appear effortless, even though someone has planned its brightness, position, charging and collection carefully. That quiet preparation is what lets a Cape Town venue feel warm at dinner, restful at bedtime and ready for changing conditions.

For a one-off wedding, hiring can keep the style cohesive without creating another item for your storeroom. For a guesthouse or frequent host, buying a small, reliable set may give you useful everyday flexibility. Either way, treat cordless lamps as part of the design language, not merely as emergency equipment.


ABC Hire can provide rechargeable table lamps for Cape Town events, weddings and styled functions, with rental planning that fits your tables, décor and guest experience. Visit ABC Hire to discuss the cordless lighting and event hire items you need for your next gathering.
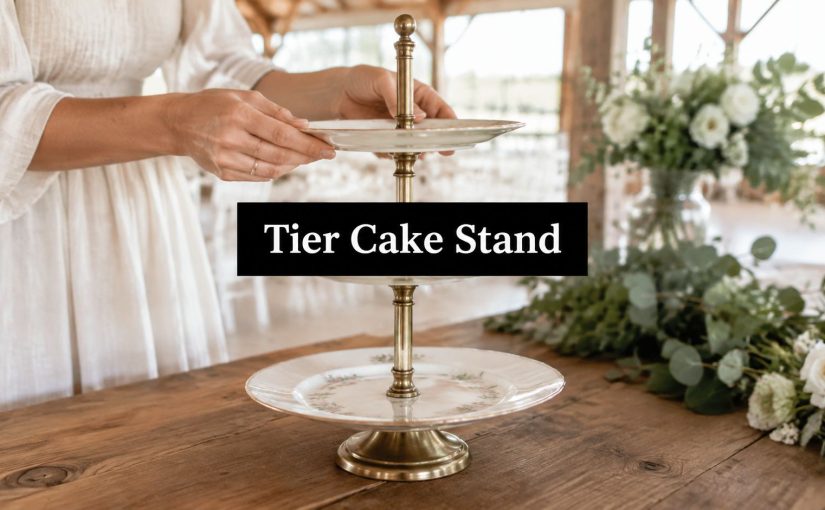
Tier Cake Stand Guide for Weddings and Events

The florist is still unloading eucalyptus when the baker arrives with a finished wedding cake, and the cake table is already causing trouble. It sits in a narrow corner of a Winelands venue, one leg is close to the edge of the dance-floor route, and the photographer wants a clean view from the entrance. The stand may look like a decorative detail, but its height, footprint, stability and handling will affect the entire display.

A tier cake stand is a structural part of an event setup. It can create height on a dessert table, separate the cake from surrounding décor and give guests a clear focal point. It can also block sightlines, invite accidental knocks or become difficult to return if the hire conditions weren't checked before collection. This guide focuses on the decisions that matter at Cape Town weddings, corporate launches, matric dances, birthdays and formal functions across Stellenbosch, Franschhoek, Paarl and the city.

What a Tier Cake Stand Does at Your Event

At a vineyard wedding, the cake table is often dressed before the florist has finished the ceremony arrangements. The planner places it near a wall or window, the baker checks the cake board, and the coordinator must choose between serving access and photographic height. That choice affects how the table works once guests, staff and suppliers share the room.

A tall stand gives the cake a clear focal point from across the venue, but it can obstruct a side-on photograph or make service awkward. A lower arrangement is easier for caterers to reach, yet dessert platters, menus and floral vessels can hide it. In tight Cape Town and Winelands venues, the right height depends on the table width, surrounding décor and the route staff will use.

At a Long Street gallery launch, the same stand can act as a clean riser for branded cupcakes or small desserts. In a school hall, it may share a trestle table with drinks, plates and a cake knife. South African suppliers stock 2-tier, 3-tier, glass, ceramic, dome and display stands, with options ranging from R199.99 for a 3-tier glass cake stand at MRP Home to R999.00 for single-tier display stands. The range covers everyday entertaining as well as formal styling, as shown in the local cake stand and dome catalogue.

Treat the stand as part of the floor plan

Confirm the display position before the cake arrives. Check it against:

  • Guest movement: Keep the stand away from routes used by waiters carrying trays or hot drinks.
  • Photographs: Leave the photographer room to work without leaning across the cake.
  • Service access: Ensure a caterer can remove slices, plates or decorations without lifting the full stand.
  • Visual height: Check that the tiers sit below nearby signage, floral arrangements and venue lighting.

For a lower-profile display, review this wood display stand guide. A local hire format with a compact 30 cm, 20 cm and 15 cm tier structure reaching about 50 cm high is listed in ABC Hire's tiered display hire information. It can look elegant on a broad reception table, but feel crowded on a narrow one.

Confirm the hire terms before collection as well. Check the deposit, packing requirements, cleaning expectations and return condition, especially when the stand will travel back from Franschhoek or Paarl. Photographing the item at pickup can also help record its condition.

Practical rule: Choose the stand after checking the table, traffic route, cake weight and return conditions.

The stand has to support service as well as styling. If a waiter can catch a sleeve on its base, or guests must reach around the cake for dessert plates, reposition the display before doors open.

Choosing the Right Format and Material

Start with the cake and venue, then select the format. Cape Town hire inventories commonly include round and square plates, scalloped porcelain, wrought iron, powder-coated steel, timber slabs with metal pillars, and gold or rose-gold pillar stands with glass tiers. Each material creates a different visual language and carries different transport and cleaning requirements.

Glass tiers are effective when you want the cake to appear light and suspended, especially in golden-hour photographs. They also need careful wrapping and firm separation during transport, particularly on a return journey from Paarl or Franschhoek. Timber feels natural at a rustic farm venue, while a raw pine slab may look out of place in a clean-lined city gallery.

Match the format to the event

  • Round plates: A safe choice for traditional wedding cakes and symmetrical floral styling.
  • Square plates: Useful when the cake has sharp-edged tiers or a geometric corporate identity.
  • Porcelain: Suits classic, romantic and garden-party themes, but needs careful handling.
  • Wrought iron: Adds visual weight and works well with industrial, heritage or darker décor.
  • Powder-coated steel: Offers a more controlled finish and can suit contemporary venues.
  • Wood and brass: A natural fit for farm weddings, grazing tables and rustic dessert displays.
  • Glass with gold or rose-gold pillars: Creates a polished focal point for weddings, launches and milestone celebrations.

Tier count should follow the composition, not a desire to use every available level. A two-tier stand can be enough for a cake and a small floral accent. A three-tier stand is often the most adaptable format for wedding and corporate tables because it gives height without demanding the footprint of a larger display. Four- and five-tier arrangements need a deliberate venue plan, since extra height can dominate a compact room.

Spacing also matters. A tall cake on a shallow gap may visually collide with the plate above it, while generous gaps can make a small cake appear lost. Ask the hire supplier for the plate diameters, tier spacing and assembled height, rather than relying on a product photograph.

Format Material Best for Hire band per tier
Round tiered stand Glass, metal or porcelain Traditional cakes and floral displays Confirm with the local supplier
Square tiered stand Metal, glass or timber Geometric cakes and modern launches Confirm with the local supplier
Pillar stand Gold, rose-gold or powder-coated steel Formal weddings and branded dessert tables Confirm with the local supplier
Timber slab stand Raw pine, timber and brass Rustic farm and Winelands styling Confirm with the local supplier
Covered display stand Glass dome and plate Protected cake presentation Confirm with the local supplier

The table avoids invented pricing for hire because suppliers quote according to the specific item, quantity and event arrangement. Local retail listings demonstrate a broad purchase market, but a hire quote should be judged against transport, cleaning, collection and breakage responsibility, not against the shelf price alone.

For a softer rustic display, compare the proportions and finish shown in ABC Hire's wooden cupcake stand guide. A wooden stand can be attractive, but don't place it beside glossy acrylic décor unless the contrast is intentional. The same applies to metallic finishes. Gold can warm a reception table, while rose-gold may compete with copper signage or pink florals.

Weight Limits and Food Safety Basics

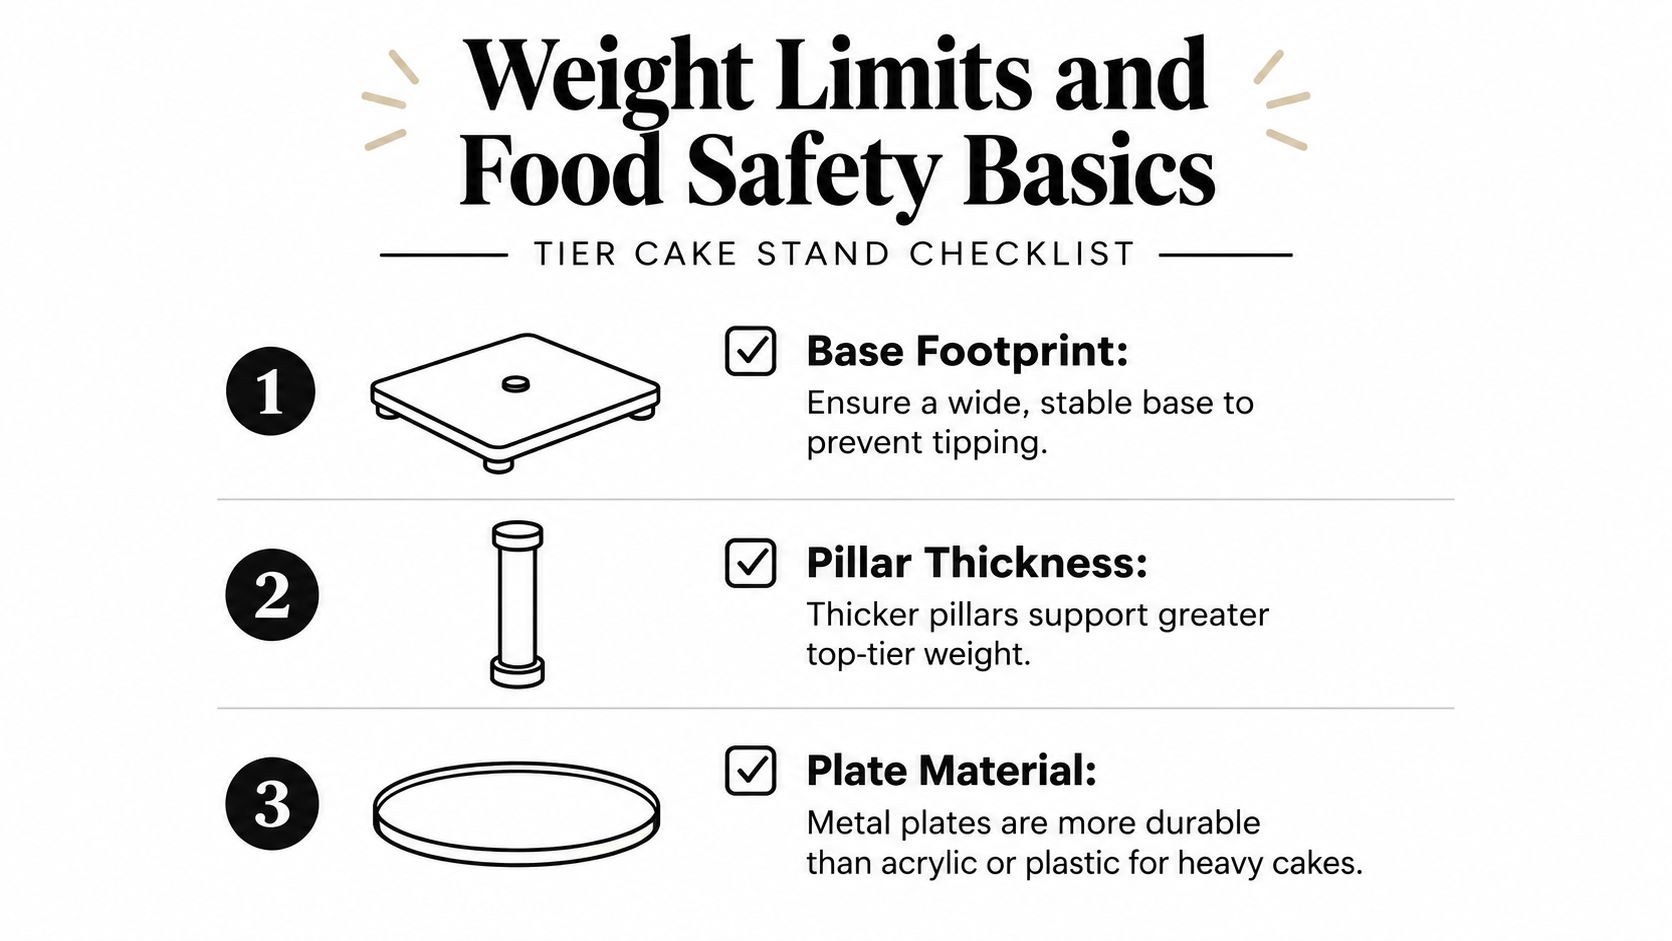
A tier cake stand doesn't have one universal safe load. Capacity depends on the base footprint, pillar thickness, plate material, locking mechanism and how evenly the cake sits on the plate. A dense fruit cake creates a different load from a light sponge, and a narrow stand becomes less forgiving when the top tier carries heavy decoration.

The most common failures at busy events are practical rather than dramatic. A top-heavy three-tier stand can tip on an uneven lawn. A glass plate can crack under a dense cake if it has a damaged edge or receives a sharp point load. A polished banquet floor can allow the base to slide when a table is nudged.

A checklist for tier cake stands highlighting the importance of base footprint, pillar thickness, and plate material.

Make the stability decision before loading the cake

Use a simple inspection before the decorator places the cake:

  • Base footprint: A broad, level base is more stable than a narrow one, especially on temporary flooring.
  • Pillar thickness: A substantial centre support resists sway better than a delicate decorative post.
  • Plate material: Metal generally tolerates handling better than fragile acrylic or thin plastic.
  • Connection points: Check that collars, screws and couplings are fully engaged.
  • Surface contact: Place the stand on a level table, with a discreet non-slip layer if the supplier permits it.

The heaviest cake belongs on the bottom plate. That keeps the centre of gravity low and reduces the chance of a top-heavy display moving when someone brushes the table. The stand supplier provides the display structure, but the cake decorator remains responsible for internal dowel rods, boards and the construction of stacked cake tiers.

South African hygiene rules also affect the display. Food displayed or stored at food premises must not be in direct contact with a floor or ceiling, so the finished cake needs to remain raised and separated from non-food-contact surfaces under the national food-premises hygiene regulations. In practice, transport the cake from its base, use a cleanable platform and keep the display in a cool, shaded area where possible.

Don't place the stand beside open flames, heat lamps or another heat source. Outdoor displays should be protected from dust, insects and weather, while covered presentation may be appropriate when the venue layout exposes the cake to passing guests. In Cape Town, food businesses also need to meet municipal hygiene requirements and hold a Certificate of Acceptability, which makes cleanable surfaces, protected storage and controlled handling part of the wider service environment, as described in the government food hygiene notice.

For a covered presentation, a glass cake dome can protect the cake while keeping it visible, provided the dome and stand are clean, stable and suitable for the cake's dimensions.

Setting Up Your Tier Cake Stand on Site

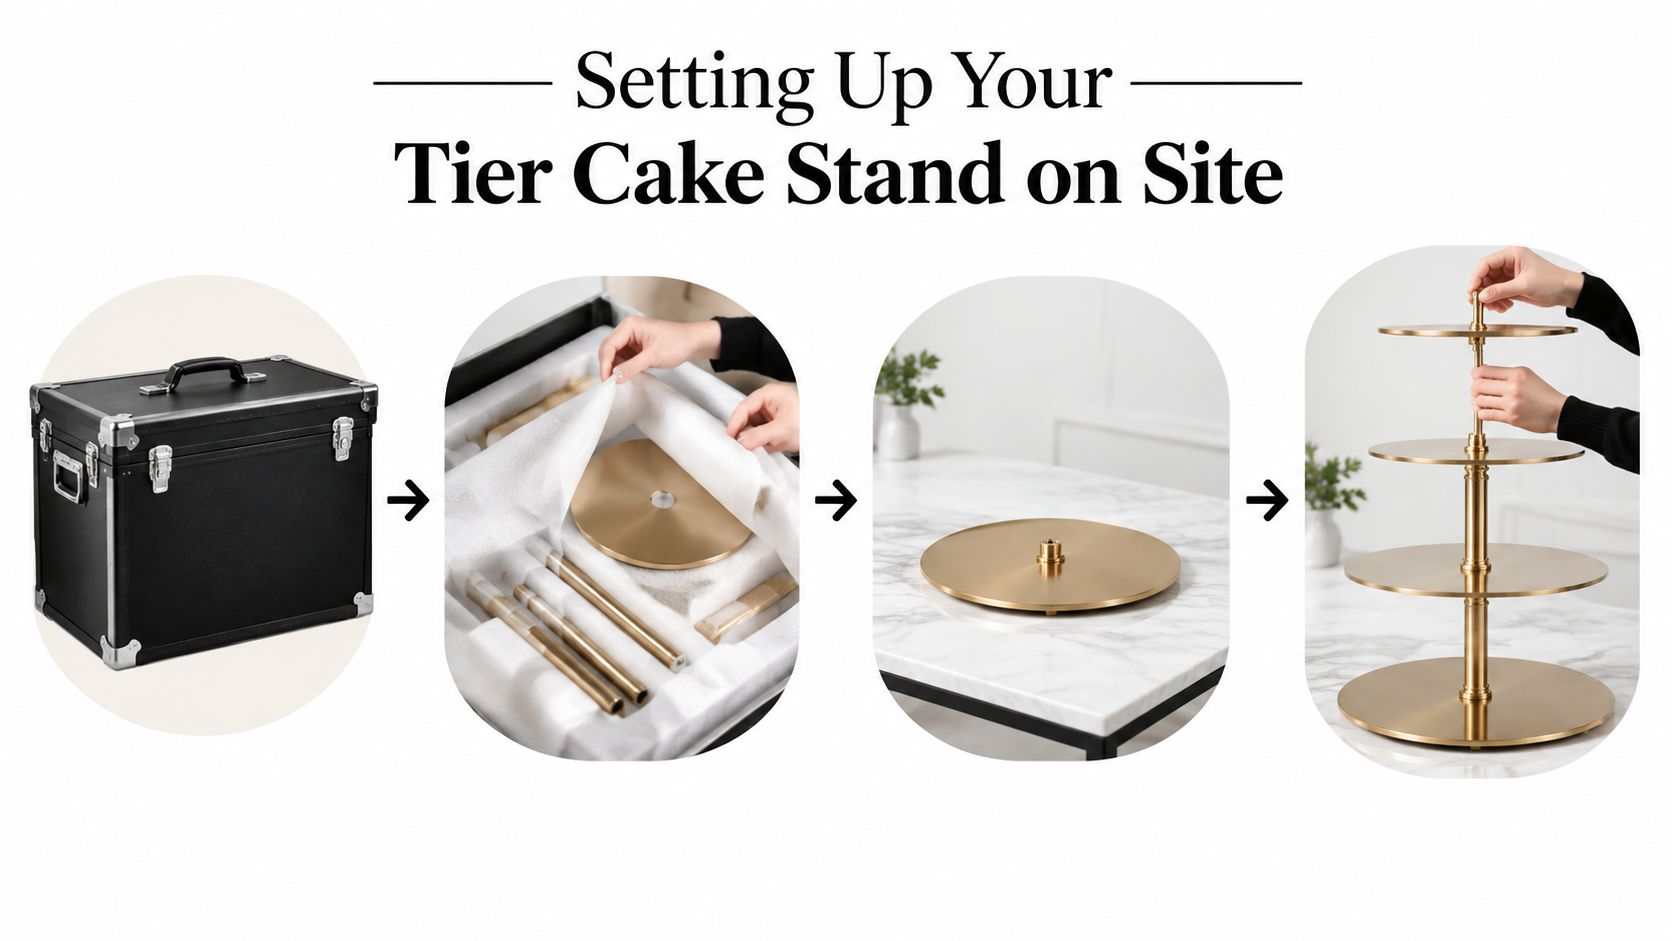
Hire stands usually arrive with separate plates, pillars, collars or fittings packed in a crate, box or protective wrapping. Before signing a delivery note, open the container and compare the contents with the order. Look for chipped glass, bent metal, loose fittings, scratched finishes and missing non-slip components, then photograph any issue and report it immediately to the driver or hire desk.

A four-step infographic showing how to unpack and assemble a gold-colored tiered cake stand on-site.

Don't assemble the stand on the most attractive part of the venue by default. A stable table in a serviceable position is more important than placing the cake directly beside the dance floor or in front of a window. Stable courtyards are usually easier than uneven thatched decks, while marquee floors may need extra checking because panels can sit slightly proud of one another.

Build on a level surface

A small spirit level is worth carrying in the event kit. Check the table in both directions, then use suitable foam shims beneath the table or approved non-slip material beneath the stand if the surface isn't even. Never force a tier into alignment by bending a pillar or tightening a fitting beyond its intended movement.

Set the centre post or lower support onto the base plate first. Fit the next plate, engage the locking collar or coupling fully, and check that the tier is horizontal before adding the next support. The assembled stand should feel firm when touched lightly, not spring sideways or rotate around the base.

Place the heaviest cake on the bottom tier and work upwards with lighter cakes, cupcakes or décor. The cake decorator must confirm that each tier has the correct internal support, cake board and dowels. A hire company can supply the stand, but it shouldn't be asked to engineer the cake itself.

What to do when something feels wrong

Stop loading the display if the stand sways, a plate tilts or a coupling arrives loose. Remove the cake or decorations, inspect the connection and contact the supplier rather than improvising with tape, glue or unrelated hardware. If the floor is the cause, relocate the table or correct the surface before continuing.

Leave enough room around the stand for a photographer and caterer to work without leaning on the table. Once the cake is in place, take a final photograph of the complete setup and note where the fittings and protective materials have been stored. That makes collection easier and helps prevent missing-part disputes.

Hiring vs Buying for One-Off Events

For a single wedding, hiring usually creates less work than buying. The purchase price is only one part of ownership. You also need a safe storage area, protective packaging, transport, cleaning supplies and a plan for what happens when the stand no longer suits the next event's colour palette or cake design.

A small Cape Town flat rarely has spare cupboard space for bulky plates and tall pillars. A custom finish may also be difficult to resell if it carries a couple's names, date or highly specific styling. Hire removes much of that storage burden and lets the planner choose a timber, glass, porcelain or metallic format for the particular venue.

Compare the responsibility, not just the rate

Cost factor Hiring Buying
Initial outlay A supplier quote for the selected stand and event period Full purchase cost paid upfront
Storage Returned after the agreed hire period Ongoing storage and protective packaging
Transport May be arranged by the supplier or added to the booking Managed by the owner
Damage exposure Deposit and return conditions may apply Owner carries repair or replacement risk
Styling flexibility Select a different finish for each event Limited to the owned item
Resale Not relevant to the client Resale may be uncertain, especially for customised pieces

Local rental listings show that suppliers may require deposits and return windows of 5 to 7 days, and some require the stand to return to the shop after the event in perfect condition, as set out in the local wedding cake hire information. Confirm who cleans the stand, who transports it, when the return clock starts and what counts as damage before paying.

Read the return clause carefully: Candle wax, chipped glass, missing collars and late returns can matter more than the advertised display price.

For one wedding, hire generally wins because the stand arrives as a managed event item and leaves with the supplier. For a brand activation that uses the same display across a weekend, hire can also reduce the need to pack and store a specialised piece between appearances. The organiser can focus on moving the product, dessert or branded message rather than protecting an asset after every service.

A planner who runs regular events may reasonably buy reusable polycarbonate or metal stands. That decision makes sense only when the same formats will be used repeatedly and the business has suitable storage and cleaning procedures. If you're also organising portrait outfits, a practical resource such as this client wardrobe for portraits illustrates the same planning principle. Reusable resources earn their place when they support many bookings, not when they create another item to manage for one occasion.

Styling Your Stand for Any Theme

A good tier cake stand should adapt to the event rather than dictate it. The same structure can feel botanical at a Winelands wedding, precise at a product launch, playful at a matric dance or restrained at an anniversary gathering.
Winelands weddings

Use trailing olive, eucalyptus or fynbos around the lower display, with low glassware so the cake remains visible. Warm Edison lighting can add depth after sunset, but keep cables away from the table legs and don't let hot bulbs sit close to buttercream.

Wire greenery into a controlled arrangement instead of laying loose stems directly across the cake. That keeps foliage from brushing the icing and makes removal cleaner. A timber stand suits an estate setting, while glass and metallic pillars create a lighter look against stone, linen and pale florals. For couples comparing venue styles and packages, the estate wedding packages from Kunde Winery provide useful context for how a dessert display needs to sit within a wider estate celebration.

Corporate launches

Treat the stand as a branded riser. Place the product or dessert at the most visible level, keep the colour palette controlled and use a small removable vinyl decal on the base plate rather than covering every surface with logos. The stand should support the campaign, not compete with the product.

Check the decal's removal method before applying it. Adhesive residue can affect cleaning and may create a return problem on hired metal or glass.

Matric dances and birthdays

Bolder colour, confetti and acrylic risers can work well for a school formal or milestone birthday. Keep loose confetti away from icing and avoid anything that can fall between stacked plates or interfere with a locking collar.

A bright cake may need a quieter stand. Conversely, a neutral cake can benefit from coloured plates, ribbons or carefully placed edible accents. Use removable styling pieces so the hire item returns in the same condition.

Memorials and anniversaries

A candlelit display calls for restraint. Choose a simple finish, low floral material and a clear cake board, then position candles well away from timber, fabric and the cake itself. Wax is difficult to remove from porous timber and can leave a hire item unsuitable for the next booking.

Powder-coated stands can also be marked by paint overspray, glitter adhesive and strong tapes. Protect the base with a removable liner approved by the supplier, keep wet décor off the plates and photograph the clean stand before packing it away.


ABC Hire supplies tiered cake stands and related event hire items for Cape Town, Stellenbosch, Franschhoek and Paarl, with options suited to weddings, corporate functions, school events and private celebrations. Visit ABC Hire with your venue layout, cake dimensions and event date so the team can help you select a stable format and clarify collection, delivery and return requirements before booking.

Punch Bowl Set Guide: Choosing, Setting Up and Serving

The guests are arriving at a Winelands venue, the welcome drinks are due on the tables, and the punch bowl looks exactly right in the photographs. Then the first rush begins. The ladle is working constantly, the ice is melting into the drink, fruit is warming under the afternoon light, and the runner realises nobody agreed when to refill it.

A punch bowl set is more than a decorative centrepiece. It's food-contact catering equipment, a measured vessel, a self-serve station and a reusable rental item that must survive transport, service and cleaning. The right setup can reduce pressure on the bar. The wrong one creates spills, dilution, breakage and avoidable hygiene risks.

What a Punch Bowl Set Actually Does at an Event

At a Cape Town wedding, a well-placed punch station gives guests an immediate drink while bartenders concentrate on wine, beer and made-to-order cocktails. It also creates a visual welcome point, particularly at a garden ceremony, harvest table or reception entrance. That benefit disappears quickly if the bowl is too small, the ladle is awkward or nobody owns the refill responsibility.

The useful way to think about a punch bowl set is as a compact drinks service system. The bowl holds the beverage, the ladle controls the pour, the underliner catches drips, and the cups determine how quickly guests move through the station. Ice inserts, float rings and matching ladle rests can improve presentation, but they only work when the basic service flow is sound.

Practical rule: If the duty manager can't explain who checks, refills and cleans the station, the set isn't ready for guests.

Where the bowl earns its place

Punch works particularly well during the welcome period, at a daytime garden function or alongside a bar that needs to manage a short arrival rush. It can also suit a non-alcoholic station at a school formal, university function or corporate activation, provided the drink is clearly labelled and the cups are easy to reach.

It's less effective when the menu depends on individual customisation. A bowl cannot replace a cocktail bar where guests expect different spirits, garnishes or sweetness levels. It also doesn't suit every modern catering layout. South African event coverage increasingly discusses pass-around bowl food, food stations, harvest tables and individually portioned formats, which makes a punch bowl more useful as a presentation-led self-serve point than as the central catering solution (Fork & Nice's discussion of harvest tables).

The historical detail still matters

Shared drinking vessels have a documented association with communal drinking in South Africa-adjacent colonial material culture. Iziko Museums of South Africa in Cape Town preserves social-history ceramics and glassware, including a donated blue glass bowl, giving planners a locally grounded reference for the long relationship between large serving vessels and social occasions (Iziko's published annual report).

That history doesn't make every bowl suitable for service. It does explain why the format still feels familiar. The operational test is simpler: can the set stay clean, cold or appropriately warm, stable and replenished throughout the event?

Sizing the Set to Your Guest Count

Start with two inputs, your confirmed guest count and the likely number of servings per person. Use 150 ml as the working serving size for planning, then adjust according to the rest of the drinks menu. A wedding with wine and cocktails may need more punch than a corporate launch where guests primarily choose beer or wine. A school formal may need more because the bowl can function as the main drinks station.

The calculation is straightforward:

Guest count × servings per guest = total servings

Then convert servings into litres and allow for the actual bowl capacity. A 10-litre bowl yields roughly 65 servings, a 14-litre bowl about 90 servings, and a 20-litre bowl around 130 servings. These figures are planning estimates based on the 150 ml serving size and should be treated as service capacity, not a promise that every last millilitre will be poured.

A working sizing table

Guest Count Servings per Guest Litres Needed Suggested Bowl Setup
50 1.5 11.25 litres One 14-litre bowl
80 2 24 litres Two 14-litre bowls, or one 14-litre plus one 10-litre
100 2 30 litres Two 14-litre bowls plus staged reserve
150 2 45 litres Three 14-litre bowls on separate stations or staged refills

For 80 guests at two servings each, you need about 160 servings. That points to two 14-litre bowls, or a 14-litre bowl paired with a 10-litre bowl. One 20-litre bowl may look substantial, but it creates a service problem because the team can't refill it without interrupting the station.

Count stations, not just litres

Large functions need distribution as well as volume. For 150 guests, three 14-litre bowls on separate stations can reduce queues and keep one runner from carrying full liquid vessels across a busy floor. If the bar package already includes welcome drinks, review the staffing and beverage split before ordering extra punch capacity. A practical reference for comparing service formats is the BeeHive Mobile Bar package guide, which helps planners think about punch alongside broader mobile-bar requirements.

Leave reserve liquid in labelled food-safe containers, not in an unmarked bucket behind the bar. The runner should know which batch belongs to which bowl, whether it contains alcohol, and when it was mixed.

Choosing Glass, Acrylic or Metal for the Cape Town Venue

Material is a venue decision, not just a styling decision. A glass punch bowl can anchor a formal Winelands table beautifully, while acrylic is usually easier for a rental team to move, clean and replace. Metal can provide a strong visual centre, but it needs more attention to temperature and condensation.

South African hygiene rules require food-contact items to be clean, smooth, non-absorbent and free of chips or cracks. That standard applies whether the bowl is glass, acrylic or metal. The material changes the practical risks, but it doesn't lower the cleaning requirement.

Material Presentation Breakage Risk Weight When Full Thermal Hold Best Fit
Glass Formal, clear and traditional Higher in transport and service Heavy Generally stable, but vulnerable to thermal shock Controlled indoor weddings and premium tables
Acrylic Clean, flexible and rental-friendly Lower breakage risk, but scratches over time Lighter Suitable for normal chilled service Large events, outdoor venues and busy stations
Metal Striking, modern or heritage-inspired Dents and surface damage are possible Heavy, especially with ice Conducts temperature quickly Branded activations and styled beverage displays

Glass makes a statement, but demands discipline

Cut or thick-walled glass looks at home beside formal crockery and polished stemware. It also allows the beverage colour to become part of the design. The trade-off is obvious during load-in. Full glass vessels are awkward to carry, vulnerable to knocks and expensive to replace if a rim chips.

South African catering guidance notes that normal glass withstands temperature changes of about 42°C, while tempered glass can handle about 130°C. The same catalogue advises immediate cleaning after use and warns against microwaves, open elements, ovens and stacking unless the item is specifically rated for it (South African catering-supplies glassware catalogue).

Acrylic is usually the operational choice

Food-grade acrylic or polycarbonate suits garden venues, school functions and high-turnover rental work. It's lighter to transport and less likely to create dangerous shards if dropped. Scratching and clouding remain concerns, so staff shouldn't use abrasive pads or stack pieces that aren't designed for stacking.

Metal bowls photograph well, particularly for a gin-based punch, copper-toned brand activation or rustic farm setting. They conduct heat rapidly, so use a separate ice insert rather than relying on the bowl wall to keep the liquid chilled. For a broader look at bowl formats and materials, planners can review Monopack ltd bowl options before specifying a set.

Setting Up the Punch Station Step by Step

The station should be set up in the same order every time. That consistency lets a junior runner follow the brief without improvising around a slippery bowl, misplaced cups or a garnish tray sitting in direct sun.

Start with the base

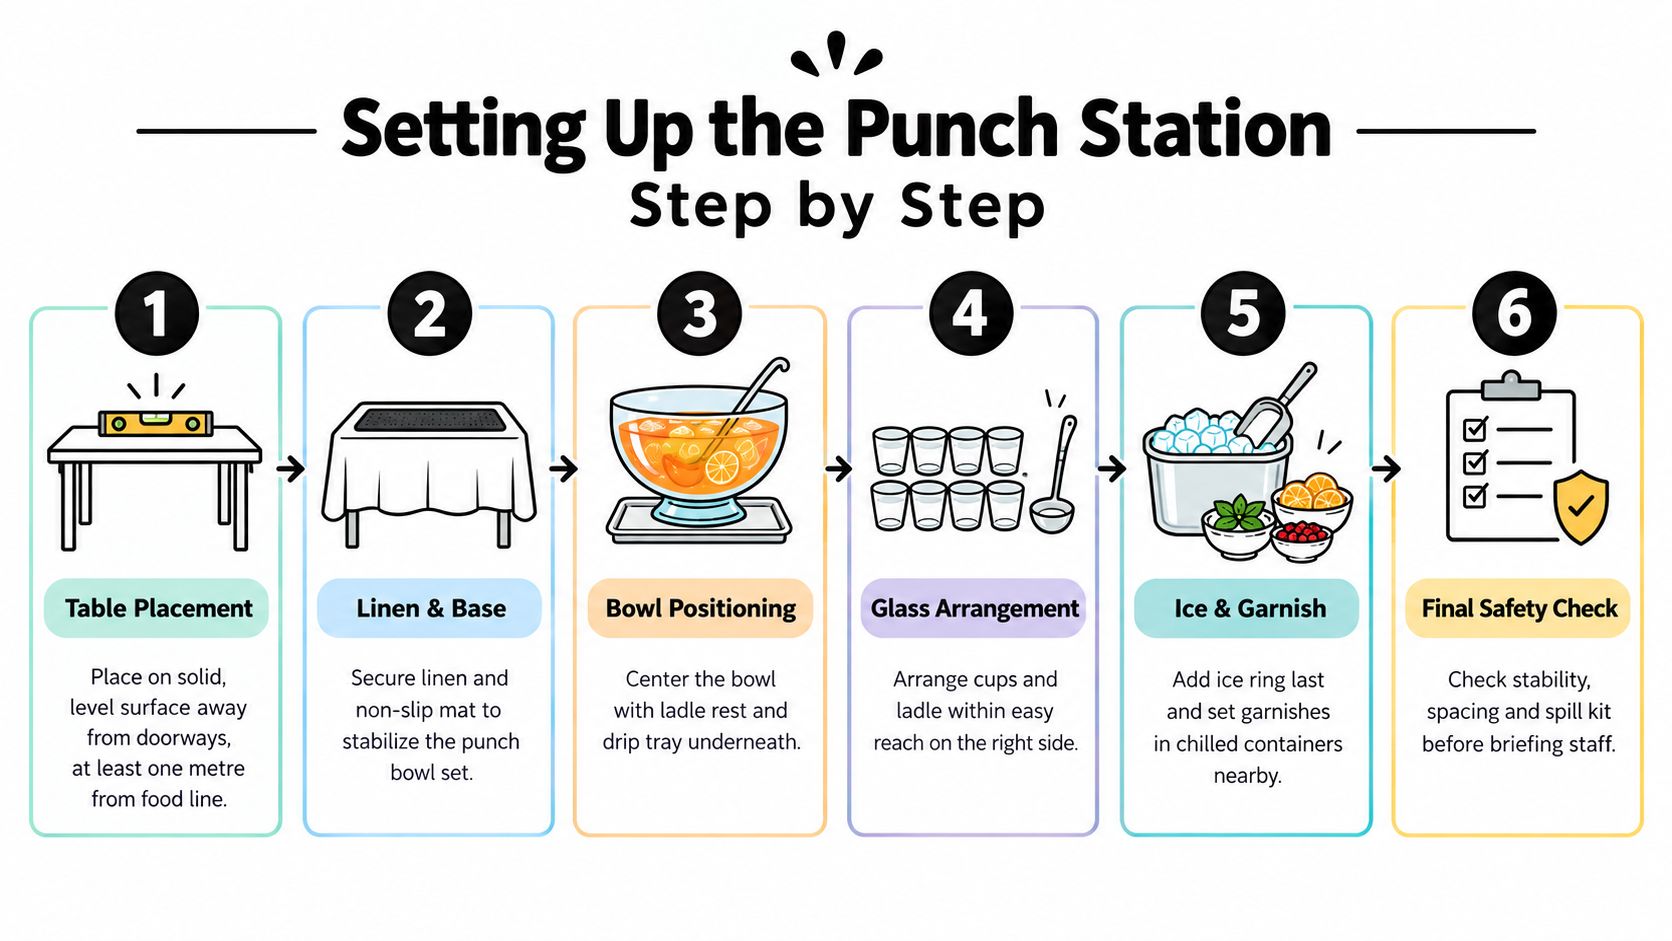
Choose a solid, level table away from doorways and service crossings. Keep the station at least one metre from any food line so guests reaching for cups don't collide with plates, trays or buffet traffic. Secure the linen, add a non-slip mat if required, and check that the table doesn't rock when pressure is applied to one corner.

An instructional infographic demonstrating the six-step process for correctly setting up a professional punch station.

Place the service pieces in order

  1. Drip tray first: It protects the linen and gives the ladle a defined landing area.
  2. Bowl in the centre: Check that the base sits fully on the tray and doesn't rock.
  3. Ladle and rest: Keep the ladle handle clear of the liquid and place it where guests can lift it without reaching across the bowl.
  4. Cups on the right: This works for right-handed guests and keeps the pour path predictable. Leave enough space for a guest using a mobility aid to approach without twisting.
  5. Ice separately: Use a nested bowl, insert or float ring where possible. Loose ice in the punch can dilute the drink quickly and makes the final servings inconsistent.
  6. Garnish last: Put citrus, herbs and flowers out immediately before doors open, preferably in chilled containers until that point.

If two punches are being served, use separate signs with the drink name and alcohol status. Brief the runner to refill when the bowl reaches about one-third full, then clean spills immediately rather than waiting for the next scheduled check.

Hygiene and Food-Safety Rules You Cannot Skip

Every ladle, cup, bowl and garnish utensil is a food-contact item. The South African hygiene regulations require these items to be clean, smooth, non-absorbent and free from chips or cracks. They must be washed before first use and again as needed during or immediately after service, and chipped or cracked crockery and utensils must not be used (South African food-premises hygiene regulations).

That means you shouldn't assume a rental set is ready just because it arrived wrapped. The person signing for the equipment should inspect it, wash it where required, and keep damaged pieces out of service.

Use a quick setup inspection

Run this check before beverage contact:

  • Look closely: Inspect the rim, base and ladle for chips, cracks, clouding or residue.
  • Check stored items: Smell cups and the bowl. A stale storage odour usually indicates that the set needs washing before use.
  • Swipe the rim: A clean finger or approved inspection method should find no grease, grit or dried residue. Wash and rinse again if it does.

The regulation also requires food-contact surfaces to be smooth, rust-proof, non-toxic and cleanable. That matters when a metal bowl has decorative joins or when an acrylic vessel has deep scratches that can hold residue.

Keep the station understandable

Place allergy information where guests can see it. Identify citrus, sulphites, dairy ingredients and alcohol rather than expecting guests to ask the bartender. Use separate ladles for different beverages, and never move a used ladle from an alcoholic punch into a non-alcoholic bowl.

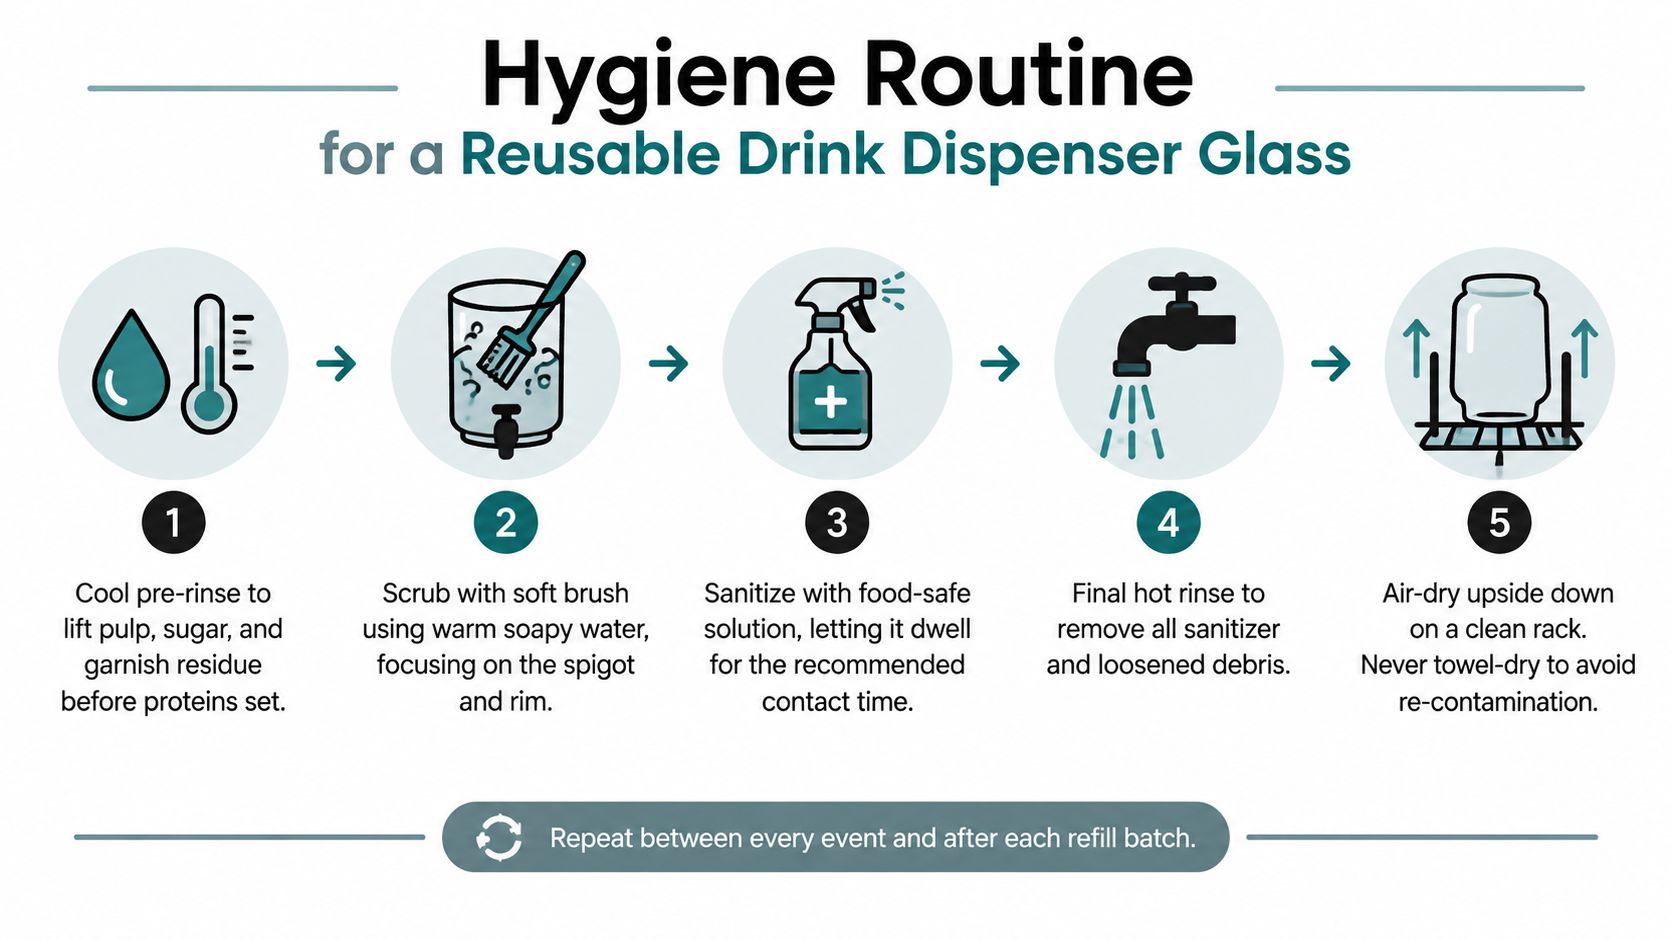
For local venue compliance, the City of Cape Town directs food businesses to follow the national hygiene requirements. Treat the punch station as regulated food service equipment, not as decorative furniture. ABC Hire's guidance on drink dispenser and glass hire is also useful when coordinating beverage vessels with the rest of a rented service setup.

Garnish and Flavour Combinations That Hold Up on a Buffet

A garnish has to survive handling, light, temperature changes and repeated ladle movement. Sliced apple and banana brown quickly, while soft fruit can break apart and cloud the bowl. Citrus wheels, frozen berries, firm herb sprigs and edible flowers generally hold their shape better, although garnish should still be added as late as practical.

Wedding service

For a wedding, a rooibos and white-peach punch gives the bowl a distinctly South African flavour direction without relying on heavy decoration. For 10 litres, use a rooibos-led base with white-peach juice or purée, then add rosemary sprigs and firm white-peach slices near service. Keep the rosemary restrained, because too much woody herb can dominate the drink.

Place peach slices and flowers in chilled containers until the station is ready. Add the rosemary last so it stays upright and aromatic rather than sinking into the ladle path.

Corporate launches

A citrus-ginger kombucha punch suits a brand activation where the beverage needs to signal freshness and a lower-alcohol or alcohol-free direction. For 10 litres, build around citrus, ginger and kombucha, then use candied ginger and thyme as the visual accents.

Kombucha can be lively and acidic, so taste the finished batch before guests arrive. Keep the garnish separate until the team has confirmed the balance. Planners developing alcohol-free menus can use this non alcoholic cocktail mixers guide for ideas on building depth without making the bowl taste like diluted juice.

School formals and family functions

A berry-lemonade punch is simple to identify and easy to serve. For 10 litres, use a lemonade base with frozen mixed berries. The berries provide colour and a cooling effect, while avoiding the need for a separate fruit garnish bowl.

Keep the ladle, cups and napkins aligned so young guests aren't reaching over the liquid. A wooden serving tray from ABC Hire's guide can help contain cups and small garnish dishes, but it should stay dry and stable rather than becoming a second crowded surface.

Running Service, Refills and Clean-Down on the Day

A reliable punch station needs a printed playbook. The duty manager should know what happens before guests arrive, when the runner refills, how the team handles used cups and what returns to the rental warehouse.

South African market context supports this flexible approach. The glassware market in South Africa was estimated at USD 71.27 million in 2024 and is projected to reach USD 119.07 million by 2033, with a projected compound annual growth rate of 5.89% from 2025 to 2033. Drinkware is identified as the largest segment, which places shared beverage vessels such as punch bowls inside a wider event-glassware category (South Africa glassware market summary).

The printed station routine

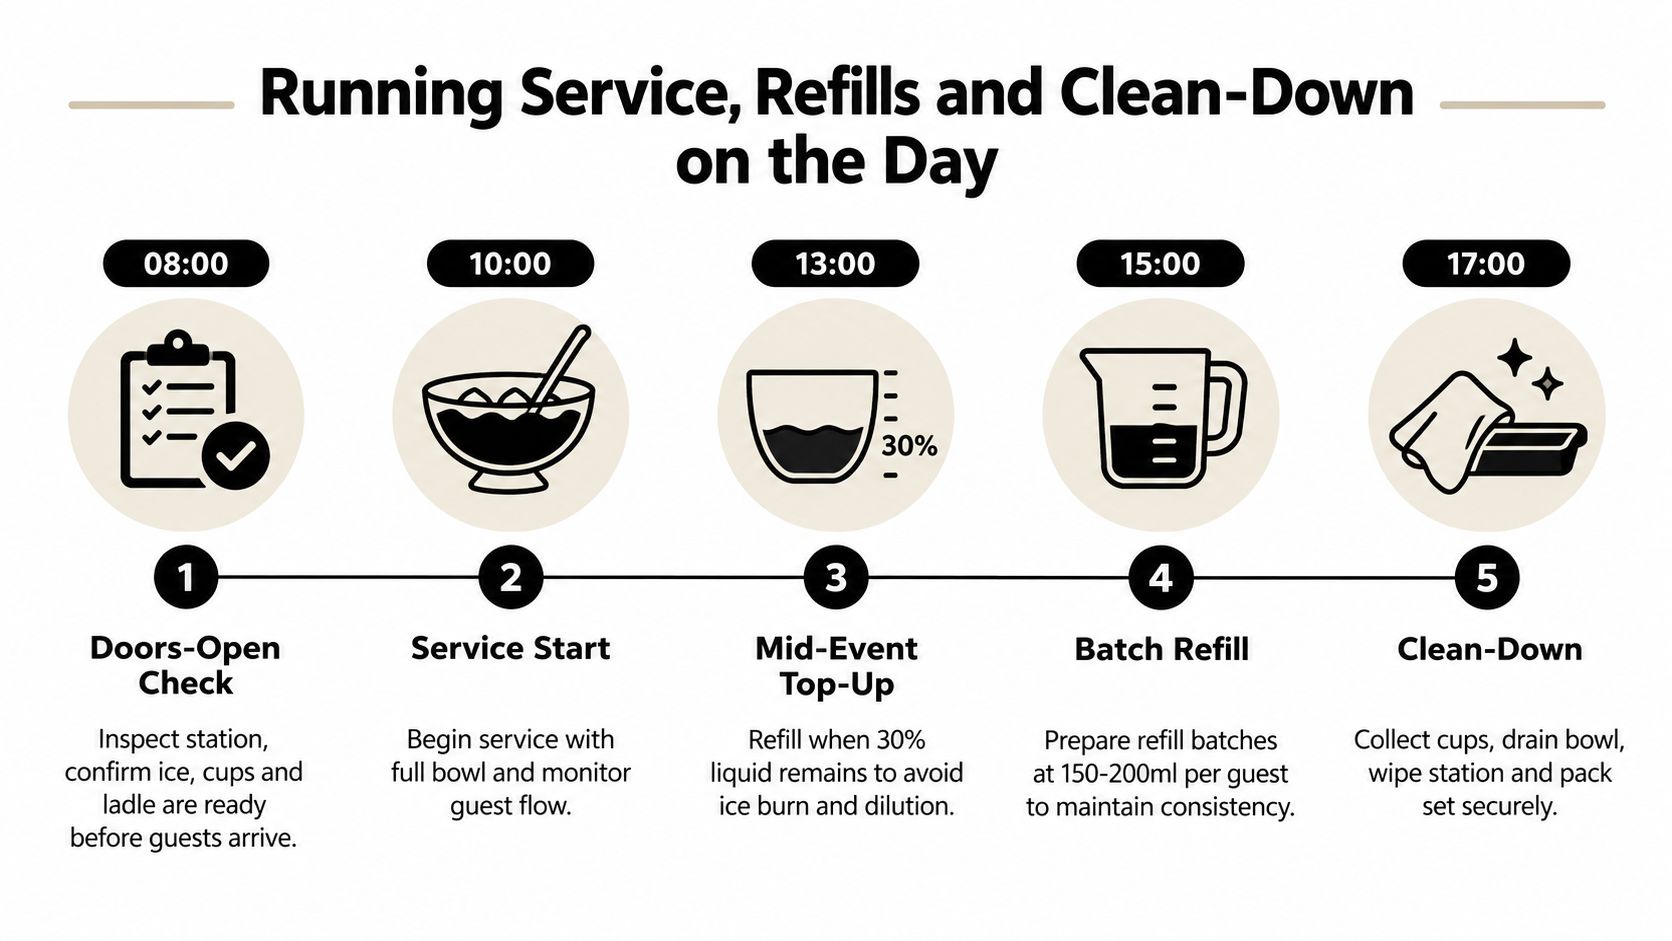
Before doors open, inspect the table, bowl, ladle, cups, ice and labels. Confirm the reserve batch, spill kit and waste container are in position. Taste and smell the punch before service, and record the setup time.

During the first service period, watch the queue rather than the bowl alone. A station can look full while guests are waiting because the ladle is too small or the cups are placed too far away. Keep the liquid level comfortably above the ladle opening and top up before the bowl becomes difficult to serve.

At the mid-event check, refill when approximately 30% of the liquid remains. That prevents the ice from dominating the remaining drink and gives the runner a clear trigger that doesn't depend on guesswork.

An infographic showing a five-step timeline for managing a punch bowl service during an event.

Batch, taste and temperature

Prepare refill batches consistently instead of adding random quantities of juice, mixer and alcohol directly to the bowl. The supplied service workflow uses 150 to 200 ml per guest for batch-refill planning, but the exact volume should follow your guest count, remaining stock and venue service plan.

Wine- and spirit-based punches should be served chilled, while fruit-juice punches also need temperature control and frequent checks. Don't rely on a metal bowl alone for cooling. Use a suitable ice insert, keep reserve batches cold, and taste at the 60-minute and 120-minute checkpoints to catch dilution, oxidation or flavour drift before guests do.

Where chilled storage is limited, review the venue's equipment plan alongside ABC Hire's bar refrigerator size guide. A refrigerated reserve is easier to manage than repeatedly adding warm liquid to a bowl.

Close the loop after service

Stop adding fresh garnish before draining the bowl. Collect cups and waste separately, pour out remaining liquid according to the venue's waste procedure, rinse the bowl and ladle, and dry the set before packing it. Don't stack pieces unless the manufacturer or rental inventory specifically allows it.

Separate cracked or chipped units immediately and label them for the rental team. Record what was returned, what was damaged and who handed it over. Reusable tableware only remains sustainable when the operator can clean it efficiently, preserve it through repeated use and identify losses before the next event. That matters in a market where South African event buyers increasingly ask about reusable décor, lower-waste service and the lifecycle value of durable equipment. The biodegradable tableware market in South Africa is forecast to grow from USD 8.9 billion in 2025 to USD 16.7 billion by 2031, increasing pressure on suppliers to explain how reusable items are managed (South African event décor sustainability coverage).

ABC Hire supplies event furniture and accessories for weddings, corporate functions, school formals and private celebrations across Cape Town, Stellenbosch, Franschhoek and Paarl, with crockery and beverage-service items available to coordinate with the wider setup. Visit ABC Hire to discuss a punch bowl set, supporting tables and the practical equipment needed to keep the station stable, presentable and serviceable from guest arrival through clean-down.

Chair Tie Backs Made Simple for Stunning Events

You arrive at a Cape Town venue before the guests, and the room looks almost right. The linen is pressed, the florals are in place, and the lighting is warm. Then you notice the chairs. Some sit at different angles, a few have visible marks, and the room lacks the repeated detail that makes a wedding, matric dance or corporate dinner feel deliberately styled.

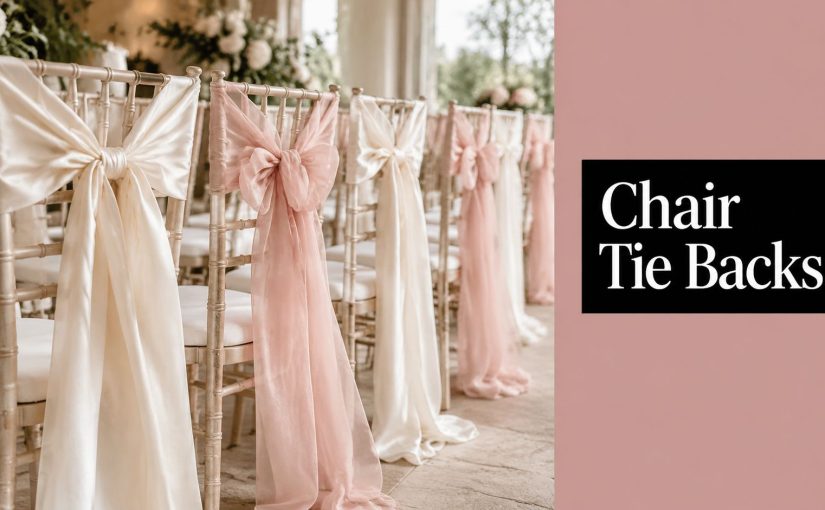
That's where chair tie backs earn their place. A well-chosen sash can turn ordinary venue seating into part of the design without covering every chair from top to bottom. It can echo the table linen, pick up a colour from the flowers, soften a hard chair profile and give photographs a consistent rhythm.

Why Chair Tie Backs Still Matter for Modern Events

A chair tie back works because it repeats a visual decision across the room. One ribbon on one chair may look decorative, but a row of matching backs creates structure around the tables. In photographs, that repeated line helps the seating read as part of the tablescape rather than as borrowed furniture placed around it.

A typical venue walk-in makes the difference obvious. White chairs might be perfectly serviceable, yet they can look disconnected from natural linen, seasonal flowers or a carefully selected lighting scheme. Add a fabric strip in a restrained colour, and the room gains a visual thread that links guest seating to the rest of the styling.

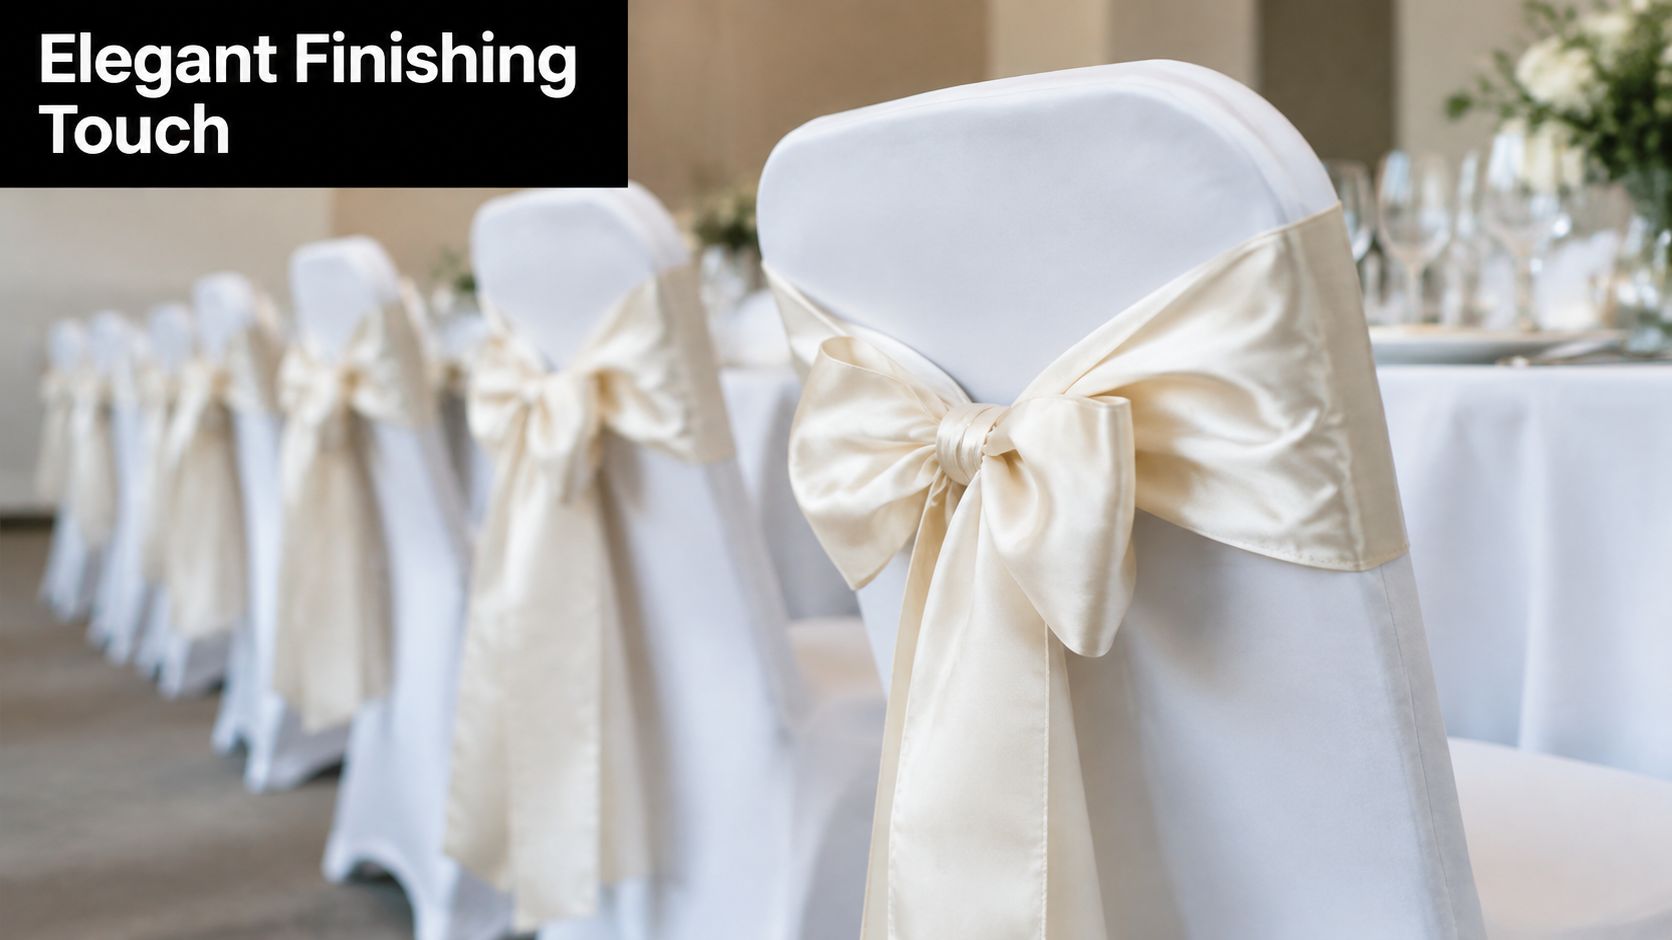
A row of white wedding chairs decorated with elegant cream satin ribbons and bows in a banquet hall.

A small detail with a local language

In South Africa, “sash” has a meaning that reaches well beyond furniture decor. Six women founded the Women's Defence of the Constitution League on 19 May 1955, and the movement became known for the black sash worn in protest against constitutional change, as documented by the Black Sash history archive. The organisation's history included silent vigils, symbolic mourning and the visible use of the sash as a public protest marker.

That gives the word a distinctly local resonance. In Cape Town and the Winelands, suppliers may use “sash”, “tie back”, “chair ribbon” or “chair dressing” for related styling pieces, but the terminology carries a traceable public history in the South African context.

Why tie backs can beat full covers

Full chair covers can conceal an unattractive frame, but they also introduce more fabric, more fitting work and a stronger visual statement. Tie backs leave the chair visible, which often suits venues with attractive timber, rattan or upholstered seating. They're especially useful when the furniture is part of a modern mixed-texture layout.

Good chair tie backs help with:

  • Room cohesion: They connect seating to linen, florals, stationery and lighting.
  • Photographic consistency: Repeated bows, knots or sweeps create a clean background behind guests.
  • Furniture flexibility: They can work alongside lounge pieces instead of forcing every seat into one formal treatment.
  • Practical styling: A single centred detail may be enough when the venue chairs are already clean and presentable.

For guest-flow planning, pair the styling decision with a reliable seating plan for weddings. The tie back should enhance the seating arrangement, not obstruct access, aisle movement or the way guests pull chairs out from the table.

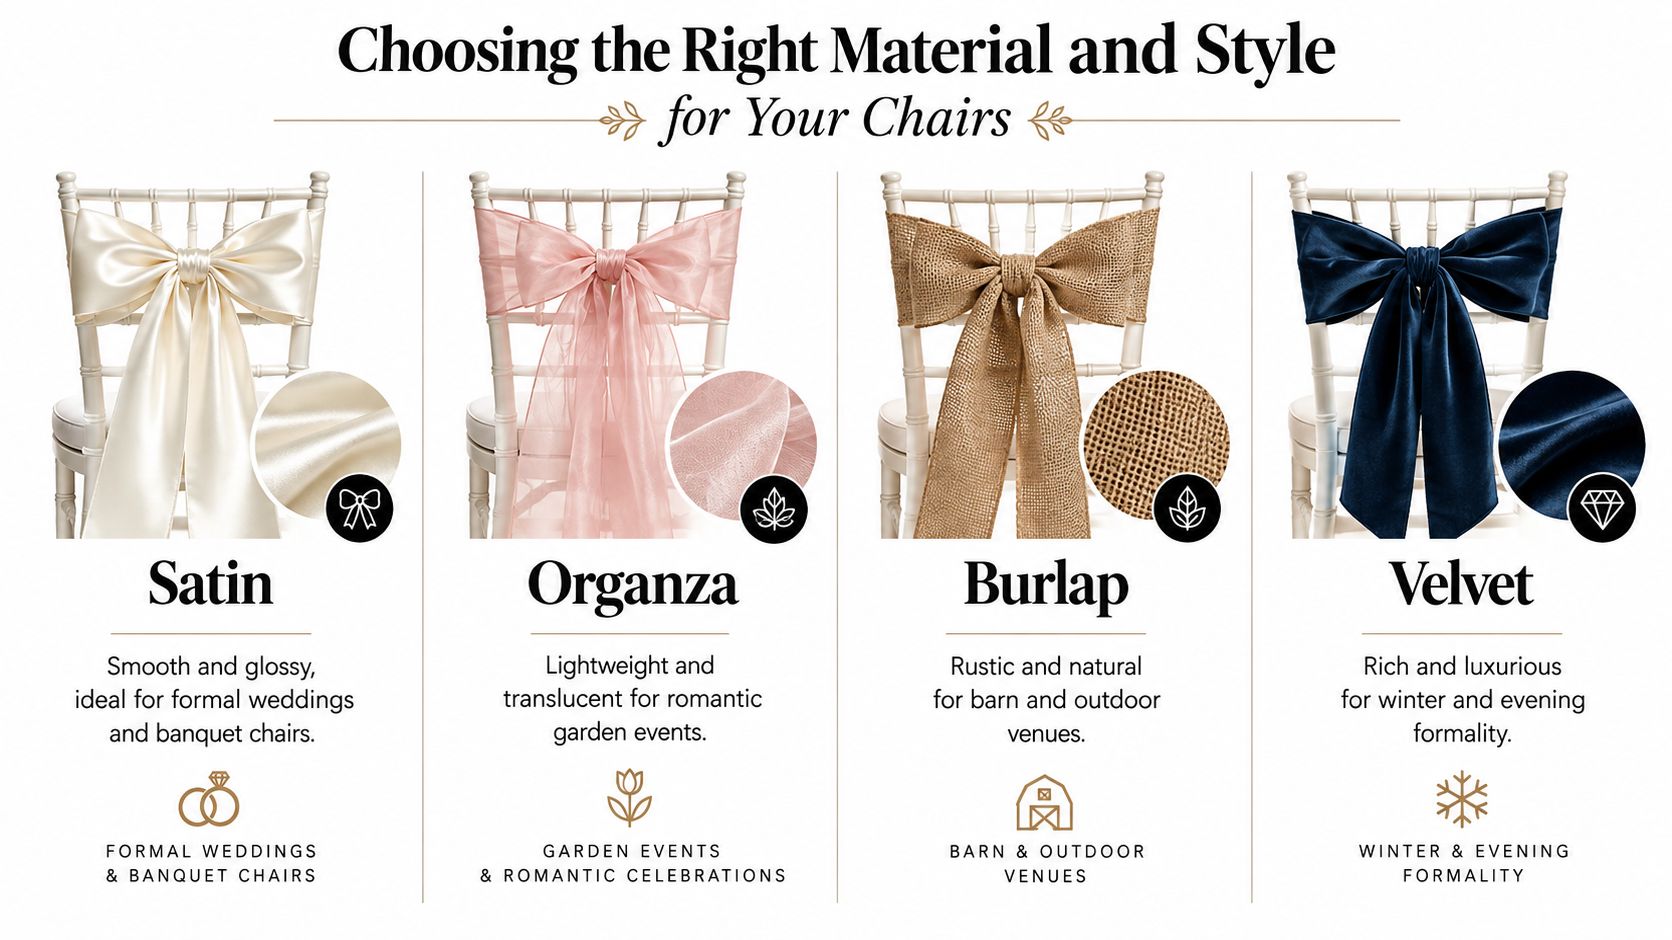
Choosing the Right Material and Style for Your Chairs

Material choice should begin with the chair, not the colour swatch. A glossy satin strip may look polished on a straight banquet chair but feel too formal on a woven rattan seat. A rough hessian tie can suit a vineyard setting, yet it may fight with plush upholstery or a sleek corporate palette.

Four different styles of chair tie backs displayed on white chairs including satin, organza, burlap, and velvet.

Compare the fabric before you order

Satin catches light and gives formal chairs a crisp, reflective finish. It's a natural fit for banquet halls, evening receptions and polished corporate dinners, but it can show creases and may slide on very smooth chair backs if the tension isn't even.

Organza is lighter and more translucent. It creates an airy effect for garden weddings and soft romantic palettes, although its sheerness can make a single layer look insubstantial against a dark chair.

Hessian and other textured natural fabrics bring warmth to outdoor celebrations, farm venues and relaxed Winelands styling. Their stiffness can help a knot hold, but the texture should be tested against guests' clothing and the chair's surface.

Velvet gives depth and absorbs light rather than reflecting it. It suits rich evening schemes and cooler-season formality, though its weight can pull a loose tie out of position.

The following guide keeps the decision practical:

Material Best For Look and Handling
Satin Formal weddings and banquet chairs Smooth, glossy and neat, but needs careful pressing and firm positioning
Organza Garden ceremonies and romantic receptions Sheer and lightweight, with a soft drape that may need layering
Hessian Rustic, vineyard and outdoor events Textured and natural, with a dependable knot but a more casual finish
Velvet Evening celebrations and formal winter styling Rich and tactile, with weight that requires a secure tie

Match the tie to the chair profile

Upholstered or fabric-backed chairs usually give a sash something to grip. A tie can sit flat across the back without needing a full slipcover, which is one reason this treatment is practical on suitable venue chairs, as discussed in this chair sash tying guide.

Tiffany and Wimbledon-style chairs often look better with a restrained strip rather than an oversized bow. Cross-back chairs already have strong geometry, so place the fabric where it supports the cross rather than hiding the structure. On rattan, test the tie against the weave. A narrow ribbon may disappear into the texture, while a broader strip can give the back a clear colour block.

For a more detailed look at trim, proportion and decorative applications, this resource on selecting designer ribbon for interiors is useful beyond event work as well. Before committing, make one complete sample chair and photograph it from the guest's seated height, the table edge and the room entrance.

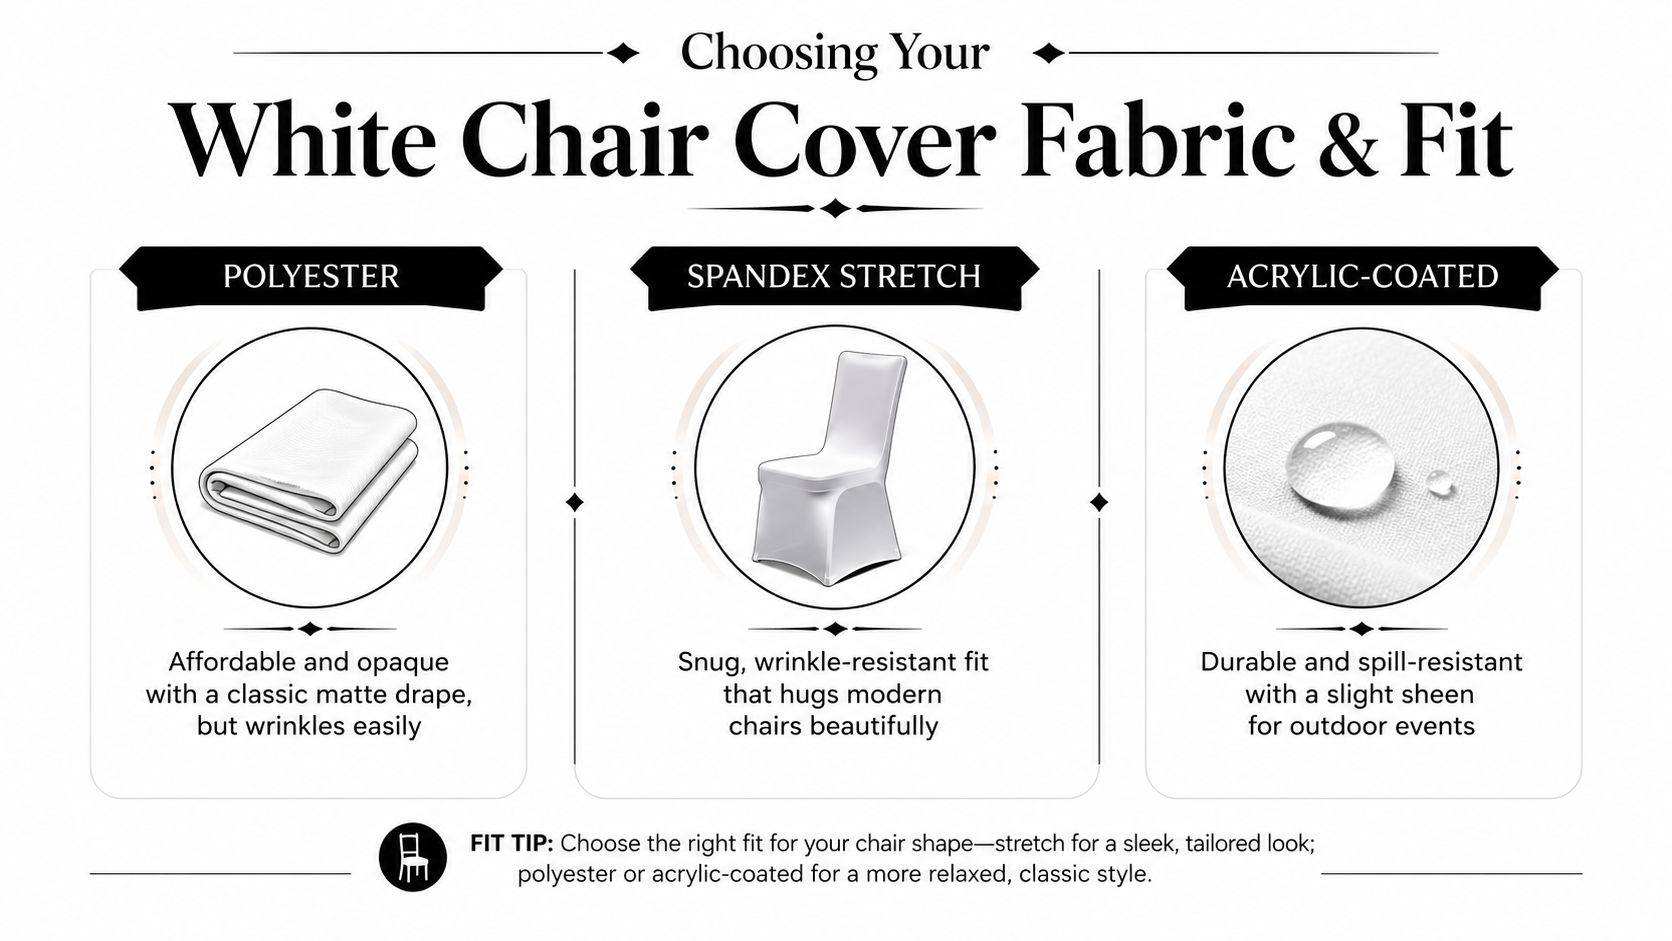
If the furniture needs broader visual coverage, compare the tie-back idea with white chair covers. A tie back is a styling accent. It won't hide a damaged frame, mismatched chair colour or upholstery that the event design needs to conceal.

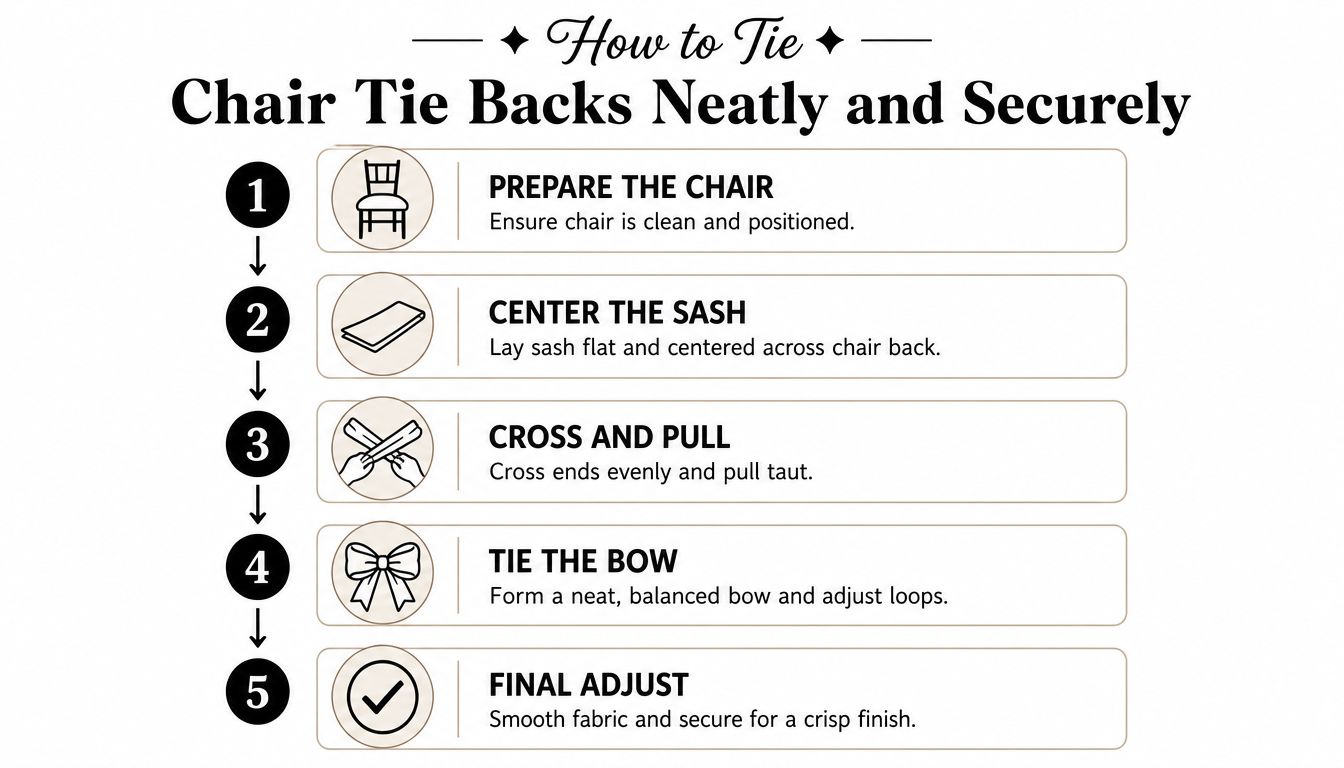
How to Tie Chair Tie Backs Neatly and Securely

A neat chair tie back depends less on an elaborate knot than on preparation and repetition. The first chair sets the standard for every chair after it, so take the time to establish the position before the team moves into production mode.

A five-step infographic guide demonstrating how to tie elegant chair tie backs for events.

Prepare one reference chair

Clear the chair back first. Remove packaging, dust, loose threads and anything that could sit beneath the fabric and distort the line. Position the chair exactly as it will sit during the event, because a sash can look centred when the chair is angled and uneven once the whole row is aligned.

Lay the sash flat across the chosen height. On a straight-backed chair, the centre is usually easy to judge. On a curved or barrel-shaped back, follow the widest stable part of the profile rather than forcing the fabric around a narrowing point.

Cross the ends evenly behind the chair. Pull until the fabric is secure, but don't tighten it so far that it compresses upholstery or creates an uncomfortable edge. Unsecured decorative pins can cause discomfort or safety problems, so use a method appropriate to the chair and venue rules.

Use a repeatable tying method

Classic bow: Cross the ends, form two balanced loops and pull them to the same size. This is the most recognisable formal treatment, but it exposes uneven work quickly, so use the reference chair as a visual target.

Simple knot with tails: Make a clean knot and leave short, even tails. This suits hessian, velvet or textured ribbon where a large bow would look heavy.

Side sweep: Anchor the crossing point slightly off-centre and let one controlled fold or tail sweep to the side. It works best when the room has a relaxed, editorial feel, but keep the direction consistent across the row.

Finish the room, not just the knot

Once the first chair is approved, assign one person to demonstrate the method and have the rest of the team copy the same height, tension and tail length. Marking a simple reference point with removable tape can help staff place each tie back consistently, provided the venue approves the method and no adhesive touches finished furniture.

Keep tails above the floor so they don't catch shoes, collect dirt or interfere with guests moving their chairs. Walk along the completed row from the entrance and check the backs as a group, rather than inspecting only one chair at a time.

Practical rule: Secure the fabric first, then create the shape. A beautiful bow that slips during guest movement is unfinished styling.

For a different perspective on tying and tension, The Fabric Company's guide to tying quilts offers useful handwork principles, although event chair dressing needs a quicker and more uniform finish. The important lesson is control. Smooth the fabric, balance the ends and make the final adjustment from the side guests will see.

Coordinating Tie Backs With Your Theme and Venue

Tie backs look premium when they belong to the room's wider material story. They look added on when the colour is chosen in isolation, the finish ignores the chair, or every available accent gets placed on the same small area.

Echo colour instead of copying it

A vineyard wedding may use soft stone linen, dried grasses and pale florals. The chair tie back doesn't need to match the linen exactly. A muted clay, dusty rose or natural flax tone can echo the flowers or stationery while allowing the tablecloth to remain the dominant surface.

Corporate styling benefits from the same restraint. If the brand colour is strong, use it as a controlled accent on selected seating or pair it with a quieter neutral. A full row of intense colour may overwhelm the room, especially when the venue already has branded signage, lighting or stage elements.

For a matric dance, the styling can be more expressive, but the chair still needs to remain comfortable and safe. Metallic ribbon, velvet or a dramatic colour can work when the room has enough visual space around it. Avoid adding bulky ornaments that knock against guests or catch on clothing.

Adapt the treatment to mixed furniture

Modern Cape Town and Winelands layouts often combine dining chairs with curved lounge seating, rattan pieces and residential-style groupings. Traditional tie backs don't need to disappear, but they do need to become more selective.

Use them on the dining chairs when those seats form the formal perimeter of the room. Leave lounge pieces unadorned if their upholstery or shape already provides the visual interest. On rattan chairs, choose a fabric with enough body to remain visible against the weave. On curved backs, place the tie at a stable point and use a smaller knot or side sweep rather than forcing a symmetrical bow across an uneven profile.

Stylist's judgement: Uniformity should follow the furniture family, not the entire furniture inventory.

A mixed plan can still feel coherent through a shared colour, repeated texture or matching floral detail. Before finalising the chair treatment, review the linen and tablecloth options alongside the chair fabric. The relationship between the two matters more than either item viewed alone.

Keep movement in mind

The best-looking chair detail still has to survive service, dancing, speeches and guests pulling seats away from tables. Keep the back profile visible where it adds character, avoid floor-length tails and don't place a tie where it presses against a curved edge. A venue walk-through with one dressed sample chair will reveal more than a colour board can.

Hiring Chair Tie Backs Versus Buying and Styling Yourself

The cheapest fabric isn't always the cheapest event solution. Buying ribbon may look economical, but the task includes measuring, cutting, pressing, transporting, styling, correcting uneven ties and dealing with leftover material after the event.

A South African wedding decor guide places chair sashes at R20 to R60 each as a seating decor line item, according to local wedding decor cost guidance. At a 100-guest reception, that benchmark works out to roughly R2,000 to R6,000 for chair sashes, before labour, setup and other decor items are added.

Compare the treatment, not just the unit price

Full covers have a different purpose. They hide chair colour and condition, but they require more fabric and a closer fit. The same South African guidance compares full chair-cover styling at about R15 to R35 per chair with a single ribbon, fabric strip or greenery tie-back at about R3 to R8 per chair, a stated 73% to 80% unit-cost reduction for the simpler treatment. For 100 chairs, the cited comparison is roughly R300 to R800 for the minimal tie-back approach versus R1,500 to R3,500 for covers.

Those figures are benchmarks, not a quote for every venue. Fabric quality, pressing, delivery, installation, collection and the complexity of the chosen style can change the final hire price.

Choose based on labour and furniture condition

DIY makes sense when the chair backs are uniform, the event team has time to prepare the fabric and the styling is deliberately simple. It becomes a false economy when the chairs vary, the fabric needs extensive pressing or the venue requires installation and removal within a tight access window.

Hiring through a rental partner such as ABC Hire can combine chair-related furniture hire with event accessories, allowing the organiser to brief one team about the room layout and finish. For a broader comparison of cover logistics, see the guidance on hiring chair covers.

Plan quantities with the room in mind

Confirm the final chair count after the floor plan is approved. Ask whether the venue supplies spare chairs, whether lounge seating is included in the styling count and who will dress any replacements. Prepare a few additional tie backs where the supplier's terms allow it, particularly when last-minute seating changes are possible.

For Stellenbosch, Franschhoek, Paarl and greater Cape Town, confirm delivery access, setup responsibility and collection timing in writing. A clear brief should include the chair photograph, tie height, material, colour, knot style and the person responsible for the final room check.

Final Checks and Pro Tips for a Flawless Finish

A chair tie-back installation succeeds in the final inspection, not when the first bow looks attractive. Give the room a deliberate walk-through from the entrance, the head table, the dance floor and the photographer's likely positions.

Use this pre-event check:

  • Count the seating: Match dressed chairs to the approved floor plan, including any changes made by the venue team.
  • Test one complete chair: Photograph the sample in the actual room light before dressing the full layout.
  • Check the height: Look across the backs in a row. Uneven placement is more visible than a small colour variation.
  • Test the fabric: Pull the chair out and sit briefly if permitted. The tie should stay secure without creating a hard or uncomfortable pressure point.
  • Lift the tails: Nothing should drag, catch shoes or brush against the floor.
  • Inspect the knots: Loose bows need tightening, while over-tightened ties need to be relaxed and repositioned.
  • Assign final ownership: One person should make the last alignment pass instead of leaving corrections to whoever notices them.

Curved and rattan chairs deserve extra attention because their profiles can make a centred tie appear crooked. Judge the result from the guest's viewpoint, not only from directly behind the chair. If a chair has a damaged back or an inconsistent colour, don't expect a small sash to solve a problem that calls for a cover or a furniture change.

Keep the reference chair available during setup. It gives the team a fixed standard for loop size, tail length, height and tension, which is far more reliable than verbal instructions passed from one person to another.

Final check: If the detail looks balanced from across the room and remains secure when the chair moves, it's doing its job.


For chair tie backs, chair covers and coordinated event furniture in Cape Town, Stellenbosch, Franschhoek and Paarl, speak with ABC Hire about the pieces that suit your venue and floor plan. Visit ABC Hire to discuss your chair styling requirements and arrange the practical hire details before event day.

Small Wooden Crate Ideas for Stylish Event Decor

The venue is open, the tables are dressed, and one long banquet table still looks flat. A few vases disappear behind the glassware, the welcome sign needs height, and the dessert display has nowhere to build upwards. A small wooden crate often solves all three problems before the first guest arrives.

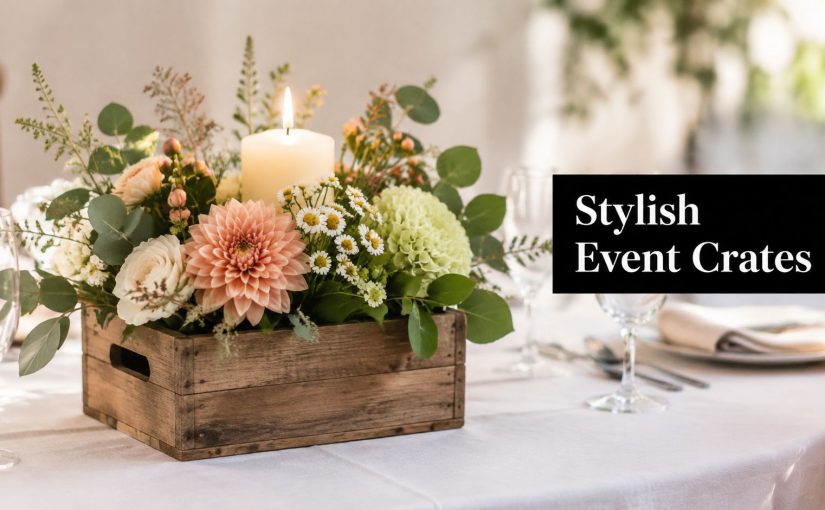
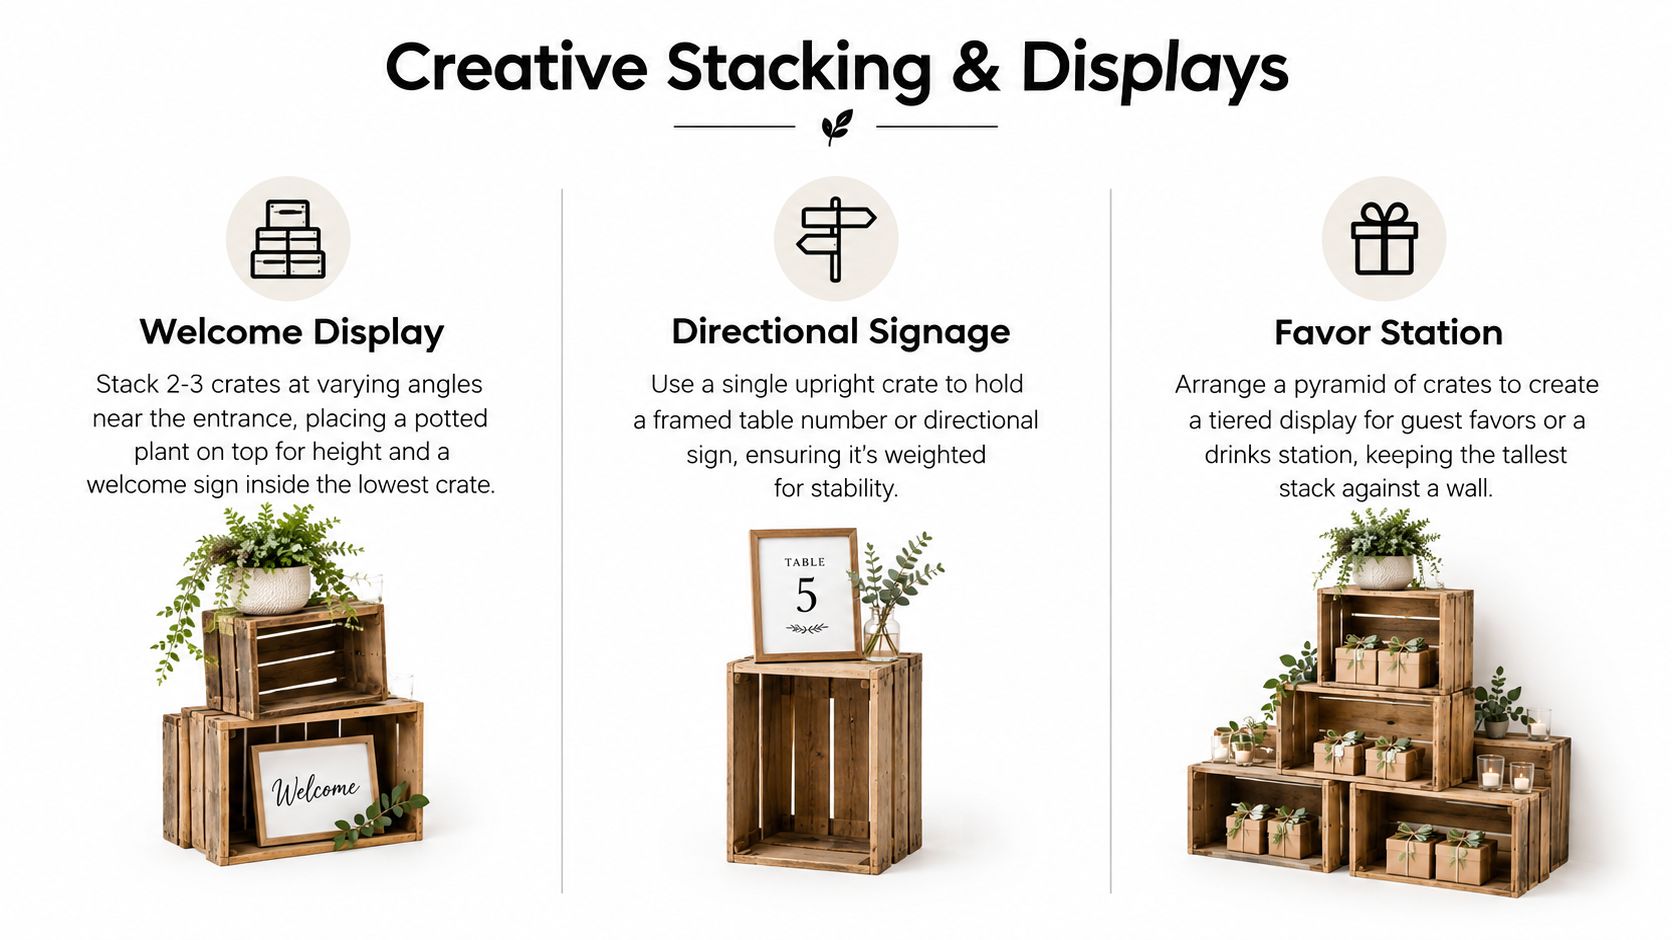
In Cape Town and the Winelands, crates work because they're more than rustic props. They're reusable styling units that can lift, frame, separate and organise event details. Turn one on its side for a floral arrangement, stack several for a welcome point, or use a single crate as a compact sign holder. Unlike fragile one-purpose décor, a well-made crate can move from a wedding to a corporate activation, then return to storage ready for another setup.

Why Small Wooden Crates Work So Well for Event Styling

At a Stellenbosch wedding, the styling problem is often practical rather than creative. The table plan looks beautiful on paper, but once the menus, wine glasses and candles are in place, the centrepiece needs more height. A stack of crates creates a level change without adding a bulky plinth, and the natural timber softens formal tableware without making the setting feel overly themed.

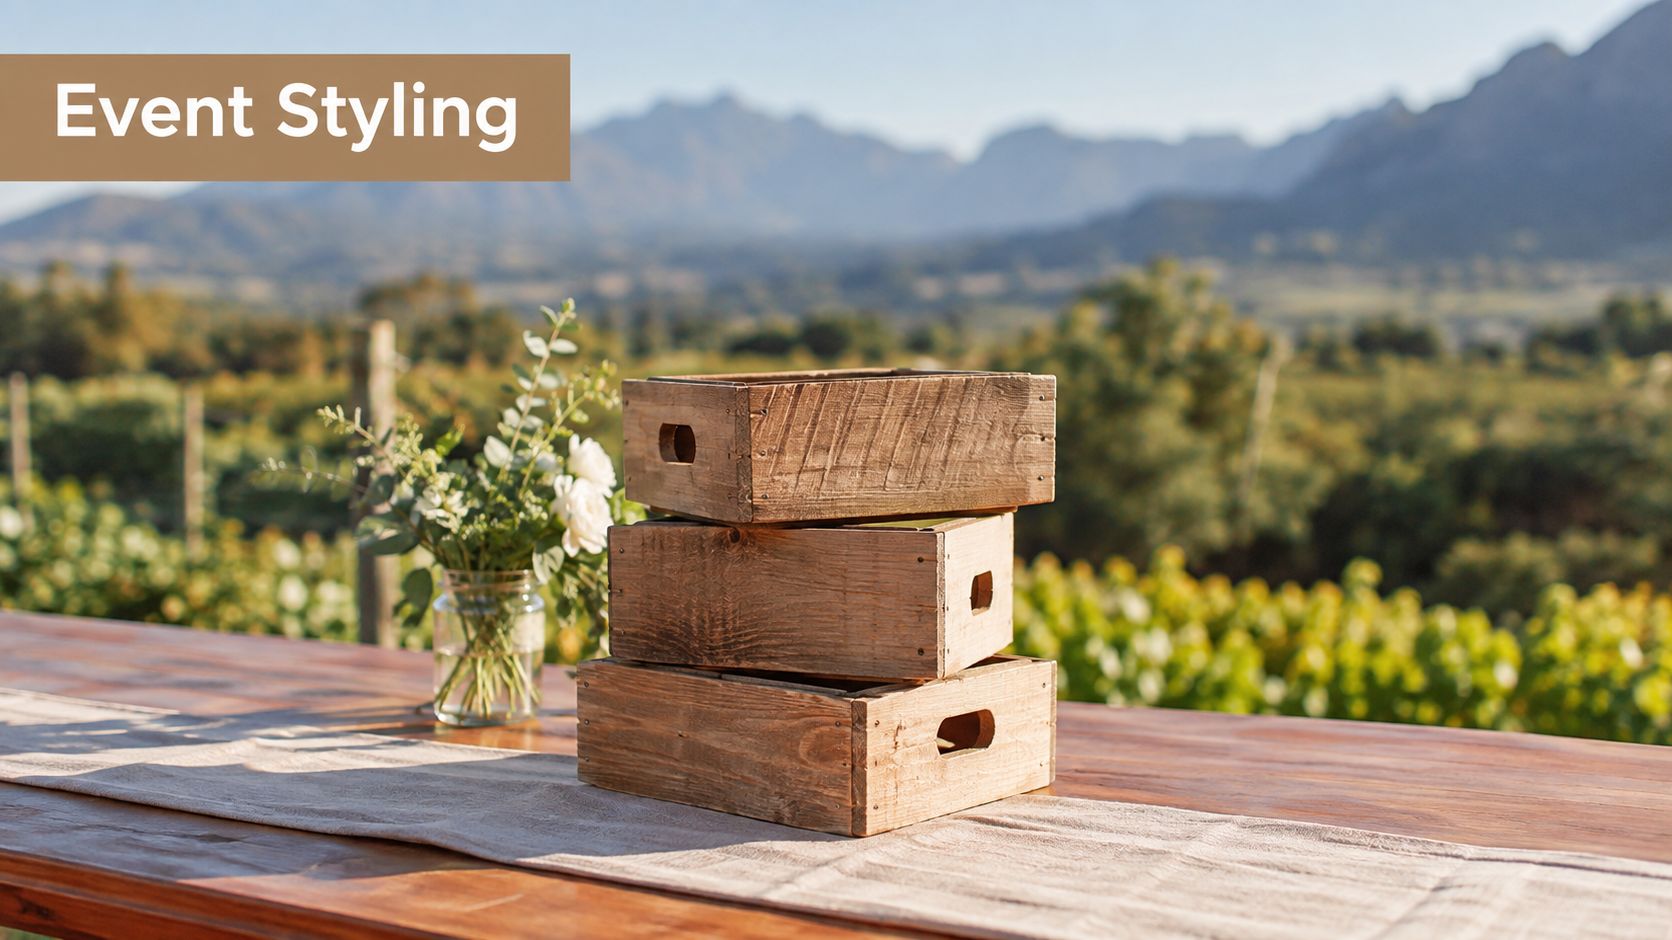
A stack of three rustic small wooden crates placed on a table with flowers in a jar.

The same unit can work differently at a birthday celebration. Place it beneath a cake sign, fill it with wrapped favours, or use it beside the bar for menus and garnishes. At a brand activation, crates can introduce a farm-market feel while giving products a clean, tiered presentation. Their open slats keep displays visually light, which matters when guests need to see products, signage or florals from several angles.

A styling building block, not a one-day prop

Crates also make pack-down more organised. Rather than dismantling a collection of separate risers, baskets and stands, a styling team can gather the crates, wipe them down and stack them for transport. That reuse makes the hire model particularly attractive for planners who work across venues and need pieces that perform more than one job.

The material has practical limits. A rough crate can catch linen, a weak corner can wobble under a heavy arrangement, and inconsistent sizes can make a deliberately casual display look accidental. Good results depend on selecting a consistent set, checking each piece before loading, and matching the crate to the job.

Practical rule: If a crate will sit near guests, treat stability, smooth edges and clear sightlines as styling requirements, not afterthoughts.

Event setups also carry responsibility beyond appearance. If décor is placed near walkways, candles, electrical equipment or guest seating, it's sensible to review how event insurance can protect you alongside your normal venue safety planning.

How to Choose the Right Small Wooden Crate for Your Event

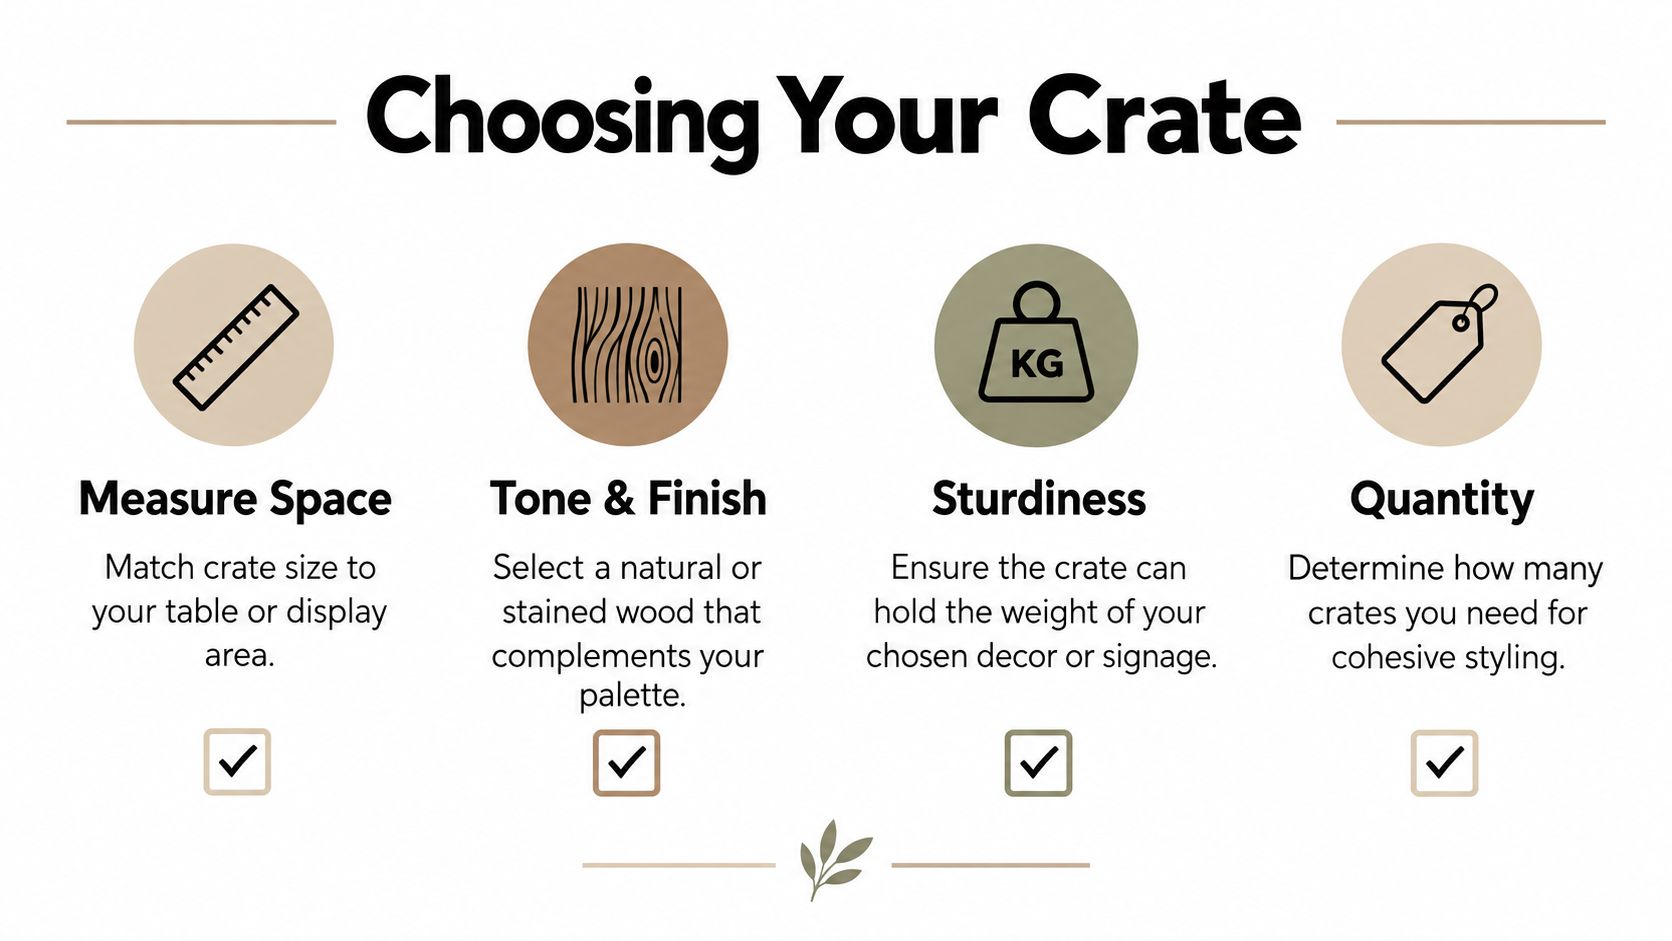
Choose the crate for its job before choosing its colour. A centrepiece crate needs enough internal space for a jar, liner or floral mechanic, while a sign crate needs a stable base and an opening that frames the board rather than hiding it. A display crate for bottles or favours must also tolerate repeated handling.

An infographic titled Choosing Your Crate showing four icons for measuring, finish, sturdiness, and quantity.

Start with the footprint

Measure the table, shelf or display zone, then allow room for hands to pass around the arrangement. On a round guest table, a crate that occupies too much surface area competes with place settings. On a long banquet table, several smaller units usually create a more relaxed rhythm than one oversized block.

Check both external and internal dimensions. Thick slats and corner framing reduce the usable space, so a jar that fits the outside measurement may not fit inside the crate. If you're sending small products or gifts, compare the crate's interior with the packed item, not the product description alone. For compact mailed goods, 4x4x4 inch shipping boxes can help you think through the relationship between packaging dimensions and the display space available.

Inspect the finish by hand

Run a cloth over the timber. If it snags, guests' clothing and table linen may do the same. Look for exposed nails, split corners, loose slats and sharp staples. A natural finish suits vineyard weddings and market-style activations, while a painted or stained set can support a corporate palette more precisely.

Mixed timber can look charming when the event deliberately uses an eclectic style. It looks untidy when the rest of the décor is symmetrical. Hire a matching set when the crates form a repeated feature, such as table numbers or a tiered favour station. Choose varied pieces only when you're controlling the composition through placement, colour and repeated florals.

Test the structure before loading

Place the crate on a level surface and press gently on each corner. It shouldn't rock. Add the intended contents, then lift it from underneath rather than by a slat. For heavier signage or décor, choose reinforced corners and a solid base.

A useful selection checklist is:

  • Measure twice: Confirm the table footprint and internal capacity before ordering.
  • Match the finish: Keep timber tones consistent unless an intentionally collected look is part of the brief.
  • Check the joinery: Reject pieces with movement, cracked boards or protruding fixings.
  • Order for repetition: Count every table, display point and spare required for replacements.

Styling Centrepieces and Florals With Small Wooden Crates

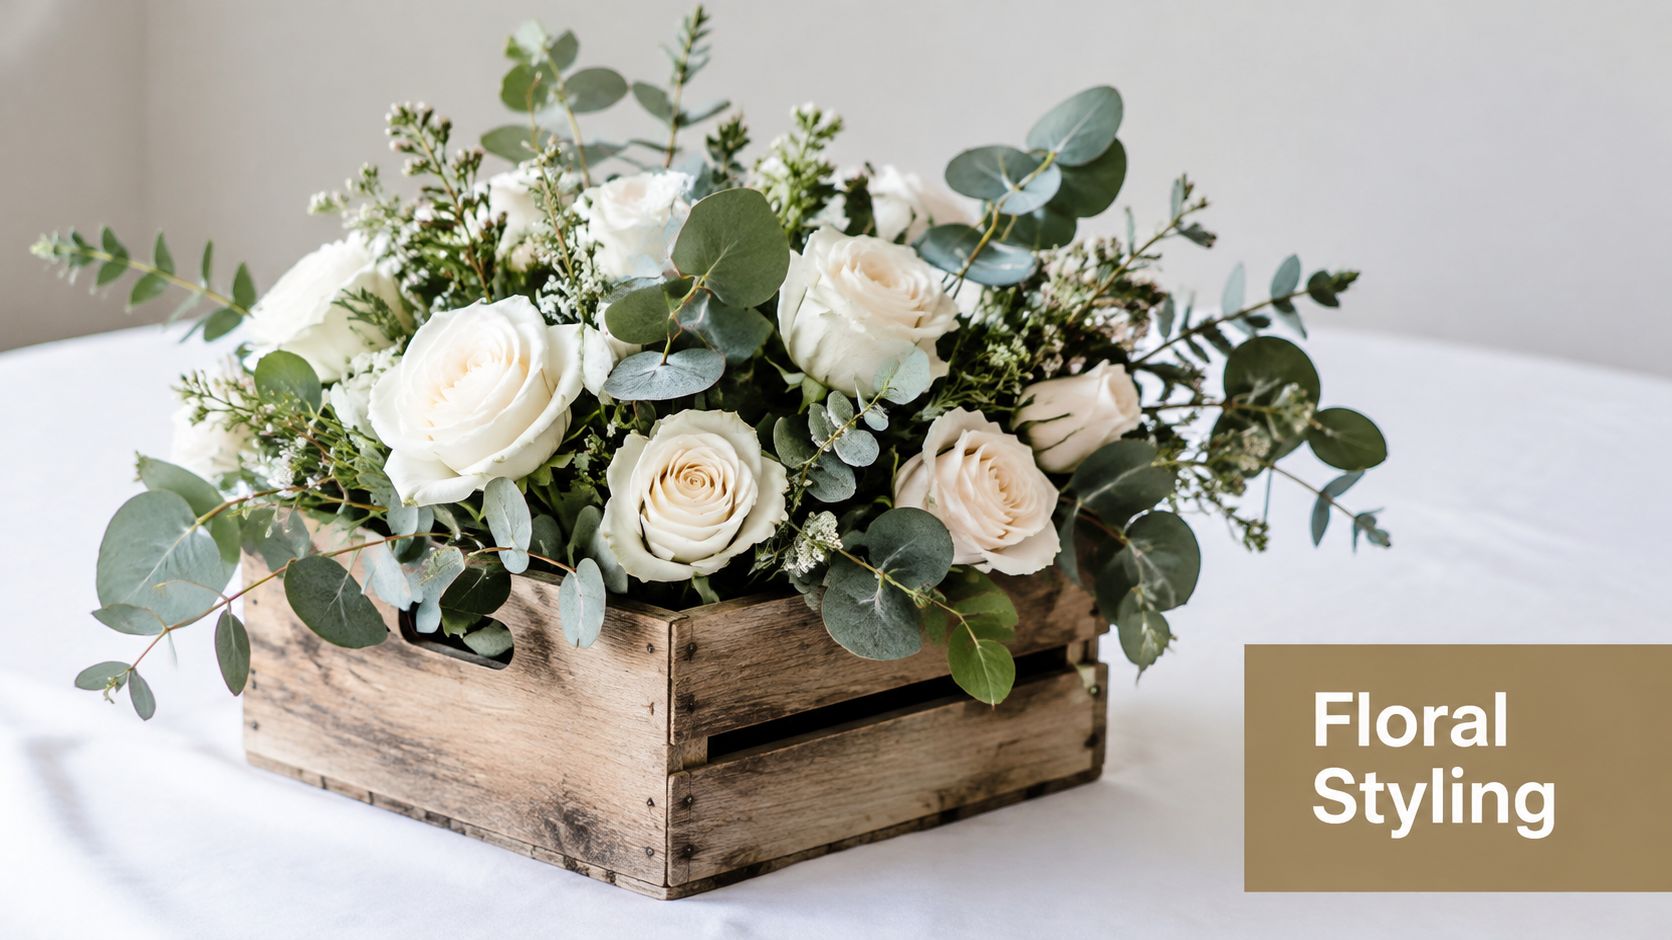
A crate gives a florist a useful frame, but it shouldn't become a hidden water container. Build the arrangement inside a watertight vessel, then place that vessel into the crate. A glass jar, ceramic pot or florist's bucket can work, provided the base is stable and the crate stays dry.

A rustic arrangement of white roses and green eucalyptus leaves inside a small wooden crate on white.

Three reliable orientations

Upright for height. Stand the crate normally and place a jar inside. Keep the flowers loose and airy, with foliage extending slightly above the rim. This works well on long tables because the crate creates height without requiring a tall, narrow vase.

On its side for a low arrangement. Turn the crate so the open face points towards guests. Arrange jars, bud vases or small potted herbs inside the opening. This is a strong choice for round tables where guests need to see across the centre.

Inverted as a riser. Turn the crate upside down and place a tray, bowl or floral vessel on top. Add a discreet non-slip layer between the crate and the item. The riser should look intentional, so repeat the same height or orientation elsewhere rather than using one isolated upside-down unit.

For a detailed companion approach to serving and display surfaces, see this guide to a wooden tray with handles. A handled tray can also make a crate arrangement easier to carry from the prep area to the table.

Keep the mechanics transport-ready

Prepare the floral vessel before delivery, but add delicate stems on site if the arrangement is likely to catch during loading. Use a liner beneath damp containers, and lift the complete unit from its base. Don't drag a wet crate across linen or polished timber.

For a Winelands look, combine one strong flower with foliage and a restrained filler. White roses with eucalyptus create a clean contrast against timber, while seasonal branches or herbs can make a farm-style table feel less formal. Corporate arrangements usually benefit from fewer flower types and stronger repetition, especially when the crate is supporting branded signage.

Candles need their own safety check. Use enclosed glass holders, keep flame away from dry foliage and never place a candle directly against the timber. If the venue has restrictions, replace open flames with battery-operated lights placed inside jars.

Match the build to the table

Long banquet tables can carry a sequence of crates with alternating florals, menus and candles. Leave clear breaks so guests can talk across the table. Round tables need a tighter centre, with one crate, a compact cluster of jars or a low arrangement that won't block faces.

A crate is most successful when it supports the flowers rather than competing with them. Let the wood provide structure, then keep the contents visually lighter than the container.

Stacking Signage and Creative Display Ideas That Guests Notice

Vertical displays attract attention, but they also introduce movement and load. Build from the widest, most stable base, keep heavier items low, and test the structure by gently pressing the top before guests arrive. A beautiful stack that shifts when someone brushes past it isn't ready for service.

An infographic showing creative ways to stack small wooden crates for event displays and wedding decorations.

Build for the guest journey

At an entrance, stack crates at varied angles only if each contact point is secure. Put a welcome board inside the lowest opening, add a plant or floral vessel to the upper level, and keep the arrangement beside the flow of guests rather than in the doorway. The display should guide people without creating a bottleneck.

For directional signage, one upright crate is often enough. Slide a framed table number or printed board into the opening, then add weight at the base if the venue is exposed to wind. Hand-lettered panels suit informal celebrations, while a clean printed board usually performs better at a corporate event where guests must read information quickly.

A dessert bar benefits from staggered levels. Use lower crates for plates and napkins, medium levels for packaged treats, and a clear central space for the main dessert. Keep the tallest section against a wall or behind the service line, so guests can reach the front without knocking into the display.

Give every stack a job

Crate cubbies work well for programmes, blankets or wrapped favours because guests can see the contents immediately. A cake plinth can create useful height, but the cake should sit on a rigid board or tray, not directly on slats. A photo backdrop can use crates as side shelving, provided the overall arrangement can't be pulled forward by a guest.

Use concealed cable ties, museum putty or non-slip material where suitable for the venue surface. Don't rely on a decorative object to hold a stack in place. If the display is tall, freestanding or positioned where children may reach it, ask the venue or technical team whether it needs anchoring.
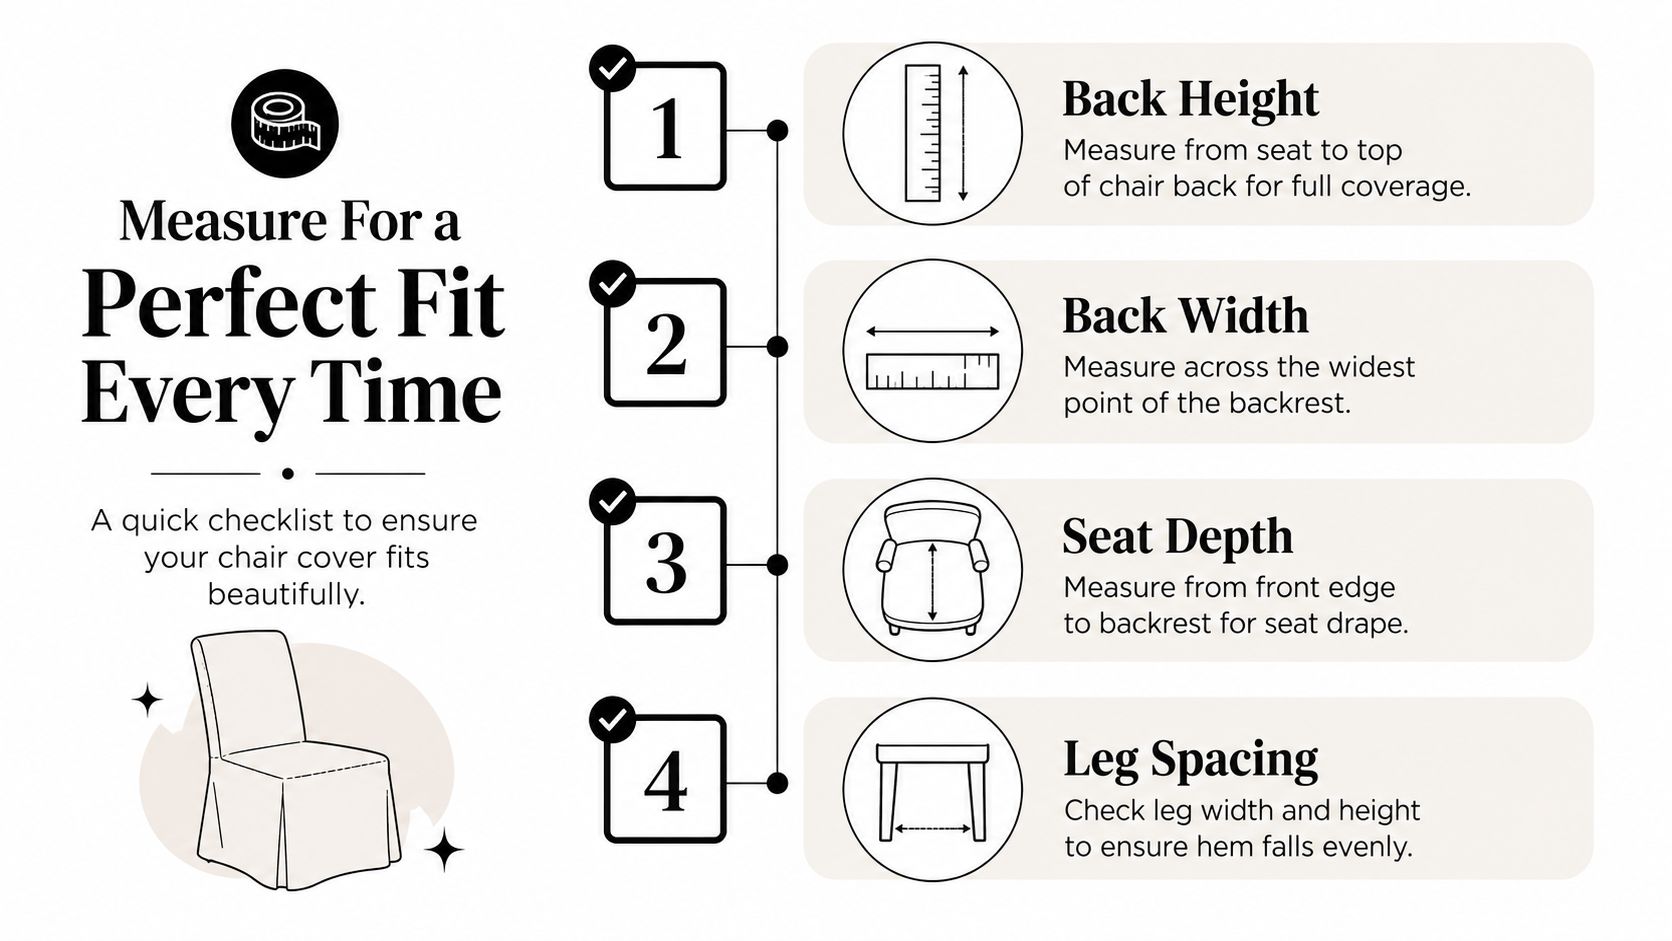
For a clean product-led arrangement, a wood display stand may be more appropriate than forcing crates to carry a job they weren't designed for. The best event styling uses the right support, not the most fashionable object.

Protect sightlines

Walk past the display from the guest's direction. Check that signage can be read without bending, that products are visible, and that staff can replenish stock without dismantling the arrangement. Photograph the setup from eye level, not only from above. A display can look balanced in a styling image while blocking the person standing in front of it.

Sourcing Reuse and Export Ready Considerations in South Africa

A small wooden crate beats cardboard when the event involves repeated handling, damp conditions, short-cycle rental movement or a need for a consistent visual system. Cardboard remains useful for clean, lightweight packaging and one-way transport, particularly when the box will be recycled after delivery.

Use Case Choose Small Wooden Crate When Choose Cardboard When
Local rental rotation You need a reusable unit that can be wiped, stacked and used again The item is travelling once and presentation is secondary
Farm-gate or market display Products need open visibility and a sturdy tiered presentation Stock needs enclosed, lightweight transit packaging
Event signage The sign needs a stable base or a natural display frame The message is temporary and will be discarded or recycled
Damp or rough handling Timber offers more resistance to crushing and repeated movement The route is controlled and the package will stay dry
Export shipment The crate can meet regulated wood-packaging requirements A compliant alternative packaging format is available

South Africa's wood trade provides the commercial backdrop for these decisions. The Observatory of Economic Complexity reported US$41.3 million in South African wood carpentry exports in 2023, with the United Kingdom, Botswana, Lesotho, Namibia and the United States among the main destinations. In December 2024, exports reached ZAR67.9 million, while imports were ZAR35.8 million, producing a positive balance of ZAR32.1 million. These figures describe wood carpentry rather than small event crates specifically, but they show that wooden products move through established regional and international trade channels. OEC trade data

For local sourcing, inspect timber provenance and construction quality rather than chasing a distressed finish. Reclaimed timber can add character, but it still needs to be clean, sound and free from protruding fixings. Guidance on reclaimed lumber from TimberSol Ltd offers useful context for evaluating reused wood visually and structurally.

Export compliance is separate from styling

For South African export use, solid wood packaging thicker than 6 mm must comply with ISPM 15. The approved treatment threshold is a core temperature of at least 56 °C for 30 minutes, and the finished crate must carry the IPPC mark with the ZA country code and HT treatment code. The practical sequence is simple: confirm that the material is regulated wood packaging, source treated timber, check the mark, and retain treatment records. South African ISPM 15 guidance

Missing or incorrect marks can lead to refusal or destruction at the destination. For event hire within South Africa, that export requirement may not apply, but a supplier should still be able to explain how the crate was made and maintained. For broader hire-versus-buy guidance, compare the expected handling pattern with the available wooden boxes and crates before committing to a large collection.

Bringing Your Crate Styled Event Together With Confidence

A successful crate setup starts with selection, not decoration. Choose pieces that fit the surface, suit the palette and stand level. Then assign each crate a clear role, whether that's holding flowers, raising a sign, organising favours or creating a visual break along a banquet table.

Before guests arrive, run a short inspection:

  • Check stability: Press each stack lightly and remove anything that rocks.
  • Protect surfaces: Use liners beneath wet vessels and non-slip material under risers.
  • Read the signs: Stand where guests will stand and confirm that every message is legible.
  • Test the flow: Walk from the entrance to the bar, tables and toilets without brushing against displays.
  • Plan pack-down: Keep crates dry, label grouped décor and load them so corners won't be crushed.

The reusable styling system holds significant value. One consistent collection can move between weddings, matric dances, brand activations and milestone birthdays, changing character through flowers, fabric, printed boards and tableware. Hire makes sense when you need a coordinated set for one event or want delivery and collection handled. Buying can suit a farm-gate brand, venue or stylist with regular storage and repeat use.

Brief your team with a simple layout photograph, a crate count, the intended orientation of each piece and the destination table or display. That small amount of organisation prevents the common event-day scramble where crates arrive but nobody knows which ones carry flowers, signage or stock.


For Cape Town, Stellenbosch, Franschhoek and Paarl events, ABC Hire offers event furniture and décor rentals that can help you build a coordinated setup without buying every piece. Visit ABC Hire to discuss the crates, display supports and wider event equipment that will make your styling practical on arrival and straightforward to collect after the celebration.

Drink Dispenser Glass Guide for Safe Events

The welcome drinks are due to go out, the venue's counter space is tight, and someone has just asked whether the glass dispensers can stand beside the entrance without becoming a hazard. At that point, a drink dispenser glass stops being a decorative detail. It becomes part of the service operation, affecting guest movement, beverage quality, hygiene, refill timing and breakage risk.

In South Africa, glass remains a high-volume beverage material. Packaging data place annual glass-bottle use at roughly 1.4 to 1.7 billion containers, equivalent to about 389,000 to 457,000 tonnes, while beverages represented 63.12% of South Africa's container-glass demand in 2025, according to the South African packaging recyclability guideline. That scale makes careful handling and recovery especially relevant for event hire.

Planning a Glass Dispenser Station

A venue coordinator preparing welcome drinks for a corporate function with 120 guests usually starts with the visual brief. The practical questions arrive shortly afterwards. Can guests reach the station without blocking the registration desk? Does the table leave enough room for cups, napkins and a drip tray? Will people carrying full glasses need to cross a busy walkway?

Those questions point to three decisions that determine whether the station works.

Start with guest flow

A dispenser should be visible from the main seating or arrival area, but it shouldn't sit in the centre of a queue. Guests need a clear approach, enough space to place a cup under the tap, and a route away from the station that doesn't force them through staff traffic.

A narrow counter may favour two smaller vessels rather than one large jar. One can hold still water and the other infused water, with cups on one side and garnishes on the other. At a larger buffet, three smaller dispensers can separate water, lemonade and iced tea while reducing the number of guests gathered around one tap.

Match volume to service intervals

The beverage choice matters as much as the guest count. Water may be replenished during the event, while punch or a branded welcome drink may need to be ready before guests arrive and topped up during a transition. A vessel that looks generous can still run short if ice, fruit and a no-fill space beneath the neck reduce usable volume.

The placement also affects service intervals. A dispenser near the catering access point is easier for staff to refill, but it may be less convenient for guests. A station at the far end of a room may improve circulation, yet make discreet monitoring more difficult.

Treat glass as a public-contact risk

Glass used by the public needs more consideration than an attractive shape and a matching stand. South Africa's compulsory safety-glazing requirements under SANS 1263-1 address glass in applications where human contact could cause injury, with the purpose of reducing cutting or piercing injuries if breakage occurs, as described in the government safety-glazing regulation.

Practical rule: Choose the station as a complete service point, not as a jar placed on a table.

Capacity selection, stable placement and cleaning control all follow from the initial layout. A narrow entrance station may need compact vessels and short refill routes. A self-service drinks bar may need stronger bases, protected edges and a named staff member watching the taps. The right drink dispenser glass is the one that fits the room, the beverage and the way guests will use it.

Choosing the Right Dispenser and Capacity

The familiar round jar with a front spigot suits water, lemonade and simple fruit infusions. Its broad opening makes filling and cleaning straightforward, although the wide body takes up more counter space and can become awkward when guests crowd around it.

A footed apothecary style raises the vessel and often gives a more formal look for weddings or styled tables. The raised base can improve cup clearance, but it also increases the importance of checking that the stand is stable and that the tap doesn't sit so high that children or shorter guests struggle to use it.

Stackable beverage cylinders work well where a caterer wants a modular station. They create a taller visual line and can separate beverages by flavour. Mini tabletop dispensers are better suited to syrups, garnish accompaniments or smaller children's stations than to serving a full event alone.

For water and flavoured water, a useful planning rule is one litre per three to four guests. Iced tea, lemonade and punch generally need more generous provision because guests often take larger servings, return for refills or use ice that displaces liquid. Keep the estimate practical by accounting for service duration, refill access, ice and fruit before selecting the vessel.

Format Capacity Range Best Beverage Match Fragility Rating
Round jar with spigot Small to large event vessels Water, infused water, lemonade Moderate
Footed apothecary style Small to medium Welcome drinks, iced tea, styled service Moderate to high
Stackable beverage cylinder Modular multiple-vessel setup Separate juices, teas and branded drinks Moderate
Mini tabletop dispenser Compact service point Syrups, garnish drinks and children's portions Moderate

Inspect the hardware, not only the shape

Look for a substantial wall, a broad base diameter and enough clearance below the jar for the cup you intend to use. The tap should have a food-grade silicone gasket that seats evenly, and the handle should close fully without requiring force. Edge protection and controlled transport matter in busy venues, particularly where guests may brush against the table.

A purpose-built chilled water system may be more appropriate for a high-throughput conference than a self-service glass jar. For a different equipment category, this overview of an instant chilled bubbler for Melbourne helps illustrate how plumbed or powered dispensing differs from a temporary event vessel.

Rental and purchase decisions also depend on repetition. Rental makes sense for a one-off wedding, activation or school function where transport, cleaning and breakage exposure are part of the service. Ownership becomes more defensible when a venue or caterer runs several comparable events and has proper storage, inspection and cleaning capacity. Local SA listings show retail prices from about R179.99 for a 5L dispenser to R599.99 for multi-dispense glass sets, while rental-oriented services advertise short-term rates from R6.30/day to R8.81/day excluding VAT, according to South African juice-dispenser rental listings. Compare the full operating burden, not only the purchase price.

For further reference on vessel selection and handling, see this practical guide to a glass water dispenser.

Setting Up the Dispenser Safely

Set the table before assembling the vessel. It should be solid, level and larger than the dispenser's base, with no overhanging edge beneath the jar. Place a non-slip mat or a clean damp towel under the base to reduce movement, then check that the table won't rock when someone leans lightly against it.

Fit the spigot before filling. The gasket must sit flat against the glass, the washer should be correctly positioned and the handle should close without sticking. Set the lid in place without forcing it. If the lid needs pressure to sit correctly, stop and inspect the fit rather than transferring strain to the glass.
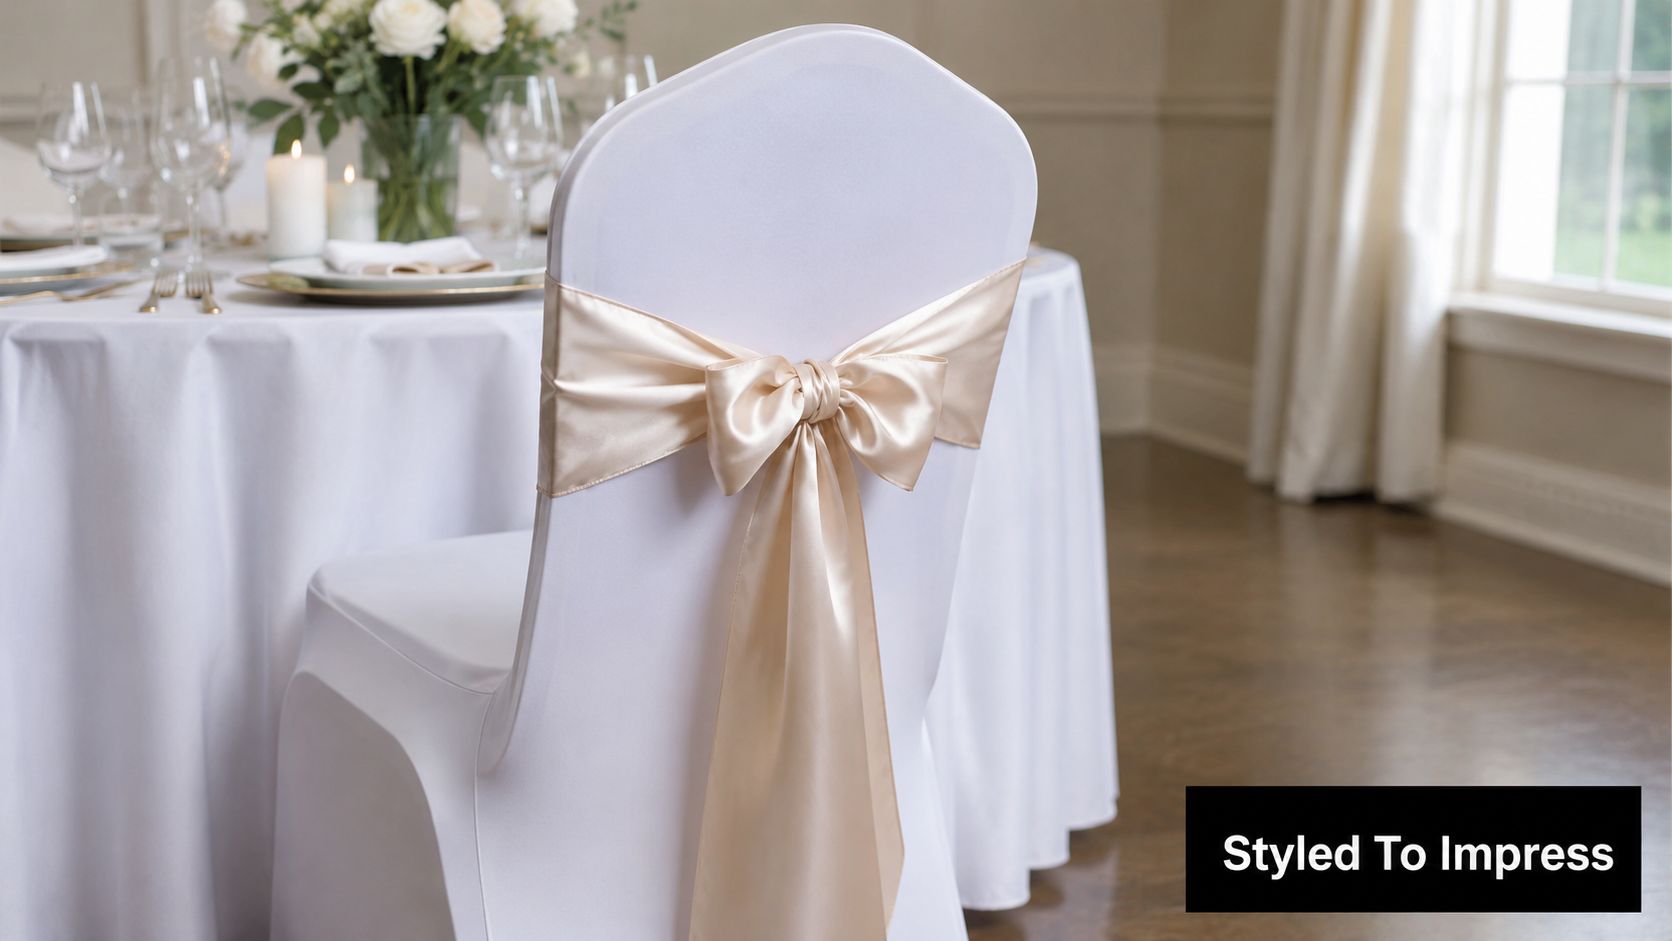
Fill only after the station is fixed

A partially filled vessel is easier and safer to move than a full one. Keep the dispenser no more than two-thirds full during transport, then complete the top-up once it has reached its final position. This reduces sloshing and limits the load placed on the base and tap while staff carry it.

Test the spigot with a measured cup before adding the beverage. Open the handle, confirm a steady flow and close it fully. Wait briefly to check for a slow drip around the seal. Testing with water is faster, cleaner and less wasteful than discovering a faulty gasket after filling the jar with punch.

Leave at least 60 centimetres of clearance in front of the tap, so a guest can stand squarely at the station and place a filled glass on the landing area. Put cups and garnish to the side, not directly behind the tap, where guests would need to reach across the stream or knock the vessel while serving.

A drinks fridge can support the station by keeping refill batches cold and reducing the need to move a heavy filled vessel. Plan the refill route with the same care as the station itself, using equipment such as a fridge for drinks where the venue layout requires staged replenishment.

Cleaning and Maintaining the Glass Vessel

A reusable drink dispenser glass needs a closed hygiene routine. South African packaged-water controls emphasise that safety depends on processing and handling, not only on the original water source. The guidance associated with SANS 1657:2025 describes reusable 18.9-litre dispenser bottles as requiring thorough cleaning before refilling, supported by good manufacturing practices and laboratory checks, as outlined in this South African dispenser-water standards summary.

Start with a cool pre-rinse. It lifts pulp, sugar and garnish fragments before proteins dry onto the surface. Follow with a food-safe detergent wash using a long-handled, soft brush that reaches the shoulder, neck and base. The spigot threads deserve particular attention because residue can remain hidden even when the main body looks clear.

Clean the tap as a separate component

Disassemble the spigot according to its design and keep the small internal washer in a clean container while the parts are washed. Scrub the threads, outlet and contact surfaces, then rinse away detergent completely. If the tap uses a seal that needs lubrication, use a food-grade silicone lubricant rather than a petroleum-based product around beverage contact points.

Apply a food-safe sanitiser at the product's stated dilution and allow the required contact time. Diluted chlorine products and food-grade peracetic acid don't share the same handling instructions, so follow the chemical label and rinse where the product requires it. Never guess the concentration from appearance.

An infographic detailing the five-step hygiene routine for cleaning a reusable drink dispenser glass properly.

The cleanest-looking vessel isn't automatically the safest vessel. Its tap, seals, handling history and drying conditions all matter.

Invert the washed glass on a clean rack and let it air-dry. Towel polishing can redeposit lint and transfer contamination from a cloth that appears clean. Before approval, inspect the rim, base and spigot opening under raking light, looking for haze, chips and fine cracks.

For exterior marks, keep a separate product from the internal hygiene routine. Guidance on safe ingredients for glass cleaner can help when selecting a suitable surface-cleaning approach, but exterior glass cleaner must never replace internal washing and sanitising.

South Africa's glass recovery infrastructure also shows why responsible handling matters. The share of glass collected rose from 38.9% in 2014 to 45.7% in 2018, while about 82% of glass packaging placed on the market is diverted from landfill each year through recycling and returnable bottles, according to the glass recovery benchmark. Preventing breakage and separating damaged vessels from reusable stock supports that wider recovery system.

Building Beverage and Garnish Stations

The beverage should determine the dispenser shape. A tall, narrow vessel suits infused water and citrus water, where cucumber, lemon or herbs create visible layers without taking over the opening. A wide-shouldered jar is more practical for punch, sangria and ice-heavy drinks because staff can add fruit and reach the interior without forcing ingredients through a narrow neck.

Recipe behaviour matters too. High-acid citrus drinks can affect some fittings over long contact periods, sugary drinks leave sticky residue, and heavily diluted beverages lose flavour as ice melts. Decide whether ice belongs inside the vessel or in an external bucket. External ice slows dilution and makes the beverage level easier to monitor, while internal ice may keep a small station colder but reduces usable liquid and can obstruct the tap.

Dispenser Style Suitable Beverages Garnish Station Components Service Notes
Tall narrow dispenser Citrus water, cucumber water, infused water Sliced citrus, mint, herb tongs Keep pieces small enough to avoid blocking the tap
Wide-shouldered jar Punch, sangria, fruit lemonade Fruit bowl, scoop, ice bucket Use a ladle if pulp or large fruit makes the tap unreliable
Footed apothecary vessel Welcome drinks, iced tea, formal service Printed menu, measured garnish cups Check stand stability and cup clearance
Mini tabletop dispenser Syrups, cordials, children's drinks Small cups, non-alcoholic syrups, labels Place at a lower, supervised station

A gin-themed station can pair a clear water dispenser with herbs, cucumber ribbons and citrus wheels, while a sangria station needs fruit portions, a scoop and a spill-resistant landing area. For children, use a lower station with non-alcoholic syrups and clear labelling rather than relying on colour alone.

Labels should identify the drink, flag alcohol and state relevant allergen information where applicable. Match the service tool to the liquid. A tap suits clear drinks, while a ladle works better for punch with pulp or floating fruit. Add a drip tray and stack cups at a height that lets guests collect them without knocking the spigot.

For further inspiration on themed layouts, these drink station ideas for entertainers show how a beverage point can operate as part of a broader entertaining setup. A related guide to glass water jugs can help coordinate the rest of the tableware without treating the dispenser as an isolated prop.

Troubleshooting Common Event Problems

Cloudy glass after washing usually points to a residue problem rather than permanent damage. Hard-water deposits, detergent film and protein residue can look acceptable while the vessel is wet, then become obvious after drying. Separate the corrective wash from the routine clean, using a vinegar or citric-acid treatment suitable for the glass and rinsing thoroughly before the normal detergent and sanitising process.

Printed capacity also creates false confidence. The stated volume may not equal usable service volume once ice, fruit and the space below the neck have been accounted for. A dispenser can therefore appear full during setup and still run short during the busiest part of the event.

Stability deserves an event-specific check

A level kitchen counter isn't the same as a marquee floor, a sloped buffet table or a bar top crossed by cable runs. Place the vessel on a non-slip mat, use suitable levelling shims where needed and avoid balancing one heavy jar on a narrow edge. Two smaller dispensers can distribute weight more safely than one oversized vessel, provided guests can reach both without crossing each other.

Don't leave the station without ownership

An unattended dispenser may drip, run empty or become surrounded by wet cups while staff handle speeches and transitions. Assign someone to check the level, refill timing, ice melt and drip tray during service. Fruit garnish trays need the same attention. Shared tongs left among cut fruit can become a contamination point, particularly when guests use them for multiple ingredients.

If a tap continues to drip after the handle is closed, remove the vessel from service and inspect the gasket rather than tightening the fitting aggressively. If the glass has a chip around the rim, a mark near the spigot base or a crack that appears only under angled light, quarantine it. A decorative vessel isn't worth exposing guests or staff to a breakage hazard.

Final Event Readiness Checklist

Use the final half-hour as a calm operational sweep, not a last-minute styling session. Start with the guest count and the total usable beverage volume, then walk the actual route guests will take from cup collection to the exit side of the station.

Check each vessel on its final table. Confirm that the surface is level, the base is stable, the station is away from foot traffic and the tap has enough clearance for the selected cup. Test the lid and spigot under the cold beverage load, then measure the beverage temperature rather than judging it by touch.

Complete the hygiene check

Confirm that each vessel was sanitised within the past four hours, that the drying racks are clear and that no film, pulp or residue remains on the internal surface. Inspect the rim and spigot under angled light. Exterior marks can be spot-cleaned with a lint-free cloth, but don't use external glass cleaner as a substitute for internal sanitation.

A 30-minute checklist for preparing a drink dispenser for an event, including cleaning, filling, and setup steps.

Top up ice and garnish shortly before doors open, then check that fruit isn't blocking the tap. Make the signage legible from the queue, include alcohol and allergen indicators where relevant, and stage the refill batch close enough for staff to reach without carrying full containers through the guest area.

Finally, assign a named person to monitor levels, manage refills and empty drip trays. Keep spare cups, waste bins and the reserve beverage within arm's reach. A station is ready when guests can understand it, use it safely and leave without creating a queue or spill.


ABC Hire can help organise the practical serving equipment around your event, including glassware, crockery, cutlery and related hire items for weddings, corporate functions, school events and private celebrations in Cape Town and the Winelands. Review the available event-hire options and visit ABC Hire to plan a drink dispenser station that is safe, clean and ready for service.

Christmas Table Linen Ideas for a Stylish Summer Feast

A December lunch in Cape Town can change character quickly. At midday, the sun is bright, a breeze is moving across the patio, and a glass of chilled wine leaves a ring beside the salad bowl. You want the table to feel like Christmas, but you don't want thick, fussy cloths that trap heat, flap in the wind or demand hours of ironing before guests arrive.

Christmas table linen solves more than a decorating problem. It protects the table, softens the setting, gives plates and glassware a visual anchor, and helps a simple outdoor meal feel intentionally hosted. The right combination can work equally well at a family lunch in Constantia, a Winelands wedding, a corporate year-end function or an evening gathering beside the coast.

Table linen also connects a summer celebration to a much older domestic tradition. One history of table linen traces its use to the Carthaginian Empire about 2,000 years ago, while white linen remained a standard tablecloth choice in many households until the mid-1930s, as described by this history of table linen. That long continuity explains why a pale cloth still feels timeless, even when you add local greenery, bright fruit or relaxed woven textures.

A beautiful festive table setting outdoors with wine, salad, and flowers overlooking a scenic vineyard.

Start with the fabric, then choose a palette, build the layers and decide whether ownership makes sense for your event. Your drinks and menu will shape the mood too, so a practical holiday wine pairings guide can help you plan beverages that sit comfortably within the table's colour and service style.

Introduction to Christmas Table Linen for Summer Celebrations

Understanding What Christmas Table Linen Includes

Think of your table as an outfit. The tablecloth is the base layer, the runner is the statement piece, napkins are the accessories and placemats define each guest's personal space. This analogy keeps the decision simple because you can ask what each layer is doing before adding another decorative item.

A diagram illustrating five essential components of Christmas table linens including tablecloths, runners, napkins, placemats, and overlays.

Start with the foundation

A tablecloth covers the main surface and establishes the visual temperature of the meal. White, ivory, sand and natural flax shades keep a South African summer table light, while a deeper colour can create a richer evening setting. A cloth also protects the surface from serving dishes, condensation and small spills.

A table runner narrows the focus. Place it down the centre of a rectangular table to connect the flowers, candles and serving bowls, or use runners across the width to mark individual settings. A runner is useful when you want festive colour without covering the whole table in red or green.

Add the guest-facing pieces

Napkins need to be practical first. They sit beside the plate, inside a glass or across the place setting, and they bring in a small, controlled burst of colour. Red napkins on a pale cloth can feel festive without making the entire table look themed.

Placemats frame each setting and protect the cloth beneath. They work particularly well for relaxed outdoor meals because they give plates a clear landing zone and help prevent cutlery, crumbs and small drips from spreading across the table.

An overlay is a decorative cloth placed over the foundation layer. It can add contrast, texture or a subtle pattern, but it isn't compulsory. On a warm December table, one well-chosen overlay usually looks more considered than several competing layers.

Practical rule: Choose one strong seasonal element, then let the other linen pieces support it.

Festive linen differs from everyday linen through its colour, weave, trim or motif, not necessarily through a Christmas print. A botanical napkin, green border or metallic thread can signal the season while remaining useful beyond December. This approach reduces overbuying and gives classic white or natural pieces a longer life across birthdays, weddings and Sunday lunches.

Choosing Fabrics That Work in South African Summer

Fabric changes the way a table behaves. In Cape Town or the Winelands, the best Christmas table linen must cope with heat, bright light, outdoor movement, food spills and the practical reality of washing it after the event.

Natural linen

Natural linen has a relaxed, breathable feel and a visible texture that suits timber tables, farm venues and coastal settings. Its relaxed creasing can look intentional, especially at a daytime lunch where polished formality would feel out of place. It does, however, require a host who accepts a softer finish rather than expecting a perfectly smooth surface.

Linen also needs careful handling. Local care guidance recommends low or lukewarm washing, a gentle cycle, mild detergent and enough space for the cloth to move freely. Washing above 40°C can cause shrinkage, while line-drying or low-heat drying helps reduce fibre stress and colour fade, according to Mungo's linen care guidance.

Cotton

Cotton feels soft and familiar, making it a practical choice for family lunches and informal celebrations. It can absorb small spills, but that same absorbency means stains need attention rather than being left until the next day. Cotton can also lose its crisp appearance sooner than a smoother blend, particularly when the table is used outdoors and the cloth is handled repeatedly.

Cotton-linen blends

A cotton-linen blend offers a middle ground. You still get some natural texture and breathability, but the cloth may be easier to manage than pure linen. This makes it useful for a host who wants a relaxed summer appearance without accepting every crease that comes with a fully natural linen surface. Ask about the care label and test how the cloth looks after washing before using it for an important event.

Treated finishes

Treated or coated finishes can help festive meals withstand splashes from gravy, juice and wine. They're especially useful for large groups, children's tables and outdoor service, where a quick wipe can prevent a small spill from becoming a permanent mark. Check whether the finish changes the hand-feel or washing instructions, because spill resistance doesn't remove the need for proper laundering.

Fabric choice Summer feel Creasing Best suited to
Natural linen Cool and textured More visible Elegant relaxed lunches and vineyard tables
Cotton Soft and familiar Moderate Family meals and casual entertaining
Cotton-linen blend Balanced and adaptable Usually easier to manage Hosts wanting texture with simpler care
Treated finish Practical at spill-prone meals Depends on the base fabric Outdoor events and larger guest groups

For a more detailed look at a related table-surface option, see ABC Hire's guide to woven table mats. The same principle applies to every fabric decision: match the material to the weather, the menu and the amount of washing you can realistically manage.

A comparison chart showing fabric properties like heat comfort, creasing, breathability, and spill resistance for summer clothing.

Finding Your Festive Colour Palette and Pattern

Begin with the surface that will occupy the most visual space. White, ivory or natural linen gives you a quiet background, much like a pale wall behind artwork. It reflects summer light, photographs cleanly and allows greenery, crockery and flowers to provide the Christmas signals.

Build the palette in layers

Choose one base, one seasonal colour and one supporting accent. A coastal table might use white linen, soft eucalyptus green and a muted terracotta or berry red. A Winelands table could pair natural flax, olive foliage and warm burgundy, while a modern Cape Town setting might use white, deep green and brushed metallic details.

The seasonal colour doesn't need to cover the whole table. Use it in napkins, a runner border, place cards or a few flowers. This keeps the setting festive without making the cloth the loudest guest at the table.

Match colour to light

Daylight reveals texture and pale colour, so natural shades and soft greens work beautifully for lunch. Evening light allows deeper reds, green napkins and restrained metallic accents to show more clearly, particularly beside warm candlelight. If your table moves from afternoon into evening, select a base that looks fresh in sunlight and add removable accents later.

Patterns need similar discipline. A botanical print can echo garden surroundings, while a small check or stripe adds structure to plain crockery. If the cloth already has a strong motif, keep the napkins simple. If the base is plain, a patterned napkin can provide the seasonal detail without crowding the table.

A beautifully decorated festive Christmas dining table set with elegant napkins, greenery, candles, and wine glasses.

Use the surroundings as part of the palette

A vineyard, garden or coastal terrace already supplies colour. Take a cue from the setting instead of fighting it. Greenery can connect the table to the surrounding area, while pale linen keeps the arrangement from becoming visually heavy.

A useful test is to place the cloth, napkin and one plate together before buying multiples. View them in the actual event space, first in daylight and then under the intended evening lighting. If the combination looks calm before flowers and glassware arrive, it will usually remain balanced once the table is complete.

How to Layer and Style Your Christmas Table With Confidence

A bare table becomes easier to style when you work from broad surfaces to small details. Don't begin with candles or ornaments. Start with the layer that controls the table's proportions.

Dress the surface first

Lay the tablecloth evenly, checking that the drop looks balanced on every side. Outdoor tables often sit on uneven paving, so smooth the cloth from the centre outward and secure it discreetly if wind is likely. Avoid allowing excess fabric to pool where guests may catch it with a shoe.

Add the runner next. Keep its direction aligned with the table unless you deliberately want crosswise runners for individual place settings. The runner should guide the eye towards the centrepiece, not compete with it.

Define each place

Place a placemat or charger at every seat, then set the dinner plate on top. Napkins can sit beside the plate, across it or inside a glass, depending on the formality of the meal. A simple fold often works better outdoors because elaborate folds can lose their shape in a breeze.

Leave enough open space for shared dishes and serving utensils. Guests need to pass bowls, reach for bread and place a glass down without disturbing the linen. The table should look composed, but it still needs to behave like a working surface.

Finish with the centre

Keep the centrepiece low enough for conversation. Greenery, seasonal fruit and small candleholders create interest without blocking sightlines. For more ideas on proportions and focal points, explore these stylish dining ideas from Everti.

If the event has a long table, repeat a simple visual rhythm instead of placing one oversized arrangement in the middle. Small clusters can be moved when food arrives, and they create a sense of continuity from one end to the other. ABC Hire's table centrepiece guide can help you think through the relationship between linen, flowers and table shape.

Outdoor check: Test the finished table with a breeze, a serving platter and a guest pulling out a chair. A beautiful arrangement that shifts, catches or blocks service needs editing.

Deciding Whether to Buy or Hire Christmas Table Linen

A Christmas lunch on a sunny Cape Town patio may use linen for only one day, while a family host may bring the same cloth out for future lunches. That difference should guide the choice more than the label on the fabric. Also consider the heat, outdoor spills and storage space involved after the guests leave.

Buying gives you control over the exact colour, fabric and size. It can suit hosts who entertain regularly or want a consistent look for future celebrations. Before ordering, see this guide to table linen for sale for sizing and fabric tips. The purchase price is only one part of the calculation. Washing, pressing, storage and replacing stained pieces also take time or money.

Hiring works like borrowing equipment for a once-off event. It can be practical for a wedding, brand event, venue function or large Christmas gathering that needs matching cloths and napkins without leaving you with a cupboard full of textiles. ABC Hire offers tablecloths and napkins through its linen service, with guidance on table shapes and drop lengths. Confirm availability, fabric, colour, sizing, delivery and collection before finalising the table plan.

Decision Factor Buy Hire from ABC Hire
One-day event You keep the linen afterwards Useful when future reuse is uncertain
Repeated celebrations Reuse can make the purchase worthwhile Convenient when styles change
Storage Needs clean, dry cupboard space No long-term home storage
Washing and ironing Your responsibility after spills Check return and care requirements
Stain or damage risk You pay for replacement Confirm the supplier's damage terms
Large guest list You must source matching pieces Can simplify matching stock
Custom styling You keep the chosen pieces Choose from available colours, fabrics and drops

Count the work after lunch

Buying can appear cheaper until the table is cleared. Allow for sorting stained cloths, washing them according to their care instructions, drying them fully, ironing them and folding them without sharp creases. Outdoor meals can add grass, sunscreen, food and drink marks, so a low purchase price does not remove the maintenance task.

Hiring reduces that home workload, but it brings its own checks. Ask who handles marks, what happens if a piece is damaged, and when the linen must be returned. For a business replacing stock at scale, fibre composition and import classification may also affect purchasing decisions. Table linen falls within HS 6302 in South African tariff references, including a cotton table-linen subheading, as outlined in the South African HS classification reference. For a private host, the practical test remains simple: compare the full cost, effort and storage burden with how often you will use the linen again.

Caring for Your Linen and Keeping It Beautiful Year After Year

Good care starts before the cloth reaches the washing machine. Remove food scraps, separate dark or strongly coloured pieces from pale linen, and deal with spills according to the fabric's care instructions. Don't leave damp, stained linen sealed in a bag after an outdoor event, because trapped moisture can make marks and odours harder to remove.

A simple post-event checklist

  • Clear gently: Shake off crumbs outdoors and lift cutlery rather than dragging it across the cloth.
  • Sort early: Separate whites, colours, delicate trims and pieces with special finishes.
  • Wash carefully: Use a low or lukewarm temperature, mild detergent and a gentle cycle. Avoid overloading so the fabric can move freely.
  • Dry with restraint: Line-dry where possible or use low heat to reduce fibre stress and colour fade.
  • Store completely dry: Fold clean linen loosely and keep it in a dry, ventilated cupboard away from direct sunlight.

If a cloth has a serious wine, oil or candle-wax mark, professional cleaning may be safer than aggressive home treatment. A service such as Tumble Laundry drycleaning illustrates the type of specialist option hosts can consider for delicate or heavily marked textiles, although you should always confirm that the service accepts your particular fabric and finish.

For hired linen, follow the supplier's return instructions rather than applying your own stain products. For owned pieces, record which cloths worked well outdoors, which colours faded and which fabrics needed the most pressing. That short note will make next summer's planning faster and protect the value of what you already have.

The most sustainable linen is the linen you can care for, store and reuse confidently.

A calm summer table doesn't require heavy winter styling. It needs a suitable base, a controlled palette, sensible layering and a care plan that begins before the first guest arrives.


ABC Hire provides tablecloths and napkins for event table dressing, with options suited to functions in Cape Town and the Winelands. Visit ABC Hire to review the available event-hire options and enquire about linen for your Christmas celebration.

Big Salad Bowls for Events: A Complete Rental Guide

You've chosen the menu, confirmed the caterer and spent time getting the buffet looking right. Then the salads arrive, and the serving bowls are too shallow, too small, too fragile or completely out of proportion with the rest of the table. Guests reach across one another, leafy greens spill over the rim and someone has to refill the same bowl before the first wave has served itself.

The right big salad bowls prevent those problems. For Cape Town weddings, Winelands celebrations, corporate lunches and large private parties, a bowl needs to hold the food comfortably, suit the service style and survive transport, handling and cleaning. It also needs to look intentional. A well-chosen bowl supports the menu, the décor and the pace of service without demanding attention.

The Unsung Hero of Your Event Buffet

A successful buffet has a visual rhythm. Platters sit at different heights, serving utensils are easy to find and each dish looks generous without appearing crowded. A large bowl of crisp greens placed in the centre can give the table freshness and colour, while a second bowl of pasta salad or roasted vegetables adds substance. Guests understand the menu at a glance, and the food remains accessible as the queue moves.

That effect depends on more than the salad itself. A narrow bowl forces guests to dig down through the leaves. A low bowl spreads food too thinly and makes a generous portion look sparse. A heavy bowl placed at the end of a self-service table can also become awkward if guests need to move it or if staff must lift it repeatedly for refills.

South Africa's wider kitchenware market reflects how important serving and dining pieces have become. Tableware represented about 55.58% of the country's kitchenware market in 2024, according to Grand View Research's South Africa kitchenware market report. That matters to event planners because tableware isn't background equipment. It shapes how guests interact with the meal.

Practical rule: If guests can't serve themselves neatly from the bowl, the bowl is the wrong size or shape, regardless of how attractive it looks.

For a children's party, presentation also extends beyond the savoury buffet. Colourful sweets can sit alongside fruit and salads, and resources such as best Italian candies for children's events can help you coordinate a cohesive food table rather than treating dessert as an afterthought.

A good bowl supports the experience in quiet ways. It keeps toppings contained, gives serving spoons room to work and makes the food look abundant without overfilling. For professional catering, it also reduces last-minute handling, which helps staff keep the buffet clean and organised.

Choosing Your Bowl Material

Material affects nearly every practical decision, from how the bowl looks under event lighting to how confidently a staff member can carry it when full. There isn't one perfect option. The right choice depends on whether the bowl will sit on a feature table, travel between kitchen and buffet, or form part of a high-volume self-service line.

A comparison chart outlining the pros and cons of wood, glass, ceramic, and acrylic salad bowls.

Match the material to the service

Wood brings warmth to rustic weddings, farm-style lunches and natural décor schemes. It's durable and visually forgiving, but it needs proper care. Oils, dressings and prolonged moisture can affect the finish, and wooden bowls generally aren't the easiest choice for a fast turnaround or dishwasher-heavy operation.

Glass is non-porous, easy to clean and visually elegant. It works particularly well when the salad has colourful layers or when the bowl needs to complement formal crockery. The trade-off is weight and fragility. Glass is a poor fit for a crowded transport crate or a buffet where guests may knock against the table.

Ceramic and stoneware offer strong visual presence and can suit substantial dishes. Their weight makes them stable on a table, while their insulating qualities can help warm ingredients retain heat for longer than they might in a thin, lightweight bowl. They can also chip, so they need careful packing and deliberate placement.

Acrylic is practical for large events because it's light and shatter-resistant. It's easier to move during setup and safer around children or tightly packed tables. Scratches and staining are the main concerns, particularly if the bowl has been used for strongly coloured dressings or is cleaned with abrasive products.

Treat compliance as part of specification

The material decision must start with food safety, not appearance. South African food-contact guidance from SGS states that bowls and other food-contact materials must not transfer constituents to food in quantities that could endanger health, alter food composition unacceptably or worsen taste and odour. Suitable items should also be marked for food contact.

Ask the hire company or supplier whether the bowl is intended for food service and how it should be cleaned. Don't assume that a decorative wooden vessel, painted ceramic piece or display container is suitable because it looks like a serving bowl.

For most events, a sensible specification is a stable, food-contact-safe bowl with a wide opening, manageable weight and a finish suited to the menu. Save the most delicate pieces for supervised feature displays, not busy self-service stations.

The Ultimate Size and Capacity Guide

Capacity planning starts with the salad, not the guest list. A fluffy green salad takes up considerable space but may be served in lighter portions. Potato, pasta, grain and bean salads are denser, more filling and usually occupy less volume per serving. A single capacity rule can therefore create either needless refills or excessive leftovers.

South African catering supply listings commonly place large serving bowls in the 3L to 3.6L range, providing a useful local benchmark for buffet service, as shown by Core Catering's bowl listings. That range is a practical starting point, but you still need to consider the menu, the number of other sides and whether the bowl will be refilled during service.

Use this planning guide

The table below is a working planning aid, not a promise of exact portions. Confirm quantities with the caterer, especially when the salad is a main component rather than one of several side dishes.

Bowl Volume (Litres) Servings (Leafy Green Salad) Servings (Dense Salad, e.g. Potato, Pasta)
1L Small group service Small group service
2L Moderate side-dish service Moderate side-dish service
3L Large buffet service Large buffet service
3.6L High-volume buffet service High-volume buffet service

The key is to use the table comparatively. If you're serving a leafy salad alongside several other sides, a 3L bowl may be easier for guests to access than a very deep vessel. If the menu includes a dense pasta salad that guests may treat as a substantial side, the same capacity may disappear faster.

Plan for access, not just volume

A bowl's opening matters as much as its litre capacity. Wide, moderately shallow bowls let guests see the ingredients and reach the base with a serving spoon. Very deep bowls can hide toppings, trap dressing at the bottom and encourage guests to stir aggressively, which quickly makes a buffet look untidy.

Check the wider equipment plan before finalising your bowls. The ABC Hire guide to catering equipment for hire can help you assess bowls alongside tables, serving equipment and the rest of the food-service setup.

Serving insight: A bowl that can be lifted safely when full is more useful than one that only looks impressive when empty.

For events with staggered service, ask whether the caterer prefers two smaller bowls displayed at separate points or one large bowl at the centre. Splitting a salad can reduce queues and keep one presentation area looking fresh, but it increases the number of utensils and display positions to manage.

Styling and Placing Bowls on Your Buffet

A buffet should guide people naturally. Put plates and cutlery at the start, place salads where guests can pause without blocking the main dishes, and leave enough space for a serving spoon to rest without sliding into the food. The bowl should support that movement rather than becoming an obstacle.

A buffet table with several large bowls filled with various colorful and healthy salads and vegetables.

Create height without creating risk

Use sturdy risers beneath selected bowls to break up a flat table line. A raised bowl is easier to see from the queue and can give a central salad the importance it deserves. Keep heavier ceramic or stoneware pieces on secure, low platforms, and avoid placing a full bowl where a guest must lean across hot food to reach it.

Shape also creates interest. Round bowls soften a formal rectangular table, oval bowls work well along a long buffet and square vessels can suit a modern corporate setup. Don't mix shapes randomly. Repeat one material or colour so the display feels coordinated rather than assembled from whatever was available.

Use serving utensils that match the food. Long-handled salad servers work in deep bowls, while shorter utensils give better control in wide, shallow vessels. A pasta salad needs a spoon or fork that can lift dense ingredients without spilling dressing over the rim.

For a broader approach to table presentation, the ABC Hire guide to décor on a table offers useful context for balancing food vessels with centrepieces, candles and other decorative elements.

Style for the season

South African food coverage points to a move towards substantial winter salads, challenging the idea that salads belong only to summer entertaining. The Africa Food Show's discussion of South African food trends highlights the growing appeal of hearty formats with warm or roasted ingredients.

For these menus, stoneware can work particularly well. Its weight and visual warmth suit roasted vegetables, grains and legumes, while an earthy finish complements winter tablescapes. Keep warm ingredients separate from delicate leaves where possible, and confirm the bowl's intended use with the caterer before adding hot food.

Summer displays can be lighter. Acrylic or clear glass can emphasise colourful vegetables, citrus and herbs, while pale ceramics keep the table bright. For creative inspiration beyond catering, fruit bowl artwork can provide colour and composition ideas for a produce-led display.

The strongest buffet styling looks effortless because the practical details have already been solved. Leave room around each bowl, label unfamiliar ingredients and replace messy utensils before the table begins to look tired.

Rental Logistics Cleaning and Care

Buying big salad bowls makes sense when you host often and have suitable storage, but ownership brings work that's easy to underestimate. Large vessels occupy awkward cupboard space, need protective packing and can become expensive to replace when a rim chips or a glass bowl breaks. You also need enough matching pieces to cover peak events, even though much of that stock may sit unused between occasions.

Rental changes the calculation. You select the capacity and finish required for one event, then return the items instead of storing them indefinitely. A professional hire service can also manage cleaning, inspection and packing as part of its operating process.

What to confirm before booking

Ask specific questions rather than assuming every hire package works the same way.

  • Food-contact suitability: Confirm that the bowls are intended for serving food and ask about any restrictions on warm ingredients, acidic dressings or staining foods.
  • Cleaning standards: Establish whether the service supplies sanitised items and how you should scrape, rinse or pack them after use.
  • Delivery access: Share the venue address, loading conditions, stairs and setup time so the delivery team can plan realistically.
  • Collection requirements: Find out whether bowls need to be stacked in supplied crates and whether leftover food must be removed before pickup.
  • Replacement terms: Read the policy for chips, cracks, breakage and missing serving utensils before the event.

For a fuller view of how crockery fits with plates, glasses and other tableware, use the ABC Hire guide to cutlery and crockery hire.

Protect the bowl during service

Don't drag a full bowl across linen. Lift it with both hands, keep the base level and use a trolley for heavier ceramic pieces. Place a non-slip mat beneath bowls on polished tables, particularly when guests will serve themselves.

At the end of service, remove food promptly and follow the hire company's instructions. Don't soak wooden bowls for long periods, stack ceramic vessels while they're still greasy or use scouring pads on acrylic. Good handling protects the equipment and prevents avoidable charges.

ABC Hire is one Cape Town rental option that supplies event furniture, décor, cutlery, crockery, glassware and event equipment for functions across Cape Town and nearby Winelands areas. For planners, the main value of hiring isn't just access to a bowl. It's reducing the number of storage, transport and cleaning tasks that compete with the rest of event delivery.

Sustainable Serving A Modern Event Choice

Single-use tableware can look convenient until you account for purchasing, transport, disposal and the visual effect of a waste-heavy service. A reusable hire bowl follows a different pattern. It's delivered, used, cleaned and returned for future events, which keeps the item in circulation rather than sending it into the waste stream after one occasion.

That model suits event work because many functions already rely on hired infrastructure. Tables, chairs, glassware, lighting and décor move from venue to venue. Reusable serving bowls fit naturally into the same system.

An infographic comparing the sustainable benefits of renting versus purchasing catering items for serving food.

Choose the format that matches the event

A reusable rental is usually the strongest choice for weddings, corporate functions and venue-based events where collection is already organised. It also gives the table a more finished appearance than a disposable container, particularly when the menu is designed around shared presentation.

Compostable options can be appropriate where retrieval, washing or reverse logistics aren't practical. They still need correct disposal arrangements, and the event team must know which local facilities can accept the material. “Compostable” on its own doesn't remove the need for planning.

Returnable systems require clear accountability. Assign one person to collect bowls after service, separate food waste from equipment and check that utensils haven't been left at guest tables. A small end-of-event procedure makes reuse far more reliable.

South African businesses are adopting reuse and refill models as part of a wider sustainability direction, according to the South African Plastics Pact annual report. That makes reusable rental bowls a practical choice for planners who want to reduce disposable consumption without compromising presentation.

Better event practice: Choose the lowest-waste serving format your venue can realistically collect, clean or return. Good intentions fail when the logistics aren't assigned.

Sustainability also includes durability. A bowl that survives repeated service, packs efficiently and remains attractive over time can be more responsible than a cheap item that needs frequent replacement. Discuss the full handling cycle with the hire company before making the final selection.

Common Questions About Big Salad Bowls

How many bowls should I hire?

Start with the number of salads, their density and the service layout. One large bowl can suit a compact buffet, while two matching bowls may work better for a long table or separate serving points. Ask the caterer whether they'll refill during service, then choose a capacity that allows safe access without filling the bowl right to the rim.

Can I serve warm salad in a large bowl?

You can, but the material must suit the food. Stoneware or ceramic may complement warm ingredients, while acrylic and some wooden products may have restrictions. Confirm the manufacturer's or hire company's food-use guidance before placing hot roasted vegetables, grains or warm dressings in the bowl.

Is a wide bowl better than a deep bowl?

For most self-service buffets, yes. A wide opening gives guests better visibility and access, helps serving utensils reach the base and makes the display look generous. A deep bowl can still work for a leafy salad if it remains stable and the utensil is long enough to serve comfortably.

How should filled bowls be transported?

Transport salads separately from the bowls whenever possible, then fill them at the venue. If a filled bowl must be moved, use both hands, keep it level and place it on a trolley or stable tray. Don't carry a heavy ceramic or glass bowl through a crowded venue without a clear route.

Should I rent or buy?

Rent if the event is occasional, the menu changes frequently or you don't have suitable storage. Buy only when you host regularly, can protect the inventory and have a consistent need for the same size and material.


For Cape Town and Winelands events, ABC Hire offers crockery, glassware, décor, furniture and event equipment that can help you build a coordinated buffet without buying and storing every item. Contact the team with your guest count, menu and venue details, then confirm the right big salad bowls, delivery arrangements and collection plan before your event date.

Wooden Boxes and Crates for Events: A Practical Guide

You're halfway through a Saturday setup at a Stellenbosch estate. The ceremony furniture is in place, the florist is asking where the welcome sign should go, and someone has just discovered that the cake table rocks on the barn floor. A well-chosen set of wooden boxes and crates can solve several of those problems at once, but only if you've specified the right units, planned their placement, and checked their condition before guests arrive.

For Cape Town weddings, corporate functions, birthdays, and Winelands celebrations, crates aren't just rustic decoration. They're practical event infrastructure. They create height, define zones, support signage, conceal awkward surfaces, and give a temporary venue a more considered finish without permanent construction.

Why Wooden Boxes and Crates Work So Well at Events

At a vineyard venue, an open slatted crate can turn a bare entrance into a welcome station. Two crates beside the path can hold florals, a guest book, or escort cards, while deeper wine crates behind the bar provide storage and visual height. On a rooftop in Cape Town, solid boxes can lift a cake display above table level and help disguise cable runs without introducing bulky staging.

The important distinction is that these products aren't interchangeable.

  • Apple-crate style units are open, slatted, and visually light. They work well for florals, small display items, signage, and layered shelves.
  • Wine crates are usually deeper and more substantial. They suit bottle displays, cake plinths, bar backs, and gift tables.
  • Solid storage boxes offer a cleaner face and better concealment. Use them where loose equipment, packaging, or cables need to disappear.
  • Pallet-style plinths create broad, low platforms for lounge groupings, product displays, or larger installations.

The hire-counter mistake is ordering by appearance alone. A crate that looks perfect in a photograph may have the wrong depth for a cake stand, an unstable base for a floral arrangement, or a surface that marks linen.

Agricultural workers in a sunny vineyard loading wooden crates into the back of a cargo van.

One hire item, several jobs

Crates earn their place because they can work throughout the event. A wine crate used for ceremony signage can move to the bar later. A display box can become a gift-table anchor, then hold blankets or candles during the evening. That flexibility matters when the venue has terraces, gravel paths, barn floors, and garden areas rather than one level, finished room.

Wood also suits the Winelands because it reinforces the venue's agricultural character. You can create texture and height without commissioning a custom build or adding large quantities of floristry. Open crates soften a practical setup, while solid boxes keep the space tidy.

For heavier transport or storage requirements, it's useful to understand the difference between decorative event crates and purpose-built shipping containers. This guide to heavy duty boxes for ultimate protection explains why construction, protection, and load handling matter when the contents are valuable or movement is demanding.

Practical rule: Choose the crate for the job first, then choose the finish. A pretty crate with the wrong structure still creates an on-day problem.

Choosing the Right Sizes, Finishes, and Load Ratings

Start with the object you're supporting, not the look you're trying to create. Measure the cake stand, signage base, serving trays, floral vessel, or display product. Then allow enough surface area for safe placement and enough clearance for guests to move around it.

For a smaller celebration, small slatted crates around 40 x 30 x 25 cm can hold favours, escort cards, or compact floral displays. A medium unit around 50 x 40 x 30 cm gives a centrepiece or welcome arrangement more presence. Larger wine crates around 60 x 45 x 35 cm are better suited to cake plinths, bar-back displays, and substantial signage. These are practical hire descriptions, not universal manufacturing standards, so confirm the supplier's actual dimensions before approving the quote.

Match the unit to the event

An event for around 80 guests may need only a few small crates at the entrance and gift table, with medium units supporting floral moments. For a gathering of around 150 guests, plan more deliberately around bar storage, signage, cake height, and multiple guest-flow points. A 250-guest event typically needs broader platforms or repeated crate runs, especially when the venue has separate ceremony, drinks, dining, and dancing areas.

Oversized pallet-style platforms are useful for lounge furniture and product displays, but they need a stable, level base. Don't stack small decorative units to imitate a platform unless the supplier has confirmed that the construction and load path are suitable.

Finish changes the entire reading of the event:

  • Raw pine feels relaxed and photographs warmly, but inspect it closely for splinters, rough corners, and resin.
  • Sealed oak suits an upscale wedding or corporate launch because it looks deliberate rather than improvised.
  • Whitewashed timber works for garden parties and lighter palettes, particularly with linen and soft florals.
  • Charred timber finishes create a darker, graphic look for evening events, moody lighting, and brand activations.

Treat load capacity as a specification

Never assume that a larger crate automatically carries more weight. Ask for the supplier's safe load guidance for the exact unit, especially if crates will be stacked or used under a heavy cake, bar stock, audio equipment, or display product.

Crate Size (approx.) Common Use Finish Options Safe Load
40 x 30 x 25 cm Favours, escort cards, small florals Raw pine, whitewashed Supplier-rated only
50 x 40 x 30 cm Centrepiece bases, welcome displays Raw, sealed, painted Supplier-rated only
60 x 45 x 35 cm Cake plinths, bar backs, signage Wine-crate finish, sealed oak Supplier-rated only
Pallet-style platform Lounge groupings, broad displays Pine, stained, painted Confirm structural rating before use

For a wider furniture plan, review how wooden tables and chairs are specified alongside your crate hire. The same principle applies. Dimensions, surface condition, stability, and intended use should appear in the conversation before the quote is signed.

Styling Ideas for Weddings, Corporate Events, and Birthdays

The same wooden crate can look romantic, corporate, or playful. The difference comes from the finish, what sits around it, and how deliberately the installation is composed.

A graphic showing three ways to style wooden crates for weddings, corporate events, and birthday parties.

Winelands weddings

Raw wine crates are the natural fit for a vineyard wedding, but rustic doesn't mean untidy. Pair them with greenery garlands, taper candles, and amber glass to build warmth around the timber. Use staggered heights for a welcome table or dessert display, then keep the palette restrained so the arrangement looks connected to the venue rather than like a prop collection.

For daylight ceremonies, raw or lightly sealed timber usually photographs well against stone, vines, and pale linen. In the evening, candles and warm festoon lighting bring out the wood grain. Keep open crates away from exposed flame unless the venue and safety team have approved the arrangement, and use stable candle vessels rather than placing loose candles directly on rough timber.

Corporate launches

Corporate events need more control. A stack of untreated crates can make a product launch look like a farmers' market, even when that wasn't the intention. Sealed oak, matte black, or a consistent painted finish gives the same modular flexibility a sharper visual language.

Use crates as product pedestals, bar backings, plinths for branded collateral, or weight bases for a step-and-repeat structure. Add minimal florals, clean signage, and controlled lighting. Leave enough negative space around the product so the display reads as a brand environment rather than storage.

Design decision: If the event message is polished, use repetition. Matching finishes and aligned edges look intentional. Random crate combinations look accidental.

Birthdays and milestone parties

Birthday styling gives you more freedom to layer colour. Painted crates can support dessert stands, gifts, party favours, or a photo-booth platform. For children's events, seal the surfaces, remove sharp edges, and top working surfaces with linen, board, or another smooth covering.

Fairy lights, colourful blooms, balloons, and coordinated tableware can make the crates feel playful without losing their practical role. For an adult milestone celebration, use deeper tones, one strong floral colour, and a dessert arrangement at varied heights.

The styling should also follow the lighting plan. Pale finishes disappear under bright daylight less readily than under dim, coloured uplighting. Dark finishes can look refined in a cocktail room but become visually heavy in a sunny garden. If you're also hiring serving pieces, compare the crate treatment with wooden serving trays so the display materials feel consistent.

Placement Planning and Layout Decisions

Start with the venue floorplan and mark the fixed points first. Place the bar, cake table, gift table, DJ or band zone, registration desk, and primary entrances before deciding where decorative crates belong. Those anchors determine guest movement, sightlines, power access, and the locations where a crate installation can help.

A common mistake is scattering crates wherever there's an empty corner. That creates visual noise and can narrow circulation. Treat crate runs as soft wayfinding. They can lead guests towards the welcome area, frame a dessert station, or give a long dining room a grounded perimeter.

Build from the edges of movement

For a Winelands barn, two medium apple crates can flank the entrance path and hold welcome signage or flowers. Keep the walking line clear, particularly where gravel meets timber or where guests may arrive in formal shoes. On a Cape Town hotel ballroom floor, a continuous line of long pine crates behind long-table seating can create a display or storage edge without interrupting the dining plan.

Check every surface. Grass can hide dips, gravel can shift under a narrow foot, and tiled stoep areas can make a crate rock if one corner is slightly high. Use approved levelling methods, not folded napkins or loose packing material that guests can catch with a shoe.

Layout Footprint Best Venue Type Guest Count Range
Central cluster Compact, concentrated area Barns, courtyards, lounge zones Small to medium gatherings
Perimeter run Long, shallow edge Ballrooms, dining halls, galleries Medium to large gatherings
Aisle marker Narrow repeated points Gardens, vineyard paths, ceremony entrances Any size, if circulation remains clear

Protect exits and service routes

Never place crates in front of emergency exits, fire hose reels, access panels, ramps, or service doors. Keep a clear route behind bars and catering stations so staff aren't forced to carry hot trays around a decorative installation.

Use the venue's real measurements, not a supplier catalogue image. Mark the crate footprints with tape during a walkthrough, then photograph the test layout. That simple exercise reveals whether the stack blocks a view, catches a door swing, or sits too close to a guest's chair.

Layout rule: If a crate feature makes guests walk around it instead of past it, it's probably in the wrong place.

Safety, Transport, and Rental Logistics in Cape Town

A crate installation is still temporary event infrastructure. It needs the same practical discipline as furniture, staging, and display equipment. Confirm that the supplier carries public liability cover, and ask whether the crates meet the relevant SANS structural loading requirements for their intended use, particularly where units will be stacked or used as seating.

Request documented load guidance for each crate type. Don't put a heavy cake, beverage stock, speaker, or product display on an unrated box because its timber looks thick. Inspect every unit before guests arrive for splinters, protruding nails, loose boards, unstable feet, mould, and strong treated-timber odours.

A checklist for renting wooden boxes and crates in Cape Town, including insurance, safety, transport, condition, and collection.

Plan the Western Cape route

Transport between Cape Town, Stellenbosch, Paarl, and Franschhoek isn't just a mileage question. Farm venues may have narrow gates, steep driveways, gravel access, or limited unloading space. Confirm the vehicle type, arrival window, parking location, and whether the crew will carry the crates from the vehicle to the setup area.

Ask the supplier to state clearly whether delivery, setup, breakdown, and collection are included in the quoted service. Clarify weekend surcharges, after-hours collection, venue curfews, and the contact person responsible for decisions if the event runs late.

Outdoor events need an extra weather conversation. Crates should be protected from damp ground, and tall stacks need a suitable securing plan where wind is a concern. A ventilated crate isn't automatically stable, and an open structure can still tip if it's placed on uneven ground or loaded unevenly.

Record condition and responsibility

Take date-stamped photographs when the crates arrive. Capture corners, faces, feet, and any existing marks. Repeat the process at collection, especially if other suppliers have handled the items during the event.

For a broader checklist covering event furniture hire in Cape Town, use the same questions you'd ask for chairs and tables. Who delivers, who sets up, who collects, what condition is expected, and what happens if access changes at the last minute?

South African export packaging follows a different compliance path from event décor. For cross-border shipments, solid wood packaging thicker than 6 mm must be ISPM 15 compliant, and accepted treatments include heat treatment, dielectric heating, or methyl bromide fumigation. The visible mark needs the IPPC symbol, the country code ZA, a unique provider code, and the treatment code. South African guidance specifies heat treatment at a minimum core temperature of 56°C for 30 minutes. These requirements are documented in South African ISPM 15 guidance for export crates.

Quick Wins and Common Pitfalls Before You Sign

Give the final checklist to the coordinator, venue manager, and supplier representative. Everyone should be working from the same crate count, floorplan, access window, and collection agreement.

Before signing, confirm:

  • Count: Match the final crate quantity to the floorplan and each display function. Don't rely on a rough visual estimate for a busy Winelands wedding.
  • Timing: Check delivery and collection against the venue's actual loading access and curfew. A late collection can create a problem after the guests have left.
  • Finish: Keep timber colour, crate depth, and surface treatment consistent in photographs. Mixed finishes can look messy when placed beside pale linen.
  • Condition: Photograph every crate on arrival, then inspect for splinters, nails, rocking corners, staining, and moisture before styling.
  • Contract: Clarify the damage deposit, cancellation terms, replacement responsibility, after-hours contact, and return condition in writing.

Untreated timber can bleed tannin onto light linen, particularly when damp or freshly exposed to moisture. Test any crate that will sit directly on a tablecloth, and use a protective layer where necessary. Don't wrap linen around crates for the first time at the venue. Pre-tie and label those wraps offsite so the setup crew isn't improvising with pins, tape, or loose fabric.

A site walkthrough is also essential. Test the actual ground where the crates will stand, including grass, gravel, stone, timber decking, and tiled surfaces. Check the bakkie route at farm venues, measure narrow gates, and confirm where the delivery vehicle can unload.

Best backup: Keep one spare crate and a small styling kit onsite. A spare unit can replace a damaged box, support a last-minute sign, or stabilise a display without delaying the programme.

The wider South African wood-products industry includes 50 large, 53 medium, and 516 small companies, with total employment of 19,485 in 2014, according to a sector profile citing a Fibre Processing and Manufacturing SETA update. The profile also records Stats SA sales for products of wood at R1.712 billion in April 2016. That context reinforces the value of using an established supplier with clear condition records, documented construction, and a dependable delivery process rather than treating crates as disposable décor. See the South African wood-products sector profile for that background.

Wooden packaging also supports regional movement into nearby markets including Botswana, Namibia, Zambia, Lesotho, and Eswatini, according to South African trade data for wooden goods. For repeat regional shipments, reusable wooden packaging can make more sense than a one-off disposable solution when repairability, durability, and compliance matter across the route.


For wooden boxes and crates, ABC Hire can help you coordinate practical event furniture and styling across Cape Town, Stellenbosch, Franschhoek, and surrounding areas. Review your floorplan, confirm your crate functions and access requirements, then visit ABC Hire to organise the hire equipment your event needs.

White Chair Covers How to Choose Fit and Style Them

You arrive at a Cape Town venue and find three chair styles around the room: glossy plastic seats, older banquet chairs and a few bistro models from a previous booking. The tables are dressed, the lighting is ready, but the seating looks accidental. Fitted white chair covers can bring the room together quickly, provided the fabric, fit and installation are right. Poorly chosen covers do the opposite, showing dark chair edges, pulling at seams and bunching where the seat meets the back.

Introduction to White Chair Covers for Stylish Events

White chair covers remain a practical choice for weddings, corporate functions, matric dances and milestone celebrations across Cape Town and the Winelands. They give mismatched seating a consistent appearance, reflect available light and create a clean base for sashes, table linen and florals. For a formal reception, that visual uniformity can make the room feel organised before guests notice any individual décor detail.

Elegant banquet hall featuring round tables with white tablecloths and chair covers for a formal wedding reception.

The demand isn't based only on fashion. Statistics South Africa reported 102,373 registered marriages and unions in 2024, compared with 105,123 in 2023 and 143,279 in 2015, according to this summary of the official release from South Africa's 2024 marriage trends. That recurring wedding and formal-event pipeline keeps chair dressing relevant for hire companies, venues and planners, even as couples become more selective about where they spend on décor.

White covers make the most sense when the existing chairs are serviceable but visually inconsistent, when a venue needs a formal finish, or when a planner wants one neutral foundation across different table settings. They're less convincing when the chairs themselves are attractive, textured or part of the design. Cape Town trend coverage points towards linen, rattan, cane and softer lounge styling rather than rows of identical, flat seating, so a covered chair shouldn't be treated as an automatic upgrade.

The practical difference comes from site work. A cover must match the chair envelope, tolerate handling, photograph without obvious transparency and arrive clean enough to need little correction. For broader planning support, the event planning playbook for professionals is useful when coordinating suppliers, schedules and venue responsibilities around the décor installation.

How to Choose the Right White Chair Cover Fabric and Fit

The fabric decision affects the finish more than a decorative sash does. A lightweight stretch cover may fit quickly, but it can reveal a darker chair underneath. A heavier construction can look more substantial, yet it may take longer to handle, wash and dry. Choose according to the chair, venue and event duration rather than selecting the cheapest white option.

Comparing the main fabric choices

Polyester usually gives a familiar matte appearance with a stable drape. It works well for formal indoor settings when the cut is generous enough and the fabric isn't too thin. Its weakness is creasing, especially after transport or when covers have been packed before they're fully dry.

Spandex stretch hugs the chair and can produce a neat, contemporary silhouette. It's useful when the chair profile is consistent across the room and the installer needs to move efficiently. Stretch isn't a substitute for measurement, though. A cover that is forced over a wide or sharply edged chair will show stress at the seams and may sit unevenly around the legs.

Acrylic-coated polyester offers a more structured option. A Cape Town chair-cover sample is specified at 240 g/m² acrylic-coated polyester, while imported banquet covers are often around 160 GSM spandex, and South African upholstery suppliers list white fabrics in a broader 222 to 510 g/m² range, as documented in this South African fabric-weight comparison. The heavier end generally offers better opacity, drape and wrinkle recovery, which matters under daylight and flash.

Fabric Type Weight Range Best For Watch Out For
Lightweight spandex Around 160 GSM Short indoor functions with matching modern chairs Transparency, overstretched seams and seat bunching
Acrylic-coated polyester Around 240 g/m² in a Cape Town sample Repeated handling, branded or more structured installations Slight sheen and a less relaxed drape
Upholstery-weight fabric Roughly 222 to 510 g/m² in ZA supplier listings Higher-opacity finishes and demanding repeated use More handling weight, storage volume and care effort

Practical rule: If you can see the chair colour through the fabric before installation, daylight and camera flash will make the problem more obvious.

For faster fitting, look for a fitted construction with a centre-back Velcro closure where the chair design allows it. The closure can reduce reworking during a large setup, but it still needs to match the chair model. For outdoor events, prioritise a fabric that handles spills and movement, then confirm the supplier's cleaning and weather policy. For branded functions, choose opacity and shape stability before adding a logo or colour accent.

A comparison guide for choosing white chair covers made of polyester, spandex stretch, or acrylic-coated fabric.

Measuring Your Chairs and Getting a Perfect Fit Every Time

“Universal fit” is one of the costliest assumptions in event hire. Chairs that look similar across a venue can have different back heights, widths, seat depths and leg positions. Measure the actual chair batch, not the photograph supplied by the venue.

Use a four-point measuring workflow

  1. Measure back height. Start at the seat and measure to the highest point of the back. This tells you whether the cover will reach the top without pulling upwards from the seat.
  2. Measure back width. Measure across the widest part of the backrest. Some South African listings publish backrest widths around 41 cm, while other chair-cover envelopes are listed at 39 x 37 cm, so compare the supplier's specification with your chair rather than relying on a product name.
  3. Measure seat depth. Measure from the front edge of the seat to the backrest. This determines whether the fabric will lie over the seat or stop short and create a visible gap.
  4. Check leg spacing and height. Look at where the legs sit relative to the corners and measure the available clearance. A hem that lands unevenly will make an otherwise good cover look untidy.

The supplier's published envelope is a starting point, not proof of compatibility. Measure one chair in each profile, write the dimensions on a simple hire sheet and label the batches as bistro, banquet or plastic. That staging step prevents a common installation error, where a team reaches for the nearest white cover and gradually creates different tension across the room.

A measuring guide for selecting the right size chair covers, featuring four steps with instructional diagrams.

Trial-fit before committing

Fit one cover before unpacking the full batch. Pull it evenly over the back, settle the fabric around the seat and inspect the legs from the front and side. Check for stretched seams, exposed chair colour, diagonal pulling, loose fabric at the corners and a hem that rises on one side.

If the cover uses Velcro, close it without forcing the edges together. The closure should sit centrally and remain flat when the chair is pushed under the table. For plastic chairs, the guidance in ABC Hire's guide to chair covers for plastic chairs is a useful reference when comparing profiles and fitting requirements.

Do the trial fit in the same lighting the guests will see if possible. A cover can look acceptable in a dim storeroom and appear translucent beneath a bright marquee or direct window light. Approve the complete look only after the test chair has been viewed from the aisle, table edge and photography position.

Styling White Chair Covers for Weddings and Corporate Events

A plain white cover works best when the rest of the room has a clear visual direction. The mistake is adding a sash, bow, runner, flower and contrasting napkin to every chair until the seating becomes busy. Choose one strong chair detail, then let the tables and room carry the remaining colour.

A elegant white chair cover decorated with a shiny champagne-colored satin ribbon bow tied on the back.

Match the styling to the event

For a Winelands wedding, a soft linen sash, muted sage tie or natural-texture accent can stop white seating from feeling too stark. A satin champagne bow creates a more formal finish, but it needs consistent placement and tension. Uneven bows are easy for guests and photographers to notice, particularly along a long table.

Corporate events usually benefit from restraint. Use the brand colour in a narrow sash, table runner or napkin rather than covering every chair with a large branded panel. White provides a clean background for a launch, networking function or awards evening, but the chair treatment shouldn't compete with signage or stage content.

Matric dances can handle more contrast, especially with coordinated lighting and reflective table details. Check the fabric under the actual venue lighting, because warm festoon lights can make white covers appear creamier while daylight exposes creases and transparency.

White seating should create rhythm across the room, not become the loudest décor element.

Before finalising a wedding palette, planners can use resources such as plan your wedding décor with Wedding Vendors to compare décor categories and supplier questions. If the venue already has a strong chair profile, compare the covered look with white Tiffany chairs before hiring covers. A visible frame, cane texture or shaped back may provide more character with less fabric handling.

Keep the photographer's viewpoint in mind. Walk the room from the entrance, head table and dance floor, then correct any chair where the bow twists, the cover rides up or a dark edge shows. Those small corrections protect the overall finish more effectively than adding another decorative layer.

Care Cleaning and Hire Versus Buying Tips for Cape Town Hosts

White covers show handling marks quickly, so care begins before the event. Store clean covers completely dry, away from direct sunlight and anything that can transfer colour. Fold them consistently, keep fabric types separate and don't compress damp pieces into a sealed bag. Moisture trapped in storage can create odours and marks that are difficult to remove before a booking.

Steaming is usually safer than pressing directly with a hot iron, particularly for stretch fabrics and coated surfaces. Use a garment steamer to relax transport creases, keep the head moving and test an inside area first. Spot-clean food, makeup and dust according to the hire company's instructions, and don't apply bleach or aggressive stain removers unless the fabric owner approves them.

Make the hire decision on operations

Hiring is usually sensible when the event is occasional, when storage is limited or when the chairs vary from venue to venue. Buying can make sense for a planner with repeat demand, a dedicated storage area and a reliable cleaning process. The purchase price isn't the whole calculation. Add sorting, washing, drying, steaming, repairs, packing and the labour needed to fit every chair.

South Africa's imported furniture and textile ecosystem also affects availability and pricing. Imports accounted for about one-third of South African furniture sales, with imported goods estimated at about R1.5 billion per year, while imports of carpets and other textile floor coverings were valued at US$42 million in 2023, according to South Africa textile floor-covering import data. These figures don't price a specific chair cover, but they show why replacement costs, fabric variety and supplier lead times can be influenced by imported inputs.

For Cape Town, Stellenbosch, Franschhoek and Paarl bookings, ask whether delivery includes collection, whether cleaning is included, how covers are packed and whether setup labour is available. Confirm access times, stairs, loading zones and the venue's strike deadline before accepting a low hire rate. The practical questions in this guide to hiring chair covers can help you compare a simple collection booking with a managed installation.

If you're fitting a large venue yourself, price the labour fairly. A cover that saves money on the invoice can still become expensive when several people spend the setup trying to correct the wrong size or remove deep creases.

Final Checklist Before You Dress Your Chairs

White chair covers are the right choice when the existing seating is sound but inconsistent, when the event needs a formal neutral base and when the covers can be fitted without visible strain. They're not automatically the right choice for a venue with attractive timber, rattan or cane chairs, or for a Winelands design built around texture and relaxed lounge groupings.

Before confirming an order, check the following:

  • Fabric: Choose opacity and wrinkle recovery for the lighting, duration and handling demands.
  • Measurements: Record back height, width, seat depth and leg spacing for every chair profile.
  • Trial fit: Approve one fully dressed chair before accepting the complete batch.
  • Staging: Keep bistro, banquet and plastic chairs separated and labelled.
  • Styling: Select one chair accent, then coordinate it with table linen and the room palette.
  • Care: Confirm cleaning, steaming, packing, storage and stain procedures.
  • Logistics: Agree delivery access, setup responsibility, collection timing and labour before event day.

South Africa's registered marriage pipeline remains substantial enough to keep formal chair dressing relevant, even though the official marriage rate has declined from its earlier average, as reported in the 2024 marriages and unions release summary. That makes consistency and reusability more valuable than a one-event visual shortcut. A good hire partner should help you decide whether covers, white chair hire or a textured alternative suits the venue rather than forcing one finish onto every booking.

Start with one chair. Fit it, photograph it in daylight and under the event lighting, then inspect the seams, corners and hem from the guest's viewpoint. That small test prevents most last-minute surprises and gives your supplier a clear brief before the full delivery is packed.


ABC Hire supplies event furniture and white chair options for weddings, corporate functions and private events across Cape Town, Stellenbosch, Franschhoek and Paarl. Visit ABC Hire to discuss chair styling, delivery, setup and the practical fit requirements for your venue.