How to Plan Wedding in South Africa: Expert Tips & Guides

Planning your wedding in South Africa should be an incredible journey, not a stressful one. The secret? Breaking it down into manageable stages. It all boils down to nailing down your vision and budget first. Once that's sorted, you can lock in the big players like your venue, and then, as the big day gets closer, you can start weaving in all the smaller, personal details.

This approach turns what can feel like an overwhelming task into a genuinely organised—and even enjoyable—experience.

Your South African Wedding Journey Begins Here

Getting stuck into planning your wedding is one of the most exciting times of your life. It’s your chance to create a celebration that tells your story as a couple, all set against the stunning backdrop of South Africa. So, let go of the idea of a never-ending to-do list. Instead, think of this as a creative project with clear, distinct phases.

From dreaming up the perfect day to watching it all come together, a solid plan is your absolute best friend.

This guide is your roadmap. It’s packed with realistic timelines and practical advice drawn from countless real wedding experiences. The goal isn’t just to get you to the altar; it’s to help you savour every step along the way. We'll focus on making smart, considered decisions that feel right for you and your budget, so you feel confident and in control, not frazzled.

Visualising Your Timeline

A clear timeline is a game-changer. It breaks the entire process down into smaller, more achievable goals that you can tick off one by one. Here’s a quick look at the major milestones you’ll be hitting as you plan your wedding.

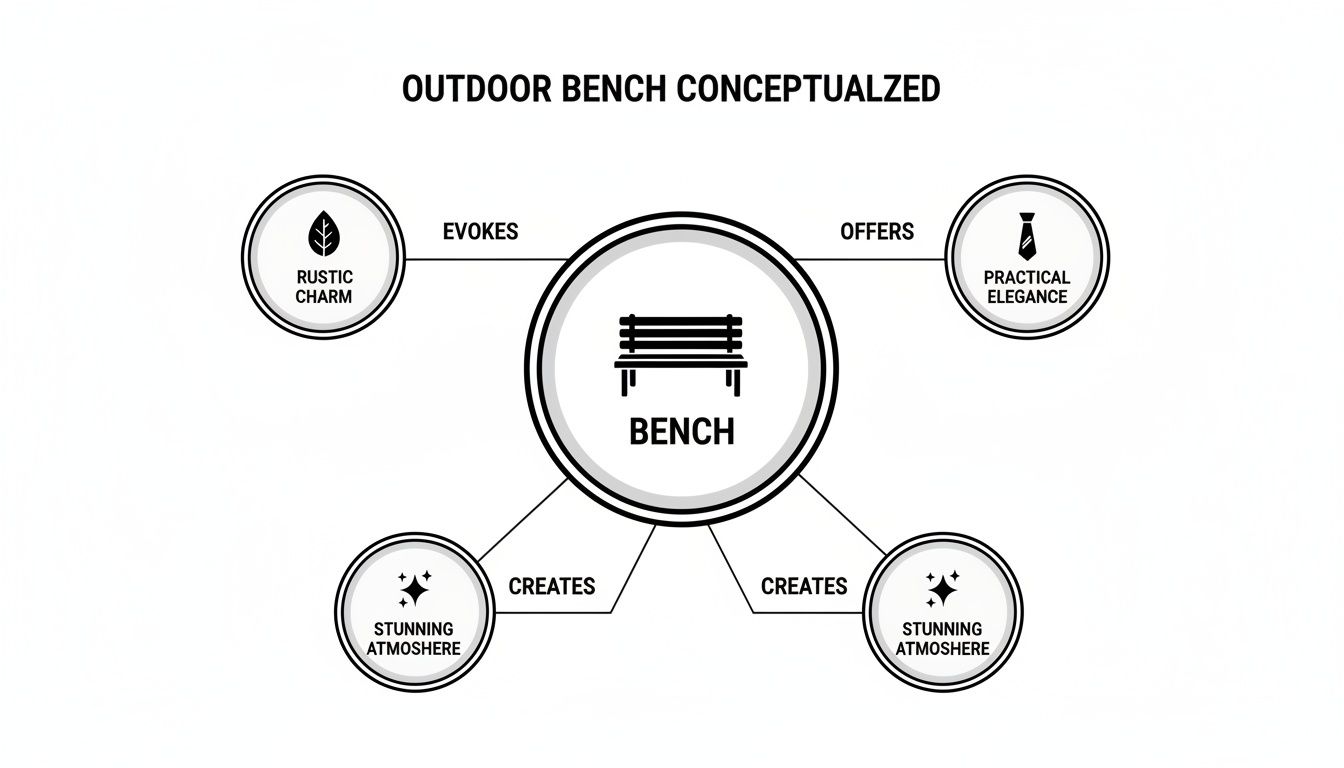
Image

This visual guide really helps to highlight the most critical deadlines—things like booking your venue about a year out, securing your other key vendors at the six-month mark, and then handling all the final logistics a month before.

To give you a bird's-eye view, we can break the entire process into four distinct phases. This helps make everything feel much less daunting.

| The Four Phases of Wedding Planning |
| :— | :— | :— |
| Phase | Timeline | Key Tasks |
| Phase 1: The Foundation | 12+ Months Out | Setting your budget, drafting the guest list, choosing a date, and booking your venue. |
| Phase 2: Building Your Team | 8-10 Months Out | Hiring key vendors: photographer, caterer, florist, and entertainment. |
| Phase 3: The Creative Details | 4-7 Months Out | Designing invitations, planning the décor, organising rentals, and cake tastings. |
| Phase 4: Final Preparations | 1-3 Months Out | Finalising guest numbers, creating a seating plan, and confirming all vendor logistics. |

Seeing it laid out like this shows that with a bit of forward planning, you can tackle everything step-by-step without feeling rushed.

The Modern South African Wedding Context

It’s also fascinating to see how the wedding landscape itself is changing. Over the past two decades, South Africa has seen a pretty significant drop in marriage registrations, which definitely influences how couples approach planning their big day.

Civil marriages fell from around 143,339 in 2000 to just 99,289 by 2023, with the crude marriage rate now sitting at about 1.7 per 1,000 people. What does this shift suggest? Well, it seems couples today are being more deliberate and personal in their planning, moving away from purely traditional ceremonies to create something that truly reflects who they are. You can dive deeper into these South African marriage trends to get the bigger picture.

Key Takeaway: A successful wedding plan hinges on a clear vision, a realistic budget, and a well-structured timeline. By focusing on these core elements from the start, you can navigate the process with confidence and create a celebration that is both beautiful and meaningful.

Nailing these foundational elements really does set you up for a smoother journey. It allows you to prioritise what truly matters to you—whether that’s incredible food, a breathtaking venue, or simply a relaxed, fun-filled day with your favourite people.

Setting Your Foundation in the First 90 Days

The first three months are when your wedding day goes from a dream in your head to a real, tangible plan. This is where you make the big, foundational decisions that everything else hinges on, from the canapés to the colour scheme. Think of it as laying the groundwork for your entire celebration.

Image

Before you fall down the Pinterest rabbit hole or start booking venue tours, you need to get crystal clear on three core elements: your budget, your guest list, and your overall wedding style. Nailing these down first makes everything that follows so much smoother.

Master Your Wedding Budget

The very first chat you need to have is about money. It might not be the most romantic part of getting married, but setting a realistic budget is the single most important thing you can do for a stress-free planning experience. This number will dictate your guest count, your venue, and every vendor you hire.

Start by sitting down together and being completely honest about what you can comfortably afford from savings. If family are chipping in, have that conversation early and make sure you understand if their contribution comes with any strings attached.

A simple spreadsheet is your best friend here. List out all the potential expenses and give each category a percentage of your total budget. It’s a quick way to see where your priorities really are.

  • Venue & Catering: This is the big one, usually taking up 45-50% of the total budget.
  • Photography & Videography: Expect to allocate around 10-15%.
  • Attire & Rings: This typically comes in at about 8-10%.
  • Décor & Florals: Often 8-10%, but this can vary wildly.
  • Entertainment: Set aside 5-10% for music and fun.

And whatever you do, don't forget a contingency fund! An extra 5-10% buffer is an absolute lifesaver for those little costs that always seem to pop up out of nowhere.

Define Your Guest List and Wedding Style

With a budget in mind, it's time to tackle the guest list. These two are completely intertwined; more guests mean higher costs for absolutely everything, from catering to chair rentals. A great way to manage this is by creating tiered lists.

Your "A-List" is for immediate family and your absolute closest friends—the non-negotiables. The "B-List" can be for extended family and other good friends, and the "C-List" for colleagues or plus-ones. This system makes it much easier to make cuts if you need to align with your venue's capacity or your budget.

Real-World Tip: When making your guest list, agree on a simple rule. A popular one is, "Have we had a proper chat with them in the last year?" It helps keep the list feeling personal and prevents it from spiralling out of control.

Once you have a rough guest count, you get to the really fun part: defining your wedding style. Are you dreaming of a rustic farm celebration out in the Karoo? A sophisticated, elegant affair in the Cape Winelands? Or maybe a chic, modern event in the heart of Johannesburg? Your style will guide your venue search and all your décor choices.

Secure Your Venue and Cornerstone Vendors

Okay, you've got your budget, an estimated guest count, and a clear vision. Now you can confidently start the hunt for your venue. This is usually the biggest single expense and sets the entire tone for the day, so it’s something you want to book as early as possible.

When you go on venue tours, go armed with a list of questions. Don't be shy! Ask exactly what's included. Does the fee cover tables, chairs, and basic linens? Are there sneaky costs like a cake-cutting fee or charges for using your own vendors? Getting the details now prevents nasty surprises later.

Here are a few key things to double-check before signing on the dotted line:

  • Capacity: Can it comfortably fit everyone on your list?
  • Availability: Is your dream date (or a backup) open?
  • Inclusions: Get a detailed list of what the hire fee actually covers.
  • Restrictions: Are there noise curfews or rules about décor?
  • Payment Schedule: Know the deposit amount and when the final payment is due.

Once the venue is secured, it’s time to lock in your other cornerstone vendors. These are the pros who get booked up fast, like your photographer, videographer, and caterer (if the venue doesn't provide one). Getting these critical suppliers booked early means you get your first-choice team and can finally tick some of the biggest items off your to-do list.

Assembling Your Professional Wedding Team

Okay, you’ve locked in your venue. That’s a massive tick on the to-do list and the foundation of your wedding day is officially set. Now for the really fun part: pulling together the dream team of people who will bring your vision to life. This isn't just about ticking boxes and booking suppliers; it's about curating a team of professionals who get your vibe and can work together like a well-oiled machine.

Image

Think of your vendors as the artists and experts who will handle all the moving parts. From the person capturing the memories to the one dropping the perfect beats, every choice you make is crucial. Let's walk through how to find, vet, and hire the perfect team for your South African wedding.

Prioritising Your Key Players

Some suppliers have a huge impact on the feel of your day, and they get snapped up fast—often 10-12 months in advance. As soon as your venue is confirmed, it's smart to focus on securing these "big three" first.

  • Photographer & Videographer: These are your memory keepers. Long after the cake is eaten and the last guest has gone home, their work is what you'll have to look back on.
  • Caterer: Let's be honest, food is a massive part of the guest experience. If your venue doesn’t handle catering in-house, finding someone who matches your taste and budget is a top priority.
  • Entertainment: The right music sets the entire mood, from a gentle melody during the ceremony to a packed dance floor at the reception. A great DJ or band can truly make or break the party.

When you kick off your search, don't just rely on a quick Google. Ask your venue for their list of preferred suppliers. They’ve seen it all and their recommendations are usually gold. Also, don't be shy about asking recently married friends for their honest opinions.

Vetting Vendors Beyond the Price Tag

So, you’ve got a shortlist. The real work starts now. It’s so tempting to just go with the cheapest quote, but that can be a big mistake. A vendor’s portfolio and personality are just as important as their price list.

When you're looking at a photographer's portfolio, search for consistency. A few amazing "hero" shots are great, but ask to see a full wedding gallery, preferably from a venue similar to yours. This shows you how they handle different lighting and capture those small, candid moments throughout an entire day.

The same goes for a DJ. Ask for sample playlists or even clips of them in action. You need to make sure their style clicks with the vibe you want. And never underestimate the importance of a personal connection! You’ll be spending a lot of time with these people (especially your photographer), so a call or a coffee before you book is an absolute must.

Key Insight: The best vendor relationships are built on trust. You're hiring these people for their expertise, so once you've done your homework, let them do what they do best. It'll allow you to relax and actually enjoy your day, knowing everything is in capable hands.

Questions You Must Ask Before Signing

Before you put down a deposit, you need to get into the nitty-gritty. A solid contract protects both you and the vendor. Here are a few non-negotiables to ask every potential supplier.

  • What exactly is included in your different packages?
  • Do you have a backup plan for emergencies or illness?
  • What are your payment terms (deposit, final balance due date)?
  • Are you able to provide proof of liability insurance?
  • What is your cancellation policy?

For caterers, be sure to ask about menu customisation, how they handle dietary requirements, and if staffing costs are included. For your DJ or band, clarify if they bring their own sound gear and what they need for setup. Asking these questions upfront saves a world of headaches and hidden costs later on.

Filling Out Your Vendor Roster

With your core team in place, you can move on to the other pros who add those beautiful, personal layers to your day. This means your florist, décor specialist, officiant, and your hair and makeup artist. The same rules apply: find people whose style you adore and whose personality you click with.

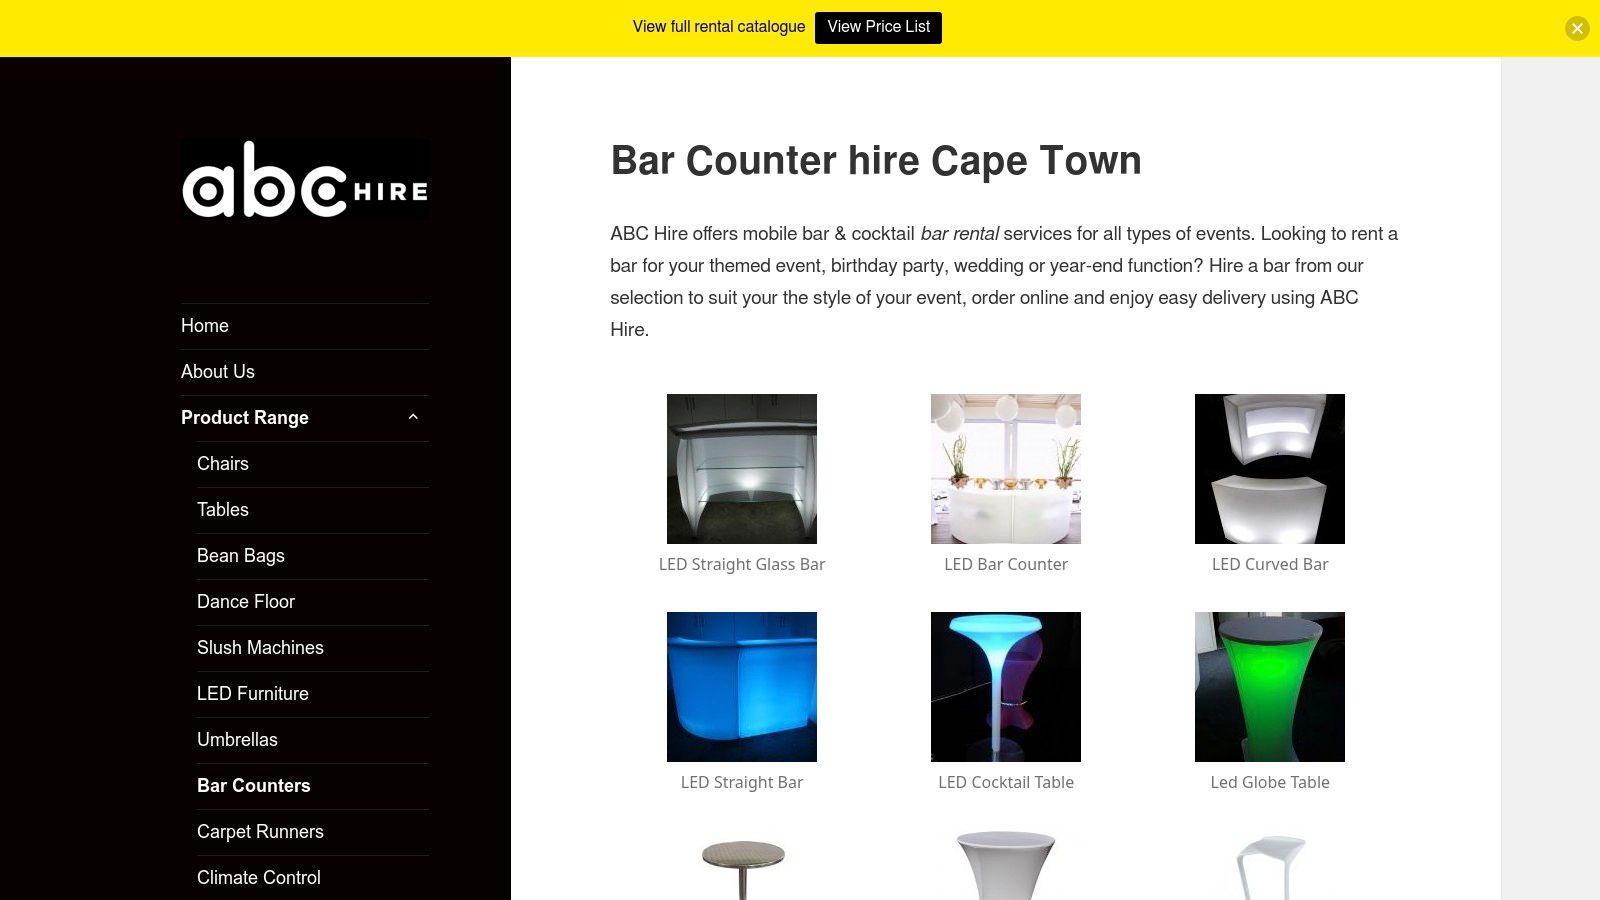
When it comes to décor and furniture, a company like ABC Hire can be an absolute lifesaver. They have everything from the essentials like tables and chairs to unique pieces that add that extra flair. You might even find fun extras you hadn't considered, like a cotton candy machine hire to give your guests a sweet surprise.

Ultimately, every vendor should feel like part of the team, all working together to create an unforgettable celebration. A well-chosen team doesn’t just provide a service; they provide complete peace of mind.

Crafting the Details From Attire to Invitations

Right, the heavy lifting is mostly done. You’ve locked in your venue and booked the big-ticket vendors. Now for the fun part—diving into all the personal touches that will make your wedding feel completely, uniquely yours. This is where your vision starts to become a reality, from the feel of the fabric on your dress to the first impression your invitations make.

Image

It’s time to bring your colour palette and theme to life, turning a well-planned event into a day packed with memories. Get ready for some exciting decisions, from cake tastings to building the perfect dance floor playlist.

Finding Your Perfect Wedding Attire

This is a big one. Choosing what you'll wear is probably one of the most personal decisions you'll make in this whole process. It’s a good idea to start the search about 9-12 months before the wedding. Custom gowns and tailored suits can take a surprising amount of time to create and deliver, so you don't want to be rushed.

Give yourself the freedom to explore different boutiques and try on styles you might not have considered. When you find "the one," remember that the journey isn't over. You'll likely need at least three fittings to get the fit absolutely perfect, with the final tweak happening just a week or two before the big day.

Expert Tip: When you go for your fittings, take the exact shoes and undergarments you’ll be wearing on the day. Trust me on this—it’s the only way to get the hem length and silhouette just right and avoid any last-minute alteration panic.

Don't forget the rest of your crew! The groom and wedding party's outfits should tie into the overall vibe of the day. Aim to get this sorted around the 6-month mark, which leaves plenty of time for everyone to get their orders in and any necessary tailoring done.

Communicating With Your Guests

Think of your wedding stationery as the official teaser trailer for your big day. It sets the tone and builds anticipation long before anyone arrives.

  • Save-the-Dates: Get these in the post about 6-8 months out. This is especially important if you have guests travelling from overseas or if you’re planning a destination wedding in a popular spot like the Cape Winelands or along the Garden Route.
  • Formal Invitations: The sweet spot for sending these is 8-12 weeks before the wedding. It’s enough notice for guests to make plans, but not so far ahead that they forget to RSVP.
  • Wedding Website: Honestly, a wedding website is a non-negotiable these days. It acts as a central hub for everything your guests need to know—directions, accommodation suggestions, gift registry details, and the day's timeline. It will save you from answering the same questions a hundred times.

Curating the Ceremony and Reception Experience

This is where you get to inject your personalities into every moment of the day. What kind of atmosphere do you want to create? Is it a formal, traditional affair or something more laid-back and modern?

Start thinking about how the ceremony will flow. You'll need to choose readings, decide on your vows, and pick out any rituals that feel meaningful to you as a couple. This is also when you should select the music for those key moments, like the walk down the aisle and your grand exit as a married couple.

For the reception, menu and cake tastings are easily one of the best parts of wedding planning! Work with your caterer to put together a menu that you both love and that fits the style of your wedding.

Music is crucial for setting the energy of the reception. I always suggest couples create a few different playlists:

  1. Cocktail Hour: Something upbeat but chill that encourages people to mingle.
  2. Dinner: Think background music that’s present but doesn't drown out conversation.
  3. Dancing: Time to bring the party! A good mix of timeless classics and current hits will get everyone, from your gran to your cousins, onto the dance floor.

By putting thought into these elements, you’re not just planning a party; you’re crafting an experience that flows beautifully and feels personal from start to finish.

Right, you're in the home stretch! With just a few months to go, your wedding planning is about to shift gears. The big, dreamy decisions are mostly behind you. Now, it’s all about the details, the logistics, and making sure everything comes together without a hitch.

This is the countdown phase. Think of it less as a frantic rush and more as the final, satisfying act of bringing your vision to life. You’ve set the stage, and now it’s time for the final cues to ensure a flawless performance.

Nailing Down Your Guest List and Seating Chart

The RSVP deadline has probably just passed, which means you've got that all-important final guest count. This number is your magic key for the last few big tasks. First thing's first: get that number over to your venue and caterer straight away, as your final bill hinges on it.

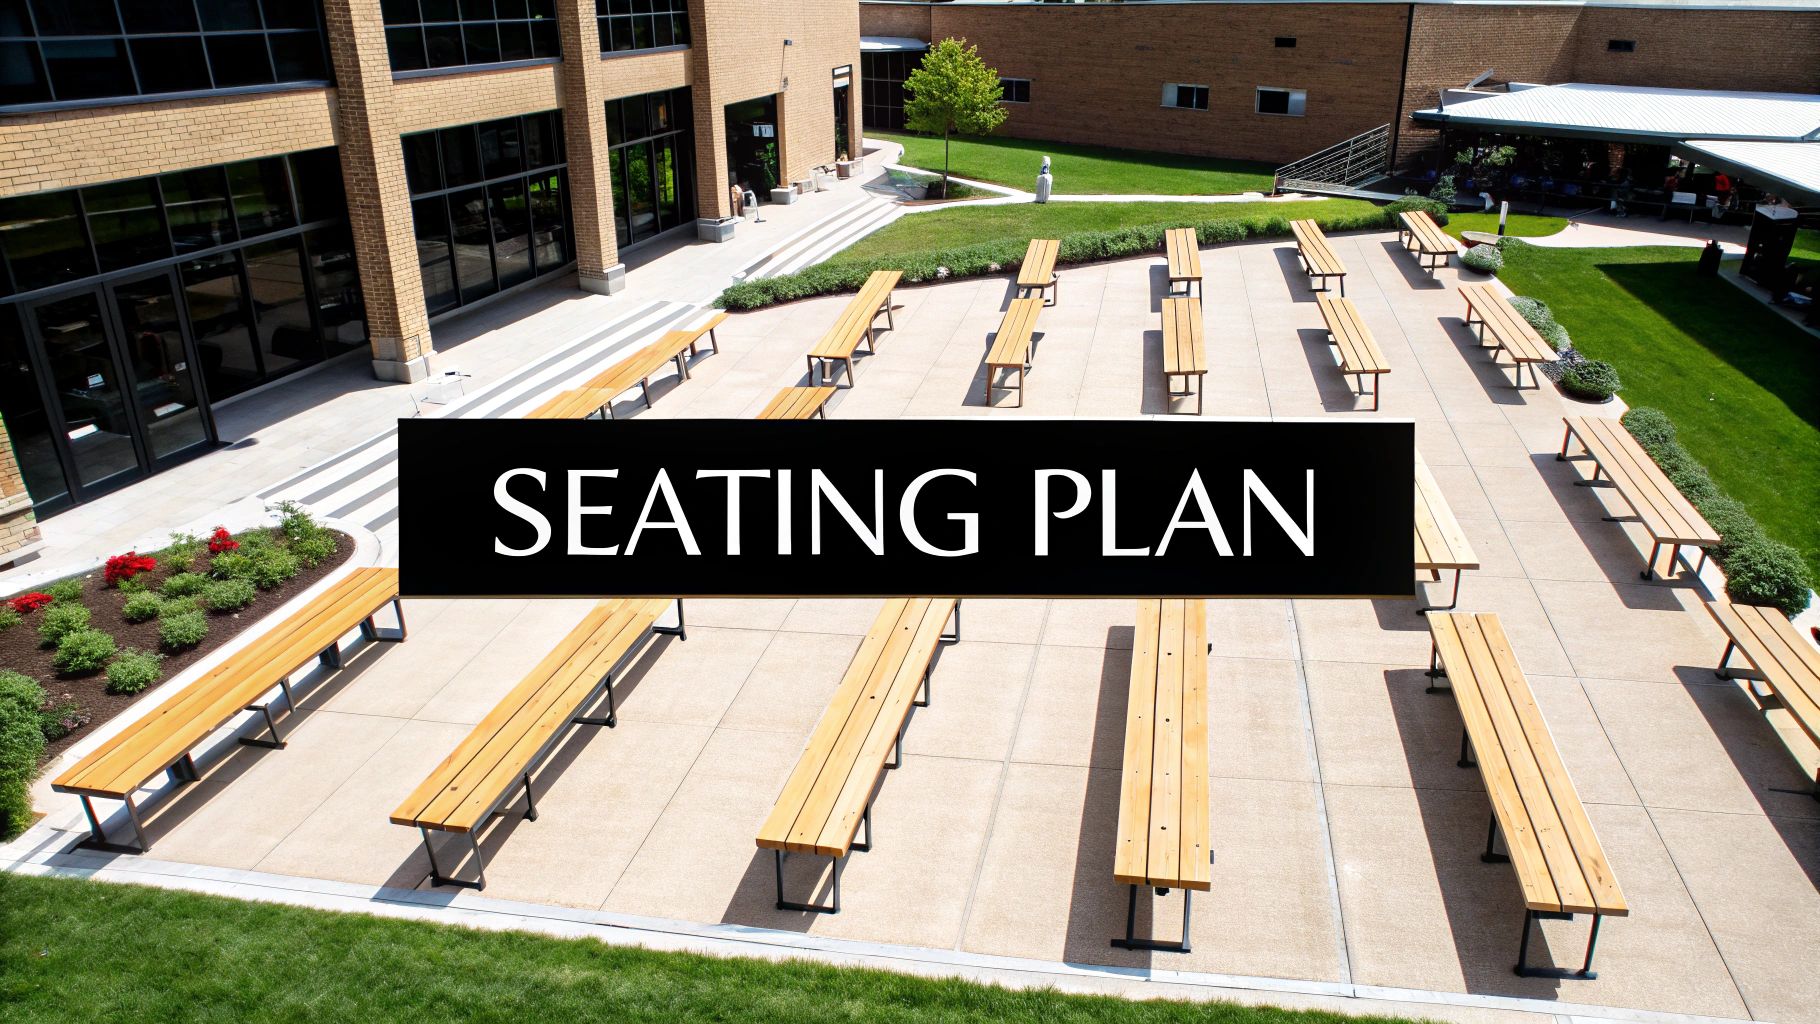
Now for the seating chart. I know, it can feel like a high-stakes puzzle, but a bit of strategy makes it much easier. I always tell my clients to start by grouping guests into natural clusters: close family, extended family, university mates, work friends, you get the idea. This way, everyone has a familiar face nearby.

Here are a few pointers from my experience to create a happy, buzzing reception:

  • The Top Table: Are you picturing a traditional head table with your entire wedding party, or a more intimate sweetheart table just for the two of you? Decide this first.
  • Family First: Give your parents and immediate family the best seats in the house, usually with a great view of the head table.
  • Encourage Mingling: It’s tempting to group everyone with their cliques, but don't be afraid to mix it up a little. A well-placed social butterfly can really get a quiet table talking.
  • Play Matchmaker (Platonically!): You know your friends best. Pop your outgoing, chatty friends at tables with quieter guests to help break the ice and get the conversation flowing.

The Master Timeline and Final Vendor Check-ins

This is your wedding day bible: the master timeline. It's a minute-by-minute schedule that lays out everything, from the moment hair and makeup begins right down to the last song of the night. About two weeks out, send this document to your key players: the venue coordinator, photographer, DJ, and MC.

My biggest piece of advice? Don't just hit 'send' on that email and hope for the best. Pick up the phone. A quick final call with each vendor to walk through the timeline together is invaluable. It clears up any confusion and guarantees everyone is 100% on the same page.

This is also the time for one last round of confirmations with all your suppliers.

  1. Double-check all arrival and setup times.
  2. Review the final delivery list (e.g., confirming the exact number of tables from ABC Hire or the specific floral arrangements).
  3. Settle any outstanding payments. You do not want to be worrying about money on your wedding day.
  4. Give them the emergency contact details for your maid of honour or wedding coordinator—not you!

Ticking Off Those Last Essential Details

With all the big vendor logistics sorted, there are a few other crucial bits and pieces to take care of. In the final weeks, it’s surprisingly easy for the small-but-mighty tasks to get overlooked.

It's an interesting trend we're seeing here in South Africa, where couples are often tying the knot a bit later in life. Statistics show the median age for brides is 34 and for grooms, it’s 38. This means couples are often more established and are planning a day that truly reflects their tastes, focusing on quality experiences for a curated guest list. This makes getting these final details right even more important. You can actually read more about how marriage age trends influence wedding planning in South Africa on the Stats SA site.

Here’s a quick checklist for your final countdown:

  • Get Your Marriage Licence: Don’t put this off! Check the required documents and processing times well in advance.
  • Buy Your Wedding Rings: If you haven’t already, now’s the time. Get them sized correctly and tuck them away somewhere safe.
  • Do a Final Venue Walkthrough: Schedule one last visit, ideally with your coordinator or decorator, to walk through the setup and finalise the layout.
  • Organise Welcome Baskets: A lovely touch for travelling guests. A few local treats and a weekend schedule go a long way.
  • Pack a Wedding Day Emergency Kit: A small bag with essentials like safety pins, plasters, pain relievers, and a mini sewing kit has saved the day more times than I can count.

By methodically working through these final steps, you’re paving the way for a day you can actually enjoy. This careful prep work is a gift to your future self, freeing you up to be present and soak in every incredible moment you’ve worked so hard to create.

A Few Common Questions About Planning Your Big Day

As you get closer to your wedding day, it’s totally normal for a million little questions to start popping up. You’re juggling final details, and that mix of excitement and nerves is all part of the process. To help you feel more confident, we’ve tackled some of the most frequent questions we hear from couples planning their weddings in South Africa.

Think of this as your quick-fire guide to clearing up those last-minute worries so you can focus on the fun stuff.

What’s the Real Average Cost of a Wedding in South Africa?

This is always the million-rand question, and honestly, the answer is "it depends." The biggest factors are always your guest count, the location you choose, and the overall feel you're going for. While it's tough to nail down one single national average, most couples with 80-100 guests typically spend somewhere in the ballpark of R80,000 to R150,000.

But please, take that number with a grain of salt. It's just a guideline. A glamorous affair in a sought-after spot like the Cape Winelands can easily climb past R300,000. Your budget should be about what feels right and affordable for you, not about keeping up with anyone else.

When Is the Best Time of Year to Get Married?

Across most of South Africa, the wedding season really kicks off in spring and runs all the way through autumn (September to April). This is when you'll get that beautiful, warmer weather everyone loves. The big exception, though, is the Western Cape. It has a winter rainfall season, so its dry, sunny summer months are prime time for "I do's."

Insider Tip: Don't rule out an off-season wedding between May and August. You'll often find that vendors have much better availability and you might even snag some great deals, especially if you're getting married outside the Western Cape.

Do I Actually Need a Wedding Planner?

A planner isn't a must-have for every couple, but their value is massive, especially if you’re trying to plan from a distance or have a super demanding job. A full-service planner handles everything from day one, while a "day-of" coordinator is a lifesaver who jumps in during the last month to make sure the wedding day itself goes off without a hitch.

If your budget is a bit tight, hiring a coordinator for just that final stretch is a brilliant compromise. Their experience and connections can genuinely save you a lot of stress and money in the end.

What Are the Legal Requirements to Get Married?

Getting legally married in South Africa is pretty straightforward, but you’ve got to tick all the right boxes. Here’s a quick rundown of what you’ll need:

  • Both of you must be over 18 years old.
  • You’ll need valid identification – either a South African ID or a passport if you're not a citizen.
  • You'll each have to provide three recent ID-sized photos.
  • You are required to have an interview with your registered marriage officer before the ceremony.
  • If this isn't your first marriage, you must show a final decree of divorce or the death certificate of your late spouse.

Ready to bring your wedding vision to life with the perfect décor and furniture? ABC Hire has everything you need to create an unforgettable atmosphere for your special day. From elegant seating to show-stopping LED furniture, we make event rentals in Cape Town and the Winelands effortless. Explore our collection at https://abchire.co.za and let’s start planning
Beautiful Arches for Weddings Your Guests Will Love

Your wedding arch is so much more than just a pretty backdrop. It's the heart of your ceremony, the exact spot where you'll say your vows and step into your new life together. Think of it as a beautiful frame for the most significant moments of your day, a gateway symbolising the move from single life to a shared future.

Why a Wedding Arch is More Than Just Decor

Image

Don't just see the wedding arch as a piece of decor; see it as the centrepiece of your ceremony's story. It’s often the first thing your guests notice and the lasting image they have of you exchanging your vows. Here in South Africa, with our breathtaking landscapes – from the rolling Cape Winelands to a chic Johannesburg rooftop – the right arch truly defines the space where your union is celebrated.

This single element has the incredible power to tie your whole wedding aesthetic together. It's a statement piece that instantly communicates your personal style, whether you’re going for rustic charm, modern minimalism, or classic romance. A well-chosen arch also elevates your wedding photos from simple snapshots to truly unforgettable portraits.

Setting the Scene for Your Vows

The perfect arch creates an intimate, almost sacred space for your ceremony, even if you're in a wide-open outdoor setting. It naturally draws everyone's eyes, focusing all the attention on the two of you and adding a deeper layer of significance to the moment. For instance, a rustic wooden arch draped with proteas and fynbos immediately grounds a ceremony in its beautiful South African context.

A wedding arch is more than an architectural element; it's a frame for your commitment. It silently announces to everyone present, "This is where it all begins," making the moment feel even more monumental.

A Peek at Different Arch Styles

As we go through this guide, we'll dive into the amazing variety of wedding arches available to help you find the one that feels just right. We'll look at specific designs and show you how they can be customised to fit your unique vision:

  • Rustic Wooden Frames: Absolutely ideal for outdoor, farm, or winelands celebrations.
  • Modern Metallic Structures: Perfect for creating a chic, contemporary look in urban venues.
  • Classic Floral Arches: Timeless and romantic, and easily adaptable to any colour scheme.
  • Unique Asymmetrical Designs: For couples who want to make a bold, artistic statement.

Our goal is simple: to help you see the arch not as an afterthought, but as a personalised gateway that beautifully tells your unique love story.

Finding Your Perfect Wedding Arch Style

Choosing a wedding arch can feel like a big deal, but it really comes down to one thing: does it reflect your story as a couple? Think of it less as just another piece of décor and more as the frame for the most important moment of your day. The right arch complements your venue, enhances your theme, and sets the tone for your whole ceremony.

Let's walk through some of the most loved arch styles we see at weddings across South Africa to help you find the one that feels just right.

Classic Round and Moon Gate Arches

There's a reason the round arch, or "moon gate," is a timeless classic. Its perfect circle is a beautiful symbol of eternity and endless love—what better backdrop for saying "I do"? This style is incredibly versatile, fitting in perfectly with romantic, traditional, or even boho-themed weddings.

You could picture a moon gate covered in lush, cascading roses for a classic garden wedding. Or, for a laid-back coastal vibe, imagine it decorated with dried palms, fluffy pampas grass, and soft fabrics that gently move in the sea breeze. It’s all about how you style it.

Rustic Triangular and A-Frame Arches

If you’re planning a rustic, bohemian, or earthy wedding, a triangular or A-frame arch is a fantastic choice. The strong, grounded shape brings a sense of stability and feels deeply connected to nature. It’s the perfect fit for a bushveld celebration, a forest ceremony, or a relaxed winelands wedding.

Image

These arches are almost always made from wood, which just adds to their natural charm. You can keep things simple with a single garland of eucalyptus or make a statement with a bold, asymmetrical floral arrangement on one corner.

Matching Your Arch to Your Wedding Theme

To make things a little easier, here’s a quick guide to help you pair the perfect arch with your overall wedding theme and venue.

Arch Style Best Suited For (Theme) Ideal Venue Type
Round/Moon Gate Classic, Romantic, Garden, Bohemian Gardens, Beaches, Ballrooms, Wineries
Triangular/A-Frame Rustic, Bohemian, Earthy, Forest Bushveld Lodges, Forests, Farms, Barns
Hexagonal/Geometric Modern, Minimalist, Industrial, Chic Urban Lofts, Rooftops, Art Galleries, Modern Warehouses
Square/Rectangular Traditional, Elegant, Formal Churches, Hotel Ballrooms, Manicured Gardens

Ultimately, the best choice is the one that feels most like you. This table is just a starting point to spark some ideas!

Modern Hexagonal and Geometric Arches

For the couple with a modern, minimalist, or industrial style, a hexagonal arch is a real showstopper. Its clean lines and unique shape create a striking, architectural backdrop that’s perfect for sleek, urban venues.

These arches are often crafted from metals like copper or gold-toned steel, but dark-stained wood also looks incredible. They don’t need much dressing up, either. A simple spray of orchids, a few hanging geometric lanterns, or even leaving it completely bare allows the beautiful shape to speak for itself.

Your wedding arch should feel like it belongs in the space. Consider the existing architecture and natural landscape of your venue. The goal is to complement the setting, not compete with it.

It's also interesting to see how wedding trends evolve. Recent data shows that between 2014 and 2023, the median age for South African brides went up from 31 to 34. This shift often comes with a desire for more personalised and thoughtfully designed wedding elements, where statement pieces like arches blend timeless symbolism with contemporary style. You can read more about these trends in the official report from Statistics South Africa.

Bringing Your Wedding Arch to Life with Decor

Image

So, you've picked the perfect structure. Now for the fun part—bringing it to life! Decorating the arch is where you get to splash your personality all over one of the most photographed pieces of your wedding day. Whether you’re dreaming of a massive cascade of fresh flowers or something a bit more unique, the decor is what turns a simple frame into a show-stopping focal point.

Decorating wedding arches is really about finding that sweet spot—a harmonious balance. You want to enhance the arch and its surroundings, not completely overpower them. Take a moment to think about how the colours, textures, and shapes of your decorations will vibe with your venue, your outfits, and the overall mood you're aiming for.

Collaborating with Your Florist

Getting a skilled florist on your team is an absolute game-changer for achieving a breathtaking floral design. When you go for your consultation, make sure you're armed with inspiration photos, your colour palette, and the nitty-gritty details of your arch, like its material and size. A pro will know which seasonal blooms not only look stunning but can also withstand the elements, especially if you’re tying the knot outdoors.

A great florist does more than just pick out pretty flowers; they’ll help you nail the perfect arrangement style for your vision.

  • Lush and Asymmetrical: This is a hugely popular style right now. It features a big, organic-feeling floral explosion on one corner, often balanced by a smaller cluster on the opposite side. It’s a fantastic way to add a bit of drama and a modern, romantic feel.
  • Simple and Elegant Garland: You can't go wrong with a classic. A simple garland of greenery, like eucalyptus or olive branches, twisted around the frame is just timeless. For little pops of colour, you can weave in a few feature flowers like proteas or classic roses.
  • Full Floral Coverage: If you’re going for maximum impact, this is it. Covering the entire arch in flowers creates an unbelievably luxurious backdrop. This looks particularly incredible on round or moon gate arches, transforming them into a complete floral wreath.

Beyond the Blooms: Creative Non-Floral Ideas

Flowers are gorgeous, but they're not the only game in town. More and more couples are getting creative with alternatives that really show off their style and can often be a bit kinder to the budget. These non-floral touches add amazing texture, movement, and a deeply personal feel.

Imagine soft, flowing fabrics like chiffon or silk draped elegantly over the arch. They catch the breeze so beautifully, creating a soft, romantic, and almost ethereal vibe. If you’re planning a bohemian or rustic wedding, things like pampas grass, dried palms, and macramé hangings are stunning choices that bring in natural, textural elements.

Here’s a tip: don’t be afraid to weave in personal items that tell your love story. Think about adding strands of fairy lights, a custom neon sign with your initials, or even a string of photos from your journey together. That’s how you make your arch truly one-of-a-kind.

We're also seeing a trend where the arch decor is designed to perfectly complement the venue itself. Here in South Africa, premier venues from the Kruger Park to the Stellenbosch Winelands often include arch rentals and floral arrangements in their packages, specifically designed to enhance their stunning backdrops. It just goes to show how central wedding arches have become to the whole ceremony experience. You can find out more about how venues incorporate these features into their offerings to see what’s possible.

Getting the Arch Size and Placement Just Right

It’s easy to get swept up in the beautiful floral designs and dreamy drapery of a wedding arch, but let’s talk about the practical side for a moment: size and placement. These two details are just as crucial as the decorations. An arch that’s too small will look swallowed up by the venue, and one that’s too big can completely overshadow the couple. And bad placement? That can mean terrible photos and guests who can't see a thing.

Finding the Sweet Spot for Size

First things first, you need to get the scale right. The whole point of the arch is to create a beautiful frame for you, your partner, and the officiant, without making anyone feel squished.

A great rule of thumb is to make sure the arch is at least a metre wider than the two of you standing together, and about a metre taller than the tallest person underneath it. This leaves plenty of breathing room and creates a lovely, balanced look in your wedding photos.

For instance, a standard arch is often around 2.2 metres high and 1.5 metres wide. This is a solid choice for most couples. But if you're saying "I do" with a massive backdrop, like the Drakensberg mountains, you’ll want a bigger, more commanding arch to hold its own against the scenery.

Picking the Perfect Position

Once you’ve nailed the size, you need to figure out exactly where it’s going to go. This is more than just finding a pretty spot; it's a strategic move that affects your photos, your guests' experience, and the whole vibe of the ceremony. Think of it as setting the stage for one of the biggest moments of your life.

Here are a few things I always tell my clients to think about:

  • Follow the Sun: This is a biggie for any outdoor ceremony. You want to position the arch so the sun is in front of you, casting a soft, beautiful light on your faces. If the sun is right behind you, you’ll end up as dark silhouettes in your photos, which is not the look we're going for!
  • Check the Sightlines: Take a little walk to the back and sides of where your guests will be sitting. Can everyone see the arch clearly? The last thing you want is a tree or a pillar blocking the view for half your family.
  • What's in the Background? Take a look at what’s directly behind your chosen spot. The ideal background is something scenic and uncluttered—whether it's the ocean, a rolling vineyard, or even just a beautifully styled wall. This makes sure all eyes are on you.

Making Sure It Stays Put, No Matter What

Stability is absolutely non-negotiable. This is especially true if you’re getting married in a breezy spot, like anywhere along the Cape coast. A wobbly arch is a distraction, and a toppling one is a disaster you definitely don’t need on your wedding day.

My top tip for outdoor weddings? Always have a plan to secure your arch. Heavy-duty sandbags or weights are a must, and they can easily be hidden with a bit of fabric or some cleverly placed flowers. If you’re on a lawn, get some sturdy stakes and drive them deep into the ground.

If you’re hiring your arch, have a chat with the rental company about it. Make sure they provide weights and know what they're doing with outdoor setups. Leaning on their professional experience will give you total peace of mind, so you can focus on the happy tears and not on the wind.

To DIY or To Hire Your Wedding Arch?

Image

This is one of the big questions every couple faces. Should you build the wedding arch yourself, or simply hire one from the pros? There's honestly no right or wrong answer here. It really boils down to a mix of your budget, your skills, your timeline, and—let's be real—your stress levels.

The thought of building your own wedding arch is incredibly romantic, isn't it? It’s a chance to pour your own creativity and love into something that will literally frame the moment you say "I do." The satisfaction of being able to point and say, "we made that," is massive and makes for a deeply personal touch.

But before you rush off to the hardware store, it's worth taking a moment for a reality check. Do you actually have the right tools, the skills, and most importantly, the time to take this on in the frantic lead-up to your wedding? A DIY arch isn't just about putting some wood together; you've got to figure out how to safely transport a big, awkward structure to your venue and then set it up so it doesn’t topple over.

The Perks of a Professional Hire

Hiring an arch from a professional company like ours takes all that logistical headache right off your shoulders. We’ve seen it all and done it all. We’re well-oiled machines when it comes to delivering, assembling, and securing arches in every kind of venue and weather condition imaginable. Plus, you get access to a huge selection of styles, from classic wooden frames to modern metal hexagons, making it easy to find something that perfectly matches your vision.

Let's break down the benefits of hiring:

  • Convenience: No building, no transport nightmares, and zero setup stress on your wedding day.
  • Professional Quality: The arch will be sturdy, well-maintained, and look perfectly polished. No wobbly legs or splinters here!
  • Variety: You get your pick of dozens of designs you probably couldn't create yourself without a serious amount of effort.
  • Peace of Mind: Knowing it will be delivered on time and installed correctly is absolutely priceless.

Thinking about other large rental items? An outdoor wedding, especially in our unpredictable climate, often needs more than just an arch. A sturdy structure can be a lifesaver for sheltering guests. You can explore more options in our guide to finding a gazebo for hire.

The Realities of the DIY Route

If you’re still leaning towards the DIY path, it’s vital to be realistic about what you’re getting into. Think beyond just the construction. Does it need to be sanded, painted, or stained to look wedding-ready? And what's the plan for taking it down and getting it off the property after the party's over?

This choice often taps into bigger wedding trends. Here in South Africa, especially around Gauteng and the Western Cape, we're seeing a huge move towards personalised, eco-conscious weddings. Many couples are choosing to build arches from sustainable materials or decorate them with local fynbos, reflecting a desire for a more meaningful celebration.

Ultimately, you need to weigh the potential cost savings against the huge investment of your personal time and energy. If you're a naturally handy person who loves a good project, going DIY could be an incredibly rewarding experience. But if the thought of adding one more thing to your massive to-do list feels overwhelming, hiring is the smart, stress-free choice that guarantees a beautiful result.

Answering Your Wedding Arch Questions

Even with all the planning, it's natural to have a few questions pop up about your wedding arch. Don't worry, that's completely normal! Getting these last few details ironed out is the final step to feeling confident and excited about your ceremony setup.

Let's dive into some of the most common queries we hear from couples.

How Much Does a Wedding Arch Hire Cost in South Africa?

This is a bit like asking how much a car costs – it really depends on the model and all the extras! The price to hire a wedding arch in South Africa can vary quite a bit based on what you have in mind.

A simple, unadorned wooden or metal frame is a great starting point, usually costing between R800 and R1,500. This is a fantastic option if you're on a tighter budget and feel creative enough to handle the decorations yourself.

If you’re dreaming of an arch dripping with lush, fresh flowers arranged by a professional florist, you can expect the price to range from R3,000 to over R15,000. The final figure depends heavily on the types and amount of flowers you choose, how complex the design is, and your florist's level of expertise.

Quick tip: Always ask what’s included in the quote. Does the price cover delivery to your venue, setup on the day, and collection afterwards? These little logistical details can add up, so it's best to get a clear picture from the get-go.

Can I Use a Wedding Arch Indoors?

Absolutely! An indoor wedding arch is a brilliant way to create a beautiful, intimate focal point for your ceremony. It can instantly define the space, adding a real sense of occasion and romance, even in a large or minimalist room.

One of the biggest perks of an indoor ceremony? No weather worries! You won’t have to stress about wind or rain, which means you can get more creative with delicate decor. Think fine fabrics, hanging candles, or intricate paper elements that just wouldn't last outside. It's a guaranteed stunning backdrop, no matter what the weather decides to do.

What Happens to the Arch After the Ceremony?

Don't just let that beautiful arch have its one moment of glory! It has so much more to give. Repurposing your arch at the reception is a clever and sustainable way to get the most bang for your buck.

Here are a few ideas we love:

  • Behind the Main Table: Move the arch so it frames the newlyweds' table. It creates a stunning backdrop for all those speeches and photos throughout the night.
  • As a Photo Booth: Pop it in a designated spot to create a stylish, ready-made photo booth. Just add a few fun props, and your guests will have a blast.
  • At the Reception Entrance: Welcome your guests in style by placing the arch at the entrance to your reception area. It makes for a grand and memorable arrival.

Are There Good Alternatives to a Floral Arch?

Yes, heaps of them! While flowers are a classic for a reason, there are so many unique alternatives that can showcase your personal style. If you’re after something a little different, you've got options.

For a bohemian vibe, imagine an arch draped in gorgeous macramé or decorated with soft, feathery pampas grass. If your theme is more modern and industrial, a sleek copper or black metal frame with glowing Edison bulbs creates a seriously chic atmosphere. You could also play with colourful ribbons, elegant draped fabrics, or even create a "deconstructed" arch using two separate floral pillars to frame you. The possibilities are truly endless.


Ready to find the perfect arch without the stress? At ABC Hire, we offer a beautiful selection of high-quality arches and event furniture to bring your Cape Town wedding vision to life. Explore our collection and let us handle the details. https://abchire.co.za

Your Guide to Mobile Bar Service in South Africa

Ever wondered how to bring a top-tier bar experience to your event, wherever it might be? Picture this: a fully stocked, professionally staffed bar magically appearing at your chosen venue. That’s the magic of a mobile bar service. It’s not just about serving drinks; it’s about crafting a complete pop-up beverage experience that’s designed around your event.

What Exactly Is a Mobile Bar Service?

Think of it like hiring a private chef, but for the drinks. You’re not just getting a few bottles of wine and someone to pour them. Instead, you’re getting an all-in-one solution that brings the entire bar setup—and the atmosphere that comes with it—right to your doorstep. It could be a garden wedding, a corporate launch, or even a birthday bash in your own backyard.

Image

This kind of pop-up experience has become incredibly popular, and for good reason. Here in South Africa, the mobile bar industry has been growing fast, thanks to our vibrant event culture. In fact, the market has expanded by an average of 10-15% annually over the last five years, all driven by the demand for unique and hassle-free drink solutions. You can dive deeper into the mobile bar hire market and see how it’s changing the game for all sorts of events.

What Is Typically Included?

A professional mobile bar service takes care of absolutely everything, so you can actually enjoy your own party. It’s a complete package deal.

Here’s what you can generally expect:

  • The Physical Bar: A stylish, functional bar counter that can often be customised to fit the look and feel of your event.
  • Professional Staff: You get skilled mixologists and bartenders who know their way around everything from a classic G&T to a custom-designed cocktail menu.
  • Complete Glassware and Equipment: No need to worry about a thing. All the right glasses, shakers, ice buckets, and other tools are part of the service.
  • Premium Stock: They’ll bring a curated selection of spirits, wines, beers, and non-alcoholic drinks, all based on what you and your guests will love.
  • Licensing and Insurance: A reputable company handles all the necessary liquor licensing, making sure your event is fully compliant and completely stress-free.

By managing everything from the first pour to the final clean-up, a mobile bar ensures every guest feels catered to, transforming a standard gathering into a truly memorable occasion. It’s an investment in the overall guest experience.

Why a Mobile Bar Elevates Your Event

When you’re planning the drinks for your event, you generally have three choices: use the venue’s built-in bar, try to set one up yourself, or bring in the professionals with a mobile bar service. While the first two options might seem like the easiest path, a mobile bar brings some serious advantages that can completely transform your event’s atmosphere. It’s more than just a place to get a drink; it becomes a centrepiece for the whole celebration.

Image

The biggest draw is pure convenience. A mobile service takes care of everything from A to Z—the physical bar structure, all the glassware, ice, fancy garnishes, and most importantly, the professional staff. This all-in-one package lifts a massive weight off your shoulders, letting you actually enjoy your party instead of stressing about running out of ice or lemons.

This convenience has a direct impact on your guests’ experience. They’re not just stuck with a basic beer and wine selection. Instead, they get to enjoy perfectly made cocktails crafted by people who really know what they’re doing. Suddenly, grabbing a drink becomes an interactive and memorable moment.

Predictable Costs and Zero Surprises

Let’s be honest, one of the trickiest parts of planning any event is sticking to a budget. A DIY bar can easily get out of hand with last-minute trips to the bottle store and buying way more supplies than you actually need. On the other hand, venue bars can hit you with high markups and minimum spend requirements that lead to a nasty surprise on the final bill.

A mobile bar service changes the game with clear, upfront package pricing. You know exactly what you’re paying for from the start, whether it’s a per-head rate or a flat fee for a certain number of hours. That kind of financial clarity makes budgeting a breeze, with no fear of hidden costs popping up after the party is over.

With a mobile bar, you are investing in a controlled, predictable expense that delivers a high-value experience, eliminating the guesswork and potential overspending associated with other options.

Unmatched Customisation and Branding

This is where a mobile bar really gets to show off. Think of it as a blank canvas you can paint to perfectly match your event’s theme and style. You just can’t get that level of personalisation from a standard venue bar.

You get to create a bespoke experience that truly reflects the vibe of your gathering.

  • Weddings: How about “his and hers” signature cocktails that tell a little story about the two of you?
  • Corporate Events: You can brand the front of the bar with your company logo, adding a sleek, professional touch to a product launch or client function.
  • Themed Parties: Go all out with a drink menu that fits your theme, whether it’s tropical tiki cocktails for a summer bash or sophisticated martinis for a glamorous affair.

In the end, hiring a mobile bar is so much more than just outsourcing the drinks. It’s an investment in creating a polished, engaging, and totally stress-free event. It elevates the whole occasion, providing a professional and customised focal point that will leave a great impression on every single one of your guests.

Choosing the Right Mobile Bar for Your Occasion

Not all events are created equal, and your bar setup should reflect that. Picking the right mobile bar service is about so much more than just the drinks on offer—it’s about matching the entire service style to the atmosphere you want to create.

Think of it like choosing music for a party. You wouldn’t blast a heavy metal playlist at a sophisticated corporate dinner, would you? In the same way, the bar for a black-tie wedding should probably focus on classic cocktails and elegant champagne toasts, creating an air of class and celebration. The whole experience needs to be refined and seamless.

Matching the Bar to the Event Vibe

For a professional corporate gathering, the focus shifts slightly. Sure, cocktails are great, but premium non-alcoholic options become just as important. The bar itself can be a fantastic networking hub, maybe subtly branded with your company logo, rather than being the main event. Here, the service should feel discreet, polished, and efficient.

Then you have a casual backyard birthday party or a buzzing festival. That calls for a completely different approach! The priority is speed, accessibility, and a fun, engaging atmosphere. The menu would lean towards popular beers, ciders, and simple mixed drinks that can be served quickly to keep queues short and the good times rolling.

As you can see, a mobile bar doesn’t just add flair; it often makes more financial sense and leaves guests much happier.

To help you decide, here’s a quick guide on what kind of mobile bar service works best for different types of events.

Mobile Bar Service Suitability by Event Type

Event Type Primary Focus Suggested Menu Key Feature
Weddings Elegance & Celebration Signature Cocktails, Champagne, Premium Wines A beautiful bar setup that complements the décor.
Corporate Events Professionalism & Networking Premium Spirits, Mocktails, Branded Options Discreet, efficient service and subtle branding opportunities.
Private Parties Fun & Casual Atmosphere Beer, Cider, Easy Mixed Drinks A relaxed vibe with a flexible and compact setup.
Festivals Speed & High Volume Popular Beers, Ciders, Pre-Batched Cocktails A durable, fast setup designed to handle large crowds.

This table should give you a starting point, but the best mobile bar providers will always work with you to customise their offering.

Key Questions for Your Event Type

To make sure you’re booking the perfect fit, run through these questions:

  • Weddings: Does the service specialise in elegant presentation? Can they create signature cocktails for the couple and handle a champagne toast for the speeches?
  • Corporate Events: Can the bar be customised with our company branding? Do they have a sophisticated range of non-alcoholic mocktails for all guests?
  • Private Parties: Is their setup flexible enough for a smaller, more intimate space like a garden or living room? Do they have packages suited for a relaxed, casual get-together?
  • Festivals: Can their team handle high-volume service without a hitch? Is their setup durable and quick to assemble for outdoor conditions?

By thinking about your event’s specific goals—whether that’s pure elegance, professional networking, or high-energy fun—you can choose a mobile bar service that does more than just pour drinks. It will actively enhance the entire guest experience, feeling like a natural, integral part of your event, not just an add-on.

How to Design Your Perfect Drinks Menu

Alright, let’s get to the fun part: creating the drinks menu. This is your chance to really stamp your event’s personality onto every single glass. But before we start dreaming up signature cocktails, we need to sort out the service style. Getting the financial setup right is the foundation for all your creative choices.

Image

It’s tempting to jump straight into flavour combinations, but picking the right package comes first. Each option shapes a totally different guest experience and, just as importantly, affects your budget in different ways. Nail this decision, and everything else will fall into place.

Understanding Your Service Options

Most mobile bar services, including ours, offer a few standard packages that we can then tweak to fit your event perfectly. The best way to choose is to think about how you want your guests to feel and interact with the bar.

  • Open Bar: This is the go-to for weddings and corporate functions for a reason. You pay a set price per guest, and they can enjoy unlimited drinks for an agreed-upon time. It’s seamless, generous, and lets everyone relax without worrying about their wallets.
  • Cash Bar: Just like your favourite local spot, guests simply pay for their own drinks. This is a brilliant budget-friendly choice for the host and works especially well for public events, festivals, or more casual get-togethers.
  • Limited Tab: This is the perfect middle ground. You put a pre-determined amount of money behind the bar (the “tab”) to treat your guests. Once that limit is hit, the bar can easily switch over to a cash bar for the rest of the night.

Sorting out your service style first gives you a clear budget to work with. That means you can let your creativity run wild on the menu itself, knowing you won’t get any nasty surprises down the line.

Crafting a Balanced and Exciting Menu

Once the nuts and bolts are sorted, we can dive into selecting the drinks. A truly great menu has something for everyone. It’s a balancing act between comfortable classics and a few special touches that make the day unforgettable.

You’ll want to include a good mix of drinks to cater to all the different tastes in your crowd. A well-rounded menu is a sign of a great host—it shows you’ve thought about every single guest’s enjoyment.

Here’s how to build a menu that’s guaranteed to be a hit:

  1. Start with the Classics: You simply can’t go wrong here. Make sure you have a quality selection of wines (a good red, a crisp white, and a rosé), some popular local craft beers, and a solid range of spirits like vodka, gin, and whiskey.
  2. Add Signature Cocktails: This is where you really get to shine. Work with your mobile bar service to dream up one or two signature cocktails that tie into your event’s theme. A refreshing gin and elderflower spritz for a summer wedding? Perfect. A sophisticated espresso martini for a corporate launch? Absolutely.
  3. Don’t Forget Non-Alcoholic Options: The days of just offering a sad-looking jug of juice are long gone. A modern menu needs exciting and delicious non-alcoholic choices. Think artisanal mocktails made with fresh herbs, premium iced teas, or sparkling fruit infusions. It’s all about making sure every guest feels included.

At the end of the day, designing the perfect menu is a team effort between your vision and your provider’s expertise. By getting the practical service style right first, you free yourself up to create a drinks selection that will leave a fantastic impression on all your guests.

Getting the Logistics and Legal Stuff Sorted

Pulling off a flawless event is all about nailing the behind-the-scenes details. When you hire a mobile bar, a little bit of practical planning makes sure everything runs like clockwork, from the first drink poured to the last call. Getting your head around these key logistics and legal bits is the secret to a stress-free party.

First up, a simple site check. Your mobile bar needs a dedicated spot to work its magic. Think about the physical space – is there enough flat, stable ground for the bar to be set up? Most services need a clear area of about 3×3 metres, but this can change depending on the bar’s design and how many guests you’re expecting.

Then there are the practical needs, like electricity and water. While many modern mobile bars are pretty self-sufficient, access to a standard power outlet is usually a must for things like cool lighting, blenders, and keeping the drinks ice-cold. A nearby water source is also super helpful for rinsing equipment and general clean-up, keeping the service area looking professional all night long.

Navigating Liquor Licences in South Africa

Beyond the physical setup, the most important piece of the puzzle is the legal side of things, specifically the liquor licence. In South Africa, serving alcohol is a regulated business, and getting it wrong can land you, the host, in hot water. This is exactly why choosing a fully licensed and insured mobile bar service is non-negotiable.

A professional mobile bar will have all the necessary liquor licences that allow them to legally sell and serve alcohol at different venues. This takes the entire legal headache off your plate.

Hiring a licensed provider is your guarantee of legal compliance and total peace of mind. They handle all the regulations, making sure your event isn’t just fun, but also 100% above board.

Honestly, this legal protection is probably the most valuable part of the service. It means you can relax and enjoy the party with your guests without a single worry about the complexities of provincial liquor laws.

Essential Questions to Ask Your Bar Service

To make sure you’ve covered all your bases, it’s a great idea to have a checklist of questions ready when you’re chatting with a potential mobile bar service. Getting clarity upfront prevents any last-minute surprises and makes sure you and your provider are on the same page. Don’t forget to plan for the weather, either; for outdoor events, you could look at something like a gazebo for hire to keep the bar area and your guests protected from the elements.

Here are a few crucial questions to pop on your list:

  • Setup and Breakdown: How much time do you need to set up before the event starts and to pack down afterwards?
  • Staffing: How many bartenders will you provide for my number of guests? We want to avoid long queues!
  • Hidden Costs: Does your quote include everything, like travel, ice, and glassware, or are there any extra charges I should know about?
  • Insurance: Can you show me proof of your public liability insurance?

Asking these questions from the get-go helps you make a smart choice, picking a partner who is transparent, professional, and totally ready to make your event a massive success.

How to Book Your Mobile Bar with ABC Hire

Ready to bring an unforgettable bar experience to your next event? Getting your mobile bar service sorted with ABC Hire is a simple, friendly process designed to bring your vision to life, completely stress-free. We’ve fine-tuned our approach to make sure we’re on the same page from the very first chat.

It all kicks off with a quick enquiry. Just get in touch with our team and let us know your event date, a rough guest count, and what kind of party you’re planning. This gives us the basics we need to get the ball rolling.

Your Personalised Consultation

After you reach out, we’ll set up a proper consultation. This is where we get into the good stuff and really figure out what you’re imagining. We’ll chat about themes, what your guests might like to drink, and different menu ideas to make sure the bar is a perfect fit for your event. This chat is what really sets our service apart—we’re not just another supplier; we’re your creative partners.

This isn’t just about hiring a bar; it’s a partnership. Our main goal is to sync up with your event’s vibe and deliver a seamless, memorable experience for you and your guests. We take care of all the little details so you can relax and enjoy the celebration.

Clear Quoting and Locking in Your Date

Once we’ve hashed out the details, we’ll send you a clear, customised quote. There are absolutely no hidden fees. Our proposals break everything down for you—from the staff and the drinks to the glassware and setup—so you know exactly what you’re paying for.

When you’re happy with the plan, the last step is to secure your date. A deposit locks in your booking, and our team officially becomes part of your event crew. From that moment on, we’re working behind the scenes to get every detail organised, proving why we’re the go-to choice for an incredible mobile bar service in South Africa.

Still Have a Few Questions About Mobile Bars?

It’s completely normal to have a few questions floating around, even after seeing all the benefits. We get it. To help you feel 100% confident, we’ve put together answers to some of the most common things people ask us.

One of the first things on everyone’s mind is cost. You’ll be happy to know that hiring a mobile bar is often much more budget-friendly than you might think, especially when you compare it to the high markups you find at most venue bars. Our packages are straightforward and transparent – you only pay for what you actually need, with no nasty surprises or hidden fees.

Then there’s the legal stuff, like licensing. With ABC Hire, you can relax completely. We are fully licensed and insured, which means we handle all the paperwork and legal requirements for serving alcohol at your event. You’re completely covered, so you can just focus on your guests and have a good time.

Can You Customise the Bar Appearance?

Of course! This is one of the best parts. We can absolutely tailor the look of the bar to fit your event’s theme perfectly. Whether you’re planning a rustic farm wedding or a polished corporate function, we’ll work with you to make sure the bar adds to your decor instead of just being a place to get drinks.

A lot of people think mobile bars are just for huge, outdoor events. But the truth is, our setups are incredibly flexible. We can adapt them for indoor venues, small garden parties, and just about anything in between.

What If My Guests Don’t Drink Alcohol?

We believe everyone at the party deserves a fantastic drink in their hand. That’s why we always include a brilliant selection of non-alcoholic options. We go way beyond just a few soft drinks and create genuinely delicious, handcrafted mocktails. This way, all your guests feel included, and your designated drivers will be just as impressed with their drinks as everyone else.


Ready to give your guests a drinks experience they won’t forget? ABC Hire provides a professional, fully customisable mobile bar service that takes care of every last detail. Contact us today to get a personalised quote and secure your date!

Your Guide to a Wedding with Arch in South Africa

A wedding arch is so much more than just the latest trend. It’s a powerful statement piece, the one element that truly frames the most important moment of your entire ceremony. An arch has this incredible ability to transform any space—from a sprawling Cape Winelands vineyard to a chic Johannesburg rooftop—into a deeply personal, almost sacred, spot for your vows.

Why an Arch Is the Heart of Your Ceremony

Image

Sure, it makes for a beautiful backdrop in photos, but a wedding arch serves a much deeper purpose. It becomes the visual and emotional centre of your ceremony, drawing everyone's gaze to the exact spot where you'll make your lifelong promises. This single structure creates a defined, intimate space, almost like an open-air chapel, focusing all the energy and emotion right on the two of you.

There's also some powerful symbolism at play. Arches have always represented a gateway, a new beginning—what could be more fitting for a wedding day? As you stand beneath it, you’re symbolically stepping through a doorway into your new life together. It’s a touch that creates a memorable and meaningful experience for both you and your guests.

The Rise of the Wedding Arch in South Africa

The explosion in popularity of wedding arches here in South Africa has gone hand-in-hand with our love for outdoor ceremonies. As more and more couples choose our country's stunning natural landscapes for their venues, an arch provides that essential focal point. It complements the scenery, rather than competing with it.

The numbers really back this up. A 2022 survey showed that 37% of outdoor weddings in SA featured an arch. That’s a huge jump from just 22% back in 2015. It's no coincidence that this happened as outdoor venue bookings shot up by 15% over the same time. These days, couples are putting aside 8-12% of their total wedding budget just for ceremony décor, and the arch often eats up nearly half of that. You can find more insights into how wedding trends and budgets are being allocated across the country.

An arch does more than just decorate a space; it anchors the moment. It tells your guests, "This is it. This is the place where our forever begins." It’s the silent witness to your vows and the frame for your first kiss as a married couple.

Ultimately, choosing to have a wedding with arch is about creating a deliberate, beautiful, and completely unforgettable setting for the most important promises you will ever make.

Choosing the Perfect Wedding Arch Style

Let's talk about the heart of your ceremony space: the wedding arch. Picking the right one is so much more than just choosing a structure; it's about finding a design that truly captures the soul of your wedding day. Your arch needs to feel like it belongs, whether you're going for rustic charm on a Karoo farm or sleek elegance at a Cape Town city venue.

A great place to start is by looking at your venue. What's the existing vibe? A raw, wooden arbour draped in flowing fabric just sings in a bohemian or rustic setting. On the other hand, if your wedding is more modern and minimalist, a clean metallic frame—like a dramatic circular moon gate or a sharp hexagonal design—might be the perfect fit.

Matching Your Arch to Your Wedding Theme

Think of your arch as the first big statement your guests will see. The shape alone sets a powerful tone. Traditional square or rectangular arches have a classic, timeless feel, while circular or semi-circular designs often symbolise eternity and unity, making them a huge favourite for modern, romantic ceremonies.

Here are a few ideas to get you started:

  • For the Rustic and Bohemian Bride: You can't go wrong with a wooden triangle arch (often called an "A-frame"). It looks absolutely stunning styled asymmetrically with pampas grass, dried palms, and a few magnificent king proteas.
  • For Timeless Elegance: A classic four-post arbour or a simple curved design is pure sophistication. Imagine it adorned with lush white roses, soft greenery like eucalyptus, and delicate, draping fabric.
  • For the Modern and Minimalist Couple: This is where sleek metal structures shine. A gold hoop, a black hexagonal frame, or even a clear acrylic "ghost" arch can look incredible. Decorate it sparsely with just a few perfect orchids or calla lilies for a high-impact, low-fuss look.

We've seen the arch become a true centrepiece in South Africa. In fact, there's been a documented 25% rise in outdoor ceremonies featuring prominent floral or wooden arches between 2015 and 2023. This goes hand-in-hand with a growing love for sustainable design, with demand for locally sourced blooms like proteas and fynbos shooting up by 40% in the same period. You can read more on how wedding arch trends have evolved.

To help you visualise the options, here's a quick comparison of some popular arch styles and what they're best for.

Wedding Arch Style Comparison

Arch Style Best For Theme Common Materials Popular Floral/Decor
Classic Square/Arbour Traditional, Elegant, Garden Wood, Metal Roses, Peonies, Eucalyptus, Draping Fabric
Circular "Moon Gate" Modern, Romantic, Bohemian Metal (Gold/Copper), Wood Asymmetrical florals, Pampas Grass, Greenery
Hexagonal Arch Geometric, Modern, Industrial Metal (Black/Gold), Wood Minimalist florals, Dried Palms, Orchids
Triangular "A-Frame" Rustic, Bohemian, Free-Spirited Raw Wood, Birch Proteas, Fynbos, Macrame, Asymmetrical sprays
Driftwood Arch Beach, Coastal, Natural Natural Driftwood Shells, Soft Linens, Air Plants, Tropical Foliage

This table is just a starting point, of course. The real magic happens when you start mixing and matching to create something that's uniquely yours.

Infusing Local South African Flair

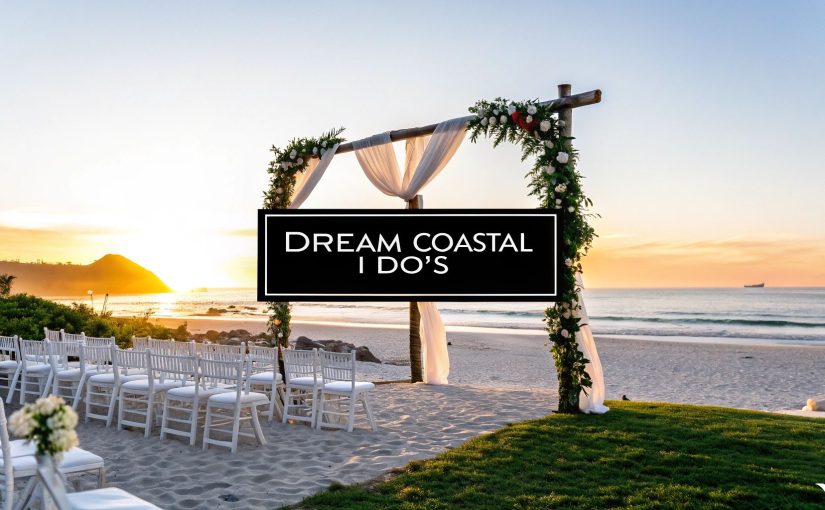
No matter which style you lean towards, bringing in local elements is what will make your wedding with arch feel distinctly South African. Picture a rustic wooden frame adorned with fragrant fynbos and proteas, perfectly framing a view of the Stellenbosch mountains. Or, for a coastal wedding, imagine a beautiful driftwood arch decorated with delicate shells and soft fabrics catching the sea breeze.

Here’s a little visual inspiration for your ceremony centrepiece.

Image

This just goes to show how simple touches like draping fabric and a few well-placed lanterns can completely transform a structure into a breathtaking focal point.

The most beautiful wedding arch is one that reflects your personality as a couple. Don’t be afraid to mix materials, combine different floral styles, or choose a shape that feels unconventional. Your arch frames your promises—make sure it feels like you.

Ultimately, it’s all about creating a cohesive look that ties your whole ceremony space together. Your arch is the heart of it all, setting the stage for the magical moments ahead.

To Hire or To DIY? A Practical Cost Breakdown

Image

Once you’ve got that perfect wedding arch vision in your head, the next big question is a practical one: do you hire a professional, or do you build it yourself? This decision really comes down to your budget, your timeline, and just how much you want to be involved in the hands-on details.

Both routes can get you a stunning result, but they are worlds apart when it comes to the investment of your time and money.

The Professional Hire Route

Let’s be honest, hiring a professional vendor is the stress-free option. For so many couples, that peace of mind during the hectic run-up to the wedding day is worth its weight in gold. Rental companies and florists take care of everything, from the first design chat to the final teardown after your ceremony.

Hiring an arch here in South Africa usually means you’re getting a full-service package. This is a massive plus, as it completely frees you from worrying about the logistics.

Here’s what you can typically expect to be included in a rental package:

  • The Arch Structure: A high-quality, stable arch in the style you've chosen, whether it's rustic wood or sleek, modern metal.
  • Delivery and Collection: The vendor brings the arch to your venue and, just as importantly, picks it up afterwards. No fuss.
  • Professional Setup: An experienced team puts the arch together safely and securely, right where you want it.
  • Teardown: After you’ve said "I do," they dismantle and remove it, leaving you to get on with celebrating.

When it comes to the numbers, hiring a basic arch structure in South Africa can range from ZAR 2,000 to ZAR 6,000. Once you factor in florals and other decorations, the total cost often lands somewhere between ZAR 5,000 and ZAR 15,000, depending on how elaborate you want to go. It might sound like a lot, but that price covers materials, labour, transport, and expertise, ensuring a flawless result.

Hiring an arch is more than just renting an item; you're investing in convenience and professional execution. It eliminates the stress of sourcing materials, construction, and day-of setup, which is a massive relief for most couples.

Taking the DIY Approach

Building your own wedding arch can be an incredibly rewarding project. It’s a chance to create something deeply personal for your ceremony. But, you have to be realistic about your skills, time, and what you have in the toolbox.

A DIY arch can certainly be cost-effective. You could potentially keep material costs under ZAR 1,500 for a simple wooden design. However, that budget can creep up fast if you need to buy or hire tools you don’t already own.

Thinking about the DIY route? Here’s a practical checklist to consider first:

  • Essential Skills: You'll need some basic carpentry know-how. Think measuring, cutting angles accurately, and securely joining pieces of wood or piping.
  • Necessary Tools: A drill, a saw (a mitre saw is brilliant for getting those angles perfect), a measuring tape, and a staple gun for attaching decor are pretty much non-negotiable.
  • Sourcing Materials: You'll need to research suppliers for quality wood (like pine 2x4s), copper piping, or whatever you plan to use. Don't forget screws, brackets, and maybe some weights for stability.
  • Time Commitment: Be realistic. Building the arch could take up a full weekend. Then you still have to figure out how to transport it and assemble it on-site on your wedding day.

While a DIY arch adds a beautiful, personal touch, it’s worth remembering that other ceremony structures are a different story. Gazebos, for instance, are almost always better to hire due to their complexity. If you want to dive deeper into this, you can learn more about hiring a gazebo for your event and see why some things are just best left to the pros.

Ultimately, the hire-versus-DIY decision comes down to balancing your budget against your available time and your desire for a hands-on project.

Styling Your Arch with South African Flair

An undecorated arch is just a frame; it’s the styling that breathes life and personality into your ceremony’s focal point. This is where you can truly make it your own, weaving in elements that speak to your story as a couple. Moving beyond traditional florals opens up a world of creativity, especially when you start drawing inspiration from South Africa’s rich textures and vibrant culture.

Imagine a rustic wooden arch not just with flowers, but with swathes of elegant fabric catching the breeze in the Cape Winelands. Or picture a modern metal frame adorned with the bold, iconic patterns of Shweshwe fabric, creating a striking visual that honours local heritage. These thoughtful touches are what transform a beautiful structure into a meaningful centrepiece.

Incorporating Local Textures and Flora

South Africa’s natural landscape offers an incredible palette to work with. Think beyond the usual roses and consider incorporating indigenous elements for a look that feels authentic and grounded. This approach connects your wedding with arch directly to the beautiful setting you’ve chosen.

Here are a few ideas to get you started:

  • Indigenous Flowers: You can’t go wrong with the magnificent King Protea, our national flower. Pair it with delicate fynbos, striking pincushions, or silver-leafed Brunia for a bouquet that’s both wild and elegant.
  • Natural Grasses: Pampas grass is incredibly popular for a reason. Its soft, feathery plumes add texture and a dreamy, bohemian feel. Mix it with dried palms for a more modern, structural look.
  • Eucalyptus and Greenery: The silvery-green leaves of eucalyptus (which you might know as "blue gum") provide a fragrant and beautiful base for any floral arrangement, draping beautifully over any arch shape.

We're seeing more and more couples in South Africa blending symbolic meaning with decoration. For instance, arches decorated with indigenous flora like proteas alongside traditional cloths such as Shweshwe fabric are chosen to honour cultural heritage in about 27% of weddings surveyed. In multicultural weddings, particularly in big cities, hybrid arches with both Western-style florals and African artistic elements are used in roughly 35% of ceremonies. You can explore more about what's coming next in floral arch trends for 2025.

Creating a Magical Evening Glow

If your ceremony is set for late afternoon or you plan to repurpose the arch for your reception, lighting is an absolute must. It creates a magical, romantic atmosphere as the sun goes down and the celebration kicks into gear.

Good lighting can highlight the beautiful details of your arch and cast a warm, inviting glow over the entire area, making it a stunning feature well into the night.

Lighting Options to Consider:

Light Type Best For Styling Tip
Fairy Lights Romantic, whimsical, and dreamy themes. Weave them delicately through your flowers or wrap them tightly around the arch's frame for a sparkling effect.
Edison Bulbs Rustic, industrial, or modern aesthetics. Hang them at different heights from the top of the arch for a stylish, warm, and slightly retro vibe.
Uplighting Creating dramatic, colourful effects. Place small, coloured LED uplighters at the base of the arch to light it up from below, adding real depth and drama.

Pro Tip: When securing your decor, especially heavier floral arrangements or lighting, always use more than you think you need. Floral wire and sturdy cable ties will be your best friends. Make sure everything is tightly fastened to prevent anything from shifting or falling, particularly at an outdoor venue where you might have to deal with a bit of wind.

Achieving a Balanced and Beautiful Design

The secret to a stunning arch is balance. Whether you prefer a symmetrical, classic look or a more modern, asymmetrical arrangement, the goal is to create a design that looks intentional and polished from every single angle. Don't forget, your photographer will be capturing this from the front, sides, and even from behind.

Before you get started, take a step back and consider the arch's shape and its surroundings. An asymmetrical design, with a large floral spray on one corner and a smaller one lower down on the opposite side, can look incredibly chic and dynamic. For a more traditional feel, simply mirror your decorations on both sides.

Whatever you choose, just make sure the final result frames you and your partner beautifully without overwhelming the space.

Right, let's get this sorted. Even the most stunning wedding arch can fall flat if you just plonk it down anywhere. The final piece of the puzzle is positioning it perfectly—not just for the photos, but for safety and the whole vibe of your ceremony. Where this beautiful centrepiece ends up matters just as much as what it's made of.

Think of your venue as a stage and your arch as the main event. The first thing you absolutely have to consider is the backdrop. Are you framing a breathtaking view of the Stellenbosch mountains? Or maybe the rolling waves of the KZN coast? The arch should complement the view, not block it. It's a great idea to visit the spot at the same time of day as your ceremony to see exactly what your guests (and your photographer!) will be looking at.

Getting the Light and Environment Just Right

For an outdoor ceremony, the sun is your main spotlight, and its position can make or break your photos. If the sun is sitting directly behind the arch, you and your partner might end up as silhouettes. On the other hand, if it's shining straight into your eyes, you’ll be squinting all the way through your vows. Not ideal.

What you're aiming for is soft, even light on your faces. Have a chat with your photographer beforehand—they are the experts when it comes to light and can give you some brilliant advice on the best orientation. Often, just a slight angle to the sun is all it takes.

Beyond the sun, you need to check out the ground itself. Is it level? An uneven surface can make an arch wobbly and unsafe, which is the last thing you want.

Always, always have a plan for securing your arch, especially if you're in a breezy spot like Cape Town. Talk to your rental company or coordinator about options like sandbags, weights, or stakes to make sure it’s completely stable before anyone arrives.

Working with Your Team of Vendors

Getting this right is a team effort. Clear communication between your photographer, florist, and venue manager is non-negotiable. They all have a part to play in where the arch ends up, so everyone needs to be on the same page.

  • Your Photographer: They need to know the location to plan their shots and check the lighting. They might suggest shifting it slightly to avoid a random dustbin in the background or to catch that perfect golden hour glow.
  • Your Florist: They need to know the final spot to figure out how wind and sun will affect the flowers. It also helps them make sure their arrangements are properly secured to the structure.
  • Your Venue Manager: This person is your on-the-ground expert. They know the property inside and out—where the sprinklers pop up, which spots get blasted by the wind, and where you can find a power source for any lighting. They're your go-to for placing the arch safely and securely.

A quick chat on the day or a detailed email chain with everyone involved can save a world of last-minute stress. This way, when you walk down that aisle, your arch isn't just a pretty backdrop—it's a safe, secure, and perfectly placed frame for one of the biggest moments of your life.

Common Questions About Wedding Arches

Building your ceremony backdrop often throws up a handful of practical queries. Clearing these up early means you’ll glide through final decisions with confidence—and without last-minute panic.

From budgeting to bad-weather back-ups, here’s a closer look at what couples tend to ask when they choose an arch as their focal point.

How Much Does Arch Hire Cost In South Africa

Pricing depends on a few big factors: structure, style and styling. If you go for the basics—a bare frame in wood, metal or acrylic—you’re generally looking at ZAR 2,000 and ZAR 6,000.

Add florals, draping and design flair, and the numbers climb quickly. A fully dressed arch can run from ZAR 5,000 to ZAR 15,000, especially when you pick premium blooms like proteas or long-stem roses.

Before signing off on a quote, double-check whether it includes delivery, installation and pack-down. Those line items can catch you by surprise.

Can I Reuse My Arch At The Reception

Reusing your arch instantly ties your ceremony and reception spaces together. It’s also a clever way to stretch your décor budget. Here are a few crowd-pleasers:

  • Behind The Head Table: Creates a stunning backdrop for speeches and snaps
  • Cake Feature: Frame your dessert display for extra impact
  • DIY Photo Booth: Add props and let guests capture candid moments

Map out the move in advance—whether you enlist your planner, venue team or a couple of trusty helpers.

What Is The Plan For Rain

No matter how perfect the forecast, it’s wise to have a rain strategy. First, chat with your venue about covered options—a patio, hall or marquee.

Next, confirm your arch is easy to relocate or that its décor elements can shift indoors without wilting. Some fabrics and flowers don’t take kindly to moisture, so ask your florist for hardy alternatives.

Finally, if you end up under a marquee, make sure the ground stays firm. Mud underfoot is no friend to any precious focal point.


Ready to find the perfect arch or other essential hire items for your special day? ABC Hire offers a wide range of high-quality event furniture and decor to bring your wedding vision to life in Cape Town and beyond. Explore our collection at https://abchire.co.za.

Cape Town Bar Tables and Chairs Event Guide

Picking the right bar tables and chairs for your event in Cape Town is about so much more than just giving people a place to sit. It’s about creating an atmosphere. Think of them as your secret weapon for shaping how your guests interact, defining the layout of your space, and setting the perfect tone from the get-go.

Why Bar Furniture is the Foundation of Great Event Design

Imagine your event space as a blank canvas. Sure, things like lighting and décor add the colour and flair, but it’s the bar tables and chairs that create the fundamental structure. They subtly guide how people move, where they decide to gather, and how comfortably they can socialise. Nailing this foundation is always the first step to pulling off a seamless and memorable day.

It all comes down to context. A high-powered corporate networking event at the Cape Town International Convention Centre calls for a totally different setup than, say, a laid-back beach wedding in Camps Bay. The first might need sleek, minimalist poseur tables to encourage people to stand and mingle, while the wedding could use rustic wooden high-tops to create cosy little seating pods for guests to chat.

Matching Furniture to Your Event’s Goal

The real aim is to make sure your furniture choices support what you’re trying to achieve with your event. It’s worth thinking about a few key functions:

  • Getting People Talking: High-top tables are natural social hubs. They give guests a casual spot to rest their drinks and strike up a conversation, without the formal feel of a traditional dining table.
  • Making the Most of Your Space: Bar-height furniture generally has a smaller footprint. This is a game-changer in popular but often tight Cape Town venues, letting you fit more guests in comfortably.
  • Setting the Vibe: The material, colour, and style of your furniture are instant communicators. Sleek metal gives off a modern, industrial vibe, while warm wood makes a space feel rustic and welcoming straight away.

The right furniture doesn’t just fill a room; it directs the energy within it. It acts as an unspoken host, guiding guests to connect, relax, and enjoy the experience you’ve carefully planned.

The growing demand for quality event rentals isn’t just a hunch; it’s a clear trend in the local market. This just goes to show how crucial well-designed, functional furniture has become for creating amazing event experiences. You can read more about the South African furniture market trends on Fortune Business Insights.

At the end of the day, your choices should make your guests comfortable and help the event flow naturally from start to finish.

Exploring Different Types of Bar Tables and Stools

When you’re planning an event, it’s easy to lump all bar tables and chairs into one category. But that’s like saying all shoes are the same. In reality, just like you wouldn’t wear hiking boots to a wedding, different bar furniture setups serve very different purposes. Getting this right is the secret to creating social spaces that feel just right for your guests here in Cape Town.

Your options really come down to a few key styles. You’ve got your classic bar tables, the more compact poseur tables, and larger high-top tables. Each one brings something unique to the table (pun intended!), shaping the atmosphere and how your guests interact.

Here’s a quick look at some of the most popular styles you’ll find available for hire.

Image

As you can see, the visual differences are clear—from sleek, modern lines to more rustic, traditional looks. Each design helps define the feel of a space before a single guest arrives.

Tables That Shape Guest Interaction

Think of a poseur table as a social hub, a “watering hole” for your event. These are your taller, smaller tables (usually around 106cm to 110cm high) designed for standing around. They’re absolutely perfect for networking events or cocktail hours because they encourage people to move, mingle, and drift between conversations.

A high-top table, on the other hand, is more like a “mini-lounge.” It’s still bar-height, but it’s larger and built to comfortably seat two to four people. This is how you create those intimate little pockets where small groups can settle in for a proper chat without needing a full dining table.

This kind of functional variety is the bread and butter of the furniture hire world. The South African furniture market has found its footing at around USD 2.3 billion in recent years, and a huge chunk of that comes from the hospitality industry. Event planners rely on versatile pieces like these to build adaptable, welcoming spaces. You can dig deeper into these furniture market insights from Future Market Insights if you’re curious.

Choosing the Right Seating

The chairs you choose are just as crucial as the tables. They dictate comfort and control the flow of your event. The main decision you’ll face is whether to go for stools with or without back support.

Your choice of seating sends a clear signal to your guests. Backless stools say, “Stay for a quick chat,” while high-back chairs invite them to “Settle in and get comfortable.”

Let’s look at the two most popular options:

  • Backless Bar Stools: Sleek and space-efficient, these are your go-to for short-term use. They tuck neatly under tables, making them ideal for high-traffic areas where you want to keep the energy up and encourage a more dynamic, standing-room feel.
  • High-Back Bar Chairs: When you expect guests to be seated for a while, comfort is everything. High-back chairs provide that essential support, making them a much better choice for casual dining setups, VIP lounges, or any part of your event where people will be settled for longer.

Bar Table and Chair Pairing Guide

To make things even clearer, here’s a quick guide to help you match the right tables with the right chairs for any kind of event you might be planning.

Table Type Ideal Chair Style Best For (Event Type)
Poseur Table Backless Bar Stools Cocktail hours, networking events, trade shows, and high-traffic areas.
High-Top Table High-Back Bar Chairs Casual dining, VIP lounges, breakout sessions, and intimate social zones.
LED Cocktail Table Sleek, Modern Stools Night-time parties, product launches, weddings, and modern-themed events.
Rustic Wooden High Table Industrial or Tolix Stools Rustic weddings, outdoor gatherings, wine farm events, and barn parties.

Ultimately, the goal is to create a seamless experience. The right pairing doesn’t just look good—it makes your guests feel comfortable and encourages them to connect in the exact way you intended.

Matching Materials and Finishes to Your Theme

Think of the materials you choose for your bar tables and chairs as the key ingredients in a recipe—they completely define the final flavour of your event. Wood can whisper rustic charm, metal gives off a cool industrial edge, and sleek acrylics create a clean, modern feel. Getting it right is about more than just aesthetics; it’s about telling a consistent story that your guests can see and touch from the moment they walk in.

The material really does set the tone. A beautiful reclaimed wood bar table at a Stellenbosch wine farm wedding, for example, just feels right. It ties the furniture into the earthy, authentic atmosphere of the vineyards. In the same way, polished chrome or black metal bar tables and chairs would be the perfect fit for a slick tech launch at the V&A Waterfront, reflecting a modern and forward-thinking brand.

Wood for Warmth and Rustic Appeal

There’s a reason wood is such a classic choice. It brings an organic, welcoming warmth that’s incredibly versatile. From deep mahogany for a sophisticated indoor event to light, weathered pine for a relaxed beachside gathering, wood can be styled to suit almost any theme you can imagine.

It’s an excellent go-to for events aiming for a comfortable and inviting atmosphere. Here in Cape Town, you’ll find great rental options like these:

  • Reclaimed Wood: Perfect for rustic, bohemian, or eco-conscious themes. It brings a real sense of history and character to the space.
  • Dark-Stained Hardwoods: Ideal when you want to create a more formal or luxurious feel, perhaps for a gala dinner or a corporate awards evening.
  • Light-Coloured Pine or Oak: A brilliant choice for casual, daytime events or those with a laid-back Scandinavian or coastal vibe.

Metal for Modern and Industrial Styles

If your event calls for a sharper, more contemporary look, metal is your best friend. It’s durable, sleek, and makes a strong visual statement. Metal furniture often has a lighter frame and a smaller profile, making it a seriously practical option for maximising space in tighter venues.

Choosing a material is a sensory decision. The cool, smooth feel of metal or the textured grain of wood communicates your event’s personality before a single word is spoken.

The finish on the metal can completely alter the mood. Brushed aluminium, for instance, offers a soft, modern feel, while powder-coated black steel gives you that bold, industrial look that pairs so well with exposed brick or concrete venues. For a bit of glam, polished chrome or gold finishes add an instant touch of luxury, perfect for celebratory parties or high-end product launches.

Acrylics and Plastics for a Minimalist Touch

For a truly clean and almost futuristic aesthetic, you can’t go wrong with acrylic or high-quality plastic furniture. These pieces often come in transparent or bold, solid colours, creating a wonderful sense of lightness and space. Those clear ‘ghost’ chairs and tables are fantastic for small venues because they don’t visually clutter the room.

This style is a perfect match for modern art gallery openings, minimalist weddings, or any event where you want the decor, lighting, or the venue’s architecture to be the main attraction. The clean lines of these bar tables and chairs ensure they complement your theme without ever overpowering it.

How to Perfect Your Event Layout and Spacing

Image

Getting the layout of your bar tables and chairs right is a bit like directing traffic at a busy intersection. When it’s done well, everything just flows. People move, mingle, and find their space without a second thought. But get it wrong, and you create jams and awkward dead zones.

The secret is to stop thinking about furniture and start thinking about pathways. A classic rookie error is to underestimate just how much room people actually need. A cramped layout can really kill the vibe, making your guests feel trapped rather than free to enjoy themselves.

Mastering Key Measurements

While every event space is different, there are a few golden rules that will keep you on the right track. For a start, the sweet spot for comfort is a height difference of about 25-30 cm between the bar stool seat and the tabletop. This gives everyone enough legroom without making them feel like they’re reaching for their drinks.

But the real game-changer is the space around the furniture.

  • Main Walkways: These are the high-traffic arteries of your event space. Keep them clear and wide – at least 1.2 to 1.5 metres. This is enough for two people to pass comfortably and for catering staff to get through without any hassle.
  • Between Tables: When you’re setting up clusters of bar tables and chairs, give them some breathing room. A minimum of 90 cm between each table is essential so guests can pull out their stools without bumping into the person behind them.
  • Social Zones: Don’t just dot individual tables around. Group three or four poseur tables together to create a natural hub for mingling. It’s amazing how this simple trick encourages people to connect.

A great layout doesn’t just accommodate guests; it anticipates their needs. It gives them the freedom to move, connect, and enjoy the atmosphere without ever feeling restricted by the furniture.

Planning for the Cape Town Climate

Here in Cape Town, we live for our beautiful outdoor venues. But that means you have to plan for the elements. Whether it’s a blazing sun or a gusty southeaster, your furniture placement needs to be smart.

You might need to factor in extra space for shade solutions, which can impact your entire layout. For some practical tips on keeping everyone comfortable, have a look at our guide on Cape Town umbrella hire.

At the end of the day, a successful layout should feel completely effortless. It guides people naturally, creating a seamless flow that gets conversations started and makes sure every corner of your venue is put to good use.

Styling Your Furniture to Create Atmosphere

You’ve sorted the materials and perfected the layout. Now for the fun part: turning your functional bar tables and chairs into elements that genuinely shape the feel of your event. This is where you get to inject your personality and make the space your own.

With just a few creative touches, you can lift your furniture from being simple hired items to being a core part of your event’s atmosphere. It’s the difference between a room that just has furniture in it, and a space that feels intentional, immersive, and truly memorable for your guests.

From Blank Canvas to Centrepiece

Think of your bar tables as miniature canvases, just waiting for a splash of personality. One of the easiest and most effective ways to do this is with linens. A crisp white linen gives you that classic, clean look, but a bold, colourful runner can instantly bring in your theme or brand colours.

For a bit of local Western Cape charm, why not bring some of our incredible local flora into your centrepieces?

  • Subtle Fynbos Arrangements: A few small, low-profile arrangements of fynbos like proteas or ericas add an authentic local touch without getting in the way or blocking sightlines.
  • Minimalist Greenery: Sometimes less is more. A simple runner of eucalyptus leaves down the centre of a long cocktail table creates a fresh, organic feel that’s perfect for outdoor or rustic-themed events.
  • Candles and Lanterns: For any event running into the evening, the warm, intimate glow from a few candles or small lanterns is unbeatable. It just encourages people to slow down and connect.

The key is to enhance the table, not clutter it. The best centrepieces add beauty and interest while leaving plenty of space for guests to put down their drinks and actually socialise.

Styling is the final layer that connects every element of your event. It’s how you transform a collection of hired items into a cohesive, atmospheric experience that feels uniquely yours.

The Power of Strategic Lighting

Never, ever underestimate the power of lighting. It’s probably the most powerful tool you have for shifting the mood of a space. The right lighting can turn your bar tables and chairs into inviting focal points, drawing guests into social hubs and creating a dynamic vibe as your event moves from day to night.

For a truly magical evening effect, you can’t go wrong with the soft glow of fairy lights. They’re so versatile – wrap them around table legs, drape them overhead, or create a shimmering backdrop. If you want some more ideas for creating that wow-factor, our guide on using a fairy light curtain has some brilliant tips.

By combining creative centrepieces with the right linens and strategic lighting, you ensure your furniture doesn’t just fill the space—it absolutely brings it to life.

Getting Your Furniture Hire Sorted in Cape Town

Hiring furniture for your event should be the easy part, not a source of stress. The secret is having a solid plan for the logistics, right from your first phone call to the final collection after the party’s over. This ensures you get top-quality bar tables and chairs delivered on time, without any nasty surprises here in Cape Town.

First things first, get the delivery and collection details ironed out. Most hire companies will give you a delivery window rather than a precise time, so make sure you know what it is and have someone ready on-site. It’s also a good idea to ask about their policy for tricky venues—you know, the ones with lots of stairs or nightmare parking. Sometimes, they might charge a little extra for the hassle.

Key Questions for Your Hire Company

Before you sign on the dotted line, you need clear answers to a few non-negotiables. A quick chat about these points can save you from hidden costs and a whole lot of drama down the line.

  • Damage Waivers: What exactly does the damage waiver cover? You need to know what they consider normal wear and tear versus what you might have to pay for if a guest gets a bit too enthusiastic.
  • Payment Terms: How much is the deposit, and when is the final balance due?
  • Cancellation Policy: Life happens. What’s the plan if your event date has to shift or, worst-case scenario, gets cancelled?

Getting straight answers on the logistics is every bit as important as picking furniture that looks good. It’s what makes for a smooth, stress-free hire experience.

Finally, take a moment to think about the overall vibe. While you’re sorting out your tables and chairs, you might realise that a few relaxed seating areas could really complete the atmosphere. For some great ideas on comfy, casual seating, have a look at our guide on Cape Town bean bag hire.

Common Questions About Hiring Bar Furniture

Image

When you’re planning an event, a few questions about bar tables and chairs always seem to pop up. Getting them sorted early on is the key to creating an event space that’s both functional and has that perfect vibe. Let’s walk through some of the most common queries we hear from event planners here in Cape Town.

It’s a simple question, but one that can make or break your event’s flow and your guests’ comfort.

How Many Bar Stools Should I Hire Per Table?

For a standard round cocktail or poseur table, three to four stools is the magic number. This gives everyone enough personal space to pop their drink down and chat comfortably without feeling like they’re all crammed together.

If you’re looking at longer, rectangular high tables, you’ll want to think a bit differently. A good guideline is to allow about 60 cm of space for each person. This makes sure there’s plenty of elbow room, whether guests are grabbing a bite or networking.

What Is the Difference Between a Bar Table and a Poseur Table?

You’ll often hear these terms used interchangeably in the events world, but there’s a small difference that’s good to know.

A ‘poseur table’ is generally the smaller, taller table (around 110cm high) that’s perfect for guests to stand around and mingle. A ‘bar table’ can be a broader term that also covers those larger high-tops designed to actually seat two to four people on stools.

It’s always a good idea to double-check the exact dimensions with your hire company. Just confirming the furniture matches your vision can save you from any layout headaches on the day.

Should I Choose Stools With or Without Backs?

This really comes down to the style of your event and how long you expect your guests to be sitting.

For something like a high-energy cocktail hour where people are moving around, backless stools are ideal. They encourage mingling and take up less physical and visual space.

But, if you’re setting up a casual dining area or a VIP lounge where guests will be settled for a while, stools with backs are a must. That extra support and comfort make all the difference, encouraging people to relax and stay a while.

How Far in Advance Should I Book Furniture in Cape Town?

Cape Town’s peak season, which usually kicks off in November and runs through to March, gets incredibly busy. For big weddings or corporate functions during this time, you’ll want to book your bar tables and chairs at least two to three months in advance.

For smaller events or if you’re planning something in the off-season, you might be okay with three to four weeks’ notice. That said, booking early always gives you the best selection and peace of mind.


Ready to create an unforgettable atmosphere at your next event? ABC Hire offers a premium selection of bar tables, chairs, and other essential event furniture to bring your vision to life in Cape Town. Explore our collection and get a quote today at https://abchire.co.za.

A Guide to Plinth for Hire in South Africa

Ever noticed how an empty corner or a flat display can make an event space feel a bit… unfinished? A plinth for hire is often the secret weapon event stylists use to bring structure, focus, and a touch of class to any room. They’re surprisingly versatile, turning an ordinary setup into something truly special.

How Plinths Elevate Your Event Design

Image

Don’t just think of a plinth as a stand. It’s a powerful design tool that tells your guests exactly where to look. Here in Johannesburg and Cape Town, we see designers use them all the time to create a visual journey, guiding people through a venue without saying a word.

A single, perfectly placed plinth can transform a wedding cake into an absolute showstopper. Or, imagine a series of plinths at different heights for a product launch—suddenly, your items look like they belong in a high-end gallery. Their real power is in their simplicity and the instant dimension they add to a space.

Creating Memorable Moments

At the end of the day, you want your event to leave a lasting impression, and the small details are what people remember. Plinths are brilliant for this.

  • They add vertical interest: By breaking up flat, horizontal lines, plinths make a room feel more dynamic and professionally styled.
  • They highlight the important stuff: Whether it’s a stunning floral arrangement or a new product, a plinth ensures your key elements get the attention they deserve.
  • They tie your theme together: The right choice—be it rustic wood or a sleek, modern acrylic—can pull your whole look together, reinforcing the event’s theme and vibe.

When you elevate key features, you’re not just filling a space. You’re carefully crafting an experience for your guests, making every detail feel intentional and special.

This thinking isn’t just for formal displays, either. Even casual lounge areas can be elevated with thoughtful decor. Our guide on stylish bean bag hire in Cape Town is full of ideas for creating settings that are both comfy and chic. Ultimately, using a plinth for hire helps you set the stage for those moments people won’t forget.

Choosing the Perfect Plinths for Your Event

Feeling a bit lost in the sea of plinth hire options? You’re not the only one. The real magic of a stunning event often comes down to getting these small, but crucial, details just right. Choosing the perfect plinth isn’t just about what looks good; it’s about finding the right material, shape, and size to bring your entire vision to life.

Matching Plinths to Your Event Style

Let’s talk materials. A sleek, white acrylic plinth can give you that modern, clean feel—perfect for a high-end product launch or a minimalist wedding. If you’re going for a more rustic vibe, a wooden plinth adds warmth and texture that’s brilliant for a bohemian-themed celebration or displaying organic products.

The shape of the plinth also sets the tone. Square or rectangular plinths have a contemporary, structured look, while the classic round plinths create a softer, more elegant feel. Don’t be shy about mixing and matching different shapes and heights to create some visual interest.

A great trick I’ve used many times is creating a set of staggered-height pedestals for a dessert table. It instantly transforms a simple spread into a dynamic, multi-level masterpiece that really draws guests in. It’s so much more engaging than just lining everything up on a flat surface.

On the other hand, a single, tall, dramatic plinth can make a massive statement at your venue’s entrance. Pop a breathtaking floral arrangement or a welcome sign on it, and you’ve immediately set a sophisticated tone and created a natural focal point.

It’s not just anecdotal, either. We see these trends in the data from local event planners. A recent survey showed that while a versatile 62% of clients go for classic white plinths, a solid 38% are now choosing bold coloured or metallic finishes to make a statement. In Johannesburg, corporate event planners often lean towards practicality, with around 70% picking low to mid-height plinths for easily accessible product displays. You can get more details on these industry preferences by exploring some white plinth hire insights.

The goal is simple: select plinths that not only complement your theme but also serve a clear purpose—whether that’s creating drama, guiding guests, or making your key items pop.

Plinth Style Guide for Popular Event Themes

To make things a bit easier, I’ve put together a quick guide to match plinth styles with common event themes. It’s a great starting point for figuring out what might work for you.

Event Theme Recommended Plinth Style Best For Showcasing Pro Tip
Modern & Minimalist White or black acrylic, square or rectangular shapes. Sculptures, high-end products, simple cakes. Use staggered heights to create clean, architectural lines.
Romantic Wedding Round plinths, mirrored or soft pastel colours. Floral arrangements, wedding cakes, welcome signs. A mirrored plinth can reflect light beautifully and make a space feel larger.
Bohemian / Rustic Natural wood, textured finishes, organic shapes. Artisan foods, handcrafted decor, plant displays. Don’t be afraid of imperfections; a slightly weathered wood finish adds character.
Corporate Launch Sleek metallic (gold, silver), branded colours, geometric shapes. New products, awards, interactive touch-screens. Custom-wrap a plinth with your company logo for maximum brand impact.

This table should help narrow down your choices and give you a clearer direction based on the look and feel you’re aiming for.

Navigating the Plinth Hire Process

Image

Finding the right plinth for hire should be one of the easier parts of your event planning, but a few small details can make a huge difference. Knowing what to ask and when to book will save you from any last-minute stress.

Your first step is to track down a few reliable suppliers, whether you’re in Johannesburg, Cape Town, or Durban. A quick search will give you plenty of options, but it’s the follow-up questions that really matter.

Don’t just ask for a price—ask for the total cost. Make sure to clarify delivery and collection fees, as these can sneak up on your budget. It’s also wise to get the details on their damage policy. What happens if a plinth gets a nasty scratch or takes a tumble during your event?

Booking and Budgeting Your Plinths

Timing is everything, especially during South Africa’s peak event seasons. The stretch from September to December gets incredibly busy with weddings and corporate year-end functions. If your event falls in these months, you’ll want to book your plinths at least two to three months in advance to be safe.

When it comes to cost, the local market is pretty consistent. You can generally expect to pay between R250 to R450 for plinth rentals, depending on the piece or set. For example, a classic set of three round plinths might go for around R450, while you could find a four-piece set of silver square plinths for as little as R250. This gives you a bit of flexibility to find something that fits your budget.

The most important thing is to have a clear, open conversation with your supplier. A good rental company will happily break down every cost, from delivery charges to potential damage waivers, so you can budget with total confidence.

Finalising the Logistics

Once you’ve picked your supplier and they’ve confirmed your items are available, it’s time to nail down the logistics. Your rental agreement should clearly outline the hire period, with exact dates and times for both drop-off and collection.

Before you sign on the dotted line, run through these final checks:

  • Setup Options: Do they just drop the plinths off, or will their team help with setup? If you’re planning an elaborate display, having an extra pair of hands to position everything can be a lifesaver.
  • Venue Access: Double-check the delivery window with your venue and pass this info on to the hire company. Make sure there’s clear access for their team to avoid any headaches on the day.
  • Contingency Plans: What’s their policy on last-minute changes? It’s good to know if you can add or remove items from your order closer to the event date.

Getting these practical points sorted ensures a smooth ride from your first enquiry all the way to post-event collection. A well-organised hire process is just as crucial as the decor itself—much like making sure you’ve got proper cover for an outdoor event. If you are planning something outside, you might want to check out our guide on choosing a gazebo for hire.

Time to Style: Getting the Most Out of Your Plinths

Image

You’ve sorted out your plinth for hire, and now the really creative work begins—making them look absolutely incredible. This is where you get to move beyond simple function and start creating a real atmosphere. Trust me, the secret to a professional-looking display often comes down to just a few clever design tricks.

One of the easiest yet most effective techniques is simply playing with different heights. Don’t just line up plinths of the same size. Instead, think about creating a dynamic, multi-level arrangement that draws people in.

Imagine a dessert station: you’d place the main wedding cake on the tallest plinth, letting it be the hero, and then surround it with smaller treats on shorter plinths. This one small change guides the eye and makes the whole setup feel more generous and visually exciting.

Another go-to concept for stylists is the “rule of three.” For some reason, our eyes just find groupings of odd numbers—especially threes—more appealing and balanced. Try clustering three plinths of staggered heights together to create an instant focal point, perhaps at the entrance or in an empty corner of your venue.

Creating a Polished, Cohesive Look

To really take your plinths to the next level, think about how they fit into the bigger picture. They shouldn’t just float in the space; they need to feel connected to their surroundings. When you pair them with other decorative elements, you create a cohesive, high-end look that feels completely intentional.

A few ideas to get you started:

  • Backdrops are your best friend. Placing your plinths in front of a stunning flower wall, a branded banner, or even a simple fabric drape instantly frames the display and makes it pop.
  • Bring in florals and greenery. Weaving floral arrangements or some trailing greenery around the base of the plinths can soften the hard lines and tie the display into your event’s colour palette.
  • Don’t forget the balloons. An organic balloon garland arching over or around a set of plinths adds a wonderful sense of fun and celebration. It’s a perfect touch for birthdays, baby showers, and product launches.

A well-styled plinth does more than just hold something up. It becomes a key part of a complete visual story, making the entire setup feel more polished and thoughtfully designed.

Lighting is also a game-changer here. A simple, well-placed uplighter at the base of a plinth adds instant drama and sophistication, which is a must-have in a dimly lit venue.

For an even more magical feel, think about pairing your plinths with a shimmering backdrop of tiny lights. If you need some ideas, check out our guide on using a fairy light curtain. These simple additions are what ensure your displays don’t just get seen—they get remembered.

What Goes on Behind the Scenes of a Plinth Hire?

When you decide on a plinth for hire, you’re tapping into a seriously bustling local industry. Those sleek, perfect pedestals that show up at your venue don’t just appear out of thin air; they’re the end result of a massive logistical effort, usually run by passionate small and medium-sized businesses. These are the companies that really power the event decor market here in South Africa.

There’s so much more to it than just taking your booking. Think about the journey of a single plinth: it has to be warehoused, inspected, cleaned, and sometimes even repainted between every single hire to make sure it arrives looking flawless. This dedication to quality is what separates the real pros from the rest.

The Real Economic Engine of Events

The impact these hire companies have goes way beyond just providing beautiful decor. They’re a huge boost to our local economies, especially in the big event hubs.

Just look at Gauteng, which commands nearly 45% of the country’s entire event equipment rental market. With an estimated 10,000 to 15,000 plinths in active rental circulation across the country, you start to get a picture of how essential this service is. You can get a feel for the local plinth rental market and the options available.

Choosing to hire a plinth from a local company means you’re not just renting an object. You’re supporting a whole network of local jobs—from the people in the warehouse and the maintenance crews to the delivery drivers and the team that sets it all up for you.

When you understand this, it’s easier to appreciate the service you’re getting. You’re not just hiring another supplier; you’re bringing a local expert onto your team who is genuinely invested in making your event look incredible.

A Few Final Questions About Plinth Hire

Even after you’ve picked the perfect plinths, a few last-minute questions usually pop up. It’s completely normal, and we hear the same ones all the time. Let’s clear up a few common queries so you can book with total confidence.

One of the first things people ask is about the hire period. A standard rental usually covers a single event, which typically means you have the plinths for 24 to 48 hours. But what if you need them for longer, like for a retail pop-up or a week-long exhibition? Most hire companies are flexible and can offer weekly or even monthly rates, which often work out to be much better value for extended use.

What Happens if a Plinth Gets Damaged?

It’s a valid concern—accidents can happen, especially at a busy event. Every hire company knows this and has a policy in place. It’s something you should always ask about before you book.

Most suppliers expect a bit of wear and tear, so minor scuffs or scratches are usually no big deal. For anything more serious, like a deep crack or a complete break, the repair or replacement cost is typically taken from your security deposit. The key is to have this conversation upfront.

A good rule of thumb is to treat hired items as if they were your own, but make sure you understand the financial side of the damage policy before signing anything. It’s the best way to avoid any nasty surprises after the event is over.

Finally, what about branding? People often want to know if they can customise a plinth with a specific colour or slap a logo on it. The answer is almost always yes! Many suppliers offer branding services as an add-on, letting you wrap the plinths to perfectly match your event’s theme or corporate identity.


Ready to find the perfect display solution for your next event? ABC Hire has a massive selection of high-quality plinths and event furniture ready to bring your vision to life. Explore our collection and get a quote today.

Catering Food Warmers: The Ultimate Guide for Your Event

When you’re catering an event, the moment of truth isn’t just when the food is first cooked to perfection. It’s hours later, when the last guest is served. How do you make sure that final plate is just as hot, delicious, and safe as the first? That’s where catering food warmers come in.

These aren’t just hot boxes; they are the unsung heroes of the catering world. They act as the vital bridge between your kitchen and the guest’s plate, preserving the flavour, texture, and overall integrity of your carefully prepared dishes.

Keeping Your Culinary Creations Perfect

Image

The real challenge for any great caterer is delivering that just-cooked quality, long after the food has left the stove. This is where the right equipment becomes non-negotiable, and today we’re looking at the most critical piece of that puzzle: catering food warmers.

Think of them as the silent guardians of your hard work. They ensure every dish served is a flawless representation of your skill, bridging that crucial gap between preparation and the moment of service.

The Role of Warmers in Modern Catering

Here in South Africa, the events scene is always buzzing. From corporate functions in Johannesburg to beautiful, intimate weddings in the Cape Winelands, the demand for top-tier catering never stops. This has made reliable food holding equipment more important than ever.

In fact, the catering food warmer market in South Africa has grown significantly since 2023, pushed by the expanding hospitality sector. This is especially true with the rise of food delivery and outdoor catering in cities like Johannesburg and Cape Town, where food hygiene regulations are rightly strict.

A food warmer is your guarantee to guests. It promises that the last plate served will be just as delicious, warm, and safe as the first. It’s the silent workhorse that protects your reputation.

More Than Just Heat

At the end of the day, these devices do so much more than just keep food hot. They are fundamental to your success.

  • Food Safety: This is the big one. Keeping food above the 60°C danger zone is crucial for preventing the growth of harmful bacteria.
  • Quality Preservation: The right warmer helps retain moisture and texture. No more dry chicken or soggy vegetables—just food that tastes the way you intended.
  • Operational Efficiency: They give your chefs breathing room. Food can be prepared in advance, which completely streamlines the flow of service during those peak, high-pressure moments of an event.

Of course, for outdoor events, managing the food is only half the battle. You also need to keep your guests comfortable. If you’re planning an event under the open sky, you might find our guide on selecting a gazebo for hire incredibly useful. It’s another key piece of equipment for a successful outdoor gathering.

Choosing the Right Tool for the Job

Stepping into the world of catering food warmers can feel a bit overwhelming at first glance. The easiest way to think about it is like a specialist’s toolkit—you wouldn’t use a hammer to turn a screw. Each warmer has a specific job, and picking the right one is the secret to presenting your food perfectly every single time.

Getting to know the main types is your first step. From the classic look of a chafing dish to the get-up-and-go convenience of an insulated carrier, each one plays a unique role in making an event a roaring success.

The Buffet Workhorse: Chafing Dishes

Chafing dishes are probably what you picture when you think of a buffet line. They’re the cornerstone of any classic setup for a good reason! Their system is simple but incredibly effective: a pan of water is gently heated by a gel fuel source underneath, creating steam that keeps the food warm without drying it out. This method is brilliant for maintaining the perfect texture and moisture in dishes like curries, stews, and pastas.

They are the go-to choice for events where guests will be serving themselves over a few hours, like at a wedding reception or a corporate lunch. Plus, let’s be honest, they just look professional and add a touch of class to any food station.

Image

As you can see, different units are built for different jobs, from traditional chafing dishes for a classic buffet to modern electric models for more controlled environments.

When you’re dealing with a variety of warmers, it helps to see how they stack up against each other.

Your Guide to Catering Food Warmer Types

Here’s a quick breakdown to help you match the right warmer to your specific event needs.

Warmer Type Primary Use Power Source Best For Events Like
Chafing Dish Keeping food warm on a buffet line Gel Fuel / Sterno Weddings, corporate buffets, large parties
Electric Warmer Precise temperature control for various dishes Electricity Indoor events, conference centres, hotels
Heat Lamp Keeping carved meats warm without overcooking Electricity Carving stations, pass-through kitchen areas
Insulated Carrier Transporting hot food to off-site locations None (retains heat) Outdoor events, drop-off catering

Think of this table as your cheat sheet for flawless food service, no matter the occasion.

Power and Precision: Electric Warmers

When you have access to a plug socket and need to hold a specific temperature, electric food warmers are your best friend. They take away the guesswork of open flames, which makes them a safer bet for indoor venues and much easier to manage over a long event. No more swapping out fuel cans!

These handy units come in a few different styles:

  • Drawer Warmers: You’ll find these in any high-volume kitchen, like in a hotel or conference centre. They’re built to hold multiple pans of food, each at its own perfect temperature, making service a breeze during the dinner rush.
  • Countertop Warmers: These are basically the electric version of a chafing dish. They give you that consistent, reliable heat without you having to fuss with fuel canisters.
  • Heat Lamps: Absolutely perfect for a carving station. A heat lamp focuses warmth directly onto cooked meats like a Sunday roast, keeping it deliciously warm without actually continuing to cook it. This preserves the texture right up until the moment it’s served.

Ready to Go: Insulated Carriers for Off-Site Catering

For any caterer on the move, insulated food carriers are non-negotiable. Picture them as heavy-duty, high-tech cooler boxes, but designed to keep things hot for hours on end. They’re an absolute lifesaver for getting food from your kitchen to an event venue without losing a single degree of heat or a bit of quality.

This ensures that even if you’re serving in a marquee in the middle of a field, every dish arrives as hot and fresh as it was when it left the kitchen. It’s all part of the planning—just like you’d look into a cotton candy machine hire for a fun food station, choosing the right warmer is a fundamental part of your event’s success. Once you understand these core types, you’ll be able to confidently pick the perfect tool for any job, making sure your food always wows your guests.

What to Look for Before You Buy or Hire

Image

So, you know the different types of food warmers out there. That’s the first step. But choosing the right one for your event or business is about digging a little deeper into the features that make a real difference.

Whether you’re hiring a unit for a once-off wedding or buying one for your catering company, a few key details will separate a decent piece of equipment from a true workhorse. It’s a bit like buying a car—you know you need to get from A to B, but things like boot space, fuel economy, and handling are what really decide if it fits your life. Same story here.

Control and Consistency

Above all else, a food warmer has one critical job: keep food at a consistent, safe temperature. If the heat fluctuates, you risk ruining the texture of your food and, even worse, compromising safety. This is why precise temperature and humidity controls are absolute must-haves.

  • Precise Temperature Control: Always look for a warmer with a clear, easy-to-use thermostat. This lets you dial in the perfect holding temperature for everything from delicate sauces to crispy fried chicken, making sure you stay safely above the 60°C danger zone without overcooking a thing.
  • Humidity Management: This is the secret weapon against sad, dry food. Models with humidity controls or a simple water pan are brilliant because they add moisture back into the air. This is a game-changer for keeping roasted meats juicy and vegetables looking fresh for hours on end.

A great catering food warmer doesn’t just keep food hot; it creates the perfect environment to preserve the exact flavour and texture you worked so hard to achieve in the kitchen.

Durability and Practical Design

Let’s be honest, the catering world is tough on equipment. Everything gets bumped, moved, and put to the test. The materials and design of your food warmer will have a massive impact on how long it lasts and how easy it is to use, especially when you’re constantly on the move.

Built to Last with Smart Features

You can’t go wrong with high-grade stainless steel. It’s not just for looks; it’s tough, a breeze to clean, and resists rust and corrosion, which is vital for keeping things hygienic.

Think about portability, too. If you’re a mobile caterer, features like strong, lockable wheels and good handles are lifesavers. They make lugging a heavy unit from the van to the venue so much easier and safer for you and your team.

Finally, don’t overlook energy efficiency. It might seem like a small thing, but an efficient model can save you a surprising amount of money over time, particularly if it’s running for hours on end. Look for units with quality insulation and tight seals to stop heat from escaping. It means the warmer doesn’t have to work as hard, saving you on electricity bills and making it a smarter long-term investment.

Let’s be honest, beyond the delicious flavours and beautiful presentation, your number one job as a caterer is keeping the food safe and top-quality. This is where a good catering food warmer becomes your most trusted piece of kit. It’s your main line of defence against all the things that can go wrong when you’re holding food for a few hours.

The biggest threat you’re up against is what we call the temperature danger zone. Food safety laws in South Africa are crystal clear on this: it’s the temperature range between 5°C and 60°C. In this zone, nasty bacteria like Salmonella and E. coli can have a party, doubling their numbers in as little as 20 minutes. Keeping your food consistently above 60°C stops this bacterial growth cold, making sure every single plate you serve is perfectly safe.

Your Game Plan for Safe Food Holding

You can’t just chuck hot food into a cold warmer and hope for the best. To really get it right and guarantee safety, you need a solid, repeatable process. This isn’t optional; it’s the mark of a true professional.

First things first, you have to pre-heat your unit. Always switch your food warmers on at least 20-30 minutes before they’re needed. This gets the inside of the cabinet up to a safe holding temperature, stopping a dangerous temperature drop the moment you load the food in. It’s a small step that makes a world of difference.

Next, you absolutely must check the internal temperature of the food itself—not just the air inside the warmer.

Don’t ever just trust the dial on the machine. A properly calibrated food probe is the only tool that will tell you the truth about your food’s temperature. It’s your proof that you’re doing your due diligence and taking safety seriously.

Using a food probe is simple but so important:

  1. Get it in the Right Spot: Stick the probe into the thickest part of the food, making sure to avoid hitting any bones or big pockets of fat.
  2. Check a Few Places: For bigger dishes, like a large tray of lasagne or a whole roast chicken, check the temperature in a couple of different spots. This ensures the heat is getting all the way through evenly.
  3. Keep a Record: For bigger events, it’s a brilliant idea to log your temperature checks. This gives you a clear record of safety compliance and helps you notice if any of your equipment isn’t performing as it should.

It’s Not Just About Heat, It’s About Quality

While safety is the top priority, quality is what keeps clients coming back. Thankfully, modern food warmers are designed for more than just keeping food hot; they’re built to lock in the texture and moisture that make your food stand out.

Take humidity controls, for example. Many electric models have this feature, and it’s a total game-changer for anything that tends to dry out. By adding a bit of controlled moisture to the air inside, you can keep roasted meats juicy and vegetables looking fresh for hours. If your unit doesn’t have built-in controls, no stress. Just place a shallow pan of hot water on the bottom shelf. It does a great job of creating a similar humid environment, stopping your amazing food from becoming dry and sad. This way, the last guest served gets the exact same quality as the first.

Should You Hire or Buy Your Equipment?

Sooner or later, every caterer—whether you’re just starting out or you’re an established name—hits a fork in the road when it comes to equipment. For catering food warmers, the question seems simple, but the answer is anything but: is it smarter to hire what you need for each event, or is it time to buy your own?

This isn’t just about the upfront cost. It’s a big-picture decision that ripples through your cash flow, storage space, maintenance duties, and your overall flexibility. Let’s walk through the pros and cons to help you figure out the most practical and profitable path for your business.

When Hiring Is the Smartest Move

Hiring your gear is a bit like a pay-as-you-go plan—it’s flexible, low-commitment, and absolutely perfect for certain situations. If you’re a new caterer finding your feet, hiring lets you deliver a professional service without a huge investment draining your startup funds.

It’s also the go-to choice if your event schedule is unpredictable. If you only cater a handful of large functions a year, it just doesn’t make financial sense to have expensive warmers gathering dust in a storeroom.

Think of hiring as the ultimate “try before you buy” experience. It’s your chance to test out different catering food warmers—from electric drawer models to insulated carriers—and see what really fits your menu and workflow before you splash the cash.

Plus, when you hire, you can forget all about maintenance, repairs, and storage. The rental company handles all of that, delivering clean, tested, and ready-to-go equipment exactly when you need it. That convenience is a massive weight off your shoulders, freeing you up to focus on what you do best: the food and your clients.

Making the Leap to Ownership

Buying your own catering food warmers is a big step, but for many businesses, it’s a smart long-term investment that eventually pays for itself. The clearest sign that you’re ready to buy is a steady and predictable event calendar.

If you’re consistently catering several events every month, those hiring costs will start to add up, and fast. At some point, you’ll realise the total rental fees could have easily paid for the equipment outright. Once you own your warmers, every event you book puts more money straight into your pocket, beefing up your profit margins over time.

Having your own equipment on hand also offers a level of convenience and freedom you just can’t beat. You’ll never have to worry about a rental company’s stock levels or delivery times, especially during the busy season. Your gear is always ready to roll at a moment’s notice, giving you the power to say “yes” to those last-minute bookings you might otherwise have to turn down. It puts you in complete control.

Hiring vs Buying: A Smart Decision Framework

Deciding whether to hire or buy isn’t always straightforward. It depends on your business’s current stage, your financial situation, and your long-term goals. To make it easier, we’ve broken down the key factors in this simple table.

Consideration Benefits of Hiring Benefits of Buying
Upfront Cost Low initial investment, preserving cash flow. Higher initial cost, but becomes an asset.
Frequency of Use Perfect for infrequent or seasonal events. Cost-effective for regular, consistent bookings.
Maintenance & Storage No responsibility; handled by the rental company. You are responsible for all upkeep and storage.
Equipment Variety Access to different models for different events. Limited to the models you own.
Availability Dependent on rental company stock. Always available, perfect for last-minute jobs.
Long-Term Value A recurring operational expense. An investment that pays off over time.

Ultimately, the right choice is the one that best supports your operational needs and financial health. Many businesses even use a hybrid approach, owning their most-used items while hiring specialty equipment as needed.

Care and Maintenance for Better Performance

Think of your food warmers as a long-term investment in your catering reputation. Like any mission-critical piece of gear, a little bit of consistent care is what protects that investment and makes sure it performs flawlessly every time you’re on a job.

A simple daily cleaning routine is your first and best line of defence. This isn’t just about looking professional; it’s about food safety and the longevity of your equipment. After every event, let the unit cool down completely, then give all the surfaces—inside and out—a good wipe with a soft cloth and a food-safe cleaner. This simple step stops food residue from baking on, which can eventually damage the surfaces and even the heating elements.

Performing Regular Checks

Beyond the daily wipe-down, setting aside time for periodic checks is a smart move. These quick inspections can help you spot small issues before they blow up into a major disaster mid-service. Getting these checks on the calendar ensures your equipment is always ready to go when you are.

  • Inspect Power Cords: Always have a look over the cables and plugs for any signs of fraying, cracking, or damage. A dodgy cord isn’t just a performance risk; it’s a serious safety hazard.
  • Verify Thermostat Accuracy: Every now and then, pop an oven thermometer inside to check if your warmer’s thermostat is telling the truth. If the dial is set to 70°C, the inside should actually be 70°C.
  • Check Seals and Gaskets: For any enclosed warmers, run your fingers along the door seals. Look for cracks or signs of wear. A tight seal is absolutely crucial for holding temperature and keeping your energy costs down.

Consistent maintenance does more than just make your equipment last longer. It’s your insurance against embarrassing and costly breakdowns, ensuring your gear never lets you down when it matters most.

Looking after your equipment properly also says a lot about your brand. Just as a beautifully strung fairy light curtain can completely transform the mood of a venue, a spotless, well-maintained food warmer signals professionalism and a real attention to detail. This proactive approach keeps your warmers in top-notch condition, ready for any event you throw at them.

Answering Your Top Questions

When you’re in the thick of event prep, the last thing you want is a question mark hanging over your food service. We get a lot of the same queries from caterers and event planners, so we’ve put together some quick, practical answers to the most common questions about keeping food perfectly hot and safe.

What’s the Right Temperature for Holding Food?

This is easily the most critical question, and it all comes down to safety. In South Africa, food safety rules state that hot food must be held at a temperature above 60°C. This is the magic number to stop nasty bacteria from multiplying.

But just because it’s safe doesn’t mean it’s perfect for every dish. Think of 60°C as your baseline. A delicate cream sauce might be happiest right around there, but anything crispy, like fried chicken or samoosas, needs much higher, drier heat to avoid going soggy. The best way to be sure? Don’t just trust the warmer’s dial; always use a good food probe to check the internal temperature of the food itself.

Can I Use Chafing Dishes Outside?

Absolutely, but you need a game plan. Chafing dishes are a staple for outdoor events, but the elements can be a real challenge. Your biggest foe is the wind—it can blow out your fuel source in seconds and rapidly cool the water pan, leaving you with cold food.

To stay ahead, always use wind guards around your chafing fuel. It’s also worth investing in high-quality, long-burning fuel that can stand up to a breeze. If the wind is really howling and you have access to a power point, an electric warmer or a fully insulated food carrier is a much more reliable bet.

A simple trick to stop food from drying out is a caterer’s best friend. If your warmer doesn’t have humidity controls, just slide a pan of hot water onto the bottom shelf. This creates a gentle, humid environment that keeps most dishes moist and delicious.

When you’re using heat lamps for things like a carving station, keep serving times brief to prevent drying. For roasted meats, a great technique is to let them rest in a covered pan with their own juices. This locks in both moisture and flavour beautifully.


Ready to hire the perfect catering equipment for your next event? ABC Hire offers a wide selection of professional-grade food warmers and other essential items. Explore our range today at https://abchire.co.za.

Cape Town Bean Bag Hire for Any Event

Hiring bean bags in Cape Town is one of the easiest ways to inject a bit of instant comfort and style into any event, whether it’s a beach wedding or a corporate chill zone. It’s about taking a space from stuffy and formal to relaxed and social with almost no effort.

Why Bean Bags Are a Game-Changer for Your Event

Image

Let’s be honest, traditional event seating can feel a bit rigid. When you’re planning something in a city as alive as Cape Town, the vibe you create is just as crucial as the guest list. Stuffy chairs often create invisible walls, keeping people in their own small, static circles. Bean bags, on the other hand, are a clear invitation to kick back, relax, and properly settle in.

This small shift in comfort can completely change the social dynamic of your event. Suddenly, that corporate breakout session feels less like a boardroom and more like a creative jam session. The chill-out zone at your wedding reception becomes a real space for guests to mingle and recharge between stints on the dance floor. This casual, welcoming approach encourages people to stick around longer and have more genuine conversations.

Crafting a Vibe They Won’t Forget

The sheer versatility of bean bags makes them a perfect match for Cape Town’s incredibly diverse event scene. Just picture it: bright, colourful bags dotted across the lawns for a Kirstenbosch summer concert, or maybe sleek, white ones creating a chic lounge for a product launch at the V&A Waterfront. They’re not just chairs; they’re a key part of your event’s look and feel.

The boom in the local Cape Town bean bag hire market is all down to this adaptability. As the city’s event calendar fills up with festivals, markets, and corporate functions, planners are looking for flexible solutions that work. The best rental companies now stock a huge range of styles and colours, with options tough enough for outdoor use—from beach parties in Blouberg to elegant gatherings in the winelands. You can see some great examples of local furniture hire for Cape Town events on urbantonic.co.za.

The real magic of using bean bags is how they break down social barriers without a word. They’re an unspoken cue for guests to drop their guard, get comfortable, and just be themselves.

At the end of the day, choosing bean bags is a deliberate move to put your guests’ experience first. It’s a clear signal that you’ve thought beyond the basic logistics and are focused on creating a comfortable, social, and memorable atmosphere people will still be talking about long after they’ve gone home.

Choosing the Right Bean Bag for Your Vibe

Image

Picking the right seating is about so much more than just your favourite colour. Get it right, and the bean bags you choose can completely define your event’s atmosphere, turning a simple space into a memorable experience. The secret is to match the material, shape, and style to your specific occasion and, most importantly, your guests.

Think about the context. A corporate breakout session at the Cape Town International Convention Centre calls for something different than a chilled birthday party in a Newlands backyard. For the business crowd, you’ll probably want sleek, minimalist bean bags in professional tones like charcoal or navy. They look modern and encourage collaboration without feeling too casual.

On the other hand, a sun-drenched festival at Green Point Park or a vibrant kids’ party needs two things: durability and a big splash of colour. This is where options made from sturdy, wipeable materials really shine. Brightly coloured vinyl or heavy-duty outdoor canvas can handle spills and constant use, keeping the energy high and the cleanup easy.

Matching Material to the Moment

A bean bag’s fabric really gives it its personality. Nailing this detail ensures your Cape Town bean bag hire is both beautiful and practical.

  • Indoor Luxury: For an elegant indoor lounge or a cosy wedding corner, go for plush fabrics. Faux suede or soft-touch canvas adds a layer of warmth and sophistication that invites guests to sink in and relax.
  • Outdoor Resilience: Cape Town’s weather can turn on a dime, from brilliant sunshine to the infamous “Cape Doctor” wind. This means outdoor events need tough solutions. Look for water-resistant and UV-protected fabrics to prevent fading and damage.
  • Family-Friendly Fun: When kids are on the guest list, easy-to-clean materials are a non-negotiable. Smooth vinyl or coated polyesters make wiping away sticky fingerprints a completely stress-free task.

Your seating shouldn’t just fill a space; it should enhance it. By considering the practical needs of your venue and the desired mood, you turn a simple bean bag into a powerful design tool that prioritises guest comfort and elevates your theme.

To help you decide, here’s a quick guide matching bean bag styles to popular Cape Town event types.

Bean Bag Selection Guide for Cape Town Events

Event Type Recommended Bean Bag Style Key Features
Corporate Conference Breakout Structured Lounger (e.g., in grey or black) Sleek, professional look; provides back support.
Outdoor Wedding/Garden Party Large Outdoor Canvas Cushion Water-resistant, UV-protected, and comfortable for lounging.
Beach Party (e.g., Clifton/Camps Bay) Classic Round Vinyl Easy to clean sand off, bright colours pop against the scenery.
Kids’ Birthday Party Small, Colourful Vinyl or Polyester Durable, spill-proof, and lightweight for easy moving.
Music Festival / Market Giant Oversized Floor Cushion Can seat multiple people, creates a communal, relaxed vibe.

Choosing the right style makes all the difference in creating the perfect, comfortable space for your guests to enjoy.

The right seating also works beautifully with other decor. For instance, if you’re setting a magical evening scene, think about how your bean bags will look alongside ambient lighting. You can get some great ideas from our guide on creating a stunning atmosphere with a fairy light curtain hire, which pairs perfectly with a cosy lounge setup. It’s all about creating a cohesive, inviting environment where every detail works together.

How to Book Your Bean Bag Hire with Confidence

So, you’re ready to lock in your bean bag hire for that Cape Town event? Fantastic. The whole process should be simple, not a mission. With a bit of prep, you can go from quote to confirmation without any stress. The real trick is having the right info ready before you even pick up the phone or send that first email.

Before you start getting quotes, get your details sorted. You’ll need your event date, the venue address, and a pretty firm guest count. Those are the big three that any rental company will ask for straight away. It’s also smart to think about exactly where the bean bags will go. Are they destined for a polished indoor floor, or are they being set up on grass? This tiny detail can change everything from logistics to the type of bean bag recommended.

Casual, comfy seating is booming right now, and the numbers back it up. The South African bean bag market is expected to grow by 4.93% a year between 2025 and 2030, mostly thanks to the events scene. You can read a bit more about these market trends over at Bonafide Research. What does that mean for you? More choices, but also more competition for bookings. Getting in early is always a good move.

Get These Questions Answered First

Before you commit, you need to ask a few key things. Don’t feel shy about getting into the nitty-gritty; any pro company will be happy to walk you through their process.

  • Delivery and Collection: What are the final costs, all in? Is setup part of the deal, or is it just a drop-and-go service? Also, clarify their standard times for drop-off and pickup.
  • The Damage Policy: You need to know what they consider “damage” versus just normal wear and tear from an event. It’s always best to ask for their policy in writing so there are no surprises later.
  • What About Weather? This is Cape Town, after all. For any outdoor event, ask about their rain policy. Some bean bags are water-resistant, but you absolutely need to know the rules before the clouds roll in.

Booking is really a simple loop: you choose what you need, schedule the logistics, and then just sit back and enjoy the event. It’s that easy.

Image

When you look at it this way, there’s nothing to feel anxious about.

Finalising your booking is about more than just making a payment. It’s your chance to confirm everything in writing—colours, quantities, and all the delivery details. A quick confirmation email that lays it all out is great protection for both you and the supplier.

And don’t forget the rest of your outdoor setup! On a classic sunny Cape Town day, pairing your bean bags with some proper shade is non-negotiable. Our guide to selecting the right Cape Town umbrella hire is the perfect next step to creating a comfy, stylish, and sun-safe lounge area for your guests.

Designing Your Layout for Maximum Impact

Okay, the bean bags have arrived. This is where the magic happens. Anyone can just scatter them around, but a truly great event planner knows that the layout is everything. You’re not just putting out chairs; you’re crafting an experience and designing zones that get people interacting exactly how you want them to.

Take a corporate mixer, for example. The last thing you want is bean bags lined up in neat, sterile rows like a school assembly. Instead, think about creating small, casual circles of three to five bags. This simple trick makes networking feel less stiff and much more natural, encouraging conversation without needing to book a separate breakout room.

Creating Functional and Stylish Zones

Now, if you’re planning a festival or a big outdoor wedding, you need a different strategy. The key here is to create dedicated ‘chill-out zones’. These are your little pockets of calm away from the main hustle and bustle, where guests can catch their breath, have a proper chat, and just recharge. Try grouping clusters of bean bags under a big shady tree or in a quiet corner to carve out a distinct, relaxed area.

And since we’re in Cape Town, we have to talk about the weather. On a beautiful sunny day, shade isn’t a luxury—it’s a necessity. Pairing your Cape Town bean bag hire with some kind of shelter is a non-negotiable. Our guide on choosing the right gazebo for hire has some great tips for creating a setup that looks fantastic while keeping your guests (and the furniture) protected from that harsh sun.

A well-designed layout does more than just provide seating; it directs the flow of your event. Use bean bags to create intimate nooks, vibrant social hubs, or quiet retreats, guiding your guests through different moods and experiences within the same venue.

Don’t forget the practical side of things. Chat with your venue coordinator to lock down the best times for delivery and collection so you’re not tripping over other suppliers. Make sure there’s clear, easy access to wherever you want the bean bags set up, especially if it’s a tricky spot like a beach or a sprawling lawn. A little bit of pre-planning here makes the whole setup process a breeze, giving you more time to focus on what really matters: your guests.

Common Rental Mistakes and How to Avoid Them

Image

Hiring bean bags in Cape Town seems straightforward enough, right? But I’ve seen a few simple slip-ups turn a relaxed vibe into a last-minute scramble. Learning from these common missteps is the easiest way to make sure your event seating is a total win.

One of the biggest mistakes is simply not ordering enough. It’s easy to think one bean bag per person will do the trick, but that’s not how people hang out. You want to create comfy little zones where guests can cluster and socialise. A great rule of thumb I always recommend is to get 15-20% more bean bags than your actual guest count. It gives everyone space and creates that genuine lounge atmosphere you’re going for.

Another classic oversight is forgetting to check in with the venue. You’d be surprised how many places have specific rules about outside furniture hire. They might have a designated drop-off area, strict delivery hours, or even policies about what can be placed on their precious lawns. A quick call to the venue manager beforehand can save you a world of logistical headaches on the day.

Protecting Your Hire and Your Wallet

Forgetting about the weather is a classic Cape Town blunder. That perfect, sunny afternoon can change in a heartbeat when the Cape Doctor starts to blow.

Here’s how to stay ahead of the game:

  • For outdoor events: Always, always insist on bean bags made from durable, water-resistant, and UV-protected fabric. This is non-negotiable. It protects them from a surprise shower and stops them from fading in our strong sun.
  • To avoid nasty stains: If you’re serving food and drinks (especially red wine!), be strategic. Place the bean bags a little bit away from the main food stations to cut down on the risk of spills.
  • For a smooth collection: Before the event ends, decide on a clear, easy-to-reach spot where the bean bags can be stacked. This makes the pickup process incredibly fast and efficient for your supplier, which they will appreciate.

A friendly heads-up: during Cape Town’s peak season from spring through summer, rental demand can shoot up by as much as 30-50%. Leaving it too late not only means you’ll have fewer options, but it often leads to rushed decisions and those little mistakes that are so easy to avoid. You can discover more about local event trends on joyjukes.co.za.

Got Questions About Bean Bag Hire? We’ve Got Answers

Let’s tackle some of the most common questions we get about hiring bean bags in Cape Town. Getting these details sorted early on makes the whole process a lot smoother.

How Much Does It Cost to Hire Bean Bags in Cape Town?

You’re probably wondering about the budget. In Cape Town, you can expect to pay anywhere from R80 to R150 per bean bag, per day. The final price really depends on who you hire from, the quality of the bags, how many you need, and for how long.

A word of advice: always ask for a complete quote. Make sure it includes delivery, setup, and collection fees. The last thing you want are surprise costs cropping up after the event.

What Happens If a Bean Bag Is Damaged?

It happens! A spilled drink, a snag on a sharp object—events can get lively. Every rental agreement will have a damage policy. Small, easy-to-clean spills are usually no big deal, but a tear or a permanent red wine stain will likely mean you’ll be charged a fee for repair or replacement.

Be sure to ask about this upfront. Some suppliers even offer a damage waiver for a small extra fee. It can be a smart move, especially for parties, giving you one less thing to worry about.

Understanding the damage policy isn’t just about avoiding fees; it’s about setting clear expectations with your supplier, ensuring a smooth and professional relationship from start to finish.

How Far in Advance Should I Book My Hire?

The sooner, the better. Cape Town’s event season, which runs from September through to April, is incredibly busy. If you need a large number of bean bags or have your heart set on specific colours, booking 4-6 weeks in advance is a safe bet.

For a smaller, more casual get-together, you might get away with booking a week or two beforehand, but you’ll be chancing it with what’s available.


Planning the perfect event starts with the right furniture. For a comfortable and stylish setup your guests will love, trust ABC Hire. Explore our full range of bean bags and other event essentials at https://abchire.co.za.

Your Guide to a Perfect Fairy Light Curtain Backdrop

A fairy light curtain is so much more than just a string of lights; it’s one of the most effective tools I’ve seen for completely transforming an event space in minutes. With just one simple piece of decor, you can instantly create a magical, warm, and unforgettable atmosphere, turning any plain wall into a show-stopping backdrop.

Creating an Unforgettable Atmosphere with Fairy Lights

Image

Let’s be honest, very few decorations can alter a space as quickly and dramatically as a wall of light. A cascade of warm, twinkling lights is an instant atmosphere creator, making it a bit of a secret weapon for event designers and party hosts across Cape Town.

Forget generic decor; this is about crafting an experience.

The Visual Impact on Event Spaces

The real magic of a fairy light curtain is its versatility. It can be the star of the show or a subtle supporting element that elevates everything else around it.

I’ve seen them used in so many creative ways:

  • Wedding Receptions: Imagine a curtain of lights behind the main table, casting a romantic glow on the happy couple. It creates a dreamy, soft-focus background that looks absolutely incredible in photos.
  • Corporate Events: For a more professional setting, a sleek, cool-white light curtain can frame a stage or create a sophisticated focal point behind a registration desk. It adds a touch of class without being distracting.
  • Birthday Parties: A vibrant fairy light curtain can turn a plain wall into a fantastic photo booth backdrop, encouraging guests to snap and share memories all night. This works especially well when you pair it with other fun rentals. You can get some more ideas in our guide on hiring a cotton candy machine.

A single wall of lights can make a room feel warmer, more intimate, and infinitely more special. It’s often the difference between a simple gathering and a truly memorable occasion.

A Growing Trend in South Africa

This love for atmospheric lighting is a trend that’s really taking off. While specific data on fairy light curtains is hard to come by for the South African market, the demand for decorative, energy-efficient lighting solutions is clearly on the rise.

We’re seeing a huge shift towards more aesthetically pleasing event and home decor. The LED market, which includes these beautiful light curtains, is benefiting massively from this. It’s all about creating a vibe, and these lights deliver every time.

Choosing the Right Fairy Light Curtain for Your Vision

This is where the magic really starts to happen. Picking the perfect fairy light curtain is the first step in bringing your creative vision to life. Get this right, and you set the entire mood for the event. Get it wrong, and it can feel a little… off. It’s about more than just brightness; it’s about matching the light’s personality to your theme and venue.

Light Colour: The Mood-Setter

Think of it like choosing a paint colour for a room.

Warm white lights give off that soft, yellowish glow that just feels cosy and romantic. They’re my go-to for rustic barn weddings, intimate anniversary dinners, or any event where you want people to feel instantly welcome and relaxed.

On the other hand, cool white lights are crisp, modern, and vibrant. These are brilliant for corporate functions, slick birthday parties, or when you’re going for that stunning winter wonderland effect.

Don’t underestimate the power of colour temperature. The choice between warm and cool white will fundamentally alter the mood of your space and how it appears in photographs.

Deciding on a Power Source

The practical side of things can’t be ignored, and your venue’s layout will pretty much decide this for you. Each power option has its pros and cons, so have a good think about where you’ll be setting up.

Here’s a quick rundown of what I’ve learned from experience:

  • Plug-In: This is your most reliable bet for consistent, long-lasting brightness. Perfect for indoor events where you have plenty of wall sockets. You can set them up and forget about them, knowing they won’t dim halfway through the speeches.
  • Battery-Operated: Absolute lifesavers for venues with tricky power situations. Think remote gardens, historic buildings with protected walls, or anywhere you want to avoid a mess of extension cords. They give you total freedom to place lights anywhere.
  • Solar-Powered: A fantastic, eco-friendly choice for outdoor events that start in the day and drift into the evening, like a garden party or a beach celebration. They look incredible alongside other outdoor rentals, like the ones in our guide to Cape Town umbrella hire.

To help you decide at a glance, here’s a simple comparison of the features.

Fairy Light Curtain Feature Comparison

Use this table to quickly compare key features and decide which type of fairy light curtain is best for your event.

Feature Plug-In Battery-Operated Solar-Powered
Best For Indoor events, long durations Tricky venues, outdoor spaces Outdoor day-to-night events
Brightness Strongest & most consistent Can dim as batteries weaken Varies with sun exposure
Portability Limited by cord length Highly portable, no cords Portable, needs sun access
Eco-Friendly Standard energy use Depends on battery type High
Setup Needs nearby power outlets Easiest & most flexible Needs placement in sunlight

Ultimately, the best choice really hinges on your specific venue and how you plan to use the lights throughout your event.

Style and Design Considerations

Beyond the technical stuff, the actual design of the curtain plays a huge part in the final look.

A uniform drop style, where every strand is the same length, gives you a very clean, polished backdrop. It’s fantastic for creating a solid wall of light behind a main table or for framing a stage with a sleek, modern feel.

If you’re after something a bit more whimsical and organic, an icicle-style curtain is perfect. The staggered, varying lengths add a touch of relaxed, bohemian charm. I love using these to create a dreamy, starry-night effect.

It’s no surprise that these lights have become so popular. The global LED curtain lights market was valued at a massive USD 2.17 billion in 2024 and is only expected to keep growing. It just goes to show how much people value beautiful, energy-efficient lighting for their events and homes. You can read more about the growth of the LED curtain lights market on Expert Market Research if you’re interested in the trends.

How to Hang Your Fairy Light Curtain Like a Pro

Right, this is where the magic really starts to happen. Getting the installation right is the key to that polished, professional look, and it saves you from the nightmare of tangled wires and wonky strands. Let’s go through the tools and tricks that seasoned event planners swear by.

First off, get your toolkit ready. You don’t need a huge box of gear, just a few essentials that make all the difference. For most indoor walls, especially at venues where you can’t leave a mark, damage-free adhesive hooks are your absolute best friend. If you’re working with a more rustic vibe—think exposed beams or wooden frames—a handful of clear zip ties or small nails will do the trick. And a measuring tape? Non-negotiable for getting your spacing perfect.

Preparing Your Space for Installation

Before you even think about unwrapping those lights, take a second to prep your surface. Give the wall or window frame a quick wipe down to get rid of any dust. This is a crucial step if you’re using adhesive hooks, as it helps them get a proper grip that’ll last the whole event.

Next, measure the width of the space you want to cover. Then, unroll your fairy light curtain on the floor, making sure to keep the main horizontal wire separate from the vertical strands. Trust me on this one—this simple move prevents a tangled mess and makes the whole process about ten times easier. It’s a small detail that saves you a massive headache.

This basic workflow is your secret to a quick, clean setup. This little infographic breaks down the core steps for a handy visual guide.

Image

Thinking about it as measure, mount, and hang really simplifies things and helps make sure you don’t miss a step.

Mounting Techniques for Different Surfaces

The surface you’re working with will completely change your game plan. You wouldn’t tackle a painted wall the same way you would a delicate window frame.

  • Painted Drywall: This is what you’ll run into most of the time. Use clear, removable adhesive hooks and space them evenly across the top. Make sure you follow the instructions on the packet, especially the bit about waiting before you hang anything, to get a really strong bond.
  • Window Frames: Small, clear hooks work a charm here too. You could also use clear adhesive tape for a super discreet look, just securing the main wire along the top of the frame.
  • Exposed Beams or Archways: This is where zip ties are a game-changer. They’re strong, practically invisible from a distance, and won’t damage the structure.
  • Behind Sheer Fabric: For that soft, dreamy glow, hang your fairy light curtain first, then drape a layer of tulle or organza over it. Use a separate set of hooks or pins to secure the fabric.
Here’s a pro tip: always start hanging from the end closest to your power source. This way, you know for sure that your cord will reach the socket without having to stretch the lights awkwardly or scramble for an extension lead at the last minute.

By picking the right tools and matching your technique to the surface, you’ll guarantee an installation that’s both stunning and secure. A well-hung fairy light curtain looks intentional and elegant, lifting the whole atmosphere of your event from simply decorated to truly magical. Getting this part right sets the stage for everything else.

Creative Styling Techniques for a Breathtaking Display

Image

Right, so your fairy light curtain is up and secure. That’s the groundwork done. But just hanging the lights is like setting the stage; the real magic happens when you start styling. This is where we go beyond the basics and add those creative touches that turn a simple wall of light into an unforgettable centrepiece.

The secret is all about playing with depth and texture. A single layer of lights is pretty, sure, but when you start combining it with other elements, you get that rich, professional look everyone wants. It’s the difference between a nice decoration and a truly immersive experience for your guests.

Layering with Fabrics for a Dreamy Effect

One of the most effective tricks in the book has to be layering your fairy lights with sheer fabrics. Think tulle, organza, or chiffon. These materials catch the light in the most beautiful way, diffusing it to create a soft, ethereal glow that’s incredibly romantic and looks amazing in photos.

Here’s how to nail this look:

  • Hang the lights first: Get your curtain installed right up against the wall or backdrop.
  • Drape the fabric over the top: Use a separate rod or another set of hooks to hang a panel of sheer fabric just a few centimetres in front of the lights.
  • Let it hang loose: Don’t pull the fabric taut. You want it to drape naturally, creating soft folds. A slightly gathered look always works best.

We see this done all the time for weddings and engagement parties. It instantly adds a layer of sophistication and romance to any venue.

Weaving in Greenery and Florals

If you’re aiming for a more organic, bohemian, or rustic theme, you have to bring in some natural elements. Weaving greenery (real or faux) and floral garlands through the strands of your light curtain adds incredible texture and a touch of natural beauty.

Picture a wedding reception with a warm white fairy light curtain as the backdrop for the main table. By artfully weaving some eucalyptus garlands and a few clusters of white roses along the top and down the sides, you create a stunning focal point that pulls the whole room’s decor together. Simple, but so effective.

Pro Tip: Less is often more. The goal here is to complement the lights, not completely cover them. A few well-placed garlands will have a much bigger impact than a dense wall of foliage. You want those lights to twinkle through the gaps for that truly magical effect.

The demand for creative lighting is exploding globally. While specific numbers for the South African market are hard to come by, the smart curtain fairy light market hit a global size of USD 1.21 billion in 2024. That just shows how much people value these kinds of creative lighting options for their events. You can dig deeper into the growth of the smart lighting market on Growth Market Reports.

Creating Thematic Focal Points

Don’t just think of your fairy light curtain as a background—make it the main attraction! By being strategic with where you place and how you style it, you can highlight specific areas and create a genuine ‘wow’ moment for your guests.

For instance, you could:

  • Frame a Dessert Table: Make your cake or sweet treats the undisputed star by placing a shimmering light curtain behind them. It naturally draws everyone’s eyes and creates a picture-perfect spot.
  • Design a “Starry Night” Ceiling: For indoor events with high ceilings, hanging multiple curtains overhead can create the illusion of a sparkling night sky. This works especially well in marquees, which you can read more about in our guide on hiring a gazebo.
  • Build a Grand Entrance: Drape lights around an entryway or arch to welcome guests with an immediate sense of occasion and magic from the moment they arrive.

Right, so you’ve done the hard work, stepped back to admire your masterpiece, and… something’s not quite right. A whole section is dark, or it looks a bit wonky. Don’t stress! This happens to everyone, even us pros.

Think of this as your setup first-aid kit. Most of the little hiccups you’ll run into when hanging a fairy light curtain are surprisingly easy to fix. Let’s tackle some of the most common issues so you can get that perfect glow.

What to Do When a Section of Lights Is Out

It’s the moment that makes your heart sink. You’ve got the curtain hung perfectly, you plug it in, and one long, lonely strand refuses to light up. Before you start thinking the whole set is a dud, take a deep breath and check a couple of things.

First, follow that dark strand all the way up to where it meets the main horizontal wire. Sometimes, during the excitement of unboxing and hanging, one of these little connections gets pulled loose. Give it a gentle but firm push back into place – often, that’s all it needs. If that doesn’t do the trick, have a quick look along the wire itself for any obvious pinches or damage.

  • Check the Connection: Make sure the base of the non-working strand is pushed securely into the main wire.
  • Inspect the Wire: Scan for any little breaks or damage in the thin copper wire.
  • Swap Power Sources: It’s worth a shot! Try a different plug point or fresh batteries just to rule out a power issue.

Fixing Unevenly Spaced Strands

You’ve got them up, but the spacing is all over the place. One gap is wide, the next is narrow, and the whole thing just looks messy. You absolutely do not have to take it all down and start from scratch.

This is an easy one. Most fairy light curtains are designed so you can gently slide the vertical strands along the main horizontal wire. Just unhook the main wire from its mounting points, and manually shuffle the strands left or right until they look perfectly spaced. If you’re a perfectionist, grab a tape measure to get the gap between each strand spot on.

A tiny adjustment here makes all the difference between something that looks DIY and a truly professional installation. Taking a few extra minutes to get the spacing just right is a small effort that pays off big time.

Safely Hiding Cords and Wires

Nothing ruins the magic of a floating wall of light faster than a tangled mess of extension cords snaking across the floor. The goal is to make the lights look effortless, and a huge part of that illusion is hiding how they get their power.

Clear or white adhesive clips are your best friend here. Use them to run the power cord neatly along a skirting board, down a corner, or behind a door frame where no one will see it. If you’re setting up near furniture, even better – just tuck the cord behind a couch or under a rug. For events, we always use gaffer tape that matches the floor colour. It keeps the wires flat, prevents a tripping hazard, and keeps the whole look clean and polished. Get the cords out of sight, and all the attention will stay right where you want it: on your beautiful fairy light curtain.

Your Fairy Light Curtain Questions, Answered

Image

Let’s quickly run through some of the questions we get all the time about using fairy light curtains for events. Getting these details sorted will help you finalise your plans with confidence, knowing your setup will be every bit as magical as you’ve pictured.

How Long Does It Take to Set Up a Fairy Light Curtain?

This can change depending on your setup, but a good rule of thumb for a standard 3×3 metre curtain is to budget around 30-45 minutes. That gives you plenty of time to carefully get the lights untangled, measure and place your hooks properly, and hang the curtain without rushing.

If you’re getting a bit more creative by layering them with fabric or weaving in some florals, you’ll probably want to set aside closer to an hour. The real key here is patience—rushing is when things get tangled and you end up with uneven spacing.

Can I Use Them Outdoors?

Absolutely, but you have to be smart about it and pick the right lights. Not all fairy light curtains are made to brave the great outdoors. If you’re planning an event outside, it’s essential to look for lights with an IP rating (like IP44 or higher), which tells you they’re protected against water splashes.

For an outdoor setup, think about these options:

  • Battery-operated curtains are fantastic for flexibility, saving you the headache of finding an outdoor plug point.
  • Solar-powered lights are a brilliant, eco-friendly choice, especially for events that kick off in the afternoon and run into the evening.
  • If you go with a plug-in model, double-check that the plug and any extension cords are also rated for outdoor use and kept safe from moisture.

Choosing a fairy light curtain specifically designed for outdoor use isn’t just about making sure they work; it’s a critical safety step. Always read the product specs before you hang any electrical decor outside.

What Is the Best Way to Store a Fairy Light Curtain After Use?

Storing them properly is the secret to avoiding a tangled mess next time. The biggest mistake you can make is to just bunch them up and chuck them in a box—you’ll be greeted by a frustrating knot when you pull them out again.

Instead, grab a piece of sturdy cardboard or even a plastic coat hanger. Start by neatly wrapping the main horizontal wire around your cardboard or hanger. After that, carefully wrap each vertical strand on its own or in small, easy-to-manage bundles. This keeps everything organised and ready to go for your next event.

Can a Fairy Light Curtain Damage Walls?

This is a huge concern, especially when you’re in a hired venue. The great news is, with the right tools, you can hang your lights without leaving so much as a scratch. For most painted walls, your best friends are damage-free, removable adhesive hooks.

These hooks are made to hold a surprising amount of weight and then peel off cleanly without ripping the paint. Just make sure you follow the instructions on the packet for putting them up and taking them down—especially the part about letting the adhesive set before you hang anything. A little bit of prep work will keep the venue’s walls looking perfect.


Ready to create a truly magical atmosphere at your next event? ABC Hire offers a stunning range of lighting and decor rentals to bring your vision to life.

Explore our collection and book your rentals today at https://abchire.co.za.

Cape Town Umbrella Hire for Perfect Events

Choosing the right shade is a make-or-break detail for any outdoor event, and working with a professional Cape Town umbrella hire service is the best way to keep your guests comfortable and protected.

You might be planning an elegant cover for a Winelands wedding or need something tough and wind-resistant for a corporate function on the beach. Whatever the occasion, the right umbrella choice really does define your event’s atmosphere and success.

How to Choose the Right Umbrellas for Your Cape Town Event

The secret to a great outdoor event in Cape Town? Making sure your guests are comfortable. That starts with getting the shade just right.

We all know the local climate – brilliant sun one minute, and a surprise visit from the “Cape Doctor” wind the next. This means you have to be smart when picking out your umbrellas. It’s not just about looks; it’s about making sure they’re functional, safe, and create a vibe that feels welcoming.

Your first big decision is the style of umbrella. Each type has its own job and adds a unique feel to your space.

  • Classic Market Umbrellas: Think of these as the reliable all-rounders of event rentals. With a pole right down the middle, they slot perfectly into patio tables or can be dotted across a lawn with heavy bases. They’re brilliant for creating a casual, café-style seating area or just giving individual shade spots at a garden party.
  • Cantilever Umbrellas: When you need wide-open coverage without a pole getting in the way, cantilever umbrellas are the clear winner. Because the base is off to the side, they’re perfect for shading lounge furniture, a kids’ play area, or a buffet station without interrupting the flow of your setup.

Matching Materials and Frames to Your Theme

Once you’ve settled on a style, the materials for the canopy and frame play a massive part in both how they look and how long they’ll last.

A rustic wooden frame could be the perfect touch for a relaxed Stellenbosch farm wedding, giving everything a natural, organic feel. On the other hand, a sleek, powder-coated aluminium frame offers a modern, clean look that’s ideal for a sophisticated corporate launch at a venue overlooking Camps Bay.

The canopy fabric is just as important. High-quality polyester gives you fantastic UV protection and comes in a huge range of colours, which is great for matching your brand or event’s colour scheme. For a more classic and rugged look, heavy-duty canvas is often a favourite, known for being incredibly durable.

Here’s a critical tip for any Cape Town event planner: always ask about wind-resistance. Vented canopies are a non-negotiable. They let gusts of wind pass straight through, which stops the umbrella from turning into a massive, dangerous kite.

Finally, don’t ever underestimate the base. A standard 25kg base might be fine for a sheltered courtyard, but for any spot that’s exposed to the wind, you must insist on 50kg or heavier bases. It’s a non-negotiable for safety. Any reputable Cape Town umbrella hire company will check out your venue and recommend the right anchoring to make sure everything stays put, so you and your guests can just relax and enjoy the day.

Decoding Umbrella Hire Costs and Packages

Figuring out the budget for your event means you need a clear picture of what goes into a Cape Town umbrella hire quote. It’s easy to focus on a simple daily rate, but the real value is often hidden in bundled packages and understanding all the potential costs involved.

For instance, instead of just hiring a single umbrella, many local suppliers offer packages that include chairs, tables, or even stylish lounge furniture. If you’re planning a wedding reception or a corporate chill zone, bundling these items together almost always leads to better savings than hiring each piece on its own. It’s always a good idea to ask for a comparison quote to see which option gives you more bang for your buck.

Proper shade is absolutely essential for enjoying Cape Town’s incredible beaches and outdoor venues, and it’s something your guests will thank you for.

Image

This really brings home the importance of keeping everyone protected from our strong sun, which is the whole point of a quality umbrella hire service in the first place.

Factors That Influence Your Final Quote

There are a few key things that will directly affect the price you pay. Getting your head around these will help you tweak your order to fit your budget without skimping on quality or guest safety.

  • Umbrella Size & Quality: It makes sense that a big 3-metre cantilever umbrella will cost more to hire than a standard 2-metre market umbrella. It’s just a more complex piece of equipment and provides a much larger area of shade.
  • Rental Duration: Most companies will give you a better daily rate for multi-day hires. This is perfect for those weekend-long festivals or extended corporate events where you need cover for more than just a few hours.
  • Logistics Fees: Don’t get caught out by forgetting delivery, professional setup, and collection fees. These are often listed as separate items on your quote and will depend on how far your venue is and how easy it is to access.

My best tip? Always, always ask for an itemised quote. This transparency means no nasty surprises or hidden fees. You’ll see exactly where your money is going and can make smarter decisions about your event setup.

To give you a clearer idea of what to expect, here’s a look at some typical pricing you might find in Cape Town.

Sample Umbrella Hire Pricing in Cape Town

This table breaks down the average daily rental costs for different umbrella types and packages. Remember, these are just estimates, but they’re a great starting point for your event budget.

Item Average Daily Rate (ZAR) Best For
Standard 2.5m Market Umbrella R150 – R250 Small café tables, market stalls, intimate gatherings
Large 3m Cantilever Umbrella R400 – R600 Lounge areas, poolside seating, larger dining setups
Beach Umbrella & 2 Chairs Package R200 – R350 Casual beach parties, picnics, relaxed outdoor events
Full Lounge Set (2 Umbrellas & Furniture) R1,500 – R2,500+ Weddings, corporate events, creating a VIP zone

These prices can obviously shift based on the supplier and the specifics of your event, but it helps paint a picture of the investment needed.

Interestingly, even the cost of casual beach rentals can give us a clue about the local market. On popular spots like Camps Bay, prices are heavily influenced by tourist seasons and the exchange rate. For example, some visitors have mentioned that a package of two lounge chairs and an umbrella might go for around R200, with prices changing based on demand. You can dig into some of these past pricing discussions from visitors on the Cape Town beach rentals Tripadvisor.com forum. It just goes to show that while event hire pricing is more stable, it still operates within a very dynamic local economy.

Managing the Booking and Rental Logistics

A great Cape Town umbrella hire experience really comes down to getting the logistics right. Once you’ve picked the perfect style, the next part is navigating the booking and rental process without a hitch. Honestly, getting this part right is what makes an event feel truly seamless.

First things first, you need to work out exactly how many umbrellas you’ll need. I’ve seen people make the mistake of ordering too many, or worse, not nearly enough.

A good rule of thumb is to plan for one large umbrella (about 3 metres) for every 6-8 guests if they’re sitting down for a meal. If it’s more of a casual cocktail setup where people are standing and mingling, you can probably stretch that to 10-12 guests per umbrella. Don’t forget to factor in your venue’s layout and any natural shade from trees or buildings.

Questions to Ask Before You Sign

Before you commit, it’s so important to have a proper chat with your rental company. Think of it as a quick interview to make sure they’re the right team for your event.

Here are the absolute must-ask questions:

  • Weather Policy: What happens if there’s extreme wind or rain? Do they have a cancellation or postponement procedure? Ask if you can get a refund or a credit for a future date.
  • Damage Waiver: How do they handle accidents? Most reputable companies offer a damage waiver for a small fee, and I always recommend taking it for peace of mind.
  • Payment Terms: Get clarity on the deposit amount needed to secure your booking and find out when the final payment is due. No surprises later!
  • Delivery and Collection Window: Nail down the exact times for drop-off and pickup. You need to make sure this works with your venue’s access times and restrictions.

Sorting these details out upfront saves a world of headaches down the line. It’s all about clear communication, which is just as vital as the quality of the umbrellas themselves.

Always get confirmation that the delivery team will handle the complete setup, including properly anchoring the umbrellas. This is a massive safety issue, especially with Cape Town’s unpredictable winds. It’s definitely not a task you want to be handling yourself on the day.

Coordinating these logistics properly means your shade solution is a beautiful addition to your event, not a complication. It frees you up to focus on the fun stuff, like finalising the menu or maybe even adding something quirky like our cotton candy machine hire. A well-organised rental is one less thing on your to-do list.

Why Supporting Local Cape Town Suppliers Matters

When you sort out your Cape Town umbrella hire, you’re doing more than just getting some shade for your event. You’re actually making a choice that sends ripples through the local community. Opting for a local supplier is a direct investment in the city’s economy and its talented craftspeople.

Image

It’s about supporting the businesses that create proper, skilled jobs right here in the Western Cape, especially in trades like textile manufacturing and metalwork. This keeps the local supply chain strong and makes sure those unique skills don’t disappear.

And let’s be honest, the perks for you as an event planner are pretty significant too. Local companies just get the unique challenges of Cape Town’s four-seasons-in-one-day weather. Their advice is genuinely useful, not just something from a corporate manual.

Direct Benefits for Your Event

Working with a supplier just down the road means you’re getting more than just a product; you’re getting a personal touch. That local connection makes a real difference.

  • Faster Turnaround Times: Got a last-minute change or suddenly realise you need another umbrella? A local team can react way faster than a national chain.
  • Personalised Customer Service: More often than not, you’re speaking directly to the owner or a small, tight-knit crew. They’re personally invested in making your day a success.
  • Access to Unique Products: Many local suppliers have cool, locally-made items that you just won’t find anywhere else, adding a bit of authentic Cape Town flair to your event.

When you choose local, you’re not just renting equipment. You’re backing the local economy and getting a partner who really knows the ins and outs of the city’s event scene.

Cape Town has a surprisingly robust umbrella production scene, which is great for regional manufacturing and jobs. For instance, local manufacturers employ specialist textile workers and supervisors to keep quality high. This creates formal jobs—adding to the 263,000 new positions recorded last year—and keeps local craftsmanship alive and well. You can get a sense of Cape Town’s manufacturing job market on za.indeed.com.

Taking Your Outdoor Event Setup Beyond Just Umbrellas

While a professional Cape Town umbrella hire is the cornerstone of any great outdoor event, crafting a truly unforgettable atmosphere means thinking bigger. The best events I’ve seen are the ones that anticipate what guests need and build a comfortable, stylish, and cohesive environment from the ground up.

Image

This is where complementary rentals really shine. Think about pairing your umbrellas with other functional pieces to create distinct “zones” within your venue. A cleverly placed gazebo, for instance, can establish a dedicated lounge area or a sheltered spot for the bar, separating it from the main dining space under the umbrellas. It’s a simple trick that adds real structure and flow to your event layout.

Creating a Complete Outdoor Experience

To really elevate your setup, consider the entire guest experience, from the heat of the day right into the evening. We all know Cape Town evenings can bring a surprising chill, even after a beautifully warm day.

  • Patio Heaters: I always recommend strategically placed heaters for any event running past sunset. It’s a non-negotiable for keeping guests comfortable so they can keep enjoying the beautiful outdoor setting.
  • Stylish Lounge Furniture: Imagine low couches, ottomans, and coffee tables arranged under a large cantilever umbrella. This immediately invites guests to relax and mingle in a more informal, cosy setting.
  • Gazebos for Versatility: These structures give you more robust shelter and can be used for just about anything, from a food station to a DJ booth. For a few more ideas, you can check out our guide on finding the perfect gazebo for hire.

The goal here is to build an environment that feels thoughtfully curated. When you combine these elements, you create a space that’s both functional and genuinely inviting—so much more than just basic shelter.

A smart rental strategy isn’t just about shade; it’s about anticipating every guest’s need for comfort and creating a seamless, enjoyable experience they’ll be talking about long after the party ends.

This integrated approach is definitely catching on, with the event furniture hire market growing right alongside tourism. It’s common now for local suppliers to offer gazebo rentals at daily rates, often with great discounts for longer periods—like 15% off for a two-day hire. This just shows the demand for complete outdoor solutions that boost both the look and practicality of event spaces. You can even learn more about specific gazebo rental options from CapeUmbrellas.com.

Your Cape Town Umbrella Hire Questions Answered

As you put the finishing touches on your event plans, a few practical questions always pop up. When it comes to providing shade—a non-negotiable for any Cape Town event—getting clear answers on the details is crucial for peace of mind.

Let’s run through some of the most common queries we get from event planners about umbrella hire.

What If an Umbrella Gets Damaged?

It happens! But don’t worry, rental companies are well-prepared for the occasional mishap. Your rental contract will have a clear damage policy, which usually involves a security deposit or an optional damage waiver. Make sure you read and understand this part before signing.

For a minor scuff or a small tear, you’ll likely face a small repair fee. For something more serious, like a snapped frame or a lost umbrella, you could be responsible for the full replacement cost. A good tip is to always inspect the umbrellas with the delivery team when they arrive and point out any pre-existing issues. A quick photo on your phone can save a lot of hassle later.

How Far in Advance Should I Book?

If your event falls within Cape Town’s peak season (that’s November through to March), we strongly recommend booking your umbrellas 4-6 weeks in advance. This is especially important for larger functions or if you have your heart set on a specific style, as popular items get booked out fast.

Planning a smaller get-together or an event in the off-season? You can usually get away with a 2-3 week lead time. Still, booking early never hurts—it’s one less thing to worry about and makes the entire process smoother.

Here’s a pro tip for anyone hosting at a notoriously windy spot like Clifton or Camps Bay: tell your rental company exactly where the event is. They need to supply heavy-duty, wind-resistant umbrellas with the right bases (often 50kg or more) to keep everyone safe.

Most professional hire companies will also manage the delivery, setup, and collection for you, though this might appear as a separate charge on your invoice. It’s well worth confirming this full-service option, as it saves you a ton of time and ensures their experienced team installs everything correctly and safely.


Ready to create the perfect shaded space for your event? ABC Hire offers a premium selection of umbrellas and event furniture to make your day a success. Explore our options and get a quote today at https://abchire.co.za.

📍 Cape Town + Winelands