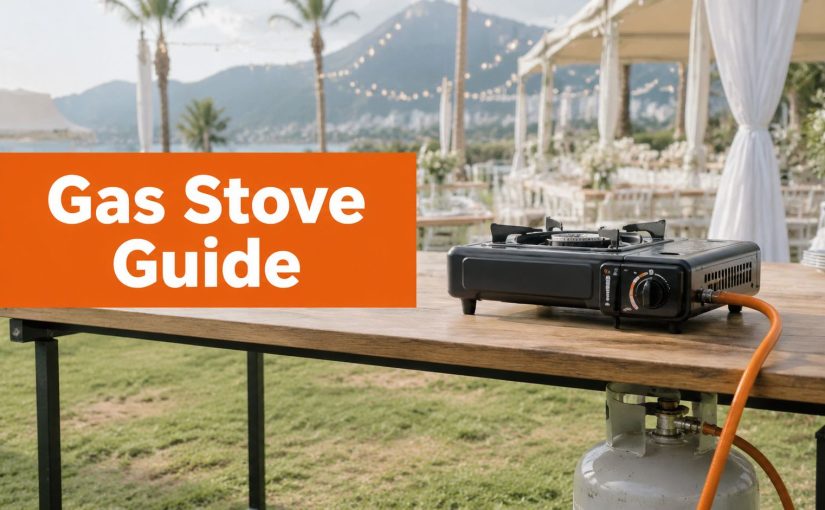
Small Gas Stove with Cylinder: A Guide for Cape Town Events

On a wedding morning in Stellenbosch, the electric line can look perfect right up until load-shedding hits mid-plating. The passes go cold, the garnish station stalls, and somebody from the venue starts asking what can still be cooked without power. That is usually the moment a small gas stove with cylinder stops being a backup item and becomes the only reason service stays on time.

A compact LPG setup works because it is self-contained. It runs from a detachable cylinder, not fixed gas infrastructure, so a team can place it where the work needs to happen, whether that's a prep table in a marquee kitchen, a catering nook in the Winelands, or a temporary station on the Cape Town side of a corporate activation. South African energy conditions and the practical need for portable cooking have pushed this format into normal event operations, not niche camping gear, and the Department of Mineral Resources and Energy has long treated LPG as a clean-burning cooking fuel in the country's broader energy transition (Hometech Vista reference).
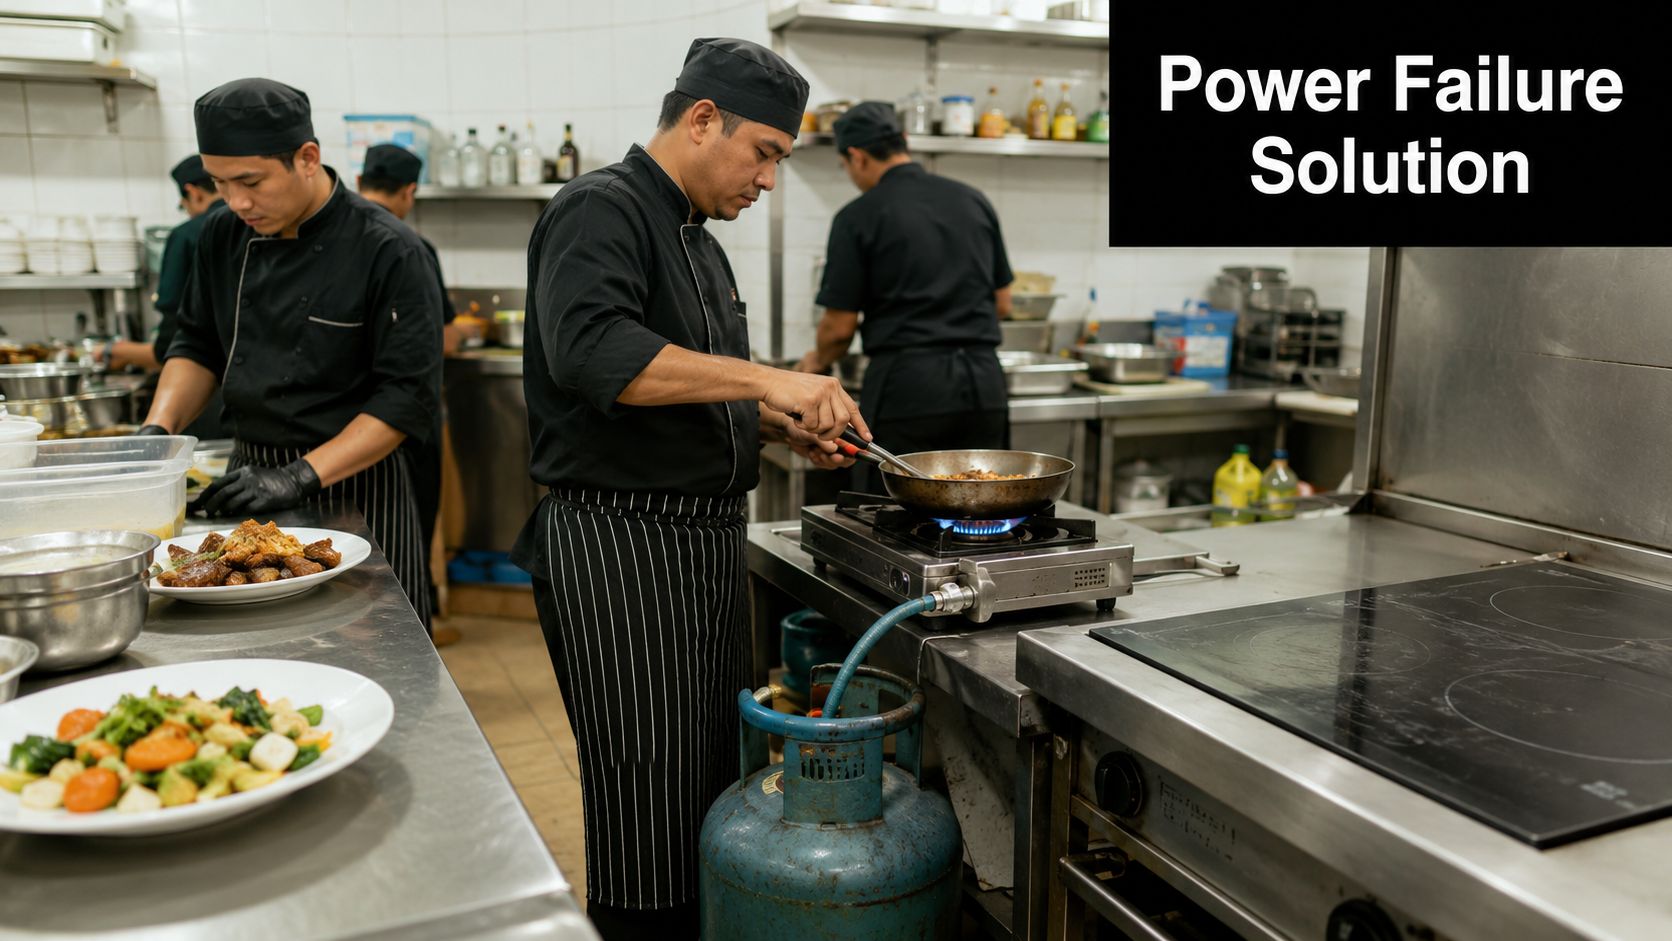
A professional chef cooking in a commercial kitchen using a portable gas stove and cylinder.

For event work, the appeal is simple. You get rapid deployment, portable heat, and a cooking point that doesn't care whether the venue's electrical circuit is stable. That matters for wedding planners, caterers, and venue coordinators who need to keep food moving even when the grid doesn't cooperate. It also explains why small cylinder-based stoves have become a standard support item for short-duration food service, mobile catering, and backup cooking in the Western Cape.

Why Small Gas Stoves Are Essential for South African Events

A function can be halfway through canapés, the ovens can cut out, and the kitchen team still keeps service moving because the backup line is already lit. That is the practical value of a small gas stove with cylinder, it keeps food service running when electricity fails, without waiting for a fixed installation or a technician to restore the line. In South African event work, that resilience is basic operational planning.

What the setup actually is

The format is straightforward. A small portable stove connects to a detachable LPG cylinder, usually through a regulator and hose assembly, so the appliance can run without fixed gas pipes. That makes it useful in temporary kitchens, catering tents, hotel back-of-house areas, and outdoor service points where a fixed line does not exist or cannot be relied on.

The important detail is that this is more than a burner sitting on a bottle. In South African practice, the cylinder, regulator, hose, and appliance all have to work as one system because that combination governs gas flow and safety compliance. Event teams should treat it as a complete setup, not just a stove. A useful practical reference for coordinating the cooking surface itself is ABC Hire's gas stove plates guide, especially when the worktop needs to match the burner layout.

Why it fits Cape Town and the Winelands

Western Cape events often happen in venues that look beautiful but were never built for heavy kitchen infrastructure. Old farm venues, tasting rooms, temporary marquees, and boutique function spaces can be awkward for fixed kitchens, especially when power dips or when the menu needs a dedicated hot station. A portable LPG stove solves the access problem quickly, which is why it shows up so often in mobile catering, load-shedding backup, and compact prep areas.

Practical rule: If the venue cannot guarantee uninterrupted power for the hot line, treat portable LPG as part of the event plan, not the emergency plan.

The broader South African picture explains the shift. As liquid fuel and electricity costs fluctuate, portable LPG equipment remains a practical fallback, and that matters in a market where households and businesses already rely on bottled gas for flexibility. For event planners, the lesson is clear. If the menu cannot stall, the heat source cannot depend on the grid.

Indoor use needs a second check. In enclosed Winelands venues, the issue extends beyond correct connections to whether the cooking area provides enough ventilation, because a busy catering line in a closed room can create avoidable risk even when the stove itself is operating properly.

Types of Small Gas Stoves and Cylinder Sizes Explained

The wrong stove choice slows service and creates avoidable mess on the line. A tiny single burner can hold a sauce or warm milk, but it will struggle if you expect it to carry a busy two-course service. A larger portable unit gives the chef more room to work, yet it takes more space, needs a steadier setup, and asks for better cookware placement over the flame.

Match the stove to the job

A single-burner compact stove is the easiest unit to move and set up. One cited compact model weighs about 0.75 kg, uses a 3/8" LH gas-cylinder connection, and is rated at 8,000 BTU with 186 g/h gas consumption (Companion single burner stove reference). In event work, that suits a coffee station, a warming point for milk, or light prep where portability matters more than output.

A tabletop connected unit sits on a surface and links to the cylinder through a hose and regulator. That is usually the better fit for mobile catering lines because it gives the chef a steadier working surface and keeps the cylinder off the cooking area. A two-burner portable stove makes sense when a small wedding kitchen needs two tasks running at once, such as heating sauce on one side and finishing a side dish on the other.

Cylinder size matters more than people think

In South Africa, 9 kg and 14 kg cylinders are common domestic refill sizes used in portable stove setups. The smaller bottle suits light-duty or mobile use, while the larger one works better for longer intermittent cooking runs or event prep that stretches through the day.

The choice comes down to how the line will run. If the stove is backup heat or a short service point, the 9 kg option is easier to move and store. If the crew is doing repeated hot holding, sauces, or breakfast service, the 14 kg cylinder gives more breathing room before a refill is needed.

Small Gas Stove and Cylinder Options for Events
Stove Type Cylinder Size Estimated Burn Time Best For
Single-burner compact stove 9 kg Not fixed, depends on load and flame use Coffee stations, warming, light mobile prep
Tabletop portable stove 9 kg or 14 kg Not fixed, depends on load and flame use Small catering lines, temporary kitchens
Two-burner portable stove 14 kg Not fixed, depends on load and flame use Wedding kitchens, multi-item service

A useful rule from the appliance side is to match burner size and pan size together. A compact burner under an oversized pan wastes flame contact and slows service, which is why cookware selection matters as much as cylinder choice. For planners comparing surface options, a breakdown of gas stove plate types helps with the layout side of the decision, especially when the prep table has to suit the burner pattern.

Indoor venues add another layer. In a closed Winelands room, the same small stove that works well on an open prep table can create heat and fumes if the layout leaves no room for airflow. On a busy event, that trade-off matters as much as burner count, because the stove has to suit the menu, the room, and the crew working around it. For venue compliance on enclosed catering setups, NFPA 96 code compliance is a useful benchmark to keep in view when the kitchen is temporary rather than fixed.

Safety Regulations and Ventilation Requirements

A gas stove that works well on a demo table can still be a poor fit for a closed venue if airflow is ignored. That is the part many planners miss. Correct connections matter, but the cooking area also needs enough ventilation and enough working space for staff to move safely without putting guests at avoidable risk.

Ventilation is not optional

Indoor gas cooking raises the stakes around air quality. Research shows that gas cooking can push indoor nitrogen dioxide above outdoor standards within minutes when ventilation is poor, with greater concern for children, pregnant people, and those with respiratory conditions (PMC article). In a Cape Town function room or a closed Winelands venue, a small stove cannot go wherever there is a gap in the floor plan.

The practical answer is direct. Use the stove only where air can move properly, and do not treat a closed prep nook like a normal kitchen. If the venue layout holds heat or fumes in place, move the station, improve extraction, or choose a different setup.

Practical insight: The prettiest service area is often the worst place for a gas stove if it has no airflow.

Regulators, hoses, and pressure matching

Safety also depends on pressure compatibility. For compact LPG cylinder-stove setups, cylinder design pressure is typically around 3.0 to 3.2 MPa, with working pressure around 2.1 to 2.2 MPa and test pressure around 3.0 to 3.2 MPa, so the regulator and hose assembly must match low-pressure appliance specifications rather than direct high-pressure cylinder output (Daly Cylinder reference). A burner rated around 28 to 30/37 mbar and drawing about 280 g/h at 3.8 kW gives a useful sense of how the appliance and cylinder need to be balanced, but only if the regulator suits the stove itself.

For venue work, the rule stays simple:

  • Use approved equipment: Cylinder, regulator, hose, and stove all need to be compliant and undamaged.
  • Keep it ventilated: If the air is stale, the setup is wrong.
  • Avoid improvised fittings: A poor connection is not a shortcut, it is a failure point.
  • Know the venue rules: Municipal bylaws and venue requirements can limit where cylinders are stored or used.

For enclosed catering setups, NFPA 96 code compliance is a useful benchmark for extraction, clearance, and safe airflow around cooking equipment. For planners comparing broader hire options, the ABC Hire catering equipment hire overview is a practical reference point for the rest of the kit around the stove.
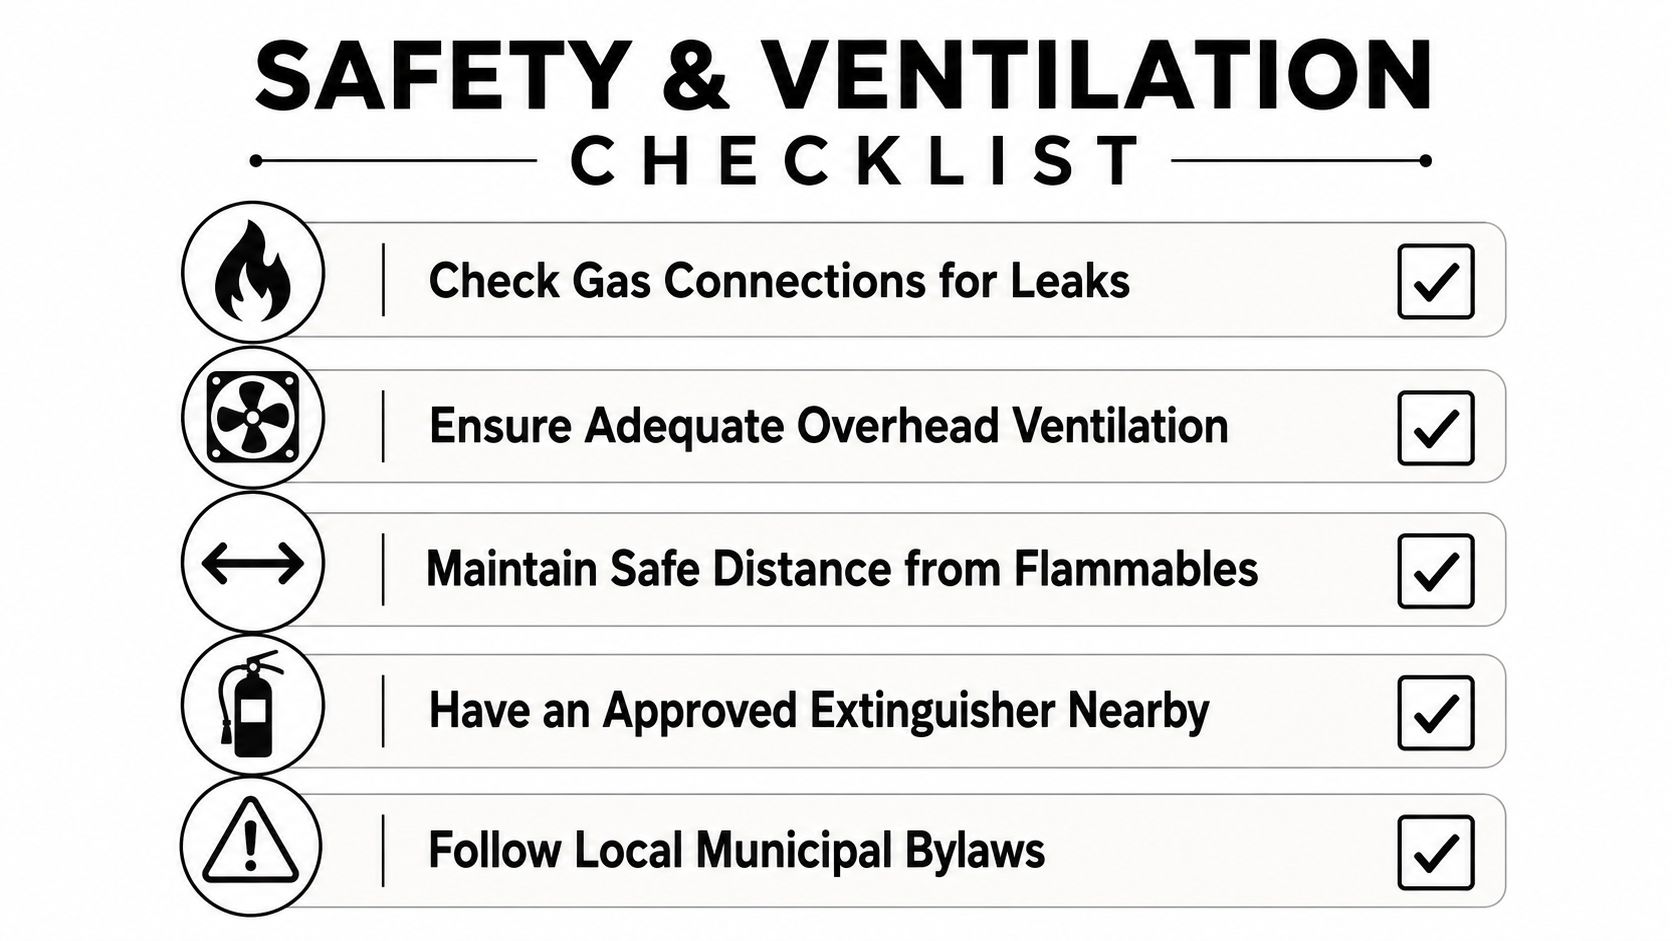
A safety and ventilation checklist for gas appliances, featuring five essential safety steps with checkboxes.

Renting Versus Buying for Event Planners

A wedding planner handling one or two functions a month does not need the same gas strategy as a catering company that works every week. The choice is operational, not emotional. The wrong setup ties up cash, storage space, and transport capacity that should be going into plates, staffing, or décor.

When renting makes more sense

Renting works best when the stove only comes out for specific events. If the unit is used a few times a year, ownership costs go beyond the purchase price, because storage, maintenance, regulator checks, hose replacement, and the pressure of finding the unit ready the night before load-shedding all sit on your side of the ledger.

Rental also helps when the job changes from event to event. A compact breakfast station one week and a larger mobile prep line the next week call for different equipment, and a rental supplier can scale the kit without forcing you to own everything. For planners who already rent tables, chairs, or climate control, a stove can fit into the same procurement pattern. A practical reference point for broader catering kit is the ABC Hire catering equipment hire overview.

When buying starts to make sense

Buying starts to make more sense when the stove is part of the working inventory every week. A corporate activations team or a caterer moving across multiple venues may prefer to own the unit so it is always available for a last-minute job. Ownership also helps when a crew has standardised on one regulator type, one hose length, and one burner size.

The hidden costs still matter. A cylinder refill is only part of the running cost. Regulator replacements, hose wear, transport, and storage all sit on the ownership side of the ledger. If the team does not have a dry, secure place to keep gas gear, renting can be the cleaner operational choice, especially when a job needs to move quickly between venues.
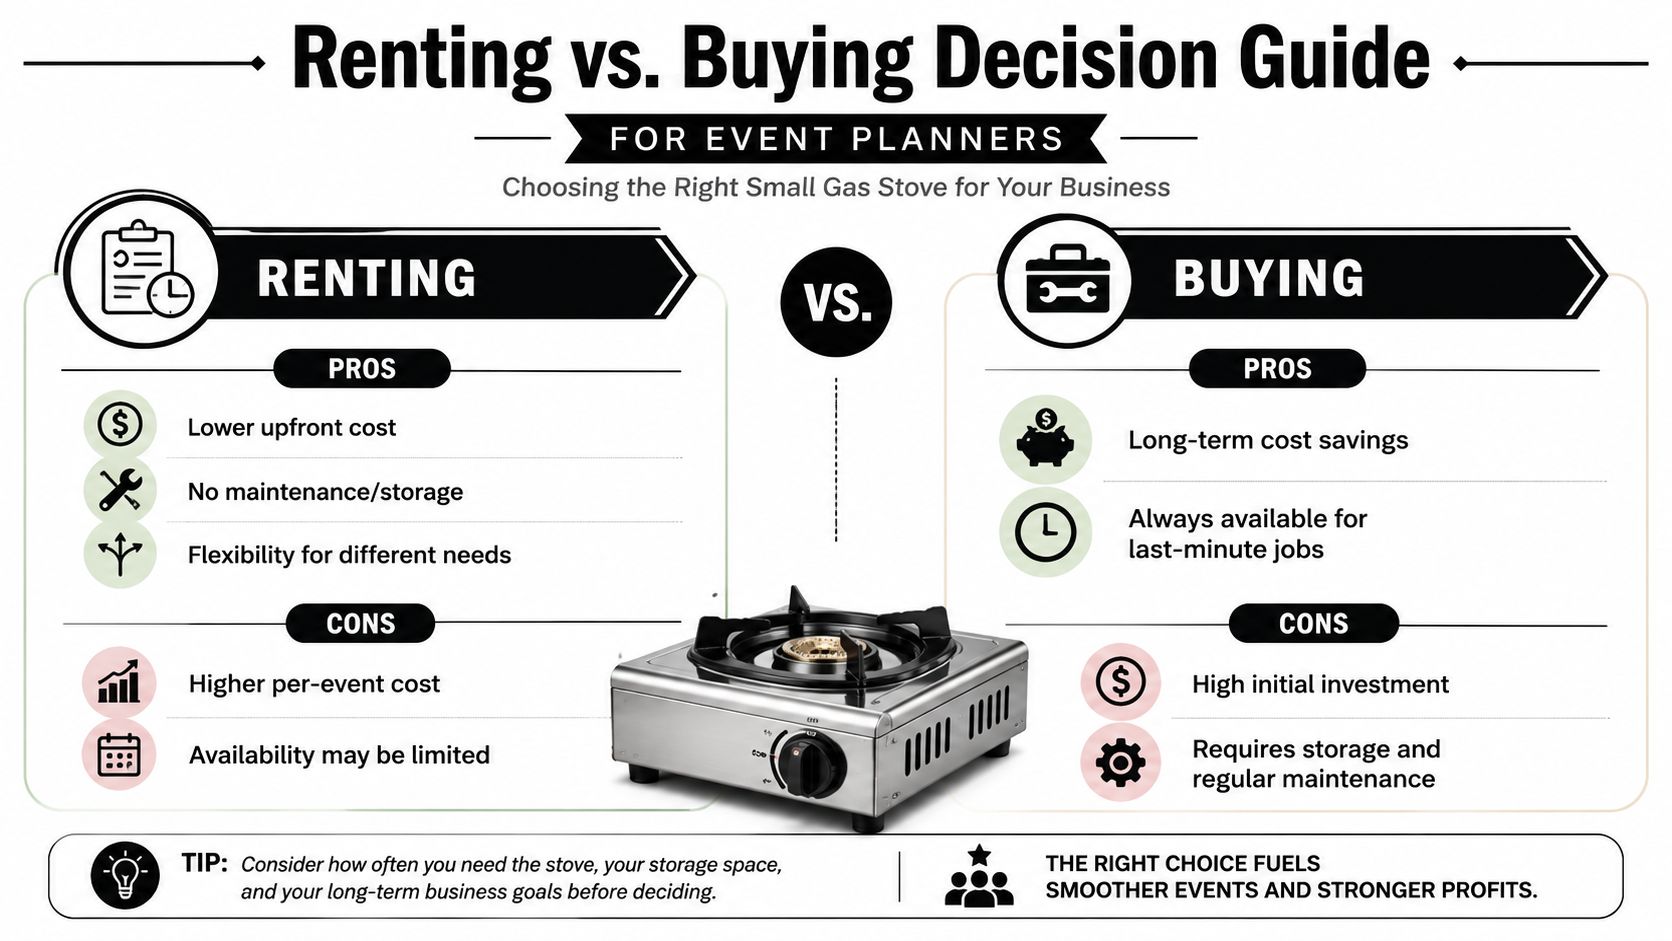
A comparison guide for event planners deciding between renting or buying a small gas stove.

The practical takeaway is blunt. Rent if the stove is occasional and the menu changes. Buy if the stove is part of repeat service and your crew can store and maintain it properly. One point many planners miss is the cylinder supply chain itself. World Bank material on bottled gas makes clear that adoption depends on affordability and logistics, not only on the appliance (World Bank reference).

Setup Checklist and Maintenance Tips for Event Day

A clean setup saves time, cuts risk, and keeps the line moving. On a busy wedding day in Cape Town or the Winelands, the teams that finish service smoothly are the ones that check the kit before the first pan heats up, not the ones that discover a loose hose after guests are already seated.

Use the same sequence every time

Start with the cylinder. Confirm that it is full enough for the service, standing upright, and placed where servers, cables, or luggage trolleys will not knock it over. Then inspect the regulator and hose for cracks, kinks, wear, or loose fittings. If either part looks tired, replace it before service starts, not while the kitchen is under pressure.

Next, place the stove on a stable, level, non-flammable surface. Secure the regulator to the cylinder and the appliance to the regulator according to the manufacturer's instructions, then test the connections with soapy water. If bubbles appear, shut the unit down and correct the seal before anyone lights it.

After that, check the cooking arrangement itself. A burner that is too small for the pan wastes heat and slows service, while a burner that is too large for delicate warming can scorch food. A busy catering line needs the flame, the pan, and the task to match.

In enclosed venues, especially older Winelands rooms with limited airflow, the setup also needs space around the stove. Keep it out of corners, away from curtains, and clear of stacked trays so heat and fumes do not build up where staff are working.

Keep the unit working properly

Good maintenance comes down to routine. Wipe spills off the body and burner area after use, clean burner heads so ports do not clog, and inspect the hose regularly so cracks do not turn into a service interruption. If a regulator behaves oddly, if the flame looks unstable, or if the stove struggles to hold output, take it out of service.

Keep the stove clean enough that a leak test tells you something useful.

A simple event-day routine keeps the pressure down and makes handovers easier for the crew:

  • Pre-event inspection: Check cylinder, regulator, hose, and burner condition before load-in.
  • Positioning: Keep the stove away from guest traffic, fabric, paper, and other flammables.
  • Connection: Tighten fittings properly and test for leaks with soapy water.
  • Operation: Never leave a lit stove unattended during service.
  • Shutdown: Close the cylinder valve fully before disconnecting or moving the unit.

For planners who like a structured prep list, the event planning checklist template is a useful companion when the stove has to fit into a wider service plan.
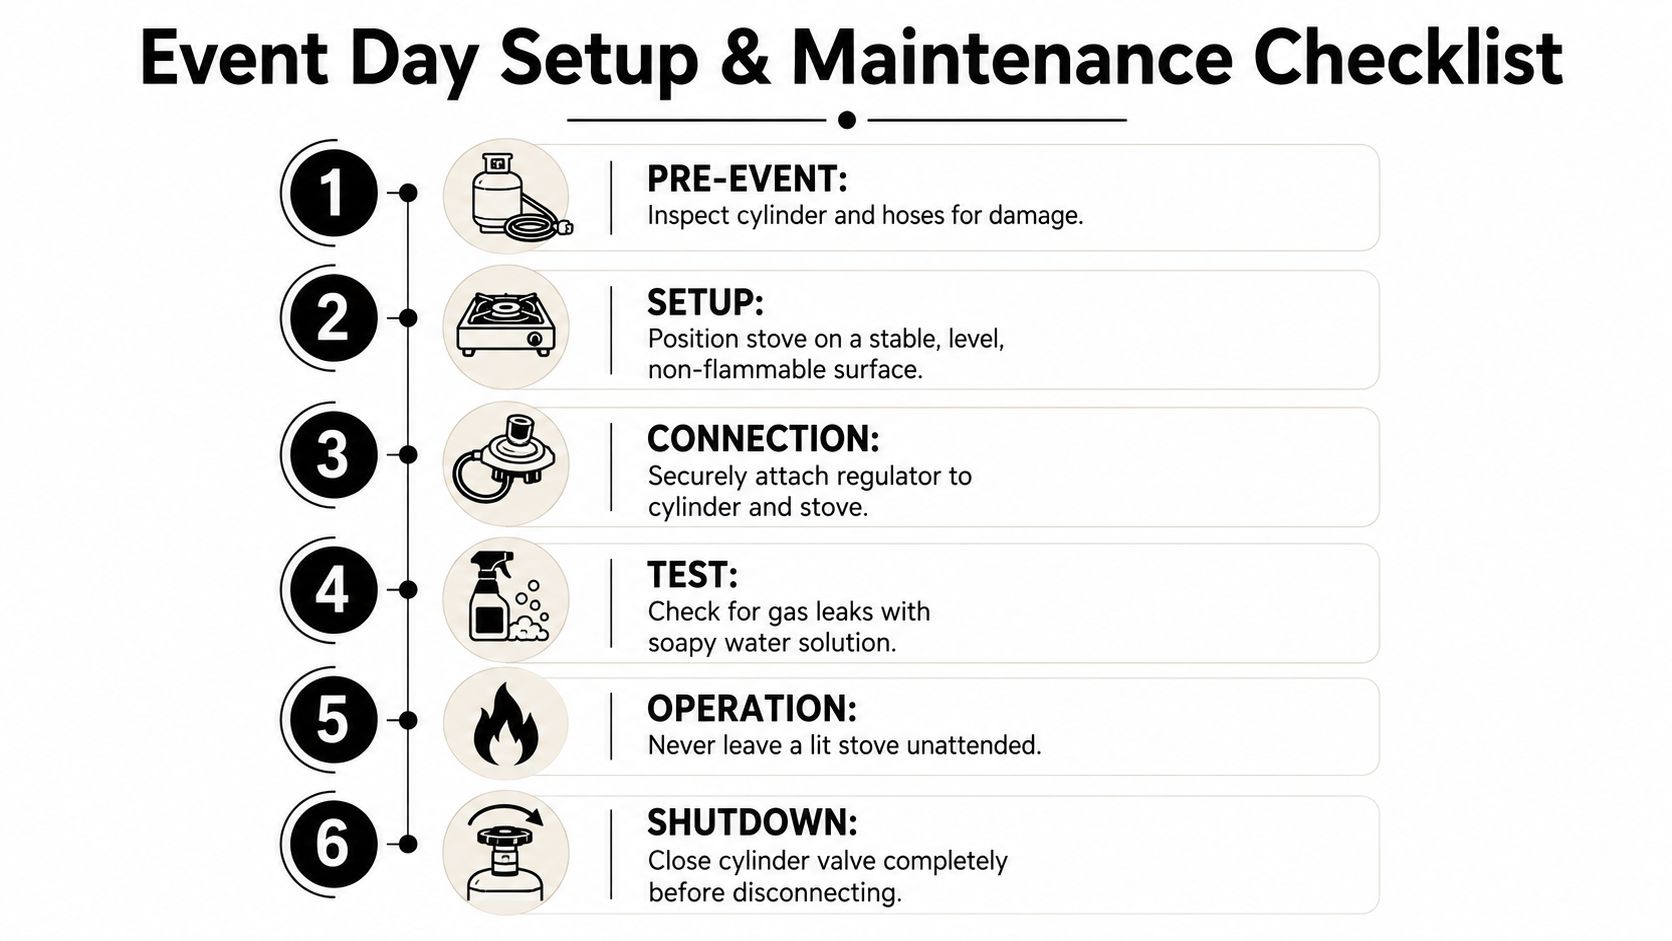
A six-step infographic guide for the safe setup, operation, and shutdown of a gas stove and cylinder.

Frequently Asked Questions About Small Gas Stoves for Events

A Cape Town venue can use a small gas stove with cylinder indoors, but only where the room has proper ventilation and the venue allows it. In enclosed prep rooms, especially in Winelands venues with limited airflow, the issue is indoor air quality and how the heat source sits in relation to staff, food, and exits.

A 9 kg cylinder does not give the same runtime in every service. Burner output, cookware size, and how hard the stove is pushed all change the result, so a compact burner rated at 186 g/h only gives you a rough guide to consumption at appliance level, as noted earlier.

Event planners also need to treat temporary catering setups as controlled work, not a casual plug-in and cook arrangement. Approved equipment, proper installation, and clear sign-off on cylinders, hoses, and regulators should all be in place before service starts, because the venue, supplier, and installer each have a role to play.

If a cylinder runs out during service, the response has to be immediate and orderly. Move to a spare cylinder that has already been checked and staged, then relight only after confirming the regulator and hose are still secure. If there is no backup cylinder on site, the menu needs to shift straight to cold service, holding, or another option that does not depend on flame.

ABC Hire serves Cape Town, Stellenbosch, Franschhoek, and Paarl, so planners who need a rental option can keep the logistics local rather than chasing kit from far away. For short-term event use, renting often makes more sense than buying when storage, maintenance, and transport all need to stay simple, especially for busy event teams that do not want extra gear sitting in a storeroom between bookings.
How to Build a Cheese Platter Board for Cape Town Events

You can have a beautiful board lined up, the vineyard lawn ready, and a guest list that looks manageable on paper, then the afternoon heat starts working against you. Soft cheese loosens, cut fruit dulls, and the platter that looked sharp during load-in can look tired before the first round of speeches. That's the challenge with a cheese platter board in Cape Town, not just making it look generous, but keeping it elegant, safe, and easy to serve through a long event window.

A cheese platter board works because it sits at the point where hospitality, speed, and visual impact meet. Cheese has a long culinary history, with cheesemaking dating back more than 4,000 years in ancient records, and some evidence placing it over 7,000 years ago in early European and Mediterranean finds, while the formal cheese course became established in Europe during the 17th and 18th centuries according to the International Dairy Foods Association's history of cheese. That lineage matters in South African event catering, because this isn't a novelty garnish, it's a proven serving format built for sharing.

Why a Cheese Platter Board Works for Cape Town Events

A planner standing on a Winelands lawn knows the pressure points immediately. The guest list is final, the venue has a narrow load-in window, and the food has to look as good at service time as it did in the proposal deck. A cheese platter board fits that brief better than most centrepiece formats because it doesn't need on-site cooking, it transitions easily from intimate gatherings to larger receptions, and it feels at home beside local wines.

The format also carries visual credibility. Cheese boards grew from a structured course into a shared platter for social entertaining, and that shift from formal dining to easy hospitality is exactly why they work so well at weddings, tastings, matric dances, and corporate functions. The long history behind the format, documented by the International Dairy Foods Association, gives planners a useful answer when clients ask why this style feels polished without being stiff.

The practical reason it wins on event day

The biggest advantage is operational, not decorative. A board can be staged early, replenished cleanly, and photographed from several angles without a chef standing over it. It also pairs naturally with tasting-style service, which is why it suits pre-drinks, cellar-door events, and brand activations where guests circulate rather than sit.

Practical rule: if the food has to look premium, travel well, and require minimal last-minute work, a cheese board is often the safest centrepiece choice.

There's still a decision to make, though. The right guest quantity, cheese mix, board style, and temperature control plan all change how well the final display survives. That's where most catering advice goes thin, and where event planners need a working method instead of pretty inspiration.

Calculating Quantities for Any Guest Count

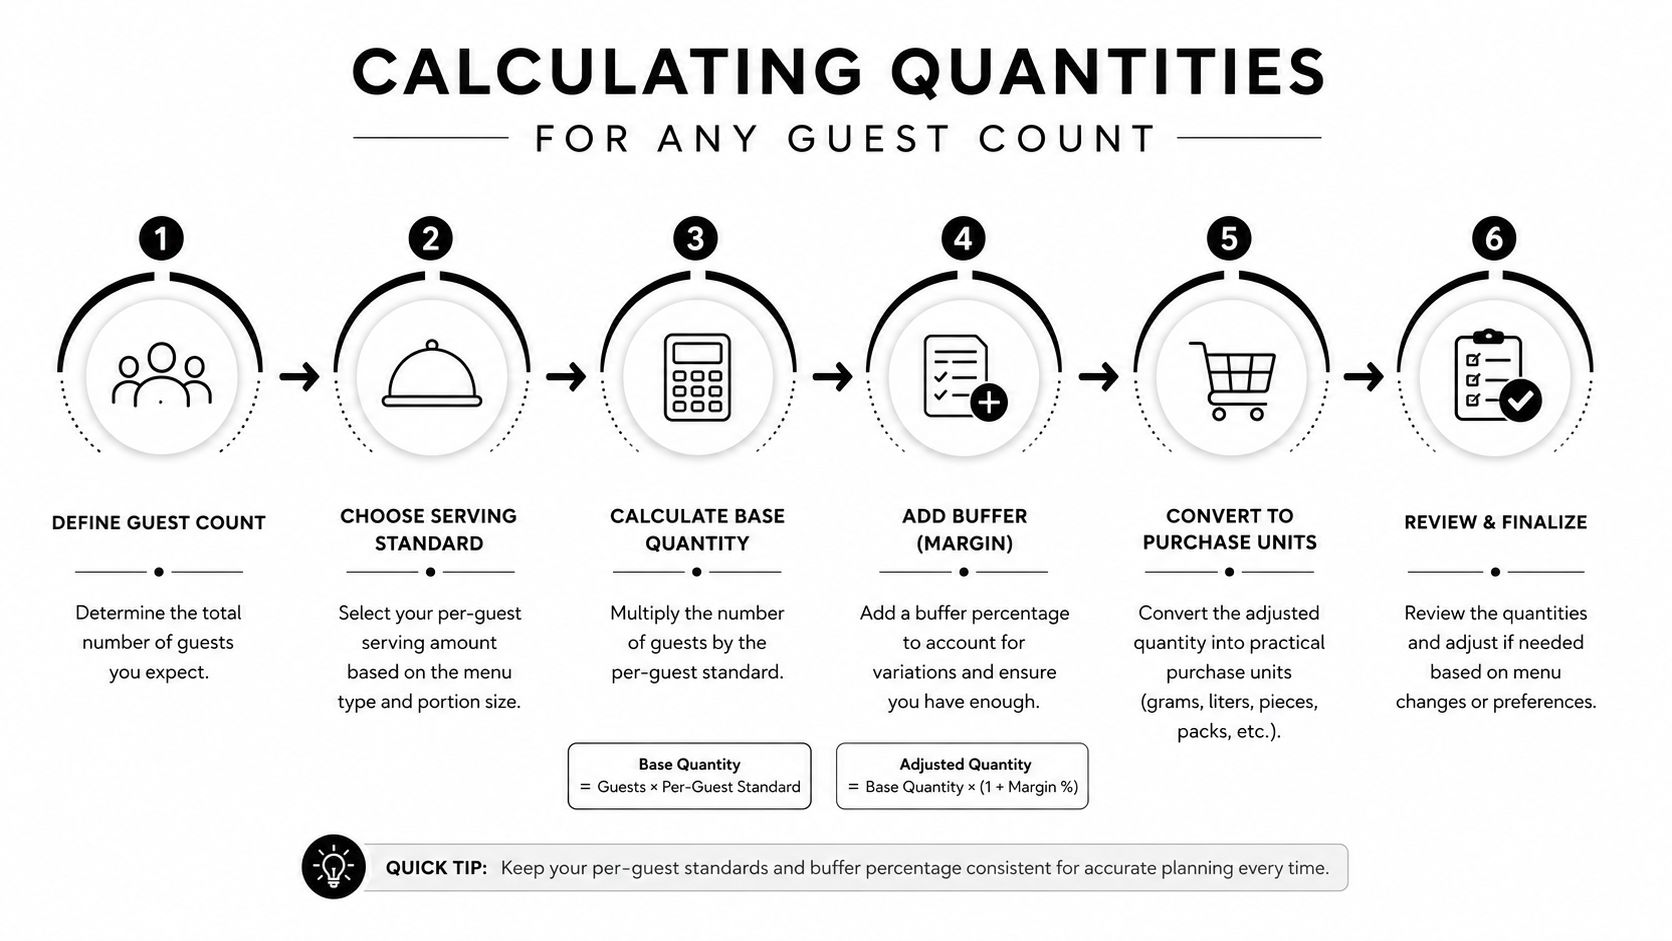
A six-step infographic on calculating food quantities for event planning for any number of guests.

Start with the cheese itself, then build the rest of the board around that number. For a cheese-centric platter, the record-based guidance in the brief points to 1.75 oz (50 g) of each cheese per person, while a board that sits alongside other food can drop to ¾ oz (25 g) per person. Another catering benchmark for an appetizer board is 1 to 1.5 oz of cheese per guest per cheese, with 3 to 4 cheeses usually giving enough flavour contrast without overcrowding the display, as noted in Shelburne Farms' cheese board guidance.

A simple working formula

Use this order of planning:

  1. Decide the board's role. If it's the main grazing station, lean heavier on cheese. If it shares space with canapés or charcuterie, go lighter.
  2. Pick 3 to 4 cheeses first. That gives contrast without turning the board into a shop shelf.
  3. Size cheese before accompaniments. Once the cheese mass is fixed, fill the board with bread, crackers, fruit, nuts, and spreads around it.
  4. Leave space for topping up. A board that looks too full from the start usually looks messy by the midpoint of service.
  5. Match quantity to format. A small dinner board needs density. A corporate station needs easier access and a faster refill pattern.

For an 80-guest Winelands wedding where the board is a pre-dinner feature and not the only food on site, the lighter benchmark is usually the smarter one. That means sizing for the lower per-guest range, then using accompaniments to create visual abundance rather than forcing too much cheese onto the board. The Guinness World Records listing for the largest cheese platter, at 2,012.85 kg (4,437 lb 9.92 oz) with around 145 varieties from Wisconsin producers, shows the format can scale dramatically, but event service still works best when the board stays readable and easy to approach, not overstuffed, according to Guinness World Records.

Use the cheese count to set the shape of the board, not the other way around. If the board is too small for the mix, guests end up fighting for space around the same wedges.

That logic holds whether you're feeding 20 people at a private dinner or 300 guests at a corporate launch. The method is the same, only the refill rhythm changes.

Choosing Cheeses That Earn Their Place on the Board

The easiest mistake is shopping by instinct instead of function. A board needs cheese roles, not just cheese names, because guests read the display as a composition, not a list. Hard cheeses anchor, semi-soft cheeses bridge, soft cheeses spread, and blue cheeses give the board a strong finish.

Category Role on Board Texture Pairing Direction
Hard Anchor Firm, sliceable, grating-friendly Works with crackers, crusty bread, and structured wine
Semi-soft Bridge Supple, balanced Fits most guests and softens the jump between stronger styles
Soft Spread Creamy, yielding Needs bread, fruit, or plain crackers for easy service
Blue Accent Bold, pungent Best used in smaller amounts as the flavour highlight

A balanced shortlist usually starts with one familiar crowd-pleaser, one local Winelands option, one hard cheese with structure, one creamy cheese, and one blue for contrast. That mix gives you comfort and interest without making the board feel random. It also helps when you brief a supplier, because you're asking for a texture profile and service role, not just a shopping list.

What to avoid when you're selecting

Avoid building the whole board from soft cheeses. They look lovely for a moment, then lose edge and become difficult to slice or spread neatly once service starts. Avoid buying only crowd-pleasers too, because the board becomes flat and forgettable.

The best boards usually have one cheese that most guests already know, one that feels a little local or seasonal, and one that makes people pause. That pause matters in a tasting setting, because it encourages conversation without turning the station into a lecture.

If a cheese doesn't change the board's texture, colour, or flavour range, it probably doesn't deserve space.

Building and Styling the Board Itself

A pair of hands arranging artisan cheese slices on a rustic wooden board for a platter.

Start with the hardest cheeses, because they do the visual heavy lifting. They act as anchors, they hold clean edges, and they give the board structure before anything softer goes in. Once those are placed, add the creamy cheeses and spreads, then fill the negative space with fruit, nuts, olives, preserves, and bread.

The order that keeps the board tidy

First place the boards or trays, then the main cheeses, then the supporting elements. Use bowls and small ramekins for olives, honey, chutney, or mustard so the liquids don't spread into the cheese area. That keeps the surface clean and lets you add height without clutter.

Colour matters more than people think. Pale cheeses need contrast from dark grapes, figs, berries, or dried fruit, while a few herbs or leafy garnishes can break up the visual weight. Odd numbers usually look more natural than pairs or perfect symmetry, but don't force that rule if the serving flow needs clearer access.

The board should still have breathing space around each cheese. Guests need room to cut, scoop, and move without damaging the arrangement, and the display looks more premium when nothing is jammed edge to edge. The wooden serving board guide from ABC Hire is useful here because the surface itself affects how polished the final layout feels, especially on rustic, vineyard-style tables.

A well-styled board should look abundant, but never crowded. The moment guests can't tell where one item ends and the next begins, the composition has gone too far.

Heat, Timing and Food Safety on Long Event Days

A cheese platter board can look perfect at set-down and still fall apart by mid-service if the temperature is wrong. Cape Town summer heat is hard on soft cheeses, cut fruit, and anything with a glossy finish, and the board starts to look tired long before guests are finished. On long winery lunches and outdoor corporate functions, the display has to survive the afternoon as well as the first reveal.

The fix is to treat timing as part of styling. Put the board out closer to guest arrival, not during early venue setup, and build a plan for refreshes if service will run for hours. Use shade wherever you can, because direct sun on a vineyard lawn or terrace will push the board downhill fast. Chilled staging bowls under selected items can keep the display steady without changing the look, and the Wayfair cheeseboard guide still gives a solid baseline for room-temperature presentation, even if it does not deal with long hot-service days in a practical way.

What holds up best

Hard cheeses handle service better than soft cheeses. They keep their shape, slice cleanly, and stay presentable for longer, which matters when the board is meant to sit in front of guests rather than disappear into the kitchen after five minutes. Soft cheeses need quicker replenishment and tighter checks because once they warm, they lose their edges and the board starts to look messy.

Cold storage behind the scenes matters just as much. The display can be styled perfectly, but if the back-up stock is sitting warm, the next refill only resets the problem for a short while. That is why a mobile fridge for hire guide from ABC Hire fits this part of planning so well, because the board depends on what is stored off-site or off-board as much as what guests can see.

Food safety and presentation rise or fall together on long event days. If the back-up stock is warm, the next refill only repeats the same issue.

Cross-contact control matters too, especially when prep teams are handling dairy, fruit, crackers, and garnish in the same prep flow. The guide on prevent cutting board cross contamination is a useful reminder that clean surfaces, separate tools, and clear prep zones are part of keeping the board safe, not just tidy.

Transport, Setup and Hygiene on Site

The journey from prep kitchen to venue is where many boards lose quality. Pack the cold items last, keep the load order logical, and avoid stacking anything that can crush fruit, crack cheese edges, or smear garnish. A board that arrives intact usually got packed in the reverse order of how it's served, with the most delicate items protected and the board surface kept clean and dry.

On site, the board should go down on a stable base before anything is styled on top. Serving knives, spoons, tongs, and cheese markers need to be placed where staff can reach them without crossing over the food. Allergen labels help guests self-serve confidently, especially at corporate functions and formal weddings where mixed dietary needs are the norm.

The board itself also matters for hygiene. A procurement-grade specification that allows for surface roughness not exceeding 3.2 µm Ra, thickness variation within ±2 mm, and edge radii of 2 to 3 mm, with groove channels about 4 to 5 mm deep and 6 to 7 mm wide, is not just technical jargon, it reduces moisture ingress, warping, and sanitation problems between events, according to the professional cheese board procurement guide. In rental work, those finish tolerances directly affect whether a board cleans properly after repeated wash-and-dry cycles.

Leftovers need a plan before service begins. If the board is meant to be reset later, keep the reserve stock separated, chilled, and clearly marked so staff don't mix fresh product with display items that have already sat in the room. That habit protects both the presentation and the venue's reputation.

Wine Pairings That Work in the Winelands

A good cheese board in the Cape lands best when the wine feels intentional, not improvised. Strong blues usually want contrast, aged hard cheeses need structure, creamy soft cheeses prefer brightness, and semi-soft cheeses sit comfortably in the middle. That gives you a useful pairing logic for weddings, cellar tastings, and corporate launches where guests expect the board to reflect the wine list rather than compete with it.

For a straightforward Winelands pairing map, bold blue cheese works well with a tawny port or sweet dessert-style wine, aged hard cheese suits a structured red such as Cabernet Sauvignon or a Bordeaux-style blend, creamy soft cheeses pair naturally with Sauvignon Blanc or Cap Classique, and semi-soft or washed-rind cheeses can sit comfortably with Pinot Noir or a lighter Chardonnay. For hosts who want a wider flavour reference beyond wine, the whiskey food pairing guide shows the same basic principle at work, pairing intensity with structure instead of throwing random flavours together.

How to label pairings so guests use them

Keep the signage short. Guests don't need a tasting essay, they need confidence. A simple note such as “Best with Cap Classique” or “Try this with the red blend” is enough to guide self-service without slowing the line.

Waiting staff should know which cheese sits where and which pour matches it. That helps at formal receptions where guests ask the same question repeatedly, and it keeps the board from becoming a bottleneck. If the bar team knows the pairing story, they can steer guests naturally instead of improvising answers.

For the physical setup, matching the serving style to the room makes a difference. The wine glasses and crystal guide from ABC Hire is relevant because stemware, board height, and table placement should feel like one design choice, not separate rentals dropped into the room.

How ABC Hire helps the board work on site

The right rental pieces remove friction where it shows up. Cheese boards, crates, and display props help with height and layout. LED cubes and furniture suit evening functions where the board needs to read as a feature station. Tables and climate control equipment solve the service window and heat problem. Slush machines can support the beverage side of a summer activation, which keeps guests moving while the board remains accessible.

For smaller private dinners, a single well-built board with simple props is usually enough. For larger weddings and corporate activations, the board often needs support from tables, chilled staging, and a cleaner traffic flow around the station. That's where good rental choices matter, because they let the food stay elegant without asking the venue team to improvise on the day.

Quick checklist for the quote

  • Board size and finish to suit the guest count and service style
  • Chilled support for backup stock and long outdoor service
  • Display props for height, visibility, and table styling
  • Stemware and furniture to match the wine experience
  • Climate control if the board has to survive a warm afternoon

If you're planning a wedding, tasting, matric dance, or corporate function in Cape Town, Stellenbosch, Franschhoek, or Paarl, build the rental quote around the board first, then add the pieces that keep it attractive and safe for the full event window. Visit ABC Hire to source the boards, props, furniture, and climate-control support that make a cheese platter board work properly on the day.

Gas Stove Plates: A Pro Guide for Event Planners

Two hours before service, the room usually looks calm to guests and frantic to everyone working behind it. In Cape Town that pressure often lands hardest at venues with a beautiful view and limited back-of-house infrastructure. The marquee is up, the bar is stocked, the florist has finished, and the caterer is still trying to get stock to a proper boil on a weak cooktop.

That's where gas stove plates stop being a line item and become operational equipment.

For temporary events, they carry more responsibility than many planners realise. They need to light consistently, hold heat under pressure, survive transport, suit the available fuel, and fit a service plan that won't unravel once guests are seated. A stove plate that works perfectly in a permanent kitchen can become awkward, unstable, or slow in a field kitchen, a wine estate prep area, or a loading-bay service zone.

In the Cape Town and Winelands event circuit, that matters. Mobile setups are common. LPG is often the practical choice away from fixed services. Weather changes quickly. Access windows are tight. If the cooking line loses rhythm, the whole event feels it.

Your Guide to Flawless Event Catering

A common event-day problem isn't dramatic. It's gradual. The canapés start a few minutes late because pans are taking too long to recover heat. Sauces aren't holding properly because one burner runs softer than the others. The chef shifts pots around, staff begin queueing for the usable burner, and the service team starts making quiet adjustments in the background.

Guests rarely know the source. They only notice that food arrives unevenly.

For wedding planners in the Winelands, brand teams running outdoor activations, and coordinators managing campus or corporate events around Cape Town, gas stove plates often sit at the centre of that pressure. They're the bridge between menu ambition and what the site can support. A polished service plan on paper means very little if the catering team can't sear, boil, reduce, and hold with confidence on site.

Practical rule: If the menu depends on timing, the cooking equipment must be chosen around service pace, not just headcount.

Temporary kitchens punish weak equipment. Domestic units often struggle with repeated heavy pots, quick turnarounds, and long holding periods. Event kitchens also deal with uneven ground, rushed installs, transport handling, and teams who may not know the quirks of a specific unit until they're already under pressure.

The reliable approach is simple. Choose for output, fuel suitability, stability, and easy recovery after transport. Then test the setup exactly as it will run on the day. That means actual pans, actual gas supply, actual wind exposure if any part of the line is semi-open, and actual staffing.

When planners get this right, the improvement shows up everywhere. Service steadies. Caterers work faster. Safety checks are easier. Cleanup is less chaotic. Above all, the kitchen stops improvising and starts producing.

Understanding Professional Gas Stove Plates

Professional gas stove plates are built for volume, repetition, and hard use. They aren't just domestic stoves in a tougher frame. The difference is visible in the burner design, the support structure, the materials, and the way they cope with sustained service.

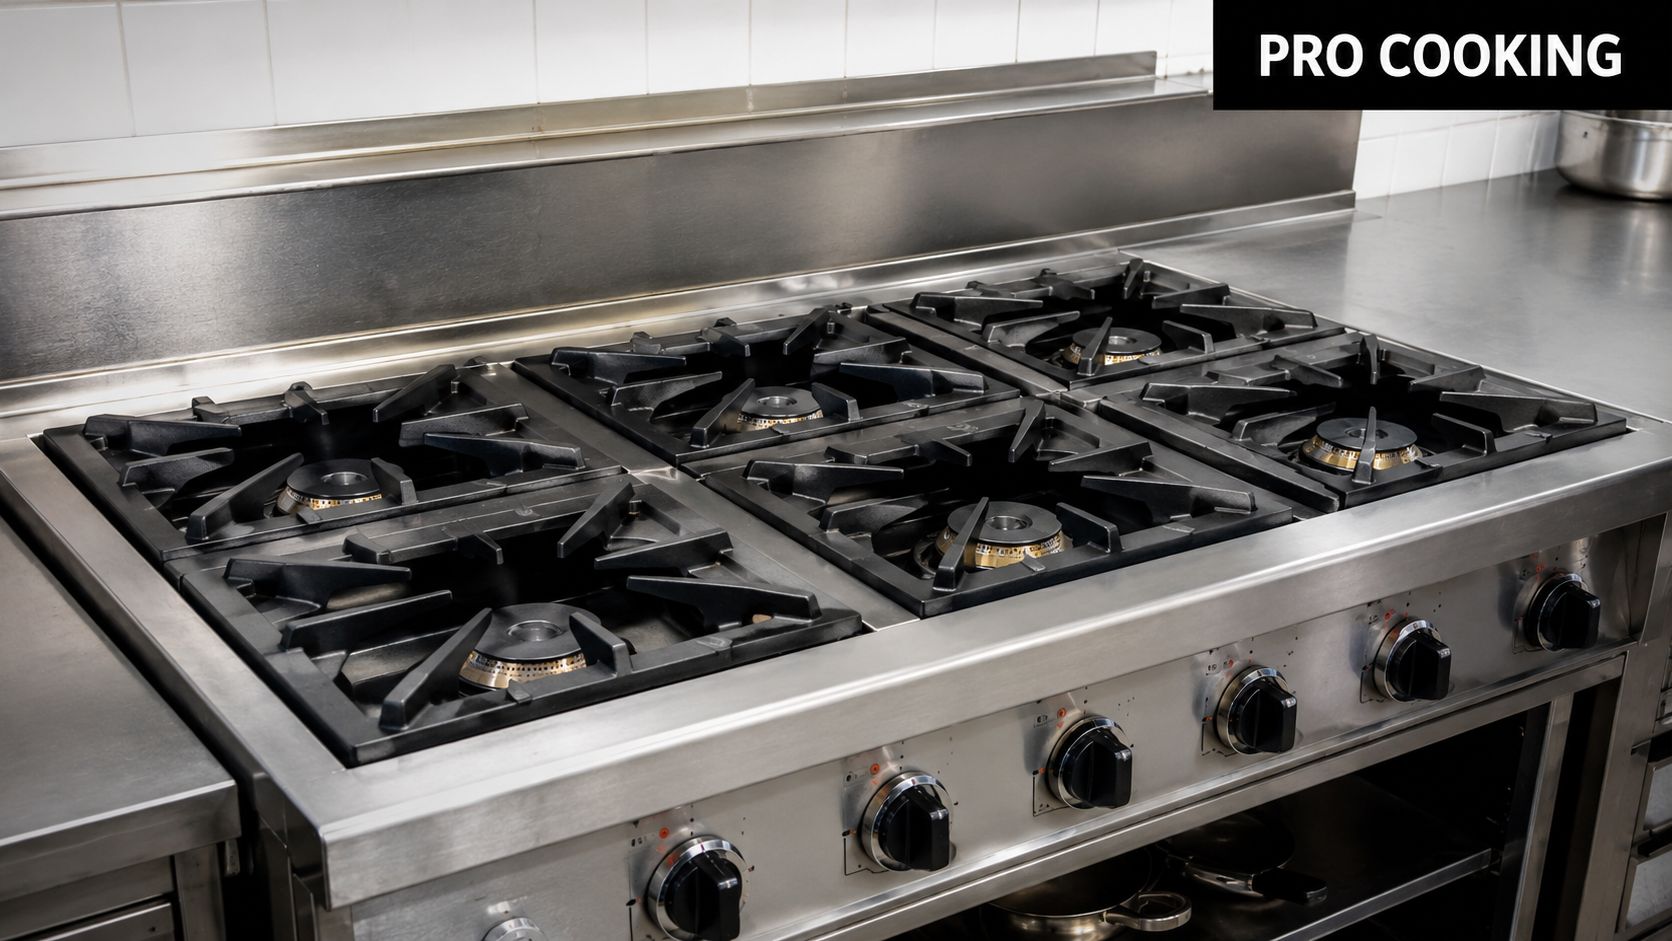
A professional industrial gas stove with six heavy-duty burners and stainless steel finishes in a commercial kitchen.

What separates commercial from domestic

The easiest way to think about heat output is horsepower. A unit might light and cook in both settings, but one is designed for family dinner and the other is designed for repeated event service with stockpots, sauté pans, and rapid refires.

Commercial gas stove plates can be specified at 25,000 BTU per burner in four-burner configurations, while typical residential cooktop burners often range from 500 to 20,000 BTU according to the Star-Max four-burner hot plate specification. That extra output is what supports fast heat-up, stronger searing, quicker boil recovery, and better throughput when the kitchen is turning out plates without pause.

Higher output isn't automatically better in every situation, though. More burner power also means more thermal load on the top surface and more demand on ventilation. If the pan is too small for the burner, or the extractor plan is poor, you lose efficiency and control.

The questions planners should ask

Before approving a unit for an event, ask practical questions that non-specialists often skip:

  • Burner purpose: Is the caterer using it for stockpots, finishing pans, or both?
  • Pan match: Do the pan bases suit the burner size, or will heat spill around the edges?
  • Surface stability: Will it sit level on the event flooring or temporary prep table?
  • Flame behaviour: Does it hold a steady flame once the kitchen is fully running?

The right stove plate is the one that keeps performing after the third pan change, not the one that looks impressive at load-in.

Open burner or sealed style

In event use, operators often prefer configurations that are easy to wipe down and easy to inspect after transport. Open styles can make access and cleaning simpler. More enclosed designs can help contain mess around the top. Neither is universally better. What matters is whether the team can clean, relight, and monitor the unit fast during service.

For planners, the practical lesson is straightforward. Don't hire or approve a gas stove plate based only on burner count. Ask how it behaves under pressure, what fuel it's configured for, and whether the caterer has used that exact type before.

Choosing the Right Stove Plate Material

The material on and around the cooking surface affects more than appearance. In event work, it changes how the unit travels, how quickly it cleans up, how forgiving it is during heavy service, and how much abuse it can take over a season of weddings, launches, and off-site catering jobs.

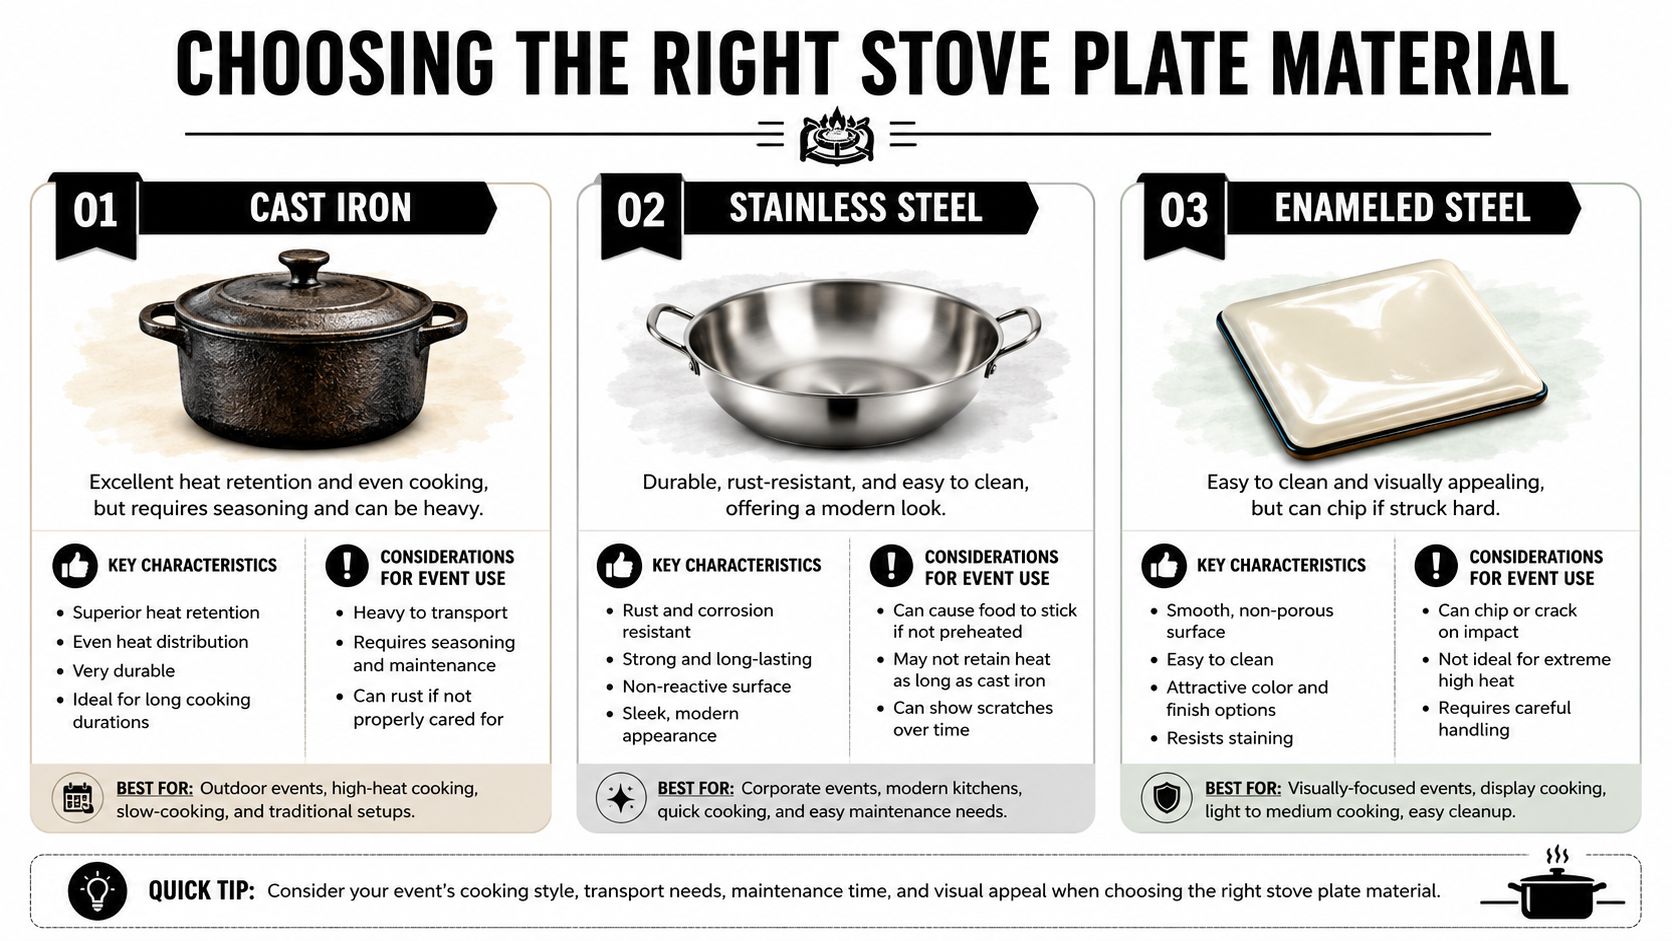
An infographic comparing three types of stove plate materials: cast iron, stainless steel, and enameled steel.

Cast iron for hard kitchen use

Cast iron makes sense when stability and heat retention matter most. Once hot, it tends to hold temperature well, which helps when a busy kitchen is moving heavy pots on and off the flame. That can be useful for menus with repeated pan work, reductions, or high-heat finishing.

The trade-off is obvious to anyone who's loaded a truck at midnight. It's heavy. It also needs more deliberate cleaning and drying if you want it to stay in good condition. If staff rush post-event breakdown and leave moisture sitting on it, the surface won't thank you.

Cast iron suits teams that already run disciplined kitchen pack-downs. It's less forgiving if the unit will pass through many hands.

Stainless steel for quick reset and easy presentation

Stainless steel is often the most practical choice for event operations where turnaround speed matters. It's straightforward to wipe down, it looks clean in open prep areas, and it handles repeated transport well when packed properly.

For temporary kitchens, that matters more than many buyers expect. A unit that can be cleaned quickly between hire periods or event days reduces friction for everyone. It also helps front-of-house adjacent cooking stations maintain a more polished look.

This is usually the easiest material to live with if the setup changes every week.

Site insight: If a unit will be loaded, unloaded, cleaned fast, and sent back out regularly, stainless steel usually creates the fewest headaches.

Enamelled steel for lighter-duty use

Enamelled steel often appeals to teams that want a tidy, smart appearance without the weight of cast iron. It's generally easier to wipe than rougher surfaces and can look good in visible service areas.

Its weakness is impact. In event environments, equipment gets nudged by crates, stacked too tightly, or knocked during strike. If the enamel chips, the finish starts losing its advantage quickly. That doesn't make it a bad option. It means it needs gentler handling and a more controlled transport routine.

A quick comparison

Material Best fit for events Main strength Main drawback
Cast iron Heavy-duty catering lines Strong heat retention Heavier and slower to maintain
Stainless steel Frequent rentals and mobile events Easy cleaning and professional appearance Shows marks quickly if cleaned poorly
Enamelled steel Lower-impact or presentation-led setups Clean visual finish Can chip if struck hard

How to choose for the menu

Don't choose material in isolation. Match it to how the event will run.

  • For production-heavy catering: Cast iron earns its place when the stove plate will run hard for long periods.
  • For frequent transport and fast turnaround: Stainless steel is often the safest operational bet.
  • For lighter service with careful handling: Enamelled steel can work well where appearance matters and movement is limited.

A lot of planners focus on style first because the event itself is style-led. The kitchen doesn't work that way. The right material is the one that survives the truck, the install, the service window, and the clean-down without creating extra problems for the team.

Sourcing and Setup for Your Cape Town Event

In Cape Town, the first sourcing question isn't usually how many burners you want. It's whether the stove plate matches the site's actual fuel reality. Estate venues, school grounds, beaches, farms, warehouses, and private homes all create different constraints, and temporary catering setups don't get the luxury of assuming a fixed kitchen connection is available.

Start with fuel, not hardware

For South African event use, fuel compatibility often decides whether a setup is practical. A commercial hotplate sold for this market can be specified with natural gas consumption of 1.999 m³/h and LPG consumption of 0.567 m³/h for a single-burner unit, as shown in the South Africa market gas burner listing. That difference matters because it affects running cost, cylinder planning, and how long the kitchen can operate without interruption.

For mobile catering in Cape Town and the Winelands, LPG is often the realistic answer when the event is off-grid or semi-remote. Natural gas can suit sites with established infrastructure, but it's not something you want to assume at the last minute. Different gas types also mean the appliance may need the right jets or regulator settings to perform properly.

Choosing the wrong setup usually shows up fast. Flames become unstable. Heat transfer suffers. Service slows.

The rent versus buy decision

Buying makes sense when the same team runs repeated events, has proper storage, and can manage routine checks, cleaning, and transport protection. Hiring makes more sense when demand changes by season, event scale varies, or the caterer needs different configurations for different sites.

Here's a useful consideration:

  • Buy if your operation is standardised and the unit will stay in regular use.
  • Hire if your venues change often, your menus vary, or you don't want idle equipment taking up storage space.
  • Mix both if you keep core equipment in-house and bring in specialist pieces for larger jobs.

For planners building an equipment list from scratch, a broader guide to catering equipment for hire can help map the stove plate into the rest of the temporary kitchen.

Don't leave gas supply to the final week

The most common setup mistake is treating gas as an accessory instead of infrastructure. It should be confirmed as early as power, water, refrigeration, and prep space.

If your event may need a quick utility solution, it's worth reviewing options for securing temporary gas supply quickly so the catering plan isn't forced into a rushed workaround. Even when LPG is the likely route, that planning mindset is useful. The earlier fuel is locked in, the fewer unpleasant surprises appear at load-in.

Temporary kitchens fail in the gaps between suppliers. The stove plate, the regulator, the hose, the gas type, and the site conditions all have to agree with each other.

Maintenance for Quick Event Turnaround

A stove plate that cooks well but cleans badly creates trouble on the back end. In event work, that trouble usually lands when the team is tired, transport is waiting, and everyone wants to leave. Good maintenance isn't about perfection. It's about getting the equipment safely clean, ready for return or storage, and fit for the next booking without creating damage in the process.

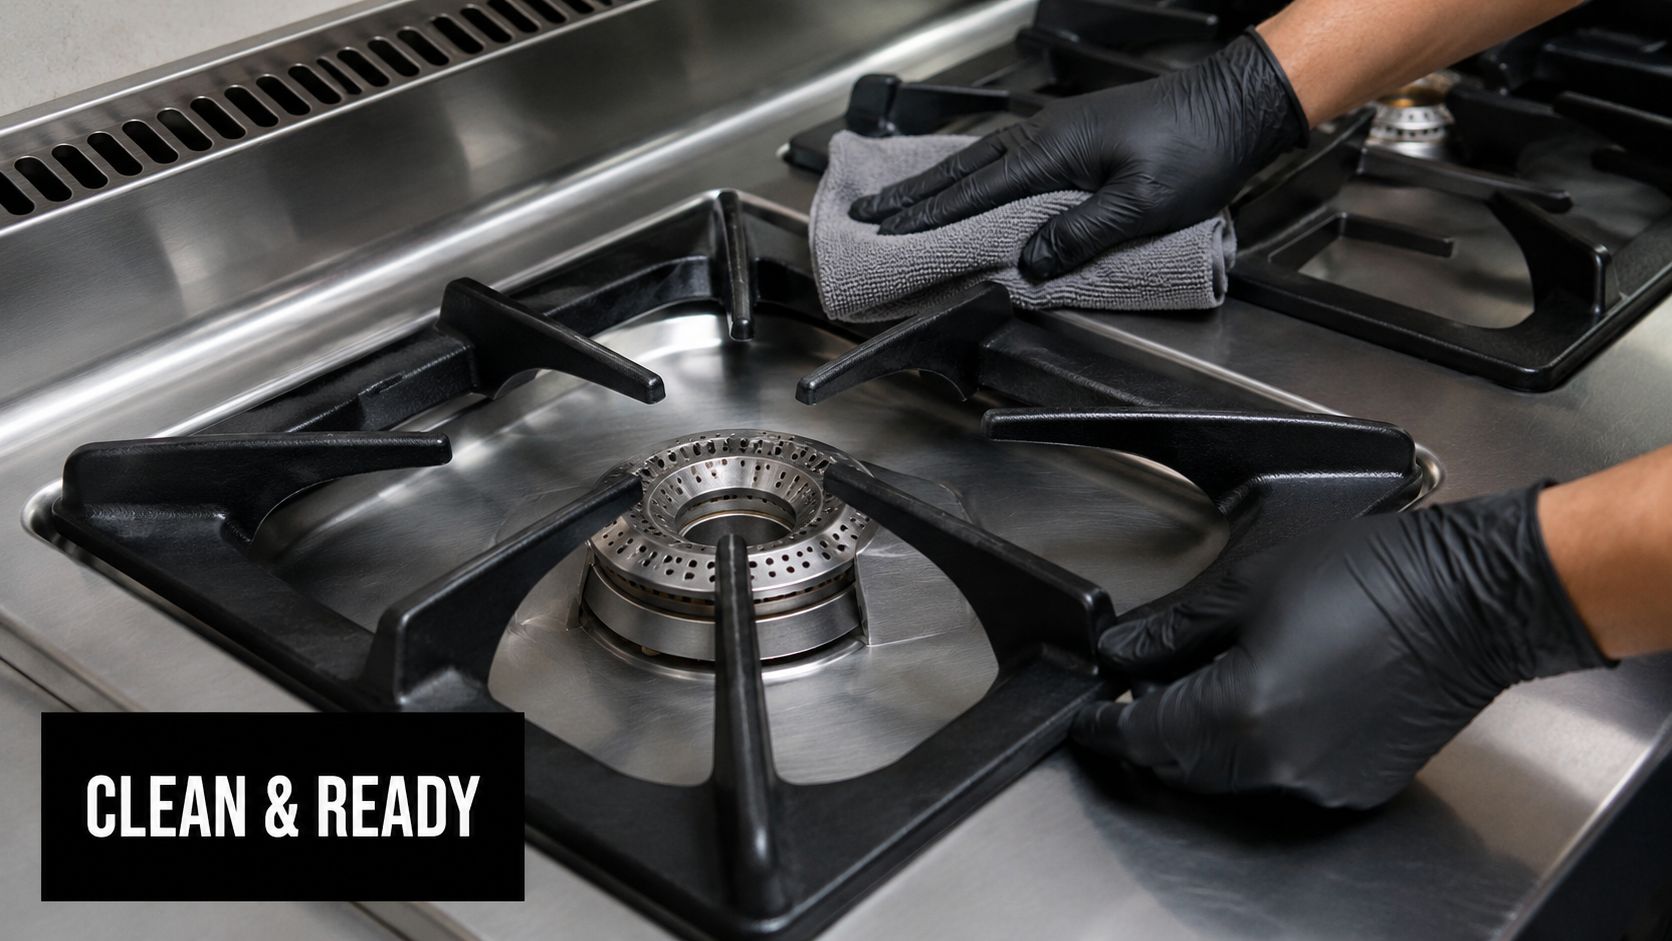
A professional cleaner wearing black gloves wipes a stainless steel gas stove top with a grey cloth.

The fast post-service routine

The safest routine is simple and repeatable:

  1. Shut down fully: Turn off burners, isolate the gas supply, and let the unit cool enough to clean safely.
  2. Remove loose debris: Lift off grates or removable top parts and clear food debris before it hardens further.
  3. Separate grease from carbon: Wipe grease first with a cloth or paper towel. Then deal with stuck residue.
  4. Dry everything properly: Moisture left on metal parts causes avoidable wear and messy storage.

The mistake teams make is jumping straight to aggressive scrubbing. That often wastes time and can damage finishes.

Cleaning by surface type

Different surfaces want different treatment.

  • Stainless steel: Use a soft cloth with mild cleaner, then dry it well so the surface doesn't streak or spot.
  • Cast iron components: Brush off residue, wipe carefully, and make sure parts are thoroughly dry before packing.
  • Enamelled areas: Avoid harsh impact and overly aggressive abrasives that can damage the finish.

If your team manages larger catering operations, broader advice on commercial kitchen maintenance and smooth operations is useful reading because it frames cleaning as part of reliability, not just hygiene.

What helps service on the next job

A well-maintained stove plate does more than look presentable. It relights more predictably, keeps burner areas clearer, and makes fault-checking easier when something goes wrong on site.

For events that also rely on holding equipment, it helps to think about the whole hot line together. Practical planning around catering food warmers often improves turnaround because the cooking and holding equipment are cleaned, packed, and redeployed as one system.

Clean enough to inspect. That's the standard that matters most after an event.

If staff can clearly see the burner parts, supports, and connection points, they're much more likely to spot a problem before the next load-out.

Troubleshooting Common On-Site Issues

When a burner starts misbehaving during service, teams often lose time by guessing. The better approach is to check the obvious mechanical issues first. In event environments, the cause is often simple: transport shifted a burner cap, debris is blocking a port, or a connection wasn't set up cleanly during a rushed install.

A recurring gap in public guidance is uneven flame troubleshooting. Problems such as clogged gas ports, misaligned burner caps, and corrosion affect flame quality and cooking performance, as highlighted in this burner troubleshooting reference video.

If the flame is weak or uneven

Start with the burner assembly itself. Don't assume the gas supply is the problem straight away.

  • Check cap alignment: If the cap isn't seated properly after transport or cleaning, the flame can burn unevenly.
  • Inspect the ports: Grease, carbon, or food debris can block sections of the burner and distort the flame.
  • Look for visible corrosion: Older or hard-used parts can degrade and stop burning cleanly.

If one burner is behaving differently from the others on the same unit, the issue is often local to that burner.

If the burner won't light cleanly

A no-light situation needs a calm sequence, not repeated clicking and frustration.

First confirm the gas is on and the unit is isolated correctly for safe inspection. Then check whether the burner parts were reassembled properly after cleaning. If the igniter clicks but the burner doesn't catch, look for blockage or poor cap seating before assuming a larger fault.

If there's no reliable ignition and staff start reaching for improvised lighting methods without a proper safety process, stop and escalate to a qualified technician or the equipment provider.

A quick field checklist

Symptom First check Likely practical cause
Yellow or patchy flame Burner cap position Misalignment after transport
Flame missing on one side Burner ports Blockage from debris or grease
Repeated lighting failure Assembly and ignition point Dirty parts or poor reassembly

The key is restraint. Minor burner issues can often be diagnosed quickly, but event staff shouldn't dismantle beyond routine user-level parts or attempt repairs that belong to a gas professional. On a live event, the smart move is to solve what's simple and stop where safety starts becoming uncertain.

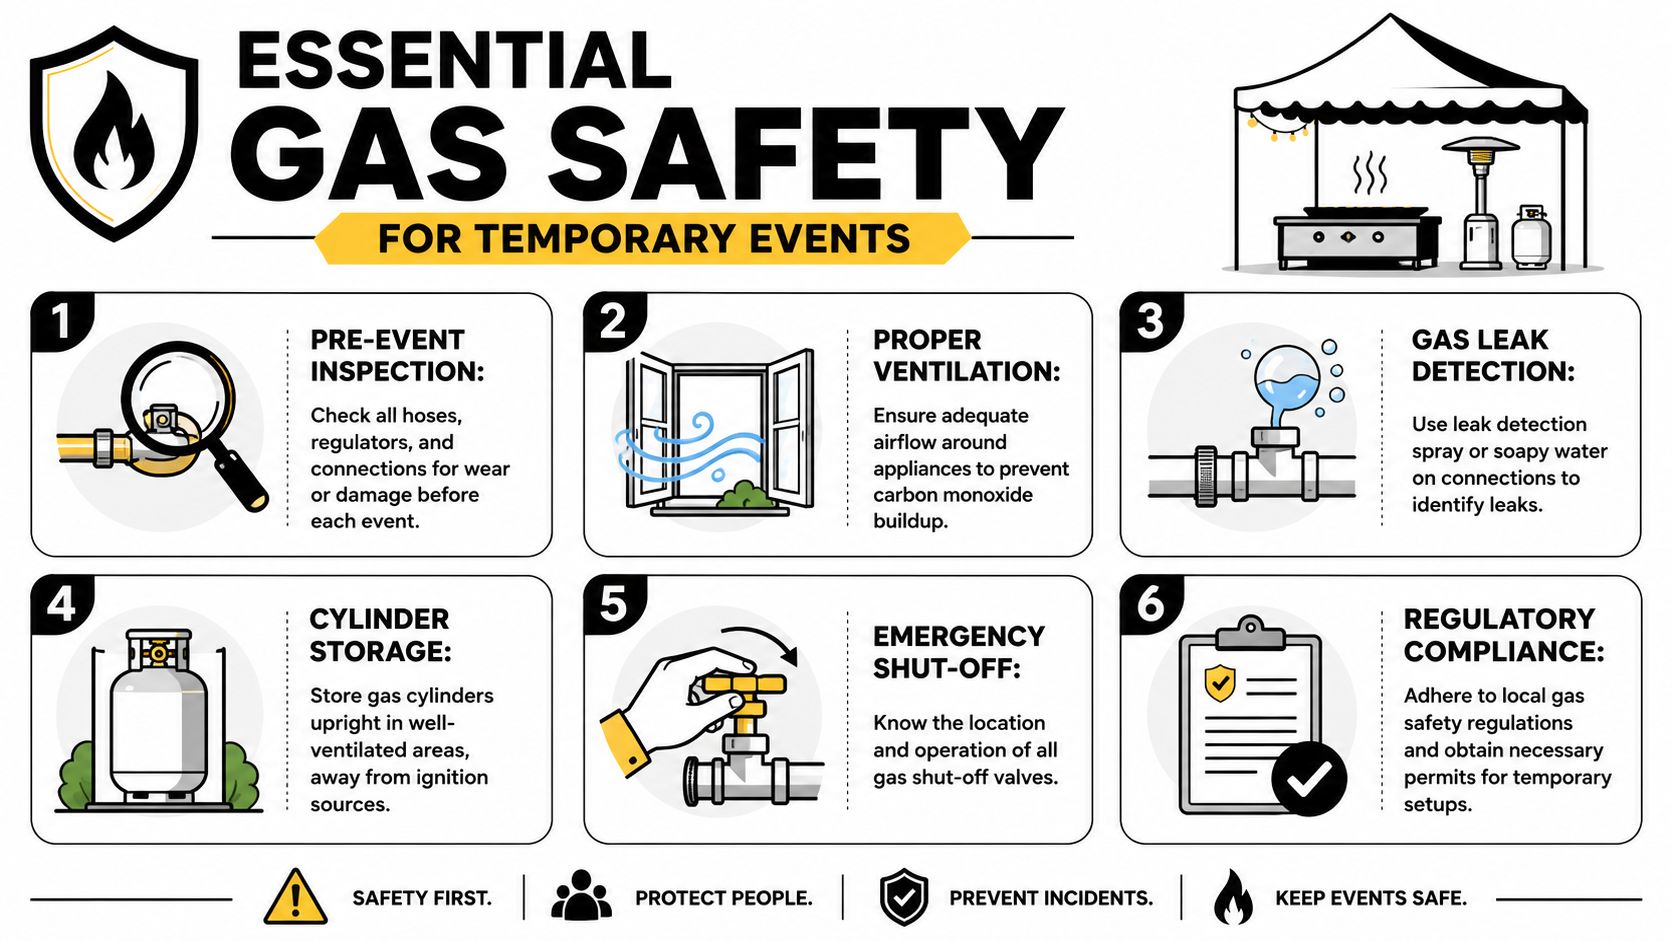
Essential Gas Safety for Temporary Events

Temporary gas setups need stricter habits than permanent kitchens because the environment changes every time. Different flooring, different airflow, different staff, different access, different pressure. If the team treats each setup as routine, that's when small oversights slip through.

A safety infographic titled Essential Gas Safety for Temporary Events showing six key gas handling procedures.

A frequently asked but poorly answered issue for South African users is the safe operation and shut-off of gas appliances, especially in temporary setups, as discussed in this South African gas safety conversation. Event teams need a clear checklist, not informal guesswork.

The non-negotiables on site

  • Inspect before every event: Check hoses, regulators, and visible connection points before the kitchen goes live.
  • Ventilate properly: Never treat a tent or marquee like a normal indoor kitchen unless airflow has been considered properly.
  • Store cylinders upright: Keep them in a suitable ventilated area away from obvious ignition risks and unnecessary traffic.
  • Know the shut-off point: Every supervisor on site should know where the supply is isolated and how to stop it quickly.
  • Check for leaks safely: Use an appropriate leak-check method before service starts.
  • Respect local requirements: Temporary event setups still need to align with local safety expectations and venue rules.

Why planners should care personally

If you're managing the event, this isn't something to leave vaguely with “the kitchen team”. Safety responsibility in live environments overlaps. The venue, planner, caterer, rental provider, and on-site manager all influence whether the setup is sensible.

For a wider operational view, this resource on comprehensive event safety guidance is useful because it places gas risk inside the bigger event safety picture. If your event also includes guest comfort equipment, planning around items like a gas outdoor heater should follow the same disciplined approach.

The safest temporary kitchen is rarely the fanciest. It's the one with clear access, stable equipment, competent setup, visible shut-off control, and no guesswork.


If you're planning an event in Cape Town, Stellenbosch, Franschhoek, Paarl, or the surrounding areas, ABC Hire can help you pull together the practical event equipment that makes service run smoothly. From core event infrastructure to reliable hire solutions for demanding setups, they're a strong local partner when you need equipment that arrives ready, looks professional, and works under pressure.

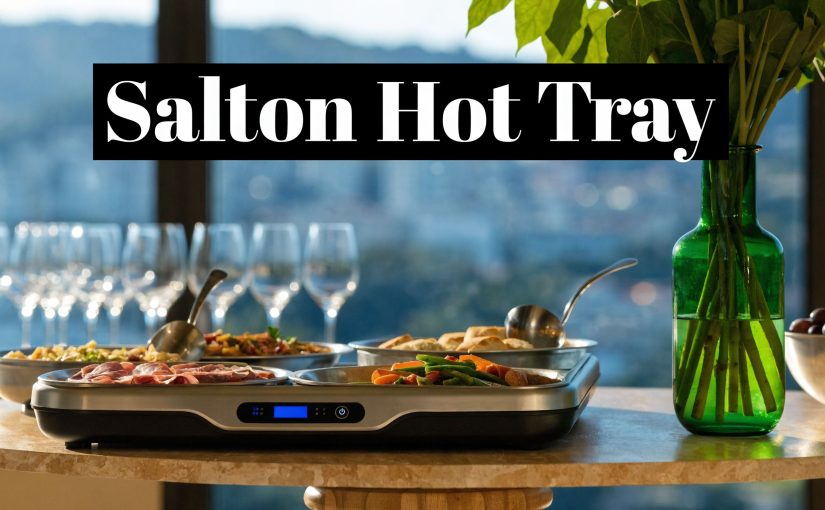
Salton Hot Tray: Cape Town Event Catering Guide

The buffet is ready. The venue looks perfect. Then the schedule slips.

In Cape Town and the Winelands, that’s rarely a small issue. Speeches run long, photos move into golden hour, guests linger over welcome drinks, and plated timing turns into buffet holding time. That’s where a salton hot tray earns its keep. It doesn’t rescue poor planning, but it does protect good food from the usual event delays that catch hosts and caterers off guard.

A lot of advice online treats a hot tray like a kitchen gadget. Event use is different. You’re dealing with transport, uneven venue power, temporary layouts, humidity, staff handovers, and guests serving themselves. A salton hot tray works well in those conditions if you choose the right unit, place it properly, power it safely, and clean it like rental equipment instead of homeware.

The Secret to Flawless Hot Food at Any Event

A Winelands wedding buffet can look calm from the front and tense from the back. The lamb is rested, the vegetables are plated, and the kitchen team knows that every extra minute before service changes texture, not just temperature. A salton hot tray solves that holding gap better than many people expect, especially when the menu is already cooked and needs to stay service-ready.

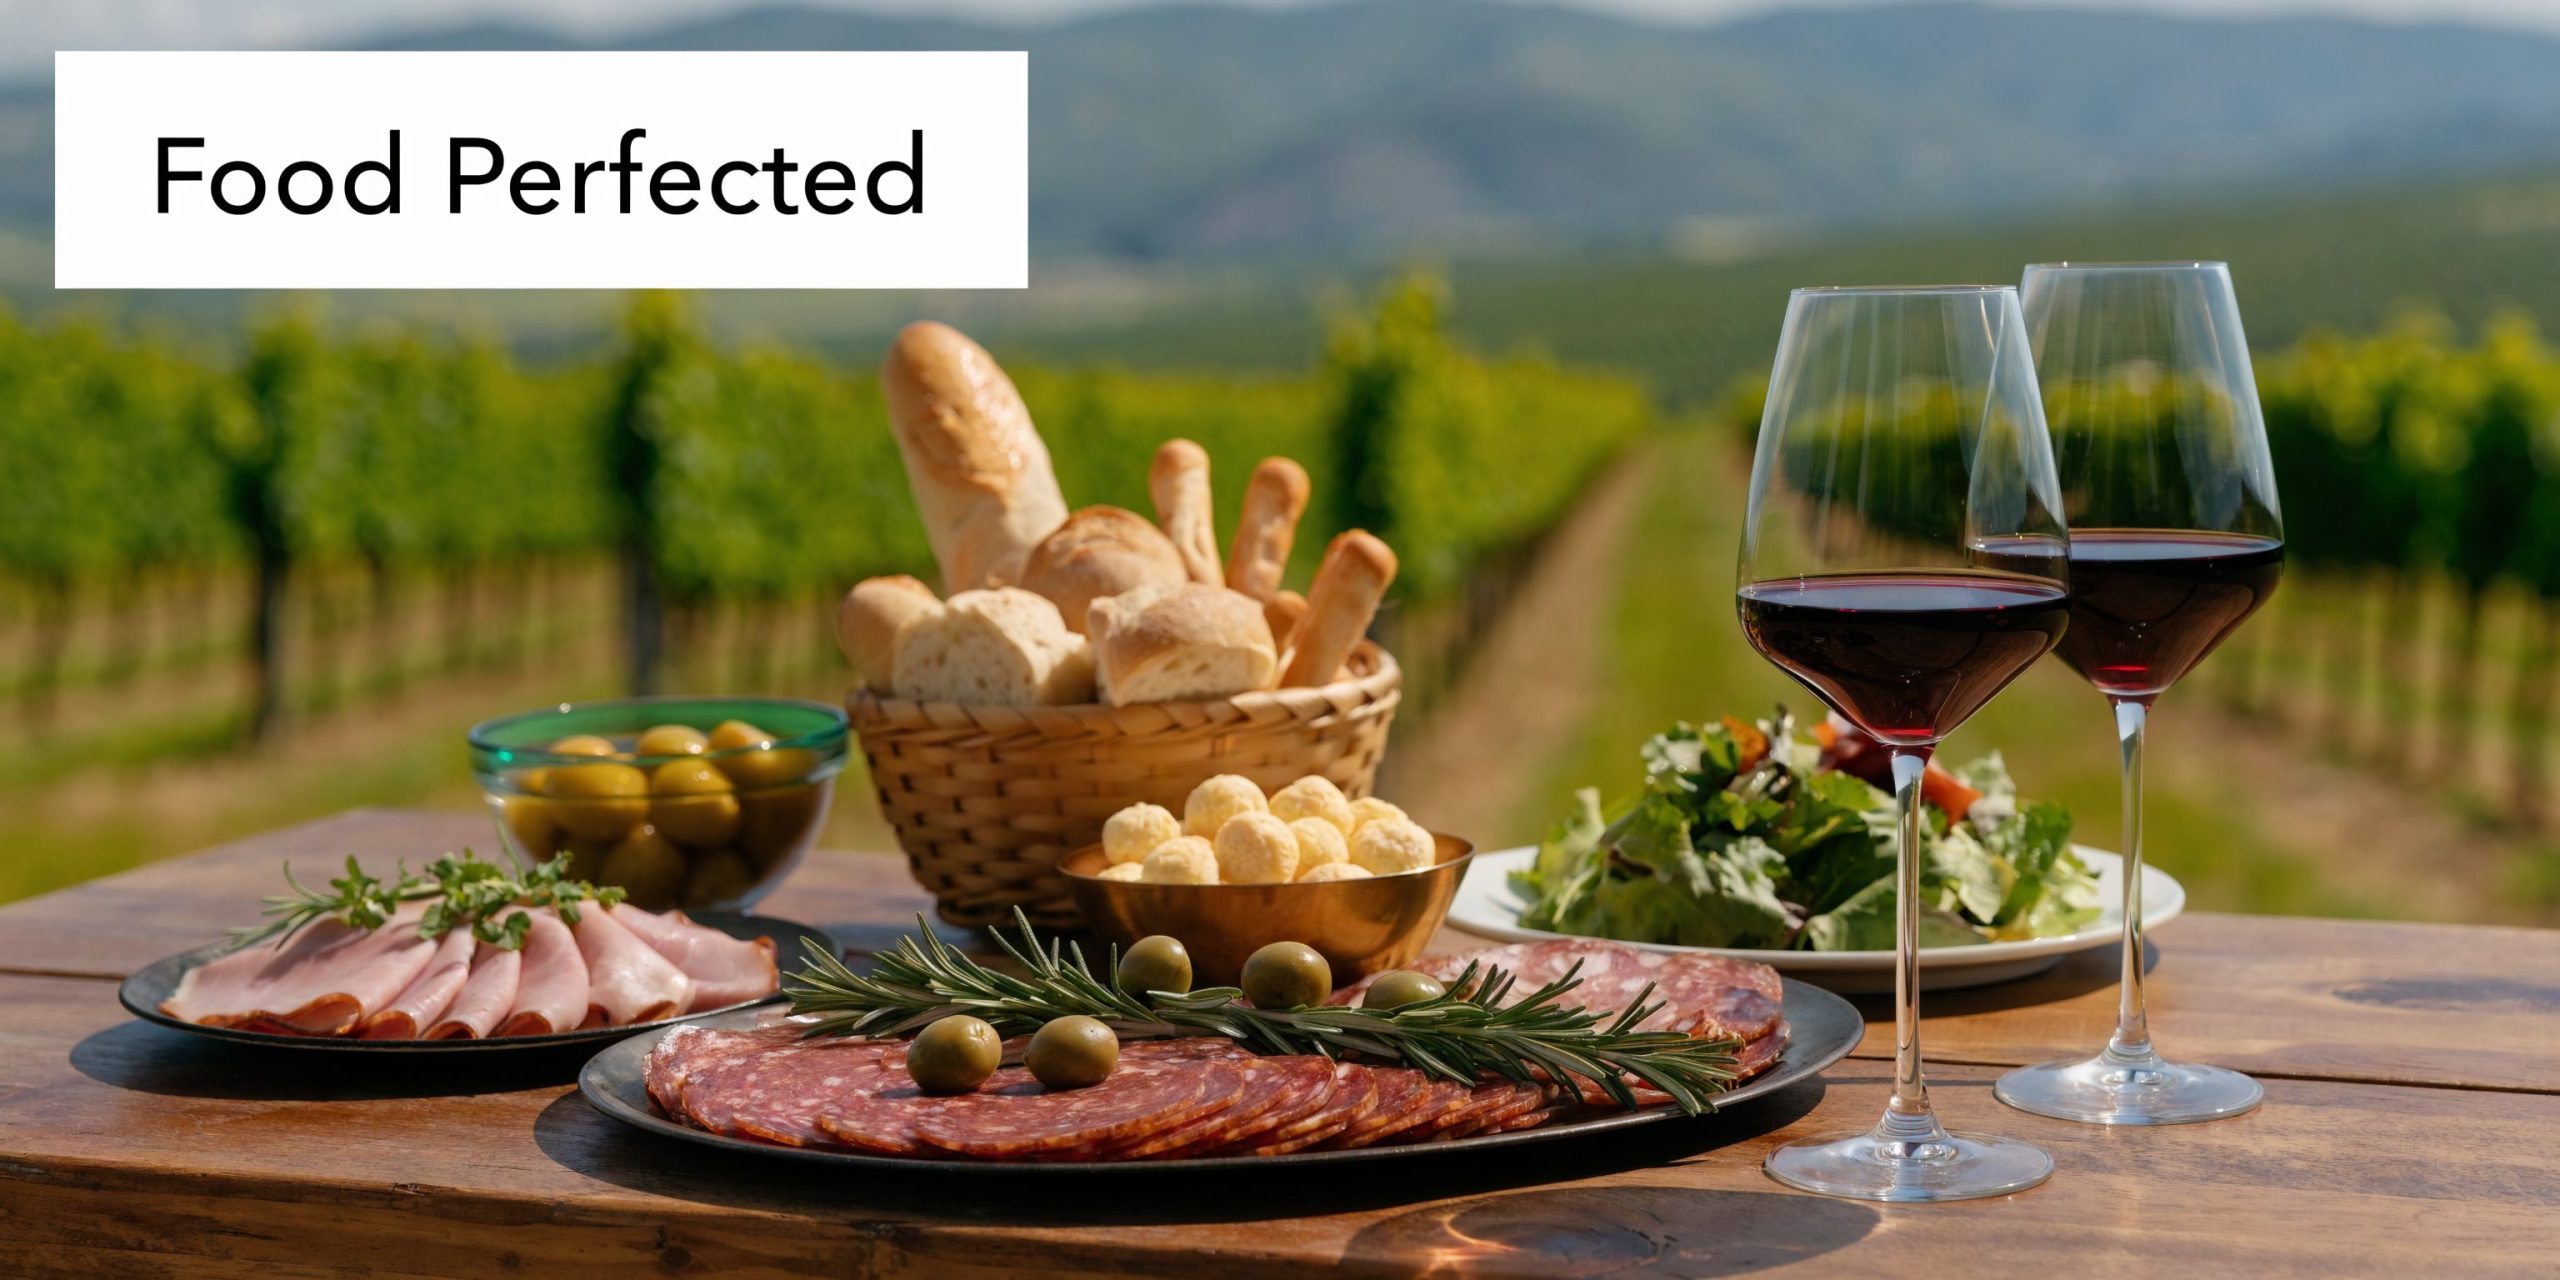
A scenic table setting with red wine, bread, meat, and cheese overlooking a vineyard during daytime.

The reason it still shows up at functions decades after its heyday is simple. It was designed around a significant problem. The Salton Hotray was invented in the early 1950s by engineer Lewis Salton after he got tired of his own suppers going cold. In an early department store demonstration, a quick on-floor showing led to an order for 60 units, which tells you how quickly people understood the appliance’s value in practice, not just in theory (Funding Universe on Salton history).

Why it still works for events

At events, the salton hot tray is strongest when the job is holding and presenting, not reheating from cold. That distinction matters.

It handles:

  • Buffet pauses well when guests are delayed
  • Service gaps between kitchen exit and guest pickup
  • Secondary holding for sauces, sides, pastries, and plated extras
  • Venue unpredictability where the room is far from the prep area

It struggles when people expect it to:

  • bring chilled food up to serving temperature
  • replace proper kitchen production
  • compensate for poor menu sequencing
  • sit overloaded under heavy cookware

A hot tray is a timing tool. Treat it like a cooker and you’ll be disappointed.

The old reputation matters for a reason

The Hotray became a household staple because it solved a universal service problem. That same logic still applies at weddings, corporate lunches, school functions, and milestone birthdays. In event work, reliability matters more than novelty. If a piece of equipment effectively keeps food ready while the rest of the programme changes, it stays in circulation.

That’s why experienced coordinators still ask for one when the running order has any risk of drift.

Choosing the Right Hot Tray for Your Guest List

The wrong hot tray creates two problems at once. You either don’t have enough surface area for the dishes you need, or you rent more tray than your layout and power setup can comfortably support.

A smaller unit suits intimate service. A larger buffet-style unit suits a broader spread where several dishes need to remain warm at once. Vintage buffet options still stand out in rentals for exactly that reason. The H-169 Hotable Buffet cart is notable for its 16” x 28” radiant glass heating surface, which gives you meaningful room for multiple dishes at service time (Salton brand history and product heritage).

Think in dishes first, not guests

Guest count matters, but dish count matters more.

If you’re serving:

  • one main and one side for a small birthday lunch, a compact tray is often enough
  • a wedding buffet with multiple proteins and sides, one tray rarely covers the full line
  • a corporate event with staggered serving, larger surface area gives the team more flexibility

A useful rule in practice is to map the actual serving vessels first. Measure the casserole dishes, gravy pots, platters, or bain-style inserts you plan to use. Then check whether the tray supports them without crowding.

ABC Hire Salton Hot Tray Rental Options

Model Type Heating Surface Power Draw Ideal For
Compact tempered glass tray Smaller single-tray format Lower draw than buffet cart models Home dinners, small birthdays, top-up holding
Standard salton hot tray Medium flat warming surface Check unit label before booking Buffet sides, canapés landing area, school functions
H-169 Hotable buffet cart 16” x 28” radiant glass heating surface Higher than compact units. Confirm circuit availability Weddings, corporates, larger self-serve buffets

What determines the right choice

Some planners focus only on hire cost. That’s understandable, but equipment value sits in how well it fits the service plan. The same logic applies across event rentals. If you’re comparing line items across a broader event budget, this guide to hire price deals for events is useful because it shows how package pricing can look sensible upfront but become inefficient when the item isn’t matched to the brief.

For food service equipment, ask:

  • How many hot dishes need to be held at once
  • What serving vessels will sit on the surface
  • Where the tray will physically stand
  • Whether the venue has stable power near the buffet
  • Whether guests will self-serve or staff will plate

If you’re comparing hot holding options more broadly, this overview of catering food warmers is worth reviewing: https://www.abchire.co.za/blog/catering-food-warmers/

Selection rule: Rent for the menu you’re serving at peak pressure, not the menu as it looks on paper.

A tray that’s slightly larger than you think you need is usually easier to manage than one packed edge to edge.

Smooth Setup for Event Safety and Flow

Most hot tray problems start before the food arrives. They start with placement, cable routing, and a rushed power decision.

In the Western Cape, that problem has become harder to ignore. Stage 4-6 load shedding affected 45% of days in Q1 2026, and 72% of event planners reported disruptions, which is why planning off-grid support for an 800W hot tray has moved from nice-to-have to operational necessity (Western Cape event disruption and load shedding context).

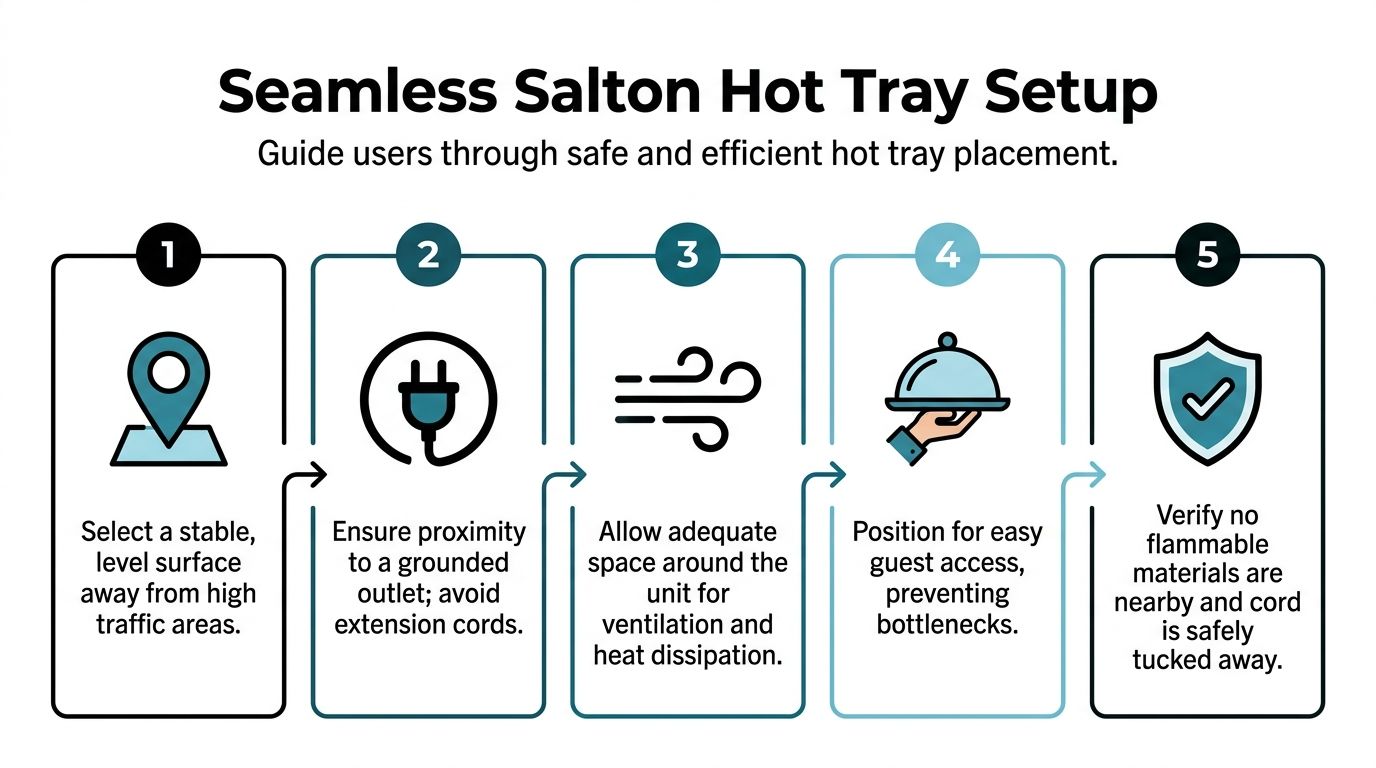
A five-step guide on how to safely set up a Salton hot tray for food service.

Place it where service can breathe

A salton hot tray shouldn’t sit at the narrowest point of the buffet. It needs a stable, level surface with enough side clearance for hands, utensils, and dish changes.

Good placement usually means:

  1. near service, but not at the guest pinch point
  2. close to a grounded outlet
  3. away from draping, paper menus, florals, and loose napkins
  4. positioned so staff can replace dishes without reaching across guests

If people need to queue tightly around it, move it. The tray should support flow, not create a traffic knot.

Handle power like event infrastructure

At a venue, “there’s a plug there” isn’t a power plan. It’s a guess.

For reliable use:

  • Use a grounded outlet: Don’t share it casually with urns, fridges, DJ gear, or decorative lighting if you can avoid it.
  • Keep cable runs short: Long temporary runs increase clutter and risk.
  • Avoid cheap extension leads: If an extension is unavoidable, it must suit the appliance load and be routed safely.
  • Plan backup power in advance: Generator and inverter compatibility should be discussed before the event day, not during setup.

A long lead across a venue floor is one of the fastest ways to turn a neat buffet into a hazard. If you need to think through cable runs properly, this guide on extension lead planning is useful: https://www.abchire.co.za/blog/20-m-extension-cord/

Practical rule: If staff can’t explain which plug powers the tray and what backup exists if that plug dies, the setup isn’t finished.

Build setup into your event risk plan

Food equipment placement belongs inside the broader venue safety conversation. That includes walkways, trip risks, crowd direction, and staff access. A good reference point for that mindset is this article on event safety management, even though it discusses a different event setting. The principle carries over cleanly. Safe events are designed, not improvised.

For Cape Town venues, especially older wine farms and temporary marquees, test the setup early if you can. The earlier you discover a weak circuit or awkward table position, the less likely it is to affect service.

Operating Your Hot Tray Like a Pro

Once the tray is in place, the work shifts from setup to discipline. Most service issues come from small mistakes. Staff add food too early, skip preheating, crowd the surface, or use the wrong dishes.

The salton hot tray has always been valued for convenience. That reputation hardened in the 1950s after a Ladies' Home Journal feature helped triple sales, and one user said she’d “rather be without her front door than her Hotray.” That level of loyalty came from dependable, low-fuss use, which is still exactly what event teams want from it today.

A professional chef carefully garnishes a variety of elegant gourmet dishes displayed on a sleek hot tray.

The service habits that make the difference

Start with a proper preheat. If the tray hasn’t stabilised before dishes go on, the first stretch of service is always weaker.

Then pay attention to vessel choice.

Use:

  • Ceramic dishes
  • Pyrex or similar oven-safe glass
  • Metal serving vessels that sit flat and stable

Avoid:

  • Melamine
  • thin, fragile glassware
  • warped containers with uneven bases
  • oversized pots that overhang too far and trap access

Heat evenly, don’t pile blindly

The best operators don’t cover every centimetre of the tray just because they can. They leave enough room to manoeuvre and enough breathing space for heat to distribute more consistently.

Three habits help immediately:

  • Put heavier dishes where the surface performs most steadily.
  • Keep sauces and moist dishes covered when possible.
  • Rotate or stir suitable items during longer holds so the top layer doesn’t tell a different story from the base.

Use speciality areas intentionally

On buffet-cart style models, dedicated warmer zones or “hot spot” areas are most useful for gravy, sauces, or beverage service accessories, not for random overflow. That’s where a lot of users go wrong. They treat every warm area the same, then wonder why one item thickens too much while another lags.

Keep the tray for maintaining service temperature. Keep the food fully cooked and properly hot before it ever lands there.

A well-run hot tray station looks quiet. That’s usually the sign that the team has done the basics right.

Post-Event Cleaning and Rental Return Protocol

“Easy clean” is one of the most misleading phrases in catering equipment. Easy to wipe isn’t the same as hygienic for rental circulation.

That matters more in local event conditions than many hosts realise. The SA National Health Laboratory Service reported a 15% higher incidence of foodborne illness at summer events, and Cape Town’s humidity makes rushed wipe-downs a poor standard for gear that has held warm food during service (summer event hygiene concern and cleaning gap).

Why a quick wipe isn’t enough

Warm surfaces, food splashes, condensed steam, sauces, and transport dust create a film you can’t always see under event lighting. On return, that residue becomes baked-on staining, odour retention, or a hygiene problem for the next booking.

A proper post-event routine should include:

  • Switch off and cool fully: Cleaning a warm tray too early can smear residue and stress the surface.
  • Lift off food debris first: Don’t grind it into the finish with a cloth.
  • Use a soft cloth or sponge: Abrasive pads shorten the life of glass and stainless surfaces.
  • Dry thoroughly before packing: Moisture left under covers or in cable storage becomes tomorrow’s problem.

Glass and stainless don’t behave the same way

Tempered glass surfaces usually show grease and fingerprints faster. Stainless styles tend to hide residue better, which is why people often clean them less thoroughly than they should.

For glass surfaces:

  • use a mild cleaner approved for food-adjacent equipment
  • avoid scraping with metal tools
  • check edges carefully for sticky build-up

For stainless surfaces:

  • wipe with the grain where relevant
  • pay attention to corners and seams
  • don’t leave sanitising product pooled on the surface

Clean for the next user, not for the handover table.

What rental teams look for on return

Rental returns are smoother when the unit comes back dry, cool, packed properly, and free from hardened residue. What causes most disputes isn’t normal use. It’s preventable damage from harsh chemicals, soaked electrics, scratched surfaces, or cords wrapped badly around hot equipment.

If you’re hiring several service items together, this broader guide to catering gear is a useful companion: https://www.abchire.co.za/blog/catering-equipment-for-hire/

Before return, do a final check:

  • Is the cord clean and untwisted?
  • Is the plug dry?
  • Are there any chips, cracks, or surface marks?
  • Has all tape, foil, or décor residue been removed?
  • Is the tray packed so it won’t shift in transit?

That last step matters. A tray can survive the event and still be damaged in the boot on the way back.

Troubleshooting Common Hot Tray Hiccups

A salton hot tray is straightforward equipment, which is good news when something feels off during service. Most hiccups are simple. The key is not to panic and not to start guessing with unsafe fixes.

If the light is on but the tray feels weak

Start with the basic checks:

  • confirm the plug is seated properly
  • test the outlet with another approved appliance
  • make sure the tray isn’t overloaded with cold or very heavy dishes
  • check whether the unit was preheated before service started

Sometimes the tray is working, but the food vessel is the primary issue. Thick-bottomed cookware, poorly fitting dishes, or containers with very little contact on the warming surface can make heating feel patchy.

If heat seems uneven

Uneven warming is often a placement problem, not a unit failure.

Try this:

  1. Re-space the dishes so they’re not packed tightly.
  2. Move the heaviest item off the most crowded section.
  3. Cover foods that are drying on top and cooling underneath.
  4. Rotate suitable dishes during service.

One overloaded tray usually performs worse than two sensibly managed holding points.

If the unit trips power or cuts out

Treat that as a setup issue first.

Remove the load, switch the tray off, and inspect the power source. Shared circuits, weak temporary leads, and venue plug points that already carry lighting or bar equipment are common culprits. Don’t keep resetting and hoping for the best. Find the source of the strain.

If you spot visible damage

A cracked glass surface, exposed wiring, or a plug that feels loose is a stop-use issue. Don’t tape it, cover it, or move forward because guests are already arriving.

If the tray looks compromised, take it out of service immediately and shift to your backup food holding plan.

That’s the professional move. Not forcing damaged equipment through one more function.

Frequently Asked Questions About Salton Hot Trays

Can a salton hot tray cook food from cold

No. It’s best used to hold already-cooked hot food at service. If you place chilled food on it and expect full reheating, service quality drops and timing gets messy fast.

Can I use it outdoors

It can work in a sheltered setup, but open outdoor use is risky. Wind cools dishes, moisture complicates electrics, and uneven flooring makes buffet service clumsy. Under cover is one thing. Fully exposed lawn service is another.

What dishes work best on the tray

Flat-based ceramic, oven-safe glass, and suitable metal serving dishes usually perform best. Containers that rock, bow, or sit on tiny contact points don’t hold evenly.

Is one tray enough for a wedding buffet

Sometimes, but often not. It depends on the menu design and whether the tray is supporting one section of service or carrying the whole hot line. For weddings, planners usually get better results by assigning each tray a clear role rather than expecting one unit to do everything.

How should I transport it

Transport it upright and cushioned. Keep hard décor items, crates, and metal stands from shifting against the surface. Don’t wrap the cord tightly around the body while the unit is still warm.

What should I ask before booking

Ask about:

  • the tray surface type
  • the unit’s power draw
  • whether your venue has suitable nearby power
  • whether you need backup supply for load shedding
  • how the item must be cleaned before return
  • how it should be packed for transport

Is a vintage model always better

Not always. Vintage units can offer excellent service area and solid presence on a buffet, but they need to be judged on condition, not nostalgia. A well-maintained newer unit is often the smarter choice if transport, handling, and quick setup are the main priorities.


If you need reliable event equipment from a team that understands Cape Town venues, Winelands logistics, and the practical realities of food service under pressure, ABC Hire is a strong place to start. They can help you choose the right rental setup for weddings, corporate functions, matric events, and private celebrations without overcomplicating the brief.