Tents for Hire in Cape Town Events

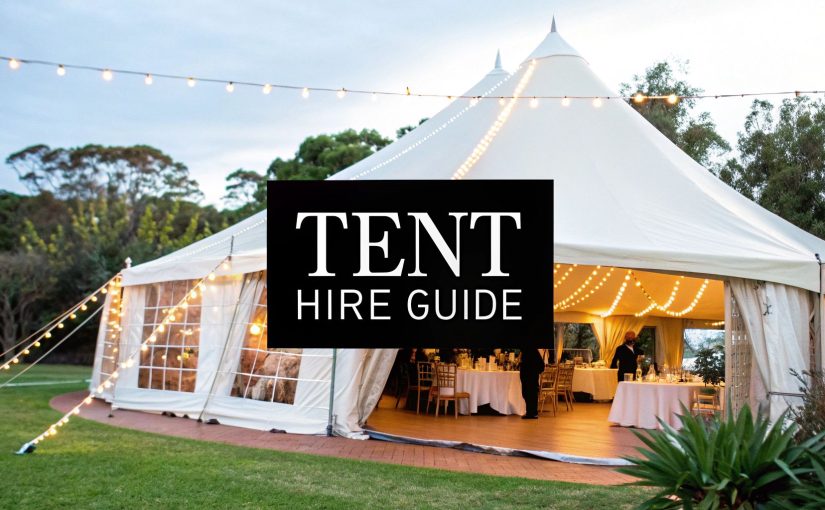
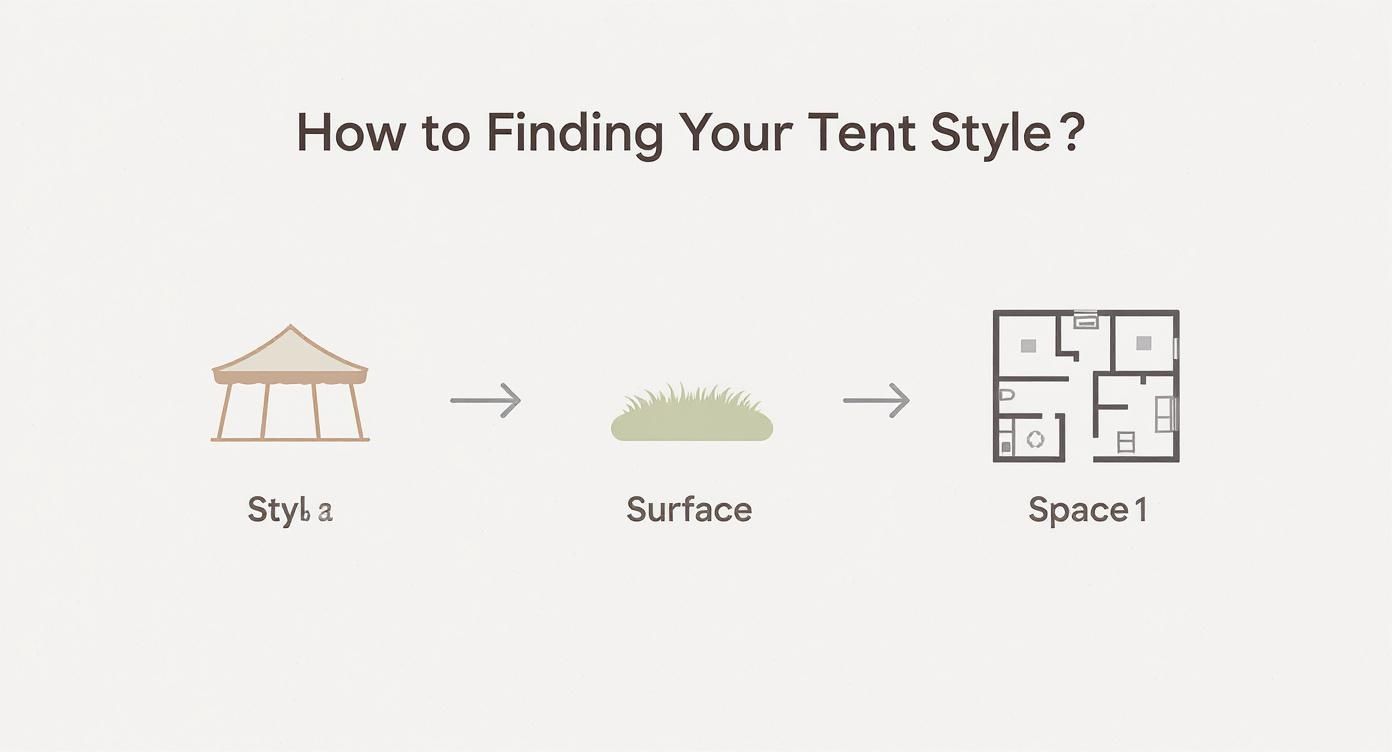
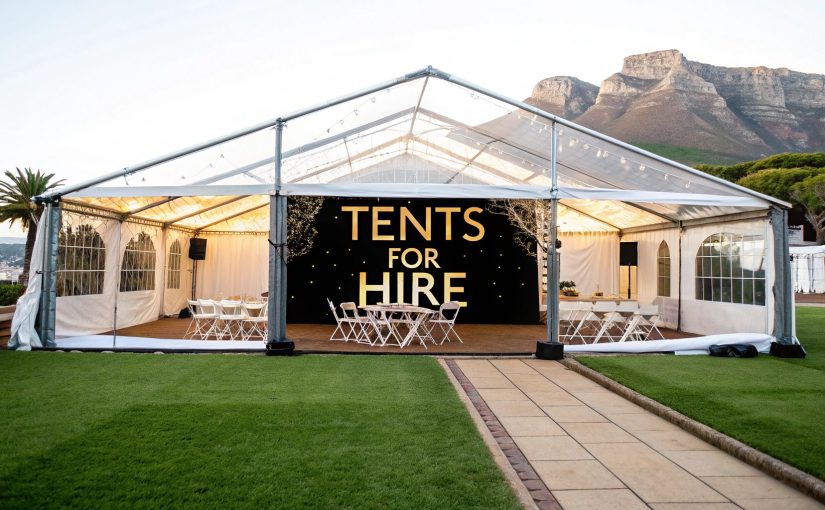
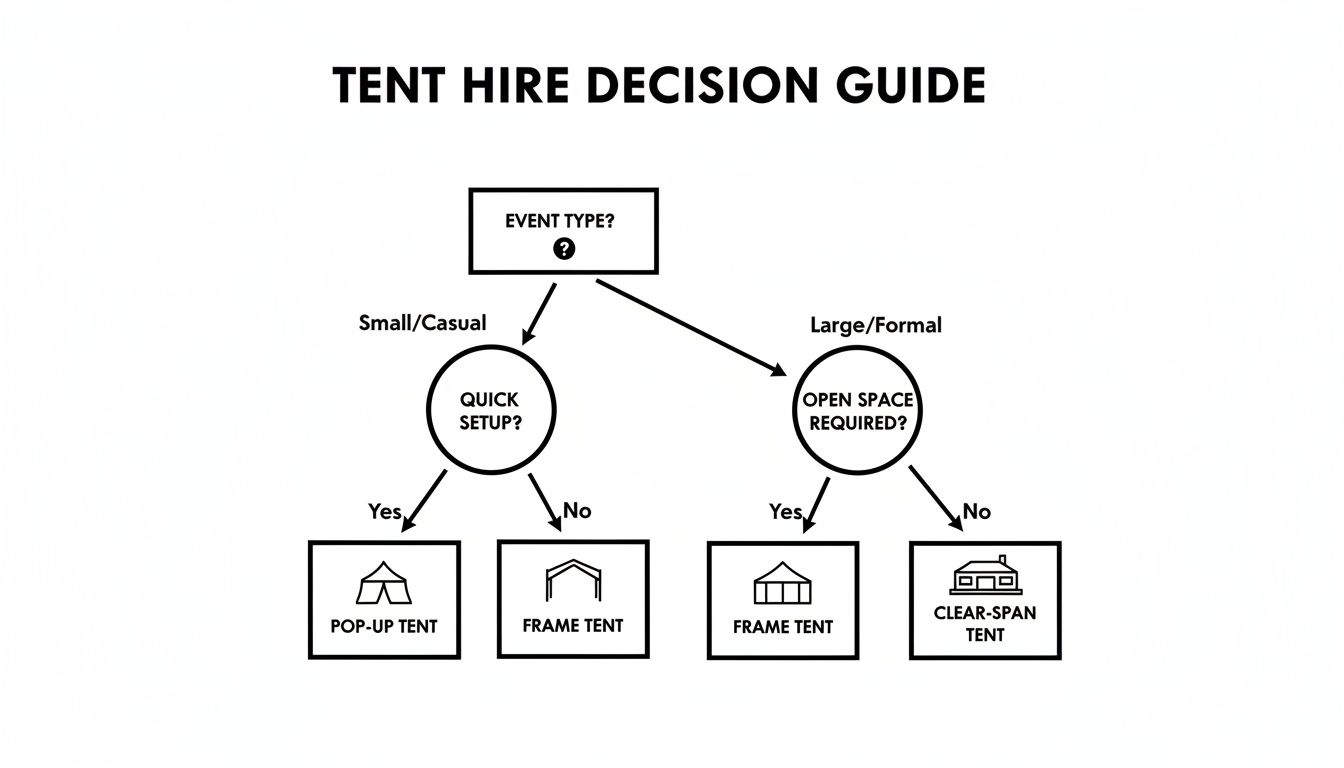
Every event has its ideal canopy. Pop-up, frame, clear-span and pole tents each bring their own strengths. By choosing the right structure for your guest count and site conditions, you avoid last-minute headaches and ensure a smooth setup.

Selecting The Best Tent Type

Before you commit, consider how many people you’re hosting, the ground you’re working with and how fast you need to get under cover.

  • Pop-Up Marquees: Ready in minutes, they handle up to 50 guests on flat lawns or patios.
  • Frame Tents: No centre poles means flexible seating for around 200, perfect on uneven terrain.
  • Clear-Span Tents: Steel-beam construction opens up space for 200+ attendees—ideal for grand weddings or galas.
  • Pole Tents: That classic peaked look accommodates 80–150 guests, provided you have clear anchoring zones.

These overviews help you match style, capacity and site requirements at a glance.

Comparison Of Common Tent Types

Below is a quick reference to guide your decision:

Comparison of Common Tent Types

Tent Type Capacity Range Structure Type Ideal Use
Pop-Up Up to 50 Lightweight Frame Small backyard parties
Frame Up to 200 Alloy Frame Weddings on uneven ground
Clear-Span 200+ Steel Beams Corporate events and galas
Pole 80–150 Centre-Pole Design Festivals and concerts

Use this table to spot which design fits your event vision.

Picture a clear-span canopy draped across a sloping vineyard for a gala dinner. You get unobstructed sightlines, rain-tight walls and enough headroom to suspend chandeliers.

“Frame roofs adapt to rocky surfaces without centre poles blocking sightlines.”

On the flip side, pop-up marquees shine for spontaneous beach birthday parties or corporate lunch breaks.

Infographic about tents for hire

Industry forecasts predict an 11.7% CAGR in MEA party-supply rentals from 2023 to 2030, reflecting growing demand in South Africa’s events market. Read the full report from Grand View Research.

For a different look, check out our guide on stretch tents for hire in Cape Town and discover how those flowing canopies can transform any outdoor space.

When your guest list outgrows one structure, think modular. You can link two pole tents for a seamless aisle or add sidewalls to expand weather protection.

In Cape Town’s coastal breeze, sturdy sidewalls are non-negotiable for stability. Always request precise venue measurements and share a detailed layout with your supplier. That extra step prevents miscommunication and surprise charges on install day.

Matching tent type to your vision—and logistics—delivers real peace of mind. Enjoy seamless hire.

Assess Site Conditions and Secure Permits

Venue terrain overview

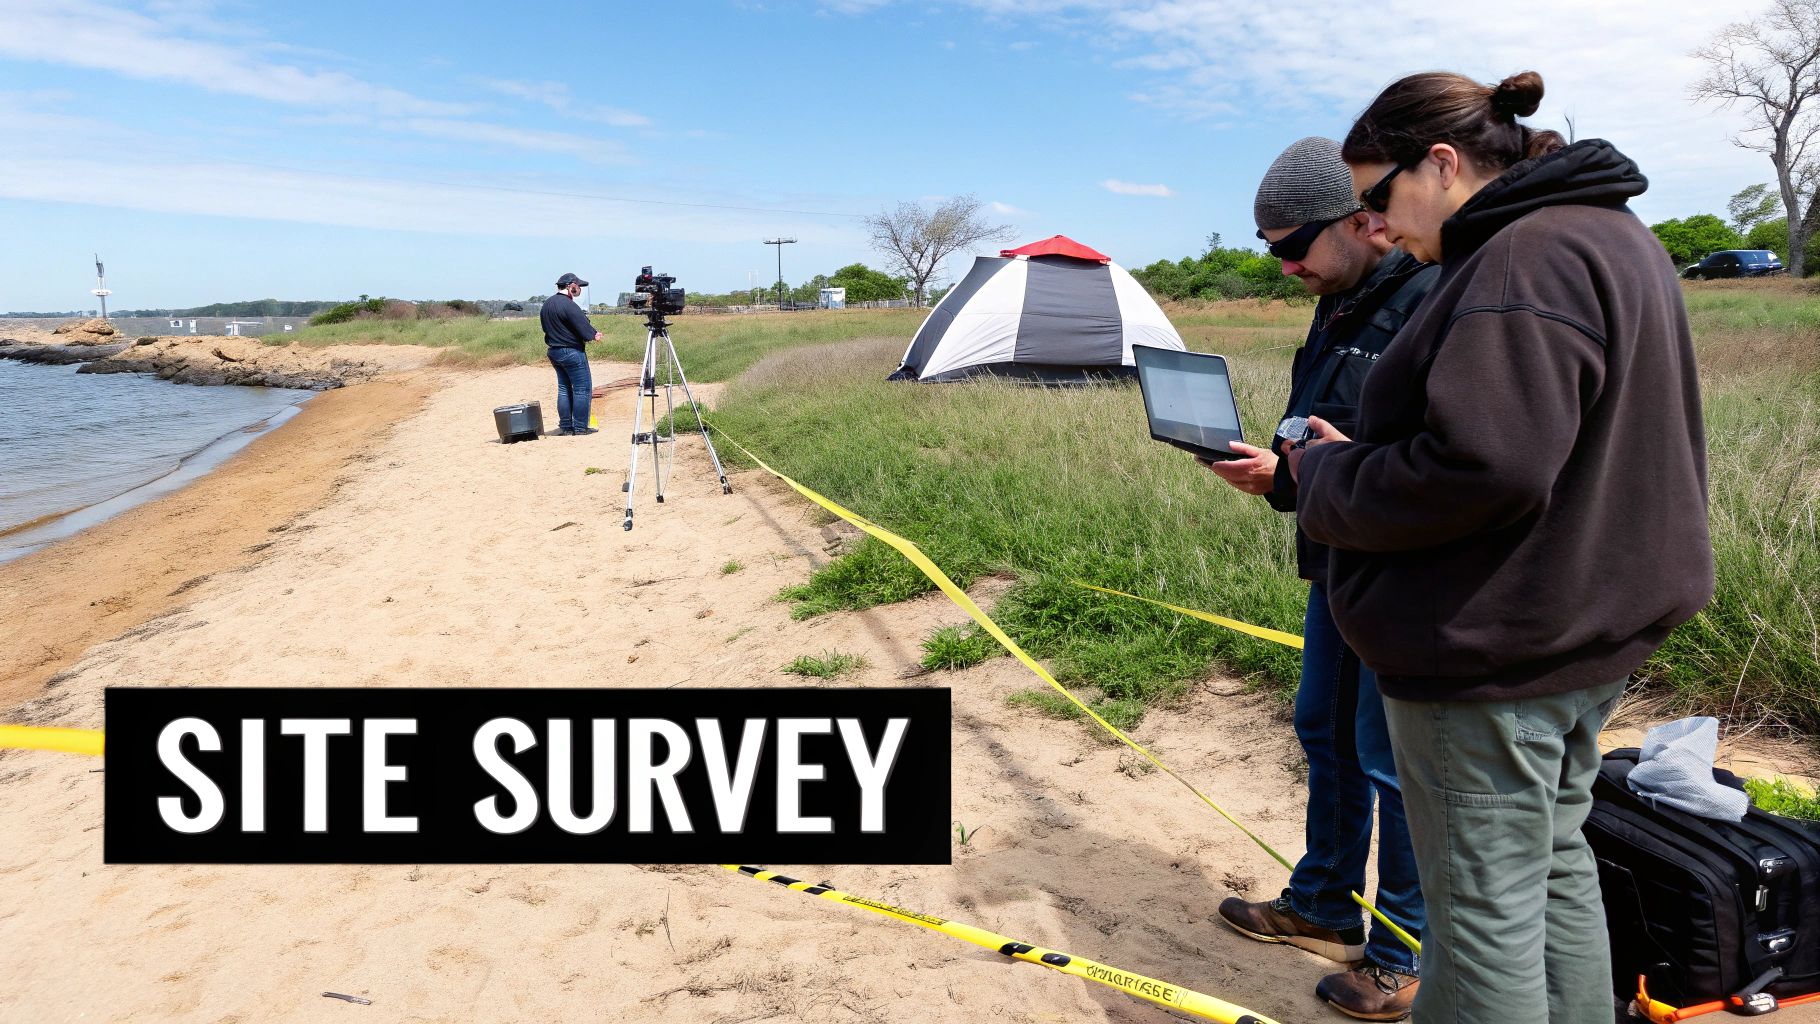
You’ll quickly find that ground stability sets the tone for any successful tent hire. A thorough site survey reveals soil type, slope and drainage patterns—details that keep muddy chaos at bay.

Imagine comparing a sandy beach with a lush riverside lawn. Beach locations often call for weighted anchors or ballast systems, while lawns benefit from raised matting to keep your guests comfortably dry.

  • Soil Composition: Guides your choice of anchors and flooring mats
  • Ground Slope: Shapes tent orientation and footprint
  • Drainage Channels: Ensures water won’t pool under flooring panels
  • Power Points: Helps you map cable runs and generator spots
  • Access Lanes: Confirms delivery trucks can reach the setup area

Site Survey Checklist

A series of wide-angle photos becomes your best friend when you’re dealing with planners. Capture each corner from different perspectives to log obstacles and natural features.

Municipal parks in Cape Town often demand precise site coordinates. GPS-marked corners let you draft an accurate plan and avoid map revisions from council at the eleventh hour.

Allow a 5–7 day buffer for basic groundworks like trenching or drainage piping. That way, even unexpected underground pipes won’t derail your timetable.

“We saved hours by mapping power and water lines in advance,” says one Cape Town event coordinator.

Permit Submission Tips

Before you rush to apply, gather every document you’ll need. Typical requirements include:

  • A detailed site plan showing tent footprint, anchor spots and emergency exits
  • Proof of public liability insurance
  • Environmental impact notes where required

Then tick off these actions:

  • Draft the site plan and mark out all anchor locations
  • Submit your temporary use application to the City of Cape Town at least 21 days before your event
  • Arrange electrical inspection certificates for any generator or mains hook-up
  • Pay permit fees and record your confirmation reference for on-site checks

Keep council holiday closures in mind. Around December, service desks handle 30% fewer submissions, so schedule your application early to beat the backlog.

Permit Type Processing Time Fee Range (ZAR)
Temporary Use Permit 10–15 working days 500–1 200
Electrical Inspection 3–5 working days 250–600
Environmental Clearance 7–10 working days 800–1 500

Preparing For Ground Work

Once your permits arrive, map out trailer access and mark off clear zones for forklifts and crew vehicles. A well-planned approach keeps everyone safe and on schedule.

  • Confirm permit numbers are displayed on-site
  • Double-check GPS coordinates with the venue manager
  • Schedule a final site walk-through 2 days before installation
  • Build in buffer time for unexpected ground repairs

Consider using surface protection boards on lawns. Polypropylene boards in 1 m² panels spread weight evenly and prevent turf damage.

“A few trenches saved us from soggy carpets after Cape storms,” recalls a local wedding planner.

Basic levelling and drainage prep typically take 8–12 hours for a 100 m² area. Book your mini-excavator or compactor in advance to avoid last-minute equipment shortages.

Access And Equipment Coordination

Before the big day, verify site entrance dimensions against your trailers—many Cape Town gates are under 3 m wide. Don’t forget to measure overhead clearances for crane lifts.

  • Check trailer turning radius for precise site approach
  • Plan around low-hanging branches and power lines
  • Designate parking zones for crew and equipment
  • Label each equipment batch for swift identification

Align your delivery window with local traffic patterns—avoid peak periods around the V&A Waterfront. Securing a timed slot cuts waiting costs and idle crew hours.

Stay in close contact with venue managers and council liaisons. A shared checklist or simple project tool can keep everyone aligned and ensure installation day runs without surprises.

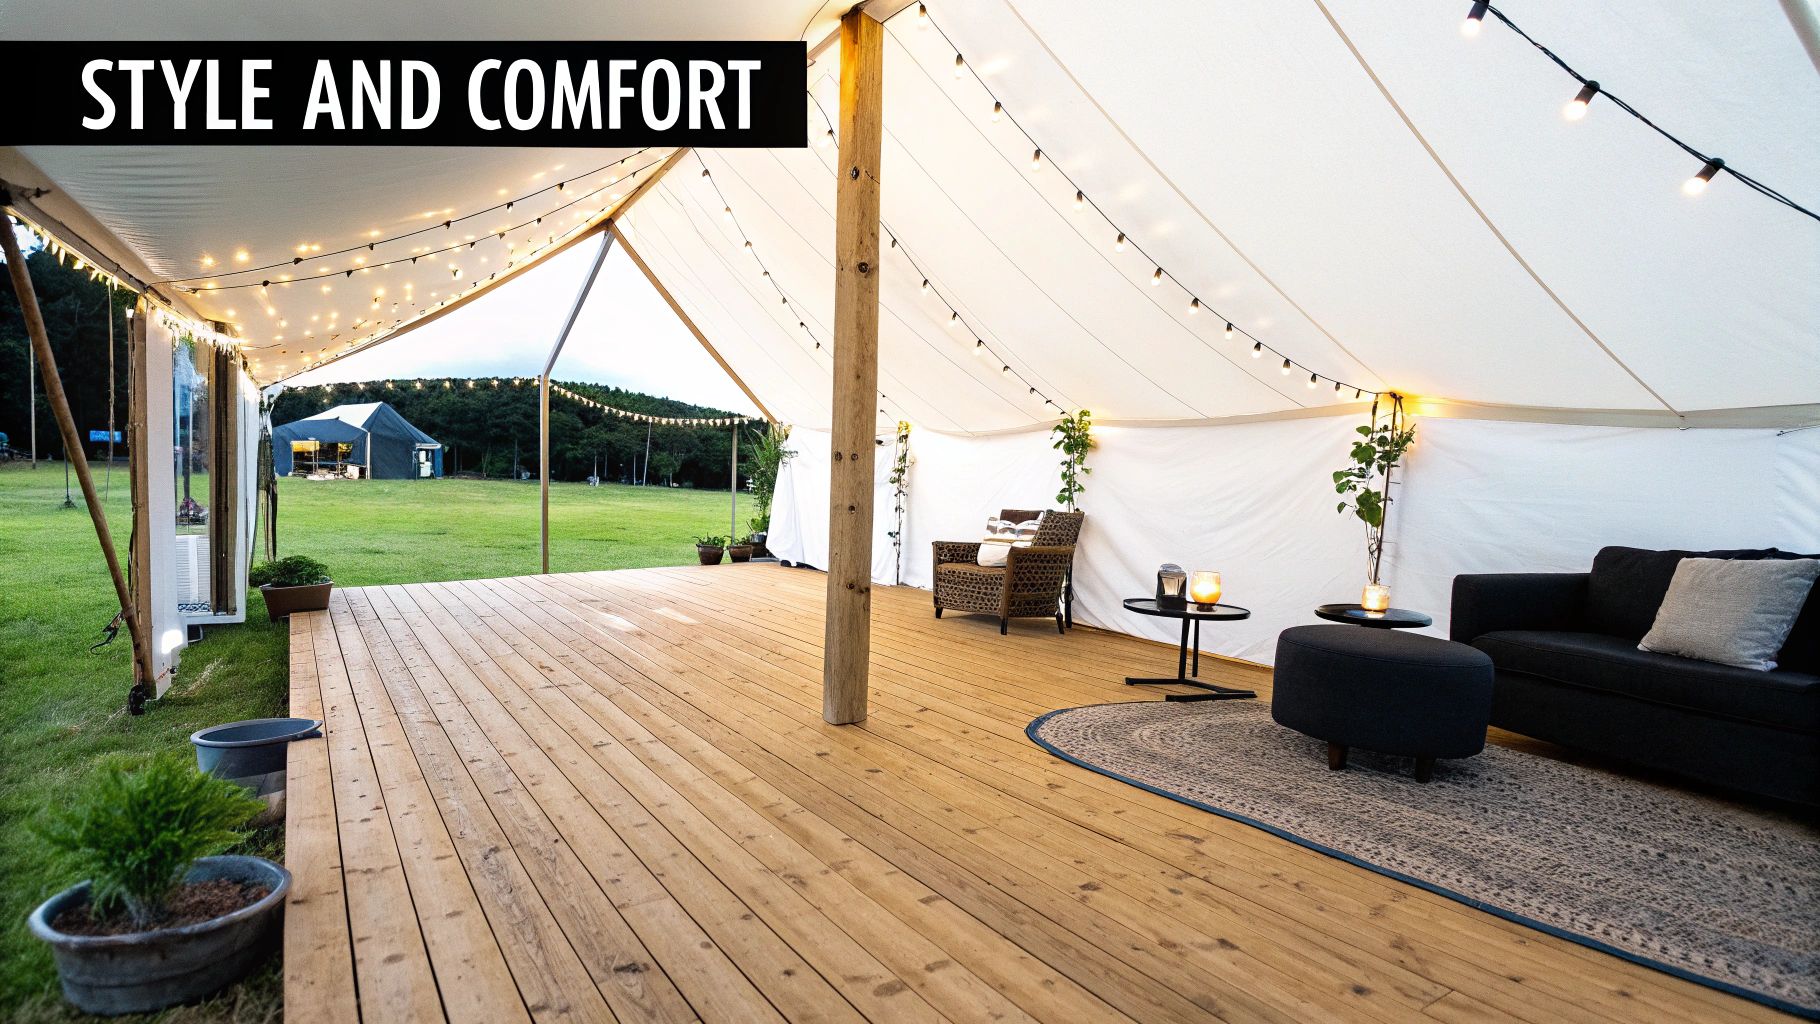
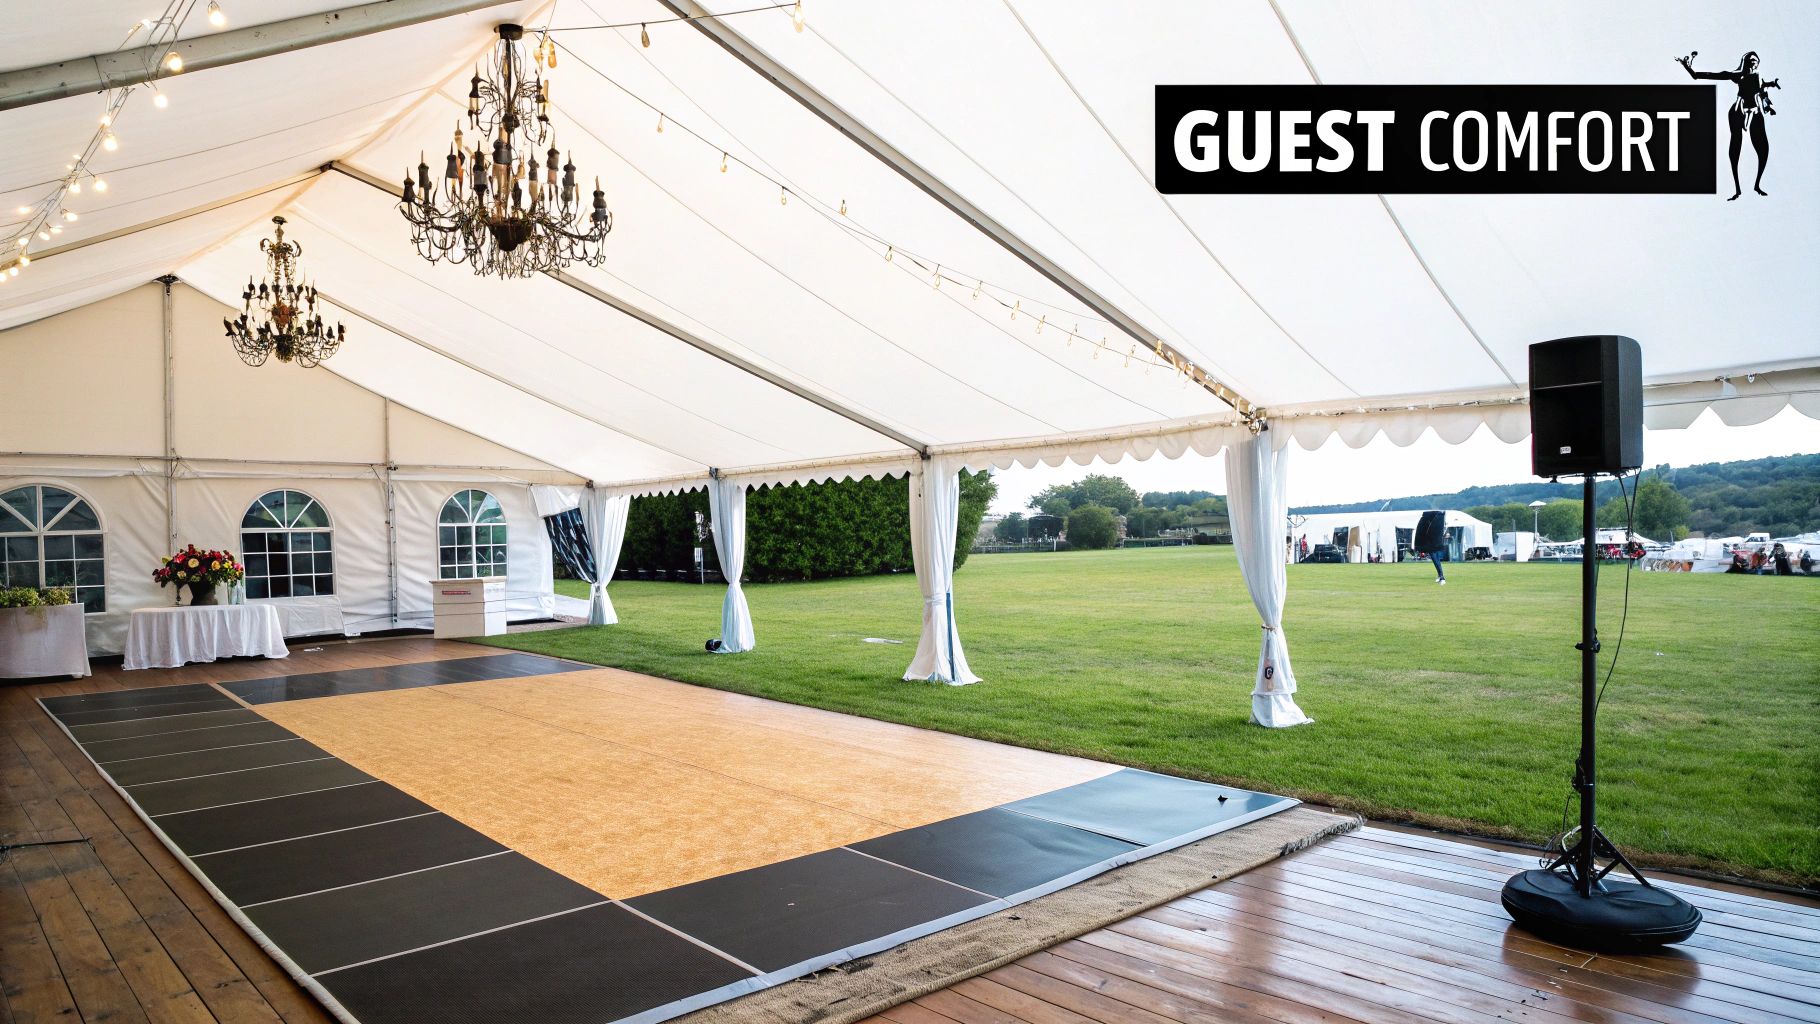
Choose Accessories And Enhance Guest Comfort

Accessories can turn a blank tent into a space your guests will remember long after the last dance. A well-chosen floor, sidewall design and climate solution keeps everyone cosy and engaged no matter the weather. Drawing on years of event work in Cape Town, I’ve seen how the right details can elevate any gathering.

Luxury flooring often sets the tone. Think polished panels for a chic wedding reception or vinyl-backed carpet rolls that hug your path and absorb footsteps at a product launch. I once fitted foam-backed strips at a beach birthday—bare feet sank into plush softness while echoes faded away.

  • Dance-floor panels: Interlocking MDF or PVC boards built tough for DJs, dancers and high heels.
  • Roll-out carpet: Vinyl-backed strips that go down in minutes and lift up just as fast.
  • Transparent sidewalls: Clear PVC walls that frame mountain views and flood your tent with natural light.
  • Blackout sidewalls: Opaque walls ideal for film screenings or creating an intimate dinner glow.

Elegant tent accessories

Lighting does more than chase shadows. It defines zones and keeps the ambience on point. From backyard parties to black-tie galas, the right fixtures can make or break your event vibe.

Select Lighting And Atmosphere

At an annual corporate gala, I combined warm LED uplights along the peaks with a statement chandelier above the head table. Guests felt drawn to the stage, then ushered into cosy conversation corners. Meanwhile, battery-operated lanterns lined the aisles—no cables snaking across walkways and zero trip hazards.

Cape Town’s unpredictable weather means temperature control is non-negotiable. For crisp winter evenings, gas-powered patio heaters deliver instant warmth under that canvas roof. When summer heat crunches in, evaporation mist fans and portable air-con units can cool the space by 6–8°C in under ten minutes.

You might be interested in advanced tips on gas-powered patio heaters in our article on gas outdoor heating solutions.

Matching temperature control to guest flow can boost revenue by 15% in shoulder seasons.

Accessory Bundle Benefit Example Rate (ZAR)
Basic Seating Saves setup time 150 per guest
Table and Linen Cohesive look 250 per guest
Full Decor Pack Turnkey design 450 per guest

Package Extras For Higher Revenue

Bundling essentials—tables, chairs and linens—can turn quiet months into high-traffic seasons. In Stellenbosch last June, a simple 10% discount on table-and-linen packages saw a 20% spike in bookings. It’s a win-win: clients love the value, and your team spends less time juggling spreadsheets.

Grouping accessories also simplifies the quoting process and keeps your crew focused on flawless execution. When everything comes from one supplier, coordination runs smoothly and peace of mind comes standard.

Plan Delivery and Installation Logistics

On the big day, timing is everything. Working out the delivery window with your tent supplier and venue manager early will save you from last-minute headaches.

Seasoned event pros always build in a 30-minute buffer for traffic snarls around Table Mountain.

Plan early and stage gear zones for swift tent assembly.

Before the crew rolls in, mark the tent outline with spray paint or chalk. Double-check power outlets and water access to avoid unwelcome surprises.

Sample Timeline For Tent Setup

The goal here is clarity. Break down tasks into bite-sized chunks so every team member knows what’s expected.

  • Footprint Marking And Stake Placement
  • Frame And Pole Erection With Weather Checks
  • Sidewall And Flooring Installation
  • Power Hookup Testing And Lighting Setup
  • Final Safety Inspection And Punch-List Sign-Off

Label your crates and designate drop zones at each corner. That way, no one is tripping over equipment—and the tent goes up without a hitch.

Communication Strategies With Vendors

Transparent, consistent communication is the glue that holds logistics together. Share a simple arrival schedule by email and follow up with a quick SMS.

  • Set a 15-minute check-in window for each delivery.
  • Assign one person as the on-site decision-maker.
  • Draft a backup plan for last-minute tweaks.

A quick pre-install call can iron out any questions. When the day wraps, gather your team for a mini-debrief. Note what worked and what you’d tweak next time.

A concise punch list of finished zones—complete with photos—helps everyone see the end result. Tuck that list into your invoice to reinforce transparency and build trust.

Budget Wisely for Tents and Extras

Working out your real costs means looking beyond the tent marquee itself. In my experience, the base hire fee is just the tip of the iceberg.

Small pop-up tents typically start at R2 000, while clear-span giants can climb to R25 000. On top of that, delivery and labour sneak in another 15–20%, and during high season you might see surcharges of up to 30%.

Planning ahead and unpacking every line item will save headaches (and budgets) later on.

Break Down Core Charges

When quotes arrive, ask suppliers to spell out each cost:

  • Base Rental Fee
    Covers only the tent frame and canopy—no extras here.

  • Delivery Charge
    Varies by distance, vehicle requirements and site access.

  • Labour Costs
    Depends on crew size, setup complexity and ground conditions.

  • Seasonal Surcharges
    Peak months often attract higher rates as demand soars.

Seeing all fees laid out side by side helps you spot hidden add-ons before you sign. That clarity makes comparing tents for hire a breeze—and keeps surprises off the final bill.

In South Africa, summer events dominate the tent market. From November through March, utilisation rates spike. Come winter (June–August), things quiet down—and so do prices.

Here’s a quick look at how pricing and demand swing with the seasons.

Seasonal swings in tent hire can really stretch your budget. Below is a snapshot of average rates and margins during busy versus quieter periods.

Pricing Variations By Season
Comparison of average utilisation rates and rental prices during peak and off-peak periods

Season Utilisation Rate Average Rental Price Margin Range
Peak (Nov–Mar) 80% R15 000 25–35%
Off-Peak (Jun–Aug) 40% R8 000 15–25%

Notice how margins tighten outside high-demand months. Use these insights to time your booking and protect your bottom line.

What’s more, labour and delivery costs can climb an extra 20–30% during those summer rushes. Factor that in when you draft your budget.

Negotiate Smartly with Suppliers

Bundling services is a proven way to shave off costs. Industry pros often package heating or lighting with the tent shell—and unlock 10–15% volume discounts.

“Combining services sharpens your negotiating edge and keeps clients happy.”

Set aside a 5–10% contingency fund for permit delays or unexpected weather. I always track every expense in a simple spreadsheet—this level of transparency builds trust and speeds up approval cycles.

Here are a few tactics that consistently work:

  • Ask for flat-rate delivery when securing multiple tent sections.
  • Leverage end-of-season inventory to negotiate lower rates.
  • Propose multi-event contracts to reduce labour charges.
  • Request bundled quotes with a clear cost breakdown per service.

These moves can cut up to 8% off your total spend.

Before signing off, compare the final estimate against your budget sheet. Smart budgeting like this turns tent hire into a predictable—rather than painful—part of event planning.

With these strategies in hand, you’ll hit your financial targets without last-minute surprises. Enjoy the savings and smooth service delivery!

Local Cape Town Event Checklist

Cape Town event checklist

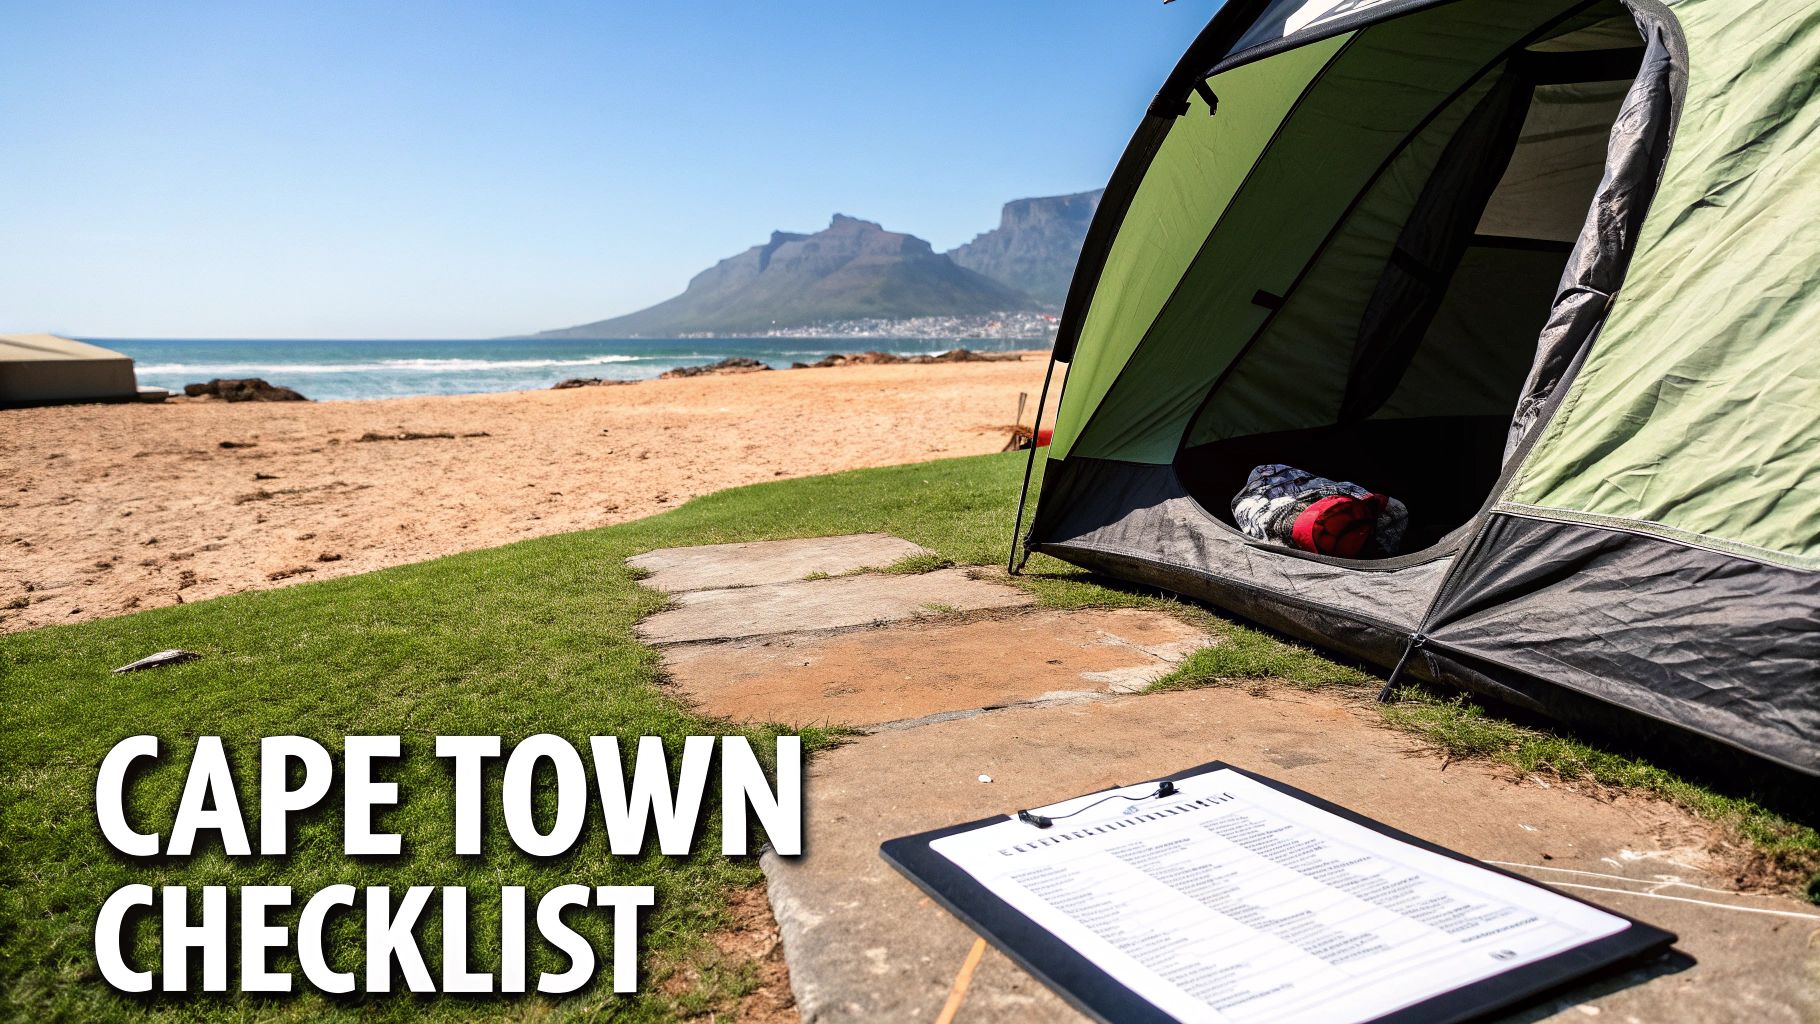
Getting your tent hire sorted in Cape Town means juggling permit windows, venue rules and our famous microclimates. Start by pencilling in deadlines for every public park, heritage site or municipal space on your shortlist.

  • Lodge applications for Kirstenbosch or Green Point Park at least six months before your event.
  • Double-check noise curfews and branding limits with each venue’s manager.
  • Factor in holiday periods that can push approvals out by up to 30%.

“Securing permits early saved us from scrambling when office closures hit in December.”

Assess Local Weather Risks

Shade from Table Mountain can disappear by lunchtime, only to be replaced by gusty coastal winds. Pick a tent and accessories that suit your exact spot.

  • Wind-rated sidewalls for beachside gatherings.
  • Ground sheets or ballast systems on sandy lawns.
  • Reliable power and water suppliers for remote sites.

Since the pandemic, demand has soared — driven by weddings, corporate functions and the tourism sector. Forecasts predict South Africa’s vacation and event rental markets will generate hundreds of millions in revenue every year, with peak seasons from November to March. Learn more about these findings on Statista.

Plan Logistics And Timing

In high season (November–March), build in extra days for delivery and setup. Sync calendars with your tent supplier and the venue so nothing clashes.

Track every milestone with ABC Hire’s checklist:

  • Site surveyed and GPS mapping completed
  • Permits confirmed and insurance documents uploaded
  • Delivery window locked in with your supplier
  • Final walkthrough scheduled 48 hours before the event

Download the event planning checklist template for Cape Town events.

A few well-timed tweaks now will save you last-minute headaches later and keep guests comfortable from start to finish.

Frequently Asked Questions

Knowing how much space to allocate can save headaches. Generally, allow 1.2 m² for each guest who’ll be mingling and 1.5 m² for every diner at a seated banquet. Then tack on a 20% buffer for aisles, service tables and bar stations.

  • Standing Reception: approx 1.2 m² per person
  • Seated Banquet: approx 1.5 m² per person

That extra breathing room keeps queues at a minimum and conversations flowing.

If you’re hosting 100 guests at tables, aim for at least 150 m². A 10×15 m marquee or a pair of linked frame tents hits that mark nicely. Armed with these figures, you’ll get accurate quotes and avoid scrambling for space at the eleventh hour.

Plan your booking well before Cape Town’s peak season. Secure a tent 3–6 months in advance. A 30% deposit typically holds your dates and prices, with the balance due about 2–4 weeks before your big day.

  • Peak Season: book 4–6 months ahead
  • Rush Orders: expect a 10–15% surcharge

These windows align with suppliers’ schedules and seasonal fee structures.

Tent Booking Advance Guide

Your basic hire package includes the canopy, poles and stakes. Everything beyond that – flooring, sidewalls and lighting – is itemised separately. Order anything less than three weeks out, and you’ll likely see a 15% rush fee.

“Flexibility drops off sharply within three weeks of your event,” says a Cape Town event coordinator.

Are Power and Lighting Included?
Most suppliers treat power hookups and LED strips as extras. You’ll find them listed individually so you know exactly what’s covered.

  • LED Strip Section: from R150
  • Generator Hire: from R850 per day

Knowing this upfront avoids nasty surprises on your invoice.

Customisation on Short Notice
Last-minute requests hinge on stock levels. Closer than three weeks, you might find sidewalls or dance floors in short supply. Aim to have 80% of your accessories confirmed before the supplier starts finalising.

Local Permit Requirements

Every venue in Cape Town has its own rules. Most councils ask for permit applications at least 21 days before installation.

  • Keep permit numbers visible onsite for inspectors

Contact ABC Hire, your trusted event partner, for expert tents for hire in Cape Town at https://abchire.co.za today

Your Ultimate Guide to Tent Hire for Parties

Hiring a tent for your party is one of the most flexible and creative ways to host an outdoor event. It literally transforms any space you choose into the perfect venue, giving you total control over the location, size, and atmosphere of your celebration. Rain or shine, you can create a truly unique and memorable experience.

Why Tent Hire Elevates Your Party Planning

A beautifully decorated tent set up for an elegant evening party

When you start planning a party, the first big question is always: where? Finding the right venue can feel impossible. The location is perfect but the room is too small, or the space is right but the décor just doesn’t fit your theme. This is where tent hire for parties completely changes the game.

Think of a hired tent as more than just a temporary shelter—it’s your very own blank canvas. You get a solid, architectural-grade structure that you can set up almost anywhere, giving you ultimate control. Suddenly, your beautiful back garden, a scenic piece of land, or even a chic urban courtyard can become the backdrop for the event you’ve been dreaming of.

Complete Creative Freedom

A traditional venue has its own fixed walls, carpets, and lighting that you have to work around. A tent, on the other hand, is a completely neutral and adaptable space. This freedom means you can build your party’s atmosphere from the ground up, making sure every single detail reflects your personal style or corporate brand.

The key benefits of this flexibility are huge:

  • Location Independence: You can host your event somewhere meaningful or stunning that would otherwise be off-limits.
  • Customisable Layouts: Want a big dance floor, a cosy lounge area, and a separate space for the buffet? No problem. You design the floor plan that works for you.
  • Thematic Control: Go wild with decorations! Match the lighting, flooring, and draping to your exact vision without any restrictions.

The demand for these kinds of personalised experiences is skyrocketing. The Middle East and Africa region has actually become the most dominant zone in the global tent rental service market, and South Africa is a massive part of that growth. Our thriving events industry—from weddings to huge corporate functions—has created a serious need for these impressive temporary structures. You see it everywhere, especially with the rise of outdoor weddings where couples use tent rentals to turn picturesque settings into truly elegant venues. If you’re interested, you can read the full research on the tent rental market to see just how much it’s booming.

A hired tent is more than just cover; it’s a strategic choice that hands you the creative reins. It allows you to design an experience, not just book a room, making your celebration truly one-of-a-kind.

Ultimately, choosing a tent for your next party is about embracing possibility. It’s a practical and stylish solution that adapts to your needs, protects your event from our unpredictable weather, and gives your guests a stunning setting to enjoy themselves in.

Finding the Perfect Tent for Your Event Style

Choosing the right tent is about so much more than just shelter—it’s about setting the entire tone for your party. Think of the tent as the canvas for your event. The style you pick can transform a simple get-together into an elegant gala or a relaxed festival.

Not all tents are created equal, and knowing the key differences will help you make a choice you’re happy with. Let’s break down the big three in the world of tent hire for parties: Frame Tents, Peg and Pole Tents, and Stretch Tents. Each one has its own personality and purpose.

The Self-Supporting Hall: Frame Tents

A Frame Tent, often called a marquee, is the ultimate problem-solver. Its biggest advantage is its clever design—a rigid aluminium frame holds up the roof, which means there are absolutely no interior poles to get in your way.

This wide-open interior gives you total freedom. You can set up your tables, create a dance floor, or position a stage anywhere you want without having to plan around annoying poles. Because they support themselves, frame tents are incredibly versatile and can be set up on almost any surface, including:

  • Grass and soft ground
  • Pavement and tar
  • Patios and decks
  • Even tennis courts!

On hard surfaces, they’re secured with heavy weights, making them a super reliable choice whether you’re in a city centre or a backyard where you can’t use pegs.

The Classic Peak: Peg and Pole Tents

If you’re picturing a classic, romantic wedding or a fancy garden party, the Peg and Pole Tent is probably what you have in mind. These tents are all about those gorgeous, high peaks, created by centre poles pushing up the sweeping canopy. The silhouette is just beautiful and looks amazing in photos.

But that classic elegance comes with two things to remember. First, those centre poles are part of the structure, so you’ll need to work them into your floor plan. Second, to get that lovely tensioned look, the tent has to be staked securely into soft ground like grass or soil. That means they won’t work on hard surfaces like concrete, but for a traditional outdoor celebration, their timeless look is hard to beat.

The Modern and Flexible: Stretch Tents

The Stretch Tent (sometimes called a Bedouin tent) is the cool, creative option. It’s made from a special waterproof fabric that’s incredibly flexible, allowing it to be rigged in all sorts of interesting shapes. You can set it up as a traditional canopy, attach it to a building, or even shape it around trees and garden features.

Stretch tents have a unique way of blending in with their surroundings. Their fluid shape feels more organic and integrated, making the tent seem like a natural part of the space rather than just a structure you’ve put up.

This makes them perfect for modern parties, cocktail events, or any celebration where you want a stylish, less formal vibe. While they look incredible, they offer a bit less protection from heavy wind and rain compared to a fully walled frame tent. If you’re planning something smaller and more casual, it’s also worth checking out other options; our guide on finding a gazebo for hire has some great tips for more intimate events.

Party Tent Styles at a Glance

Still weighing your options? This quick comparison should help you pinpoint the best fit for your party’s needs, location, and overall style.

Tent Type Best For Surface Requirement Key Advantage
Frame Tent (Marquee) Corporate events, weddings, parties needing an open floor plan. Any surface (grass, pavement, decks). Maximum layout flexibility with no interior poles.
Peg and Pole Tent Traditional weddings, classic garden parties, elegant galas. Soft ground only (grass, soil). Stunning aesthetic with high, swooping peaks.
Stretch Tent Modern cocktail parties, stylish brand activations, unique spaces. Versatile, can anchor to ground or buildings. Unmatched adaptability and contemporary style.

Ultimately, the best tent is the one that not only fits your guest list but also complements the atmosphere you want to create for your special day.

Calculating How Much Space You Really Need

Nailing the right tent size is easily one of the most important parts of hiring a tent for a party. If you go too small, your guests will be squashed and uncomfortable. But go too big, and the space can feel cold and empty, not to mention you’ll be paying for area you don’t even use. The secret is to think beyond a simple headcount and start visualising the entire event layout, mapping out every single thing that needs to fit inside.

The journey to finding your perfect tent starts with the style, the surface you’re setting it up on, and, of course, the total space you’ll need. This visual guide is a great starting point to walk you through those initial decisions.

Infographic about tent hire for parties

As you can see, once you’ve picked a tent style that fits your party’s vibe, you have to make sure it works on your surface (like grass or paving) before you can get down to the final space calculations.

Start With Your Guest Count

First things first, let’s get a rough estimate based on how your guests will be socialising. This gives you a baseline number to build on before you start adding all the other fun stuff into the mix.

A good rule of thumb is to use these simple guidelines:

  • Standing Cocktail Party: Set aside about 0.5 to 0.75 square metres per guest. This gives everyone enough room to mingle and move around without constantly bumping into each other.
  • Seated Dinner (Round Tables): You’ll need to plan for roughly 1.2 to 1.4 square metres per guest. This bigger space allows for the chairs and the room people need to pull them out without a fuss.

Let’s put that into perspective. For a standing cocktail party with 80 guests, you’re starting with a baseline of 40-60 square metres. But if you’re planning a seated dinner for those same 80 guests, you’re already looking at 96-112 square metres. That quick calculation shows you just how much the format of your event changes your space requirements.

Build Out Your Complete Floor Plan

Now for the really important bit: making room for everything else. Your guests aren’t just going to be standing or sitting. They’ll want a dance floor, a bar, and probably a spot for the DJ. Forgetting to account for these is the number one mistake people make.

The biggest oversight in party tent planning is calculating space for people but not for activities. A successful event layout accounts for the flow of movement, entertainment, and service areas—not just seating.

To make sure you don’t miss anything, use a checklist. Every single one of these elements needs its own dedicated footprint inside the tent. This is where you really see the scale of the party supply rental market. Globally, this market was valued at USD 15,225.4 million in 2023, with tables and chairs alone making up nearly 30% of that revenue. It just goes to show how much space furniture and other functional areas take up. You can learn more about the party rental market growth to get the full picture.

To help you out, here’s a quick cheat sheet with estimates for how much space you’ll need for various party elements.

Party Element Required Space (Approx. Square Metres)
Guest Seating (Round Tables) 1.2 to 1.4 sq. m per person
Guest Standing (Cocktail Style) 0.5 to 0.75 sq. m per person
Dance Floor 0.3 sq. m per guest (assuming half are dancing)
DJ Booth or Small Stage 5-10 sq. m
Bar Area 10-15 sq. m (for the bar and queuing space)
Buffet Tables (2.5m long) 3 sq. m per table (plus room for the queue)

Remember to add these figures to your baseline guest calculation to get a true picture of the total square metres you’ll need.

Let’s walk through a real-world example to see how it all comes together.

Example: An 80-Guest Party with Dinner and Dancing

  1. Guest Seating: 80 guests at 1.2 sq. metres each = 96 sq. metres
  2. Dance Floor: 80 guests x 0.3 sq. metres = 24 sq. metres
  3. DJ Booth: A decent-sized setup = 10 sq. metres
  4. Bar Area: A standard bar with space for guests = 10 sq. metres
  5. Buffet Tables: Two tables with plenty of access room = 10 sq. metres

Total Estimated Space: 96 + 24 + 10 + 10 + 10 = 150 square metres.

Following this simple process takes you from a wild guess to a realistic and functional floor plan. It’s the best way to make sure your event feels perfectly spacious and well-organised.

Accessorising Your Tent for a Flawless Event

A party tent decorated with elegant flooring, lighting, and comfortable seating

A great tent gives you the structure for your party, but it’s the accessories that really bring it to life and make it your space. Think of the tent as a blank canvas; the flooring, lighting, and climate control are the brushstrokes that turn it into a masterpiece. These aren’t just decorative extras—they’re essential for your guests’ comfort and for transforming a simple shelter into a properly luxurious venue.

The right add-ons are at the heart of modern tent hire for parties. We’re seeing a clear shift in the South African market towards more polished, personalised events. In fact, around 45% of high-end event planners are now asking for luxury tents with custom options, and 40% are demanding unique lighting and décor. It just goes to show that accessories are now seen as a must-have for creating an event that stands out. You can even discover more insights about these market trends to see how the pros are doing it.

Setting the Stage with Flooring

Don’t underestimate the power of good flooring. It does so much more than just cover up the grass; it creates a stable, clean, and safe surface for everyone. More than that, it completely elevates the feel of the interior, making it feel less like a tent and more like a real event hall.

You’ve got a few popular options to choose from:

  • Wooden Flooring: This is your top-tier choice for a solid, level base, especially if the ground underneath is a bit uneven. It gives off a seriously elegant and sophisticated vibe.
  • Dance Floors: If you expect people to be dancing, a dedicated dance floor is non-negotiable. They’re made of interlocking panels that create the perfect, smooth surface for a good party.
  • Matting or Coir: For a more rustic or casual feel, natural fibre matting is a great, cost-effective way to cover the ground and stop shoes from getting muddy.

Choosing the right floor turns your tent from an outdoor structure into a defined and comfortable indoor space—a critical step for any well-designed event.

Creating the Perfect Atmosphere with Lighting

Lighting is probably your most powerful tool for setting the mood. The right setup can make a space feel warm and intimate, vibrant and energetic, or totally dramatic. Just sticking a single light overhead will leave your tent feeling stark and unwelcoming.

Great lighting design doesn’t just illuminate a space; it directs attention, creates warmth, and crafts an emotional experience for your guests from the moment they walk in.

For a truly professional effect, think about layering different types of light:

  1. Ambient Lighting: This is your foundation. Think fairy lights or string lights draped across the ceiling to create that magical, warm glow that makes the whole space feel inviting. Our guide on using a fairy light curtain has some brilliant ideas for a stunning look.
  2. Task Lighting: This is the practical stuff. You need decent lighting over the bar, buffet tables, and at the entrance to make sure people can see what they’re doing and move around safely.
  3. Accent Lighting: Use uplighters to highlight key features like floral arrangements, decor, or the architectural peaks of the tent. It adds real depth and a touch of drama.

Ensuring Guest Comfort with Climate Control

Finally, never, ever forget the South African climate. A beautiful sunny day can quickly turn into a chilly evening, and a summer afternoon can get uncomfortably hot inside a marquee.

Climate control isn’t a luxury; it’s essential for keeping your guests happy.

  • Heaters: For evening parties or winter events, a few strategically placed patio heaters or proper tent heaters are an absolute must.
  • Fans or Air Conditioners: In the warmer months, fans keep the air circulating and provide a welcome breeze, making sure the tent stays comfortable for everyone.
  • Sidewalls: These are your best friend when it comes to weather protection. You can choose solid walls for privacy and blocking wind, or go for clear panoramic walls to keep those beautiful views while shielding guests from the elements.

Your Essential Tent Hire Process Checklist

Hiring a party tent can feel a bit daunting, but honestly, it’s not so bad when you break it down into simple, manageable steps. Think of it as a roadmap for your event setup. Following a clear process helps you sidestep common pitfalls, like getting hit with unexpected fees or not having your site ready on installation day.

This checklist will walk you through everything, from your very first phone call to the final pack-down, making sure you feel confident and in control the whole way through.

Before You Sign Anything

First things first: you need to ask the right questions before you put your name on any dotted line. A good hire company expects this and will be happy to give you clear answers. This is your chance to get a complete picture of the agreement, so don’t hold back.

Here’s what you absolutely need to cover:

  • A Detailed Quote: Insist on an itemised quote. You want to see the cost for the tent, delivery, setup, takedown, and any extras listed separately. No one likes vague numbers.
  • Insurance Coverage: Get clarity on what their insurance covers. What happens if the tent gets damaged while it’s on your property? Are you covered for wild weather?
  • Cancellation Policy: Life is unpredictable. Make sure you understand their policy on postponing or cancelling. Ask about any fees and the deadlines for making changes.
  • Payment Schedule: Confirm how much the deposit is to lock in your booking and find out when the final payment is due.

Getting all this in writing is non-negotiable. It protects you and the hire company and means no nasty surprises down the line. To get a handle on all your other event tasks, our event planning checklist template is a lifesaver.

Preparing Your Event Site

Once the booking is sorted, it’s time to get your location ready. Proper site prep is the secret to a fast, safe, and stress-free installation. The delivery crew will thank you for giving them a clear and accessible space to work their magic.

A well-prepared site is the foundation of a successful tent installation. Taking the time to measure, clear, and check the area beforehand saves significant time and prevents costly delays on event day.

Follow these simple steps to get your site ready:

  1. Measure and Mark: Use a few stakes or flags to mark out exactly where the tent will go. Crucially, remember to add at least 1.5 metres of extra space on all sides for the pegs and for the crew to move around.
  2. Check for Utilities: This is a big one. Before a single peg goes into the ground, you must know what’s underneath. Check for underground water pipes, electrical lines, or irrigation systems. If you’re not sure, it’s best to contact your local authority.
  3. Ensure Clear Access: The delivery truck needs a clear path to the setup spot. That means trimming back any low-hanging tree branches and moving any obstacles that could get in their way.
  4. Communicate with the Crew: Give the installation team a heads-up about any quirks of your site, like a sloping lawn or a tricky access point. The more they know in advance, the better.

What to Expect on Installation and Takedown Day

Knowing the schedule for setup and removal helps you plan the rest of your day. For a medium-sized tent, say a 6m x 12m marquee, a team of 3-4 people will typically need about 2-3 hours for the full installation.

The crew will show up, double-check the placement with you, and then get straight to it. Your main job is just to make sure the area is ready and they can get in and out easily. After the party’s over, the takedown is usually a quicker affair. The team will dismantle everything efficiently, leaving your garden just as they found it.

Breaking Down the Costs of Hiring a Party Tent

Figuring out the budget for your party tent can feel a bit like putting a puzzle together. You see one price, but the final quote often has a few other crucial pieces. Getting your head around this from the start will save you headaches later and help you see the real value you’re getting from a professional hire service.

It’s a bit like ordering a fantastic meal at a restaurant. The main course has its price, but you’ll also have side dishes, drinks, and a service fee. In the same way, the total cost for your tent is a mix of the tent itself, plus all the services and extras needed to make your event a roaring success.

What’s in Your Rental Quote?

Your final bill will usually be split into three main parts. Knowing what these are helps you see exactly where your money is going, and it gives you the power to tweak things to fit your budget.

  • The Base Rental Fee: This is the straightforward cost for the tent’s canopy and frame. The price tag here depends on the size and style you pick—a big, elegant frame tent is naturally going to cost more than a smaller, simpler one.
  • Labour and Delivery Charges: This covers the skilled crew who bring the tent to you, put it up, and take it down again. Things like how far they have to travel to your venue and how tricky the site is can nudge this cost up or down.
  • Essential Add-Ons: This is everything else you need to turn the tent into a proper venue. Think flooring, lighting, sidewalls for weather protection, and even climate control like heaters or fans.

This way of pricing is pretty standard across the events industry. The tent rental market has boomed in South Africa because it’s such a smart, cost-effective alternative to a permanent venue. Hiring almost always works out cheaper than building something from scratch, making it perfect for one-off events and seasonal parties. You can read more about these market trends to see the full economic picture.

What Else Can Affect the Final Price?

Beyond the big three, a few other things can shift your quote. Being aware of them means you can manage your budget better and avoid any last-minute surprises.

The most common budget surprise I see is underestimating the complexity of the site. A perfectly flat, easy-to-reach lawn will always be cheaper to work with than a sloped garden with a narrow entrance.

Here are a few things that can add to the labour costs:

  • Difficult Site Access: If the team has to lug heavy equipment a long way from their truck to where the tent needs to go, it’s going to take more time and people power.
  • Site Complexity: Putting a tent up on an uneven surface, a raised deck, or anywhere that needs special anchoring will bump up the installation fee.
  • After-Hours Service: If you need the tent set up or taken down outside of normal business hours, like late at night, you can expect to pay a bit extra for that convenience.

The best thing you can do is chat about all these details with your rental company right from the start. That way, you’ll get a clear, accurate quote that lines up perfectly with your event plans.

Common Questions About Party Tent Hire

Even after all the planning, a few nagging questions can pop up when you’re hiring a tent. We get it. To put your mind at ease, we’ve put together some quick, straightforward answers to the queries we hear most often from our clients.

How Far in Advance Should I Book a Party Tent?

Timing is absolutely crucial, especially if you want the best pick of the bunch. To be safe and avoid any last-minute panic, we always recommend booking your tent 3 to 6 months in advance. This is doubly important during South Africa’s peak seasons, like the sunny summer months and over the December holidays when demand just goes through the roof.

Got a bigger, more detailed event on the cards, like a wedding? Give yourself even more breathing room and aim for 9 to 12 months ahead. Booking early is the best way to guarantee you get the exact style and size you’ve got your heart set on.

Can a Tent Be Set Up on Pavement or Concrete?

Yes, it can! But this is where your choice of tent really matters. A Frame Tent (or marquee) is your go-to for hard surfaces. Because these structures are freestanding, they don’t need to be staked into the ground. Instead, we anchor them securely on pavement, patios, or decking using heavy-duty weights or water barrels.

Your traditional Peg and Pole Tent, however, needs soft ground like a lawn to work. It gets its stability from the tension of stakes driven deep into the earth. So, always let your hire company know what surface you’re working with – it’s one of the first things they’ll need to know.

The surface of your event site is one of the first and most critical details to share with your rental provider. It directly influences the type of tent you can safely and effectively use, making it a foundational piece of your event plan.

What’s the Plan for Bad Weather?

This is one of the best things about hiring a professional tent – you get instant peace of mind, no matter what the weather report says. These aren’t your average camping tents; they are tough, commercial-grade structures built to handle rain and moderate wind, keeping your party and your guests perfectly dry.

If the forecast looks a bit wild, adding sidewalls is a brilliant move. They offer extra protection against driving rain or a gusty breeze. You can go for solid walls for a complete shield or choose clear panoramic walls so you don’t lose that beautiful view. Just make sure to chat with your provider about the tent’s specific wind rating and their contingency plan for severe weather before you book.

Will I Need a Permit for a Tent in My Garden?

For most private parties on your own property here in South Africa, you generally won’t need a permit for a temporary tent. The rules are pretty relaxed for personal events held at home.

That said, local municipal rules can differ, especially for a really large structure or a massive guest list. If you’re unsure, it’s always smart to have a quick chat with your local council just to be 100% certain. A good, experienced hire company will usually know the local requirements and can give you solid advice.


Ready to create the perfect setting for your next celebration? The team at ABC Hire is here to help you choose the ideal tent and accessories for a flawless event. Explore our range and get a quote today at abchire.co.za

View full rental catalogue