Think of a painter’s brush. Now, instead of paint, imagine it uses light. That’s the simplest way to look at par can lighting—it’s a powerful tool used to wash walls with vibrant colour, put a speaker in the spotlight, or add dramatic highlights that completely change the feel of a space. This single light fixture is the backbone of modern event atmosphere.
Your Guide to Creating Atmosphere with Light
An empty venue is just a blank canvas. Par can lighting gives you the entire colour palette to turn that canvas into a masterpiece. These lights are the real workhorses of the event industry, loved for their versatility, simplicity, and the massive impact they deliver. Whether you’re planning a chic Cape Town wedding or a slick corporate function, knowing how to use them is a game-changer.
This guide will get you up to speed on everything you need to know regarding par can lighting rentals and uses. We’ll start with the basics of what a par can is and why it’s a must-have for creating a specific mood. You’ll learn how to use light to tell a story, draw your guests’ attention, and transform a plain room into an experience they won’t forget.
What Makes Par Cans Essential
The real magic of a par can is its focused, directional beam of light. The name “PAR” actually stands for Parabolic Aluminized Reflector, which is just the fancy term for the tech inside that shapes the light. This design creates a strong, defined beam that you can aim with precision, making it perfect for all sorts of jobs.
Here’s why they are so vital for event design:
- Atmosphere Creation: They can flip the mood of a room from cool and corporate to warm and romantic just by changing the colour.
- Focus and Direction: Use them to highlight the important stuff—a wedding cake, a company banner, or a speaker at a podium. It tells your guests exactly where to look.
- Architectural Enhancement: They are brilliant for uplighting columns, trees, or textured walls, bringing out the venue’s best features and adding a real sense of depth and drama.
A well-placed par can does more than just light something up; it sculpts the entire visual environment. It can make a small room feel grand or a massive hall feel cosy and intimate, all through the smart use of light and shadow.
From Simple Beams to Creative Effects
Back in the day, par can lighting was simple, single-colour units. But today, modern LED technology has completely changed the game. A single LED par can is now capable of producing millions of colours on demand. This opens up a world of creative options without ever having to fiddle with physical colour gels.
Think of this as your foundation for mastering event lighting. Once you get the hang of how par cans work, you’ll be able to make much better decisions when hiring equipment for your next event in the Cape Winelands or anywhere else. This knowledge helps ensure your vision comes to life exactly as you imagined it.
The Technology Driving the Light
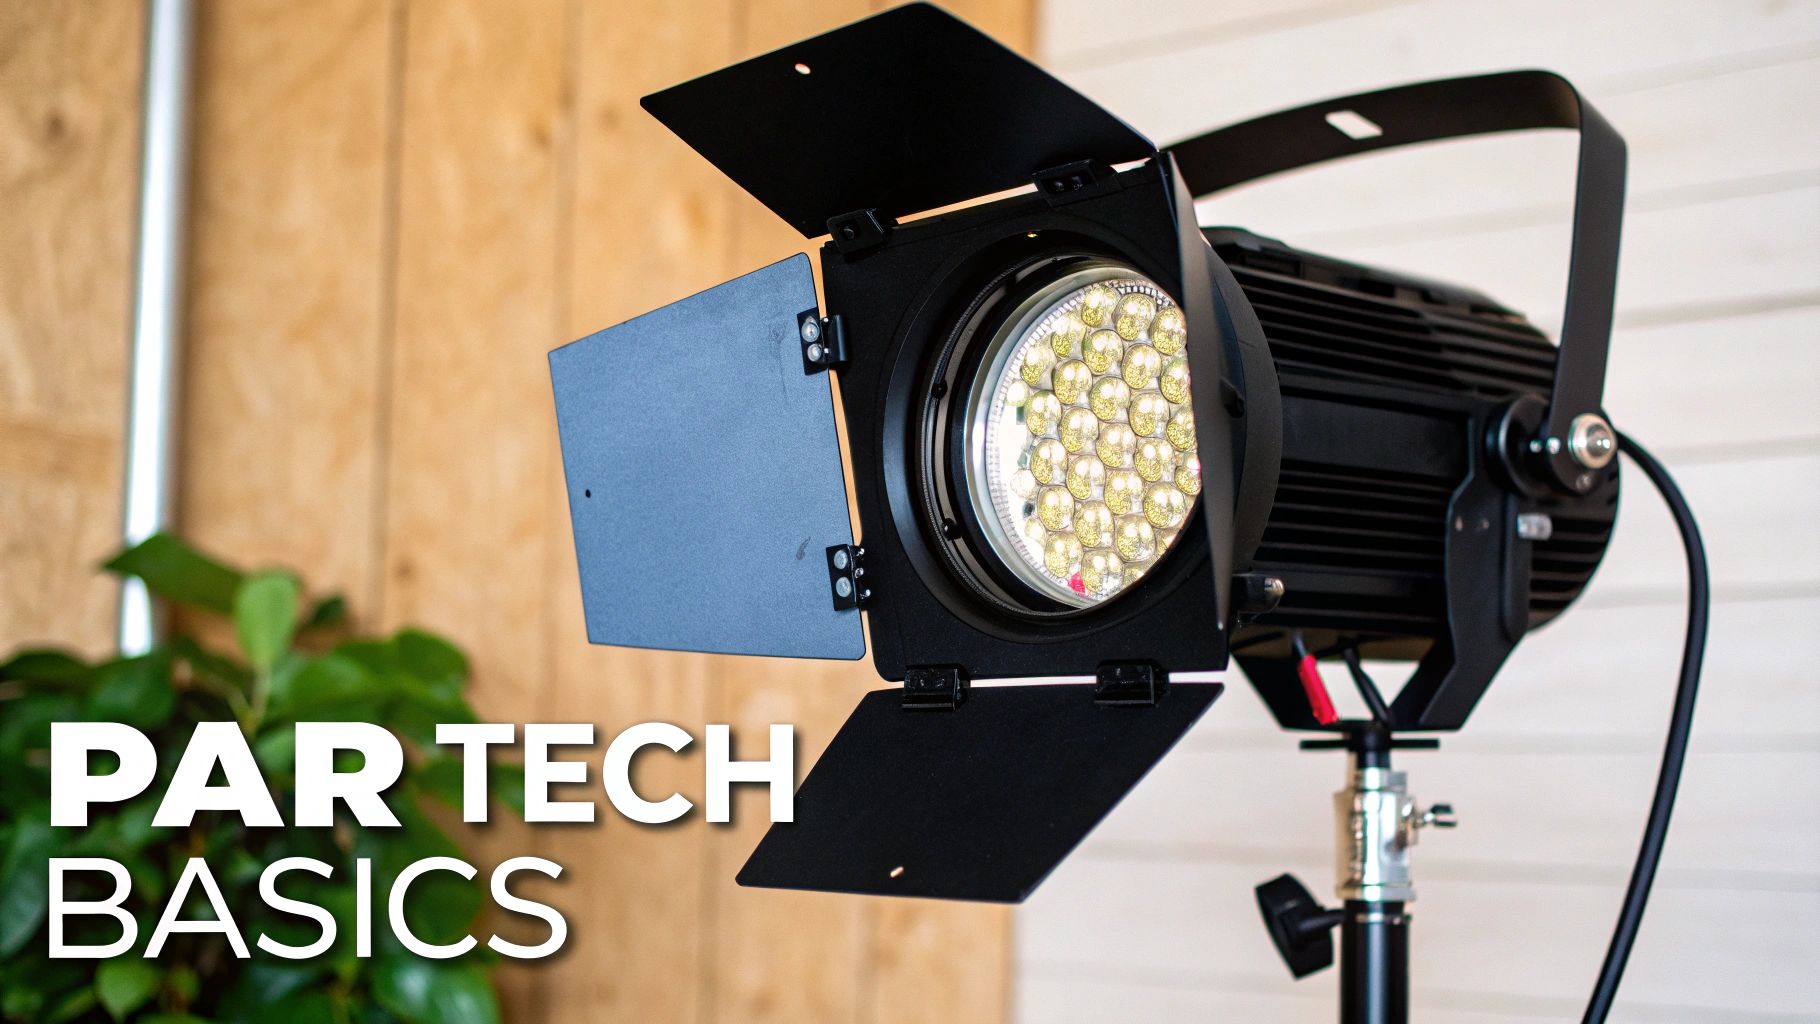
To really get the most out of event lighting, it helps to know a little about what’s going on inside the fixture. The name itself, PAR Can, gives the game away. ‘PAR’ is short for Parabolic Aluminized Reflector, which is a fancy way of describing the polished, bowl-shaped mirror inside the light.
Think of it like the reflector in a high-powered torch. That curved, reflective surface is designed to catch every bit of light from the bulb and blast it forward in a concentrated, controlled beam. Without it, you’d just have a weak, messy glow. The PAR design is the secret sauce for creating those crisp, punchy beams of light that make uplighting and spotlights so effective.
While the basic par can lighting design hasn’t changed much, the light source itself has gone through a massive evolution, moving from old-school halogen bulbs to far more versatile LED technology.
Traditional vs LED: It’s No Contest
For years, the only real choice for PAR cans was a hot, power-hungry halogen bulb. They were the workhorse of the industry, but they came with a lot of baggage. Today, Light Emitting Diodes (LEDs) have taken over, offering event planners a whole new level of flexibility and efficiency.
Knowing the difference between the two is crucial when you’re deciding what to hire.
To put it plainly, the old halogen technology just can’t compete with modern LEDs. Here’s a quick breakdown of why the switch has been so complete:
Comparing Traditional Halogen and Modern LED Par Cans
| Feature | Traditional Halogen Par Can | Modern LED Par Can |
|---|---|---|
| Heat Output | Runs extremely hot. Can be a burn risk and uncomfortable for guests. | Cool to the touch, making it safe to place anywhere. |
| Power Use | Very high. Can easily trip a venue’s circuit breakers. | Highly efficient. Uses up to 80% less power, so you can run more lights. |
| Colour Mixing | Single colour per light. Requires physical plastic sheets (‘gels’) to change. | Can create millions of colours from one fixture by mixing red, green, and blue diodes. |
| Lifespan | Short. Around 2,000 hours on average. | Extremely long. Typically 25,000 to 50,000 hours. |
| Flexibility | Limited to one colour and brightness level. Clunky and slow to change. | Colours and effects can be changed instantly and controlled electronically. |
The move to LEDs isn’t just a trend; it’s a smart, practical choice. They run cooler, use a fraction of the power, and give you an entire rainbow of colours from a single light.
This shift mirrors what’s happening across South Africa, which is leading the continent in adopting LED lighting. For event professionals, this means access to reliable, energy-efficient fixtures that won’t let you down. You can learn more about the growth of the LED market in South Africa to see just how big this change has been.
Speaking the Language of Lighting
When you’re chatting with a lighting technician, knowing a few key terms will help you get your vision across perfectly.
The most important one is beam angle. This is just the measurement, in degrees, of how wide or narrow the cone of light is. A narrow beam angle, like 15 degrees, creates a tight, intense spotlight—perfect for hitting a wedding cake or floral centrepiece. A wider angle, like 45 degrees, produces a broad wash of colour that’s ideal for covering an entire wall.
Think of it like a garden hose nozzle. Twist it one way for a powerful, focused jet stream; twist it the other for a wide, gentle spray. The beam angle on a PAR can works exactly the same way.
You might also hear someone mention a PAR64 or a PAR56. These numbers originally referred to the diameter of the bulb in eighths of an inch (so a PAR64 was 8 inches across). While the terms are a bit old-fashioned now that LED lights are integrated units, they’re still used as shorthand for the fixture’s general size and brightness. A PAR64 is almost always bigger and punchier than a PAR38.
With just those few terms in your back pocket, you can walk into any planning meeting and discuss your lighting needs like a pro.
Creative Lighting Techniques for Stunning Events
Alright, now that we’ve covered the technical side of things, let’s get into the fun stuff: the art of using par can lighting. Think of these lights as your paintbrush. With a few core techniques, you can completely transform a venue from just a room into an experience. It’s not about just making things brighter; it’s about shaping the space to create a very specific mood.
These are the exact building blocks that professional lighting designers use to craft those unforgettable moments. Once you get your head around them, you can take your event design to the next level and explain your vision with total confidence.
The Art of Uplighting
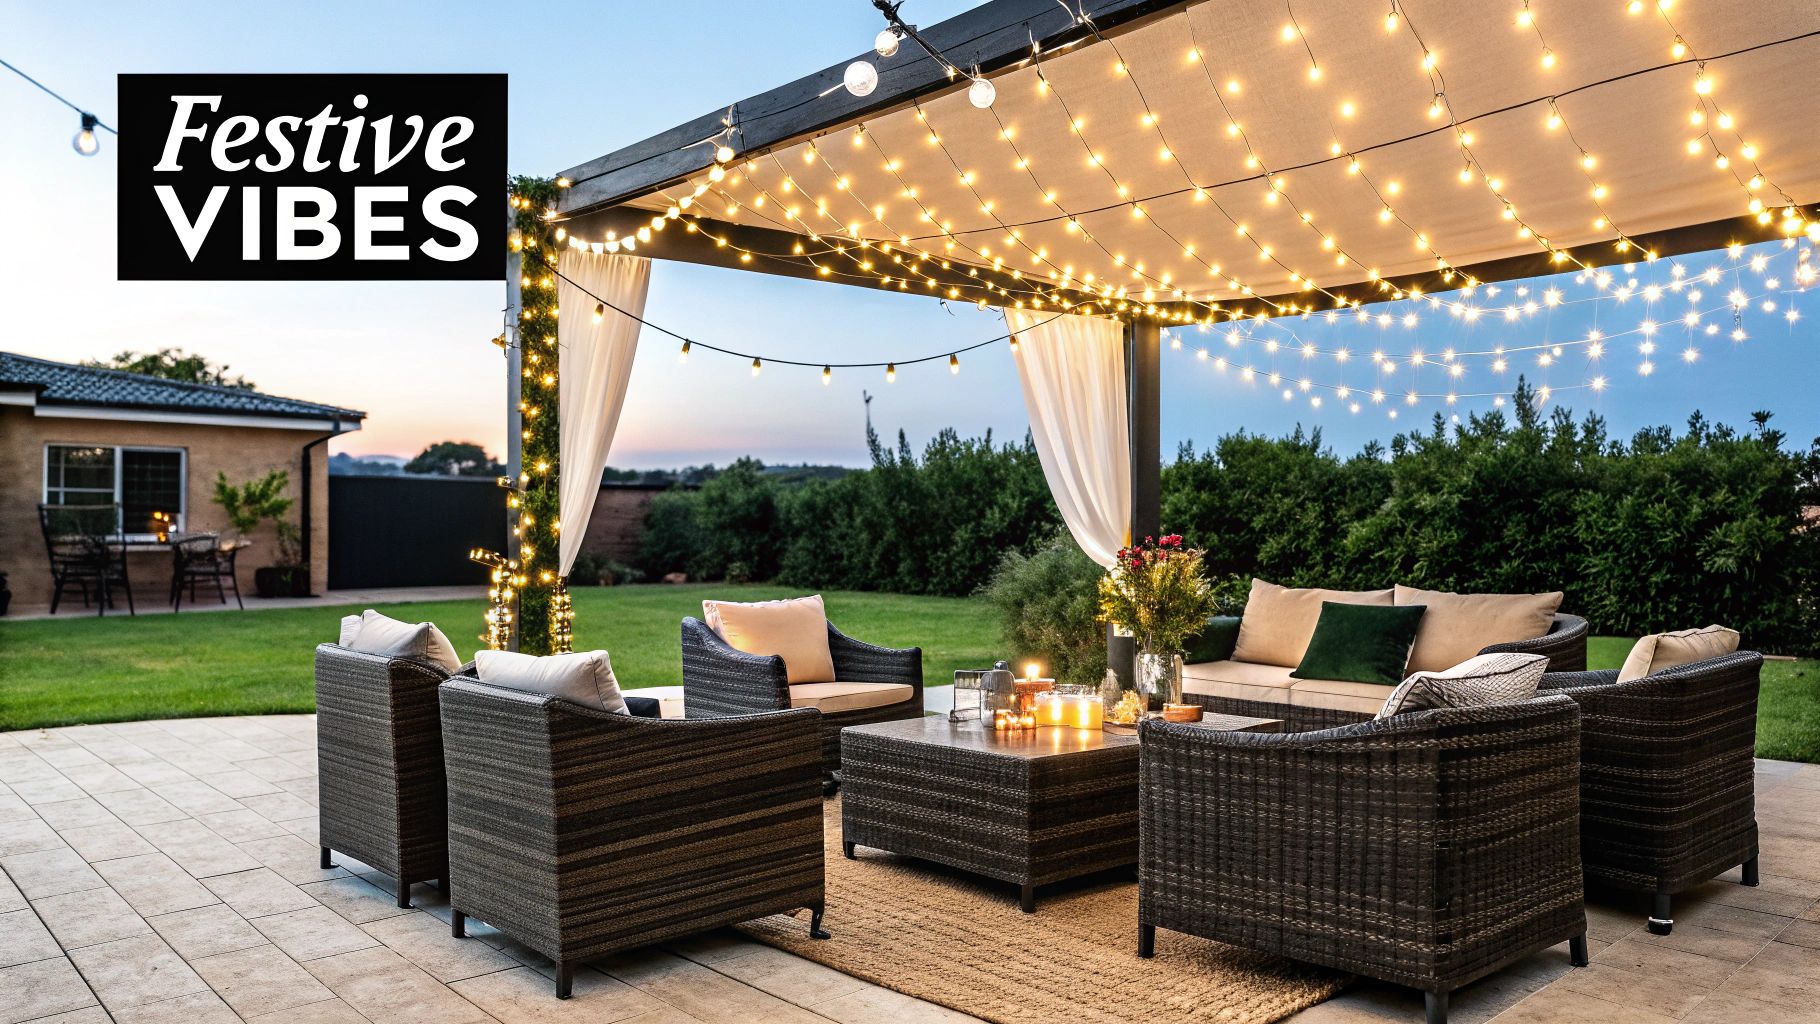
Uplighting is easily one of the most popular and high-impact techniques you’ll see at events. The idea is simple: you place par cans on the floor and aim them straight up a wall, a pillar, or even some draping. The effect, however, is dramatic.
This simple trick instantly adds height, elegance, and a touch of theatre to any space. It naturally draws your guests’ eyes upward, which makes ceilings feel higher and rooms feel so much grander. It’s also a brilliant way to wash a room in colour, turning a boring plain wall into a dynamic feature.
Picture a wedding at a Cape Winelands estate. Using amber or warm white uplighting against the old stone walls creates an incredibly romantic, intimate feel. On the other hand, for a corporate launch, a crisp, bold blue wash can reinforce the brand’s colour and give off a vibe of cool professionalism.
Uplighting is the single most effective way to change the perceived architecture of a room. It adds depth, hides imperfections, and creates a luxurious atmosphere with minimal effort and equipment.
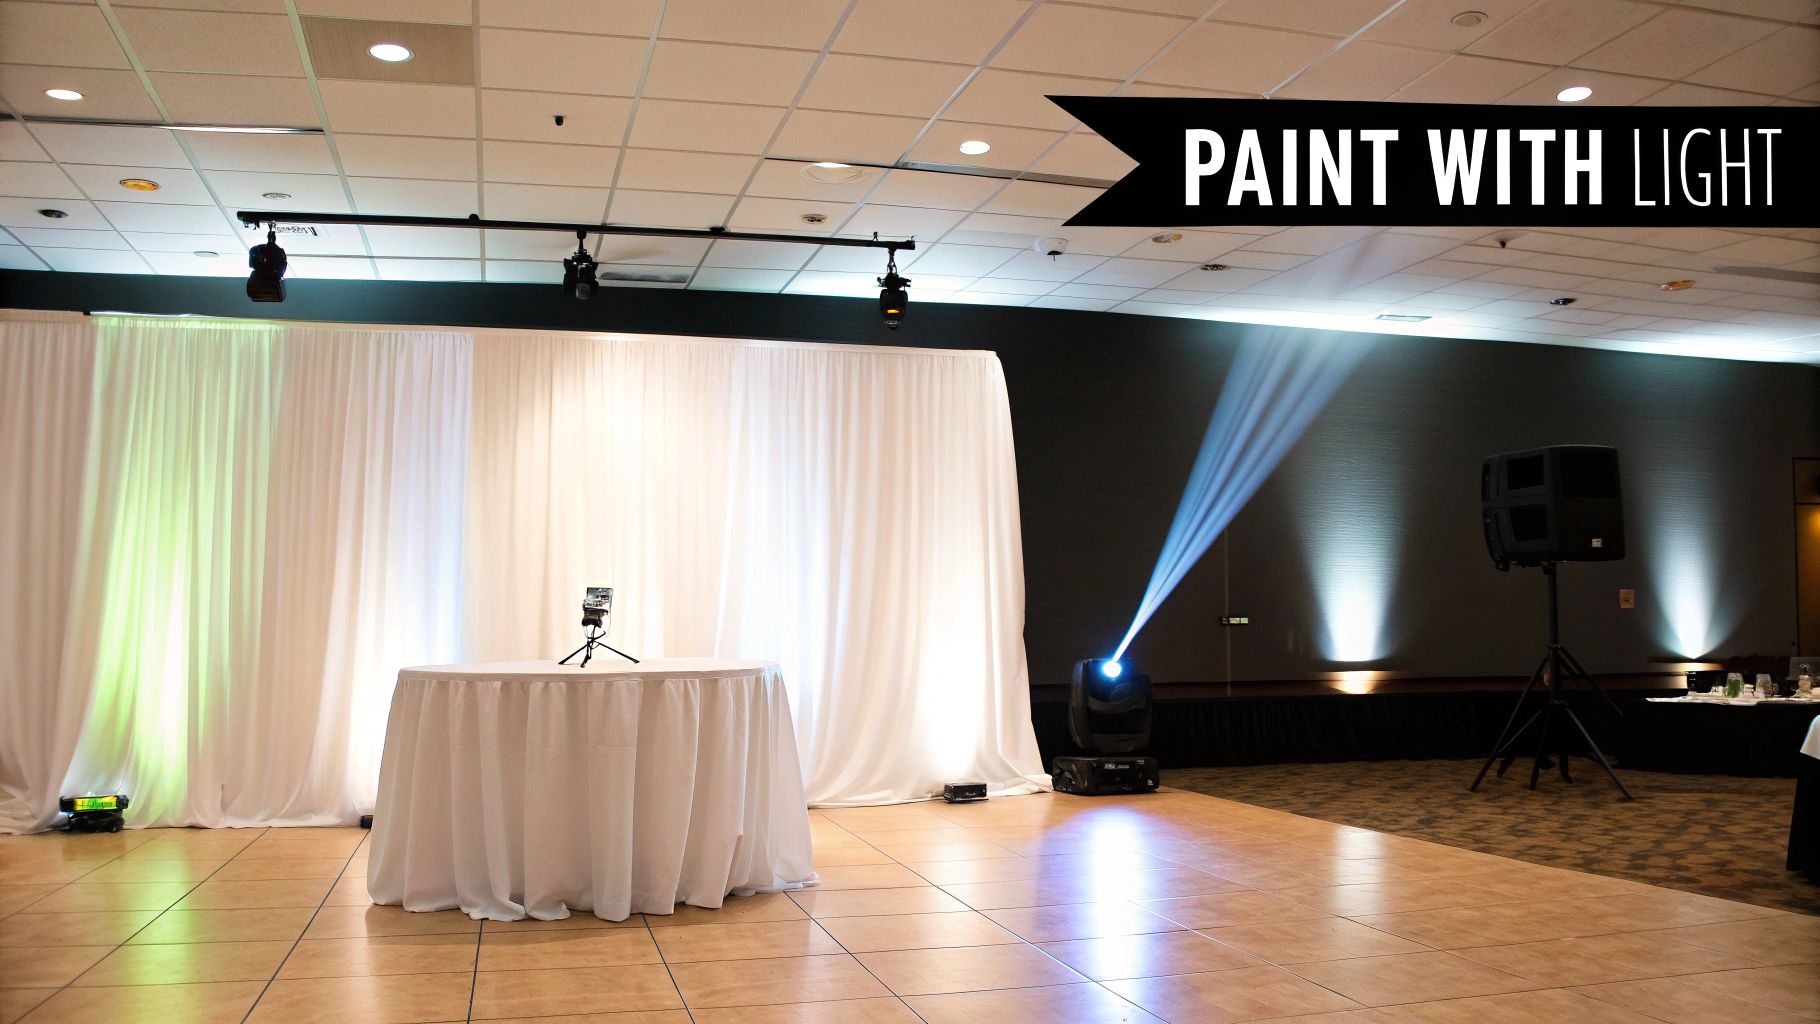
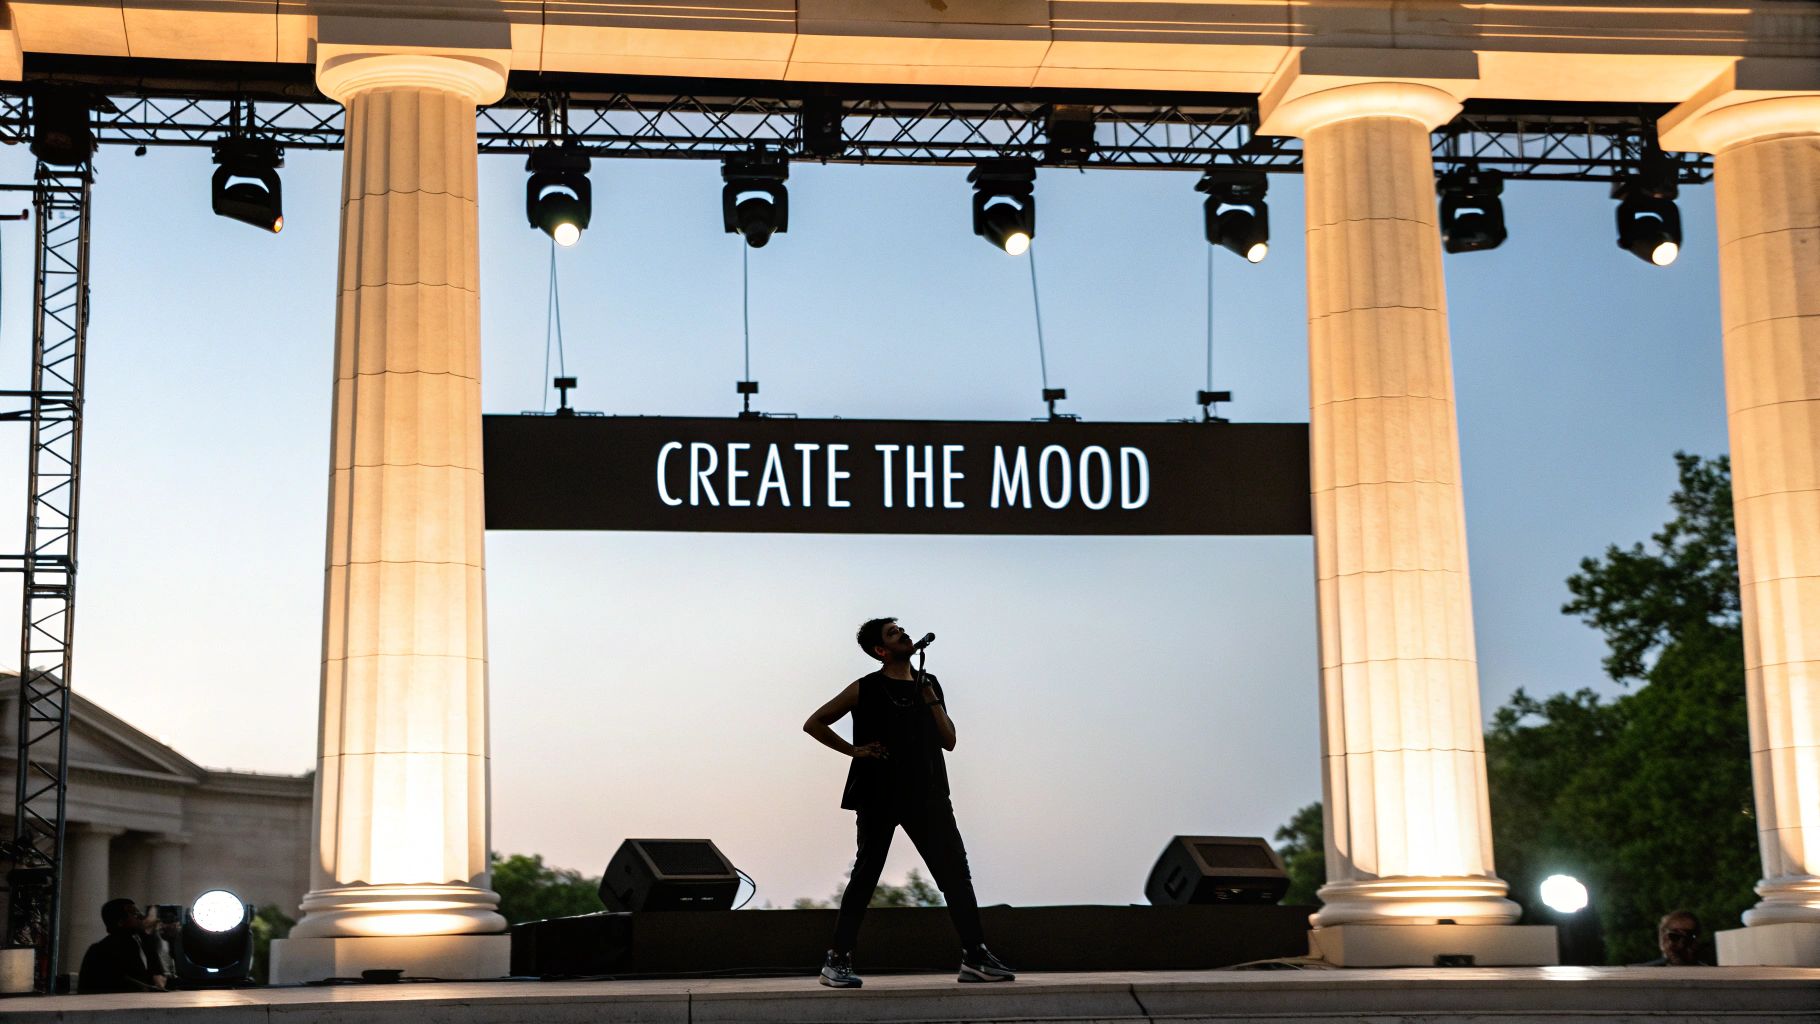
Creating Drama with Backlighting
While uplighting is about enhancing surfaces, backlighting is all about creating silhouettes and making your subject pop. This technique means placing a light source behind whatever you want to highlight—a performer, a speaker, or a beautiful floral arrangement—and pointing it back towards the audience.
The result is a striking halo of light that outlines the subject, separating them from the background. It adds a powerful, almost theatrical quality that’s perfect for stages, main tables, or any key focal point. Backlighting is what gives you that iconic, dramatic outline you see at concerts. It guarantees the star of your event doesn’t just blend into the scenery but truly commands attention.
Ensuring a Flawless Stage Wash
A stage wash is a must-have for providing smooth, even light across a whole area, like a stage, dance floor, or presentation spot. Unlike a spotlight that follows one person, a wash covers the entire space in consistent, flattering light. This is so important for making sure everyone on stage is clearly visible, without any weird shadows or dark patches.
To get it right, we mount several par cans (usually with wider beam angles) overhead and overlap their beams just slightly. The goal is a seamless field of light. A good stage wash makes sure your speakers look great and that all the photos and videos from the event look polished and professional.
Painting with Colour and Mood
Colour is your most powerful tool. Different colours trigger different emotions, and you can absolutely use this to guide how your guests feel throughout an event.
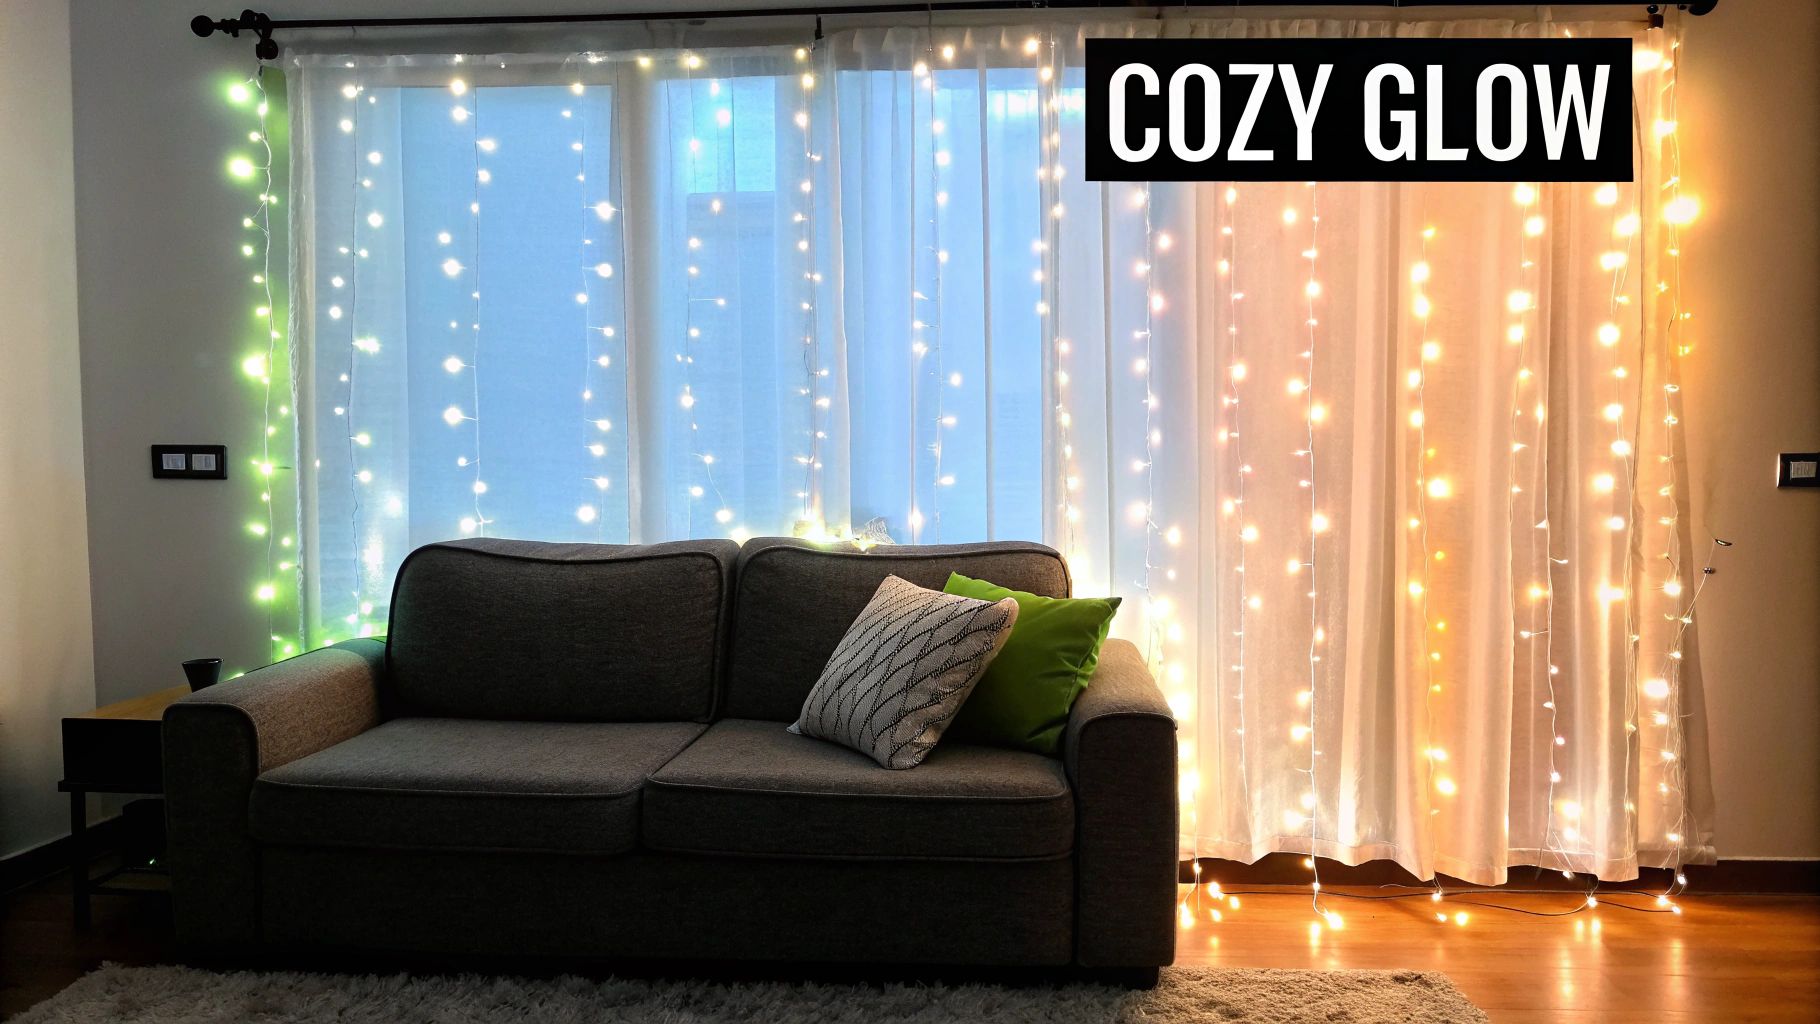
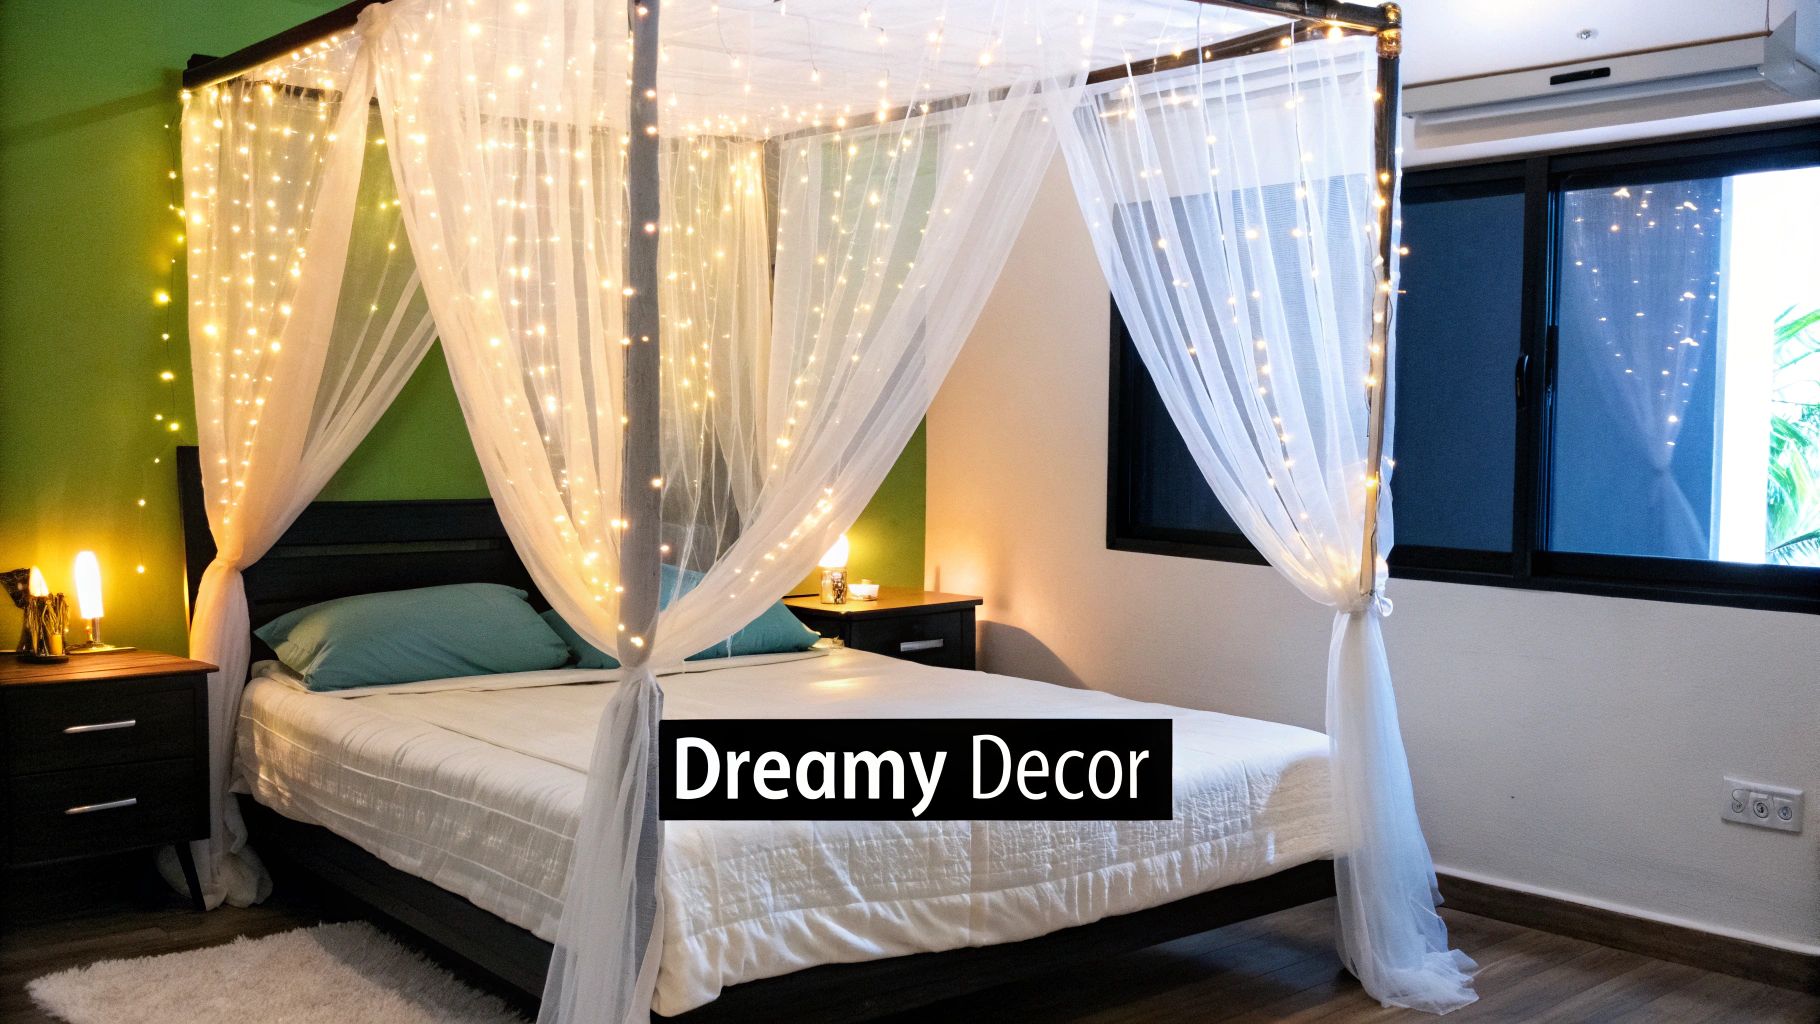
- Warm Tones (Amber, Gold, Soft Pink): These create a feeling of warmth, romance, and intimacy. They’re perfect for wedding receptions, special dinners, and any relaxed social event. They pair beautifully with other elements, too; you can learn more about creating a magical atmosphere by exploring ideas for a fairy light curtain.
- Cool Tones (Blue, Magenta, Cyan): These shades give off energy, professionalism, and a modern, high-tech vibe. They are ideal for corporate functions, product launches, and parties where you want to create a bit of a buzz.
- Vibrant Tones (Red, Green, Purple): Bold colours can either dial up the energy or create a sense of sophisticated elegance. Red is passionate and demands attention, while a deep purple can add a touch of regal luxury to a gala dinner.
When you start combining these techniques—using uplighting to set the room’s colour, a stage wash to light the action, and backlighting to make key people stand out—you create a layered, professional, and visually stunning design for any event.
A Practical Guide to Setup and Placement
Great lighting design is one thing on paper, but making it happen on the day is where the real magic lies. Now that we’ve covered the creative side, let’s get into the nuts and bolts of setting up your par can lighting safely and effectively. A little bit of planning here goes a long way, preventing those technical hiccups that can derail an otherwise perfect event.
It all starts with power. The absolute last thing you want is for the lights to cut out mid-speech at a wedding or during a keynote presentation. This means you need a basic handle on how much electricity your lights will draw so you don’t overload the venue’s circuits. One simple miscalculation can trip a breaker, plunging your beautifully lit space into complete darkness.
Mastering Power Management
The trick is to calculate your total power load. Every light fixture has a wattage rating that tells you exactly how much power it needs to run. The good news? Modern LED par cans are incredibly efficient, which is a massive relief compared to the old, power-guzzling halogen units.
To keep things running smoothly, just follow these simple steps:
- Check the Wattage: Look for the power rating on each par can you plan to use (a typical LED par might only be 72W).
- Add It All Up: Tally up the total wattage of all the lights you want to plug into a single power circuit.
- Know the Circuit Limit: In South Africa, a standard wall outlet is usually on a circuit rated for 16 amps, which can handle about 3,680 watts (16A x 230V). As a rule of thumb, always leave a buffer of around 20%, meaning you shouldn’t load a single circuit with more than roughly 2,900 watts.
Think of a power circuit like a single lane on a highway. If you try to jam too many cars (watts) onto it at once, you’ll cause a traffic jam—or in this case, a tripped breaker. By spreading your lights across different circuits, you keep the power flowing without any drama.
This focus on energy efficiency is a big deal in our local market. The South African LED lighting market, which includes event fixtures like par cans, pulled in revenue of about USD 1.03 billion and is expected to grow to USD 1.7 billion by 2030. You can get more insights on this expanding market and its regulations on Mordor Intelligence.
Rigging and Placement Options
Where you put your lights is just as important as the colours you choose. The right placement strategy is what truly brings your creative vision to life.
- Floor Placement for Uplighting: This is the easiest and often most dramatic method. Simply placing par cans on the floor and aiming them up walls, pillars, or trees creates that classic, elegant uplighting effect. It’s quick, simple, and always looks incredible.
- Tripod Stands: For a bit more flexibility, lighting stands (or tripods) get your lights off the ground. This is perfect for creating a wash of light over a stage, highlighting a specific feature like a cake table, or cross-lighting a dance floor.
- Truss Mounting: For bigger events, lights are often clamped onto a metal truss structure hanging from the ceiling. This is the professional standard for lighting stages and entire rooms from above, giving you maximum control and coverage.
Prioritising Safety at Every Step
Safety should always be your top priority. A clean, secure setup doesn’t just look more professional; it prevents accidents that could completely ruin an event.
Cable management is absolutely critical. Run all your power and data cables neatly along walls or behind fixtures. Use gaffer tape to secure them flat to the floor, especially in areas where guests will be walking. This one simple step gets rid of the most common trip hazard at any event.
Finally, make sure every fixture is secure. If you’re mounting lights on a stand or a truss, double-check that every clamp and safety cable is fastened properly. This is even more important when you’re combining lights with other gear for extra atmospheric effects. If you’re looking to add another layer of visual appeal, have a look at our guide on how fog machine hire can complement your lighting setup. A stable, well-managed setup is the true hallmark of a pro.
How Many Par Cans Does Your Event Need?
Trying to figure out exactly how many lights you need can feel a bit like guessing, but it doesn’t have to be a shot in the dark. While there isn’t a single magic number that fits every event, you can get incredibly close by looking at three simple things: the size of your venue, the type of event, and the specific vibe you’re going for.
Think about it. A cosy, intimate wedding reception at a Stellenbosch wine estate has completely different needs from a massive corporate gala at the Cape Town International Convention Centre. One might just need a few lights to create a warm, inviting glow, while the other needs a serious setup to light a stage, highlight branding, and wash the whole venue in colour.
The first step is always to decide what you want the lights to do. Are you looking for subtle uplighting along the walls, a full-on stage wash for a band, or dramatic spotlights on architectural features? Each goal requires a different approach.
Rules of Thumb for Common Scenarios
To get you started, here are a few practical guidelines. For basic wall uplighting—the most popular use for par can lighting—a great rule of thumb is to place one light every 2 to 3 metres along the walls. This spacing is usually perfect for creating a beautiful, continuous wash of colour without leaving awkward dark patches or creating harsh, overly bright “hot spots.”
Let’s see how this plays out in a few real-world scenarios:
- Intimate Wedding (50-80 guests): For a smaller venue, your focus is likely on creating warmth and romance. 10-12 LED par cans would be ideal for uplighting key walls, the main table, and maybe the entrance to tie everything together.
- Medium Corporate Event (100-150 guests): Here, you need a bit more punch. You’ll probably be looking at 18-24 par cans to uplight the room’s perimeter, provide a simple wash for a speaker on stage, and highlight company banners or displays.
- Large Gala or Awards Night (200+ guests): For a big, glamorous event, the numbers jump. You could easily need 30 or more fixtures to handle extensive uplighting, a full stage wash, backlighting for performers, and spotlighting key moments or centrepieces.
Think of it like painting a room. You wouldn’t try to paint an entire house with one tiny sample pot. The bigger your “canvas” (the venue) and the richer you want the “colour” (the atmosphere), the more “paint” (lights) you’re going to need.
The diagram below breaks down the key decisions you’ll make when setting up par cans, from placement and power right through to safety checks.
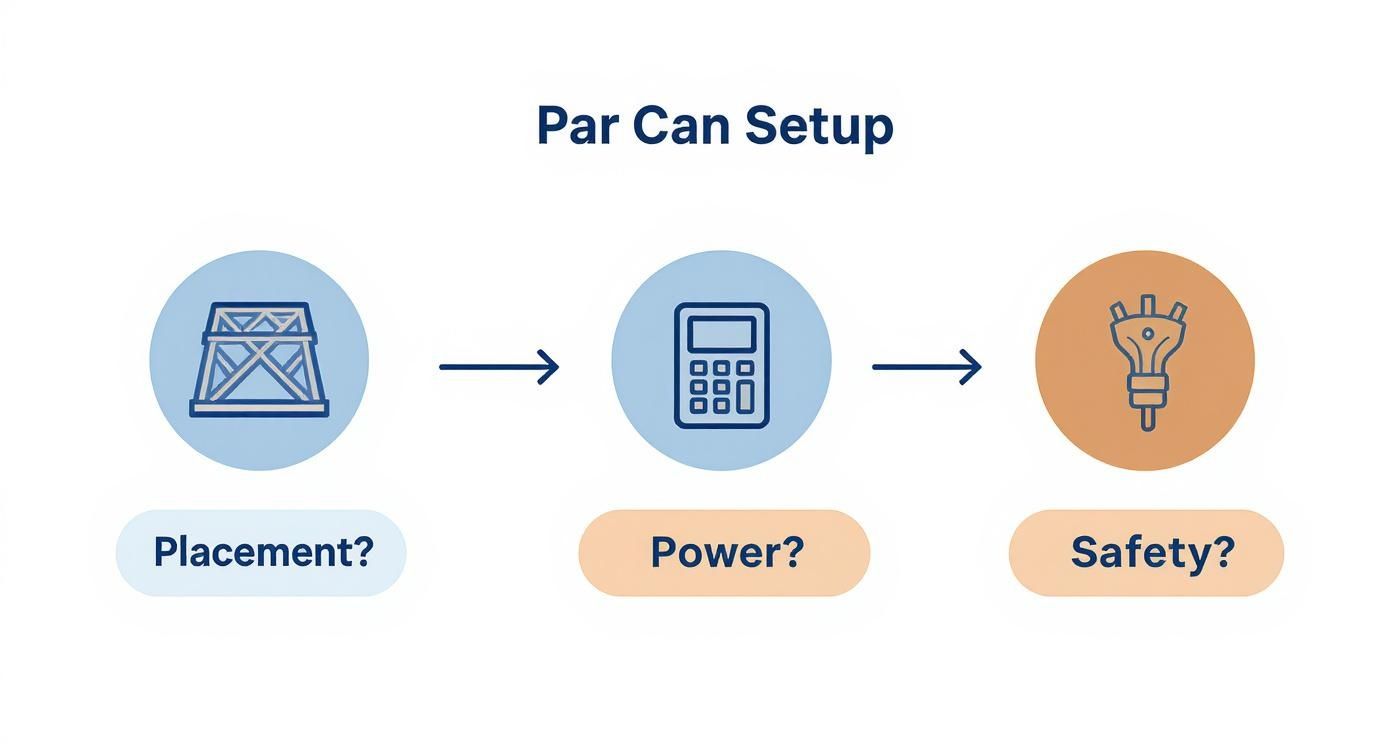
This simple flow helps you remember to think through where the lights will go, how they’ll get power, and what you need to do to make sure the installation is safe and professional.
Estimating Your Par Can Needs
To make planning even simpler, here’s a quick reference table. Use it as a starting point to gauge how many par cans your event might require.
| Event Type & Size | Example Scenario | Recommended Par Cans | Primary Use |
|---|---|---|---|
| Small Gathering (Under 80 guests) | A birthday party or intimate wedding reception in a restaurant. | 8 – 12 | Basic wall uplighting, highlighting a feature wall or main table. |
| Medium Event (80-150 guests) | A corporate function or wedding in a medium-sized hall. | 16 – 24 | Perimeter uplighting, a small stage wash, and highlighting decor. |
| Large Event (150-300+ guests) | A gala dinner, awards night, or large wedding in a ballroom. | 24 – 40+ | Full room wash, stage lighting, dance floor lighting, architectural highlights. |
| Outdoor/Marquee (Any size) | A marquee wedding or outdoor festival-style event. | Varies greatly | Creating boundaries, lighting pathways, uplighting trees or tent structure. |
Remember, this is a guide! Factors like ceiling height and wall colour will influence your final number.
Adjusting for Desired Effect and Venue
The numbers above are just a starting point. Your creative vision is what really matters. If you’re dreaming of a deep, super-saturated colour wash, you’ll want to place the lights closer together, maybe every 1.5 metres. This tight spacing makes the light beams overlap more, creating that rich, intense colour you’re after.
The venue itself is a huge factor, too. A room with dark wood-panelled walls is going to soak up light like a sponge, whereas a white marquee will reflect it beautifully. For that dark-walled venue, you might need to increase your light count by 20-30% to get the same brightness you’d achieve in a lighter space.
High ceilings also demand more powerful lights or a tighter beam angle to make sure the effect isn’t lost way up high. It’s always a good idea to chat with your rental provider. With their experience lighting up different venues all over Cape Town, they can give you expert advice tailored to your specific space.
Bringing Your Vision to Life with Light
We’ve covered a lot of ground, from the nuts and bolts of par can lighting to the creative magic that turns a simple room into a truly special place. You’ve seen how one light fixture can wash a space in emotion, pull focus with a sharp beam, and build a professional, layered atmosphere from scratch. Lighting is so much more than just a utility; it’s your most powerful tool for shaping how your guests feel the moment they walk in.
The main takeaway here is that you’re now set up to think like a lighting designer. You get the difference between a wash and a spotlight, you understand the massive impact of colour, and you know why safe, clever placement is non-negotiable. This isn’t just theory—it’s practical knowledge that gives you the power to plan with confidence and explain your vision clearly.
From Knowledge to Flawless Execution
With this new understanding, you can start turning those ideas into reality. You know what’s possible, whether you’re dreaming of a warm, romantic glow for your wedding or a slick, branded environment for a corporate launch. The next step is translating that vision into a seamless production. Remember, combining great lighting with other key elements, like a perfectly placed dance floor, is what creates that cohesive, engaging atmosphere. For more on that, check out our guide on how to hire a dance floor—it’s a perfect partner to your lighting plan.
Your event’s atmosphere is the sum of its parts. Great lighting doesn’t just illuminate the space; it enhances every other element within it, from the decor to the dance floor, creating a single, memorable experience for everyone.
This confidence is your new starting point. You can now walk into a conversation with a lighting pro, not with a vague idea, but with a clear, informed direction.
Partnering with Professionals
To make sure your event looks every bit as stunning as you’ve imagined, teaming up with an experienced crew is the way to go. They bring the technical know-how, the high-quality gear, and the on-the-ground problem-solving skills to pull off your plan without a hitch. Let them worry about the power, rigging, and programming while you focus on the big picture.
When you combine what you’ve learned here with their professional execution, you’re guaranteeing an atmosphere that isn’t just seen, but is truly felt by every single one of your guests.
Par Can Lighting: Your Questions Answered
When you’re getting into the nitty-gritty of event planning, a few practical questions about lighting are bound to pop up. We get it. Moving from the big idea to the actual setup brings up all sorts of details. Here are answers to the most common queries we get from clients planning events right here in the Cape.
Getting these specifics sorted is the key to a smooth, safe, and visually stunning event.
Can I Use Par Cans Outside?
Yes, you can—but you have to use the right gear. This is non-negotiable. For any outdoor event, from a sunset wedding on a wine farm to a garden party, you must use lights with an official IP65 rating.
An IP65 rating is your guarantee that the fixture is properly sealed against dust and can handle jets of water, which means a bit of classic Cape Town rain won’t cause a disaster. Trying to use indoor-only par cans outside is a serious electrical risk if they get wet. We also strongly recommend LED par cans for outdoor setups, as they sip power, making them much kinder to the generators you’ll likely be relying on.
What’s the Difference Between Uplighting and Downlighting?
It’s all about direction. The names really do say it all.
- Uplighting is when we place par cans on the floor and aim them up. Think of washing a wall in a vibrant colour, making majestic old trees glow, or highlighting columns and draping. It’s the secret sauce for adding drama and texture, and it’s a massive favourite for weddings and gala dinners.
- Downlighting is simply the opposite. We mount the lights overhead on a truss or from the ceiling and point them down. This is how we create a beautiful, even “wash” of light over a stage, dance floor, or dining area, making sure the important spots are perfectly lit.
A simple way to think about it: uplighting paints the ‘canvas’ of your venue—the walls, the trees, the architecture. Downlighting illuminates the action and the people within that canvas.
Most truly professional lighting designs use both. It creates a layered, dynamic look that’s both atmospheric and completely functional.
Do I Need to Hire a Lighting Technician?
This really boils down to how complex your lighting plan is.
If you’re just after some simple, static uplighting—say, setting the lights to a gorgeous amber and leaving them on all night—you probably don’t need a dedicated technician. A good rental company can deliver and set this up for you without any fuss.
However, the second you want the lights to do something, a professional technician becomes absolutely essential.
You’ll need a technician on-site if you want to:
- Change colours during the event (e.g., a soft, warm glow for dinner that transforms into a vibrant party mode for dancing).
- Sync your lights to music, a DJ set, or a video presentation.
- Use spotlights to follow a speaker on stage or highlight the wedding couple during their first dance.
- Run any kind of complex sequence of lighting cues for an awards ceremony or stage show.
A technician uses a special mixing desk (a DMX controller) to program and operate all the lights live. Their skill is what turns a static setup into a dynamic, breathtaking experience and ensures it all runs without a single hitch.
Ready to transform your Cape Town event with stunning, professional lighting? ABC Hire provides high-quality par can lighting and a full range of event furniture to create an unforgettable atmosphere. Explore our rental options and let us help you shine at https://abchire.co.za.